Log in
Search
Latest topics
» Free Flight Radio Assist by GallopingGhostler Today at 12:54 pm
» My N-1R build log
by akjgardner Today at 12:39 pm
» Purchased the last of any bult engines from Ken Enya
by getback Today at 12:05 pm
» Funny what you find when you go looking
by rsv1cox Yesterday at 3:21 pm
» Landing-gear tips
by 1975 control line guy Yesterday at 8:17 am
» Cox NaBOO - Just in time for Halloween
by rsv1cox Tue Nov 19, 2024 6:35 pm
» Canada Post strike - We are still shipping :)
by Cox International Tue Nov 19, 2024 12:01 pm
» Duende V model from RC Model magazine 1983.
by getback Tue Nov 19, 2024 6:08 am
» My current avatar photo
by roddie Mon Nov 18, 2024 9:05 pm
» My latest doodle...
by TD ABUSER Mon Nov 18, 2024 11:30 am
» Brushless motors?
by rsv1cox Sun Nov 17, 2024 6:40 pm
» Tribute Shoestring build
by amurphy6812 Sun Nov 17, 2024 5:43 pm
Cox Engine of The Month
Skyray 35 Build - Faux Streak look
Page 5 of 9
Page 5 of 9 •  1, 2, 3, 4, 5, 6, 7, 8, 9
 Re: Skyray 35 Build - Faux Streak look
Where in Idaho? I will be in Driggs all this weekend through Tuesday.Cribbs74 wrote:
The good thing is I have a whole month of July to practice with Pat Johnston in Idaho.
Jim

JPvelo- Diamond Member

- Posts : 1972
Join date : 2011-12-02
Age : 57
Location : Colorado
 Re: Skyray 35 Build - Faux Streak look
Boise/ Mountain Home area

Cribbs74- Moderator


Posts : 11907
Join date : 2011-10-24
Age : 50
Location : Tuttle, OK
 Re: Skyray 35 Build - Faux Streak look
Not much to report today, though I did spend several hours. Glued the stab and elevator together, the horn brace, bored some holes for tank, gear, etc., and more urethane is drying now.. as it pours rain. A T-storm snuck up on me.
Rusty
Rusty
_________________
Don't Panic!
...and never Ever think about how good you are at something...
while you're doing it!
My Hot Rock & Blues Playlist
...and never Ever think about how good you are at something...
while you're doing it!
My Hot Rock & Blues Playlist

RknRusty- Rest In Peace

- Posts : 10869
Join date : 2011-08-10
Age : 68
Location : South Carolina, USA
 Re: Skyray 35 Build - Faux Streak look
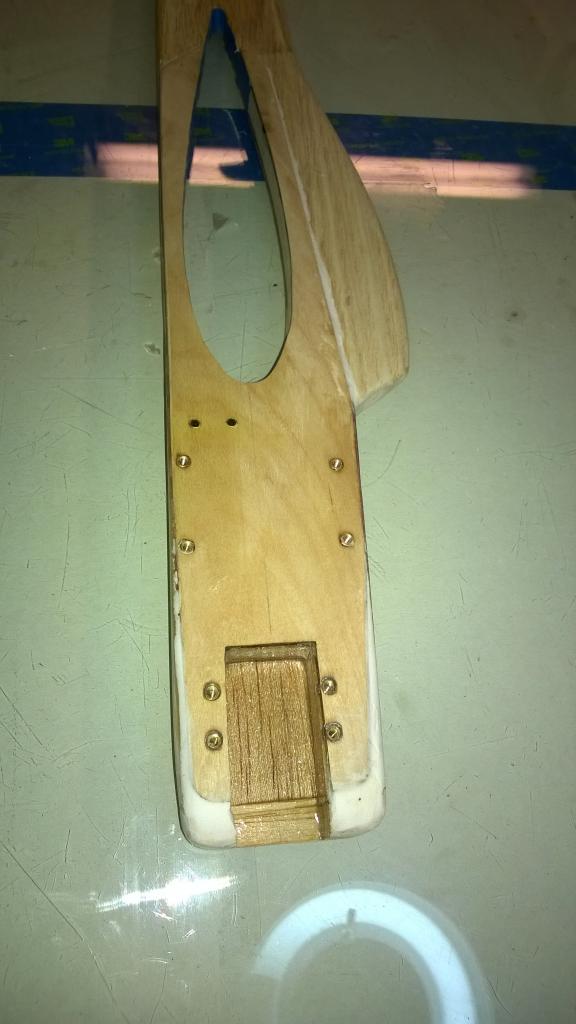
The aluminum Krylon on the test board withstood an aggressive test shot of Lustrekote with no complaints, so silver it is for the nose and doublers. I got my threaded inserts installed in the beam today and bolted the LG on to hold it up while the urethane dries on the rear fuse. The tank mounts are all ready as soon as my threaded inserts come in the mail. I have the LG mounting bolts sleeved with brass tubes and hardened the interior with thin CA, so hopefully there will never be a crushing problem. The bottom of the two bolts is through the hardwood too. Still need to sand and shape the LE of the wing and get it mounted so I can finish the flaps and tips. The tail feathers are all ready to be glued on at any time.
Here it is before I urethaned it today.

Here it is before I urethaned it today.

_________________
Don't Panic!
...and never Ever think about how good you are at something...
while you're doing it!
My Hot Rock & Blues Playlist
...and never Ever think about how good you are at something...
while you're doing it!
My Hot Rock & Blues Playlist

RknRusty- Rest In Peace

- Posts : 10869
Join date : 2011-08-10
Age : 68
Location : South Carolina, USA
 Re: Skyray 35 Build - Faux Streak look
I like the doubler work Rusty. Did you use 1/16?
I find it's a great way to cut down weight yet still maintain strength( Kens suggestion) Wish I had did it on some of my earlier builds.
I find it's a great way to cut down weight yet still maintain strength( Kens suggestion) Wish I had did it on some of my earlier builds.

Cribbs74- Moderator


Posts : 11907
Join date : 2011-10-24
Age : 50
Location : Tuttle, OK
 Re: Skyray 35 Build - Faux Streak look
I wish I could take credit but those are the kit doublers. I think it's thicker than a 16th, maybe 3/32. I'll take a look and answer that next time I go out to the shop. The damn mosquitoes ran me out of there about 6:00 this afternoon. Little vampires were eating me alive. I need to either microballoon or spackle around the edges of the doublers to blend them better and then I'll paint the silver on it.Cribbs74 wrote:I like the doubler work Rusty. Did you use 1/16?
I find it's a great way to cut down weight yet still maintain strength( Kens suggestion) Wish I had did it on some of my earlier builds.
_________________
Don't Panic!
...and never Ever think about how good you are at something...
while you're doing it!
My Hot Rock & Blues Playlist
...and never Ever think about how good you are at something...
while you're doing it!
My Hot Rock & Blues Playlist

RknRusty- Rest In Peace

- Posts : 10869
Join date : 2011-08-10
Age : 68
Location : South Carolina, USA
 Re: Skyray 35 Build - Faux Streak look
Yep, the doublers look like 3/32" ply.
I put a 1/16" cheek on the inboard side and blended it into the doubler right in front of the LG strut. I also extended the nose about 1/2" for looks. It was so short the NV would have been in front of the fuselage like on my old Skyray and it looks goofy. I blended the extension and the edges of the doublers with spackle and it's drying now. I'll sand it smooth tomorrow and start the painting process. I'm thinking of filling the grain with some microballoons mixed with polyurethane instead of primer. That will provide extra fuel proofing and hopefully be easier to sand. I'm not going to be too picky about it, I'm ready to get the paint on so I can mount the wing. Once the wing is in place I can make the flaps and tips.The tail feathers are already made and just need to be glued on.
Rusty
_________________
Don't Panic!
...and never Ever think about how good you are at something...
while you're doing it!
My Hot Rock & Blues Playlist
...and never Ever think about how good you are at something...
while you're doing it!
My Hot Rock & Blues Playlist

RknRusty- Rest In Peace

- Posts : 10869
Join date : 2011-08-10
Age : 68
Location : South Carolina, USA
 Re: Skyray 35 Build - Faux Streak look
I see, I brought it up as a weight saving idea, but of course it will work fine with 3/32.
I have been trying to build lighter lately and I think the biggest weight saving factor is wood selection. Of course finishing and build technique plays a big role as well. Anyway looking forward to more progress pictures.
Ron
I have been trying to build lighter lately and I think the biggest weight saving factor is wood selection. Of course finishing and build technique plays a big role as well. Anyway looking forward to more progress pictures.
Ron

Cribbs74- Moderator


Posts : 11907
Join date : 2011-10-24
Age : 50
Location : Tuttle, OK
 Re: Skyray 35 Build - Faux Streak look
Rusty, I am just wondering do you semi- finish ( as in dope and urethane as you described ) the wood to be glued also or just the outer surfaces ? I have always done all my finishing after the whole model is assembled thinking that I would get a better bond. If there is a easier way I surely want to know . Thanks Eric

getback- Top Poster


Posts : 10439
Join date : 2013-01-18
Age : 67
Location : julian , NC
 Re: Skyray 35 Build - Faux Streak look
In the past, I've waited until the plane was assembled. I think I'll go back to that method after this. It's more trouble than it's worth for such a utilitarian plane.getback wrote:Rusty, I am just wondering do you semi- finish ( as in dope and urethane as you described ) the wood to be glued also or just the outer surfaces ? I have always done all my finishing after the whole model is assembled thinking that I would get a better bond. If there is a easier way I surely want to know . Thanks Eric
I've never used dope, but anywhere that will need future glue is taped off before I prime and paint. In my Sunday fog I just now realized I primed the area where future wing fillets will be.
Rusty
_________________
Don't Panic!
...and never Ever think about how good you are at something...
while you're doing it!
My Hot Rock & Blues Playlist
...and never Ever think about how good you are at something...
while you're doing it!
My Hot Rock & Blues Playlist

RknRusty- Rest In Peace

- Posts : 10869
Join date : 2011-08-10
Age : 68
Location : South Carolina, USA
 Question before installing and aligning the wing.
I've been plinking away at it. I had to slow down because sanding was killing my shoulder, and then Monday was our 30th anniversary, so the weekend was dedicated to celebrating that. We had a great time, and if I had it to do all over again I'd marry the same woman as I did in July 1984.
By Monday I'm back on it shaping the square LE into a proper parabolic curve. I'd sure like one of those long shaped sanding blocks that are made for this purpose. But with a long sanding sponge I was finally able to get one side looking right compared to the little gauge the kit supplied. That's when I found out the hole in the fuselage would not accept the wing in its current shape, so I had to trim that including sanding the hard doublers. More forceful sanding kind of put me down again, so I only did non sanding tasks till today and got the flaps measured and cut. The only part not cut out yet are the wingtips.
The spackle and primer is all ready for colored paint to go on the fuse. I have center lines, thrust lines, incidence lines and other markers set up to help me align the wing and stab. In my next session I will mask and paint the front doublers and fuselage with Krylon aluminum. While it's drying I will dry fit the wing and strategize on the most important part of the assembly; how to make the LE exactly perpendicular to the thrust line, and at the same time square with the fuselage.(not the straightest fuse ever)
Do you guys use any sort of jig to hold the fuselage and make sure your LE is perpendicular to the thrust line and square with the fuselage? I could make something with a plank and dowels to set it all in. And have it all suspended over graph paper for reference marks.
Anyway it's about to suddenly look like a plane. Can't wait to entertain y'all with some pictures of progress. I just need to go slow and make sure it's all pointed in the right directions.
Show me your plane assembly jig if you have one. I'll show you mine if you don't use anything like that.
Thanks for reading.
Rusty
Last edited by RknRusty on Wed Jul 16, 2014 10:30 pm; edited 1 time in total
_________________
Don't Panic!
...and never Ever think about how good you are at something...
while you're doing it!
My Hot Rock & Blues Playlist
...and never Ever think about how good you are at something...
while you're doing it!
My Hot Rock & Blues Playlist

RknRusty- Rest In Peace

- Posts : 10869
Join date : 2011-08-10
Age : 68
Location : South Carolina, USA
 Re: Skyray 35 Build - Faux Streak look
I set the wing with a 3-5 drops of CA and kicker, then come back with epoxy a little later (or the next day/week). If it is crooked the CA is easy to cut. If there are significant gaps then the CA goes on highest points that mate with thickened epoxy doing the real work later.
If the hole is very close fitting...I haven't had a really tight fit wing recently to do anything different.
Phil
If the hole is very close fitting...I haven't had a really tight fit wing recently to do anything different.
Phil

pkrankow- Top Poster

- Posts : 3025
Join date : 2012-10-02
Location : Ohio
 Re: Skyray 35 Build - Faux Streak look
Go easy on that shoulder.

Cribbs74- Moderator


Posts : 11907
Join date : 2011-10-24
Age : 50
Location : Tuttle, OK
 Re: Skyray 35 Build - Faux Streak look
Thanks Ron. It's hard to go easy when there is so much stuff to do. But you're right. Avoiding sanding has helped. I tried left handed but that was comical. I'm going flying tomorrow, and that's actually okay as long as the engines crank easily. They usually do. I preflighted the Yak and the Ray.Cribbs74 wrote:Go easy on that shoulder.
Phil, CA tacking is my usual MO, so I'll stick with what works. I am just adding some extra precautions, trying to improve my methods of turning out a quality airframe and looking at ideas.
I'm almost there on this build. It should look really nice, and I want to be super careful lining it all up. The Yak, my first big build, was easy to assemble with the wing saddling in right in the bottom of the fuselage, and much smaller to work with too. As simple as a Ray is, it's still more complicated than any one I've built. My anal drive for perfection is just keeping the building speed down. I hope this can be a winning plane until my next graduation, if that ever even happens, I'm betting two seasons in intermediate and maybe I'll move up to advanced, I'm gaining more confidence in my flying skills faster than I did last Summer.When I watch Wayne, I see some maneuvers I know I do better than he does. V8s and clovers for example have come to the top of my best. His squares are much much better than nine, I still have slightly high or bouncy bottoms too.
As you can tell, I have the flying Jones again.
 Soon we're going to do a Big plane day and take the Strega and the Magnum out. Maybe we'll fly the magnum when you come play with us. I hope we can get you, me, Matt, Wayne, Willl Davis and Bob Zambelli all together maybe up at Watt's place. Or TripleTree Aerodrome where they have Joe Nall. Depends on your free time. We will most definitely fly as much as time allows.
Excited Rusty!
_________________
Don't Panic!
...and never Ever think about how good you are at something...
while you're doing it!
My Hot Rock & Blues Playlist
...and never Ever think about how good you are at something...
while you're doing it!
My Hot Rock & Blues Playlist

RknRusty- Rest In Peace

- Posts : 10869
Join date : 2011-08-10
Age : 68
Location : South Carolina, USA
 Re: Skyray 35 Build - Faux Streak look
Hi Rusty, the plane is looking great.
Sanding can be a nightmare on the shoulders. I always take it slow so I can at least continue on the next day.
Cant wait to see the wing on the plane after painting. I am sure this is going to be a good flyer.
Theo
Sanding can be a nightmare on the shoulders. I always take it slow so I can at least continue on the next day.
Cant wait to see the wing on the plane after painting. I am sure this is going to be a good flyer.
Theo

Theo Kleynhans- Gold Member

- Posts : 196
Join date : 2013-12-30
Age : 43
Location : South Africa
 Re: Skyray 35 Build - Faux Streak look
Here are a couple of pictures I took last week. As I mentioned I extended the nose so there's not such an unsightly gap between the spinner and the nose. I made the inboard cheek plate with the extra length and then glued some balsa blocks and a shim to account for the doubler width in place, then blended it all with drywall spackle. After shaping, soaked the spackle with CA and it's suddenly as hard as granite with the weight of almost nothing, well nothing but CA. You can also see the filler around the edges of the doublers. This is all before the detail sanding is finished.
To mask it for painting and leave unpainted area for glue and fillets around the wing, I used the fuselage wing blank left over from the kit. I placed it on tape and trimmed an extra 5/32" around the edges, inserted it and presto a perfect mask. The rear fuse already has clear poly on it. I'll wipe on another coat after the plane is built. I can put wipe that on with a cloth.

I forgot to take a picture after I sprayed the Krylon aluminum paint, but you can see it in the background in the pic I took for my oilcan thread. The canopy will be black, as will the fillets and exposed 1/2" of the center sheeting.

I finished shaping the LE of the wing and mating it to the fuse. Also cut the flaps and made a paper guide for cutting the wingtips. Tomorrow I should be able to use 60 minute epoxy and get the wing glued in. To get the thrust line perpendicular to the LE, I have bolted the engine to the fuse and put a 12.5" prop on it. I'll designate one blade as the measuring point and swing it back and forth measuring from the tip to the wing to align it. I'll do my best to square the fuse with the wing, but with the cheek block and doublers on the sides, it's hard to get much good area to use a square on it. I think TLAR and whatever I can tack with some small ply squares will get it well within the critical range.
So next time you see it it should look more like something that can fly.
Rusty

To mask it for painting and leave unpainted area for glue and fillets around the wing, I used the fuselage wing blank left over from the kit. I placed it on tape and trimmed an extra 5/32" around the edges, inserted it and presto a perfect mask. The rear fuse already has clear poly on it. I'll wipe on another coat after the plane is built. I can put wipe that on with a cloth.

I forgot to take a picture after I sprayed the Krylon aluminum paint, but you can see it in the background in the pic I took for my oilcan thread. The canopy will be black, as will the fillets and exposed 1/2" of the center sheeting.

I finished shaping the LE of the wing and mating it to the fuse. Also cut the flaps and made a paper guide for cutting the wingtips. Tomorrow I should be able to use 60 minute epoxy and get the wing glued in. To get the thrust line perpendicular to the LE, I have bolted the engine to the fuse and put a 12.5" prop on it. I'll designate one blade as the measuring point and swing it back and forth measuring from the tip to the wing to align it. I'll do my best to square the fuse with the wing, but with the cheek block and doublers on the sides, it's hard to get much good area to use a square on it. I think TLAR and whatever I can tack with some small ply squares will get it well within the critical range.
So next time you see it it should look more like something that can fly.
Rusty
_________________
Don't Panic!
...and never Ever think about how good you are at something...
while you're doing it!
My Hot Rock & Blues Playlist
...and never Ever think about how good you are at something...
while you're doing it!
My Hot Rock & Blues Playlist

RknRusty- Rest In Peace

- Posts : 10869
Join date : 2011-08-10
Age : 68
Location : South Carolina, USA
 The wing is in!
The wing is in! It's all ice from here.
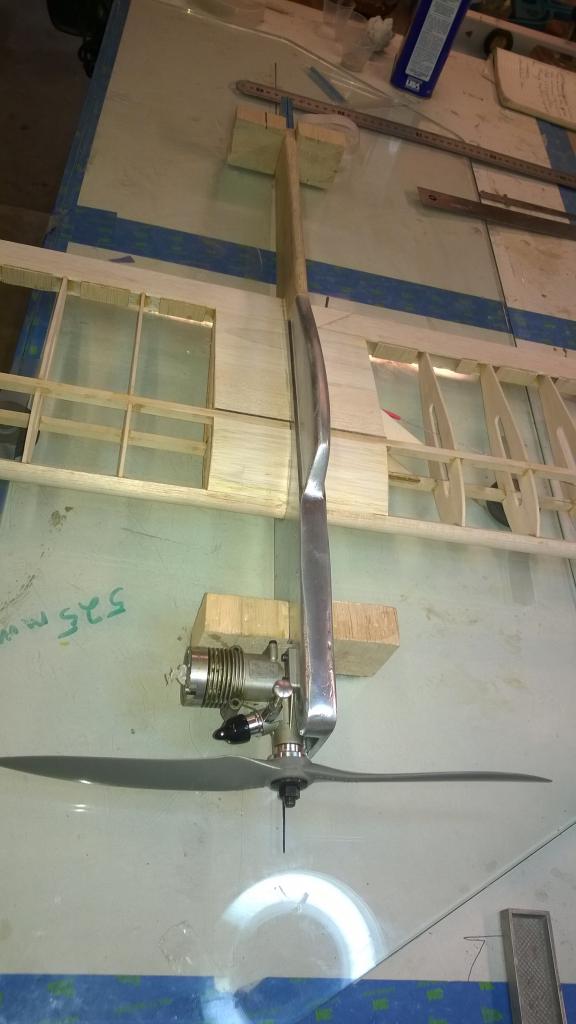
I jigged it up by gluing square blocks to my glass to snugly hold the fuselage vertical. Them I mounted the engine with no shims, straight against the beam so I could establish the thrust line, and the longest prop I could find to get the measurements from the blade tips to the leading edge and ensure that the prop and LE were exactly parallel, the most important measurement there is, from which all other control surfaces will be indexed. Then I had to make sure both sides of the wing were exactly perpendicular to the fuselage, so I used two new Dubro wheels laying flat and on which the bottom spars could rest. That should aerodynamically square everything with the thrust line no matter if there are minor curves in the fuse.
Here it is jigged for test fitting. I removed the bricks as soon as I was sure the four square blocks were secure. That's an APC 12.5" prop. I was planning to cut one blade off of a prop but amazingly this one was perfectly symetrical, so the measurements were accurate to both blade tips.

Note the two wheels supporting the bottom spars so that each side is exactly the same height. The inboard one is easier to see. Now I make sure the wing is centered so the end of each spar is exactly 525mm from its side of the fuselage.
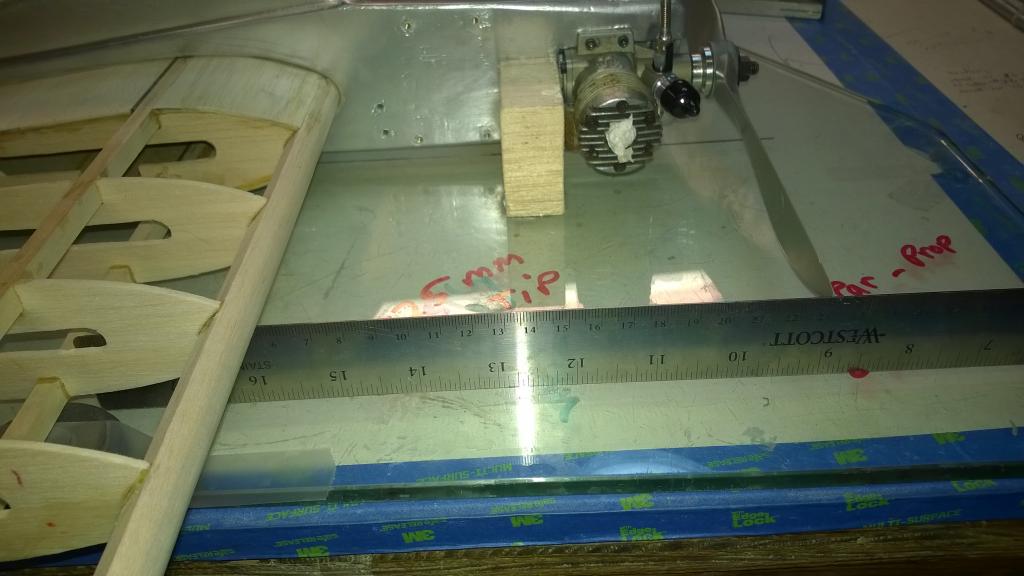
Now I measure to check that the LE is parallel with the propeller. Since the actual LE is hand sanded, there would be some possible error if there is an unseen dip in it. So I chose the spar as the most accurate point of reference and measured to the prop tip. Exactly 228mm on each side. And when making my dry run, I did remove and rotate the prop 180 degrees to double check its symmetry, and it is true. Both sides are 228mm from the spar to the blade tip. So the LE is exactly perpendicular to the thrust line, no matter if there is a minor bend in the fuselage.
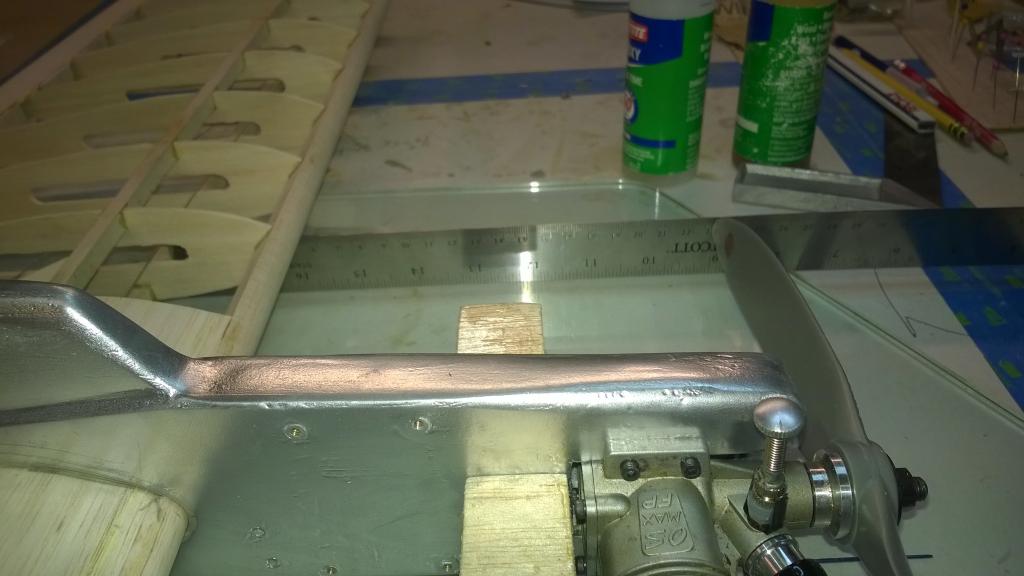
Boy, the camera enhances dings and imperfections, especially in the silver.
I test fit everything several times and couldn't think of anything I may have overlooked. I intend for this plane to be straight and true.. The wing cutout was still too tight so some more sanding was in order. Finally I was ready to practice gluing and setting the wing, flipping it over and checking the bottom and re-jigging without disturbing the measurements. Alcohol rags stacked and ready, applicators on hand, I used Loctite 60 minute two part epoxy, checked the clock. First I painted the interior of the root in the fuse so it was fully wet and absorbing but not sloppy. Inserted the wing and managed not to drag glue all over it, slathered between the index lines on the center section and passed it back and forth through the seat cleaning and adding glue where necessary, cleaned off all excess and started measuring. It all fell together nicely, re-measured all points and the glue kicked in about 30 minutes. Hmmm, 60 minute, eh. But it's all perfect. every measurement is spot on.
Tomorrow the flaps and tail feathers are all ready for glue. That will be comparatively easy. The elevator/stab have been hinged and urethaned for quite some time now. I'll cut the wingtipsand maybe install the adjustable leadout guide. I have a question about that, but will come back later and ask about it. The painting is mostly done except for the rudder, which is still wearing sanded primer, and black for the canopy. One more coat of urethane on the rear fuse. I have CF tube and all the control hardware on hand, as well as sky blue and aluminum Monokote and trim sheets. Even got decal paper and numbers. It's gonna be an airplane soon.
Rusty
I jigged it up by gluing square blocks to my glass to snugly hold the fuselage vertical. Them I mounted the engine with no shims, straight against the beam so I could establish the thrust line, and the longest prop I could find to get the measurements from the blade tips to the leading edge and ensure that the prop and LE were exactly parallel, the most important measurement there is, from which all other control surfaces will be indexed. Then I had to make sure both sides of the wing were exactly perpendicular to the fuselage, so I used two new Dubro wheels laying flat and on which the bottom spars could rest. That should aerodynamically square everything with the thrust line no matter if there are minor curves in the fuse.
Here it is jigged for test fitting. I removed the bricks as soon as I was sure the four square blocks were secure. That's an APC 12.5" prop. I was planning to cut one blade off of a prop but amazingly this one was perfectly symetrical, so the measurements were accurate to both blade tips.

Note the two wheels supporting the bottom spars so that each side is exactly the same height. The inboard one is easier to see. Now I make sure the wing is centered so the end of each spar is exactly 525mm from its side of the fuselage.

Now I measure to check that the LE is parallel with the propeller. Since the actual LE is hand sanded, there would be some possible error if there is an unseen dip in it. So I chose the spar as the most accurate point of reference and measured to the prop tip. Exactly 228mm on each side. And when making my dry run, I did remove and rotate the prop 180 degrees to double check its symmetry, and it is true. Both sides are 228mm from the spar to the blade tip. So the LE is exactly perpendicular to the thrust line, no matter if there is a minor bend in the fuselage.


Boy, the camera enhances dings and imperfections, especially in the silver.
I test fit everything several times and couldn't think of anything I may have overlooked. I intend for this plane to be straight and true.. The wing cutout was still too tight so some more sanding was in order. Finally I was ready to practice gluing and setting the wing, flipping it over and checking the bottom and re-jigging without disturbing the measurements. Alcohol rags stacked and ready, applicators on hand, I used Loctite 60 minute two part epoxy, checked the clock. First I painted the interior of the root in the fuse so it was fully wet and absorbing but not sloppy. Inserted the wing and managed not to drag glue all over it, slathered between the index lines on the center section and passed it back and forth through the seat cleaning and adding glue where necessary, cleaned off all excess and started measuring. It all fell together nicely, re-measured all points and the glue kicked in about 30 minutes. Hmmm, 60 minute, eh. But it's all perfect. every measurement is spot on.
Tomorrow the flaps and tail feathers are all ready for glue. That will be comparatively easy. The elevator/stab have been hinged and urethaned for quite some time now. I'll cut the wingtipsand maybe install the adjustable leadout guide. I have a question about that, but will come back later and ask about it. The painting is mostly done except for the rudder, which is still wearing sanded primer, and black for the canopy. One more coat of urethane on the rear fuse. I have CF tube and all the control hardware on hand, as well as sky blue and aluminum Monokote and trim sheets. Even got decal paper and numbers. It's gonna be an airplane soon.
Rusty
_________________
Don't Panic!
...and never Ever think about how good you are at something...
while you're doing it!
My Hot Rock & Blues Playlist
...and never Ever think about how good you are at something...
while you're doing it!
My Hot Rock & Blues Playlist

RknRusty- Rest In Peace

- Posts : 10869
Join date : 2011-08-10
Age : 68
Location : South Carolina, USA
 Re: Skyray 35 Build - Faux Streak look
Okay moving along quietly getting a bit done here and there. My elevator that I hinged a month ago turned out nicely with 100% free hinges. When it was time to glue it on, I checked its seat as compared with the centerline and found no tendency for incidence. But future Skyray builders beware, I've been told that many times the Sig fuselage has the stabilizer seat cut into the fuse at an off angle, not parallel with the Center/thrust line. That must be fixed. Mine only needed a little shaving to level it left to right.
Once I sat the stab in place with some fishing weights to hold it steady, I put a stack of scraps under each side for support and shimming. I looked over the top of it at the wing and shimmed the heights of each side until they were parallel. Then I used an Idea from Windy that makes aligning the hing line easy. I took a dowel with one flat end against the wing spar, I marked lightly where it crossed the hinge line. Then the other side. After a few times you can make a sharp mark to use while gluing so you can quickly align the stab and hinge line so it's the same distance across at all points. Then just eyeball it until it's flat with the wing and pin it I put some fishing sinkers on it to squeeze the glue. It came out great. So every critical surface is referenced from the spars. I figured that was the straightest component in the airframe. In my 7/20 post I used rulers to align the engine thrust line with the spars.
Looks a little like a Streak. Still needs those bird wind tips to finish the look.

_________________
Don't Panic!
...and never Ever think about how good you are at something...
while you're doing it!
My Hot Rock & Blues Playlist
...and never Ever think about how good you are at something...
while you're doing it!
My Hot Rock & Blues Playlist

RknRusty- Rest In Peace

- Posts : 10869
Join date : 2011-08-10
Age : 68
Location : South Carolina, USA
 Re: Skyray 35 Build - Faux Streak look
Very beautiful construction Rusty. The alignment description of all major parts is very useful.
Lieven
Lieven

OVERLORD- Diamond Member

- Posts : 1807
Join date : 2013-03-19
Age : 58
Location : Normandy, France
 Re: Skyray 35 Build - Faux Streak look
Looking good Rusty!!!

Cribbs74- Moderator


Posts : 11907
Join date : 2011-10-24
Age : 50
Location : Tuttle, OK
 Re: Skyray 35 Build - Faux Streak look
Thanks. Did y'all understand what I was describing about using the measuring stick to align the Stab? Basically the same thing I did with a ruler on the front end.
She just got her new parking space assigned. The tail would be complete if my left footed control horn didn't hit the damn fuse.

 Major eyeroll. I glued the rudder on tonight, I just cheated last night and had it pinned. That turned out to be a reall pain in the ass too. Actually everything does.
I'm going to put a screaming eagle head on the silver cheek block. I don't know what to name it yet, but I have some ideas.
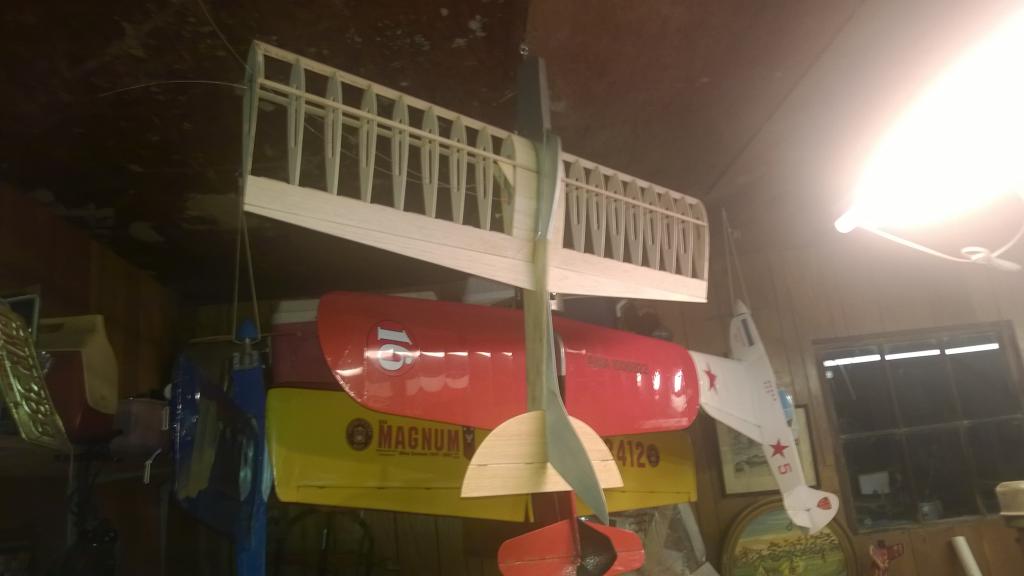
Went flying today, 94 degrees and 15mph wind. I would have gotten pattern points on my flights. I'd say I'm coming along.
Rusty
She just got her new parking space assigned. The tail would be complete if my left footed control horn didn't hit the damn fuse.
I'm going to put a screaming eagle head on the silver cheek block. I don't know what to name it yet, but I have some ideas.

Went flying today, 94 degrees and 15mph wind. I would have gotten pattern points on my flights. I'd say I'm coming along.
Rusty
_________________
Don't Panic!
...and never Ever think about how good you are at something...
while you're doing it!
My Hot Rock & Blues Playlist
...and never Ever think about how good you are at something...
while you're doing it!
My Hot Rock & Blues Playlist

RknRusty- Rest In Peace

- Posts : 10869
Join date : 2011-08-10
Age : 68
Location : South Carolina, USA
 Re: Skyray 35 Build - Faux Streak look


getback- Top Poster


Posts : 10439
Join date : 2013-01-18
Age : 67
Location : julian , NC
 Re: Skyray 35 Build - Faux Streak look
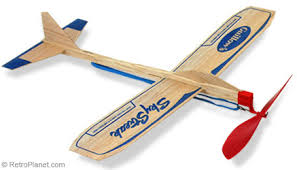
I thought of calling it Skystreak but it has already been done.


ian1954- Diamond Member

- Posts : 2688
Join date : 2011-11-16
Age : 70
Location : England
 Re: Skyray 35 Build - Faux Streak look
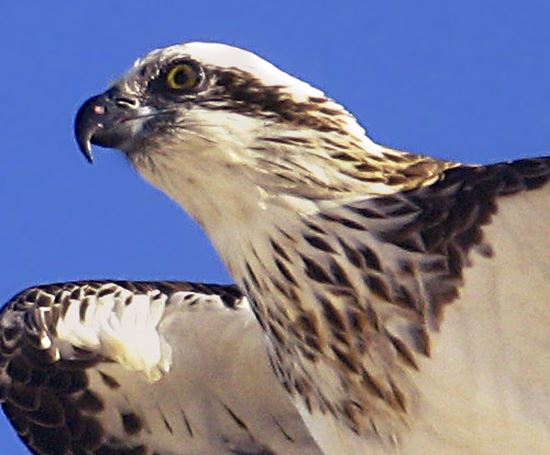
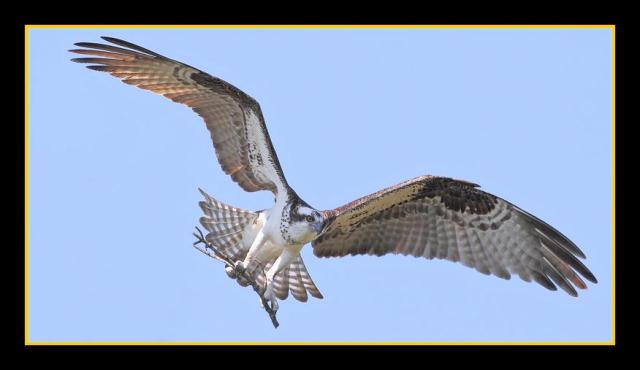
Since I'm also an avid surf fisherman, I thought of finding a picture of the head and neck of a screaming sea eagle, one of the ones I love to watch hunt while i'm fishing. They are known as the Osprey. I think that's what I'll call this plane. The Streak shape is birdlike. The silver will work as a background and some feathered silver Monokote trim on the Sky blue wing and tail feathers will seal the deal. I already have all the stuff to do it. No flying next week, just some 1/2A Saturday and maybe I can get it done.
The Osprey. I like it.
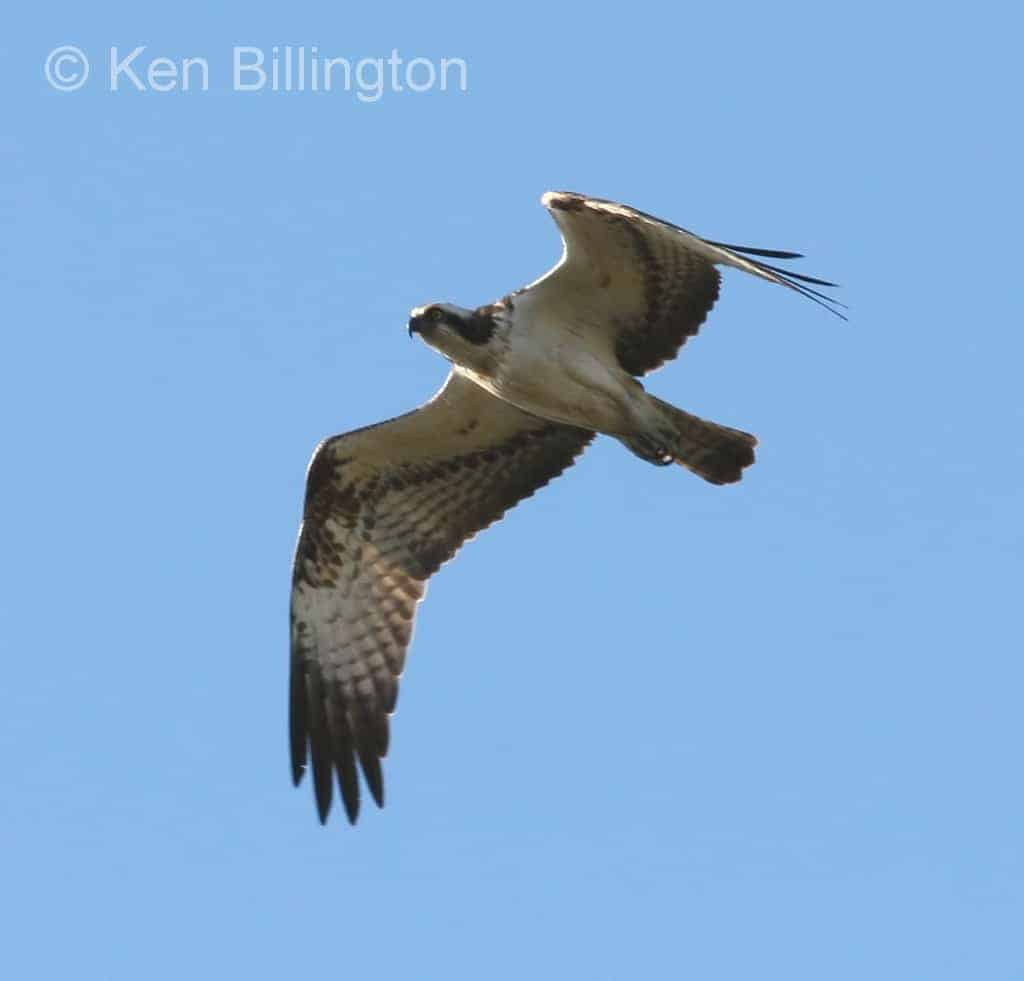
The Osprey. I like it.


_________________
Don't Panic!
...and never Ever think about how good you are at something...
while you're doing it!
My Hot Rock & Blues Playlist
...and never Ever think about how good you are at something...
while you're doing it!
My Hot Rock & Blues Playlist

RknRusty- Rest In Peace

- Posts : 10869
Join date : 2011-08-10
Age : 68
Location : South Carolina, USA
 Re: Skyray 35 Build - Faux Streak look
That's a wind ripping snout full of tooth 

 Nice call Osprey, scrappy Mark , Rocking Donkey!! Boot stomping Ron, What's Next ??


 Nice call Osprey, scrappy Mark , Rocking Donkey!! Boot stomping Ron, What's Next ??
getback- Top Poster


Posts : 10439
Join date : 2013-01-18
Age : 67
Location : julian , NC
Page 5 of 9 •  1, 2, 3, 4, 5, 6, 7, 8, 9
 Similar topics
» Scratch build skyray with beam mount for 0.049 teedee
» [solved]Baby Flight Streak build log
» Baby Flite Streak build thread
» Hybrid-Profile Flite Streak/Cox Hyper Viper scratch build
» Great video on building and flying the 1/2A Skyray and Skyray 35
» [solved]Baby Flight Streak build log
» Baby Flite Streak build thread
» Hybrid-Profile Flite Streak/Cox Hyper Viper scratch build
» Great video on building and flying the 1/2A Skyray and Skyray 35
Page 5 of 9
Permissions in this forum:
You cannot reply to topics in this forum

 Rules
Rules


