Log in
Search
Latest topics
» It's the X Wing that has a canardby 1975 control line guy Today at 12:12 am
» My current avatar photo
by GallopingGhostler Yesterday at 7:02 pm
» Cox 020 PeeWee rebuild questions
by LooseSpinner99 Yesterday at 4:38 pm
» music vids.. some of your favorites
by Kim Yesterday at 3:28 pm
» New Model Build
by bsadonkill Yesterday at 1:19 pm
» Kofuku Maru Fishing Boat Model
by Levent Suberk Yesterday at 11:39 am
» Free Flight Radio Assist
by rdw777 Yesterday at 11:24 am
» TEE DEE Having issues
by GallopingGhostler Wed Nov 13, 2024 11:38 pm
» Pathé Modeling Videos
by Levent Suberk Wed Nov 13, 2024 2:10 pm
» My latest doodle...
by layback209 Wed Nov 13, 2024 1:20 am
» Drones, pretty nifty...........
by rsv1cox Tue Nov 12, 2024 6:55 pm
» Project Cox .049 r/c & Citabrian Champion
by roddie Tue Nov 12, 2024 6:20 pm
Cox Engine of The Month
I’m So Weak …
Page 1 of 2
Page 1 of 2 • 1, 2 
 I’m So Weak …
Well, I still have about a half dozen projects waiting to be finished. Okay, about a dozen. But after test flying the new pipe bomb arrangement this morning and talking about making up a more capable plane for the engine, I just HAD to throw something together to see what the pipe bomb engine could do. So I sat down with some paper and drew up a pipe bomb specific fuselage using ¼” balsa. Wing will be my standard go-to, the SIG airfoiled 4” sheet. This one should be even easier than my last engine pod. It’s late, so I will scan the drawing later, but I did remember to take some pictures from the start this time.
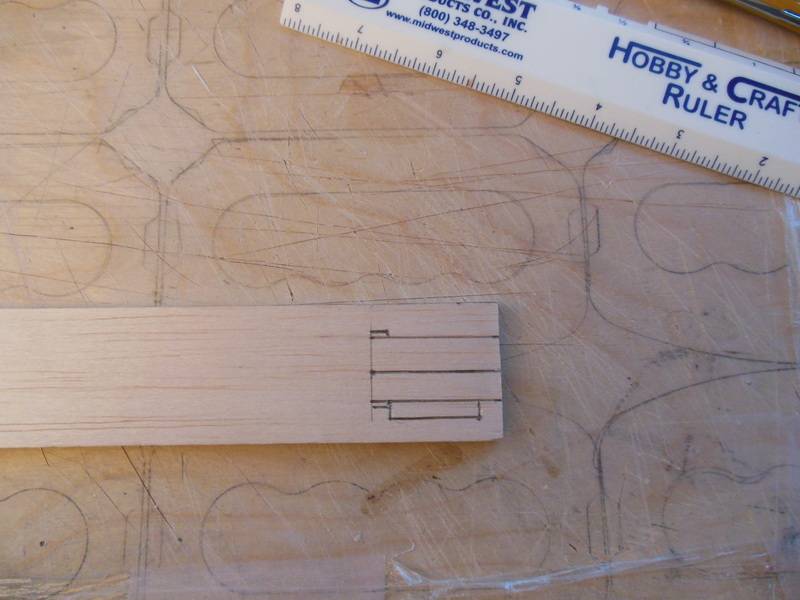
Drawing the engine cutout in the ¼” balsa nose section, the fuselage shape, and the wing/stab cutouts on the fuselage.
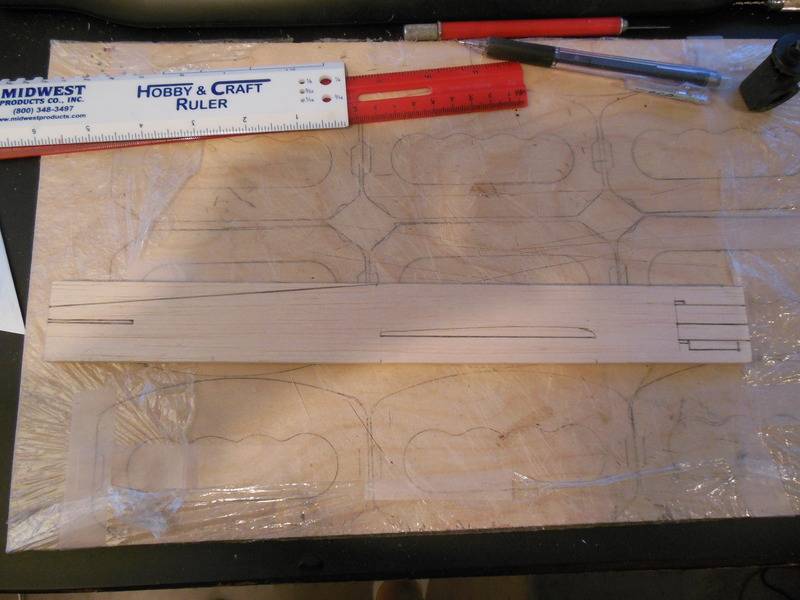
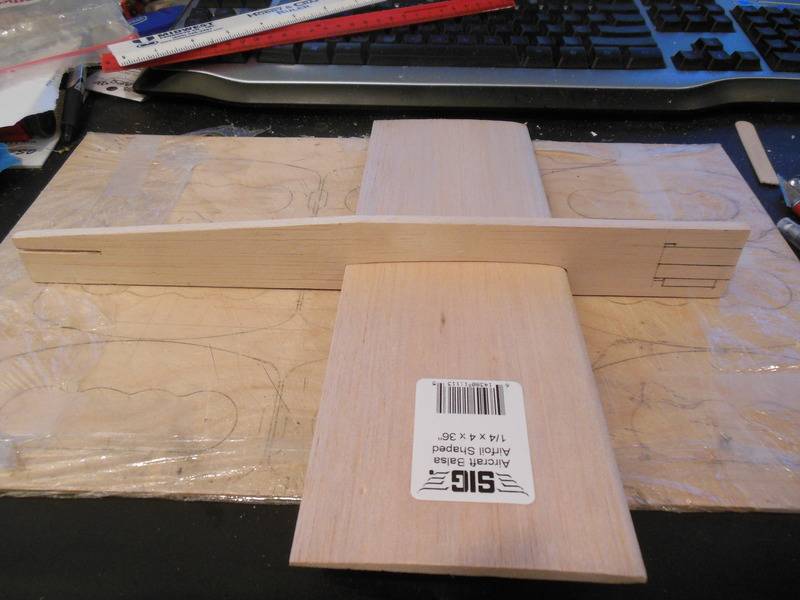
Fuselage cut to shape and the wing/stab slots cut.
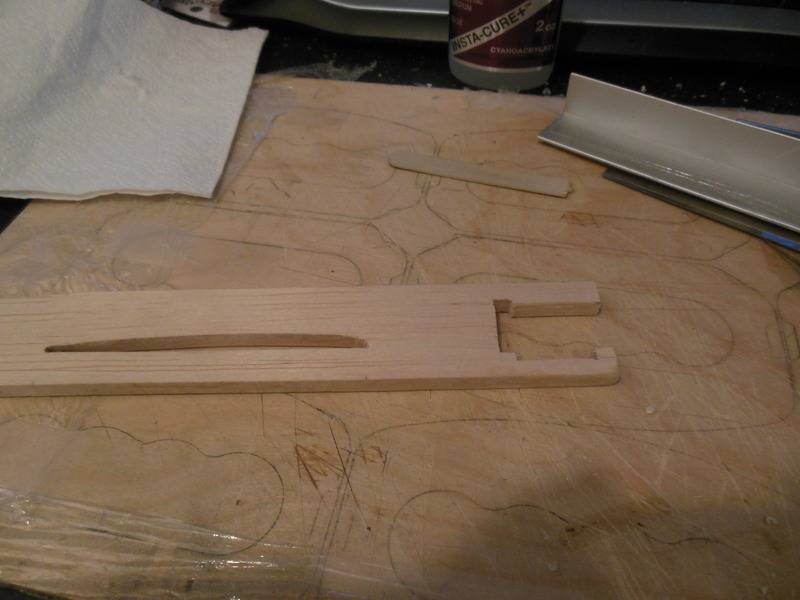
Engine cutout in the nose, and then a 3/32” ply doubler glued on the outboard side. The engine case is set in place to check as I carve things to shape. I want to get everything as tight as I can. I don’t have a master plan for the ply thicknesses I’m using, just what looks okay to me. I figure a 3/32" ply doubler on one side and a 1/32" ply doubler on the other side equals a 1/16" doubler on both sides.

Building up the inboard cheek block/engine bed. The Cheek block/engine bed is made up of a 1/32” ply doubler up against the fuselage, a ¼”balsa sheet block, and then a 3/32” balsa sheet on top. I probably could have left off the 3/32” sheet, but there would not have been much meat left when I carved out the ¼” sheet for the engine clearance.
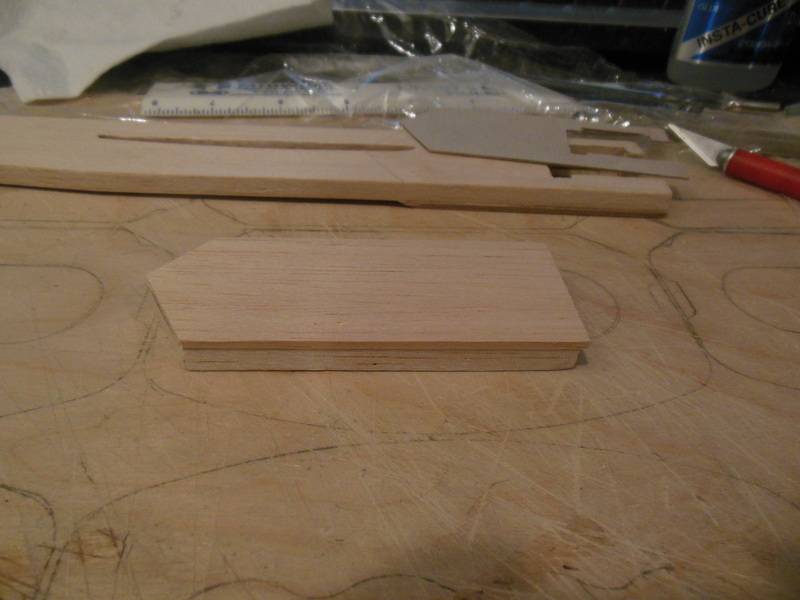
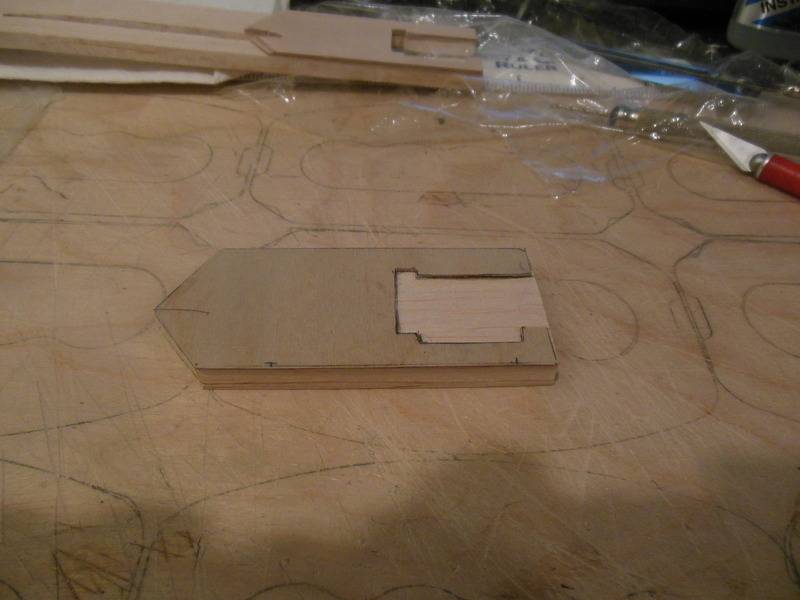
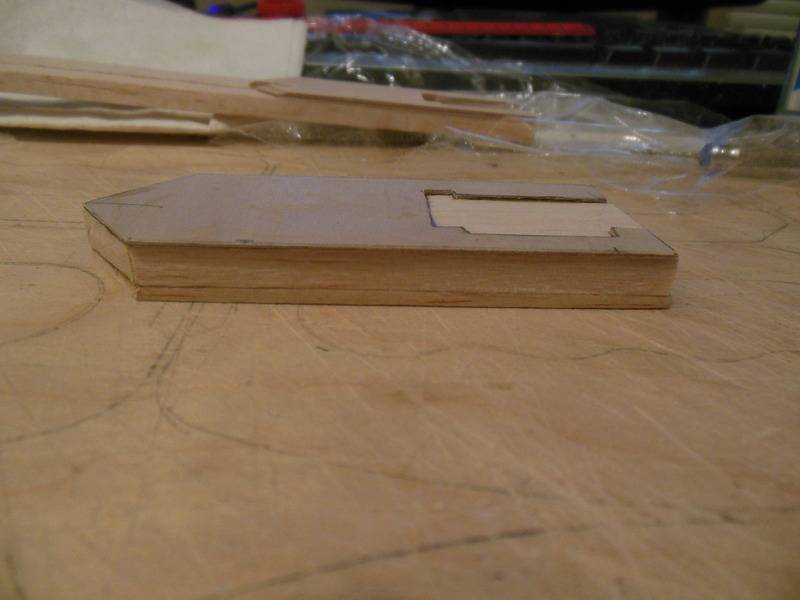
The cheek block rough sanded to shape.
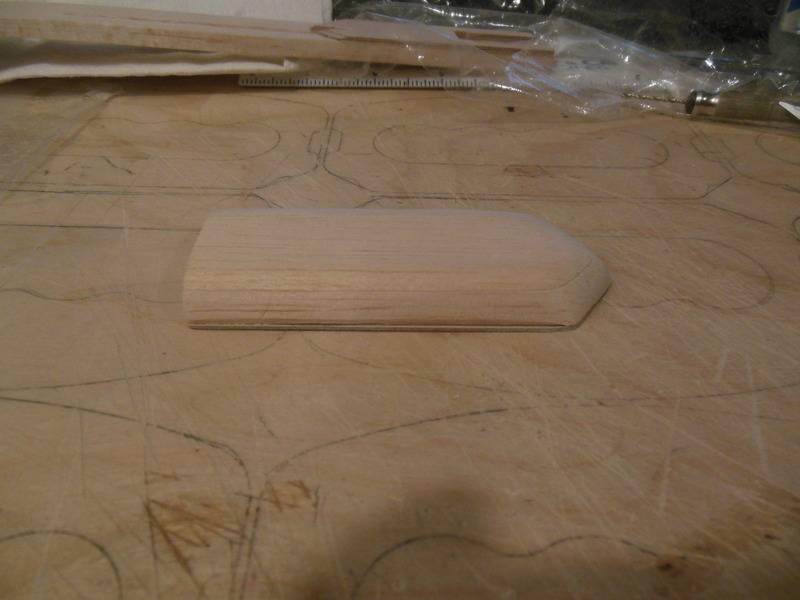
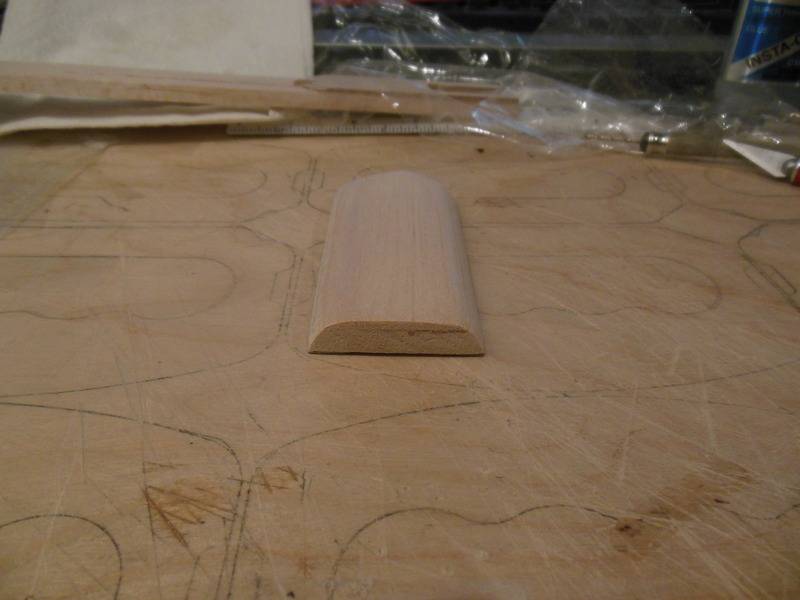
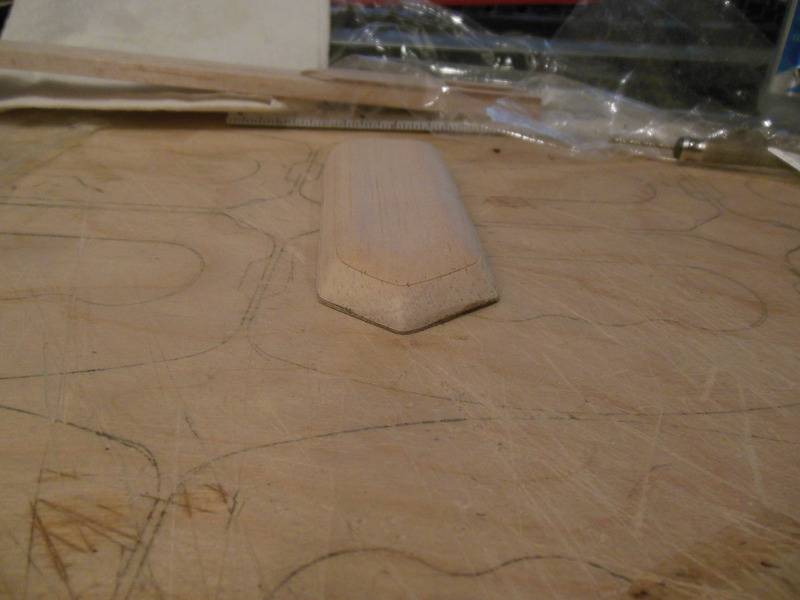
And glued to the inboard side of the fuselage. I’ll finish cutting out the slot for the wing in the cheek block later.

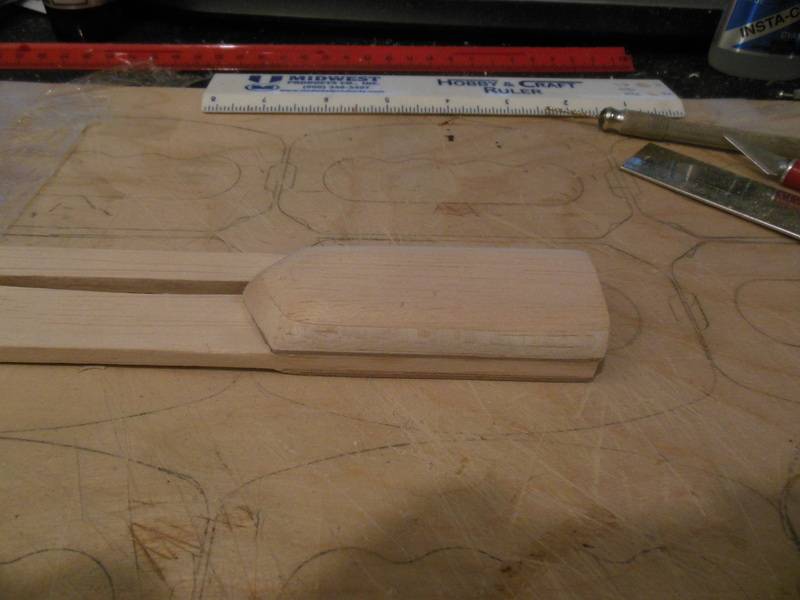
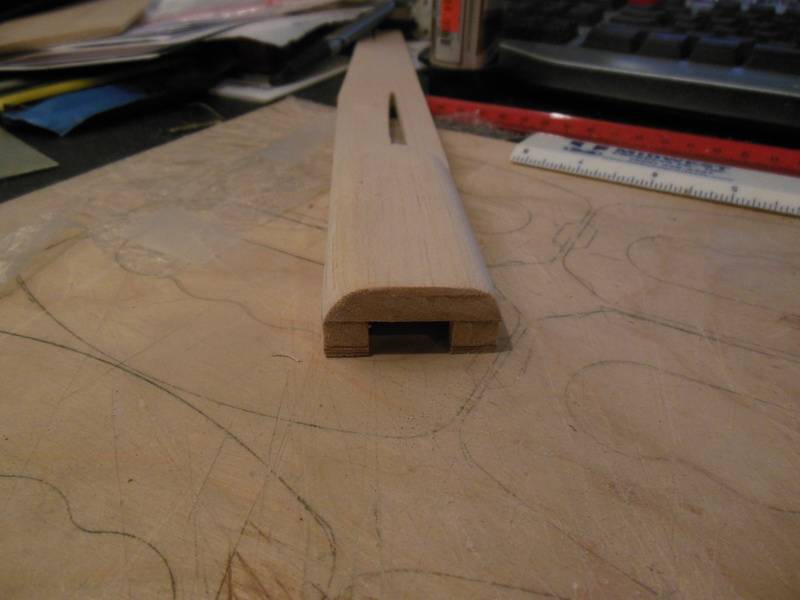
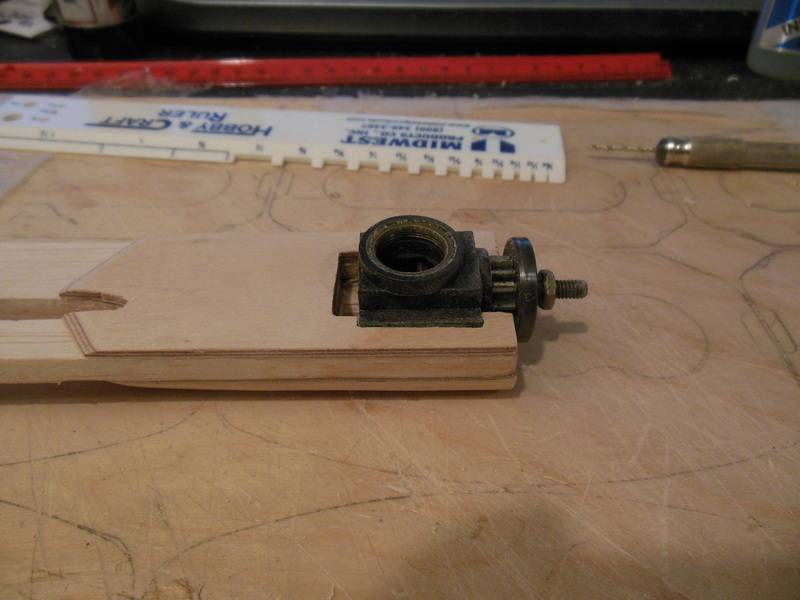
And starting to carve out the ¼” balsa for the engine. I carve a little, then drop the case in to check progress. I plan to carve out the engine pocket a little deeper than necessary, then use epoxy to bed the engine.
Goal is a flying weight of 5 ounces or less. We’ll see. I’m officially designating this one BTC-3A.
The Easily Distracted Mark
Drawing the engine cutout in the ¼” balsa nose section, the fuselage shape, and the wing/stab cutouts on the fuselage.


Fuselage cut to shape and the wing/stab slots cut.

Engine cutout in the nose, and then a 3/32” ply doubler glued on the outboard side. The engine case is set in place to check as I carve things to shape. I want to get everything as tight as I can. I don’t have a master plan for the ply thicknesses I’m using, just what looks okay to me. I figure a 3/32" ply doubler on one side and a 1/32" ply doubler on the other side equals a 1/16" doubler on both sides.


Building up the inboard cheek block/engine bed. The Cheek block/engine bed is made up of a 1/32” ply doubler up against the fuselage, a ¼”balsa sheet block, and then a 3/32” balsa sheet on top. I probably could have left off the 3/32” sheet, but there would not have been much meat left when I carved out the ¼” sheet for the engine clearance.


The cheek block rough sanded to shape.


And glued to the inboard side of the fuselage. I’ll finish cutting out the slot for the wing in the cheek block later.


And starting to carve out the ¼” balsa for the engine. I carve a little, then drop the case in to check progress. I plan to carve out the engine pocket a little deeper than necessary, then use epoxy to bed the engine.

Goal is a flying weight of 5 ounces or less. We’ll see. I’m officially designating this one BTC-3A.
The Easily Distracted Mark
batjac- Diamond Member


Posts : 2372
Join date : 2013-05-22
Age : 61
Location : Broken Arrow, OK, USA
 Re: I’m So Weak …
Looking good Mark ! Does this mean your going to put epoxy over the engine mounts ? Ericthen use epoxy to bed the engine. wrote:


getback- Top Poster


Posts : 10431
Join date : 2013-01-18
Age : 67
Location : julian , NC
 Re: I’m So Weak …
getback wrote: Looking good Mark ! Does this mean your going to put epoxy over the engine mounts ? Eric
You'll just have to keep checking back to see....

The Tease Mark

batjac- Diamond Member


Posts : 2372
Join date : 2013-05-22
Age : 61
Location : Broken Arrow, OK, USA
 Re: I’m So Weak …
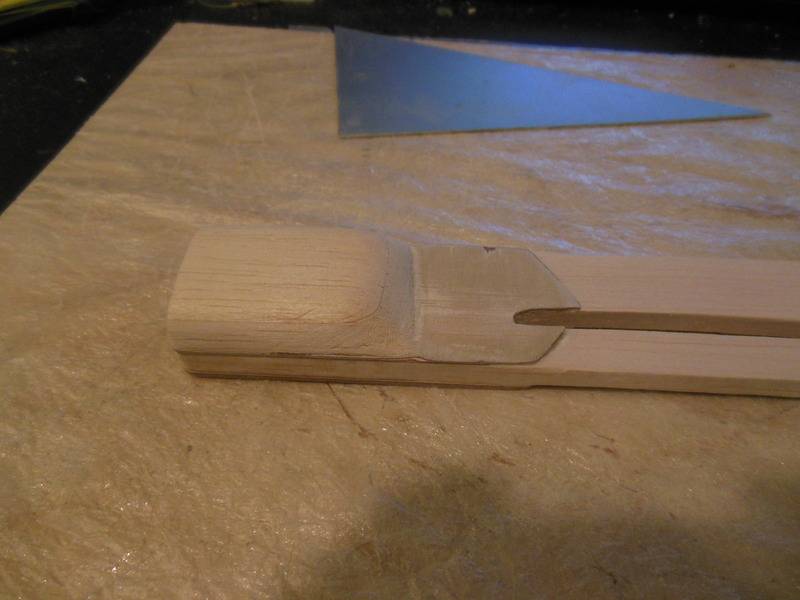
I didn't have much time to play with this the past couple of days. But the more I looked at it, the more I couldn't stand that huge cheek block. So I trimmed it back down to a more reasonable size.
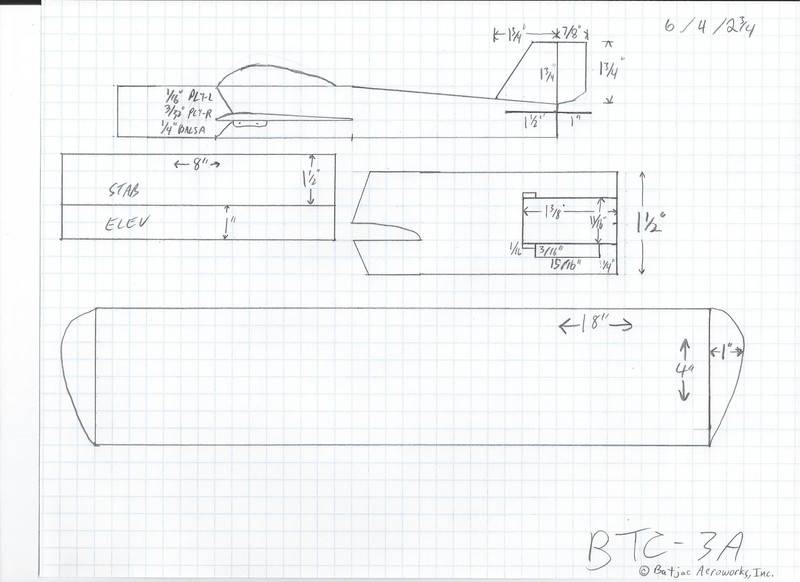
I also scanned my working drawing. I'll be adding to it as I go.
The Pokey Mark

I also scanned my working drawing. I'll be adding to it as I go.

The Pokey Mark

batjac- Diamond Member


Posts : 2372
Join date : 2013-05-22
Age : 61
Location : Broken Arrow, OK, USA
 Re: I’m So Weak …
I think you are going to "sandwich" the engine in tight rather than just glue it,

ian1954- Diamond Member

- Posts : 2688
Join date : 2011-11-16
Age : 70
Location : England
 Re: I’m So Weak …
Mark, you and many other CEFers are giving me fun-building pangs. Those builds seem like the good ol' days, and it shouldn't feel that way. The last ones I did were the Kom Bats last Summer, the Reed Speed Mustang, the Kitty Cat, the still broken Refried Bean, and back in 2011 was the Li'l Satan, all stunning successes. I've only drawn plans and bought wood since then. I'd be doing some 1/2A and .09-15 size projects if I could just keep my stunt fleet intact without always having to build and fix them. The payback for a passionate tangent I took in 2013, very fun and rewarding though it is, it's tedious work.
I have small engines for all sizes. No pipe bombs, but a handfull of Wen Macs, I think that's what they are. Little front intake .049s. And Coxes; a pair of TD .09s and a TT.15, two Medallions, a TD .049, Big Migs and two new MP Jet .061s(one of which is a racing engine). One of the Medallions was given to me by Rat9000 in hopes I'd build him a Stuntman.
I have a few of those Sig 1/4" airfoils I bought for the Stuntman23 trio I planned last year. I'd barely started when I cracked the Oriental(demolished it a year later) and planted the Nobler and the Ukey, thereby nuking my plans for Winter fun projects. This is reminding me of that, and I want to get that box of wood down and see what I have. For the Stuntmans, I'd laminate the sheets for a symmetrical airfoil.
The daydreaming Rusty
_________________
Don't Panic!
...and never Ever think about how good you are at something...
while you're doing it!
My Hot Rock & Blues Playlist
...and never Ever think about how good you are at something...
while you're doing it!
My Hot Rock & Blues Playlist

RknRusty- Rest In Peace

- Posts : 10869
Join date : 2011-08-10
Age : 68
Location : South Carolina, USA
 Re: I’m So Weak …
batjac wrote:getback wrote: Looking good Mark ! Does this mean your going to put epoxy over the engine mounts ? Eric
You'll just have to keep checking back to see....
The Tease Mark


 You sure enough TRIMMED the bulky panel down.
getback- Top Poster


Posts : 10431
Join date : 2013-01-18
Age : 67
Location : julian , NC
 Re: I’m So Weak …
Haven’t worked on this much, as I’ve been under the weather, but got some work in.
I’m afraid I gave some people the wrong impression. When I said I was going to bed the engine in the fuselage, I meant bedding it like you’d bed the action in a rifle. I didn’t see the need to go the full route of sealing the engine and treating the engine with release compound, etc. I just wrapped the engine in plastic wrap and then bedded it in the glue. Not the prettiest, but it’ll last for as much flying as I’m liable to do with this plane.


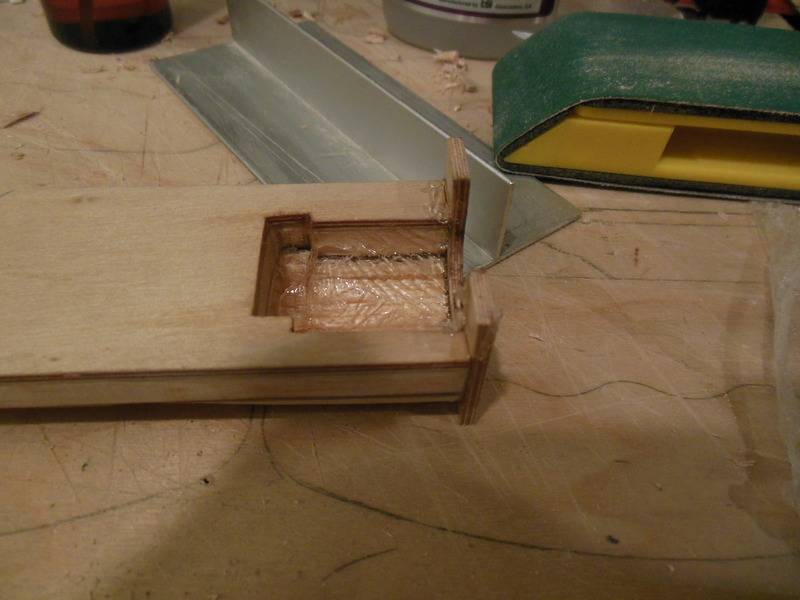
Better look at the lower firewall that I’ve cut to match the lower curve of the crankcase. I deviated from my initial plans, as I’m using the engine off of the Pipe Bomb Special, instead of the engine I was originally going to use. So the firewall butts up against the mounting tab on the right side of the engine.
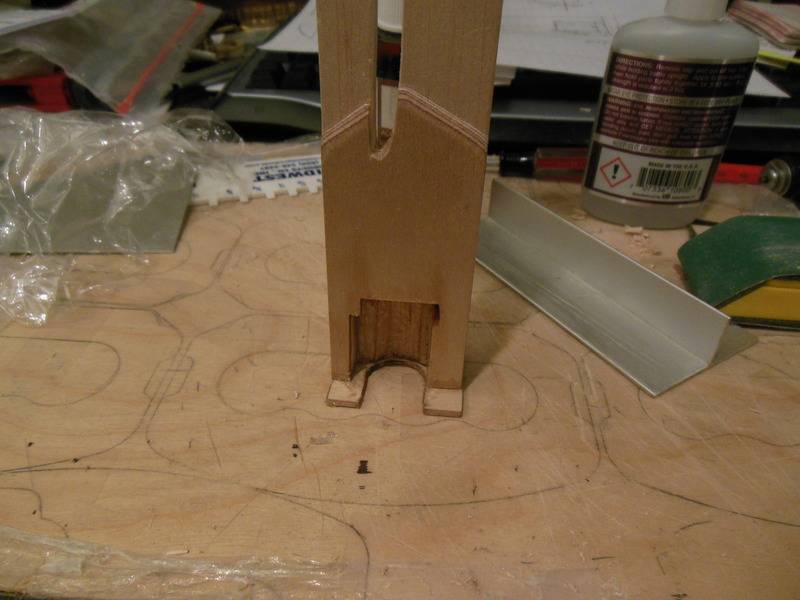
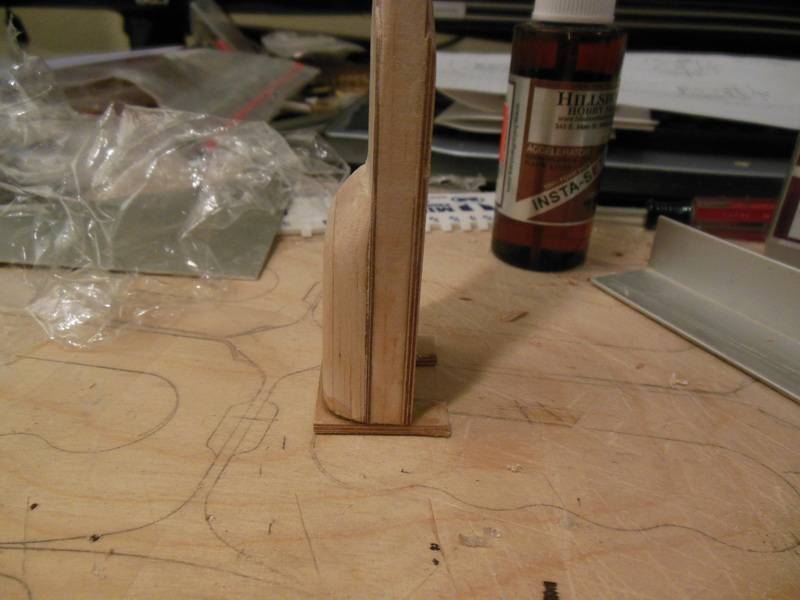
Making a hole for the fuel line to exit the bottom of the reed housing and test fitting the engine.
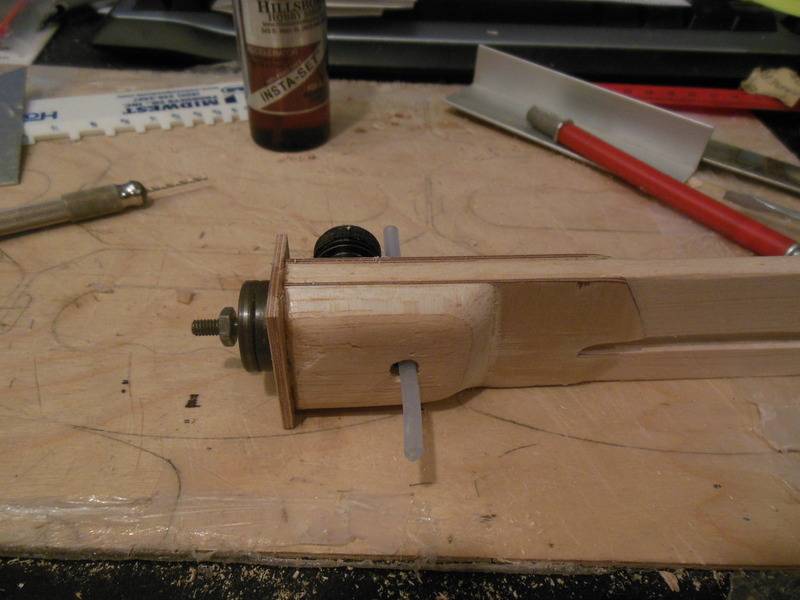
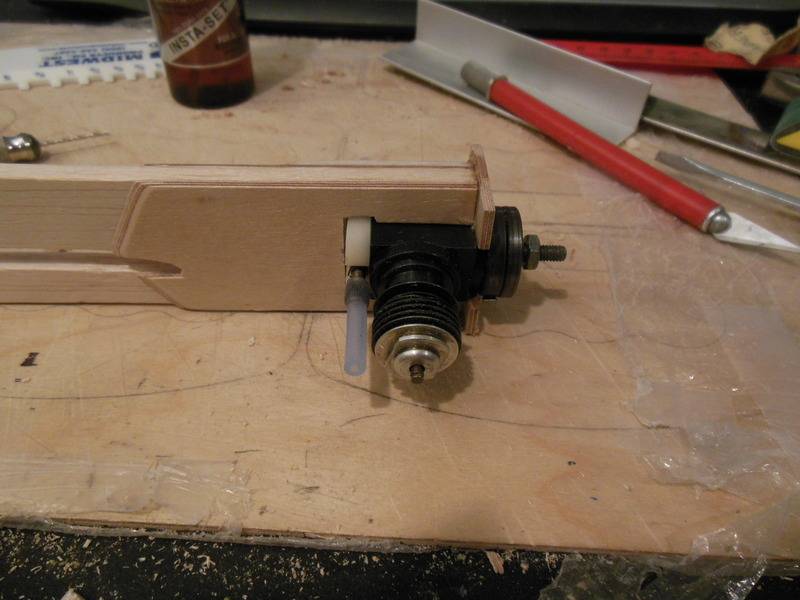
And the lower firewall trimmed to initial rough shape…
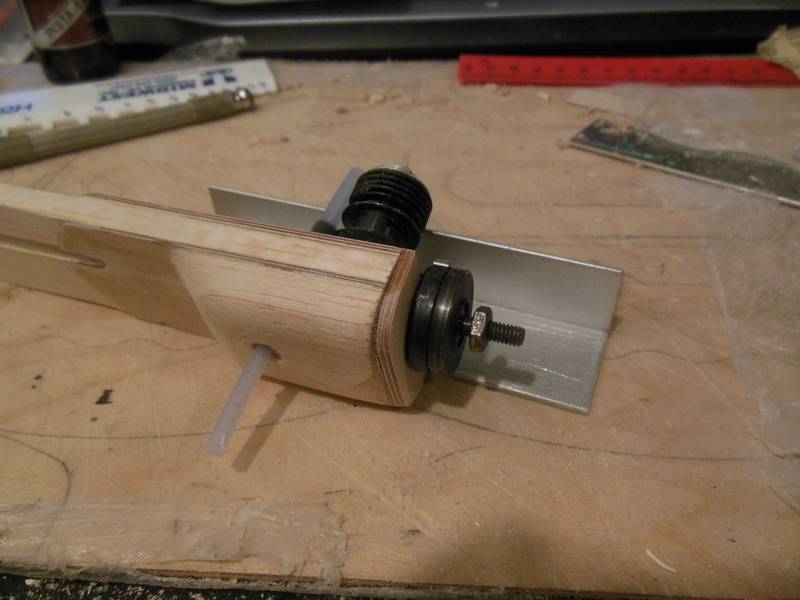
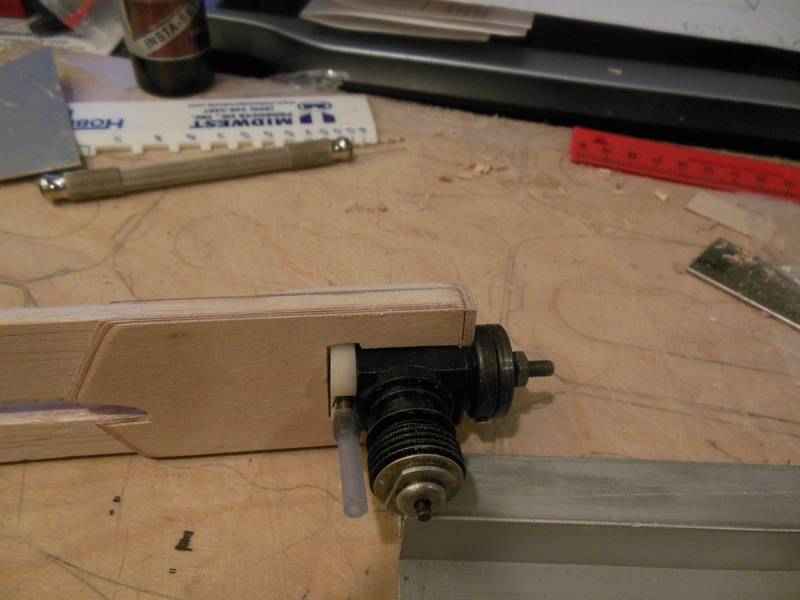
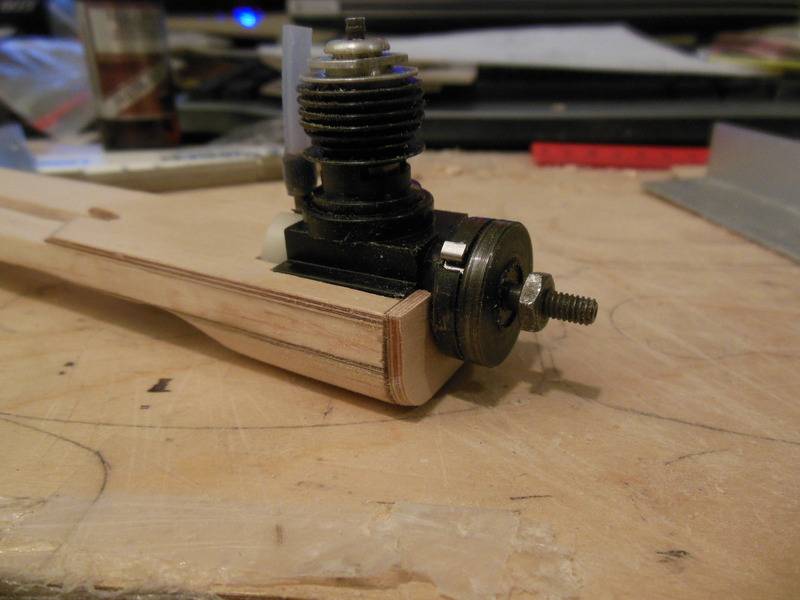
And the upper firewall/engine mount in place.
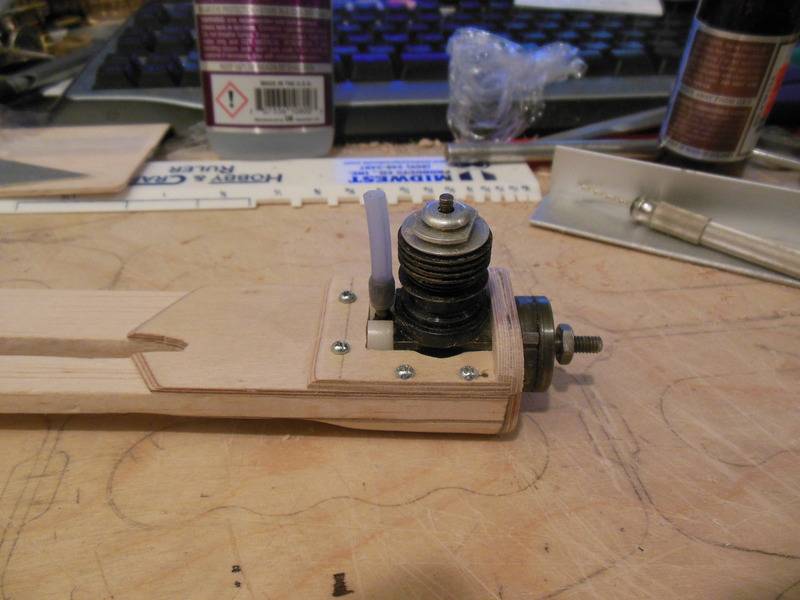
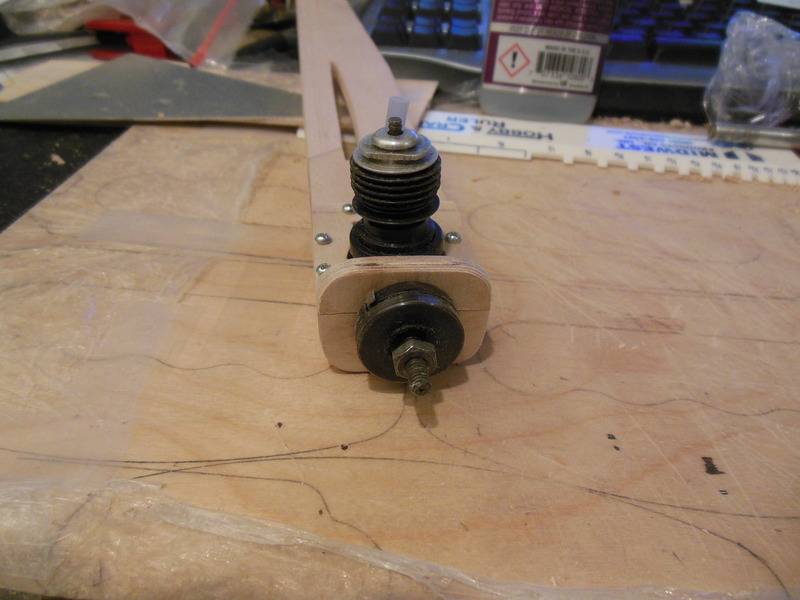
I’ll sand the upper and lower sides down a little more, but the front is still going to be a rather large plate area. We’ll see how it flies.
The Sickly Mark
I’m afraid I gave some people the wrong impression. When I said I was going to bed the engine in the fuselage, I meant bedding it like you’d bed the action in a rifle. I didn’t see the need to go the full route of sealing the engine and treating the engine with release compound, etc. I just wrapped the engine in plastic wrap and then bedded it in the glue. Not the prettiest, but it’ll last for as much flying as I’m liable to do with this plane.


Better look at the lower firewall that I’ve cut to match the lower curve of the crankcase. I deviated from my initial plans, as I’m using the engine off of the Pipe Bomb Special, instead of the engine I was originally going to use. So the firewall butts up against the mounting tab on the right side of the engine.


Making a hole for the fuel line to exit the bottom of the reed housing and test fitting the engine.


And the lower firewall trimmed to initial rough shape…


And the upper firewall/engine mount in place.


I’ll sand the upper and lower sides down a little more, but the front is still going to be a rather large plate area. We’ll see how it flies.
The Sickly Mark

batjac- Diamond Member


Posts : 2372
Join date : 2013-05-22
Age : 61
Location : Broken Arrow, OK, USA
 Re: I’m So Weak …
Nice job Mark. I like those "pipe Bomb" engines especially the starter which I consider a better approach than used on the Cox engines.
Nice job on bedding the engine but this stuff works much better without the folds of the plastic wrap. Just lightly coat the opening with the epoxy mixture, paint the bottom of the engine with the release agent and squish. Fit's like a glove.
http://www.ebay.com/itm/Acraglas-Rifle-Bedding-Kit-Enough-For-2-Rifles-/311645208296?hash=item488f807ee8:g:GrwAAOSweW5U65CR
Or, you can just use your system and buy the release agent alone.
Bob

rsv1cox- Top Poster


Posts : 11225
Join date : 2014-08-18
Location : West Virginia
 Re: I’m So Weak …
Looking good Mark , I don't see any room for the engine to breath fresh air but am sure you have that figured out and I will Wait  Eric
Eric

getback- Top Poster


Posts : 10431
Join date : 2013-01-18
Age : 67
Location : julian , NC
 Re: I’m So Weak …
Bob, if I were going to fly this thing long term I'd have done a more thorough job of bedding. But I know I'll just fly this four or five times to say, "See! It works!", and then move on to the next idea I get.
Eric, with the space around the back of the mount, and the big hole in the cheek block for the fuel hose, there's more than enough open space for air to breath. Think about how small and narrow the slot is for a tanked Bee that is bolted flush to a firewall.
The Short Attention Span Mark
Eric, with the space around the back of the mount, and the big hole in the cheek block for the fuel hose, there's more than enough open space for air to breath. Think about how small and narrow the slot is for a tanked Bee that is bolted flush to a firewall.
The Short Attention Span Mark

batjac- Diamond Member


Posts : 2372
Join date : 2013-05-22
Age : 61
Location : Broken Arrow, OK, USA
 Re: I’m So Weak …
I'll be anxious for a flight report. Did Testors ever run any 5+ inch diameter props on their .049 powered airplanes? From what info. I've gathered (not too much..) most of their models had scale-like 4" diameter 4-blade props. Did they design their .049 engine with this in mind? Their spring-starter mechanism (as I mentioned earlier) incorporates a significant "flywheel" effect. The engines are said to run well; as designed. Would a Cox 5" x 2" load it down?
I'm curious about your experiments with the NVA... Testors didn't seem to be concerned with as fine an adjustment as Cox was at the time. I think that a finer-thread needle would help to find the "sweet-spot"... and pulling that heavy-hub off the crank-shaft might afford running a larger diameter prop. Maybe I'm full of kaka... but nothing ventured.. nothing gained...
I'm curious about your experiments with the NVA... Testors didn't seem to be concerned with as fine an adjustment as Cox was at the time. I think that a finer-thread needle would help to find the "sweet-spot"... and pulling that heavy-hub off the crank-shaft might afford running a larger diameter prop. Maybe I'm full of kaka...
 Re: I’m So Weak …
Roddie,
All I've run on the Testors engines are the Cox 5x3 rubber ducky. I get between 16.5K and 17K RPM. I forget who posted a while back about trying a 6x3 prop and breaking the piston rod with it, but it seems 6x3 is too much. I've thought about cutting down a 6x3 to a 5.5x3 to get more clearance around the spring start housing, but we'll see how this plane flies first on the rubber ducky I have. I'm a little tempted to try a Cox grey 5x4 on this, but I'd have to ream open the hole to fit the Testors shaft, and I only have a couple of the competition 5x4 props. I'd hate to ruin a good Cox prop for an experiment on a Testors. I have two 2-bladed Cox 5x3 rubber ducky props reamed out for a Testors, and on one of the engines I got from my wife's friend's husband there was a Cox 5x3 3-bladed prop on a Testors that I haven't tried yet. I need to do some experiments with the 5x3 tractor and pusher props to see how they compare to the 5x3 two bladed prop on Cox engines.
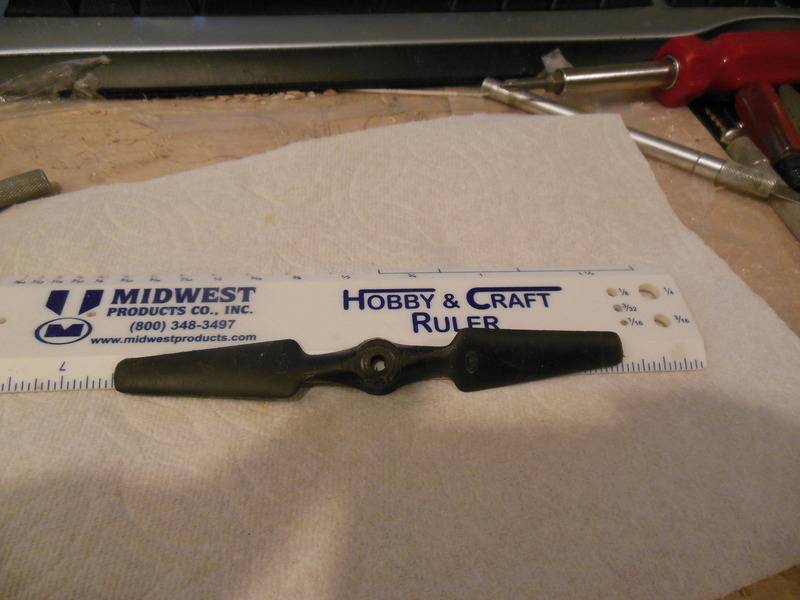
Here is a standard Testors prop that I've gotten on a couple of Testors engines. It’s a 5½ inch diameter prop. It’s not marked on the front, but the pitch pretty much matches a Tornado 4” pitch prop. You can see that the prop is shaped so that the blades don’t really start until they’re outside the fuselage sides of the blunt noses on the old Testors models vs. a Cox prop that has a more smooth transition from the root to tip. I’ve never actually run the Testors prop, as they don’t look too efficient to me. Maybe I’ll give one a try.
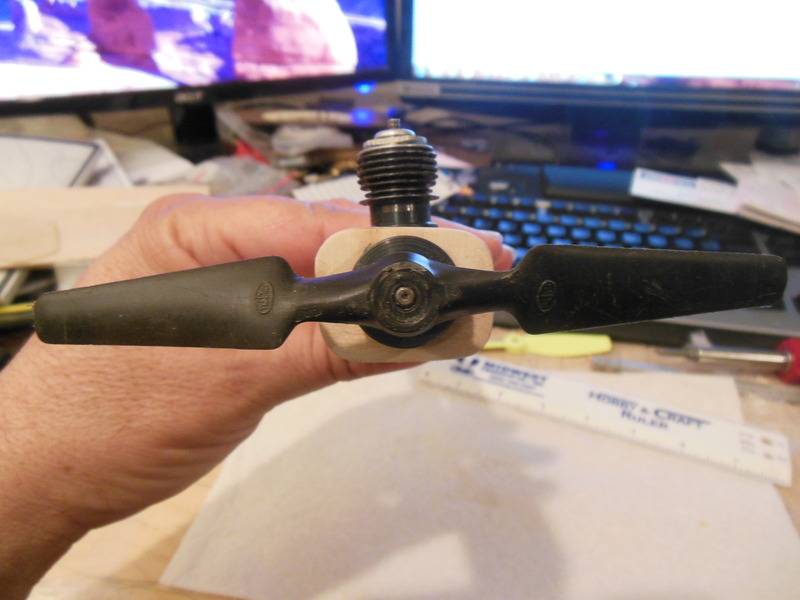

At the same time, I don't want to try to pry off the spring starter housing and ruin a running Testors engine. I’d like to know how to do it, but not interested enough to do it to one of my running engines, and I don't have any trashed Testors with the spring starter.
As for the needle, I have a spare Testors pipe bomb needle, so I can experiment a little. I just haven't decided if I'm going to go with more of a taper, or if I'm going to do a step transition like the Cox needles. Leaning towards stepped, but still undecided. I could press in a Cox spray bar with a standard needle, which I think would be fine for getting a good needle setting, but I don't know how well the plastic of these Testors backplates would take to having the spraybar pushed out and a Cox pushed in. I'm pretty sure the Cox spraybar is a hair larger in diameter. Maybe if I acquire another pipe bomb I'll experiment on that with the Cox spraybars.
The Timid Mark.
All I've run on the Testors engines are the Cox 5x3 rubber ducky. I get between 16.5K and 17K RPM. I forget who posted a while back about trying a 6x3 prop and breaking the piston rod with it, but it seems 6x3 is too much. I've thought about cutting down a 6x3 to a 5.5x3 to get more clearance around the spring start housing, but we'll see how this plane flies first on the rubber ducky I have. I'm a little tempted to try a Cox grey 5x4 on this, but I'd have to ream open the hole to fit the Testors shaft, and I only have a couple of the competition 5x4 props. I'd hate to ruin a good Cox prop for an experiment on a Testors. I have two 2-bladed Cox 5x3 rubber ducky props reamed out for a Testors, and on one of the engines I got from my wife's friend's husband there was a Cox 5x3 3-bladed prop on a Testors that I haven't tried yet. I need to do some experiments with the 5x3 tractor and pusher props to see how they compare to the 5x3 two bladed prop on Cox engines.
Here is a standard Testors prop that I've gotten on a couple of Testors engines. It’s a 5½ inch diameter prop. It’s not marked on the front, but the pitch pretty much matches a Tornado 4” pitch prop. You can see that the prop is shaped so that the blades don’t really start until they’re outside the fuselage sides of the blunt noses on the old Testors models vs. a Cox prop that has a more smooth transition from the root to tip. I’ve never actually run the Testors prop, as they don’t look too efficient to me. Maybe I’ll give one a try.


At the same time, I don't want to try to pry off the spring starter housing and ruin a running Testors engine. I’d like to know how to do it, but not interested enough to do it to one of my running engines, and I don't have any trashed Testors with the spring starter.
As for the needle, I have a spare Testors pipe bomb needle, so I can experiment a little. I just haven't decided if I'm going to go with more of a taper, or if I'm going to do a step transition like the Cox needles. Leaning towards stepped, but still undecided. I could press in a Cox spray bar with a standard needle, which I think would be fine for getting a good needle setting, but I don't know how well the plastic of these Testors backplates would take to having the spraybar pushed out and a Cox pushed in. I'm pretty sure the Cox spraybar is a hair larger in diameter. Maybe if I acquire another pipe bomb I'll experiment on that with the Cox spraybars.
The Timid Mark.

batjac- Diamond Member


Posts : 2372
Join date : 2013-05-22
Age : 61
Location : Broken Arrow, OK, USA
 Re: I’m So Weak …
Don't do what I did & try to pry off the drive plate with a screwdriver. It contains the clutch pawls which can easily be jammed by denting in the rear cover, between the spring and the clutch. The best way to get it off is to remove the piston/rod assembly and drive the crankshaft out. The clutch can't be dismantled to repair it if it gets damaged. When you refit the plate, ensure you align the two flats of the centre spring anchor with the corresponding apeture in the centre of the clutch. Otherwise, the whole thing will jam up solid.
Rod.
Rod.

Oldenginerod- Top Poster

- Posts : 4017
Join date : 2012-06-15
Age : 62
Location : Drouin, Victoria
 Re: I’m So Weak …
Oldenginerod wrote:The best way to get it off is to remove the piston/rod assembly and drive the crankshaft out. The clutch can't be dismantled to repair it if it gets damaged. When you refit the plate, ensure you align the two flats of the centre spring anchor with the corresponding apeture in the centre of the clutch. Otherwise, the whole thing will jam up solid.
Rod.
Rod, can the whole spring assembly be removed and left off? I don't know how you'd have a drive plate for the prop to seat against if the housing was removed. Can just the rear spring assembly be taken off and the drive plate be put back on?
The Inquisitive Mark

batjac- Diamond Member


Posts : 2372
Join date : 2013-05-22
Age : 61
Location : Broken Arrow, OK, USA
 Re: I’m So Weak …
Yes, I think the spring housing is riveted to the crankcase, or possibly retained by a clip. I will need to have a look in my parts bin.batjac wrote:Oldenginerod wrote:The best way to get it off is to remove the piston/rod assembly and drive the crankshaft out. The clutch can't be dismantled to repair it if it gets damaged. When you refit the plate, ensure you align the two flats of the centre spring anchor with the corresponding apeture in the centre of the clutch. Otherwise, the whole thing will jam up solid.
Rod.
Rod, can the whole spring assembly be removed and left off? I don't know how you'd have a drive plate for the prop to seat against if the housing was removed. Can just the rear spring assembly be taken off and the drive plate be put back on?
The Inquisitive Mark
The clutch assembly is the prop driver, which can be reinstalled once the spring & housing is removed. I think the crankshaft is dimensionally similar to the earlier WenMacs, so it may be possible to use a prop driver off an earlier model (Mk2 or Mk3 maybe).

Oldenginerod- Top Poster

- Posts : 4017
Join date : 2012-06-15
Age : 62
Location : Drouin, Victoria
 Re: I’m So Weak …
IF I remember correctly, years ago on my first attempt at stick ( my first two were slab wing) building a balsa model, I re-used a wen Mac AMF 049 that had the spring starter removed and the weight was reinstalled as the prop driver. It worked quite well, as it was the survivor of the Lil Satan VS Big Otto combat flight. Yeah, it seems like I had a heck of a time getting the spring housing off and removing that rivet. I do remember that Big Otto was a lot faster and more nimble than my Goldberg Lil Wizzard, but that was 50+ years ago.

Marleysky- Top Poster


Posts : 3618
Join date : 2014-09-28
Age : 72
Location : Grand Rapids, MI
 Re: I’m So Weak …
*** SIGH ***
I guess I'm going to have to acquire another pipe bomb and take it apart now....
The Resigned Mark
I guess I'm going to have to acquire another pipe bomb and take it apart now....
The Resigned Mark

batjac- Diamond Member


Posts : 2372
Join date : 2013-05-22
Age : 61
Location : Broken Arrow, OK, USA
 RE:I'm so weak
Regarding the Testors / Mc Coy/ Wen Mac 2 blade props, in the odd shaped version that everybody knows about, they made 5",5 1/2", and 6" versions. All appear to be 3" pitch although not marked. They had a square tipped 2 blade in red plastic for ? McCoy later had 6" round tip prop very similar to a Cox 6X3.
In 3 blade props they made at least two 4" versions. One for the Spitfire/Zero RTF planes and another different for the ME-109 RTF planes. They also had a 4 1/2" square tipped 3 blade prop for Corsair ? RTF planes.
There are probably a lot more variations that I don't have..
FYI...Steve
In 3 blade props they made at least two 4" versions. One for the Spitfire/Zero RTF planes and another different for the ME-109 RTF planes. They also had a 4 1/2" square tipped 3 blade prop for Corsair ? RTF planes.
There are probably a lot more variations that I don't have..
FYI...Steve

66 Malibu- Gold Member

- Posts : 477
Join date : 2012-02-28
Location : Georgia
 Re: I’m So Weak …
This has been fun thread for me.......BUT I have way too many Cox 1/2a to fuss with any of the other .049s out there
That aside, I have spent a fair amount of time re-building some older rifles and learning how to properly bed a stock and receiver/barrel
modeling clay, wood carving, hard points, release agents, various epoxies all are necessary skill and craft
Just a note....one method I used included fully coating a metal part with Mothers Carnuba wax(no buff..just thick coat) then setting in Micro Balloon thicken 90 min epoxy...removing the excess with scraper and alcohol rag....the metal part released clean...the bed was perfect and once mounted and screwd down very stable

fredvon4- Top Poster


Posts : 4012
Join date : 2011-08-26
Age : 69
Location : Lampasas Texas
 Re: I’m So Weak …
I do have a couple of Brownell's bedding kits in the closet for my old mil surplus rifles, but it's not really worth my time to pull the stuff out and bed the Testors like I'd bed a rifle action. I have the material, just not the inclination...
The Selective Mark
The Selective Mark

batjac- Diamond Member


Posts : 2372
Join date : 2013-05-22
Age : 61
Location : Broken Arrow, OK, USA
 Re: I’m So Weak …
I spent a little more time on this. I was going to make the wing tips from 1” wide pieces of ¼” balsa cut and sanded to shape, but the scrap piece of ¼” balsa I had was 1 ½” wide, so the wing got an extra inch of span. When I cut the rear of the tips off, I glued the two triangular pieces together and shaped them to make the canopy. Then I attached the elevator to the stab using sewn hinges. I’m still liking the Spectra braid for the sewn hinges. I glued everything in place and then made up the pushrod and bellcrank. Next was a simple mono-wheel landing gear a la Flite Streak. I could have sanded the nose contours a little more, but not much, so I didn’t bother. A few other final things to do for completion were done.
I didn’t take any pictures of the final assembly, since it’s pretty straight forward. If you want to see how I did it, look back at a couple of my BTC threads. It’s all the same, really.
Here it is, ready for finish. It weighs 4.95 ounces. More than I’d hoped for, but less then I feared. It balances about a ¼” behind the leading edge. Maybe after finish it will balance about where I want it.
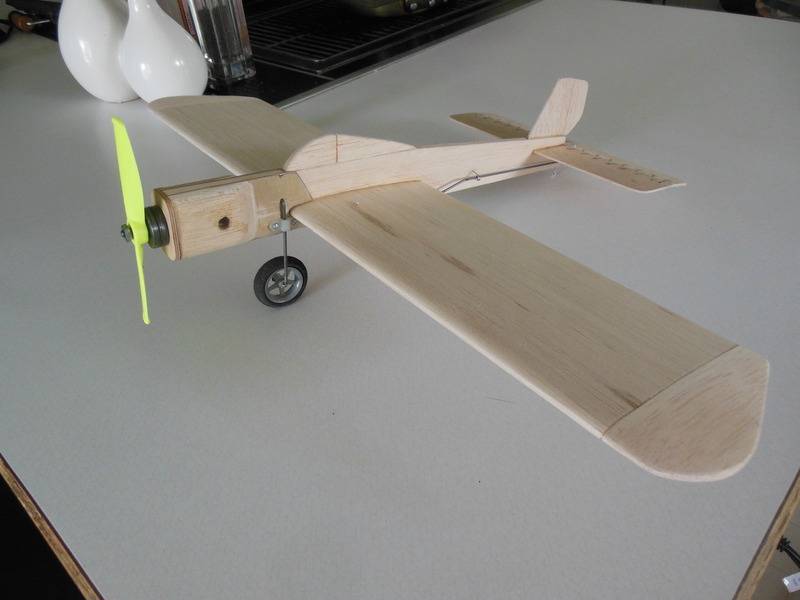
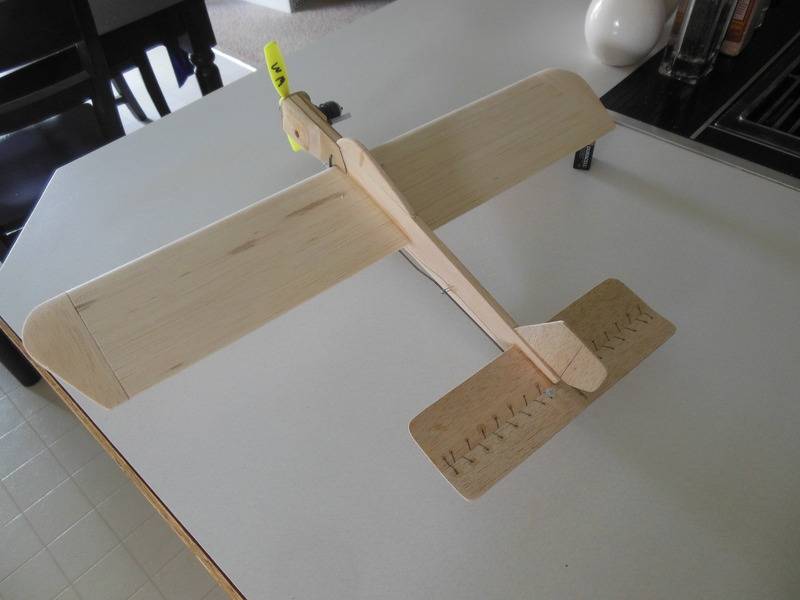
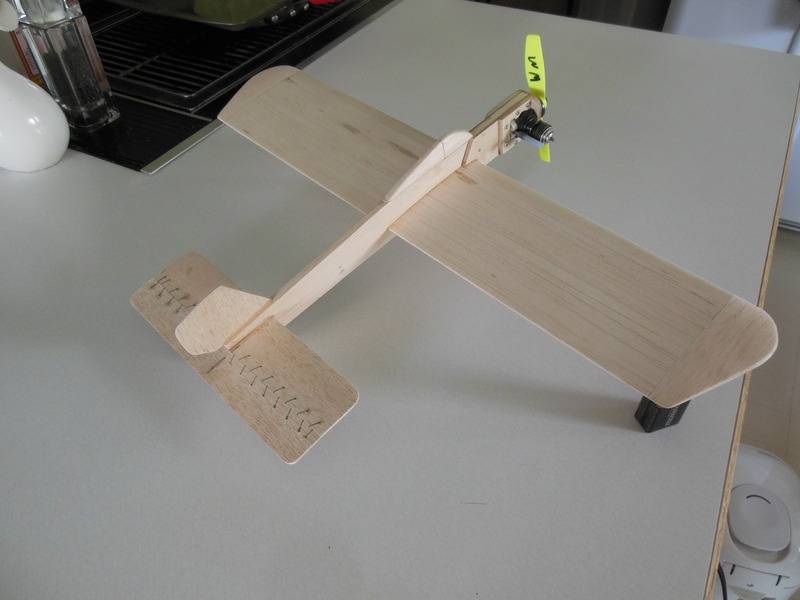
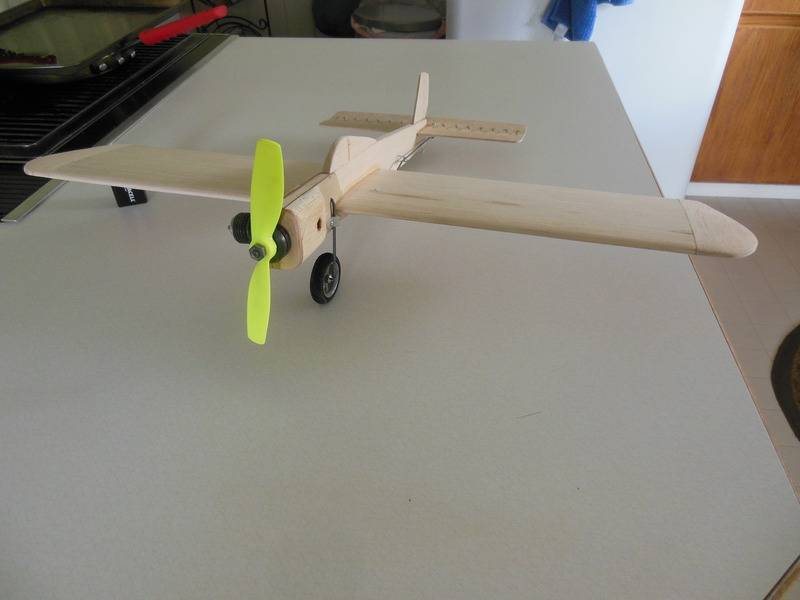
The Straight Forward Mark
I didn’t take any pictures of the final assembly, since it’s pretty straight forward. If you want to see how I did it, look back at a couple of my BTC threads. It’s all the same, really.
Here it is, ready for finish. It weighs 4.95 ounces. More than I’d hoped for, but less then I feared. It balances about a ¼” behind the leading edge. Maybe after finish it will balance about where I want it.


The Straight Forward Mark

batjac- Diamond Member


Posts : 2372
Join date : 2013-05-22
Age : 61
Location : Broken Arrow, OK, USA
 Re: I’m So Weak …
awesome

Marleysky- Top Poster


Posts : 3618
Join date : 2014-09-28
Age : 72
Location : Grand Rapids, MI
 Re: I’m So Weak …
LOOKING GOOD !! Mark , you make me feel like I need to get off my butt and finish my builds so I can move on to more projects (airplane builds) Thanks !! 

getback- Top Poster


Posts : 10431
Join date : 2013-01-18
Age : 67
Location : julian , NC
Page 1 of 2 • 1, 2 
Page 1 of 2
Permissions in this forum:
You cannot reply to topics in this forum

 Rules
Rules


