Log in
Search
Latest topics
» My N-1R build logby roddie Yesterday at 9:29 pm
» Funny what you find when you go looking
by rsv1cox Yesterday at 3:21 pm
» Landing-gear tips
by 1975 control line guy Yesterday at 8:17 am
» Purchased the last of any bult engines from Ken Enya
by sosam117 Yesterday at 7:45 am
» Cox NaBOO - Just in time for Halloween
by rsv1cox Tue Nov 19, 2024 6:35 pm
» Canada Post strike - We are still shipping :)
by Cox International Tue Nov 19, 2024 12:01 pm
» Duende V model from RC Model magazine 1983.
by getback Tue Nov 19, 2024 6:08 am
» My current avatar photo
by roddie Mon Nov 18, 2024 9:05 pm
» My latest doodle...
by TD ABUSER Mon Nov 18, 2024 11:30 am
» Brushless motors?
by rsv1cox Sun Nov 17, 2024 6:40 pm
» Free Flight Radio Assist
by rdw777 Sun Nov 17, 2024 6:03 pm
» Tribute Shoestring build
by amurphy6812 Sun Nov 17, 2024 5:43 pm
Cox Engine of The Month
So, slightly bent, broken and abused French Spad is coming home
Page 3 of 4
Page 3 of 4 •  1, 2, 3, 4
 Re: So, slightly bent, broken and abused French Spad is coming home
Thanks Robert, That's a thought. Both Walmart and Hobby Lobby has those paints.
I'm pretty sure the original builder used a fine camels hair brush to paint the model with thin paints, unlike Testors thick enamals. Nice flowing lines with no bleed which is no longer within my abilities.
I ordered these from the same vendor to save on shipping. Hopefully not too glossy. I may have to overspray with matte clear.


There must be some sort of pumice to rub in to give a dirty aged effect.
I'm pretty sure the original builder used a fine camels hair brush to paint the model with thin paints, unlike Testors thick enamals. Nice flowing lines with no bleed which is no longer within my abilities.

I ordered these from the same vendor to save on shipping. Hopefully not too glossy. I may have to overspray with matte clear.


There must be some sort of pumice to rub in to give a dirty aged effect.

rsv1cox- Top Poster


Posts : 11244
Join date : 2014-08-18
Location : West Virginia
 Re: So, slightly bent, broken and abused French Spad is coming home
I suppose you could possibly use rubbing compound, but, is it worth it? Probably a very fine sandpaper like 1000 grit might work, used wet sanded.
However, even flying aircraft restorers, seen a good number of planes in their shiny WW2 camouflaged pattern painted surfaces. Some time back, maybe 30 years ago, remember a C/L columnist ranting about how an authentically weathered and drabbed WW2 stunt warbird was downgraded on beauty points.
The judging culture at the time was for pretty shiny surfaces, it was a beauty contest. I don't know about now.
(Don't mind me, getting more hornery as I age.)


GallopingGhostler- Top Poster


Posts : 5721
Join date : 2013-07-13
Age : 70
Location : Clovis NM or NFL KC Chiefs

rsv1cox- Top Poster


Posts : 11244
Join date : 2014-08-18
Location : West Virginia
 Re: So, slightly bent, broken and abused French Spad is coming home
Bob, color mismatch is a very minor mistake. It reminds me of trying to match the red maple stain of wall cabinets throughout the house. I ended up taking a couple colors and mixing, until I got a reasonable match. House was built 38 years ago, colors even by the same manufacturers have shifted over time.
Ditto goes for finding engine paints matching those of the earlier engines of the 1940's through 1960's. Good thing about K&B is that their Torpedo series used varying shades throughout the production life of the motor. Seems whatever paints they could get the cheapest became the green head color. I found a John Deere match and that was good enough for me. The McCoy red wasn't as much of a problem.
About the only true way to fix IMO is a light fogging spray over the old surfaces, so old matched new. I'm sure you'll find a way through.

GallopingGhostler- Top Poster


Posts : 5721
Join date : 2013-07-13
Age : 70
Location : Clovis NM or NFL KC Chiefs
 Re: So, slightly bent, broken and abused French Spad is coming home
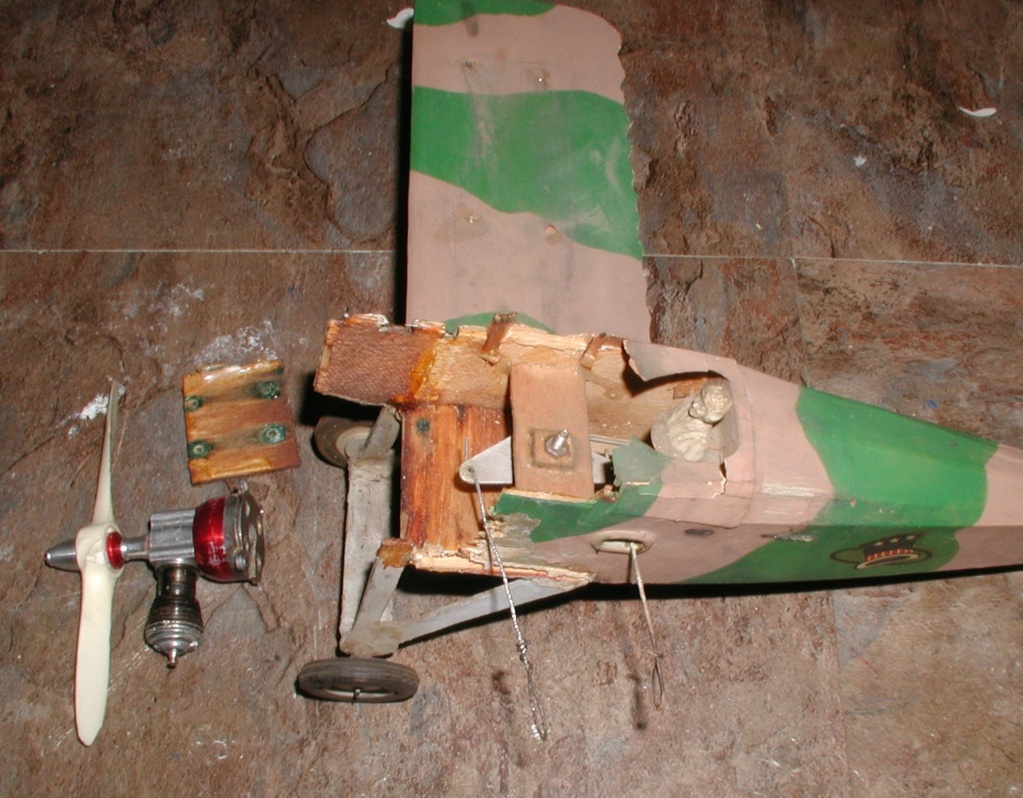
I am still learning about this model and it's builder. I wondered about these holes in the fuselages side shown in his ebay pictures.

It became plain when I connected these parts to the model.

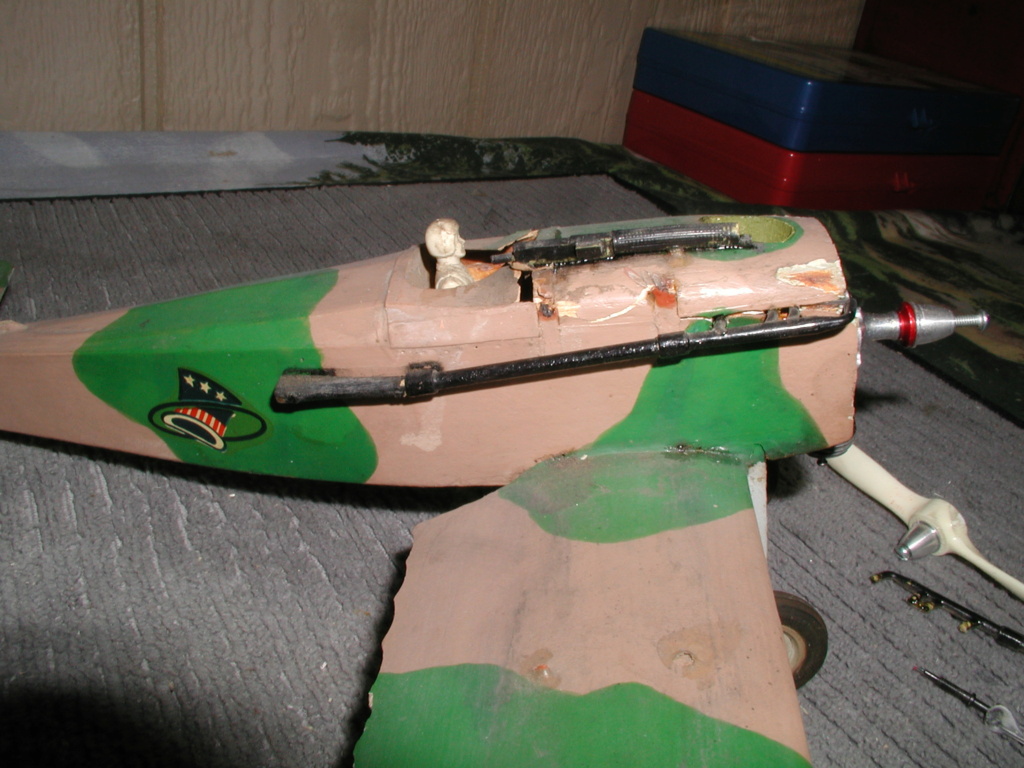
I think he added the exhaust extension to match the original airplane as it's made of balsa and painted black. Maybe his attention to detail.

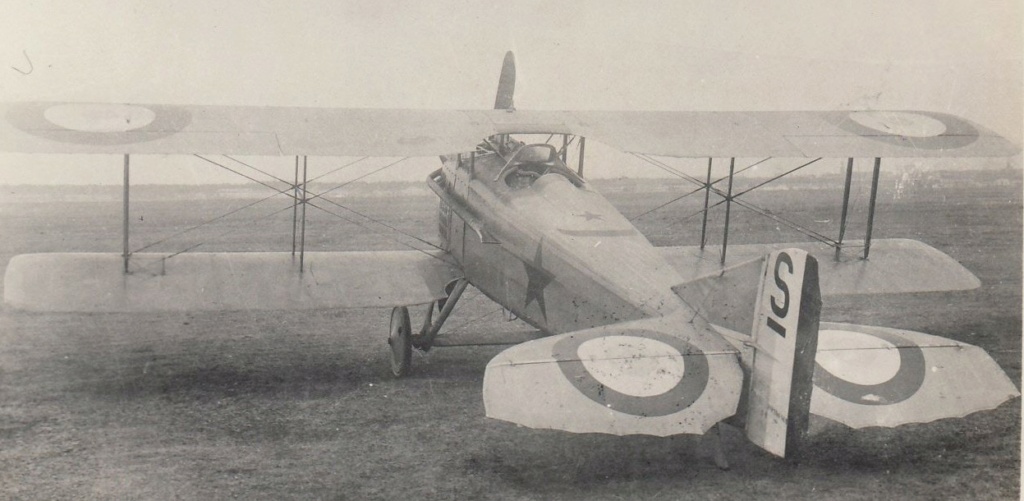

It became plain when I connected these parts to the model.


I think he added the exhaust extension to match the original airplane as it's made of balsa and painted black. Maybe his attention to detail.


rsv1cox- Top Poster


Posts : 11244
Join date : 2014-08-18
Location : West Virginia
 Re: So, slightly bent, broken and abused French Spad is coming home
That’s an interesting note about the exhaust extensions…. It’s easy to see the builder was careful and made best try to do a good job…. Puzzling though that engine was that much out of alignment when you tested fit with the firewall…. Good builder but inexperienced pilot?….. I’m sure they were heartbroken when as you say it did a figure 9…..Probably why the landing gear survived…. Oh well, I’ve re-kitted my share too…..

rdw777- Diamond Member


Posts : 1712
Join date : 2021-03-11
Location : West Texas
 Re: So, slightly bent, broken and abused French Spad is coming home
Near perfect match with the tan, not so much with the green. Tan more flat than matte. Got to let it cure for a few days then mask. John Deere green a closer match but I'm not using it and suffering another reaction.
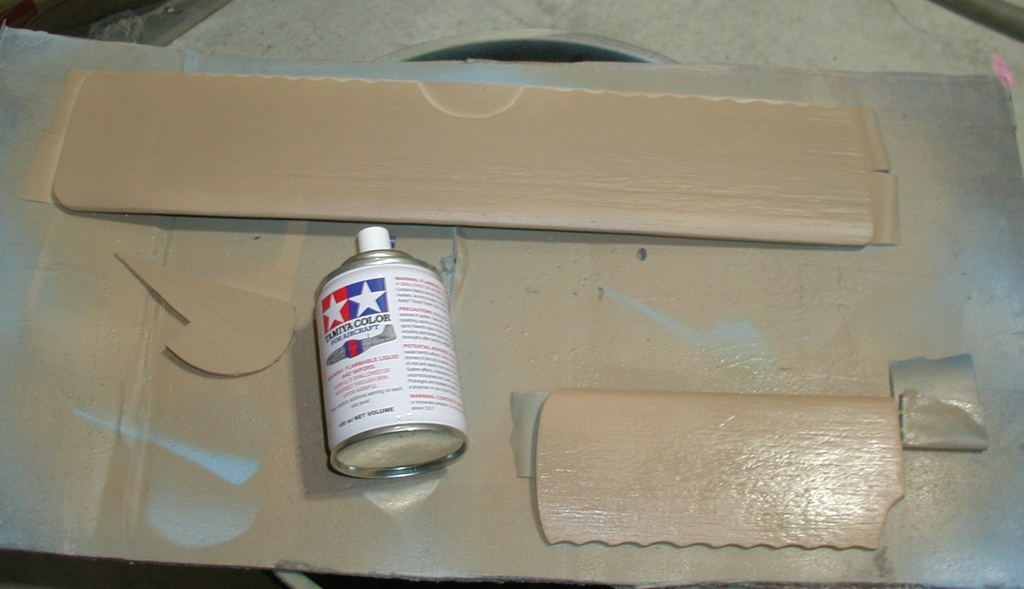

It's going to be fun building/installing the struts.
Edit:
Went looking for something closer. Costing me 12.18 with shipping and tax to find out.

Thinking that PO might have used these paints as the tan is so close.


It's going to be fun building/installing the struts.
Edit:
Went looking for something closer. Costing me 12.18 with shipping and tax to find out.

Thinking that PO might have used these paints as the tan is so close.

rsv1cox- Top Poster


Posts : 11244
Join date : 2014-08-18
Location : West Virginia
 Re: So, slightly bent, broken and abused French Spad is coming home
The tan looks spot on  …. I figured getting the right colors would be a fun trail to chase…. Kind of like getting the correct parts for an old car restore… Or any antique rehab for that matter…..Looks like you’re going to capture the builder’s original intent, Which was a good job to begin with….
 …. I figured getting the right colors would be a fun trail to chase…. Kind of like getting the correct parts for an old car restore… Or any antique rehab for that matter…..Looks like you’re going to capture the builder’s original intent, Which was a good job to begin with….

rdw777- Diamond Member


Posts : 1712
Join date : 2021-03-11
Location : West Texas
 Re: So, slightly bent, broken and abused French Spad is coming home
rdw777 wrote:The tan looks spot on…. I figured getting the right colors would be a fun trail to chase…. Kind of like getting the correct parts for an old car restore… Or any antique rehab for that matter…..Looks like you’re going to capture the builder’s original intent, Which was a good job to begin with….
Looks like you’re going to capture the builder’s original intent,
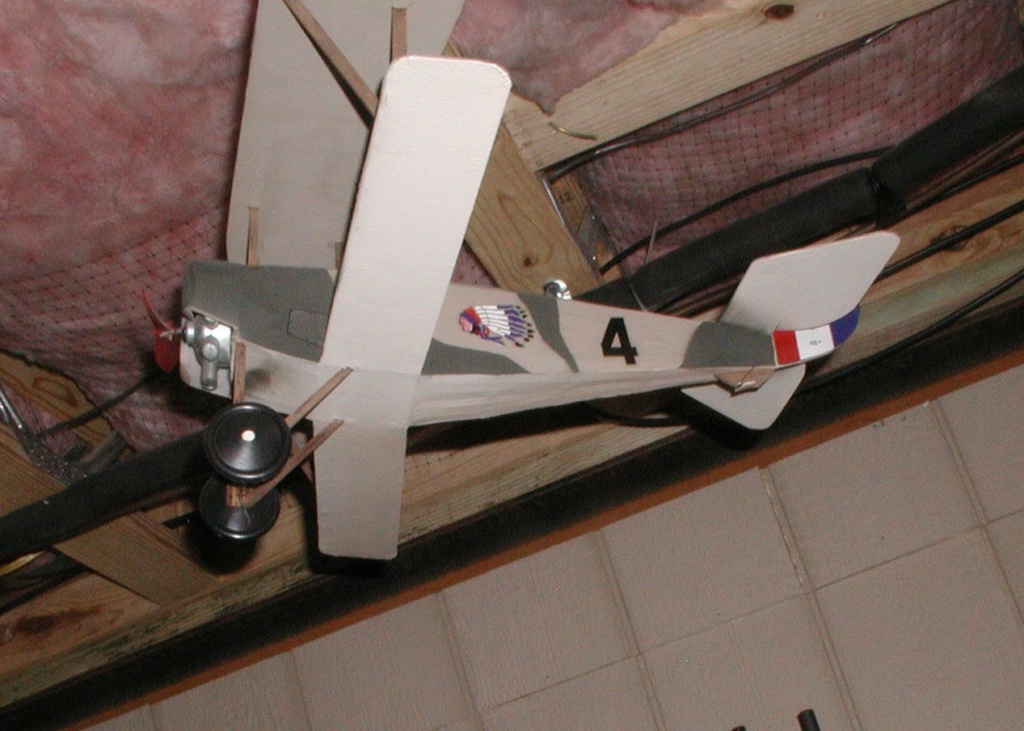
Oh so true Robert. I am sorely lacking in any creative ability so I traced the PO's camo design in waxed paper from the existing half-wing and will transfer it to painters tape and mask it off. SIG's airfoils are roughly cut and I did not spend a lot of time sanding, so I may have to mist with clear flat to avoid bleeding as the PO's hand applied paint has nice clean edges.


Years ago I could trace a fair line as I did on this Guillows PT-17, but no longer.

rsv1cox- Top Poster


Posts : 11244
Join date : 2014-08-18
Location : West Virginia
 Re: So, slightly bent, broken and abused French Spad is coming home
Not happy with my 4/40 shims

I used long nosed pliers and twisted the whole firewall out of there. Didn't take much, CA and 1/16" or less basswood. Realinged with a bit of down and right pull and CA'd back in place. Epoxy later when I'm sure. Tiny thing, Bellcrank the smallest that I have seen.


Neater than before and quite different from the PO's alignment.
Waiting for green paint.

I used long nosed pliers and twisted the whole firewall out of there. Didn't take much, CA and 1/16" or less basswood. Realinged with a bit of down and right pull and CA'd back in place. Epoxy later when I'm sure. Tiny thing, Bellcrank the smallest that I have seen.


Neater than before and quite different from the PO's alignment.
Waiting for green paint.

rsv1cox- Top Poster


Posts : 11244
Join date : 2014-08-18
Location : West Virginia
 Re: So, slightly bent, broken and abused French Spad is coming home
Planning without plans makes it exciting.
Educated guestimates hopefully come close. I traced the existing strut holes on a piece of waxed paper and transfered over to the replacement half wing and will duplicate on the top wing. I'm seriously considering using tooth picks for the wing struts, toothpicks are stronger than balsa - right? Probaby balsa or luan rectangular strips for the cabane struts.


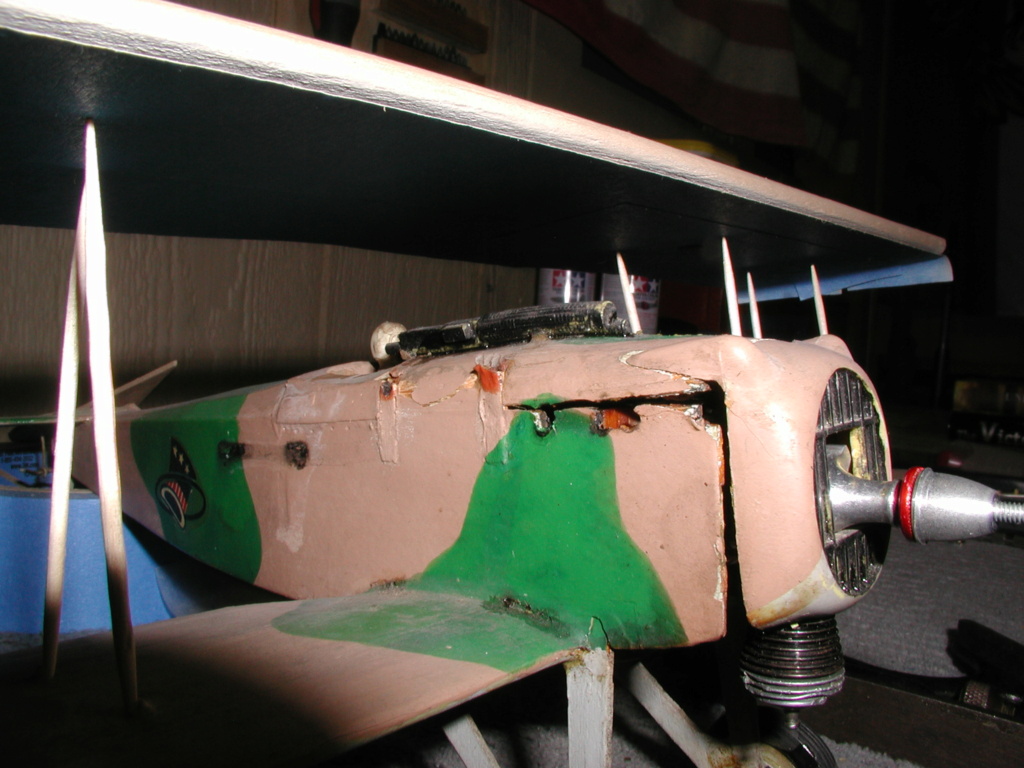
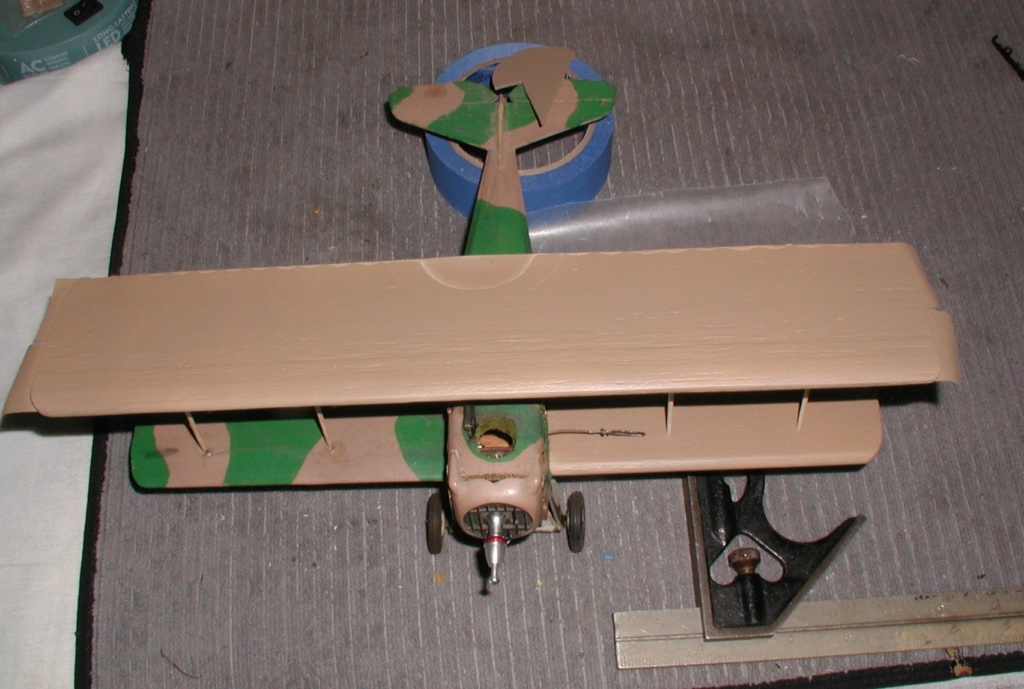
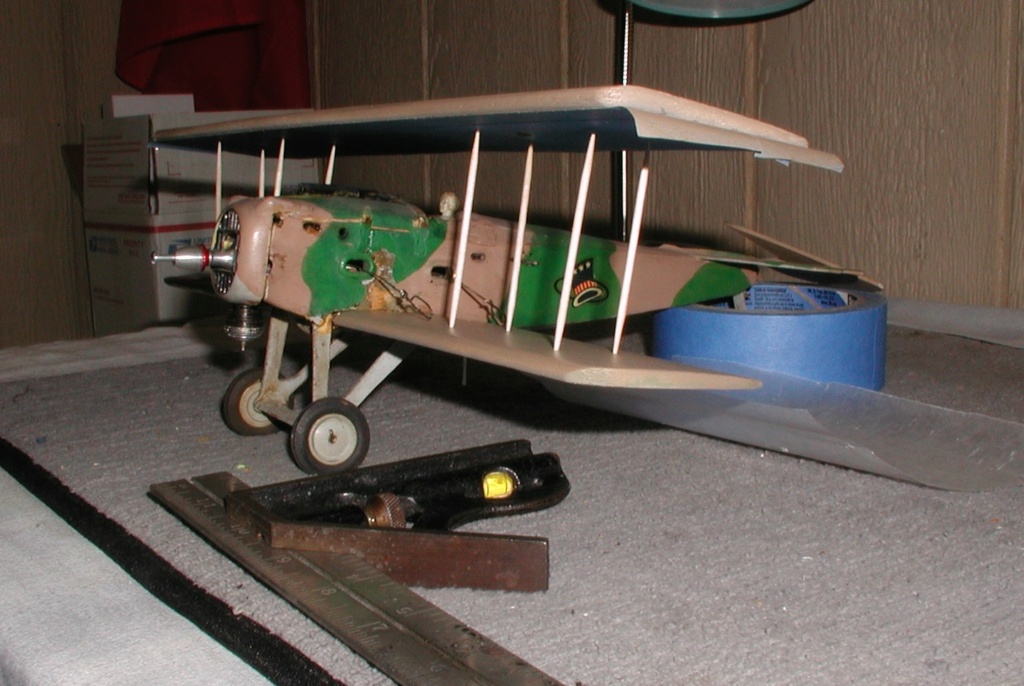
The more I get into this wreck the more I like it. Neglected puppy kicked to the curb and nursed back to health.
Educated guestimates hopefully come close. I traced the existing strut holes on a piece of waxed paper and transfered over to the replacement half wing and will duplicate on the top wing. I'm seriously considering using tooth picks for the wing struts, toothpicks are stronger than balsa - right? Probaby balsa or luan rectangular strips for the cabane struts.


The more I get into this wreck the more I like it. Neglected puppy kicked to the curb and nursed back to health.

rsv1cox- Top Poster


Posts : 11244
Join date : 2014-08-18
Location : West Virginia
 Re: So, slightly bent, broken and abused French Spad is coming home
Awesome Bob , all the Kings Horses and all the Kings men couldn’t put humpty together again, but you’re gettin er done on the Spad … good work

akjgardner- Diamond Member


Posts : 1600
Join date : 2014-12-28
Age : 65
Location : Greensberg Indiana
 Re: So, slightly bent, broken and abused French Spad is coming home
hey Bob, i reckon this will be one of your biggest rescue jobs 


Yabby- Platinum Member


Posts : 712
Join date : 2021-06-08
Location : Yorke Peninsula South Australia
 Re: So, slightly bent, broken and abused French Spad is coming home
Thanks guys.
One step forward, two steps back. I thought I would avoid edge bleed by coating the top wing with clear before applying color.

When I removed the masking tape it lifted the color. I did not use the clear on the half wing and it turned out perfect. I attempted to duplicate the original builders blotchy camo scheme by tracing it out on waxed paper.
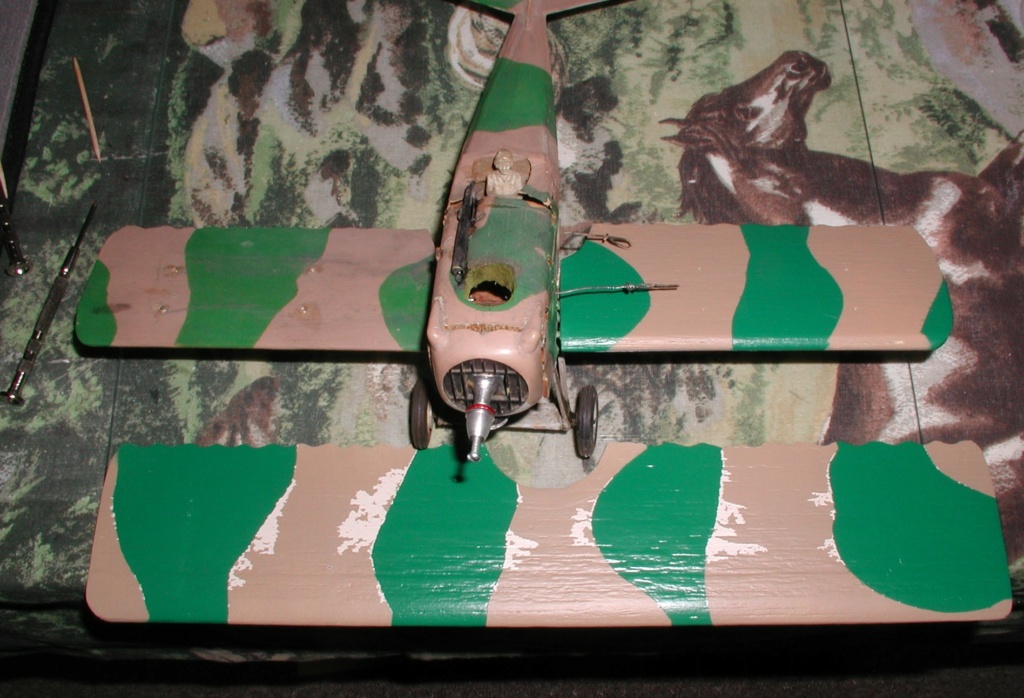
Oh well. touched it up with a fine camels hair brush. Found a close green at Walmart. Satin Spring Grass. If nothing else the name works for me.
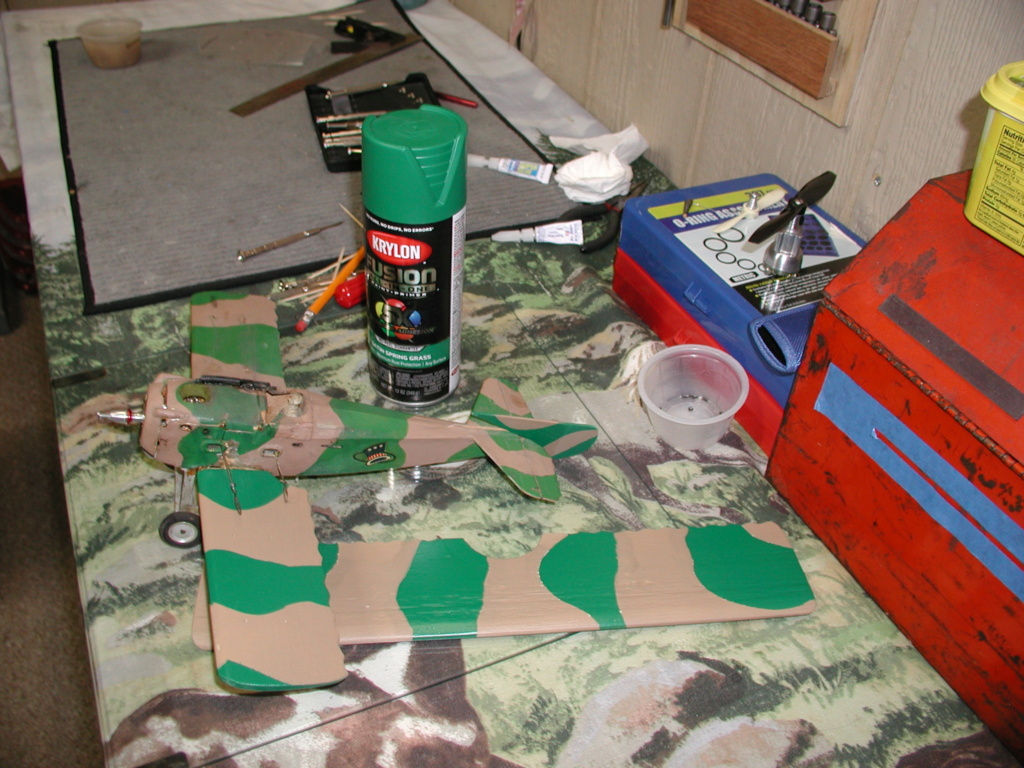
One step forward, two steps back. I thought I would avoid edge bleed by coating the top wing with clear before applying color.

When I removed the masking tape it lifted the color. I did not use the clear on the half wing and it turned out perfect. I attempted to duplicate the original builders blotchy camo scheme by tracing it out on waxed paper.

Oh well. touched it up with a fine camels hair brush. Found a close green at Walmart. Satin Spring Grass. If nothing else the name works for me.


rsv1cox- Top Poster


Posts : 11244
Join date : 2014-08-18
Location : West Virginia
 Re: So, slightly bent, broken and abused French Spad is coming home
Nice!…. That right lower wing had just enough hint to match the camo shapes, Stut locations, etc… Never would have thought you would have got that close on the green with an off the shelf store product…. That was a thoughtful way to replicate the camo shapes thru the wax paper 


rdw777- Diamond Member


Posts : 1712
Join date : 2021-03-11
Location : West Texas
 Re: So, slightly bent, broken and abused French Spad is coming home
Figuring - ratio and proportion, about 9 units to 12. It's going to be - Looks close enough!!! when cutting the struts to length which will set the distance between the top and bottom wings. Has to be correct N/S, E/W, up/down and leading to trailing edges one to the other. So I built a jig which hopefully will square everything up when it comes to gluing. Flat bottom wings helps.
The only referance that I have is the existing bottom half wing. Going with that.


Plans show the struts to be 2 3/4", tooth picks are about 2 1/2" but both are enbedded in the wings. The Spad's wings are closer together than most WW1 era fighters.
I wanted to cement everything together at once, but that's not going to happen. I will have to glue the bottom wing on first then do the struts. It's going to be interesting. I have a dozen struts to cut to length, mark, drill and install. Thinking about dowels instead of tooth picks.
Uncut picks are too tall but have the taper shown on the plan.
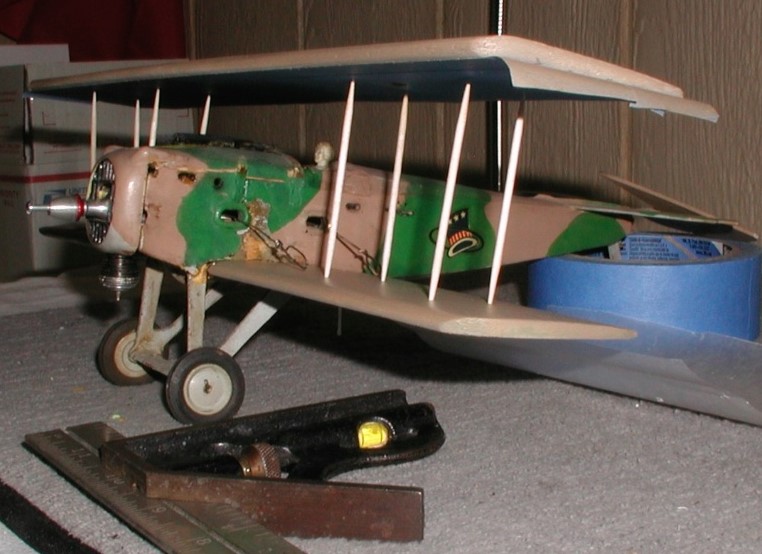
The only referance that I have is the existing bottom half wing. Going with that.


Plans show the struts to be 2 3/4", tooth picks are about 2 1/2" but both are enbedded in the wings. The Spad's wings are closer together than most WW1 era fighters.
I wanted to cement everything together at once, but that's not going to happen. I will have to glue the bottom wing on first then do the struts. It's going to be interesting. I have a dozen struts to cut to length, mark, drill and install. Thinking about dowels instead of tooth picks.
Uncut picks are too tall but have the taper shown on the plan.


rsv1cox- Top Poster


Posts : 11244
Join date : 2014-08-18
Location : West Virginia
 Re: So, slightly bent, broken and abused French Spad is coming home
Pitiful but moving along.................

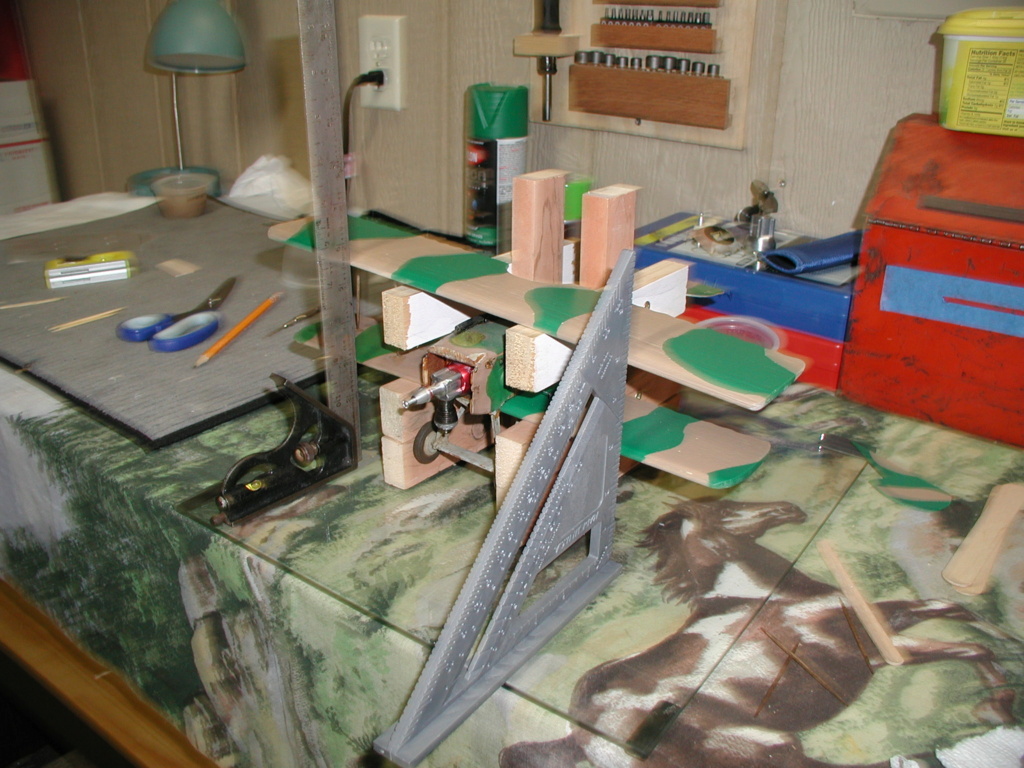
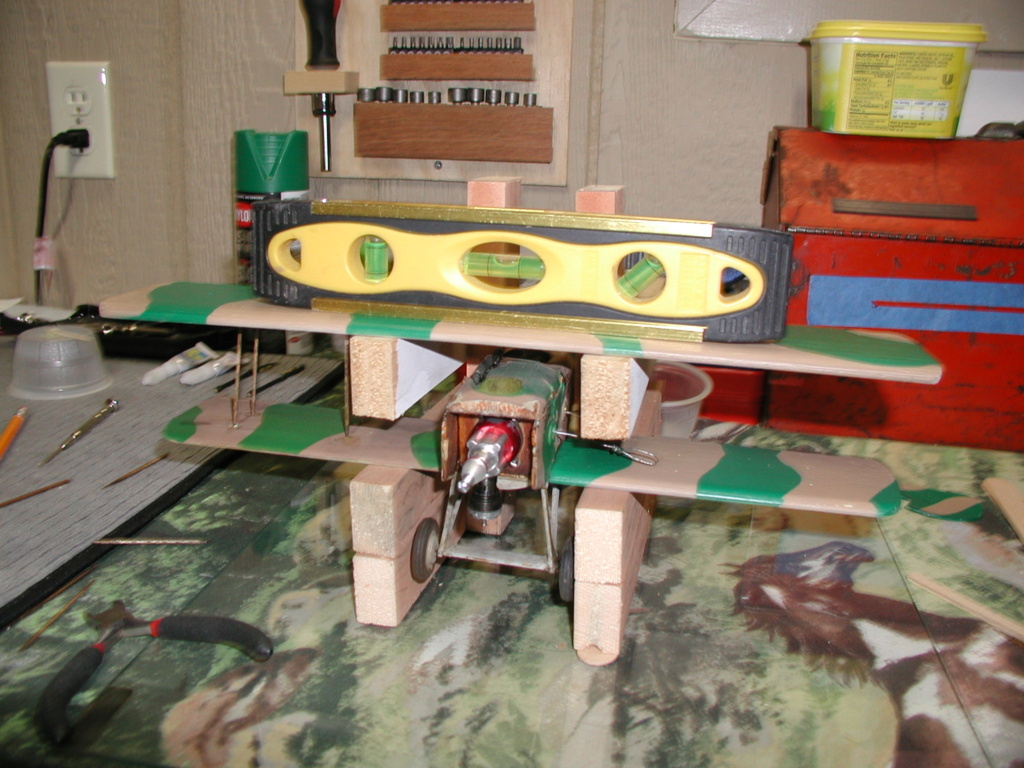
Lower half-wing installed with 30 minute epoxy. Guaging the top wings position. I cannot figure out how to correctly position the struts! You would think it would be simple, but it ain't!
Wax paper tracings are not giving me the precision required. Best way would be to remove the bottom wing and just drill 12 holes straight down from the top and pin and cement the struts. Top wing is slightly larger than the bottom which complicates. I'll figure it out but lately it's been tractor time. A lot of tractor time.

rsv1cox- Top Poster


Posts : 11244
Join date : 2014-08-18
Location : West Virginia
 Re: So, slightly bent, broken and abused French Spad is coming home
Hey Bob looking good , is it got a warp in it reason for alot of support or just support ? I am sure you know you can get longer toothpicks > https://www.amazon.com/HOPELF-Natural-Skewers-BBQ%EF%BC%8CAppetiser%EF%BC%8CFruit%EF%BC%8CCocktail%EF%BC%8CKabob%EF%BC%8CChocolate-Fountain%EF%BC%8CGrilling%EF%BC%8CBarbecue%EF%BC%8CKitchen%EF%BC%8CCrafting/dp/B07MY7XVB1/ref=sr_1_3_sspa? if you still need them . I think the camo came out good I have never tried them before 

getback- Top Poster


Posts : 10436
Join date : 2013-01-18
Age : 67
Location : julian , NC
 Re: So, slightly bent, broken and abused French Spad is coming home
getback wrote:Hey Bob looking good , is it got a warp in it reason for alot of support or just support ? I am sure you know you can get longer toothpicks > https://www.amazon.com/HOPELF-Natural-Skewers-BBQ%EF%BC%8CAppetiser%EF%BC%8CFruit%EF%BC%8CCocktail%EF%BC%8CKabob%EF%BC%8CChocolate-Fountain%EF%BC%8CGrilling%EF%BC%8CBarbecue%EF%BC%8CKitchen%EF%BC%8CCrafting/dp/B07MY7XVB1/ref=sr_1_3_sspa? if you still need them . I think the camo came out good I have never tried them before
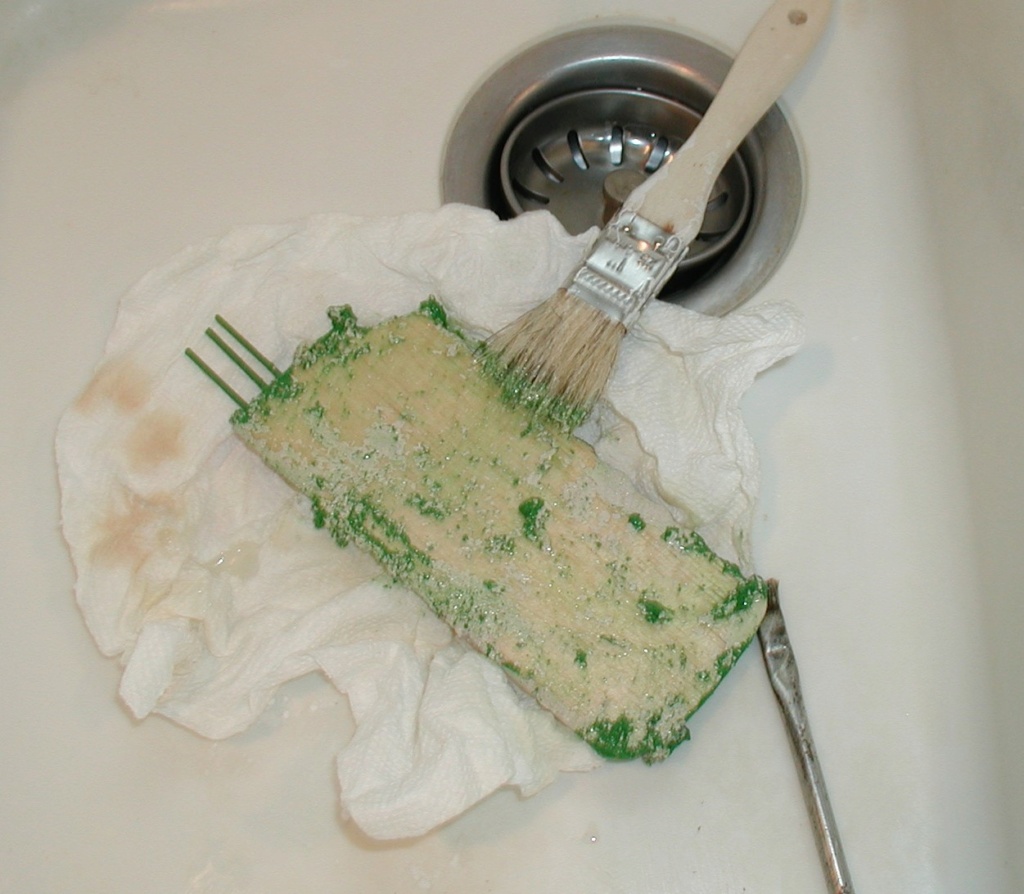
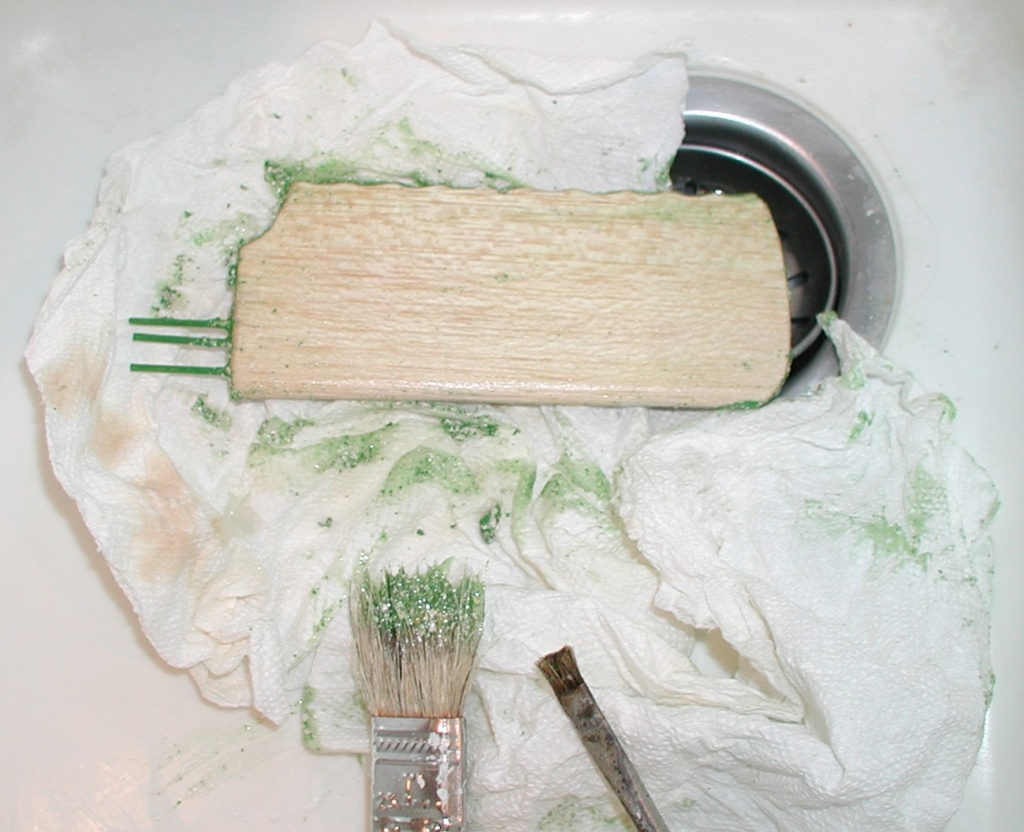
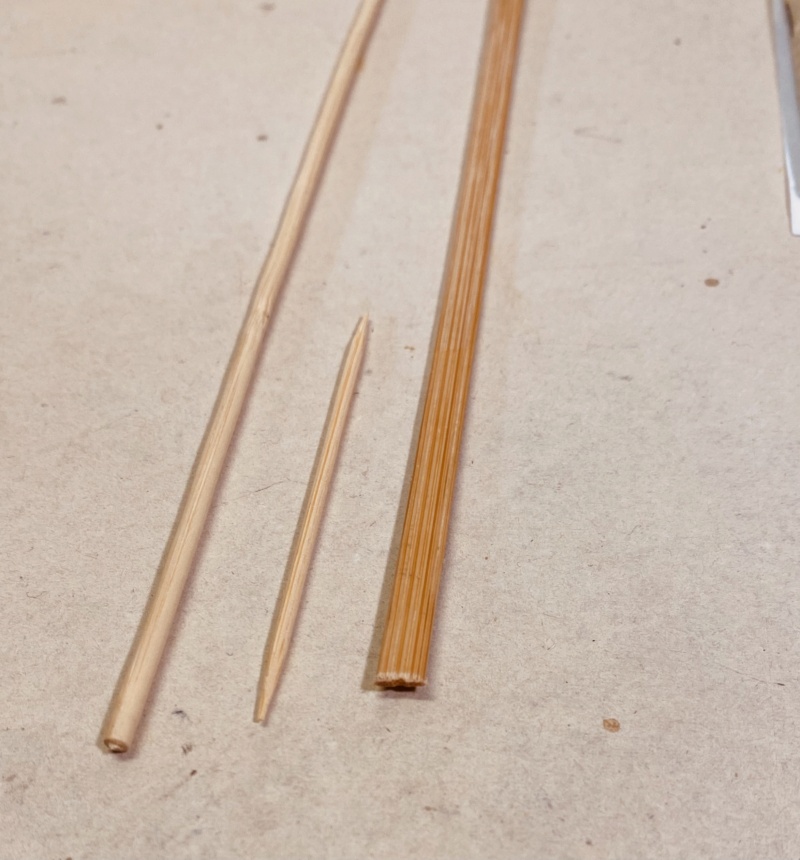
Thanks Eric, by coincidence I was in Walmart a couple of days ago and picked up a packaged pair of those bamboo picks. Bamboo is tough but stringy. I painted 12 of them Testors brown. My wood picks did not turn out well using Minwax special walnut stain.
My camo: There is no "right" or "wrong" camo, it's camoflague after all. But there is good or bad camo artistic wise, mine always tends toward the bad side as I am severely limited in artistic qualities. I live with it copying others designs.

rsv1cox- Top Poster


Posts : 11244
Join date : 2014-08-18
Location : West Virginia

rdw777- Diamond Member


Posts : 1712
Join date : 2021-03-11
Location : West Texas
 Re: So, slightly bent, broken and abused French Spad is coming home
Thanks for the offer Robert. You share a window blind rescue with roddie who used part of a blind in his P-38 wing.
But, I think I'm going to wind up using strips of hobby tongue depressers rectangular and tapered on each end to duplicate the original struts.

The old gray matter isn't working like it did even five years ago. Thought I would build the vertical stab/rudder from memory, not even close. Looked at the box picture and had a revelation. Re-did. Got to size the rudder signature and transfer to a water-slide decal. I think I can fudge the red and blend in the waves. Made up the exhausts, balsa going into plastic......used both Testors red tube and CA, each one is three pieces.............we will see. Mistakes, forgot about the top wing being longer by 1/2" each end when I used the waxed paper template to mark the strut holes. Going to look like a pin cushion before I'm through. Also wing camber, front struts have to be shorter than the back ones. Groan.............


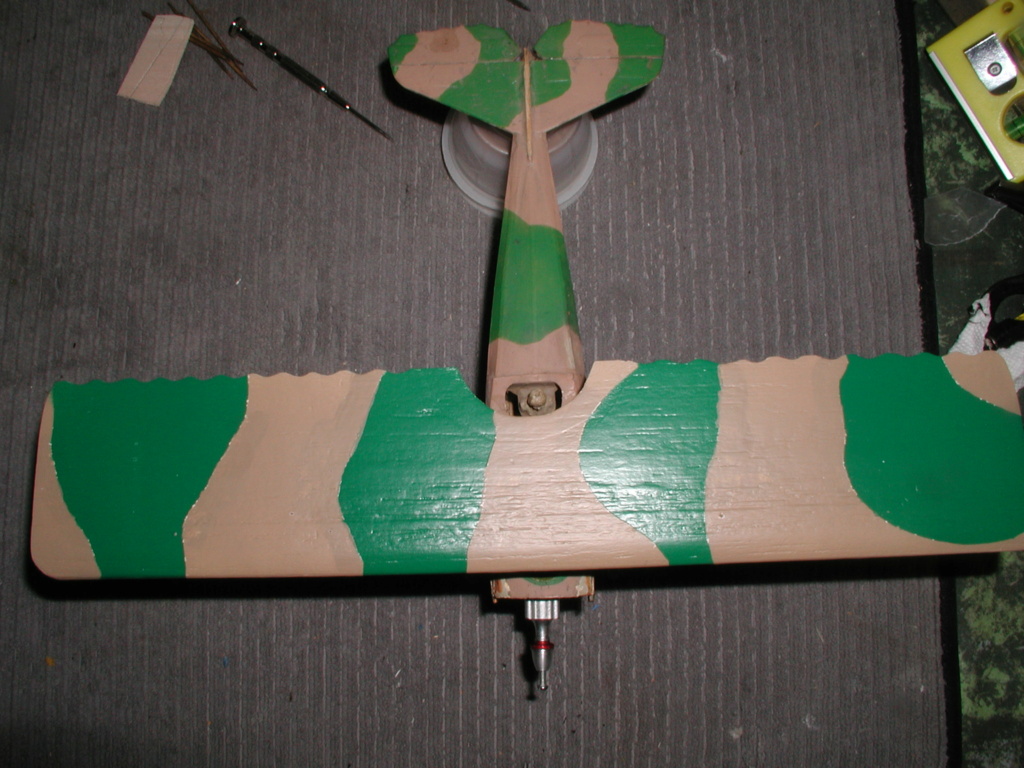
If nothing else I'm enjoying beating my brains out over this thing.
But, I think I'm going to wind up using strips of hobby tongue depressers rectangular and tapered on each end to duplicate the original struts.

The old gray matter isn't working like it did even five years ago. Thought I would build the vertical stab/rudder from memory, not even close. Looked at the box picture and had a revelation. Re-did. Got to size the rudder signature and transfer to a water-slide decal. I think I can fudge the red and blend in the waves. Made up the exhausts, balsa going into plastic......used both Testors red tube and CA, each one is three pieces.............we will see. Mistakes, forgot about the top wing being longer by 1/2" each end when I used the waxed paper template to mark the strut holes. Going to look like a pin cushion before I'm through. Also wing camber, front struts have to be shorter than the back ones. Groan.............


If nothing else I'm enjoying beating my brains out over this thing.

rsv1cox- Top Poster


Posts : 11244
Join date : 2014-08-18
Location : West Virginia
 Re: So, slightly bent, broken and abused French Spad is coming home
Looks like your Enterprise kitted half-A Spad is coming together, Bob.
My Sterling Beginner Fokker DVII used 1/8" dia. dowels with 1/16" thick square .5"x.5" ply as mount plates on the underside of the 1/8" sheet wings for strength.
Still vaguely remember mounting the 12" Comet Spad upper wing to bottom with sanded round 1/16" sq. Balsa stick struts. It was a chore for a 12 y.o. but I managed, was very proud of my Spad as a ceiling hung static display.

GallopingGhostler- Top Poster


Posts : 5721
Join date : 2013-07-13
Age : 70
Location : Clovis NM or NFL KC Chiefs
 Re: So, slightly bent, broken and abused French Spad is coming home
GallopingGhostler wrote:Looks like your Enterprise kitted half-A Spad is coming together, Bob.
My Sterling Beginner Fokker DVII used 1/8" dia. dowels with 1/16" thick square .5"x.5" ply as mount plates on the underside of the 1/8" sheet wings for strength.
Still vaguely remember mounting the 12" Comet Spad upper wing to bottom with sanded round 1/16" sq. Balsa stick struts. It was a chore for a 12 y.o. but I managed, was very proud of my Spad as a ceiling hung static display.
I found one of those Comet SPAD kits some time ago. Fairly cheap @$20 so I bought it. Widow selling her husbands kit collection.
Die cut (crunched) parts? 12" top wing vice 14" for my rebuild.
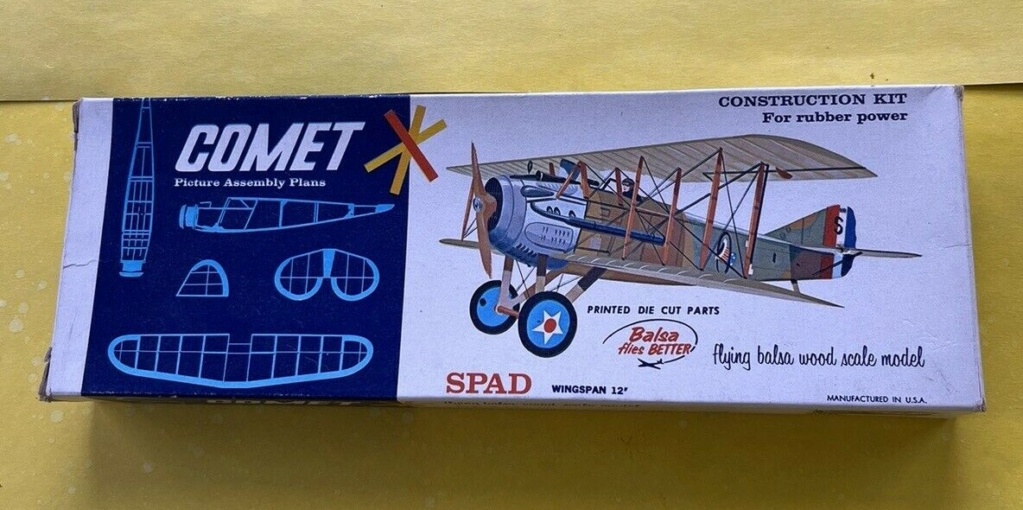
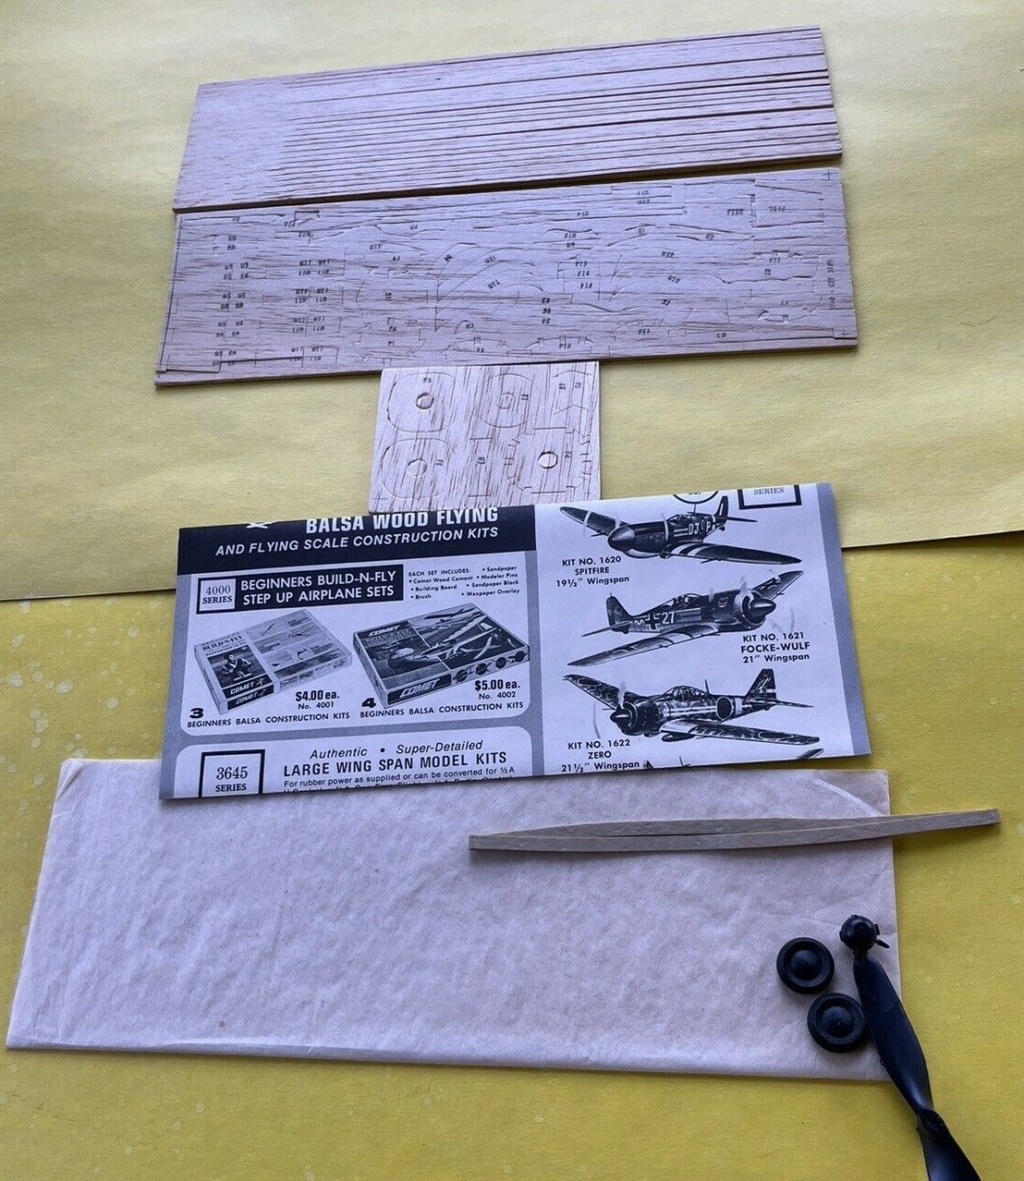
Playing around. Most fun I have had for $4.95 + $6.50 shipping.


rsv1cox- Top Poster


Posts : 11244
Join date : 2014-08-18
Location : West Virginia
 Re: So, slightly bent, broken and abused French Spad is coming home
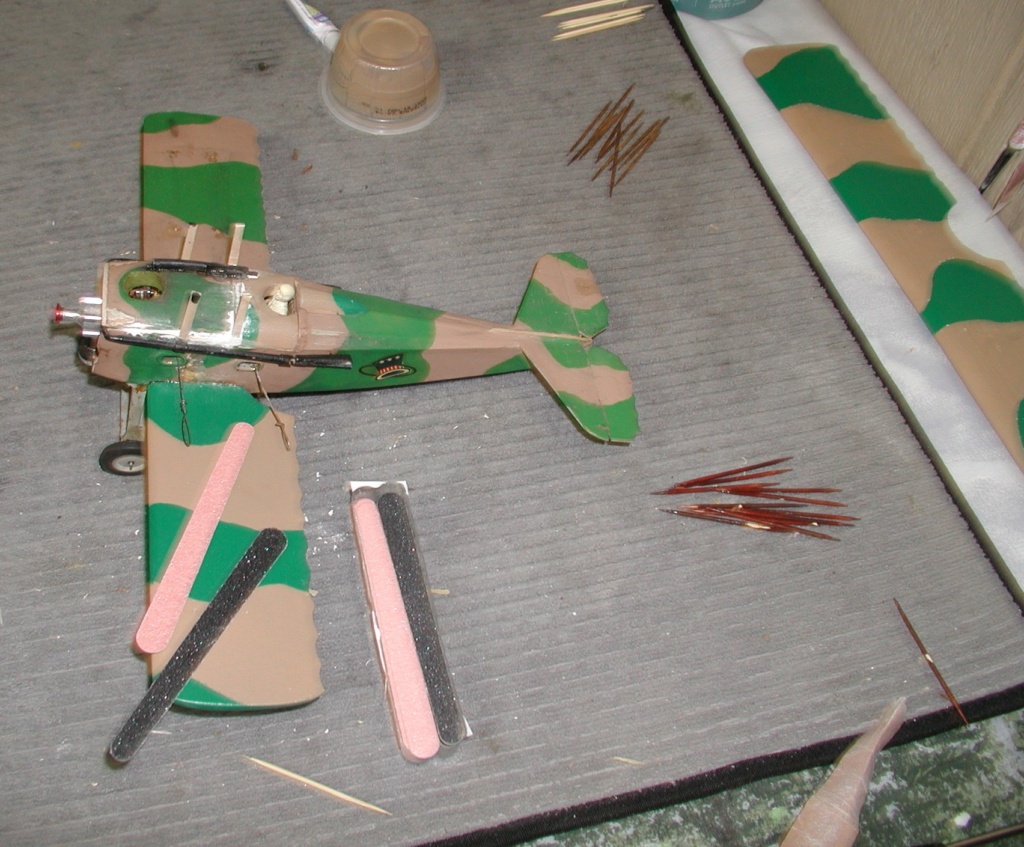
Well, I was having NO luck centering the top wing over the bottom so I flipped the thing over centered per the pictures below (complicated). Marked the outline of the cabane struts (reference for the others) with a pencil and cut out the balsa plugs being careful not to break through the top of the wing. There may be a simpler way to do it.
Not sure why I included this picture. I just like it. Hung on my pencil sharpner.

Eyeball!!!!!!!! Attached tissue covered bottom wing provided little support for the wing struts so I added gusset re-enforcements.


Removing past sins. Epoxy the cabane struts then set the wings struts (eight of them) by drilling straight down through the bottom (referance) wing.

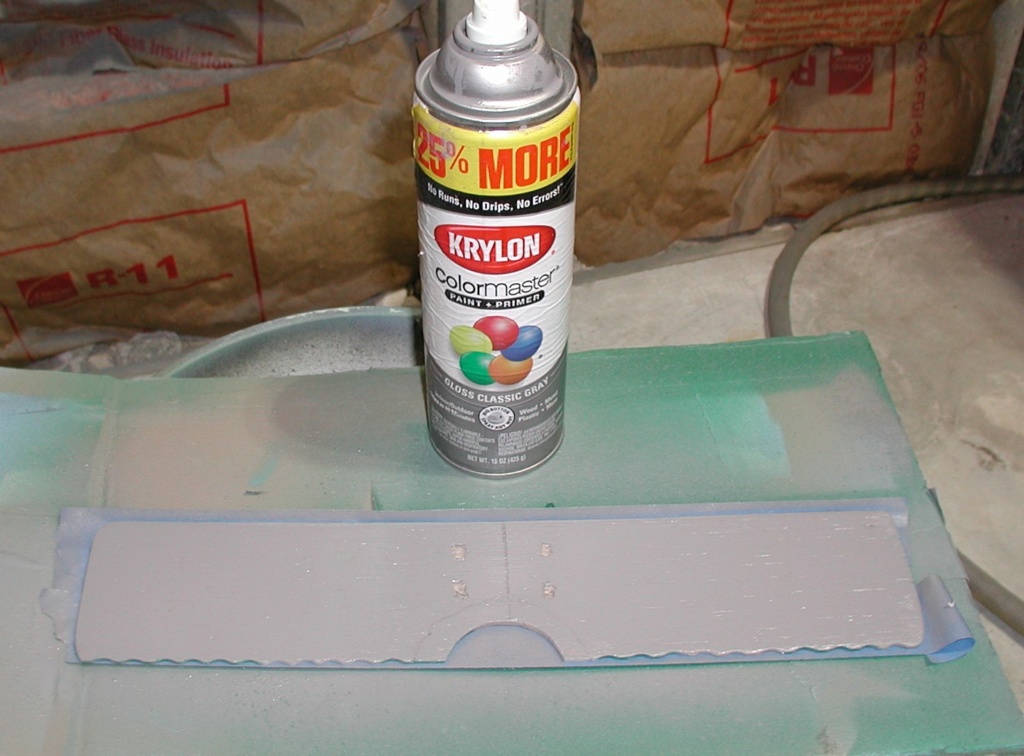
Nothing is straight on this model, it's all guesstimates. Refer to the title of this thread.
Not sure why I included this picture. I just like it. Hung on my pencil sharpner.

Eyeball!!!!!!!! Attached tissue covered bottom wing provided little support for the wing struts so I added gusset re-enforcements.


Removing past sins. Epoxy the cabane struts then set the wings struts (eight of them) by drilling straight down through the bottom (referance) wing.


Nothing is straight on this model, it's all guesstimates. Refer to the title of this thread.


rsv1cox- Top Poster


Posts : 11244
Join date : 2014-08-18
Location : West Virginia
 Re: So, slightly bent, broken and abused French Spad is coming home
Lots of jigging to get a two winger close to square… And I’m guessing a lot of wet glue joints at once!!….My first two winger was a Goldberg Little Toot with a near worn out Black Widow …. Twitchy, but fun to fly…. Son was about ten at the time and got a big kick out of it…

rdw777- Diamond Member


Posts : 1712
Join date : 2021-03-11
Location : West Texas
Page 3 of 4 •  1, 2, 3, 4
 Similar topics
» The mesh Babe Bee and a slightly bent prop
» Spacebug-Style Crankshaft Repair
» A sad home coming.........
» Power-Master fuel coming home tomorrow.
» R/N Spad/D7 kit and Shive DR-1
» Spacebug-Style Crankshaft Repair
» A sad home coming.........
» Power-Master fuel coming home tomorrow.
» R/N Spad/D7 kit and Shive DR-1
Page 3 of 4
Permissions in this forum:
You cannot reply to topics in this forum

 Rules
Rules


