Log in
Search
Latest topics
» Free Flight Radio Assist by GallopingGhostler Today at 12:54 pm
» My N-1R build log
by akjgardner Today at 12:39 pm
» Purchased the last of any bult engines from Ken Enya
by getback Today at 12:05 pm
» Funny what you find when you go looking
by rsv1cox Yesterday at 3:21 pm
» Landing-gear tips
by 1975 control line guy Yesterday at 8:17 am
» Cox NaBOO - Just in time for Halloween
by rsv1cox Tue Nov 19, 2024 6:35 pm
» Canada Post strike - We are still shipping :)
by Cox International Tue Nov 19, 2024 12:01 pm
» Duende V model from RC Model magazine 1983.
by getback Tue Nov 19, 2024 6:08 am
» My current avatar photo
by roddie Mon Nov 18, 2024 9:05 pm
» My latest doodle...
by TD ABUSER Mon Nov 18, 2024 11:30 am
» Brushless motors?
by rsv1cox Sun Nov 17, 2024 6:40 pm
» Tribute Shoestring build
by amurphy6812 Sun Nov 17, 2024 5:43 pm
Cox Engine of The Month
New Quickie 100 micro pylon racer project
Page 1 of 4
Page 1 of 4 • 1, 2, 3, 4 
 New Quickie 100 micro pylon racer project
Hello,
As of lately I try and spent more available time in my trusty workshop creating some exciting new projects… as I have already mentioned in the past my long time hopeful intension is to materialize a series of popular vintage mini models… I like to believe the vintage small model scene should be kept alive with dedicated efforts from old timer (but not necessarily old!) modelers.
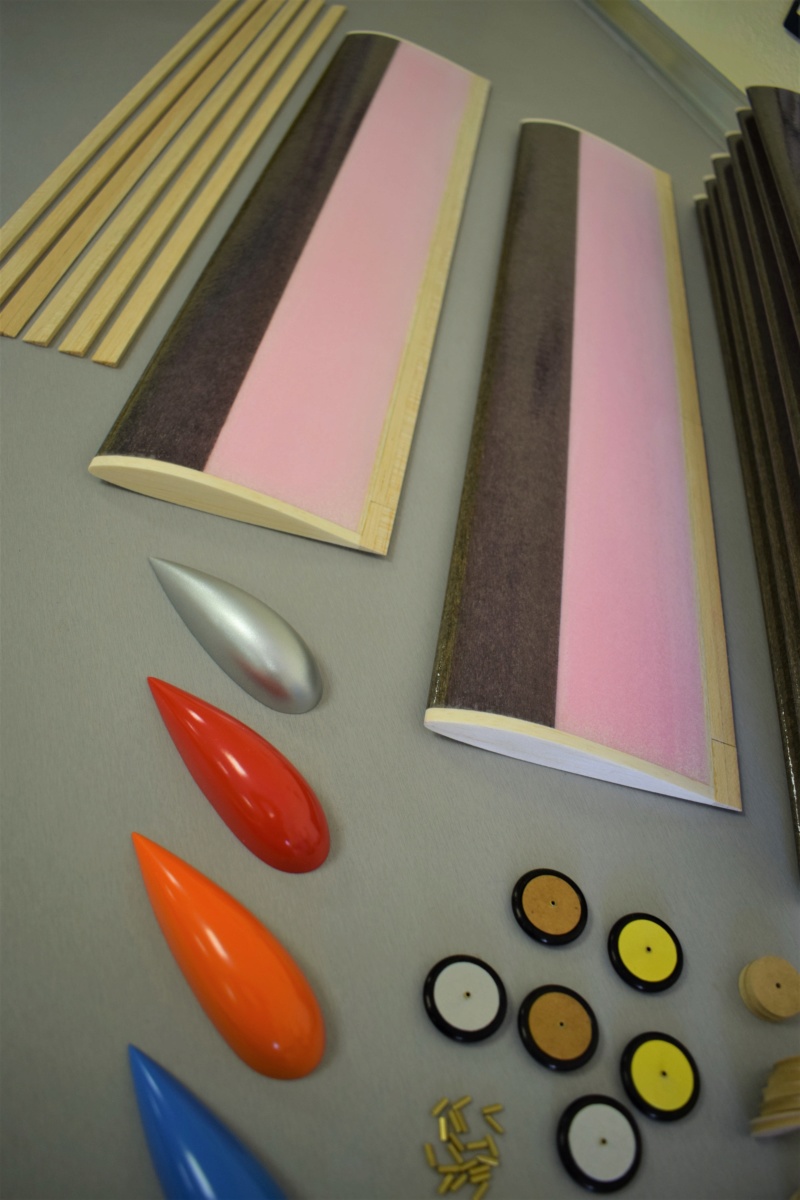
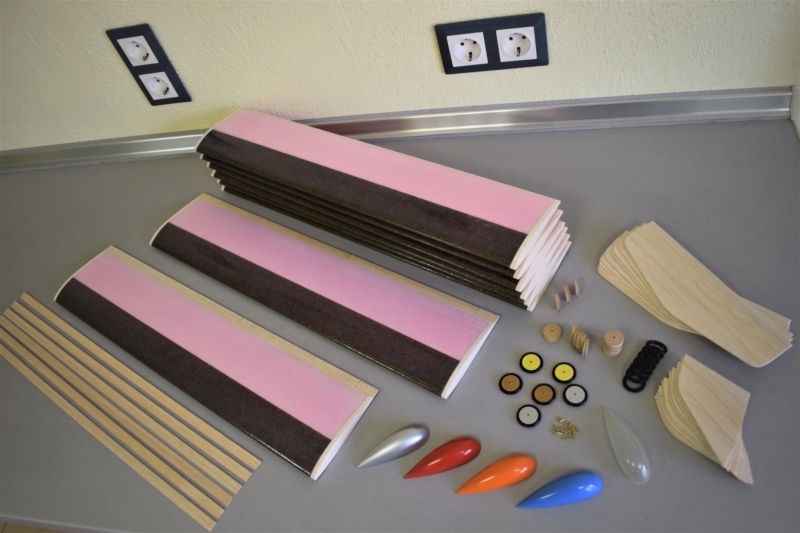
Most of these will be slightly modified to improve on a few aerodynamic or structural areas but not as much to alter the basic character of the design… most will also utilize a foam wing produced with my new A-Just precision bows.
First in series is the Quickie 100 from RCM fame that uses the outstanding Cox TD.020, model will be offered in a completely built state apart from the final painting/finishing as I feel most pilots would want to use their own personal color scheme… after all this is a micro club pylon racer so simultaneously competing four of these that have an identical color scheme will give a very hard time to pilots recognizing their own model from others!
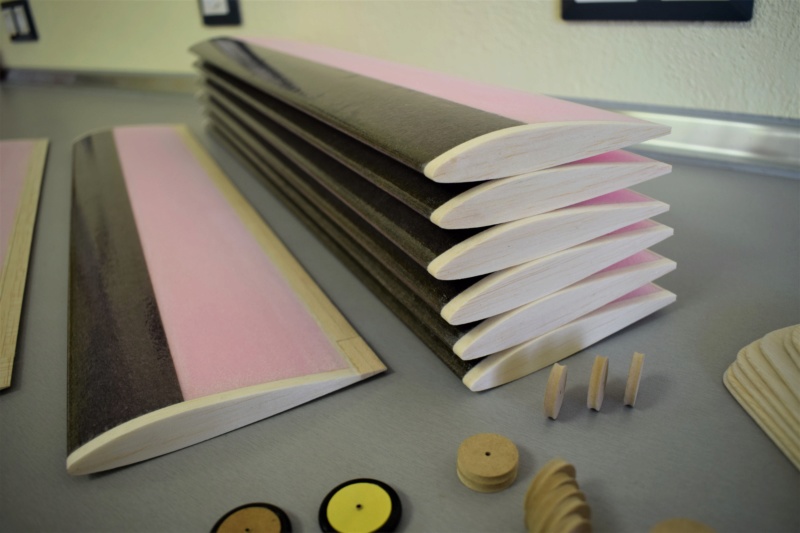
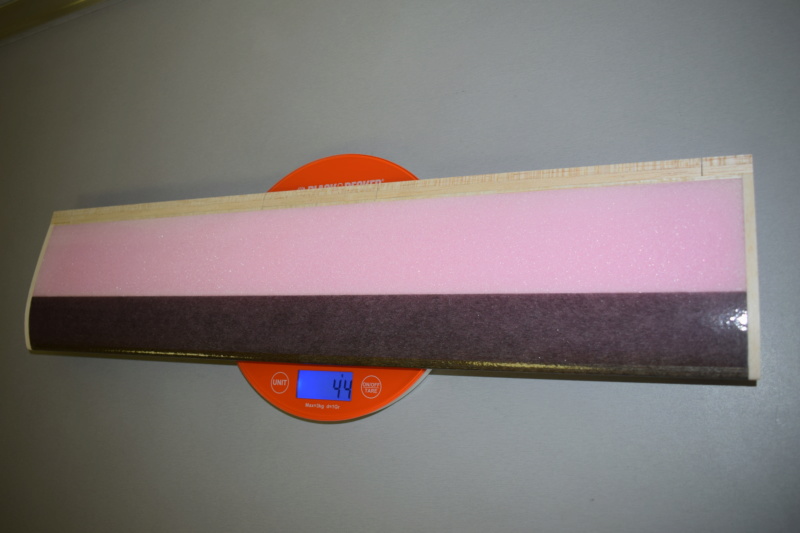
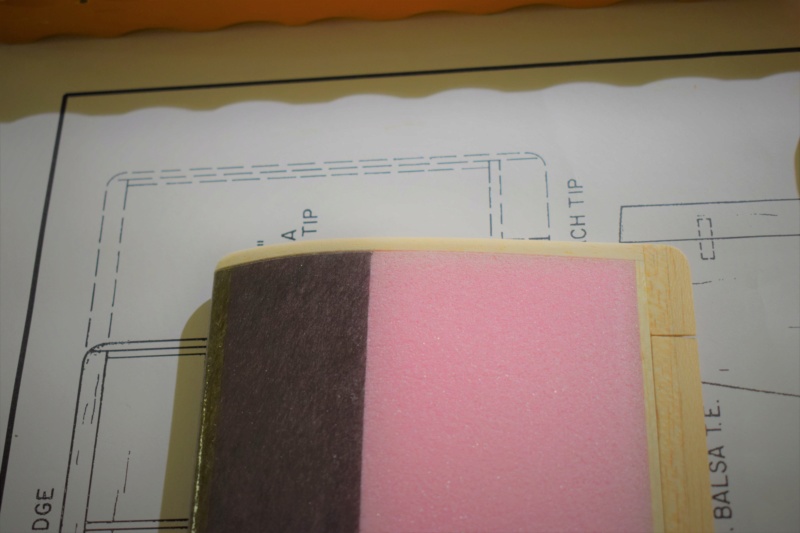
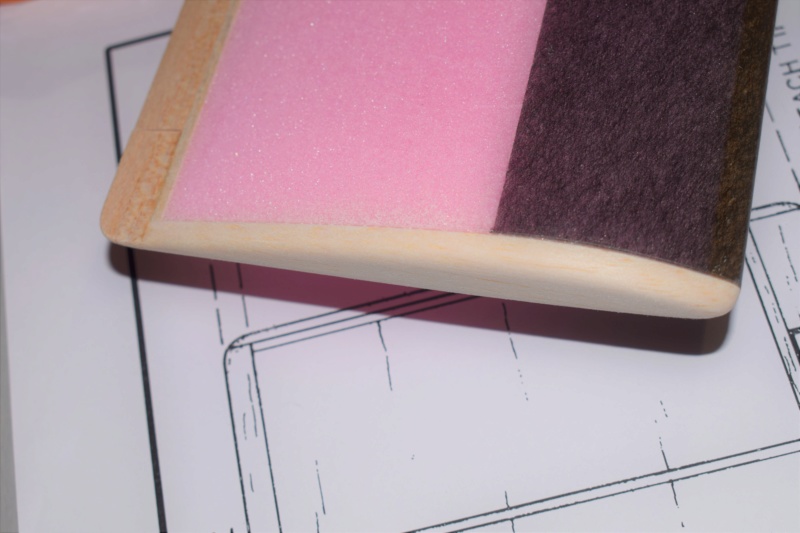
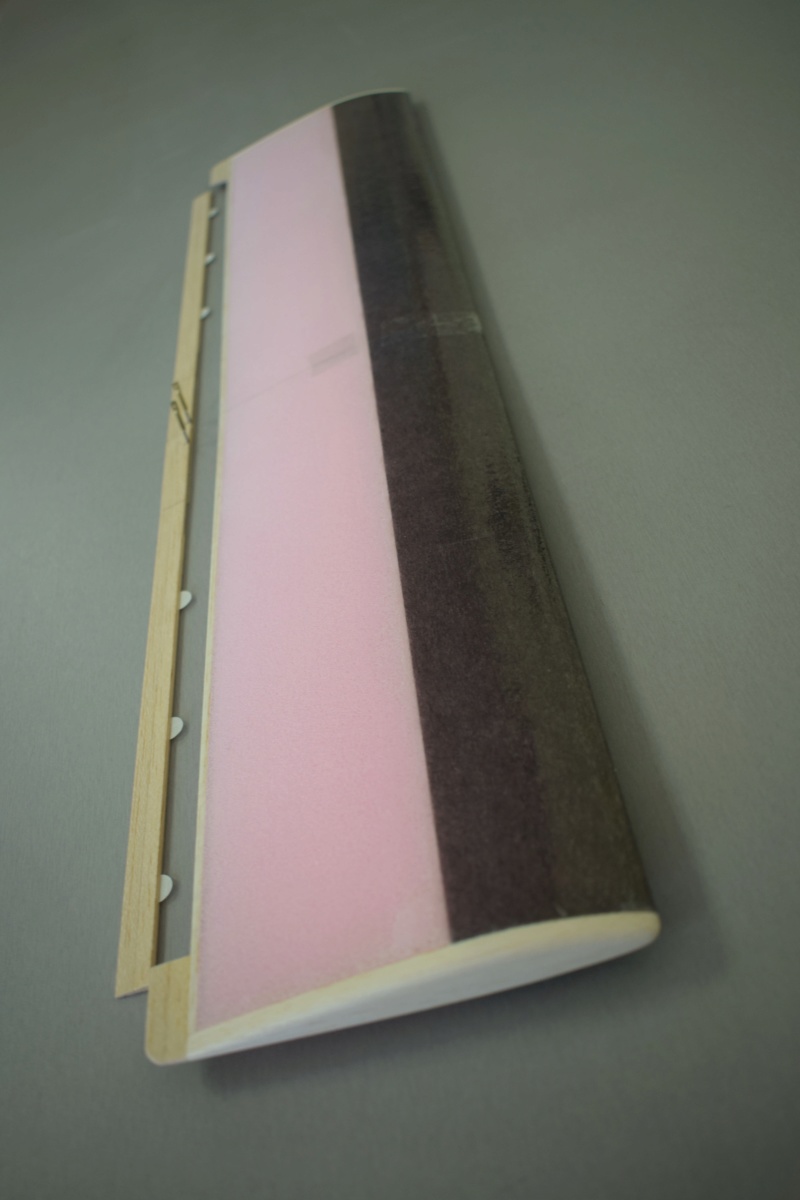
I have made some modifications to improve aerodynamics,(mainly wing airfoil and fuse cross section) and also improve the overall strength to weigh ratio of the basic airframe… original model used a built up wing… my version is produced from a high compression grade XPS foam reinforced with a seamless carbon D-tube, resulting wing is very rigid/ lightweight and entirely straight/ accurate… true and warp free wings are a definite must for small models as their use can minimize adverse in-flight trimming issues with their associated trim drag toll… a clean warp free airframe is effectively contributing to a very important overall drag reduction.
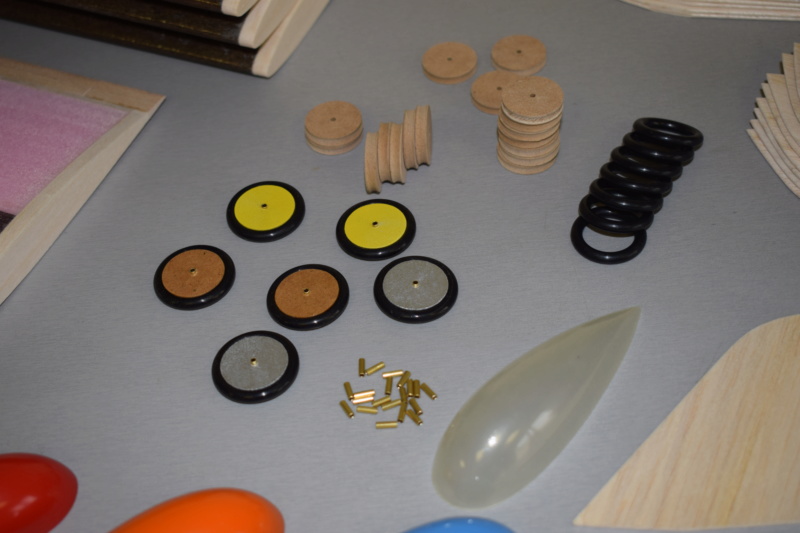
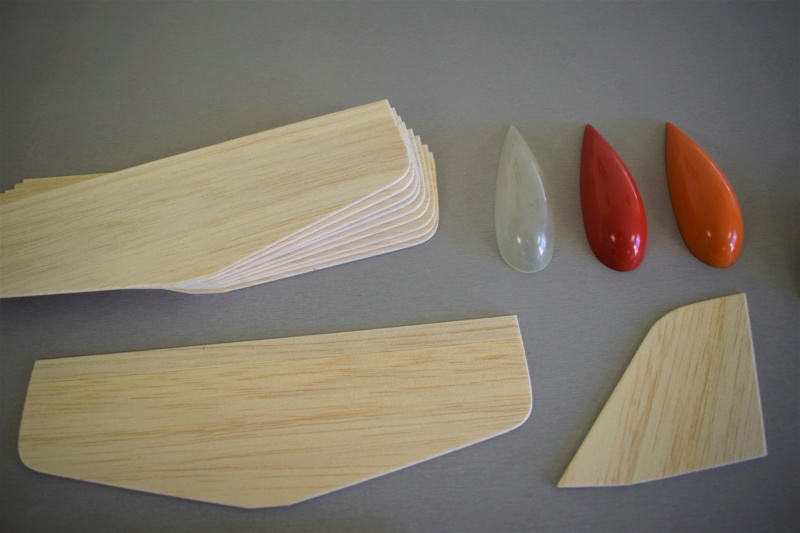
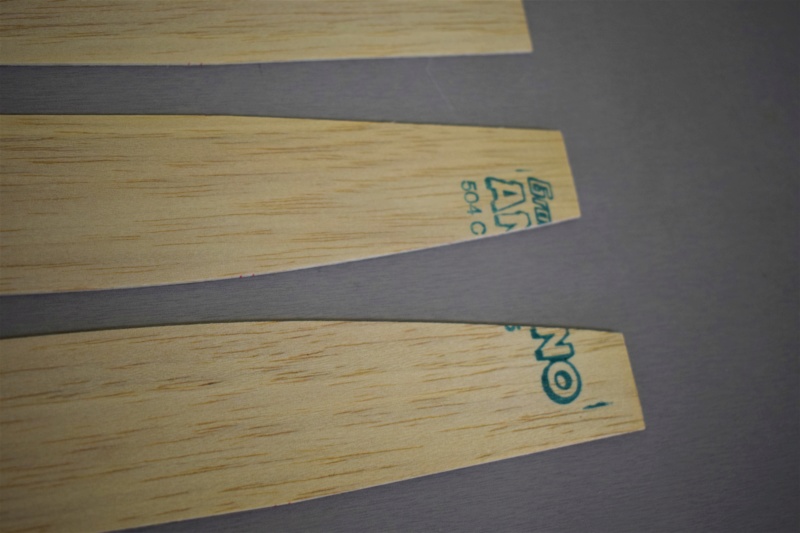
Rest of airframe is traditionally built up from contest grade balsa (Graupner Andino/ Isensee) ...entire structure is smoothly sanded ready for your favorite finishing method and color choice, radio/equipment installation is planned for with basic hardware provided to ease model completion, landing gear is from high carbon content spring steel wire and complete with wheels/collars etc… also removable to ease transport and service.
I have also two custom components that are already completed and offered separately in case any of you wishes to produce your own Quick 100 model or possibly may use these in other suitable designs… a glass molded canopy and really nice slim profile/one inch wheels, both come ready painted in extensive choice of colors, you can view these at eBay:
https://www.ebay.com/itm/Lot-of-2-Cox-engine-R-C-airplane-or-micro-electric-park-flyer-epoxy-canopy-parts/123903164015?hash=item1cd9343e6f:g:T8gAAOSwZuxdd~mZ
https://www.ebay.com/itm/Model-airplane-set-of-2-wooden-wheels-1-inch-for-Cox-sport-pylon-racing-models/124004136600?hash=item1cdf38f698:g:9poAAOSwn~td7VGM
A quite small/limited number of these models will ever be produced as they are strictly hand made with attention to detail and high finish standards, will post more photos as project work is progressing… despite the amount of work involved I have every intension to offer them at a favorable price so average budget pilots get a real chance to own and enjoy flying one of these micro racers.
I am sincerely hoping to help revitalize some of the old spark and excitement and possibly spurring vintage midget club racing!
Will be glad to answer any questions… also you can personally contact for details and/or availability at kazaklisglider@yahoo.gr
Regards Tasos.


kazaklisglider- Bronze Member

- Posts : 45
Join date : 2019-09-13
Age : 59
Location : Greece
 Re: New Quickie 100 micro pylon racer project
Wow. Beautiful craftsmanship there. Along with the surgical clean work area as well. Will be nice to watch these build up, and teh final resuly. The wings look perfect. I had wanted to try making cores, but have not as I have nobody near that does it to help me. And I hate cutting wing ribs.

NEW222- Top Poster

- Posts : 3896
Join date : 2011-08-13
Age : 46
Location : oakbank, mb
 Re: New Quickie 100 micro pylon racer project
Hello,
Thank you for your kind comments, I have always believed that a clean and uncluttered work area is always helpful in setting the right mental attitude to do detailed work… however some cutting/sawing chores do produce dust etc. but I utilize fine dust extractors in every machine I use. Additionally cleaning after a day’s work restores things to top condition for the next cutting schedule.
Have once read that famous OS Max factory had cleaning personnel dedicated to each group of milling machines and when all production work ceased a general factory cleaning team took over for final days cleaning…their jewel like engines reflected this dedication.
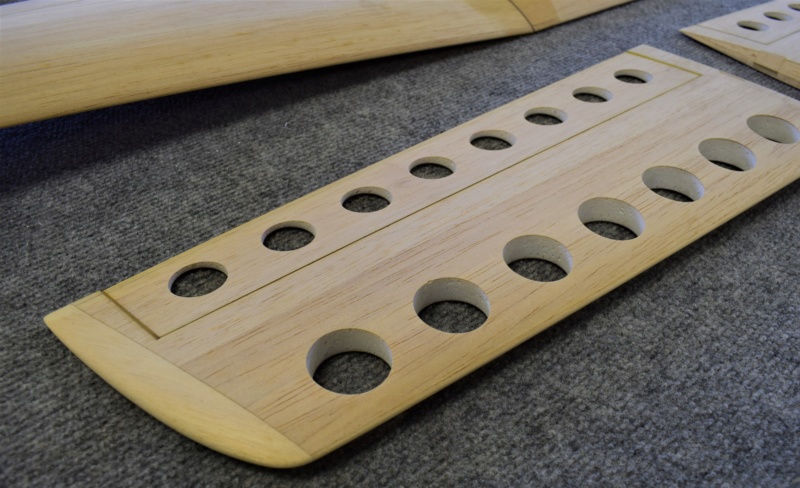
Despite common belief producing a decent foam core is not a difficult task… however some basic rules must be followed:
-Use of a lightweight and practical bow with a highly tensioned thin cutting wire
-A variable Volt/Amp power source is a definite must to precisely fine tune wire temperature
-Using accurate templates of the right material to allow easy and smooth cutting wire slide
The last parameter is the most common mistake factor as many people probably use the wrong materials such as plywood/Formica or even aluminum sheet templates…these can basically work to produce a couple of cores but despite meticulously sanding their edges to an initially super smooth state as soon as the cutting wire makes contact the elevated wire temperature combined with the press down cutting force will very soon produce tiny grooves that result local wire hesitation or momentary stops…result is waves and/or span wise groves.
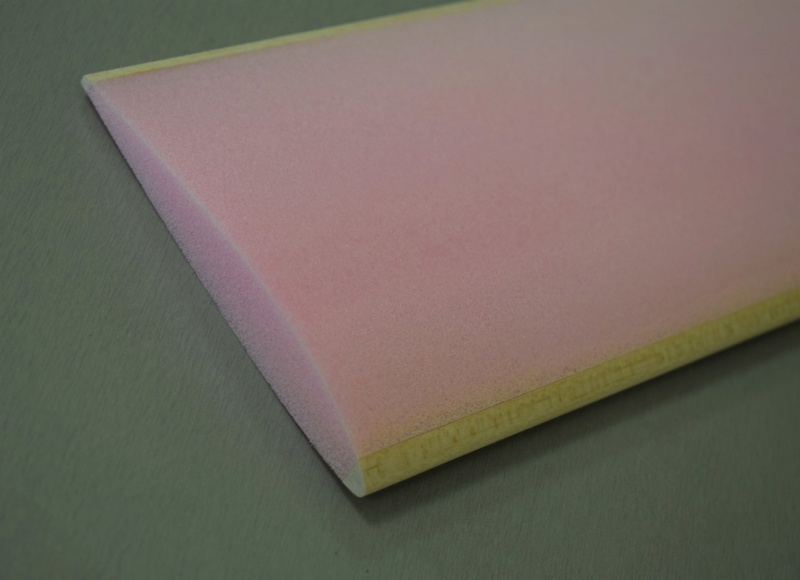
It is also very true that despite cutting a perfect core slight sanding with 220/320 grit sandpaper is always a post necessity to remove very fine/micro trailing foam fibers but this is quite easy with a true/ flat sanding block/proper light and patience.
Will be glad to assist by sending you some quotes from my 20 page A-Just bow manual… I have chapters dealing with precision cutting, making proper templates etc. that might help you.
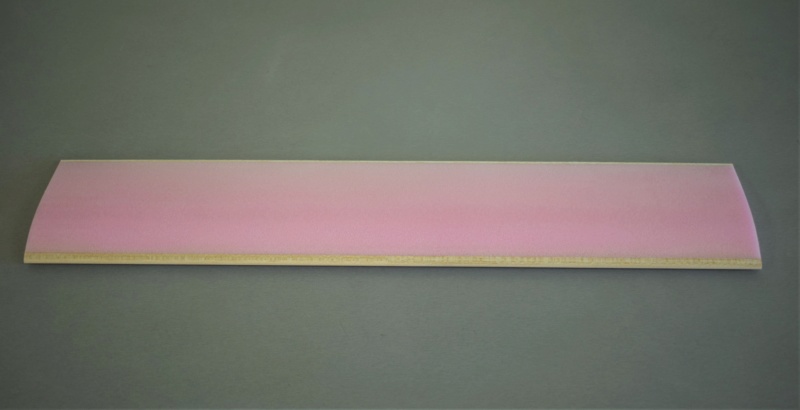
P.S. I attach a couple of previous projects (Sliver vintage sailplane and GLH) … these cores were cut just following the above mentioned basic rules.
Tasos.


kazaklisglider- Bronze Member

- Posts : 45
Join date : 2019-09-13
Age : 59
Location : Greece
 Re: New Quickie 100 micro pylon racer project
pretty cool project! You might want to consider a high wing version as it would make for a slightly more stable platform as well as less likely to catch a wingtip on landing, especially if you'd delete landing gear.
 Re: New Quickie 100 micro pylon racer project
Very precise, beautiful work there, Tasos. I saw the GLH on ebay but it disappeared by know. Do you make the Quickie in RC version i.e. with rudder and/or ailerons?

balogh- Top Poster


Posts : 4958
Join date : 2011-11-06
Age : 66
Location : Budapest Hungary
 Re: New Quickie 100 micro pylon racer project
Very Nice !! Bee watching progress . 


getback- Top Poster


Posts : 10439
Join date : 2013-01-18
Age : 67
Location : julian , NC
 Re: New Quickie 100 micro pylon racer project
Hello,
Thank you all for your nice compliments… you certainly give me the urge to keep going!
Mark, you got a good point suggesting a shoulder wing version as these are theoretically more stable compared to a low wing, but as my basic intension was to produce a (relatively!) faithful replica of the Quickie 100 so I chose to not deviate from the original wing mount…
However I have in mind a next project that will be relatively simpler to produce with a shoulder wing configuration and belly landing capability… probably using just rudder/elevator but will turn equally well with the best of racers!
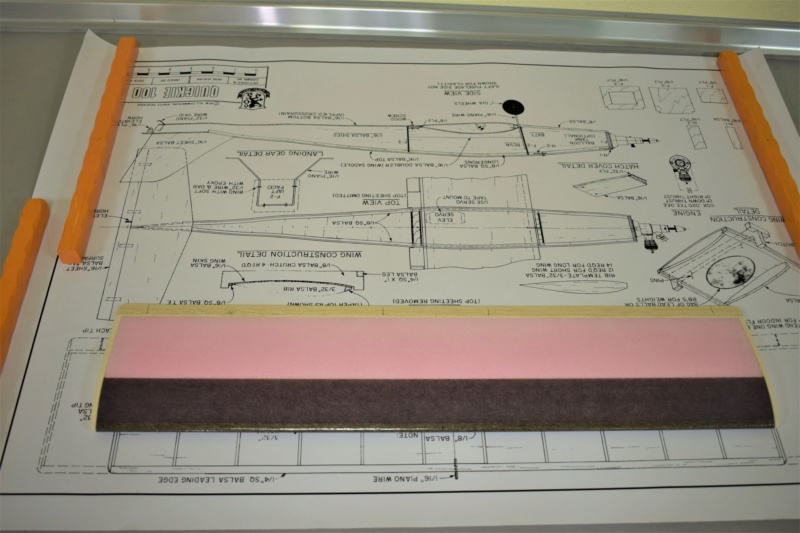
The original plan shows two wings that are basically the same (chord/airfoil) except for the wingspan, shorter one is intended for outdoor all out pylon racing, the longer is used for indoor use… However I also wanted for this micro pylon racer to be suitable for basic/average piloting skills so I did some basic aerodynamic modifications (based on my F5J sailplane competition experience) to improve stability and overall user friendly handling:
- Wingspan is increased slightly compared to the outdoor short wing pylon version and favorably provide more area and a slightly higher aspect ratio… this wing will be just as fast and slightly more efficient.
- Wing section is also modified (slightly less camber/less thickness) to improve penetration on windy days but not as much to make the model difficult to handle… in fact it will be quite forgiving during high-g turns and landings as the lower overall drag and anticipated minimal wing loading helps in both of these areas.
- Ailerons are increased in length to aid maneuverability especially during downwind turns and landing approach but again not as much to induce flutter at high speeds.
- Trailing edge/aileron datum angle is lightly reflexed by 1.5 degrees over the stock airfoil section, this micro reflex exists only on the top of the airfoil curve and will provide increased stability at low speeds… top speed/penetrating ability is also expected to benefit by a small margin... bottom airfoil curve blends smoothly with the lower line of the trailing edge.
- Slight loss of camber and consequently total lift produced is more than aptly compensated by the increase in wingspan/area and more importantly by the target very low wing loading made possible with the extensive use of contest grade balsa and foam/carbon wing.
I will refrain to provide AUW and wing loading numbers at this relatively early stage but so far every component produced is very promising both in overall strength and weight limit.
Andras, my GLH was sold on eBay quite some time ago… new owner is a very nice guy from US and he gladly reports back his contest successes on local club pylon racing competitions using this model.
My Quickie 100 models uses ailerons/elevator as per original plan… .maybe the separate elevator/ailerons/hinge line does not show very well in the photos… it is common practice that pylon racers use no rudder but should someone wish to add rudder it is relatively easy, I can advise for proper fin/rudder chord percentage.
I attach a few photos of the wing placed on top of the original plan to show differences in wingspan… progress of project is steady, have happily sanded wingtips today…balsa is from 6mm super light Isensee.
Tasos.


kazaklisglider- Bronze Member

- Posts : 45
Join date : 2019-09-13
Age : 59
Location : Greece
 Re: New Quickie 100 micro pylon racer project
Hi,
I apologize as I forgot to mention an important detail that may not be quite obvious … maybe it seemed so far that my Quickie 100 will be produced with zero dihedral!
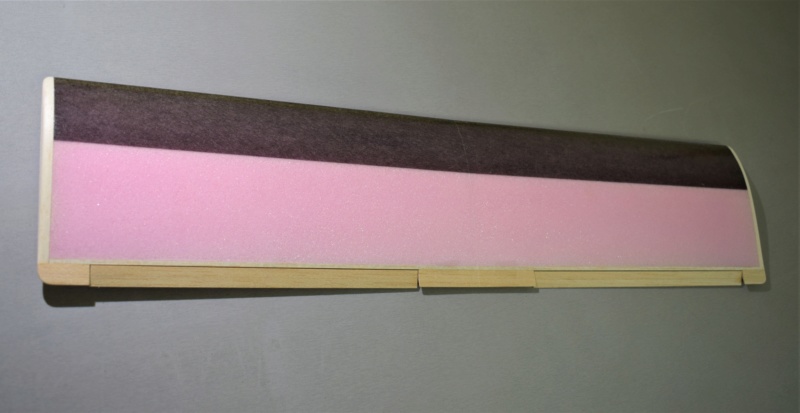
At this construction stage the wing is still flat and in one piece as this concept helped previous operations such as molding the seamless carbon D-tube, harmonizing the entire balsa trailing edge/ailerons to the correct angle etc.
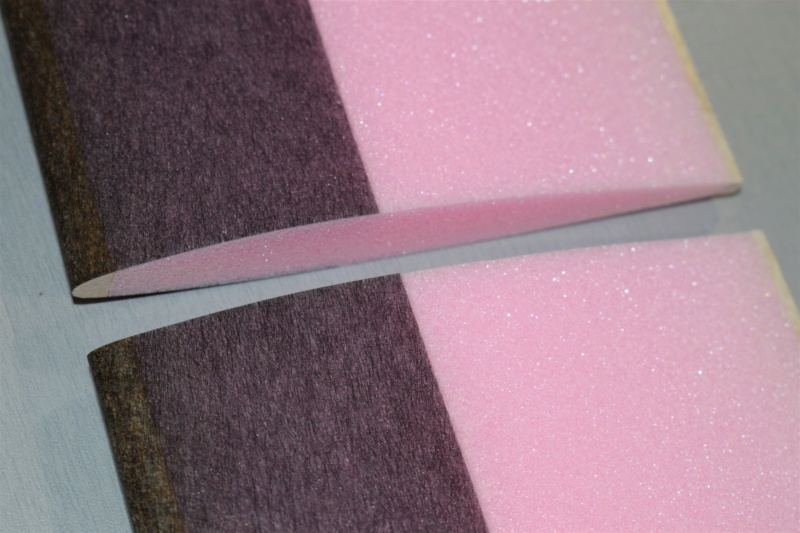
Now all these operations are competed so next step is for the one piece wing to be cut in half and root edges beveled for the correct dihedral angle (1/4inch under each panel tip dictated as per plan)… wing panels will be 24h epoxy glued/joined and be additionally center reinforced with 25gr glass cloth.
This low dihedral angle additionally improves stability and minimizing turning radius.
Tasos.

kazaklisglider- Bronze Member

- Posts : 45
Join date : 2019-09-13
Age : 59
Location : Greece
 Re: New Quickie 100 micro pylon racer project
However I have in mind a next project that will be relatively simpler to produce with a shoulder wing configuration and belly landing capability… probably using just rudder/elevator but will turn equally well with the best of racers!
I'd look at elevator/single aileron, small rudder area and minimal dihedral isn't going to turn very well.
 Re: New Quickie 100 micro pylon racer project
Hello Mark,
Of course a small rudder area and minimal dihedral will result a terrible turning performance with serious spiral instability issues… but I think I was misunderstood as I was referring to a possible collection of existing vintage designs with already proven performance…the Scorcher by Ken Willard is a good example/candidate.
I believe a simple/practical but sufficient performance model is always a winner with pilots who value an easy to use and service racer.
Regards Tasos.

kazaklisglider- Bronze Member

- Posts : 45
Join date : 2019-09-13
Age : 59
Location : Greece
 Re: New Quickie 100 micro pylon racer project
Hello,
Some more work… attention to detail means slow progress but I think with satisfactory results.
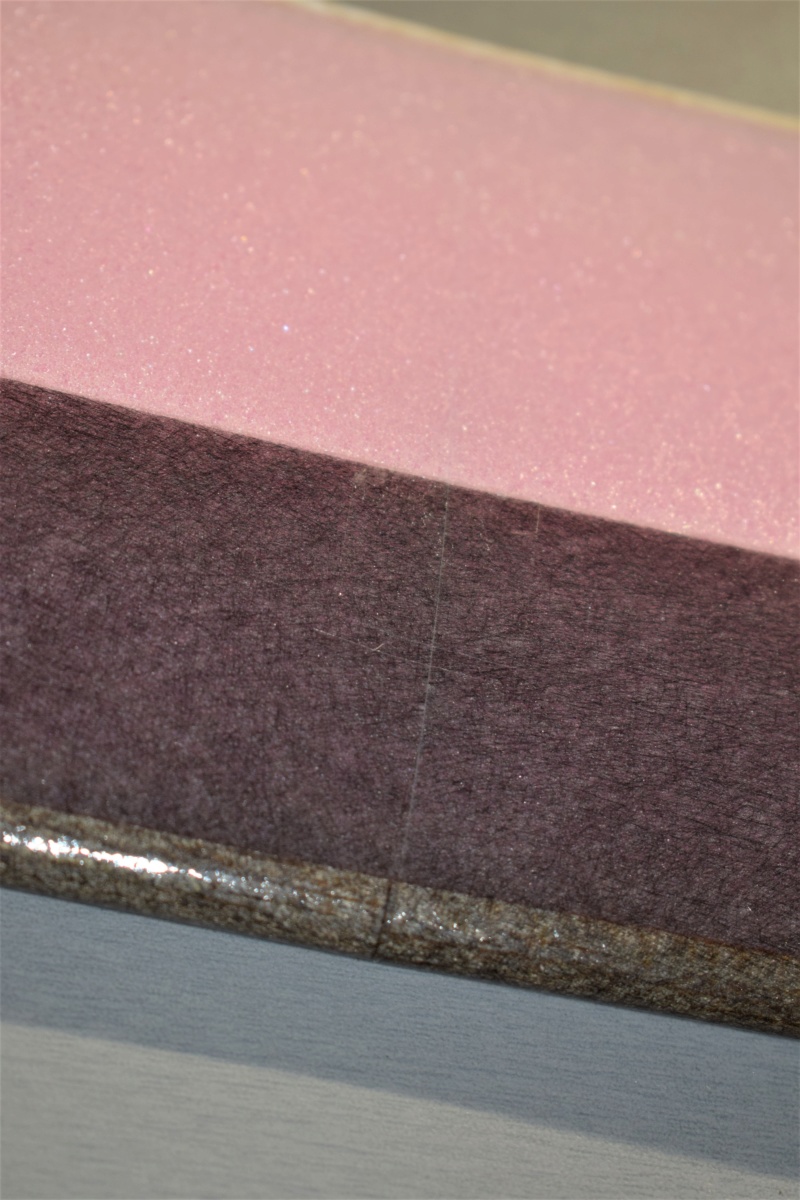
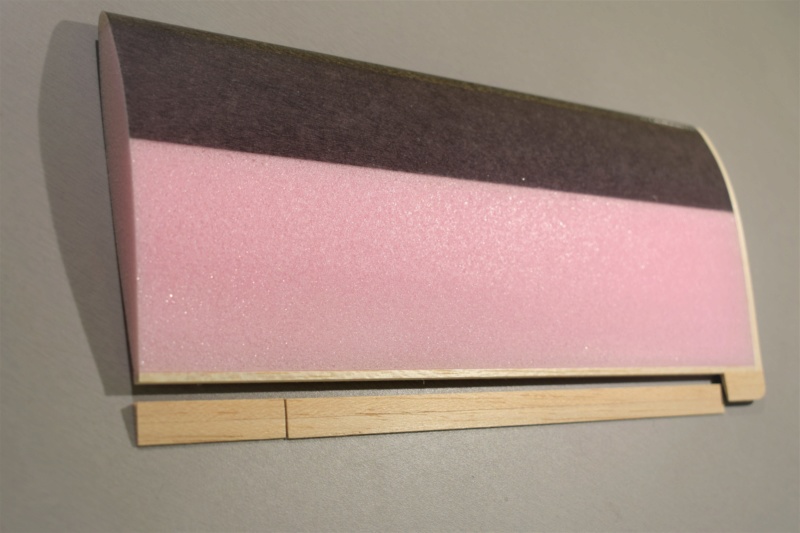
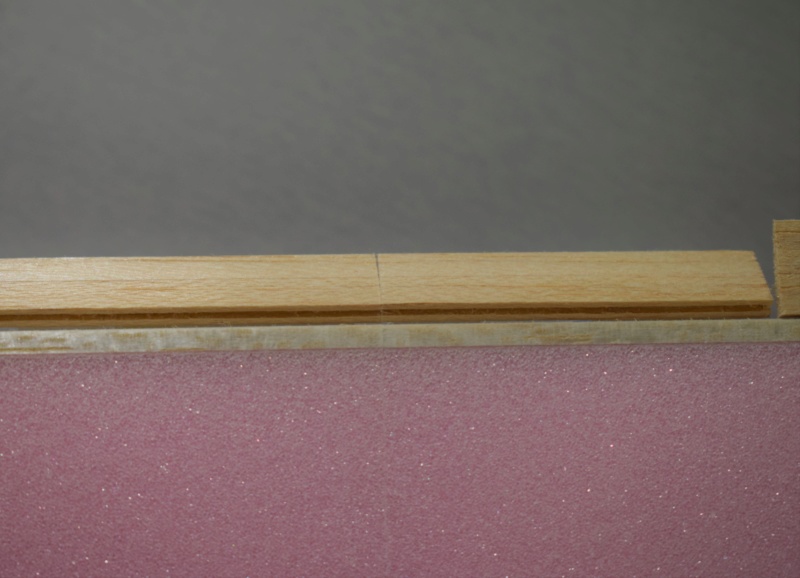
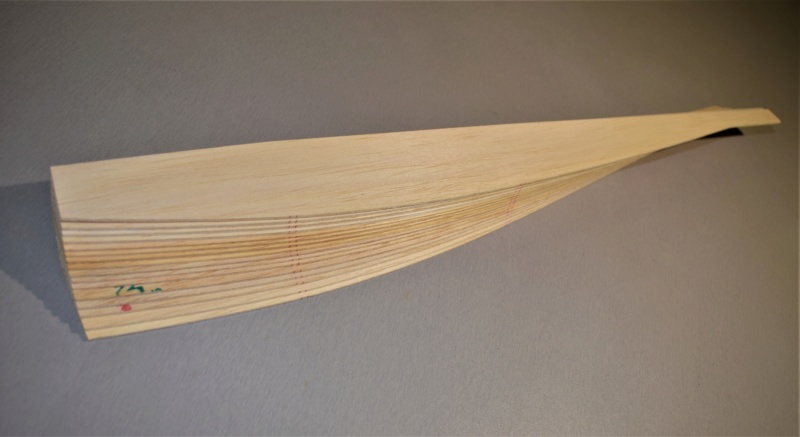
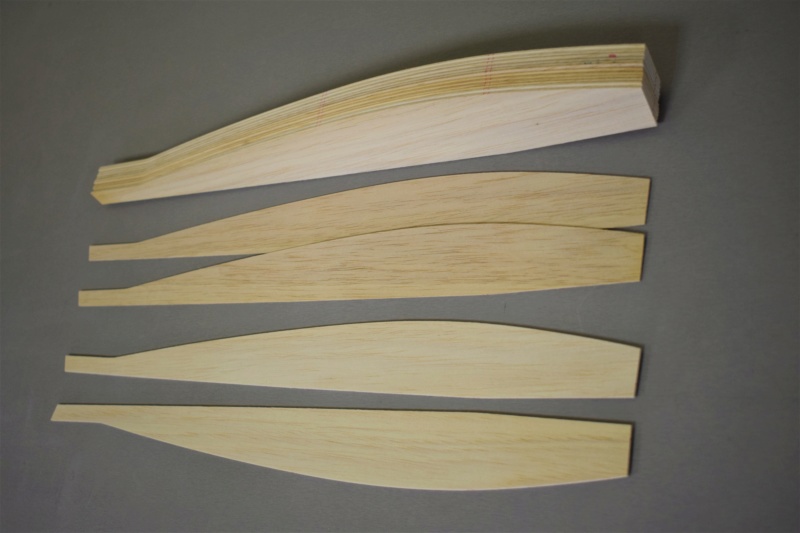
- Wings are cut in half and dihedral angle is sanded, ready to be epoxy joined.
- Grooves for aileron torque rods are milled already.
- Fuselage sides are cut and precision sanded, they are matched in pairs for grain and density... this is a strict priority for straight fuselages.
For hinges I have developed my own concept of micro easy hinges as I was never entirely satisfied with the already available ones on the market… will also offer them to modelers, details and photos soon.
Regards,
Tasos


kazaklisglider- Bronze Member

- Posts : 45
Join date : 2019-09-13
Age : 59
Location : Greece
 Re: New Quickie 100 micro pylon racer project
The TD .020 is one of my favorite Cox engines.
Sep 29, 2018
Nano Plane TD.020 - Nelson Flat Coil Insert Plug / Carbon 3.6x4.5 prop
Static Hold: 24,870 rpm / 106 mph Pitch Speed
Static Peak: 25,113 rpm /107 mph Pitch Speed
4.6oz static thrust / 30% Nitro / 20% oil
With a pressure tap the tank was bone dry when the engine
stopped providing steady rpm throughout the bench test.
Bob Mattes Glow Plug Adapter
Bob Mattes TD .020 128 tpi NV and body
Kamtechnik prototype muffler and manifold
Valentine custom .020 bullet spinner


1/2A Nut- Top Poster

- Posts : 3536
Join date : 2013-10-20
Age : 61
Location : Brad in Texas
 Re: New Quickie 100 micro pylon racer project
Hello,
Your highly customized TD sings a super smooth song!
Efforts like this from dedicated Cox fans really shows what improvements can be done over the stock engine, I am sure this engine would result ballistic performance on models such as the Quickie 100.
On the other hand a stock TD 0.20 would also ensure exciting performance providing the structure of the model is kept light… all of us know that a low wing loading is key factor for good performance but it takes attention to the smallest details in order to produce a straight and lightweight model.
Merry Christmas to you all!
Tasos.

kazaklisglider- Bronze Member

- Posts : 45
Join date : 2019-09-13
Age : 59
Location : Greece
 Re: New Quickie 100 micro pylon racer project
Thank you Tasos, yes happy holidays! 


I have designed quite a few speed plans this particular plane has done 122 mph pitch speed
with a exhaust sleeve thus far. I have not flown the muffler configuration on pressure yet with
the Bob Mattes NV and flat coil plug. 130 mph is possible. This spring flying vid with the engine.
100 sq. in is too much wing for a really fast TD .020 plane, fun group pylon races with that airfoil.
I use 43 Sq. in for the TD .020 and 75 sq. in for TD .049's see second vid both with thin airfoils.
100 sq. in. and your airfoil shown would be fun fast with a TD .049 / around 95 -105 mph with
the right prop selected. Increase's in mph is very hard to get as the drag increases with speed.
Here are some passes with the throttle sleeve:
4.2oz RTF / 19.5" Span / 43" Sq. In
Nano IV
TD .020 / 3.37 x 4.5 Prop best peak hit 28,585 rpm / 122 mph pitch speed.
Static in the hand at launch 23,192 rpm / 99 mph pitch speed 3oz thrust.
Radar read at 114 mph. Engine cooled and went richer after the last pass.
Since then I have better props to test with a lower weight bullet spinner.
Nano X
Cox TD .051 3rd Flight Tuned Pipe APC 4.3 x 5.5N Speed Plane.
Last two passes are the best peak: 28,181 rpm / 147 mph Prop Pitch Speed
Now the fastest TD .051 3ch plane on You Tube - bested Nano III now in 2nd.
Best static 21,962 rpm / 7.1oz thrust / 115 mph pitch speed / Pipe at MRP 7.5"
.144 hp - 107.4w / 7.1 oz thrust / stock piston /cylinder and crank!
25" span 75 sq. in. wing / 8.2oz RTF / Temp 87F. dry, winds 7 - 12 mph.
25% nitro / 20% oil / SPI engine / no pressure tap.


1/2A Nut- Top Poster

- Posts : 3536
Join date : 2013-10-20
Age : 61
Location : Brad in Texas
 Re: New Quickie 100 micro pylon racer project
Hello Brad,
Thanks for sharing!
Your speed planes are very well designed and optimized for all out speed… truly exciting stuff!!!
I am quite aware of how much work is involved to increase performance in a particular category, especially speed is a
difficult arena and dealing with small planes that inefficiently operate in low Re numbers makes it even harder, of course drag is the worst enemy… so my hats off for your technical approach at this area.
For the Quickie 100 my main goal was to produce a rather close replica of the original design and basically aiming to introduce average skill pilots to Midget club pylon racing with simple rules and easy to materialize Sunday local contests within small clubs… fun and truly enjoyable racing at medium speeds is the name of the game for most people.
Have already mentioned that I’ve done a few mods to the original wing section and fuse cross section aiming to enhance penetration on windy/turbulent days and not to really increase speed… I am sure some people would want to install a hotrod modified TD0.51 and scorch the sky with it but it is not the true role of the project.
However the airframe is very strong and rigid to withstand the increase in power/speed… if anyone wishes to try this please be my guest! Personally if I would use a 0.49/0.51 I’d choose a reed valve Black Widow or maybe a 0.49 Medallion on a small internal tank, both using a 5x3 Cox grey prop just to add power without much speed increase.
Tasos.

kazaklisglider- Bronze Member

- Posts : 45
Join date : 2019-09-13
Age : 59
Location : Greece
 Re: New Quickie 100 micro pylon racer project
Hi Tasos,
Yes fun group flying at a safe speed with enough pep to keep folks on their toes.
I look forward to seeing one completed and the color schemes folks go with.
If you receive any photo's or vid responses from your customers I hope they
post on your threads to share with everyone.


Yes fun group flying at a safe speed with enough pep to keep folks on their toes.
I look forward to seeing one completed and the color schemes folks go with.
If you receive any photo's or vid responses from your customers I hope they
post on your threads to share with everyone.


1/2A Nut- Top Poster

- Posts : 3536
Join date : 2013-10-20
Age : 61
Location : Brad in Texas
 Re: New Quickie 100 micro pylon racer project
Hello,
Happy New Year to all…
I wish good health and enjoyable happy flying days throughout 2020!!!
Despite the temporary setback of Christmas and New Year short holidays I had time devoted to the Quickie 100.
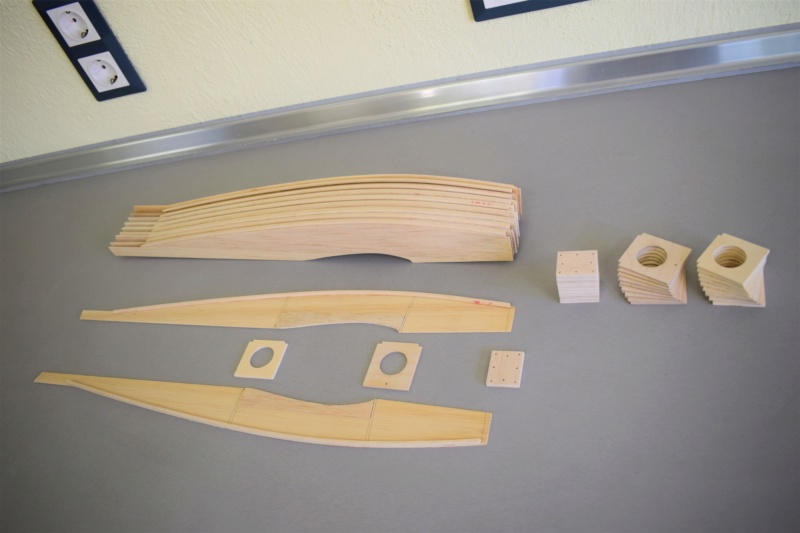
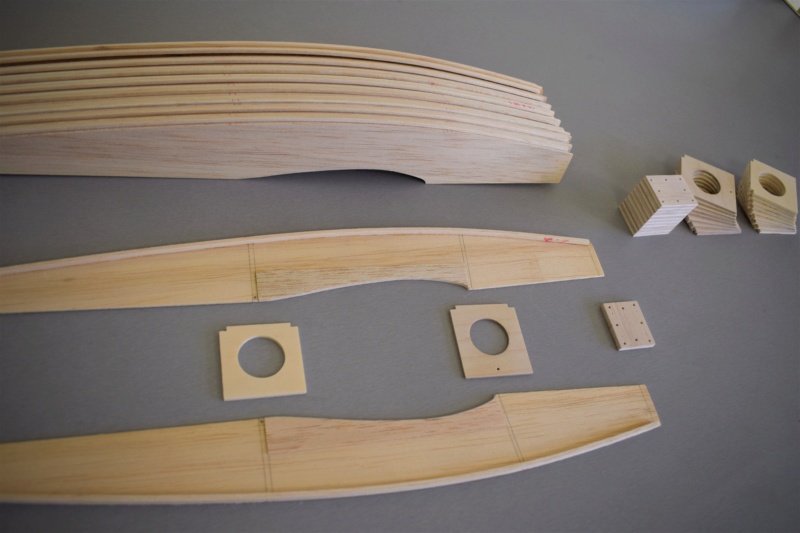
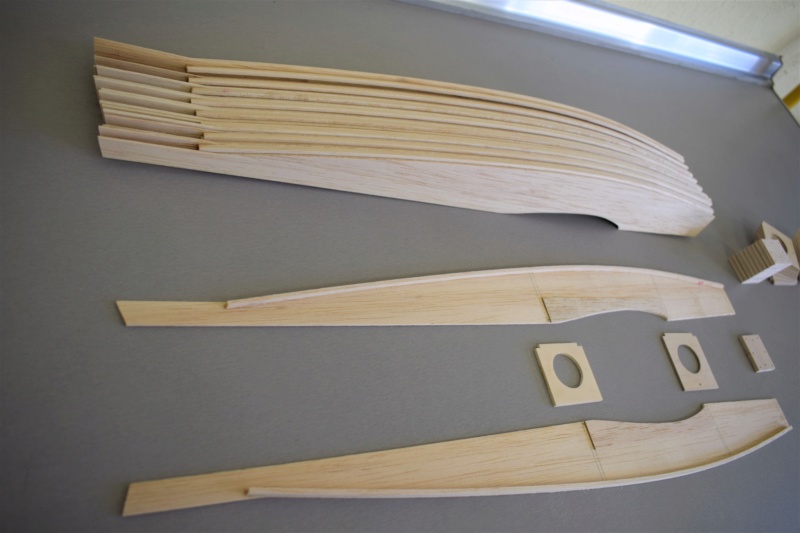
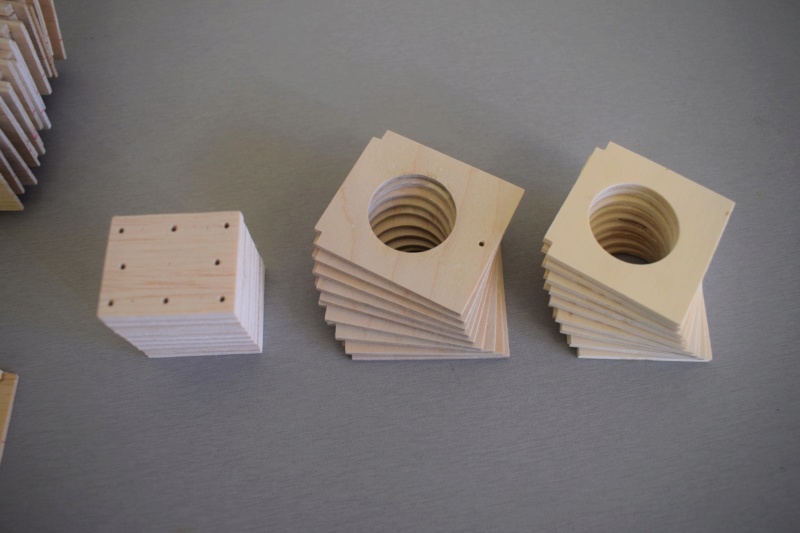
Fuselage sides have wing saddle and top stringer added, formers are machined and ready, firewall is accurately predrilled for the following engine choices:
- TD.020 with regular tank mount.
- TD.020 with short mount allowing internal fuse small tank or bladder type fuel cell.
- Reed valve 0.49 engines with regular tank short/long mount.
I have opted to include a reed valve 0.49 mounting choice for those not having an expensive TD 0.20, a good reed valve (Black Widow) with 5x3 prop and 30% nitro will result exciting performance… airframe is strong/rigid to easily take the added power, firewall is substantial 3/16 thick.
Tasos.


kazaklisglider- Bronze Member

- Posts : 45
Join date : 2019-09-13
Age : 59
Location : Greece
 Re: New Quickie 100 micro pylon racer project
Great developments Tasos ..will you sell them through ebay, and when? I would probably swap TD020 and red postage stamp 049-s on it, the latter with a Carl Goldberg mounting brace. Its mounting hole pattern is the same as the Bee tank mounting hole pattern.

Will you put blind nuts in the firewall holes?
Andras

Will you put blind nuts in the firewall holes?
Andras

balogh- Top Poster


Posts : 4958
Join date : 2011-11-06
Age : 66
Location : Budapest Hungary
 Re: New Quickie 100 micro pylon racer project
Hello Andras,
Thank you for your enquiry,
Your concerns regarding engine mounting etc. are logical but please rest assured that I have all possible issues taken care of… moreover I believe these questions might be of interest to other pilots following this presentation so I will outline some details for all viewers:
- The Baby Bee/Black Widow and similar reed valve engines have presumably the same hole pattern as the red Goldberg mount, either choice of mounts are to be side mounted with needle valve on left or right of fuselage… clearances/tolerances are carefully introduced during machining/drilling.
- Will include 2mm mounting bolts and nuts/washers for reliable/long lasting mounting as I am well aware of the castor oil seepage problem… no wood screws to loosen after a few engine runs.
- Decided to not permanently attach blind nuts as these permanently take much area/ space in the back side of the firewall and may cause later mounting problems if one wants to swap engines, the supplied nuts/washers are very secure and have the advantage to be easily removed and repositioned to change engine types… a small drop of blue color threading compound will fix things semi permanently if so desired.
- All firewall holes are 1.5mm drilled so these 2mm bolts self-tap/thread on initial screwing in… this combined with the back side nuts/washers makes for a secure engine mount impervious to fuel loosening/vibration etc.
- Yes I will supply the airframe totally assembled and consequently the firewall will be epoxy glued… however there is complete access directly to the forward fuse area and rear of firewall as I will provide a removable front hatch of enough area to make service or changing position of the nuts/washers an easy task… also the hatch allows easy separate tank or bladder fuel cell to be installed.
- Aileron torque rods will be installed with brass horn fittings predrilled but not permanently fixed at end of torque rod wires allowing cutting/changing the height of the torque rod to suit particular servo/height/ size… torque rods will be slightly oversized in height for that purpose.
- Short length steel wire pushrods to connect servo arm at the brass horn/torque rods will be furnished…also these will be a little oversize to be later cut at the appropriate/suitable length.
- Elevator pushrod will be supplied with steel wires at connection ends… these again will be over length to be cut by the modeler at his requirements, horn type is not just decided yet.
- Each airframe will be totally fine sanded and ready for individual/personal finishing method and color choice.
- Landing gear will be removable but secure when in place with easy insertion/extraction for transport and service… wheels are my custom slim line one inch diameter with micro brass bushings, every model will have one of my glass molded canopies.
- All hinging will be done and precisely slotted… hinges will be provided but not permanently fixed/glued to allow easier individual component finishing chores … These are my custom designed/produced ‘Micro Easy Hinges’ and are a new concept that i just finished materializing but had not yet available time to present in public or market etc… will do so soon.
In general i have tried to foresee and taken into account all possible needs and solve potential problems so the model will be very practical to use and interchange / install radio equipment and engine… also easily serviceable and maintain in top condition.
As work progresses will post photos and details remaining until everything is finalized and airframes are ready for shipment.
Models will be produced in limited number and offered for sale at eBay and forums CEF/ RCG, fellow members of these forums will of course receive a 12% discount of eBay listing prices.
A few notes concerning the price: As I have mentioned at the beginning of this presentation I’d like to offer the Quickie 100 at a reasonable price level suitable for the average budget modeler …as project is nearing completion will finalize price tag, at this state I am just dedicated to progress and final construction details.
Regards Tasos.

kazaklisglider- Bronze Member

- Posts : 45
Join date : 2019-09-13
Age : 59
Location : Greece
 Re: New Quickie 100 micro pylon racer project
Thanks Tasos, this is an exhaustive answer...looking forward to the Quickie rolling out from your hangar to the marketplace..I sure will be one of the first fliers to test it. (given our geo proximity)
You referred in your description to a carbon "D rod" (or similar) placed in the wing...is it the reinforcement black sheeting part surrounding the leading edge on the wing top and bottom?
Can the foam wing be covered in Oracover or similar, without causing heat damage to the foam, or you suggest some paint to cover the foam?

balogh- Top Poster


Posts : 4958
Join date : 2011-11-06
Age : 66
Location : Budapest Hungary
 Re: New Quickie 100 micro pylon racer project
Hello Andras,
The reinforcement in the wing top/bottom forward surface is a carbon D-tube that is seamless meaning it is completely wrapped in a single/no joint piece, it is molded with 24h R&G products L-20 laminating epoxy and adds considerable stiffness both torsional and span wise… it is a key structural member.
The exposed foam wing rear surface can be finished in a number of alternative ways:
- Covered with a low heat plastic film such as Solarfilm… generally polyester types such as Oracover need high heat so unsuitable for direct foam covering.
- Covered with ordinary lightweight tissue applied with brushed on thin epoxy, following can be painted with fuel proof type color paint.
- Covered in 25gr/m2 glass cloth and laminating epoxy… color by fuel proof type of paint.
- Brushed on with two light layers of thin epoxy… further color painted with fuel proof type paint.
- Brushed on with two light layers of thin laminating epoxy that has been pre-colored with a suitable color paste.
- Painted with a can spray of water based color paint suitable for foam surfaces… fuel proofing by a further light layer of thin epoxy.
- Painted with a couple of layers of brushed on water based clear varnish to seal the foam cell… further color painted with a fuel proof type paint.
- Brushed on with an emulsion of slightly thinned white wood glue applied in several layers to completely seal foam cell… further color painted with fuel proof type paint.
Methods using a water based type glue or varnish require simultaneously doing the top and bottom on each wing panel... all above methods have specific advantages or drawbacks, best method is the one that suits each user according to his experience and materials available.
Over the years (or decades!) have done all the above plus some more experimental types of finish on EPS and XPS foam… probably the easiest/quickest method is brushing on two layers of thin laminating epoxy pre-colored with a color paste, if this is not available a substitute for epoxy color paste is ordinary enamel paint or stained glass transparent enamel type paints, a couple of drops only to just color the epoxy is required… much more can hinder the epoxy from completely curing.
Whatever method one choses it is best to do a small sample on a scrap XPS type of foam to test compatibility of his specific materials… yes some answers do take time but I prefer to be exhausted than leave important issues unattended.
Tasos

kazaklisglider- Bronze Member

- Posts : 45
Join date : 2019-09-13
Age : 59
Location : Greece
 Re: New Quickie 100 micro pylon racer project
Thanks, Tasos,
Sorry for the blunt question but are epoxy based paints nitro-proof? When I wanted to fuel proof the engine cowl area on a balsa plane I built recently, I was advised here the polyurethane based spray is the reliable solution.
Sorry for the blunt question but are epoxy based paints nitro-proof? When I wanted to fuel proof the engine cowl area on a balsa plane I built recently, I was advised here the polyurethane based spray is the reliable solution.

balogh- Top Poster


Posts : 4958
Join date : 2011-11-06
Age : 66
Location : Budapest Hungary
 Re: New Quickie 100 micro pylon racer project
Hi Andras,
Yes polyurethane based paint is certainly fuel proof but sometimes not all brands are 100% immune to high nitro content... personal choice is using a good quality laminating epoxy as standard choice for long time service and able to withstand in different weather conditions.
Also my experience is that given enough time and exposure our methanol/high nitro fuels combined with hot exhaust by- products will slowly blush or surface attack most types of finishes… periodically some local refinishing is required to restore and keep the model in top condition.
Tasos

kazaklisglider- Bronze Member

- Posts : 45
Join date : 2019-09-13
Age : 59
Location : Greece
 Re: New Quickie 100 micro pylon racer project
Hello,
Have taken some photos of work progress, airframes are 70% complete at this stage but some important tasks remaining such as final joining and center reinforcing wing halves, firewall gluing and landing gear forming, plus adding top/bottom decks/ fuse hatch and last final sanding.
Hinges are my new concept of “micro easy hinges” produced of soft adhesive/ multi laminated/ special grade glass cloth… they are very flexible but almost impossible to shear under normal flexing conditions, circular shape makes slotting and insertion a very easy task with ordinary modeling knife blades.
Tail group will be completely finished/hinged ,lined up and ready to glue but not final installed to fuse to ease packing in the shipping box, as project is nearing completion I also speculate construction of the shipping container… will most probably be my standard thick wall (22mm) foam interior box that is reinforced externally with double flute (5mm) cardboard which is glued on entire foam surface, result is a very rigid structure that greatly assures safe international shipping… also lowers appreciably the shipping cost as it is quite lightweight.
Tasos


kazaklisglider- Bronze Member

- Posts : 45
Join date : 2019-09-13
Age : 59
Location : Greece
 Re: New Quickie 100 micro pylon racer project
Beautiful workmanship Tasos..Looking forward to seeing them up for sale.

balogh- Top Poster


Posts : 4958
Join date : 2011-11-06
Age : 66
Location : Budapest Hungary
Page 1 of 4 • 1, 2, 3, 4 
 Similar topics
» Willy Nillie's Shoestring micro racer powered by COX TeeDee010
» Tigercat RC pylon racer build project
» 1959 Berkeley Impulse Single Channel Pylon Racer Build
» TD .010 Micro Cam Racer
» Micro CAM Racer TD .010 Video
» Tigercat RC pylon racer build project
» 1959 Berkeley Impulse Single Channel Pylon Racer Build
» TD .010 Micro Cam Racer
» Micro CAM Racer TD .010 Video
Page 1 of 4
Permissions in this forum:
You cannot reply to topics in this forum

 Rules
Rules


