Log in
Search
Latest topics
» Tee Dee .020 combat modelby rdw777 Today at 5:07 pm
» Free Flight Radio Assist
by rdw777 Today at 4:51 pm
» My N-1R build log
by akjgardner Today at 12:39 pm
» Purchased the last of any bult engines from Ken Enya
by getback Today at 12:05 pm
» Funny what you find when you go looking
by rsv1cox Yesterday at 3:21 pm
» Landing-gear tips
by 1975 control line guy Yesterday at 8:17 am
» Cox NaBOO - Just in time for Halloween
by rsv1cox Tue Nov 19, 2024 6:35 pm
» Canada Post strike - We are still shipping :)
by Cox International Tue Nov 19, 2024 12:01 pm
» Duende V model from RC Model magazine 1983.
by getback Tue Nov 19, 2024 6:08 am
» My current avatar photo
by roddie Mon Nov 18, 2024 9:05 pm
» My latest doodle...
by TD ABUSER Mon Nov 18, 2024 11:30 am
» Brushless motors?
by rsv1cox Sun Nov 17, 2024 6:40 pm
Cox Engine of The Month
New Quickie 100 micro pylon racer project
Page 2 of 4
Page 2 of 4 •  1, 2, 3, 4
 Re: New Quickie 100 micro pylon racer project
Man that's slick looking !! Very Fine workmanship !! 


getback- Top Poster


Posts : 10439
Join date : 2013-01-18
Age : 67
Location : julian , NC
 Re: New Quickie 100 micro pylon racer project
Hello,
Thank you all for your kind comments,
I like to think of good building efforts as just modeling love acting on materials we all like to handle and build on, this building love really goes back In my early teen years (as with most of us!)… I can still vividly remember my early scratch building efforts and first experience of lovely wood smell with satin smooth feel when handling quality Pactra balsa sheets… and of course my first Top Flight Monokote covering job …truly magic moments!
Regards Tasos.

kazaklisglider- Bronze Member

- Posts : 45
Join date : 2019-09-13
Age : 59
Location : Greece
 Re: New Quickie 100 micro pylon racer project
Hello,
I hope you are all doing well and despite this is cold winter time still tinkling with your wonderful Cox engines!
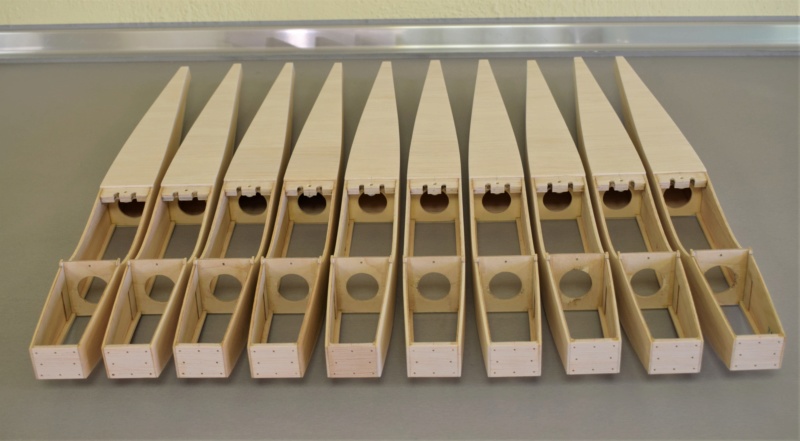
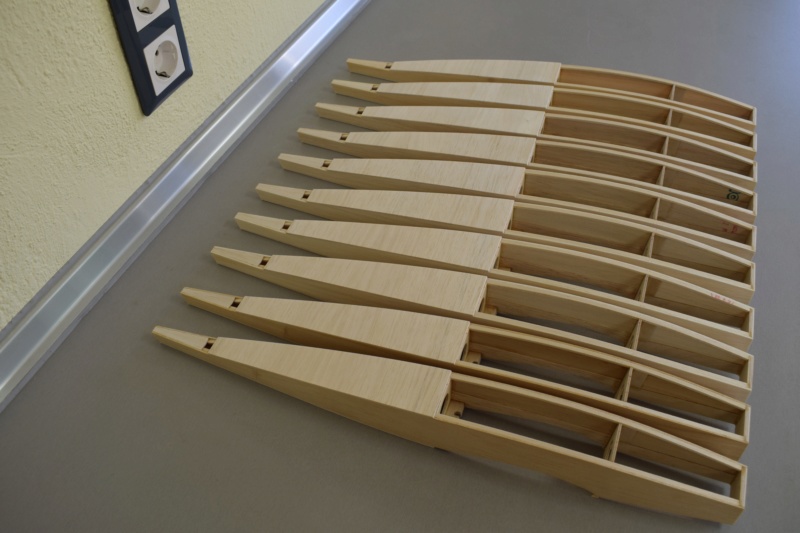
Have been working on the micro Quickie 100 project regularly so can present some more photos on progress, as small details are added airframes are evolving to their final shape…I am quite happy with results.
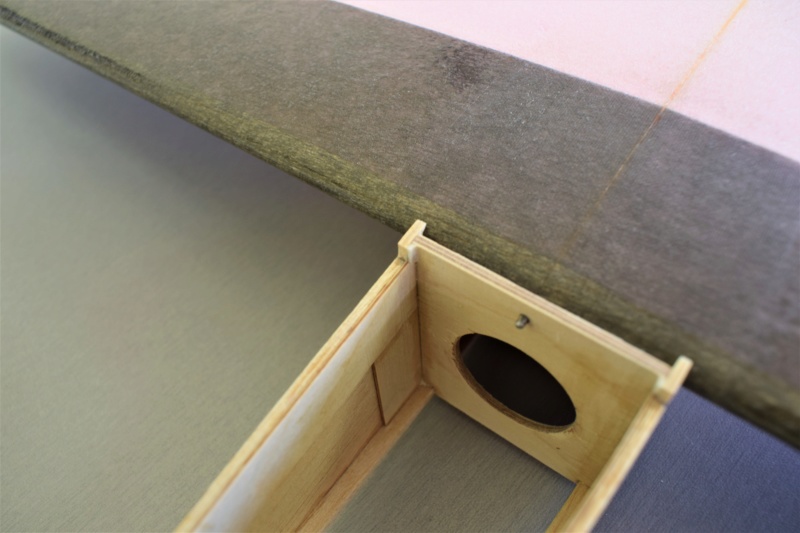
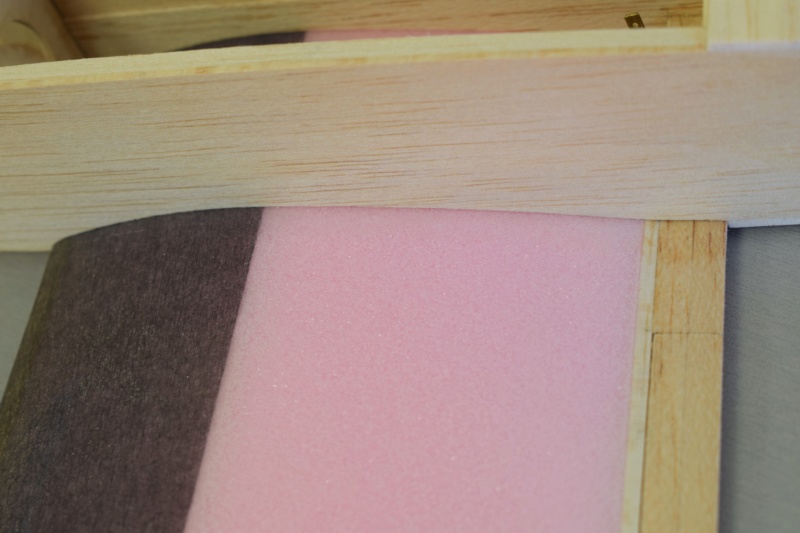
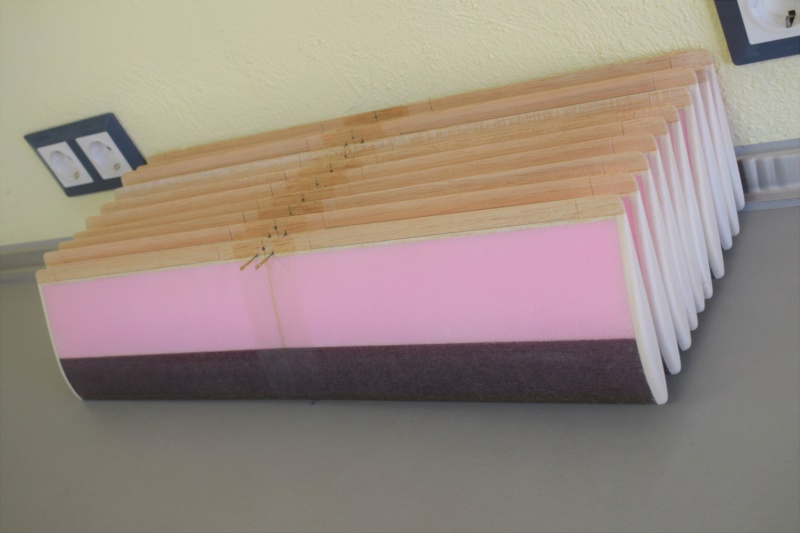
- Wings have been final joined using slow cure epoxy, special attention was given to ensure zero incidence deviation between panels.
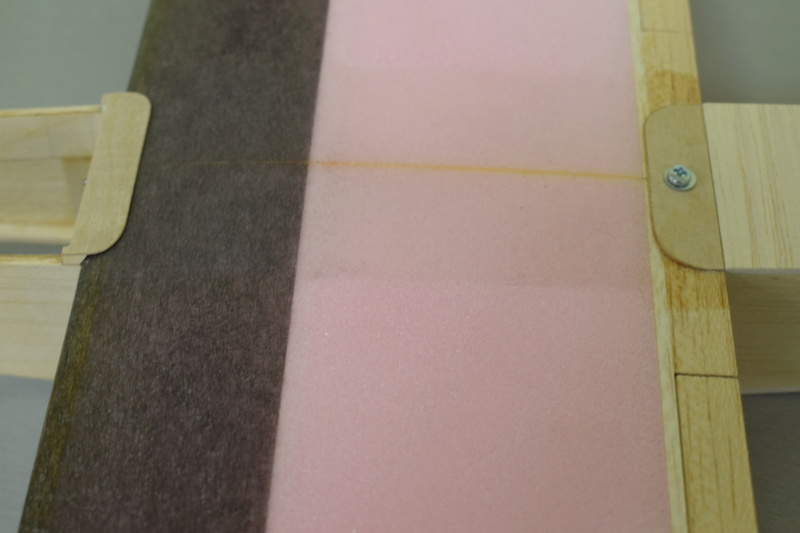
- Center reinforcement of 25gr/m glass added with overlap at LE for additional strength at wing pin area.
- Steel wing pin is drilled through entire width of wood LE plus some foam portion, 24h thin laminating epoxy glued… highly secure.
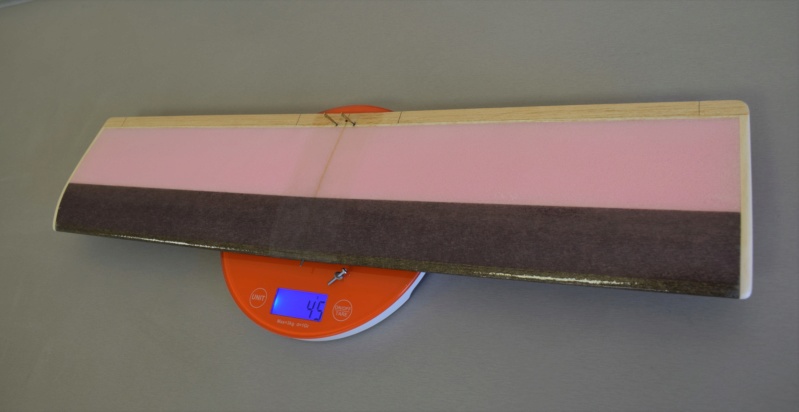
- Finished wings average 45gr (+/-5%) complete with mounting bolt.
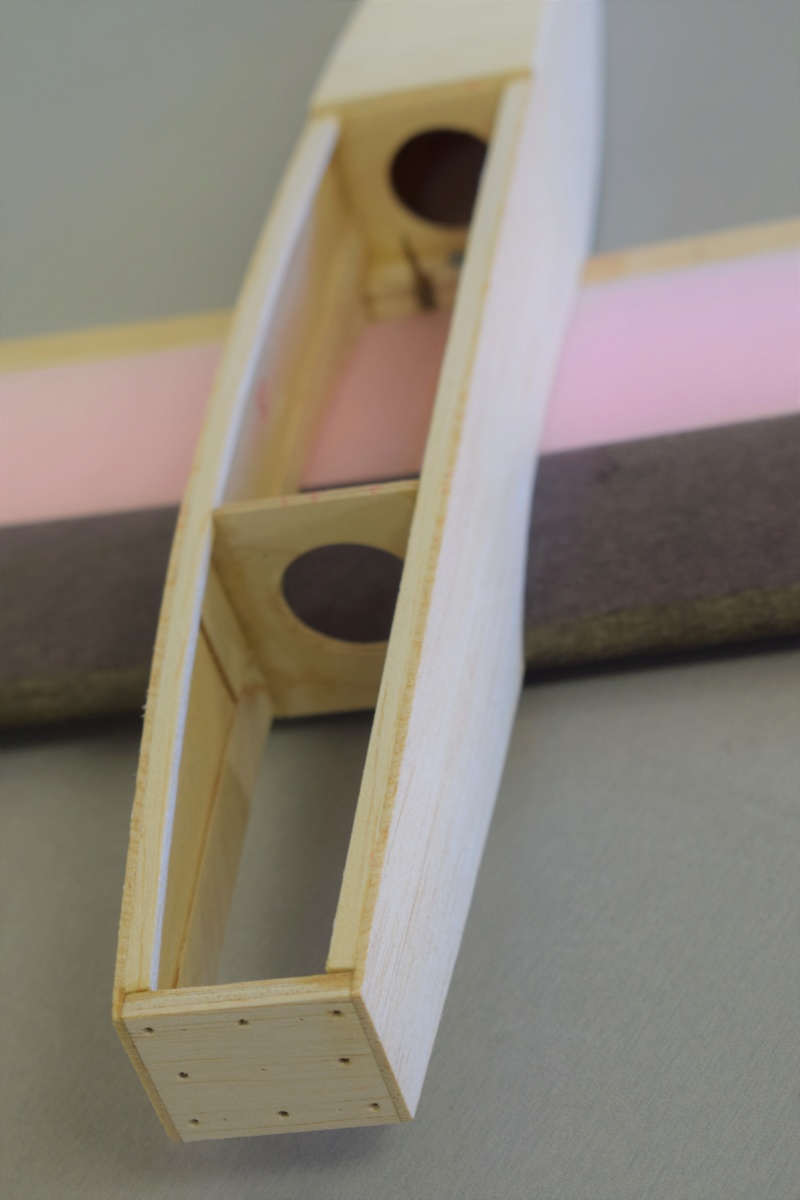
- Fuse rear decking completed with contest/lightweight 2mm sheeting applied cross grain for a very rigid aft structure.
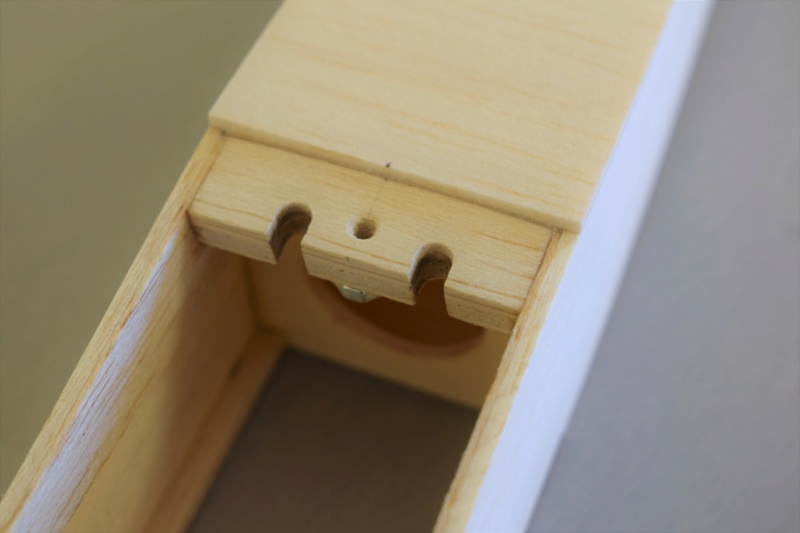
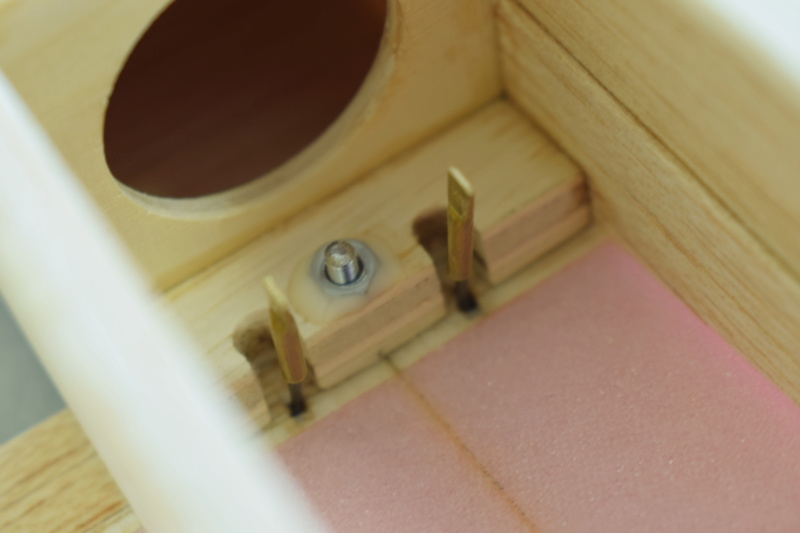
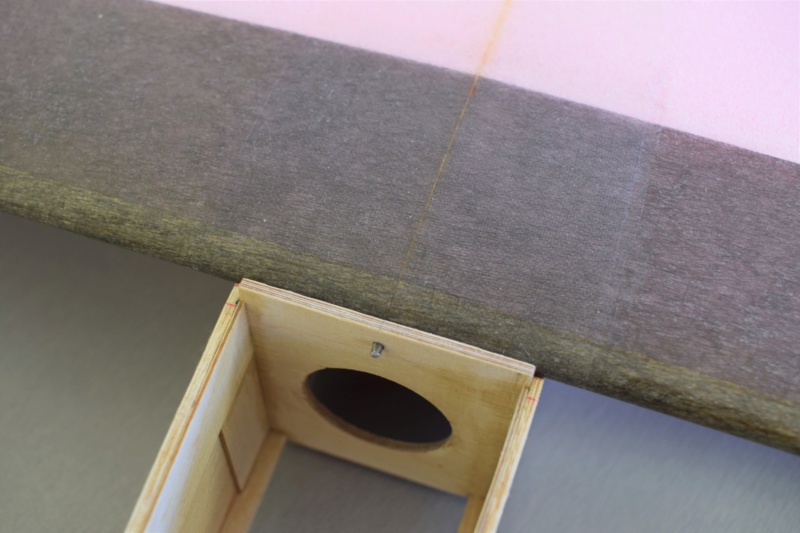
- Wing mount is added and accurately drilled/bolt nut glued securely in place, have milled sufficient relief groove area to allow for more than enough aileron torque rod throw.
- Firewall is added/glued on using quality slow curing epoxy that was additionally post cured to ensure joint strength against engine vibration and stress fatigue…pilots can safely use more powerful engines than a .020 TD with no issues.
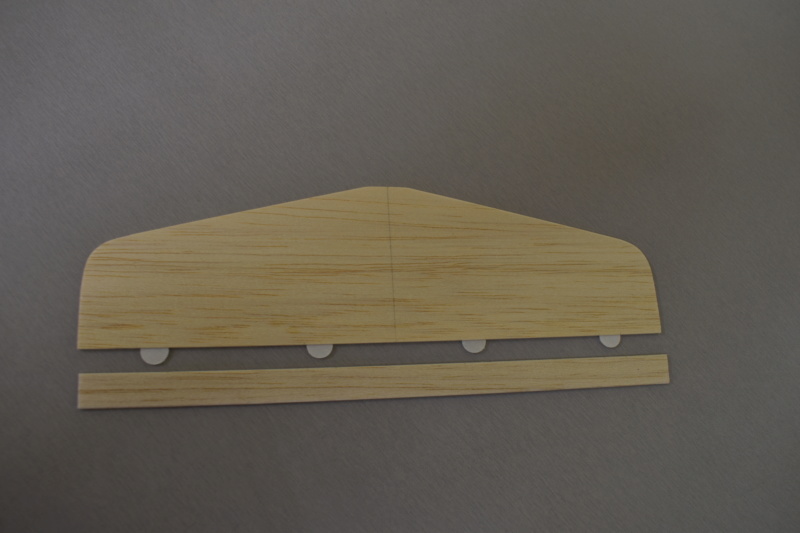
- Rear and forward thin birch ply fairing plates added to streamline wing/fuse junction and provide local strength…minimizing drag on small models is very important as attention to every small detail adds to overall efficiency especially at high speeds.
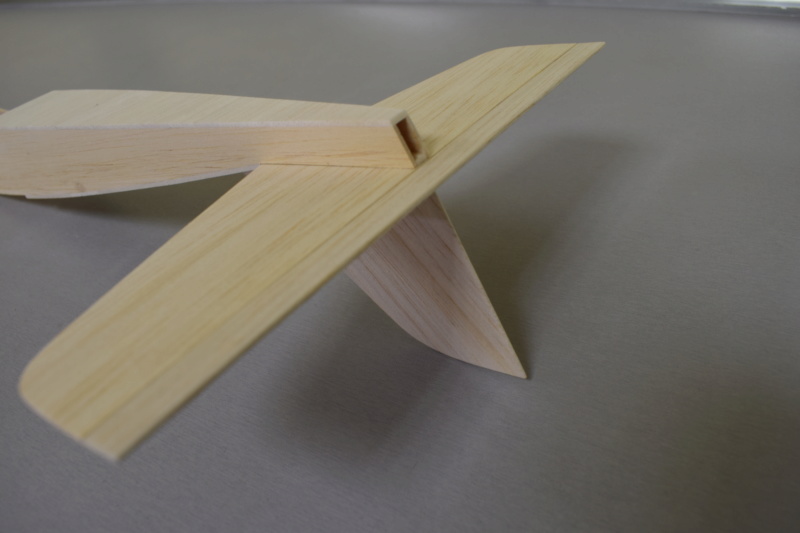
- Sufficient space is left at rear opening of fuse for elevator horn to be hidden and out of the slipstream…horns will be of the same material/construction as aileron torque rods.
What remains is adding a number of wood pieces/ local reinforcement at critical landing gear area as it will be of removable concept / slide fit, also removable hatch construction and completion of top deck using heavier C grain sheet applied cross grain.
Landing gear forming /elevator pushrod and final fuse sanding is the last operation…I foresee that approx. ten working days are still required for completing all remaining details… will then present final airframes along with price/shipping details etc.
My sincere thanks to all for sharing and following this presentation with positive feelings!
Tasos


kazaklisglider- Bronze Member

- Posts : 45
Join date : 2019-09-13
Age : 59
Location : Greece
 Re: New Quickie 100 micro pylon racer project
Extremely Nice Workmanship.

akjgardner- Diamond Member


Posts : 1601
Join date : 2014-12-28
Age : 65
Location : Greensberg Indiana
 Re: New Quickie 100 micro pylon racer project
Very Professional , all the joints are so nice and clean , with plenty of reinforcement ! 


getback- Top Poster


Posts : 10439
Join date : 2013-01-18
Age : 67
Location : julian , NC
 Re: New Quickie 100 micro pylon racer project
Hi Tasos have you added the blind nuts to the firewall mounting holes?

balogh- Top Poster


Posts : 4958
Join date : 2011-11-06
Age : 66
Location : Budapest Hungary
 Re: New Quickie 100 micro pylon racer project
Hello,
Nice to hear your kind comments, thank you!
Yes Andras I will install hardware nuts for the particular engine used on your model, I believe you already mentioned will use a reed valve .049 on red plastic Goldberg tank so you can bolt it right away… additionally if you intend to later use the .020TD I could add more nuts on the respective holes for its short or long (tank) mount.
Of course will do the same operation for other pilots wishing to acquire my micro Quickie 100… just send me a message or email at kazaklisglider@yahoo.gr with your particular engine choice.
In general the entire rear of firewall will be totally accessible through the quite large bottom hatch I provide so future modifications/additions are very easily done… removable hatch is also practical to install a small internal tank/small Rx battery etc. as there is quite enough space.
Equipment accessibility and easy service is a concept I exercise in all my models… it contributes to true model enjoyment!
Tasos.

kazaklisglider- Bronze Member

- Posts : 45
Join date : 2019-09-13
Age : 59
Location : Greece
 Re: New Quickie 100 micro pylon racer project
Thanks Tasos..when do you plan to start selling the Quickie 100? I will still have to decide how to cover the foam wing the easiest..

balogh- Top Poster


Posts : 4958
Join date : 2011-11-06
Age : 66
Location : Budapest Hungary
 Re: New Quickie 100 micro pylon racer project
Hi Andras,
Models will be offered for sale at approx. the 20th of this month,
I believe have already advised on a number of alternative finishing methods… my personal all time favorite choice for finishing foam is plastic based films (such as Solarfilm) as most have true low heat adhesion plus highly flexibility/lightweight and are very easy to apply.
If one precedes application with a brushed on light coat of Balsarite (or just thinned ordinary wood white glue) they stick much better and require even lower activating heat.
This «lowest possible” application temperature concept is a must for all covering materials (plastic or polyester based) as it preserves material flexibility allowing for dimensional variations due to environment temperature changes and wood flexure/shrinkage… future air bubble forming can be greatly reduced by just using a low initial heat.
I do not advise using a heat gun (except maybe on open bay/built up structures) as temperature cannot be controlled locally/accurately… personally I always use my trusty small covering iron used with a cotton cover.
As I regretfully see Solarfilm has ceased current production so other possible alternatives may be Oracover light… but do believe it can be still found on Solarfilm official e-shop remaining stock and various models shops who stocked it.
Top Flite Monokote if used in conjunction with an undercoat of balsarite etc. can be applied with much reduced heat and despite being polyester based it has very good flexibility so a good candidate also… also superior to plastics as far as longevity is concerned.
Tasos

kazaklisglider- Bronze Member

- Posts : 45
Join date : 2019-09-13
Age : 59
Location : Greece
 Re: New Quickie 100 micro pylon racer project
Thanks Tasos. My preference is Oracover light applied at low temp and with a textile under the iron.

balogh- Top Poster


Posts : 4958
Join date : 2011-11-06
Age : 66
Location : Budapest Hungary
 Re: New Quickie 100 micro pylon racer project
Hello,
The micro Quickie 100 project is almost finished with a just a few secondary details remaining such as producing pushrods, tail skids/elevator horns and final sanding of fuselage…rest of airframe is already complete down to the last detail.
By middle of this week I will make the final presentation photos of completed/assembled model along with price, shipping cost etc.
Until then I present some photos of last parts… very last photo is taken on a moment when lovely soft evening sunlight beam directly hit the hatch area of one model and it made me grab the camera to capture the unique light… I hope you enjoy it!
Progress work in photos shows:
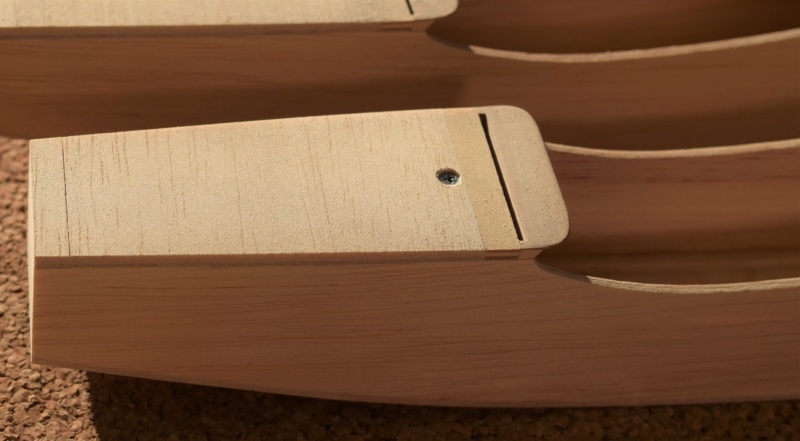
- Hatch is made from laminations of balsa with additional center ply stringer reinforcement… this concept results high rigidity without significant weight increase, hatch features front tongue engagement with a single rear screw for highly secure but easy removal.
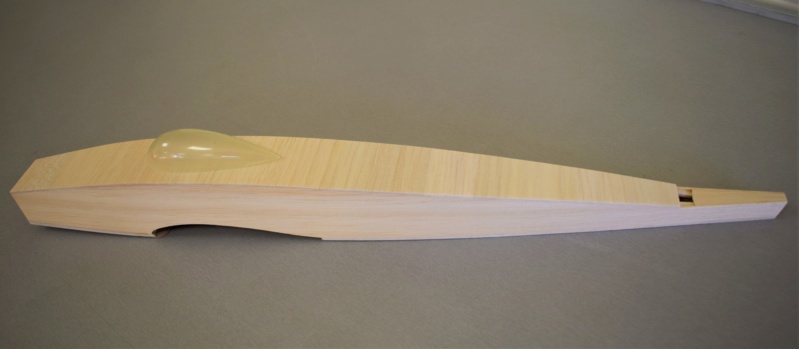
- Top sheeting is applied cross grain for torsional rigidity using selected wood of increased hardness towards the nose area, last section adjacent to firewall is high strength C grain.
- Landing gear is made from using Swedish steel product aimed for spring wire use, I have formed gear in a special jig to ensure repeatable accuracy… it is completely removable with easy slide fit to ease transport. During bending slight camber and toe-in is incorporated in axles to aid tracking in takeoff and landing, you may notice in the photos blue dots on the gear legs to mark the correct front/firewall facing side.
Have also increased overall gear clearance height to be sufficient for five inch props to be used on 0.49 engines.
Currently I am writing a short manual to aid finishing and preparing the model for flight, also working on the composite foam/cardboard shipping boxes.
Speaking of jigs… it took more than a dozen of custom jigs and tooling/fixtures to properly produce even this small/ limited number of Quickie 100 airframes, I am completely satisfied with final results as project went very smoothly… sharing various progress phases with all of you made the project truly enjoyable!
Tasos.
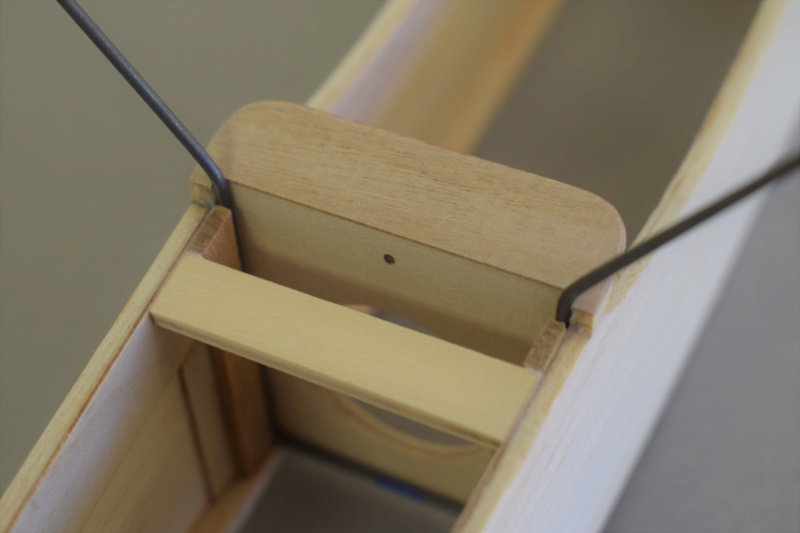
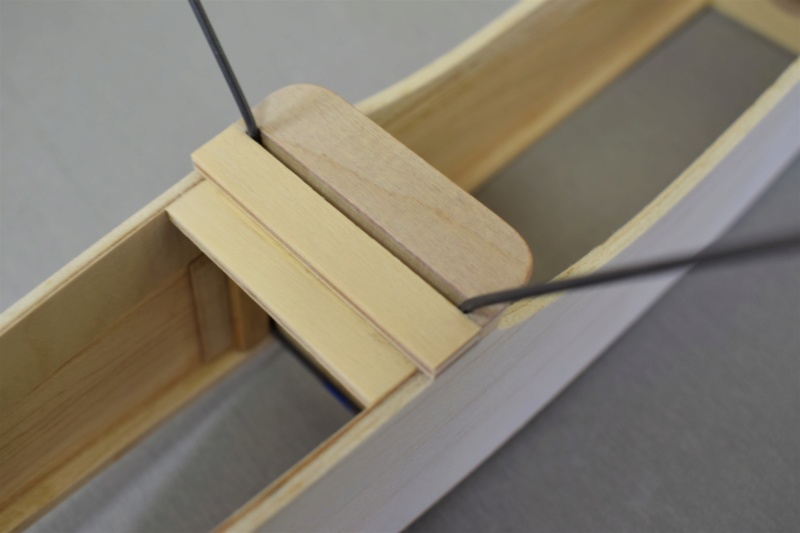


kazaklisglider- Bronze Member

- Posts : 45
Join date : 2019-09-13
Age : 59
Location : Greece
 Re: New Quickie 100 micro pylon racer project
Beautiful details Tasos. I suggest you address in the manual the usual heat-shrink Oracover or similar method of covering the foam wing ( temperature setting of the iron, whether the foil can be removed from the foam if applied incorrectly and replacement is needed etc.) that would help a lot. I e.g. am discouraged to take the chance of painting the wing or applying some unorthodox method.
Sorry for my concerns, other builders equipped better than me may find it simple..
Sorry for my concerns, other builders equipped better than me may find it simple..
Last edited by balogh on Sun Feb 23, 2020 1:28 pm; edited 1 time in total

balogh- Top Poster


Posts : 4958
Join date : 2011-11-06
Age : 66
Location : Budapest Hungary
 Re: New Quickie 100 micro pylon racer project
Hi Andras,
Yes you are very right and of course I was planning to include instructions on the manual for correct method of applying a low heat shrink covering… will also cover a number of practical alternative finishing methods, it’s quite easy to finish a dense surface XPS foam like the one I used for the wings as it acts much like lightweight balsa.
The major difference is lack of wood pores and a strict necessity to use an initial layer of Balsarite or thinned ordinary white wood glue to aid adhesion at low heat settings.
For those not wishing to use film covering a simple two layer thin epoxy glue finish is all that is required to completely seal the foam surface.
Airframe is small and cost effective on materials needed to finish, a couple of evenings of work and model is ready for radio/engine installation… every bit of hardware is included so no need to get additional materials other than finishing.
Tasos

kazaklisglider- Bronze Member

- Posts : 45
Join date : 2019-09-13
Age : 59
Location : Greece
 Re: New Quickie 100 micro pylon racer project
XPS foam tends to soften at around 74 deg C (165 deg F), the glue in Oracover requires a temp of over 80 deg C (176 deg F) to activate. You might get away with it by keeping the iron moving constantly.
One of my club colleagues uses XPS foam to build foam wings for his turbine jets. These are large models and he covers them with brown parcel paper (not recycled) and thinned PVA glue (Elmers). The finish looked crinkly when first applied but dried perfectly smooth when dried. He made it clear that you need to do both sides to prevent warping.
He has then applied all sorts of finishes dope, polyeurathane and water based finishes. He has applied Oracover Lite over the brown paper but everything is then fuel proofed as his fuel is paraffin (kerosene). The brown wrapping paper adds real strength to the foam but he doesn't cut the wings soild but hollowds them to save weight.
Here is a chap doing this

ian1954- Diamond Member

- Posts : 2688
Join date : 2011-11-16
Age : 70
Location : England
 Re: New Quickie 100 micro pylon racer project
Hi Ian,
Thank you for your contribution,
Yes standard Oracover (Polyester based) needs higher heat to activate its adhesive layer so is basically unsuitable for XPS… In one of my previous posts I suggested a number of ways to finish the wing and clearly excluded using it… I also mentioned using thinned white wood glue (such as Elmer’s) as a base coat and doing both wing sides simultaneously to prevent warping.
I quote the whole text:
Brown (Kraft) paper finishing is actually a quite old method and goes way back in the 70’s when builders looked for a quick/robust and cost effective way to cover foam wing panels… like all other methods it has its strong and weak points.
For this small model lightweight Japanese tissue is a better choice as commonly used/available versions of brown paper weigh approx. 90 to 140gr/sq. meter so quite heavy for this application.
The wing is extremely strong and stiff and could be flown as is so finish is aimed only to cover exposed foam and fuel proofing.
I am currently preparing the detailed manual for the Quickie in which will cover a number of finishing methods focusing on the easiest ways to achieve a lightweight practical finish.
Tasos.
Thank you for your contribution,
Yes standard Oracover (Polyester based) needs higher heat to activate its adhesive layer so is basically unsuitable for XPS… In one of my previous posts I suggested a number of ways to finish the wing and clearly excluded using it… I also mentioned using thinned white wood glue (such as Elmer’s) as a base coat and doing both wing sides simultaneously to prevent warping.
I quote the whole text:
kazaklisglider wrote:
The reinforcement in the wing top/bottom forward surface is a carbon D-tube that is seamless meaning it is completely wrapped in a single/no joint piece, it is molded with 24h R&G products L-20 laminating epoxy and adds considerable stiffness both torsional and span wise… it is a key structural member.
The exposed foam wing rear surface can be finished in a number of alternative ways:
- Covered with a low heat plastic film such as Solarfilm… generally polyester types such as Oracover need high heat so unsuitable for direct foam covering.
- Covered with ordinary lightweight tissue applied with brushed on thin epoxy, following can be painted with fuel proof type color paint.
- Covered in 25gr/m2 glass cloth and laminating epoxy… color by fuel proof type of paint.
- Brushed on with two light layers of thin epoxy… further color painted with fuel proof type paint.
- Brushed on with two light layers of thin laminating epoxy that has been pre-colored with a suitable color paste.
- Painted with a can spray of water based color paint suitable for foam surfaces… fuel proofing by a further light layer of thin epoxy.
- Painted with a couple of layers of brushed on water based clear varnish to seal the foam cell… further color painted with a fuel proof type paint.
- Brushed on with an emulsion of slightly thinned white wood glue applied in several layers to completely seal foam cell… further color painted with fuel proof type paint.
Methods using a water based type glue or varnish require simultaneously doing the top and bottom on each wing panel... all above methods have specific advantages or drawbacks, best method is the one that suits each user according to his experience and materials available.
Over the years (or decades!) have done all the above plus some more experimental types of finish on EPS and XPS foam… probably the easiest/quickest method is brushing on two layers of thin laminating epoxy pre-colored with a color paste, if this is not available a substitute for epoxy color paste is ordinary enamel paint or stained glass transparent enamel type paints, a couple of drops only to just color the epoxy is required… much more can hinder the epoxy from completely curing.
Brown (Kraft) paper finishing is actually a quite old method and goes way back in the 70’s when builders looked for a quick/robust and cost effective way to cover foam wing panels… like all other methods it has its strong and weak points.
For this small model lightweight Japanese tissue is a better choice as commonly used/available versions of brown paper weigh approx. 90 to 140gr/sq. meter so quite heavy for this application.
The wing is extremely strong and stiff and could be flown as is so finish is aimed only to cover exposed foam and fuel proofing.
I am currently preparing the detailed manual for the Quickie in which will cover a number of finishing methods focusing on the easiest ways to achieve a lightweight practical finish.
Tasos.

kazaklisglider- Bronze Member

- Posts : 45
Join date : 2019-09-13
Age : 59
Location : Greece
 Re: New Quickie 100 micro pylon racer project
Lovely Tasos  on the consistency and the craftsmanship thank you for sharing!
You are nearing the end I assume you will sell these on Ebay? If so have you decided on a price?


 on the consistency and the craftsmanship thank you for sharing!
You are nearing the end I assume you will sell these on Ebay? If so have you decided on a price?


1/2A Nut- Top Poster

- Posts : 3536
Join date : 2013-10-20
Age : 61
Location : Brad in Texas
 Re: New Quickie 100 micro pylon racer project
Hello Brad,
Thank you!
I plan on initially offering the micro Quickie 100 on CEF and RCG to give fellow members the opportunity to buy the model at reduced cost of 12% which is associated with EBay listings.
Yes have finalized on price and will post it along with final presentation photos very soon.
Tasos.
Thank you!
I plan on initially offering the micro Quickie 100 on CEF and RCG to give fellow members the opportunity to buy the model at reduced cost of 12% which is associated with EBay listings.
Yes have finalized on price and will post it along with final presentation photos very soon.
Tasos.

kazaklisglider- Bronze Member

- Posts : 45
Join date : 2019-09-13
Age : 59
Location : Greece
 Re: New Quickie 100 micro pylon racer project
Hello,
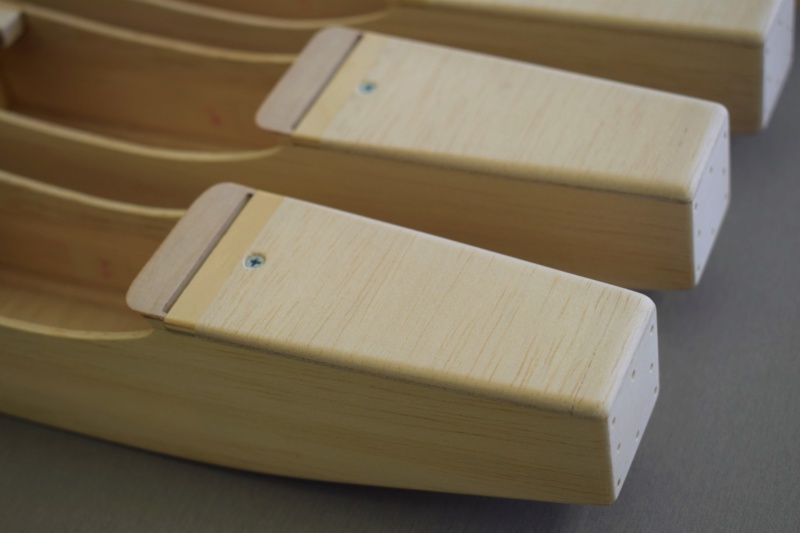
Before presenting the completed/assembled model on this weekend I present some photos of last details:
- Tail skid is very lightweight but able to resist side forces during a not so perfect landing etc… have opted not to final glue the wire to the ply saddle and fuse as doing so would make finishing/covering of rear fuse more difficult, after final gluing an additional layer of 25gr/sq. meter of glass cloth on top of the ply will complete the assembly.
- Pushrods are made from hand selected 4mm diameter hardwood that is absolutely straight and knot free, they are stiff and weigh just 2grams, ends are turned on micro wood lathe and drilled to receive the steel wire ends with a push fit… approx. 20mm of insertion length is available at either end so final length of entire pushrod is easily adjustable to suit particular servo position etc.
A clear benefit by using wooden pushrods is almost the same coefficient of thermal expansion etc. with the rest of fuse etc. so minimal elevator trim changes when flying in different conditions or humidity changes.
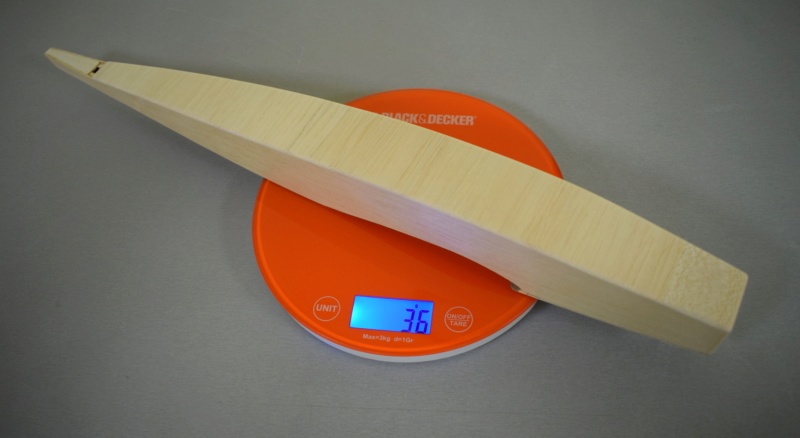
- Fuselages are final sanded and ready for finishing… total weight of a complete fuse average 36grams with +2/-2 gr deviation between each one.
Last photo shows three (4x4 inch) pieces of exactly the same XPS material I used for the wing cores… will provide these with every model package so can make safe tests of your particular covering film/paint method etc. before actually committing to the wing itself.
Photos of assembled model/ price and grand finale of presentation following at this weekend… stay tuned!!!
Regards Tasos


kazaklisglider- Bronze Member

- Posts : 45
Join date : 2019-09-13
Age : 59
Location : Greece
 Re: New Quickie 100 micro pylon racer project
Hello,
GRAND FINALE!!!
They say all good things eventually must come to an end, I am glad to say this is a happy ending as final results are very satisfying even by my own strict standards…
It took a lot of effort and dedication but your encouragement along the way meant a lot to me… so a big THANK YOU! to all who lovingly shared this project.
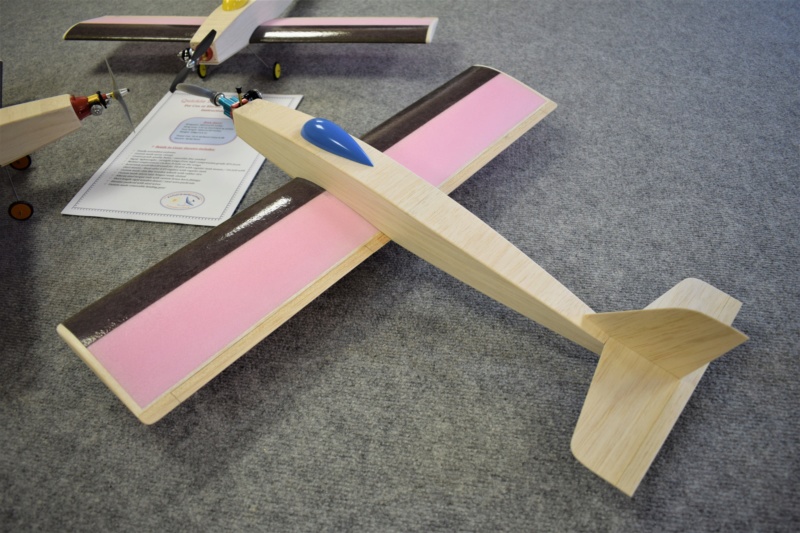
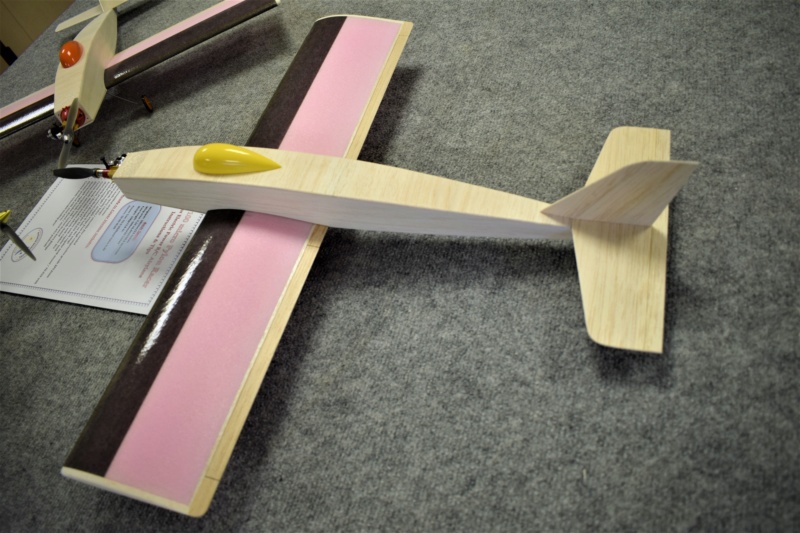
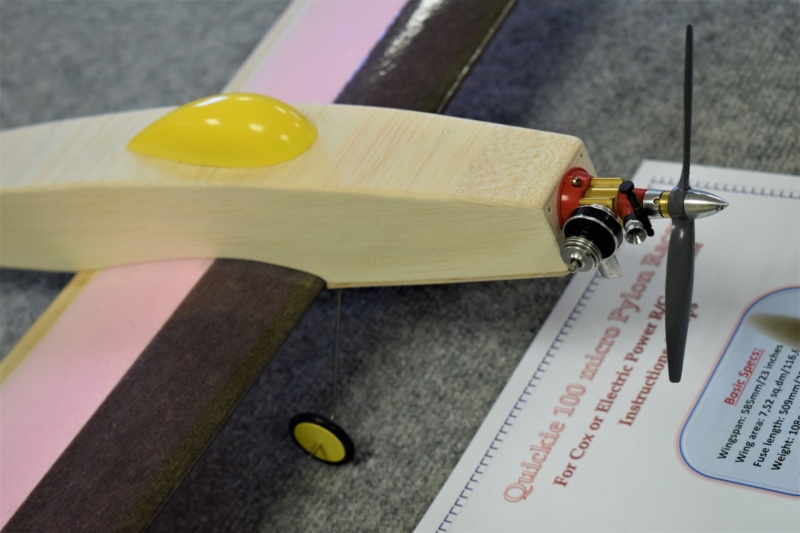
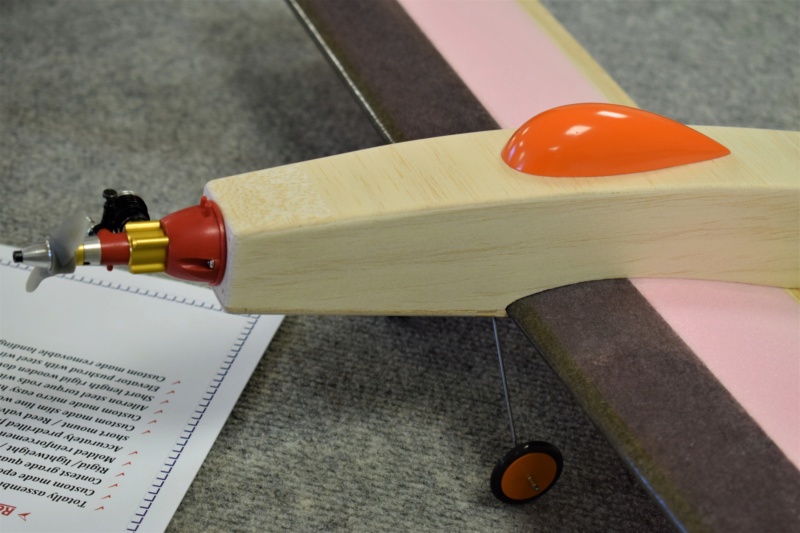
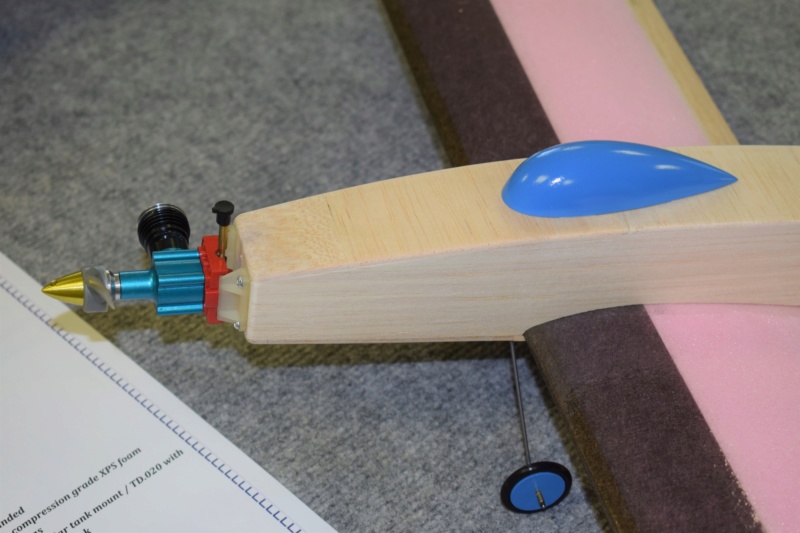
Construction details are already covered in previous photos/text so I just let you enjoy three of the completed models… there is a color selection for the canopy and slim line wheels:
- Clear varnish gloss/semitransparent effect
- Brilliant white/ gloss
- Jet black / gloss
- Sky blue/gloss
- Frosty silver/ gloss
- Traffic red/ gloss
- Light yellow/ gloss
- Pure orange/ gloss
Models will be supplied with all necessary hardware to aid equipment /engine installation… practically nothing extra to buy or additional airframe work on your part except finishing… Have designed the Quickie stickers a couple of days ago and I hope you will use them on wings and fin, also furnished along with my logo are Cox engine stickers.
Price for this specialized/limited number model is a modest 122 USD and 34 for handling/shipping… PayPal accepted plus 3% fees.
Total is 160$ USD shipped worldwide with tracking number.
Will carefully pack these valuable models in custom built containers consisting of an inner thick/dense foam box lined externally with double flute cardboard that is glued on… much like a foam core/ hard skinned wing ,very rigid/lightweight concept that I use for a number of years ensuring safe international transport.
Contact by pm or at kazaklisglider@yahoo.gr
Now please allow me to pour a nice Scotch and listen to some rock classics… maybe doing some reminiscing of Quickie 100 work details gone by… and surely dreaming of the next project!!!
PS: Have spent a very enjoyable evening with my best friend and longtime flying buddy Sotiris Reizis selecting engines for the Quickie last photo session… we hope you enjoy the outcome!
Tasos.


kazaklisglider- Bronze Member

- Posts : 45
Join date : 2019-09-13
Age : 59
Location : Greece
 Re: New Quickie 100 micro pylon racer project
Yeah looks real good congratulations Tasos! 


1/2A Nut- Top Poster

- Posts : 3536
Join date : 2013-10-20
Age : 61
Location : Brad in Texas
 Re: New Quickie 100 micro pylon racer project
Tasos I cannot remember if you have specified the wing span and all-up weight? Can you tell as the main data? Sorry if I have missed them.
Also, wiil the kit ship with the tail section and canopy already glued in place? Just asking to see how the fuselage is to be covered i.e. already assembled or piece by piece.
Thanks, Andràs
Also, wiil the kit ship with the tail section and canopy already glued in place? Just asking to see how the fuselage is to be covered i.e. already assembled or piece by piece.
Thanks, Andràs

balogh- Top Poster


Posts : 4958
Join date : 2011-11-06
Age : 66
Location : Budapest Hungary
 Re: New Quickie 100 micro pylon racer project
Hello Andras,
You haven’t missed the main data as I was waiting to completely finish the airframe to final weigh it… so here they are:
- Wingspan: 585mm/23inch
- Fuse length (excluding elevator/engine): 509mm/20inch
- Wing area: 7.52 sq.dm/116.6 sq. inch/0.809 sq.ft
- Airframe weight: 108gr/3.8oz.
AUW and final wing loading will be dependent on each pilot’s choice of finishing method and equipment installed… the model has an exceptionally high strength to weigh ratio and even when equipped with a reed valve .049 and medium size servos will still have a low wing loading.
Lightest version will be utilizing a TD .020 with tank mount and micro servos/Rx/1S lipo… using this equipment model will have a dead stick low sink rate and glide for a long distance.
Weight is of completed model as shown on the final presentation photos including accessories/hardware.
Models will be shipped with tail section/canopy/tail skid/landing gear completely finished and ready to be glued but not final attached to greatly ease the task of finishing individual components.
Details on how to properly proceed with finishing/equipment/engine installation are covered in the manual.
Tasos.

kazaklisglider- Bronze Member

- Posts : 45
Join date : 2019-09-13
Age : 59
Location : Greece
 Re: New Quickie 100 micro pylon racer project
Tasos you have done a fantastic job on the models in hand , if i could fly R/C in pylion mode i would probably purchase one ... at this time i have a few i need to just get in the air for some trial and error , LOl Enjoyed the build thread and will bee watching for the next one . 


getback- Top Poster


Posts : 10439
Join date : 2013-01-18
Age : 67
Location : julian , NC
 Re: New Quickie 100 micro pylon racer project
Thank you!
Will take the opportunity relating to your comment regarding pylon racer piloting skills to clarify a basic point behind my project:
Yes the Quickie 100 is basically intended for pylon racing but from initial concept I wanted to produce a micro model that is more user friendly than the average an all-out racer.
That is why I have introduced a number of structural and aerodynamic modifications to make the model very stable and devoid of bad handling characteristics especially at low takeoff/landing speeds and during tight turning.
With its low wing loading and attention to minimize drag it will exhibit a good glide performance (dead stick) and soft stall characteristics.
These attributes make also for a really exciting sport model that is relatively safe to fly but still has high speed potential if trimmed/pushed to that performance level.
The name of the game is having relaxed fun and not trying to chase a bad handling model all over the sky… have paid special attention to straightness of structure and accurately rigged wing/stab angles, combined with a conservative CG position and modest control throws model is relatively easy to fly despite racy appearance!
Tasos.

kazaklisglider- Bronze Member

- Posts : 45
Join date : 2019-09-13
Age : 59
Location : Greece
 Re: New Quickie 100 micro pylon racer project
Thanks Tasos for the detailed information.

balogh- Top Poster


Posts : 4958
Join date : 2011-11-06
Age : 66
Location : Budapest Hungary
Page 2 of 4 •  1, 2, 3, 4
 Similar topics
» Willy Nillie's Shoestring micro racer powered by COX TeeDee010
» Tigercat RC pylon racer build project
» 1959 Berkeley Impulse Single Channel Pylon Racer Build
» TD .010 Micro Cam Racer
» Micro CAM Racer TD .010 Video
» Tigercat RC pylon racer build project
» 1959 Berkeley Impulse Single Channel Pylon Racer Build
» TD .010 Micro Cam Racer
» Micro CAM Racer TD .010 Video
Page 2 of 4
Permissions in this forum:
You cannot reply to topics in this forum

 Rules
Rules


