Log in
Search
Latest topics
» My current avatar photoby GallopingGhostler Today at 7:02 pm
» Cox 020 PeeWee rebuild questions
by LooseSpinner99 Today at 4:38 pm
» music vids.. some of your favorites
by Kim Today at 3:28 pm
» It's the X Wing that has a canard
by rsv1cox Today at 2:23 pm
» New Model Build
by bsadonkill Today at 1:19 pm
» Kofuku Maru Fishing Boat Model
by Levent Suberk Today at 11:39 am
» Free Flight Radio Assist
by rdw777 Today at 11:24 am
» TEE DEE Having issues
by GallopingGhostler Yesterday at 11:38 pm
» Pathé Modeling Videos
by Levent Suberk Yesterday at 2:10 pm
» My latest doodle...
by layback209 Yesterday at 1:20 am
» Drones, pretty nifty...........
by rsv1cox Tue Nov 12, 2024 6:55 pm
» Project Cox .049 r/c & Citabrian Champion
by roddie Tue Nov 12, 2024 6:20 pm
Cox Engine of The Month
Hydro-bat by Vic Smeed: engine probs
Page 2 of 3
Page 2 of 3 •  1, 2, 3
 Re: Hydro-bat by Vic Smeed: engine probs
Good Fun !! Way to go with ingenuity of the putty Knife ! Watching with interest 


getback- Top Poster


Posts : 10431
Join date : 2013-01-18
Age : 67
Location : julian , NC
 Re: Hydro-bat by Vic Smeed: engine probs
[quote="roddie"]
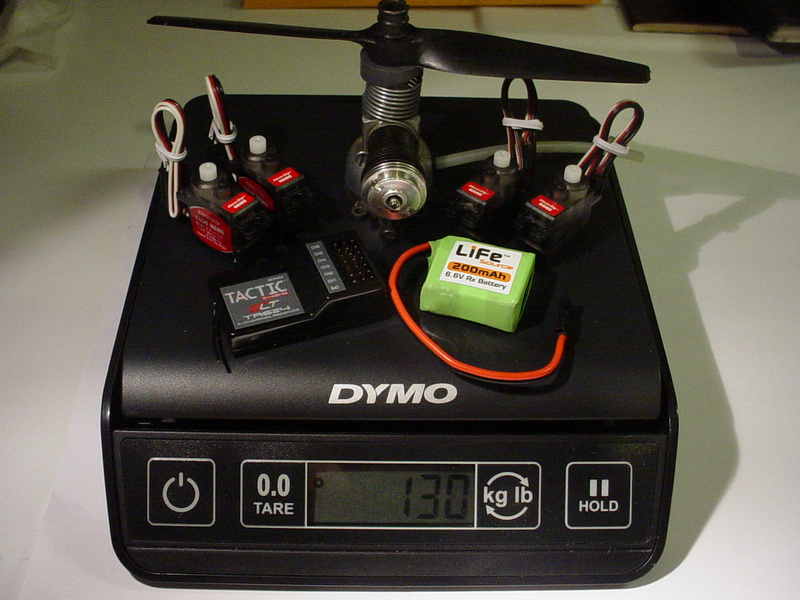
You may remember I bought a Hobbico 200mAh 6.6V 1C LiFe receiver battery a few years ago. Its weight is 15gr. It may require a regulator to drop the voltage to a safer 6V though. It's a TINY battery-pack...
See the below photo for a size-reference on the battery..
Hi Roddie,
I have been using the LiFe batteries for about two years now. I haven't had any problems. The LHS owner says that they drop to about 6V under load. I haven't tested them under a load so I can't verify that. At least I haven't had any jittery servos. I have experienced that before when the voltage was too high.
Bob
OVERLORD wrote:Thanks guys. Only the batteries have any weight. The small servo is very light and the 2.4 gHz receiver even lighter. Vic Smeed's model had a weight of 8 to 9 Oz. That's 230 to 250g. At this stage, it weights 81g.
For sealing, the article says to dope and cover in tissue the hull, then paint. I was thinking of doping the Inside and outside, then to coat with PU varnish all with sanding in between. I like to finish the model with Oracover.
You may remember I bought a Hobbico 200mAh 6.6V 1C LiFe receiver battery a few years ago. Its weight is 15gr. It may require a regulator to drop the voltage to a safer 6V though. It's a TINY battery-pack...
See the below photo for a size-reference on the battery..

Hi Roddie,
I have been using the LiFe batteries for about two years now. I haven't had any problems. The LHS owner says that they drop to about 6V under load. I haven't tested them under a load so I can't verify that. At least I haven't had any jittery servos. I have experienced that before when the voltage was too high.
Bob

fit90- Diamond Member

- Posts : 1341
Join date : 2011-08-11
Location : Naples, Florida
 Re: Hydro-bat by Vic Smeed: engine probs
Greetings,
A diode, 1N4001 comes to mind, will drop 0.6 Volts in the forward direction and handle about 1 Amp in current. Put it in series with the (+) wire in a location where it goes to the receiver. If you put it at the battery though, it will block the charging.
FJ
A diode, 1N4001 comes to mind, will drop 0.6 Volts in the forward direction and handle about 1 Amp in current. Put it in series with the (+) wire in a location where it goes to the receiver. If you put it at the battery though, it will block the charging.
FJ

Forgetful John- Silver Member

- Posts : 60
Join date : 2015-03-03
Age : 70
Location : Sparkling Houston, TX
 Re: Hydro-bat by Vic Smeed: engine probs
Thanks both; Bob and Forgetful John for the info. It would seem safer to use a diode. So.. a short extension-harness for the diode would be in order and would stay connected to the receiver.. and the battery charged independently. I hope I've got that correct..
 Re: Hydro-bat by Vic Smeed: engine probs
10-4, Roddie, that is correct. If you connect the diode backwards, it simply will not work, no damage, just reverse it.
FJ
FJ

Forgetful John- Silver Member

- Posts : 60
Join date : 2015-03-03
Age : 70
Location : Sparkling Houston, TX
 Re: Hydro-bat by Vic Smeed: engine probs
If one has one of those aircraft switch harnesses with charge cord, could simply splice a diode or two into the power line to the receiver. Then when in "off" position for charging, the diodes are bypassed. Those 1N4001 are cheap. Been a while since I last checked, but AFAIK 1N4002, 1N4003, 1N4004, etc. could be substituted.
http://www.vishay.com/docs/88503/1n4001.pdf
Difference is their breakdown voltages, 1N4001 = 50 V, 1N4004 = 400 V.

http://www.vishay.com/docs/88503/1n4001.pdf
Difference is their breakdown voltages, 1N4001 = 50 V, 1N4004 = 400 V.


GallopingGhostler- Top Poster


Posts : 5708
Join date : 2013-07-13
Age : 70
Location : Clovis NM or NFL KC Chiefs
 Re: Hydro-bat by Vic Smeed: engine probs
Thank you again.. and thanks Lieven for a bit of a side-track here. I have always had a huge interest in the most compact/lightest-weight RC gear. A nano-servo should work fine with that small rudder. My ElectriFly (Great Planes) ES50 nano-servos are rated at 16.7oz-in (1.2kg-cm) at 4.8V with an operating voltage of 4.8-6v. Weight is 9gr. If you browse RC "Park flyers".. you'll find feather-weight gear if you need any.
 Re: Hydro-bat by Vic Smeed: engine probs
The past weeks I tried to figure out how te make a light and good working rudder linkage. Originally, the rudder stock is extended above the rear deck and the linkage is above the deck with an idler to connect to the servo in the RC compartment. I think this was to preserve the watertight compartments on both sides of the pylon.
I don’t like this exposed linkage and shortened the rudder stock. The horn will be mounted at 45° otherwise it hits the transom. The fact that the rudder is at an angle gives a funny circular movement of the rudder horn: left to right but also up and down. I first tried to mount an aluminium bent horn and a 0,8mm piano wire but the piano wire is to stiff. This makes it to move too much sideways. That way the push rod could not slide into a fixed tube.
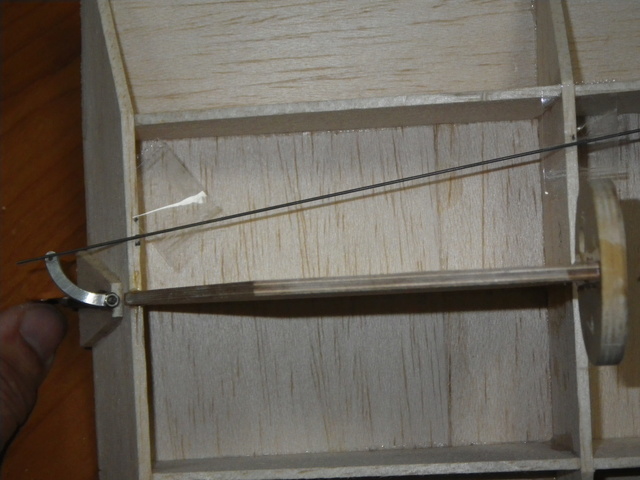
I then wanted to make a quadrant, operated by 2 wires connected to the servo. But this is complex, a bit obsolete and heavy. I found out that the cable which is lead out wire, is strong enough on its own to push/pull the rudder horn. I came up with this:
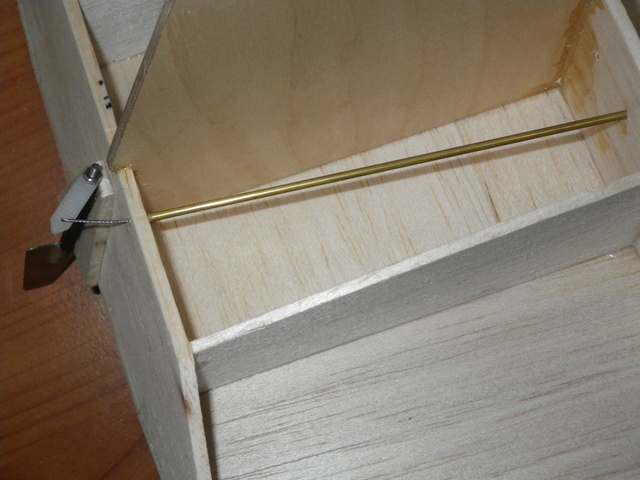
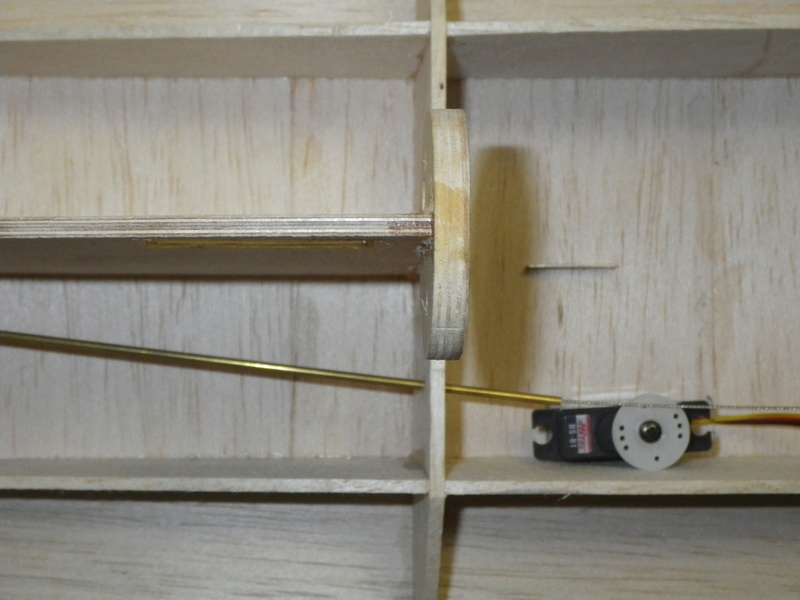
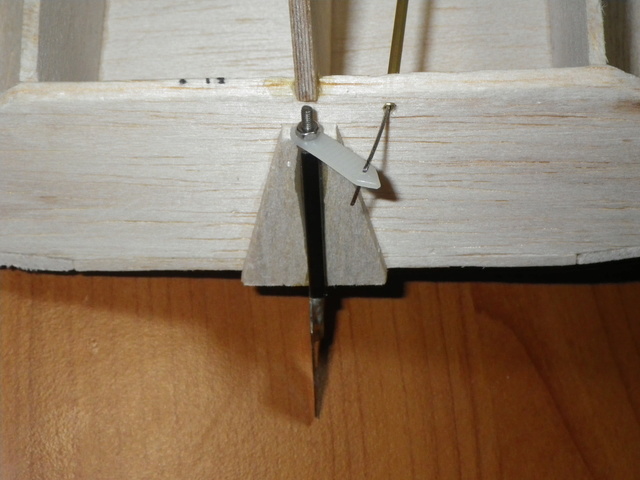
The rudder horn is made of 1 end of a tie wrap and the cable runs in a thin brass tube trough the watertight compartment. This should work with the servo in place.
I don’t like this exposed linkage and shortened the rudder stock. The horn will be mounted at 45° otherwise it hits the transom. The fact that the rudder is at an angle gives a funny circular movement of the rudder horn: left to right but also up and down. I first tried to mount an aluminium bent horn and a 0,8mm piano wire but the piano wire is to stiff. This makes it to move too much sideways. That way the push rod could not slide into a fixed tube.

I then wanted to make a quadrant, operated by 2 wires connected to the servo. But this is complex, a bit obsolete and heavy. I found out that the cable which is lead out wire, is strong enough on its own to push/pull the rudder horn. I came up with this:


The rudder horn is made of 1 end of a tie wrap and the cable runs in a thin brass tube trough the watertight compartment. This should work with the servo in place.

OVERLORD- Diamond Member

- Posts : 1807
Join date : 2013-03-19
Age : 58
Location : Normandy, France
 Re: Hydro-bat by Vic Smeed: engine probs
Lieven, I believe that your angled rudder-pivot will cause the transom to lift on the turning-side. That's not good! Because the pivot is angled; the rudder is not only deflecting water from side to side.. but also "down" when turning. Is it too late to make a wooden-wedge stand-off for the transom, to mount the rudder-tube against? That would solve some issues.. One; it would allow for making the pivot-angle perpendicular.. eliminating the "lifting" forces.. as well as simplifying the linkage-geometry. It would also allow more space for mounting the horn parallel with the transom. I fear that the exposed part of your flex-cable could flex during pushing (turning port) directional-input. If you only run the boat in a clockwise (right-turning) circuit.. it would be less critical. Have you considered installing a rubber-boot pushrod-seal? It allows angular-movement of the pushrod.. while keeping water out of the hull.
I pack the inside of the pushrod-seal in my boat, with petroleum-jelly. It doesn't leak.
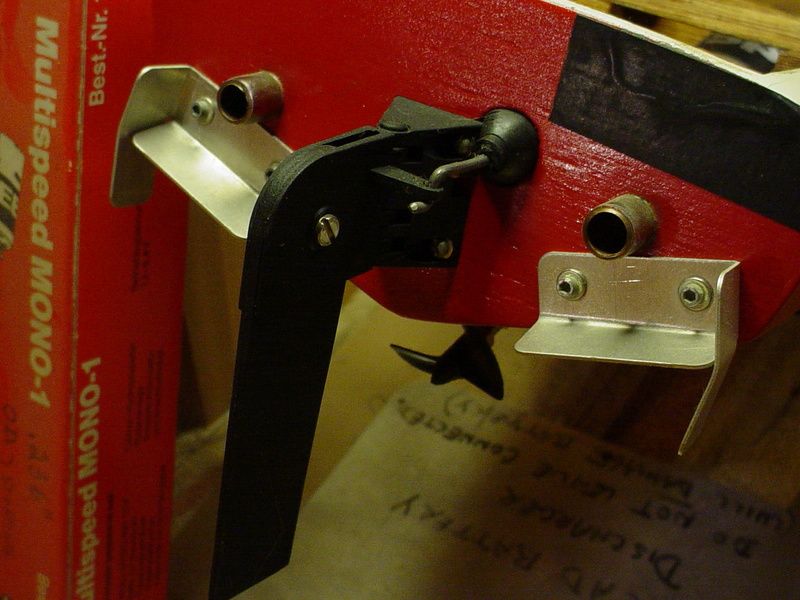
Note the distance between the rudder's pivot-post and the boat's transom. You could replicate this with a stand-off wedge-mount that's closer to vertical. I love the inward transom-angle styling on your model.. but it just doesn't afford itself to the function of a conventional rudder-mount unless modified.
I pack the inside of the pushrod-seal in my boat, with petroleum-jelly. It doesn't leak.

Note the distance between the rudder's pivot-post and the boat's transom. You could replicate this with a stand-off wedge-mount that's closer to vertical. I love the inward transom-angle styling on your model.. but it just doesn't afford itself to the function of a conventional rudder-mount unless modified.
 Re: Hydro-bat by Vic Smeed: engine probs
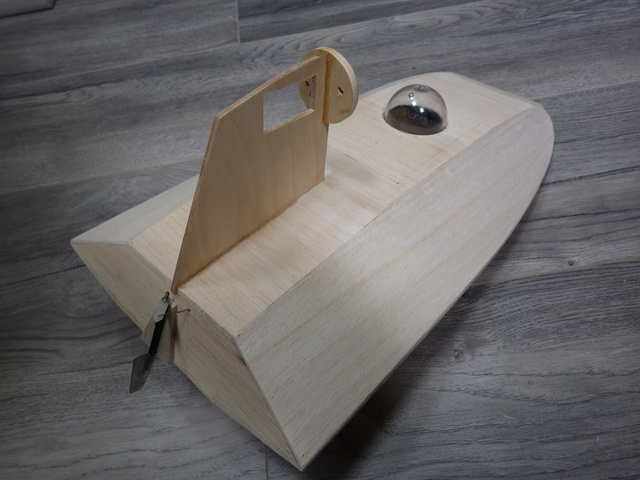
After a summer break, I continued building the Hydro-bat. I sheeted the central top starting from the transom. Before finishing, I glued an aluminium front bumper that is about 2mm more forward than the hull. The aluminium plate was covered with scrap balsa and sanded flush.

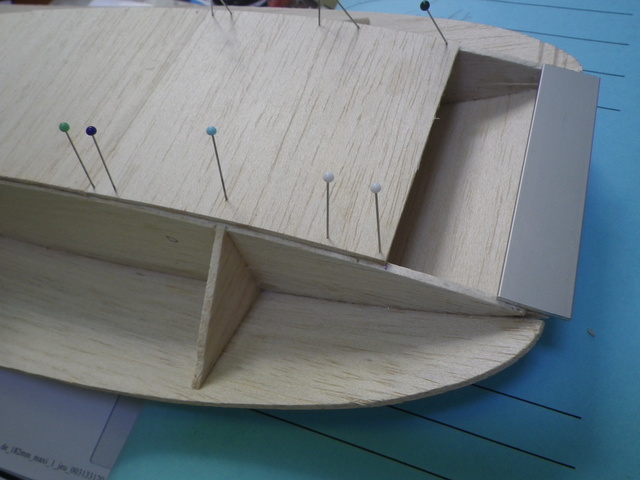
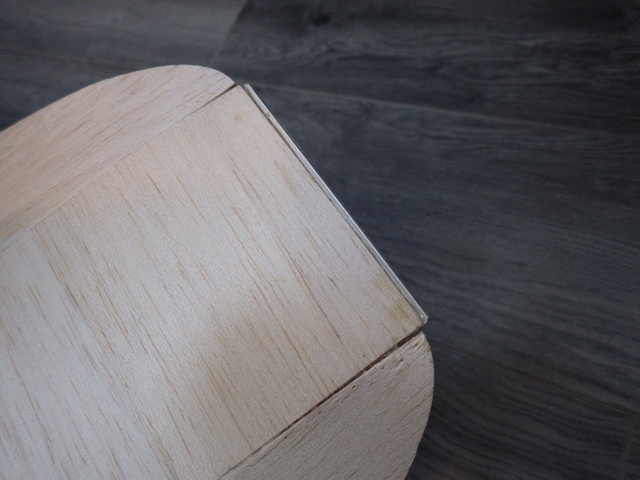
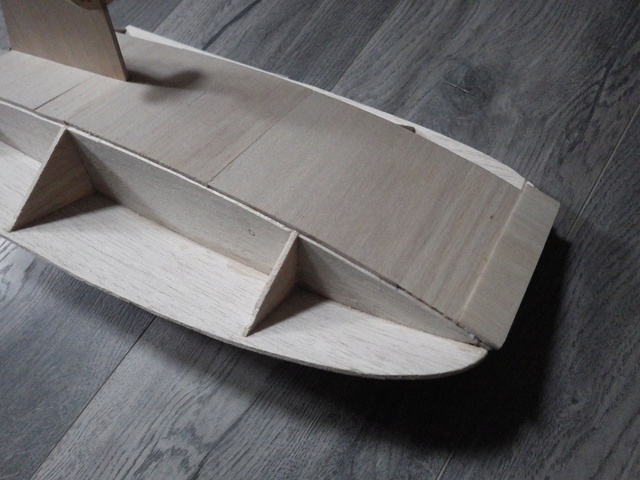
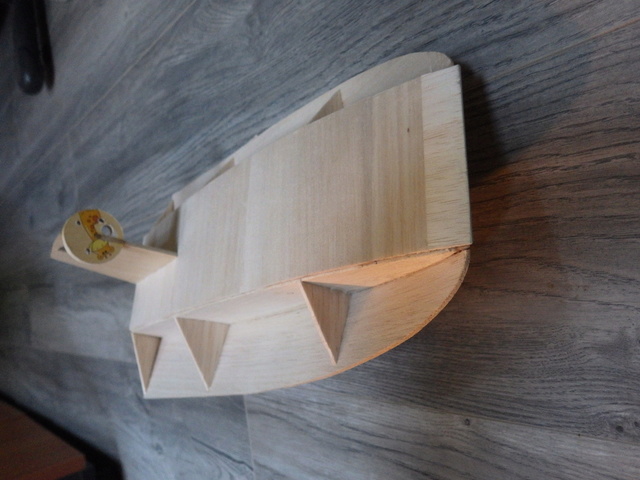
After sanding, I cut out a templet to mark where to cut out the hatch for the radio compartment. The hatch will not be flat but curved and therefore, the canopy that is fixed onto the hatch has to keep this panel in shape. I decided to not make the Vic Smeed canopy but to use a plastic hemispherical one. After marking, I cut out the top to fit.
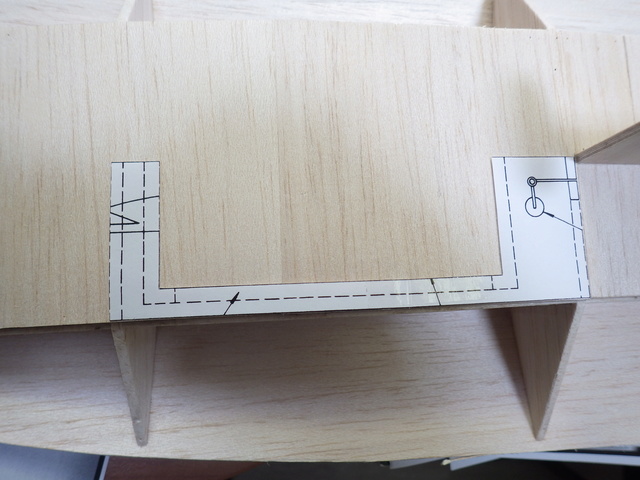

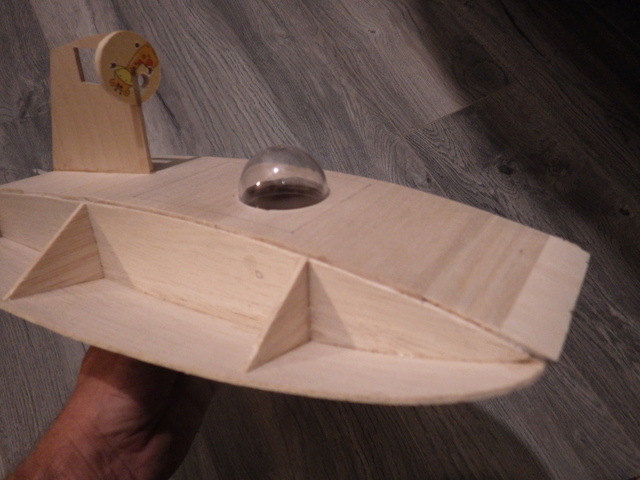
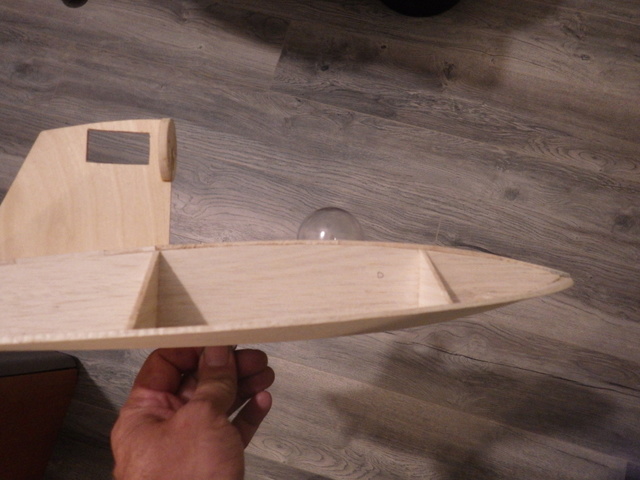
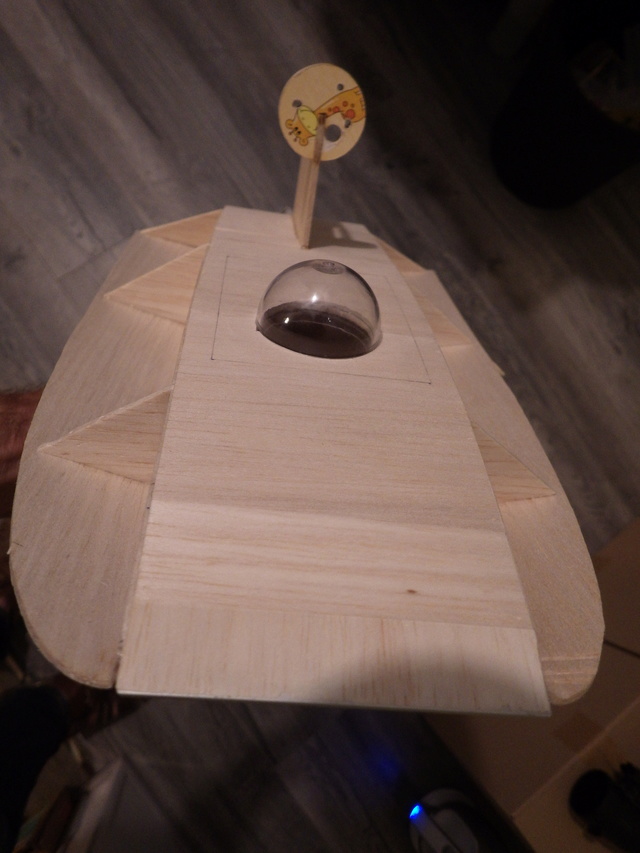
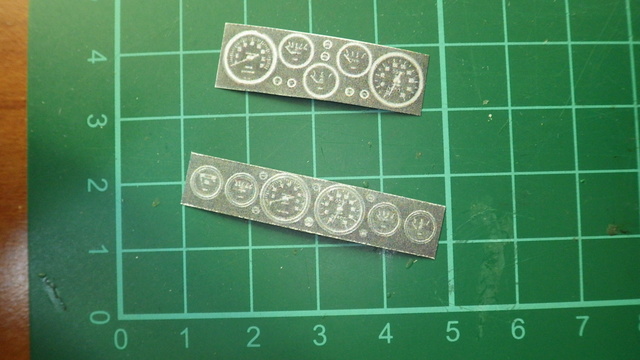
After trial fitting, I removed the canopy again to fit the dashboard. I copied the dashboard out of a 70's Jaeger car dashboard catalog. There are pictures of it on the internet and there is a large choice.
Made to the wanted size, I cut out the pic of the dash and glued it on thin balsa. The dashboard top was cut out of a black sheet of drawing paper.

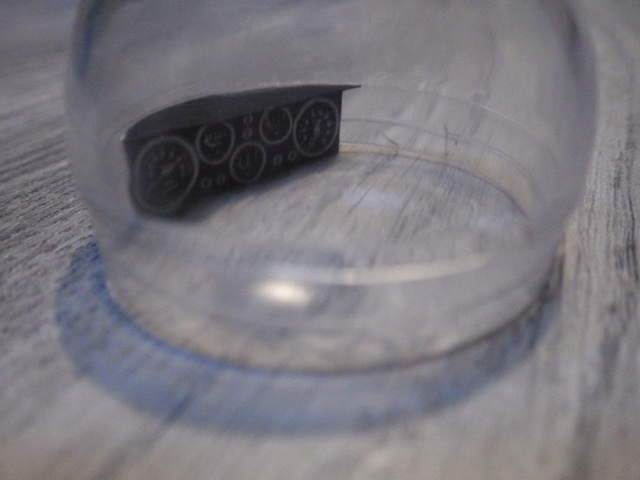
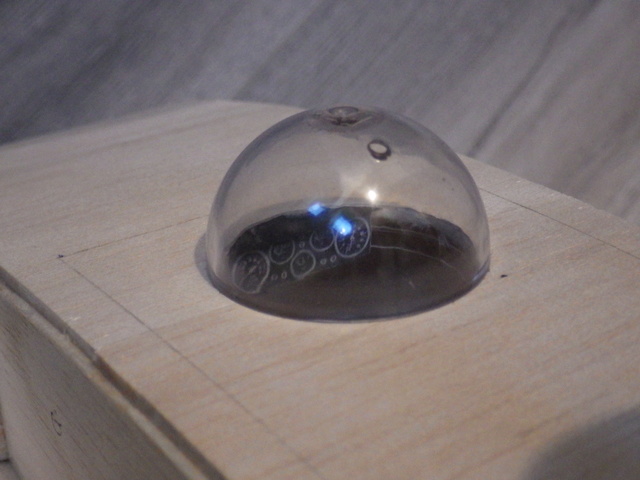
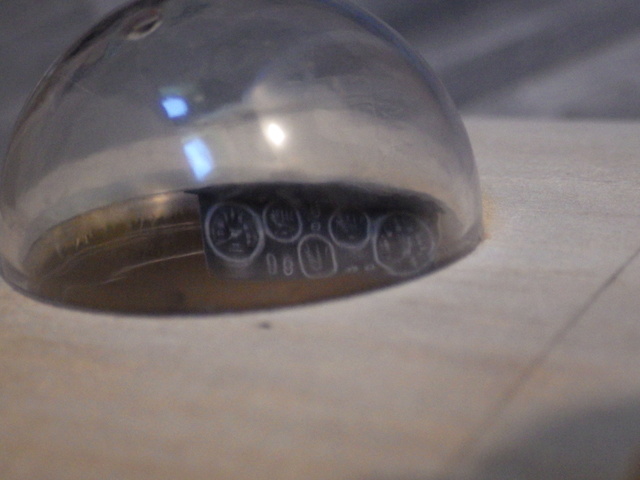
Roddie, I read about the influence of a tilted rudder. But this is really in ideal conditions. This boat will jump up and down and I don't know what else. I think that when the water is pushed down by the rudder blade, it willkeep the nose down. Initially, I thought of installing one of those Hong Kong aluminium rudders. I got 2 of them. They are well made and look good. But it's all about the joy of making things myself. Thanks for thinking of all that!!
The next things to do will be the canopy rear fin and cover both sides !
Lieven


After sanding, I cut out a templet to mark where to cut out the hatch for the radio compartment. The hatch will not be flat but curved and therefore, the canopy that is fixed onto the hatch has to keep this panel in shape. I decided to not make the Vic Smeed canopy but to use a plastic hemispherical one. After marking, I cut out the top to fit.


After trial fitting, I removed the canopy again to fit the dashboard. I copied the dashboard out of a 70's Jaeger car dashboard catalog. There are pictures of it on the internet and there is a large choice.
Made to the wanted size, I cut out the pic of the dash and glued it on thin balsa. The dashboard top was cut out of a black sheet of drawing paper.


roddie wrote:Lieven, I believe that your angled rudder-pivot will cause the transom to lift on the turning-side. That's not good! Because the pivot is angled; the rudder is not only deflecting water from side to side.. but also "down" when turning. Is it too late to make a wooden-wedge stand-off for the transom, to mount the rudder-tube against? That would solve some issues.. One; it would allow for making the pivot-angle perpendicular.. eliminating the "lifting" forces.. as well as simplifying the linkage-geometry. It would also allow more space for mounting the horn parallel with the transom. I fear that the exposed part of your flex-cable could flex during pushing (turning port) directional-input. If you only run the boat in a clockwise (right-turning) circuit.. it would be less critical. Have you considered installing a rubber-boot pushrod-seal? It allows angular-movement of the pushrod.. while keeping water out of the hull.
I pack the inside of the pushrod-seal in my boat, with petroleum-jelly. It doesn't leak.
Note the distance between the rudder's pivot-post and the boat's transom. You could replicate this with a stand-off wedge-mount that's closer to vertical. I love the inward transom-angle styling on your model.. but it just doesn't afford itself to the function of a conventional rudder-mount unless modified.
Roddie, I read about the influence of a tilted rudder. But this is really in ideal conditions. This boat will jump up and down and I don't know what else. I think that when the water is pushed down by the rudder blade, it willkeep the nose down. Initially, I thought of installing one of those Hong Kong aluminium rudders. I got 2 of them. They are well made and look good. But it's all about the joy of making things myself. Thanks for thinking of all that!!
The next things to do will be the canopy rear fin and cover both sides !
Lieven

OVERLORD- Diamond Member

- Posts : 1807
Join date : 2013-03-19
Age : 58
Location : Normandy, France
 Re: Hydro-bat by Vic Smeed: engine probs
Lieven, welcome back and as usual your model is nicely done. You seem to enjoy the unusual, pretty cool. Ken

Ken Cook- Top Poster

- Posts : 5634
Join date : 2012-03-27
Location : pennsylvania
 Re: Hydro-bat by Vic Smeed: engine probs
Good to hear from you Lieven , The bubble really gives it the spaceman effect / i like the dashboard you got for it too . Is the radio already in ? and how do ya access it ? Very Cool Build Glad to see you're back at it . 


getback- Top Poster


Posts : 10431
Join date : 2013-01-18
Age : 67
Location : julian , NC
 Re: Hydro-bat by Vic Smeed: engine probs
Thanks for your comments. The radio is not in there yet. After covering, I now have to cut out again a hatch to have access to the radio compartment. I like the bubble canopy too. It comes from those kids toys you get out of a distributor after you put in a coin. You could also use fishing floats from the make BULDO. I think the plastic will be a better quality.
http://www.buldo.com/index-en.html
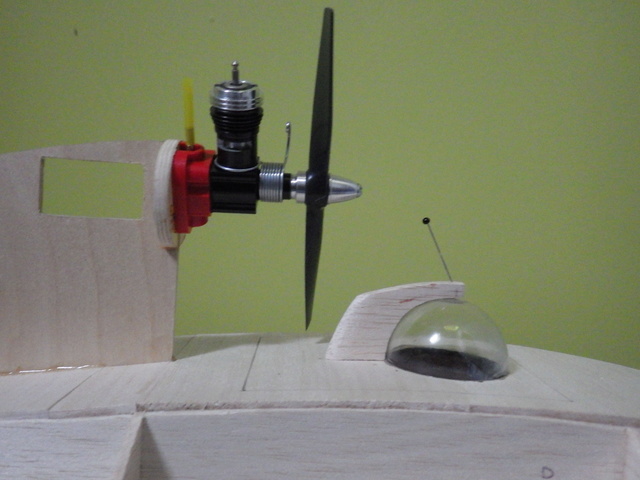
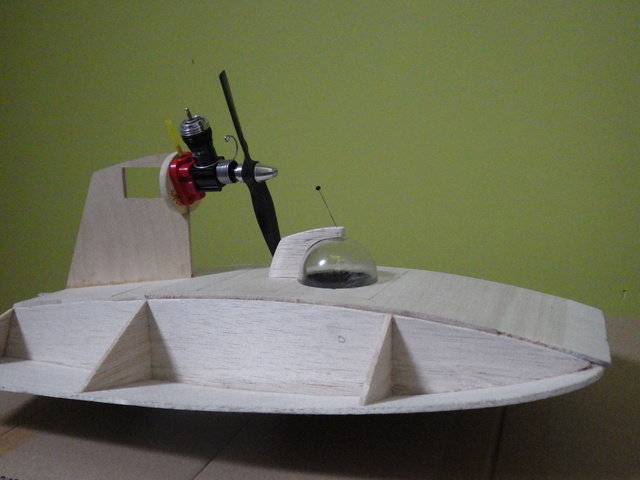
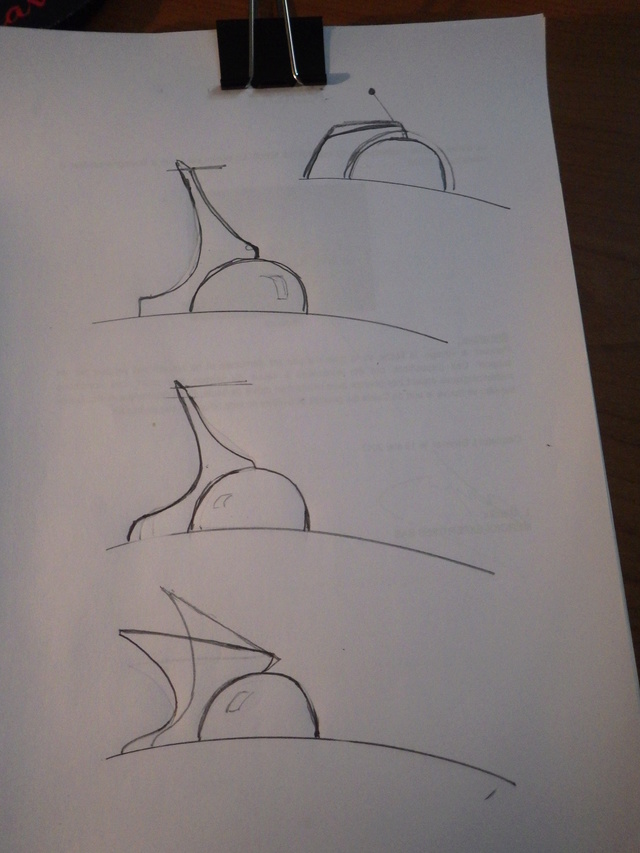
To keep the curved shape of the hatch, I need to make a fin behind the canopy. At work, i get carried away and I make scetches of what I could make. I end up with antennas of different sizes. I will probably copy the shape of the pylon. That will be the most practical.
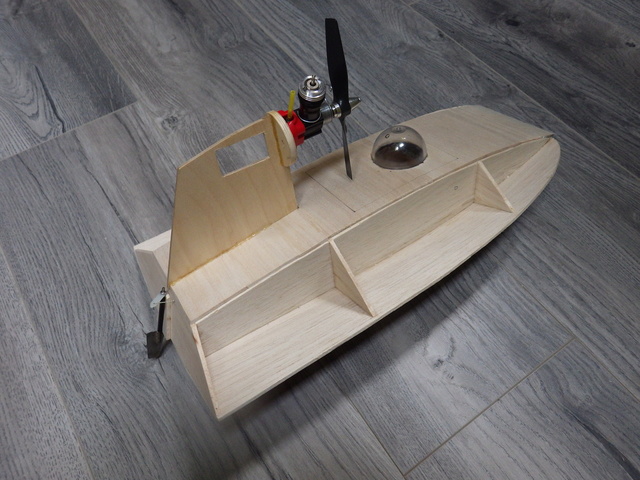
Today I fixed the engine and the boat weights 195g with the tank

http://www.buldo.com/index-en.html
To keep the curved shape of the hatch, I need to make a fin behind the canopy. At work, i get carried away and I make scetches of what I could make. I end up with antennas of different sizes. I will probably copy the shape of the pylon. That will be the most practical.

Today I fixed the engine and the boat weights 195g with the tank


OVERLORD- Diamond Member

- Posts : 1807
Join date : 2013-03-19
Age : 58
Location : Normandy, France
 Re: Hydro-bat by Vic Smeed: engine probs
The top one:
Do you read Schlock Mercenary?
http://www.schlockmercenary.com/
Although it could be Spaceman Spiff from Calvin and Hobbs...
Phil
Do you read Schlock Mercenary?
http://www.schlockmercenary.com/
Although it could be Spaceman Spiff from Calvin and Hobbs...
Phil

pkrankow- Top Poster

- Posts : 3025
Join date : 2012-10-02
Location : Ohio

OVERLORD- Diamond Member

- Posts : 1807
Join date : 2013-03-19
Age : 58
Location : Normandy, France
 Re: Hydro-bat by Vic Smeed: engine probs
I like it.
I don't know how practical it is as that pin can snag, poke, or bend. You are not a young kid with clumsy tendencies so it might be fine.
Phil
I don't know how practical it is as that pin can snag, poke, or bend. You are not a young kid with clumsy tendencies so it might be fine.
Phil

pkrankow- Top Poster

- Posts : 3025
Join date : 2012-10-02
Location : Ohio
 Re: Hydro-bat by Vic Smeed: engine probs
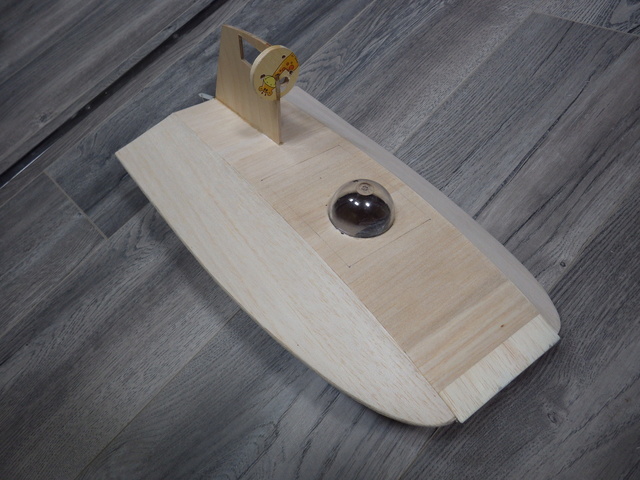
I started covering the top sides. on the proto, those were covered with short pieces of 3mm balsa with the grain crosswise.
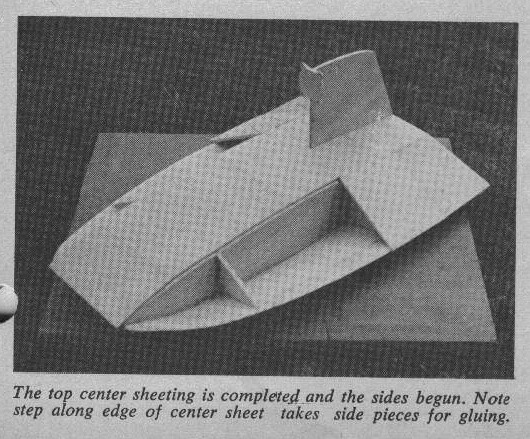
That is rather difficult to accomplish with immediate good results. None of these pieces are rectangles. And it needs careful sanding to get the curve back lengthwise. I made a pattern from paper for 1 side and cut this out in 1,5 mm balsa. That way, I save some weight and also, the sheet bends easier.
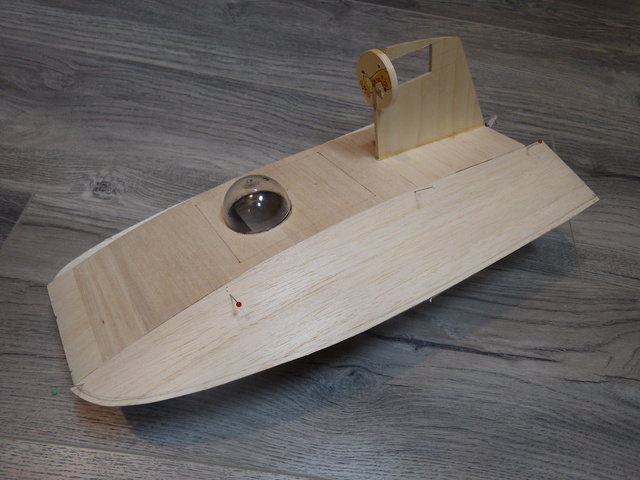
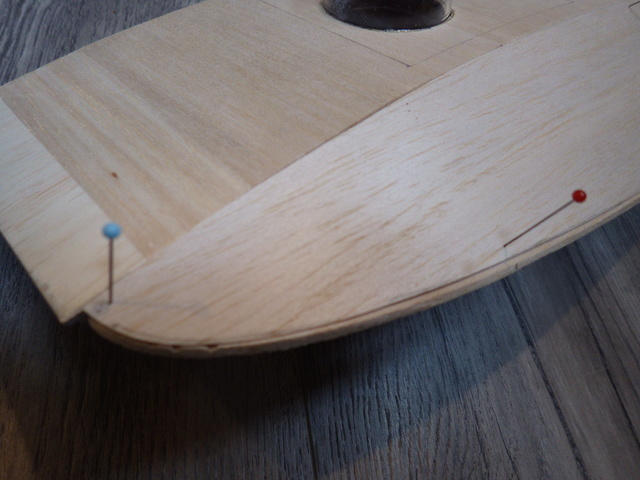
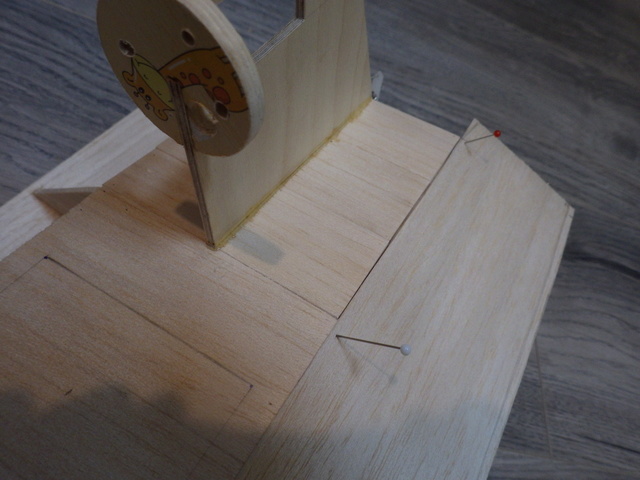
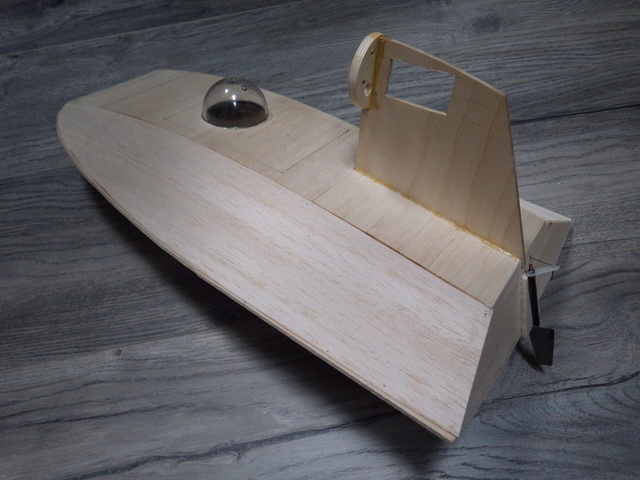
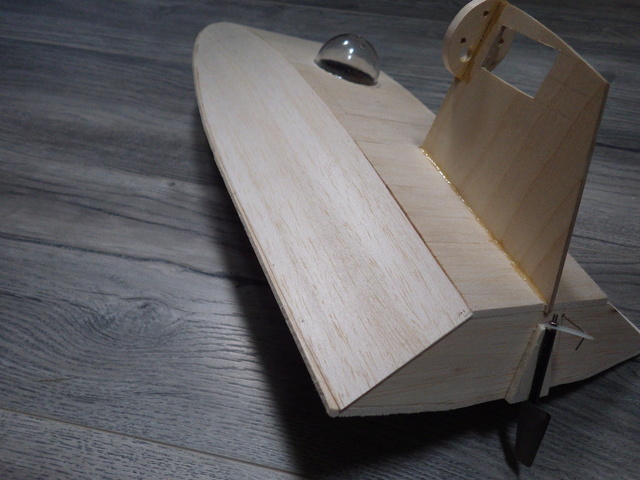
The sheet was cut to size at the transom and the edge was shaved and sanded at 90° to the bottom. sheet. There were some gaps of 0,5 mm or less due to inaccurate cutting of the sheet. I made tapered strips that I inserted with glue in these gaps. After drying and sanding that gave an all wood finish.
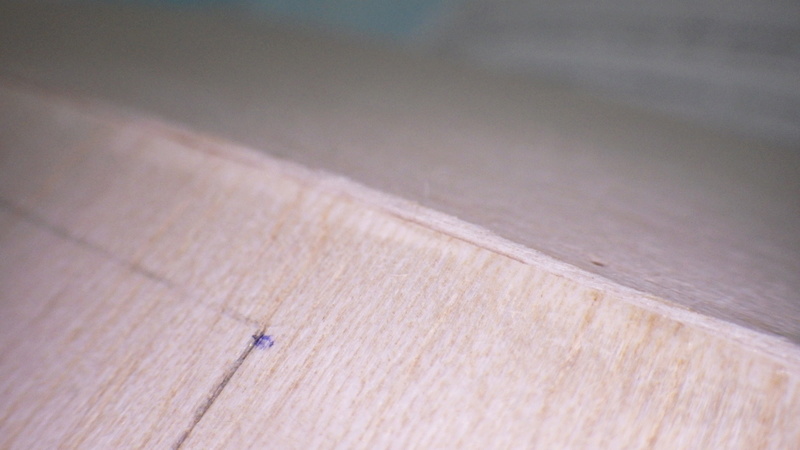
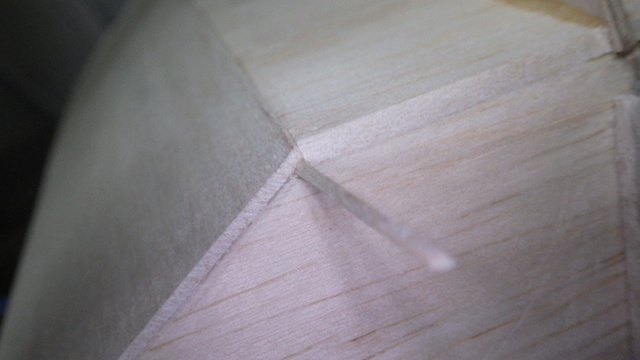

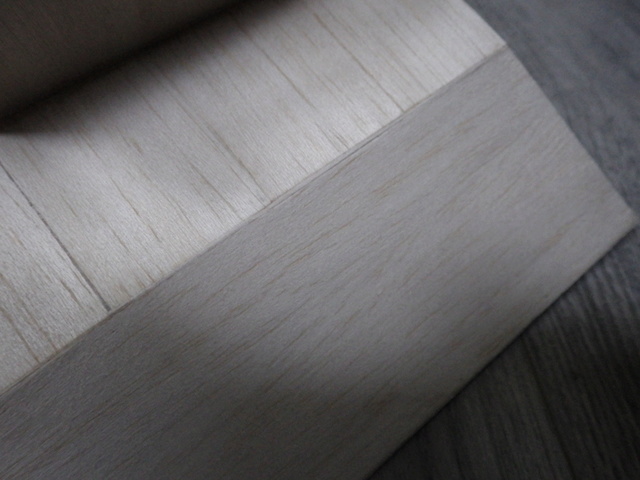
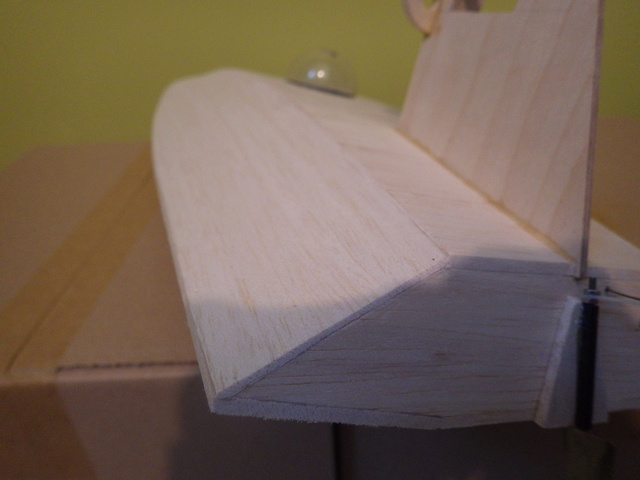

That is rather difficult to accomplish with immediate good results. None of these pieces are rectangles. And it needs careful sanding to get the curve back lengthwise. I made a pattern from paper for 1 side and cut this out in 1,5 mm balsa. That way, I save some weight and also, the sheet bends easier.


The sheet was cut to size at the transom and the edge was shaved and sanded at 90° to the bottom. sheet. There were some gaps of 0,5 mm or less due to inaccurate cutting of the sheet. I made tapered strips that I inserted with glue in these gaps. After drying and sanding that gave an all wood finish.


OVERLORD- Diamond Member

- Posts : 1807
Join date : 2013-03-19
Age : 58
Location : Normandy, France
 Re: Hydro-bat by Vic Smeed: engine probs
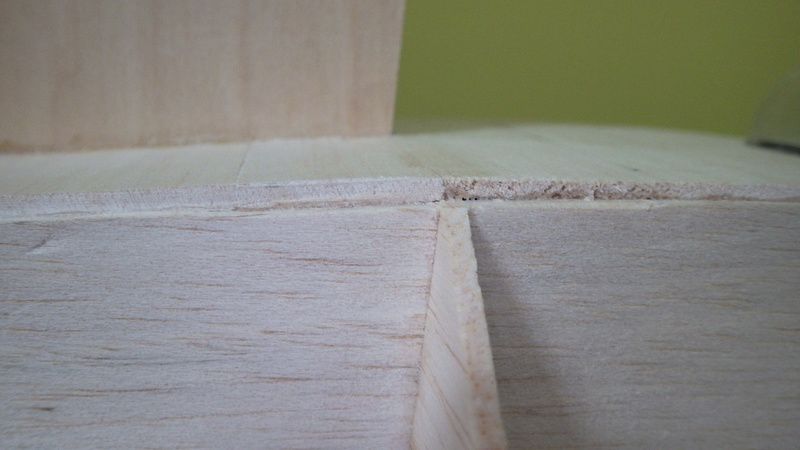
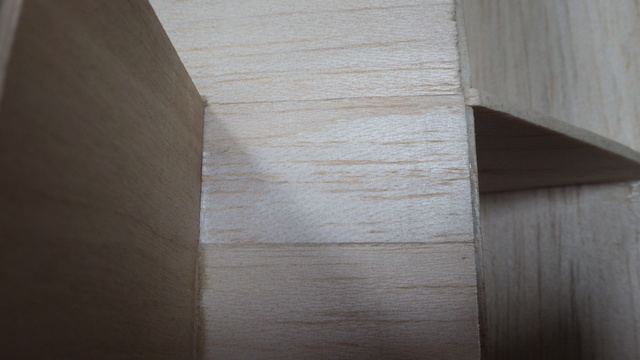
Near the pylon, I made some mistake in cutting the fore and aft member. The top sheet sagged and that bothered me since then. To remedy that, I glued another sheet on top and sanded it down. That gave the proper surface. On the pictures, the brighter wood is what's left over from the glued on sheet.
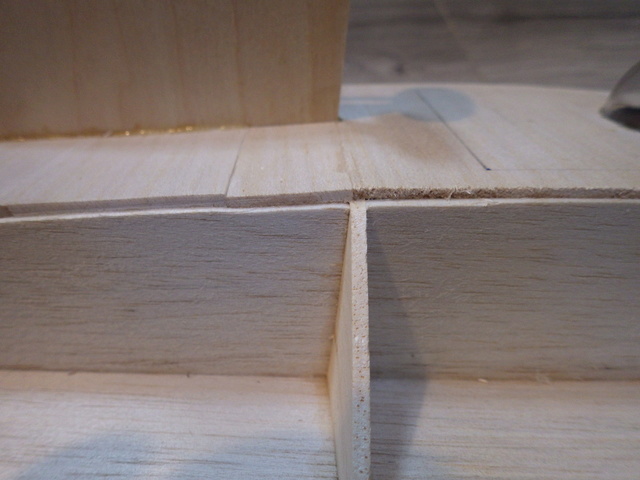



OVERLORD- Diamond Member

- Posts : 1807
Join date : 2013-03-19
Age : 58
Location : Normandy, France
 Re: Hydro-bat by Vic Smeed: engine probs
Tedious work.. reminiscent of the cowling you made for your Caudron Speed model.. and countless other works of skill and patience that you've exhibited in your model-building. This one is no exception.. and looks to be almost ready for finishing. 

 Re: Hydro-bat by Vic Smeed: engine probs
Can you devise a small fixture for sanding the 45-degree angles into the edges of the deck and the side-sheeting?
 Re: Hydro-bat by Vic Smeed: engine probs
I like this project a lot and truly wish I was not so far from a good body of water
Back when overlord was doing the bubble canopy I though it would look painted as R2D2 but he did such a cool job of the instrument panel all that work would be hidden
I can not wait for miniaturized anti gravity units... I love all the Star Wars different transports, racers, and cycles in the different movies
Now where did I store that flask of Quarks and the one with 2 micro grams of Dark matter?

fredvon4- Top Poster


Posts : 4012
Join date : 2011-08-26
Age : 69
Location : Lampasas Texas
 Re: Hydro-bat by Vic Smeed: engine probs
fredvon4 wrote:I like this project a lot and truly wish I was not so far from a good body of water
Back when overlord was doing the bubble canopy I though it would look painted as R2D2 but he did such a cool job of the instrument panel all that work would be hidden
I can not wait for miniaturized anti gravity units... I love all the Star Wars different transports, racers, and cycles in the different movies
Now where did I store that flask of Quarks and the one with 2 micro grams of Dark matter?
Phred.. you're awesome! Until the anti-gravity generators are perfected.. I'd suggest you look into acquiring a drone/quad-copter like the one that "Ian's" been playing with. They're literally plug n' play.. and CHEAP for a decent entry-level craft including a camera. They don't fulfill the "pride" involved with building a "one-of-a-kind" craft like Lieven is building.. but they certainly would assist in taking aerial photos/vids of one in action. Think of it as a "tool" that you can have some serious fun with.
 Re: Hydro-bat by Vic Smeed: engine probs
roddie wrote:Can you devise a small fixture for sanding the 45-degree angles into the edges of the deck and the side-sheeting?
I suppose you could. It'll have to be a bit universal and adjustable maybe? On this particular model, I don't know what the exact angle is and also, the angle varies from front to back. When the panel is glued onto both frames, front and transom, it is in fact twisted.
This is for Fred:
https://www.youtube.com/watch?v=pI2j4KEPQI4

OVERLORD- Diamond Member

- Posts : 1807
Join date : 2013-03-19
Age : 58
Location : Normandy, France

OVERLORD- Diamond Member

- Posts : 1807
Join date : 2013-03-19
Age : 58
Location : Normandy, France
Page 2 of 3 •  1, 2, 3
 Similar topics
» cox Queen Bee
» Vic Smeed's Debutante
» Vic Smeed Ballerina with surestart with mods.
» Hydro Boat
» Hydro Blaster pictures and manual scans .
» Vic Smeed's Debutante
» Vic Smeed Ballerina with surestart with mods.
» Hydro Boat
» Hydro Blaster pictures and manual scans .
Page 2 of 3
Permissions in this forum:
You cannot reply to topics in this forum

 Rules
Rules


