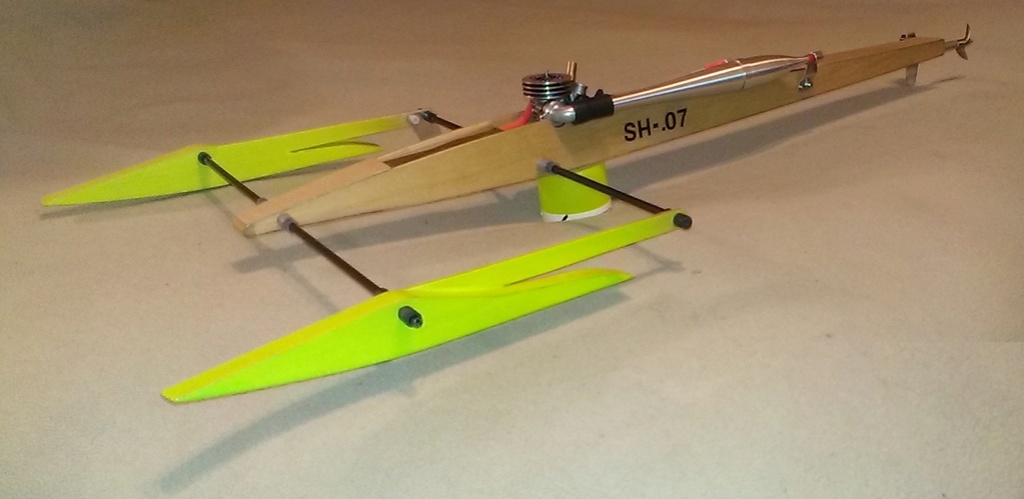
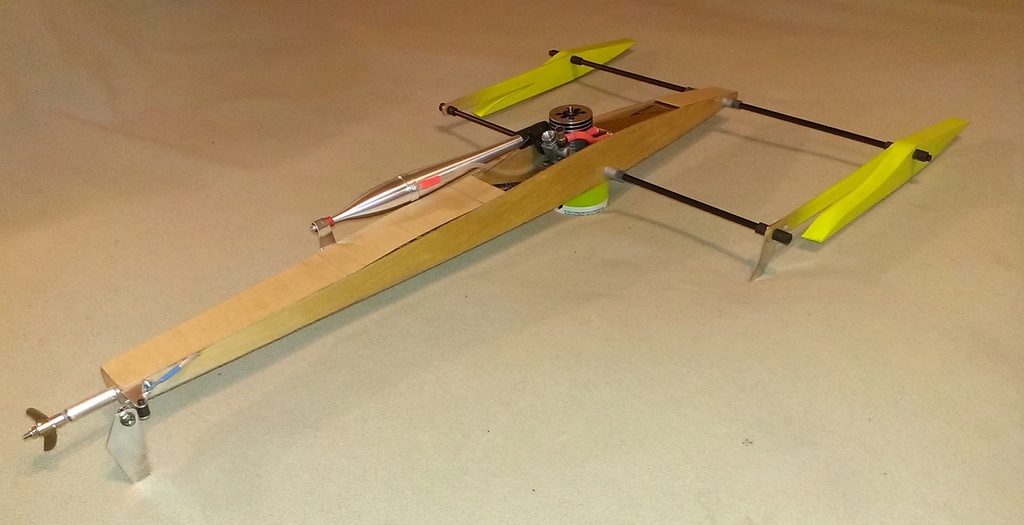
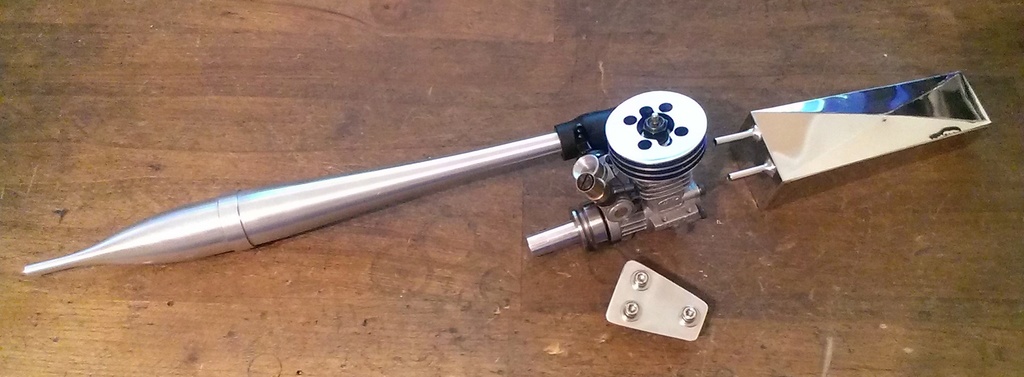
Log in
Search
Latest topics
» My latest doodle...by batjac Today at 9:47 pm
» My N-1R build log
by roddie Today at 8:50 pm
» Tee Dee .020 combat model
by rdw777 Today at 5:07 pm
» Free Flight Radio Assist
by rdw777 Today at 4:51 pm
» Purchased the last of any bult engines from Ken Enya
by getback Today at 12:05 pm
» Funny what you find when you go looking
by rsv1cox Yesterday at 3:21 pm
» Landing-gear tips
by 1975 control line guy Yesterday at 8:17 am
» Cox NaBOO - Just in time for Halloween
by rsv1cox Tue Nov 19, 2024 6:35 pm
» Canada Post strike - We are still shipping :)
by Cox International Tue Nov 19, 2024 12:01 pm
» Duende V model from RC Model magazine 1983.
by getback Tue Nov 19, 2024 6:08 am
» My current avatar photo
by roddie Mon Nov 18, 2024 9:05 pm
» Brushless motors?
by rsv1cox Sun Nov 17, 2024 6:40 pm
Cox Engine of The Month
Hydro-bat by Vic Smeed: engine probs
Page 1 of 3
Page 1 of 3 • 1, 2, 3 
 Hydro-bat by Vic Smeed: engine probs
This model will be equipped with the Black Lynx engine I won in December. It’s an airboat designed by Vic Smeed. The article appeared in the Grid Leaks issue of 7-8 1965. The plans can be downloaded from Aerofred. The hull is made of 3mm balsa with a plywood pylon.
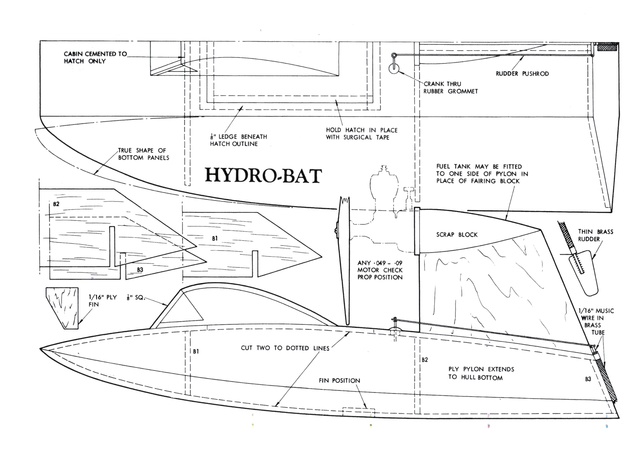
The past weekend, I cut out the 2 bulkheads and the longitudinals, all provided with slots to go together like a puzzle. The transom was then glued in place. Vic designed the transom big enough so the edges could be adjusted to the right angles.
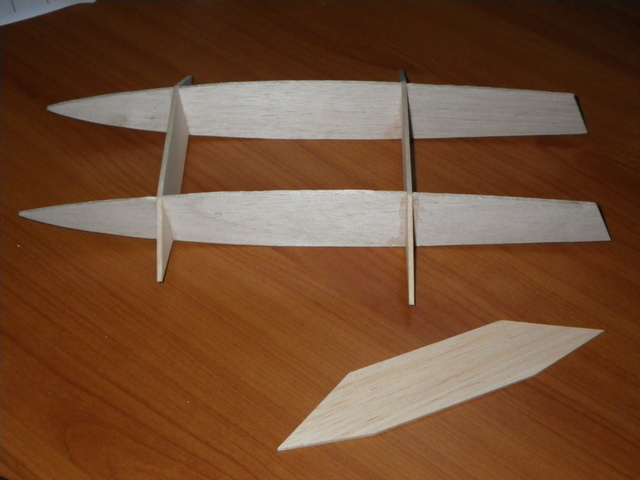

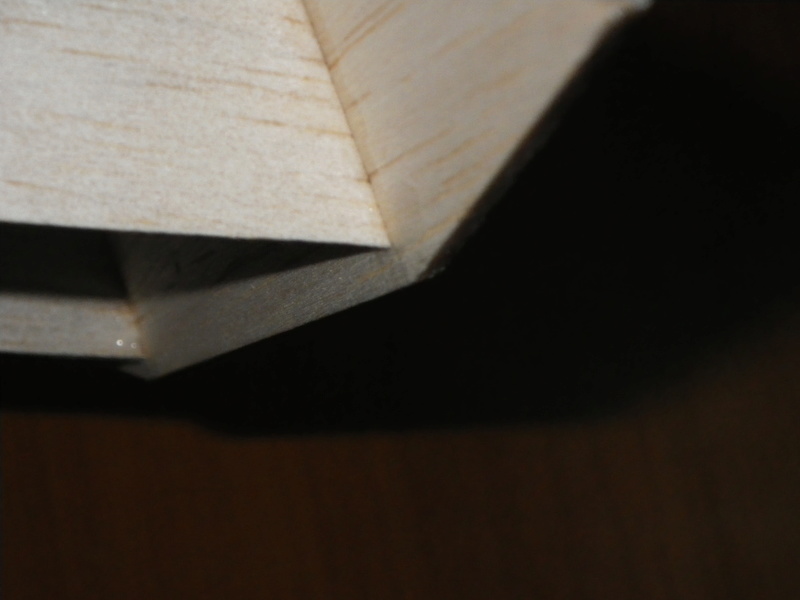
To keep a straight square finish on the transom edges, these were adjusted using a plane. It is much faster than sanding too. The next thing to do is to cut the pylon, glue that in place and plank the central bottom part.
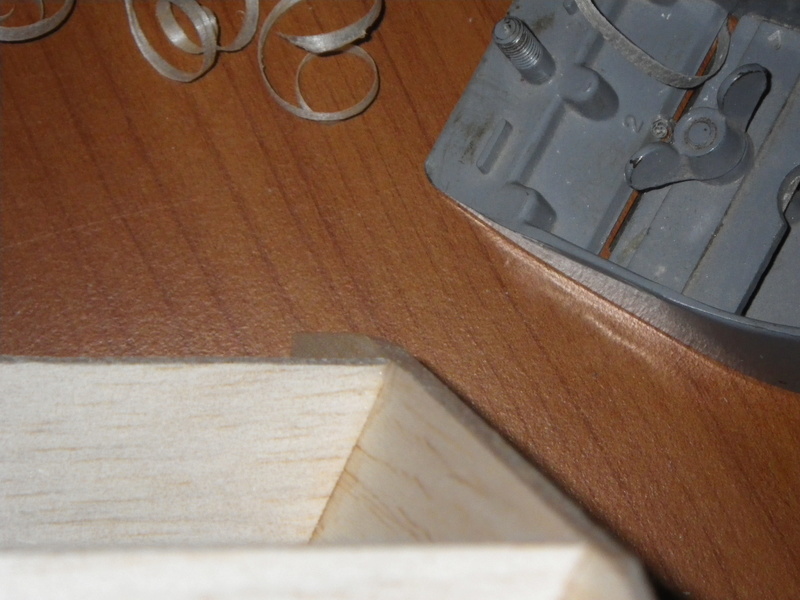
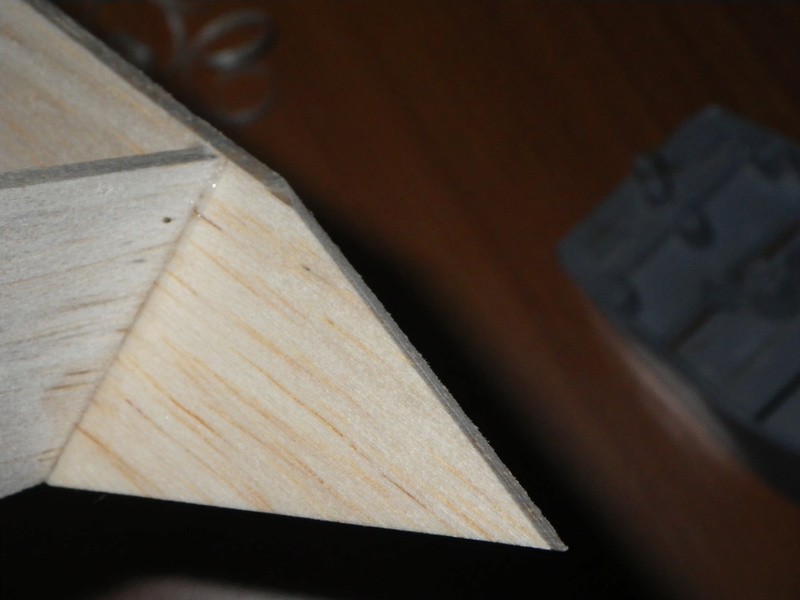
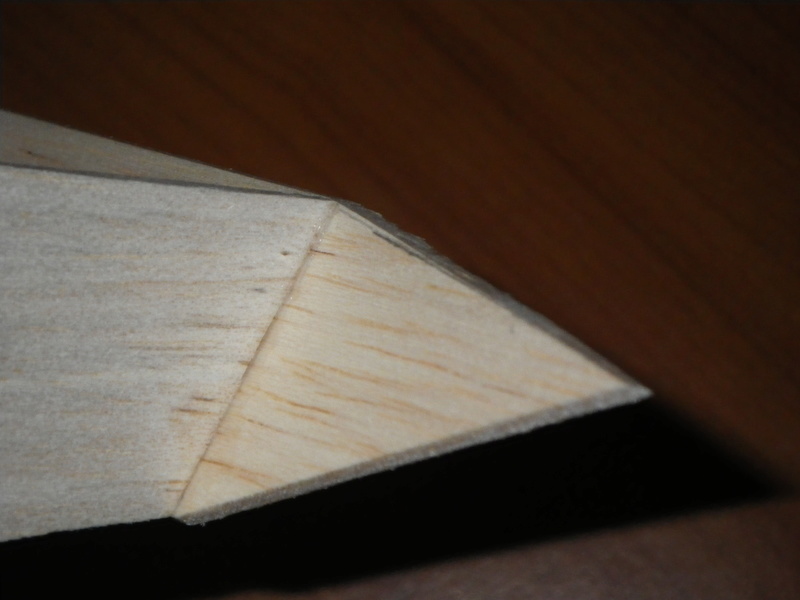
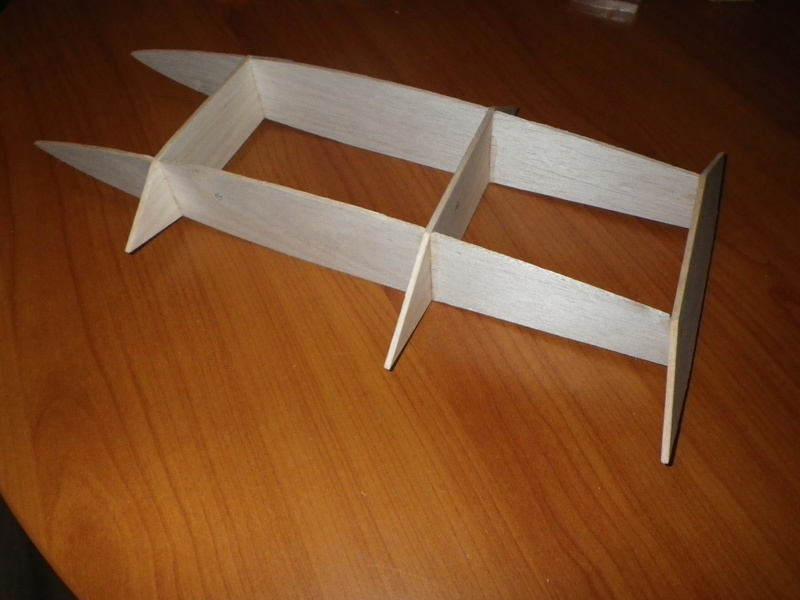

The past weekend, I cut out the 2 bulkheads and the longitudinals, all provided with slots to go together like a puzzle. The transom was then glued in place. Vic designed the transom big enough so the edges could be adjusted to the right angles.


To keep a straight square finish on the transom edges, these were adjusted using a plane. It is much faster than sanding too. The next thing to do is to cut the pylon, glue that in place and plank the central bottom part.


OVERLORD- Diamond Member

- Posts : 1807
Join date : 2013-03-19
Age : 58
Location : Normandy, France
 Re: Hydro-bat by Vic Smeed: engine probs
That is very neat and tidy woodwork.
Are you using cyano on this?
Are you using cyano on this?

ian1954- Diamond Member

- Posts : 2688
Join date : 2011-11-16
Age : 70
Location : England
 Re: Hydro-bat by Vic Smeed: engine probs
Cool Build , had to google the image to get in my mind the outset .. 
Bee sweet when done .

Bee sweet when done .


getback- Top Poster


Posts : 10439
Join date : 2013-01-18
Age : 67
Location : julian , NC
 Re: Hydro-bat by Vic Smeed: engine probs
That's the one!! I used ordinary wood glue and let it dry for 24h each time.

OVERLORD- Diamond Member

- Posts : 1807
Join date : 2013-03-19
Age : 58
Location : Normandy, France
 Re: Hydro-bat by Vic Smeed: engine probs
getback wrote:Cool Build , had to google the image to get in my mind the outset ..
Bee sweet when done .
Yes sir! Lieven finds and builds the most interesting models I've ever seen. I wish I had his snow-car here for running after a big storm that's due to hit this region early tomorrow morning.
This little boat looks like a lot of fun! I'll bet it skips-along like a hydro!
 Re: Hydro-bat by Vic Smeed: engine probs
Tomorrow would be a good day for a snow car 3+ inches predicted tonight.roddie wrote:getback wrote:Cool Build , had to google the image to get in my mind the outset ..
Bee sweet when done .
Yes sir! Lieven finds and builds the most interesting models I've ever seen. I wish I had his snow-car here for running after a big storm that's due to hit this region early tomorrow morning.
This little boat looks like a lot of fun! I'll bet it skips-along like a hydro!
Phil

pkrankow- Top Poster

- Posts : 3025
Join date : 2012-10-02
Location : Ohio
 Re: Hydro-bat by Vic Smeed: engine probs
Thanks for your encouraging posts. We havent seen snow yet this year. The snow plane stays in the cupboard for the moment.
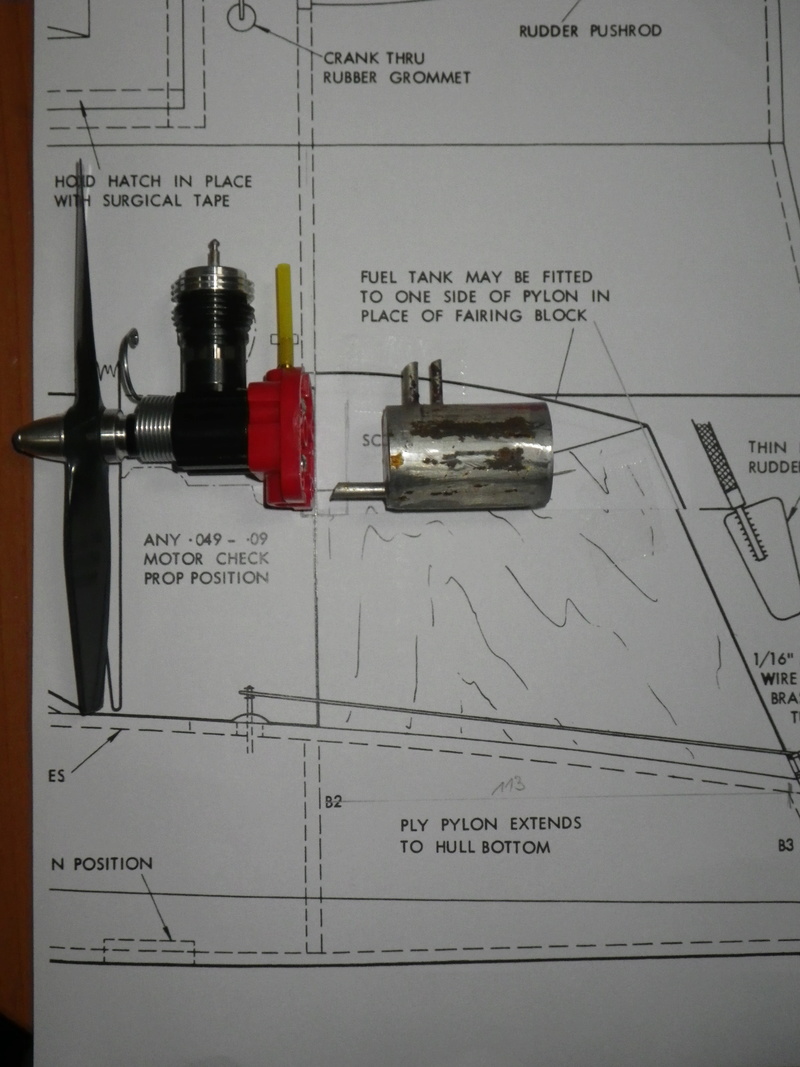
I checked out the pylon on the plan with the engine to be fitted. I will increase the height by 5mm so the prop clears the deck. I will also cut a rectangular hole to partly insert the fuel tank in the plywood.
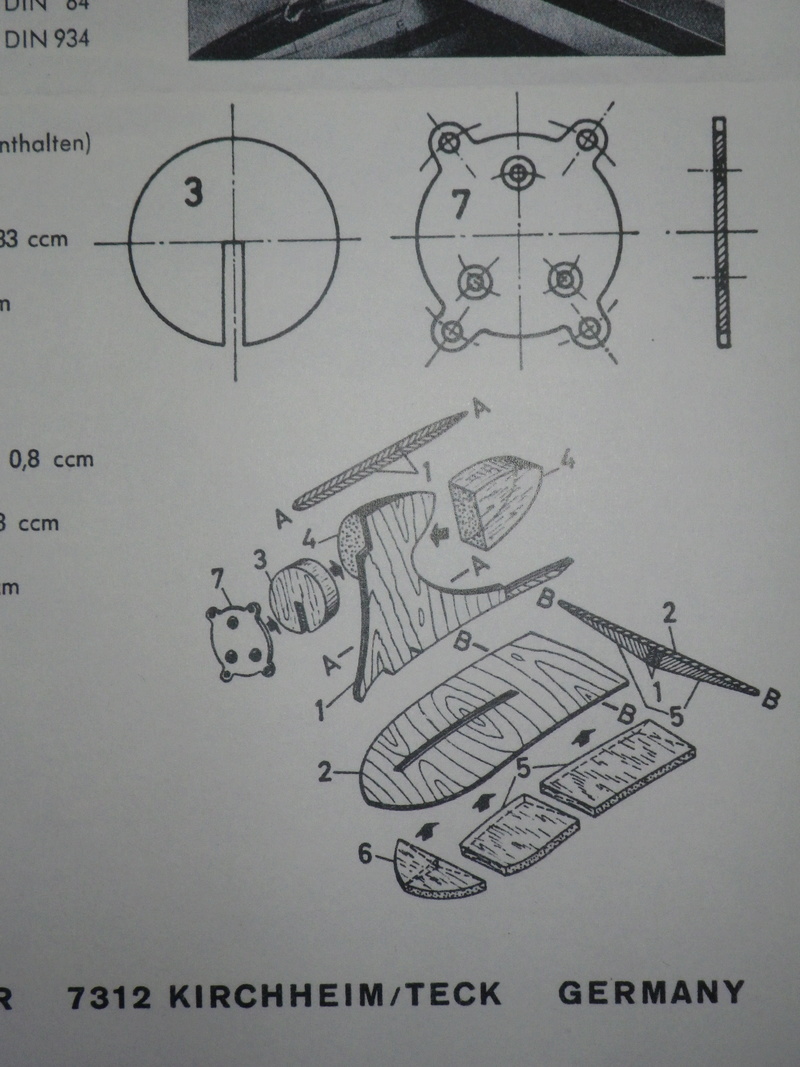
I'm planning to modify the pylon a bit. Originally, the 3mm firewall is just stuck onto the pylon's edge. I want to make an 8mm firewall with a slot to improve the bond between both pieces as is shown on the drawing of the Graupner motor mount for their small gliders (nr 3).
I checked out the pylon on the plan with the engine to be fitted. I will increase the height by 5mm so the prop clears the deck. I will also cut a rectangular hole to partly insert the fuel tank in the plywood.

I'm planning to modify the pylon a bit. Originally, the 3mm firewall is just stuck onto the pylon's edge. I want to make an 8mm firewall with a slot to improve the bond between both pieces as is shown on the drawing of the Graupner motor mount for their small gliders (nr 3).


OVERLORD- Diamond Member

- Posts : 1807
Join date : 2013-03-19
Age : 58
Location : Normandy, France
 Re: Hydro-bat by Vic Smeed: engine probs
Oh, great! Just what I need. Another plans site to spend hours searching and downloading plans....
The Time-Crunched Mark
The Time-Crunched Mark
batjac- Diamond Member


Posts : 2374
Join date : 2013-05-22
Age : 61
Location : Broken Arrow, OK, USA
 Re: Hydro-bat by Vic Smeed: engine probs
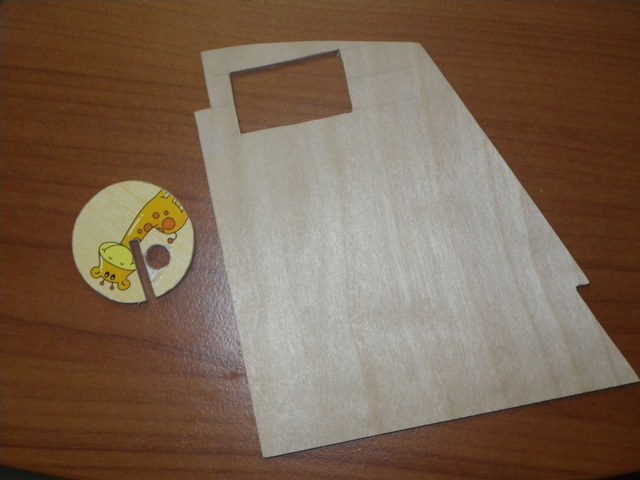
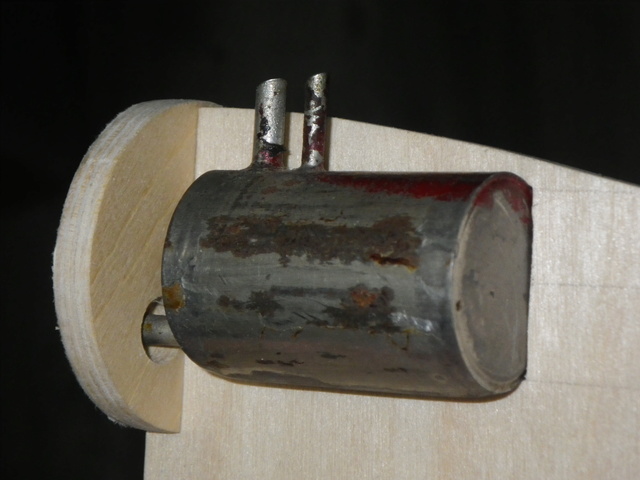
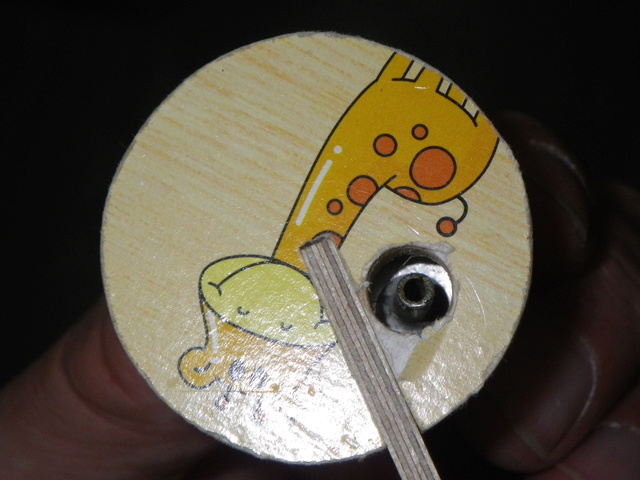
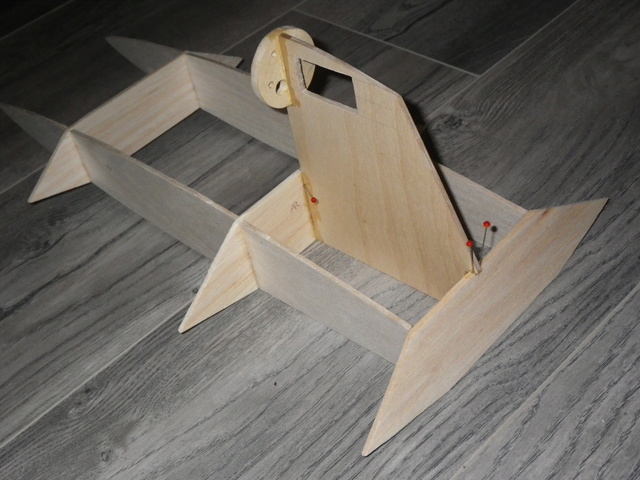
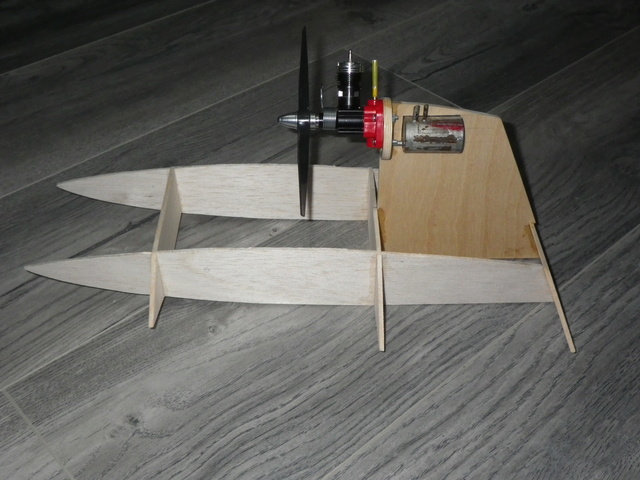
THE PYLON
The pylon was cut out from 3mm ply. The fire wall is 5,5mm thick. The tank fits in the rectangular hole. The fuel feed pipe sticks through the fire wall. The parts were epoxied together and epoxied in the frame. I dry mounted tank and engine and the prop should have enough clearance. Next is the bottom planking.
Some pictures


OVERLORD- Diamond Member

- Posts : 1807
Join date : 2013-03-19
Age : 58
Location : Normandy, France

1/2A Nut- Top Poster

- Posts : 3536
Join date : 2013-10-20
Age : 61
Location : Brad in Texas
 Re: Hydro-bat by Vic Smeed: engine probs
Wow! 1/2A Nut, that is really sweet, looks fast standing still and excellent workmanship!
OVERLORD wrote:THE PYLON The pylon was cut out from 3mm ply. The fire wall is 5,5mm thick. The tank fits in the rectangular hole. The fuel feed pipe sticks through the fire wall. The parts were epoxied together and epoxied in the frame. I dry mounted tank and engine and the prop should have enough clearance. Next is the bottom planking.
Overlord, that is a really neat looking airboat, build looking good, especially the hotter Cox engine reedie installation, streamlined versus the simpler rectangular Dumas 1/2-A swamp buggy I built in high school almost 50 years ago.


GallopingGhostler- Top Poster


Posts : 5722
Join date : 2013-07-13
Age : 70
Location : Clovis NM or NFL KC Chiefs
 Re: Hydro-bat by Vic Smeed: engine probs
Thanks for the encouragements. That's a good looking rigger Brad. Did you make the rudder?
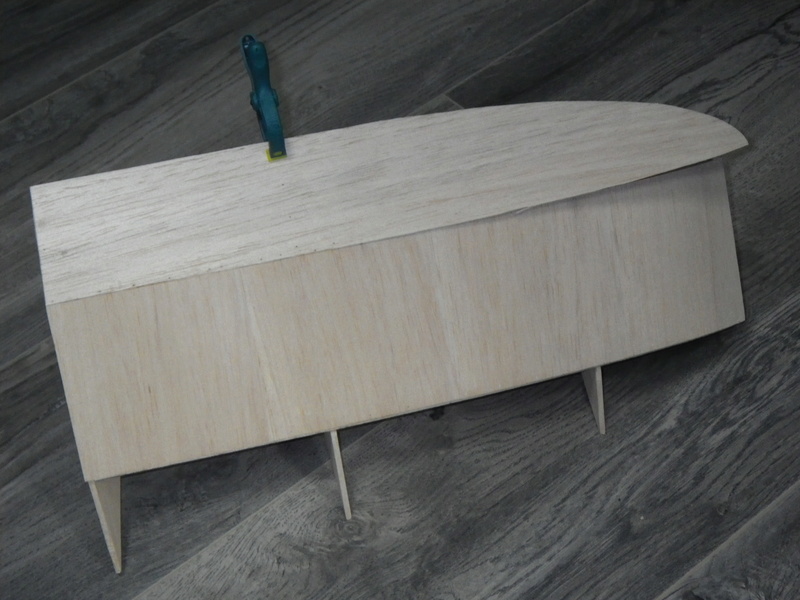
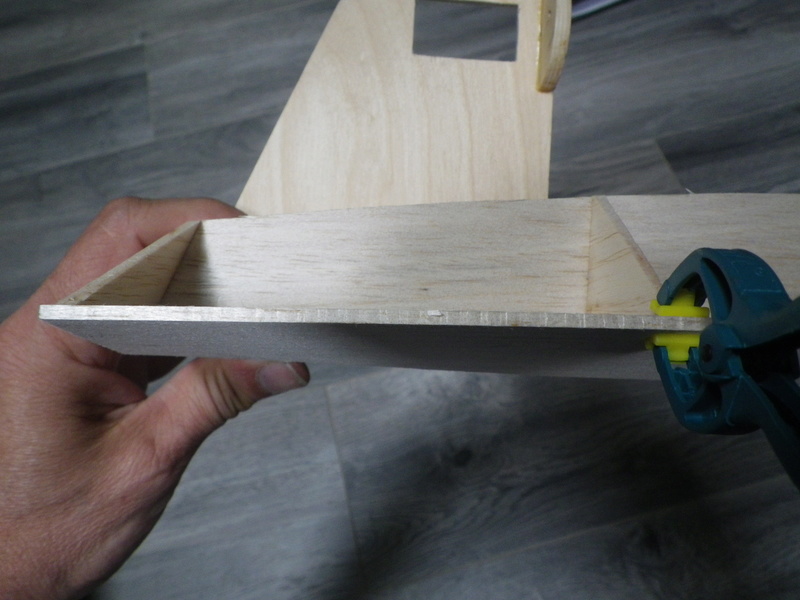
I was and still am busy covering the frame with the bottom panels. The centre part is easy with the grain across. The bottom sides are more difficult to trace first and than to glue in place. The pattern drawn by Vic Smeed fits but on some areas, there's a difference of 0,5 mm to 0,75 mm. I corrected the pattern by adding bits if paper with sticky tape while the pattern was actually on the frames. Glueing of the panel is done in 3 stages because the panels are at the same time twisted and curved wiith the grain running lengthwise. The edge that meets the central bottom panel needs to be beveled with a plane. The port panel is almost completely glued. The front part is the hardest and before fixing that part, I will first cut out the other panel and stick that on just to prevent twisting of the hull.
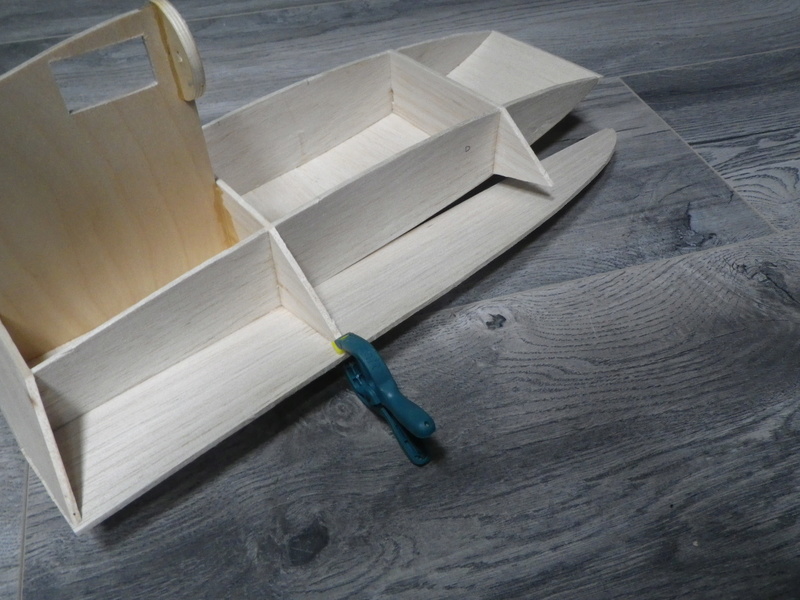
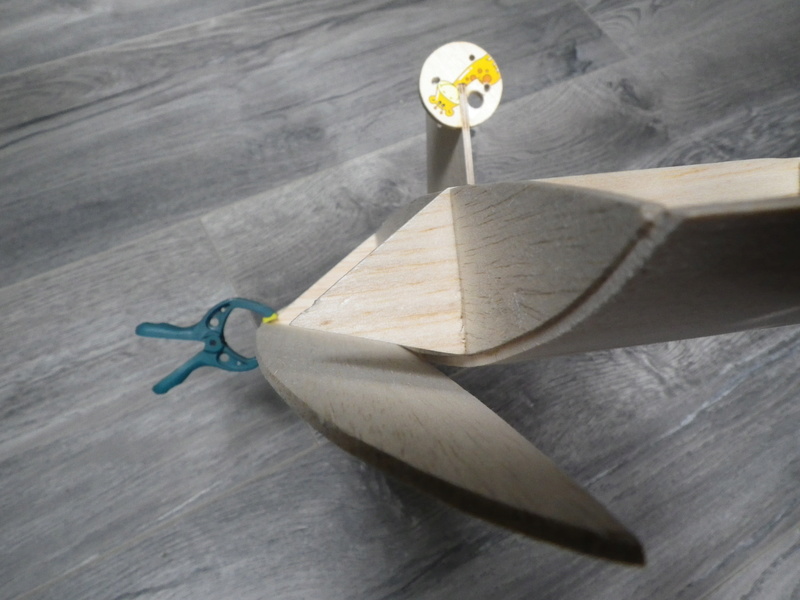
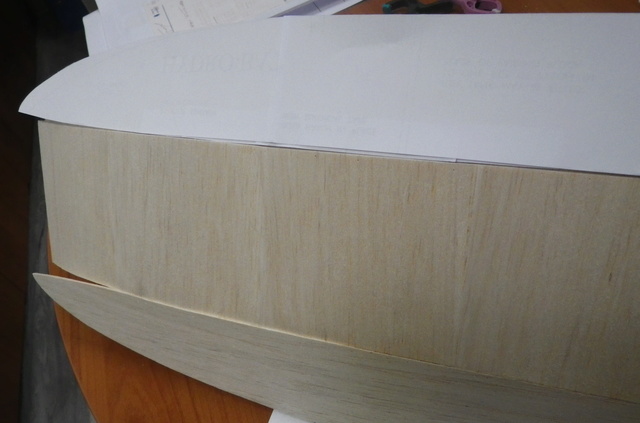
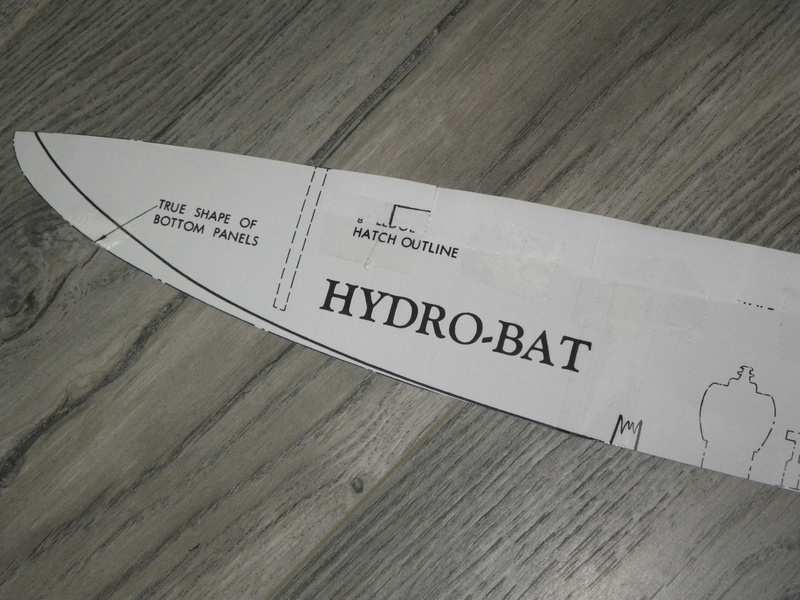
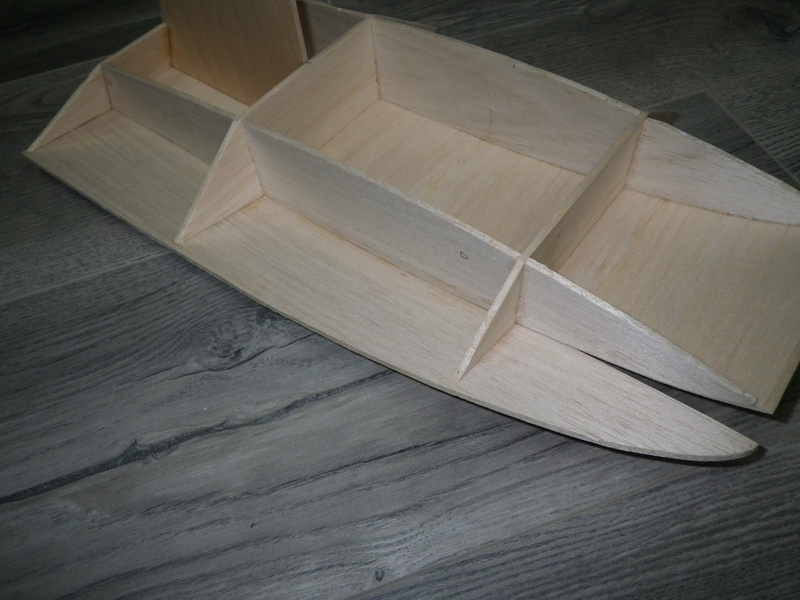
I was and still am busy covering the frame with the bottom panels. The centre part is easy with the grain across. The bottom sides are more difficult to trace first and than to glue in place. The pattern drawn by Vic Smeed fits but on some areas, there's a difference of 0,5 mm to 0,75 mm. I corrected the pattern by adding bits if paper with sticky tape while the pattern was actually on the frames. Glueing of the panel is done in 3 stages because the panels are at the same time twisted and curved wiith the grain running lengthwise. The edge that meets the central bottom panel needs to be beveled with a plane. The port panel is almost completely glued. The front part is the hardest and before fixing that part, I will first cut out the other panel and stick that on just to prevent twisting of the hull.


OVERLORD- Diamond Member

- Posts : 1807
Join date : 2013-03-19
Age : 58
Location : Normandy, France
 Re: Hydro-bat by Vic Smeed: engine probs
Looking great Lieven! Fitting those side-hull pieces is definitely tricky. I remember that from when I built my Dumas DV-10/Short-Stuff.. and that was a die-cut kit. I ended up using some auto-body filler in a few areas, and I too.. needed to even-out some areas with a surface-plane. I'm pretty sure that I applied several coats of auto-body primer; sanding between coats.. and used epoxy-paint for the finish. That model is electric-powered.. but the epoxy-paint would probably be fine with glow-fuel. The entire interior framework was brushed/sealed with epoxy glue. Is there anything in a construction-article regarding sealing the interior of the Hydro-Bat?
Have you considered adding a ballast-hold to the hull; where you've raised the height of the pylon slightly and will be carrying a heavier initial fuel payload, as compared to a Babe Bee? An automotive wheel-balancing weight-strip could fit snugly into a fore-aft channel in the center of the hull and be easily repositioned via a small hatch and needle-nose pliers.. for adjusting how the boat planes-out on the water as well.
Have you considered adding a ballast-hold to the hull; where you've raised the height of the pylon slightly and will be carrying a heavier initial fuel payload, as compared to a Babe Bee? An automotive wheel-balancing weight-strip could fit snugly into a fore-aft channel in the center of the hull and be easily repositioned via a small hatch and needle-nose pliers.. for adjusting how the boat planes-out on the water as well.
 Re: Hydro-bat by Vic Smeed: engine probs
Coming along very nicely. I have had the plans for quite a while myself, but have just not gotten to it. One day I might have the chance.

NEW222- Top Poster

- Posts : 3896
Join date : 2011-08-13
Age : 46
Location : oakbank, mb
 Re: Hydro-bat by Vic Smeed: engine probs
roddie wrote:Looking great Lieven! Fitting those side-hull pieces is definitely tricky. I remember that from when I built my Dumas DV-10/Short-Stuff.. and that was a die-cut kit. I ended up using some auto-body filler in a few areas, and I too.. needed to even-out some areas with a surface-plane. I'm pretty sure that I applied several coats of auto-body primer; sanding between coats.. and used epoxy-paint for the finish. That model is electric-powered.. but the epoxy-paint would probably be fine with glow-fuel. The entire interior framework was brushed/sealed with epoxy glue. Is there anything in a construction-article regarding sealing the interior of the Hydro-Bat?
Have you considered adding a ballast-hold to the hull; where you've raised the height of the pylon slightly and will be carrying a heavier initial fuel payload, as compared to a Babe Bee? An automotive wheel-balancing weight-strip could fit snugly into a fore-aft channel in the center of the hull and be easily repositioned via a small hatch and needle-nose pliers.. for adjusting how the boat planes-out on the water as well.
Roddie, what ballast or balancing is concerned, the article says to move the RC batteries more forward or aft in the centre compartiment. I'm not worried about this alleged extra weight. Vic Smeed mentiones it could be powered by a 09 as well. What I will mount is an aluminium strip in the forward edge that will act as a front bumper.
I got the bottom ready but the last bit was the hardest to glue and to keep in place. On one side I had to cut some grooves to help the wood to bend nicely. Also, on that same side I have to fill a narrow gap with a tiny strip of balsa.

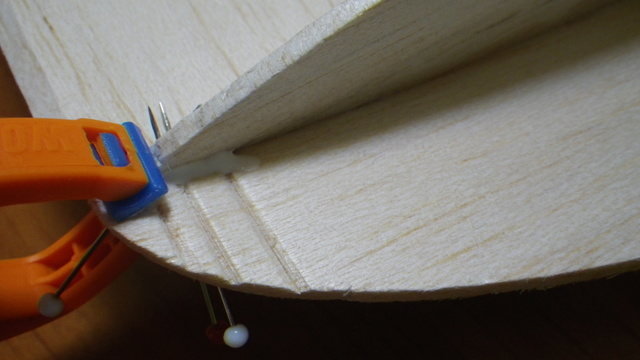
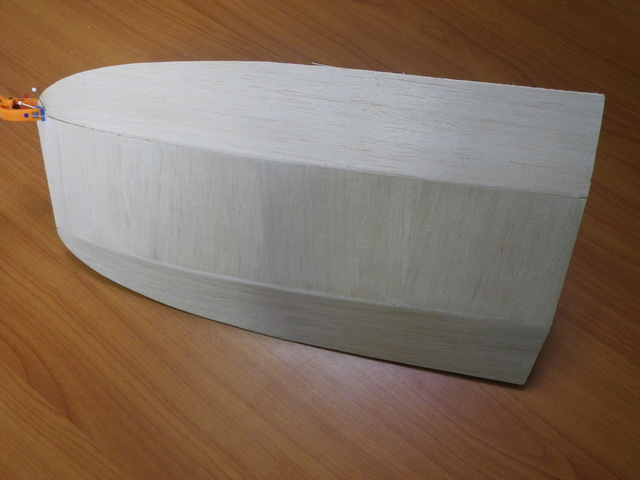
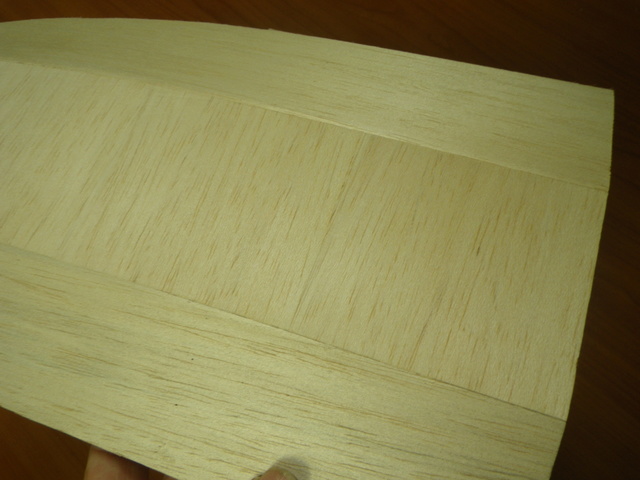
Hi New, it's a habit I'm also familiar with. What helps in such a case is when the plans were actually bought. Then I like to see them transformed in a model sooner or later.

OVERLORD- Diamond Member

- Posts : 1807
Join date : 2013-03-19
Age : 58
Location : Normandy, France
 Re: Hydro-bat by Vic Smeed: engine probs
remembered to change the post title

OVERLORD- Diamond Member

- Posts : 1807
Join date : 2013-03-19
Age : 58
Location : Normandy, France
 Re: Hydro-bat by Vic Smeed: engine probs
Dang that looks good. This is killing me!

NEW222- Top Poster

- Posts : 3896
Join date : 2011-08-13
Age : 46
Location : oakbank, mb
 Re: Hydro-bat by Vic Smeed: engine probs
Geez yes... looking great Lieven! Love the "pinning".. reminds me of how you formed the "Cauldron's" engine cowling.. and several other builds that you've meticulously mastered. I wasn't aware that that this model was radio-controlled. I thought that it was a "free-runner" or tethered-design..  I'll admit that I did have some RC ideas to pitch to you though.
Look into the newer-technology receiver-batteries. There's some LiFe packs that are tiny... and would be perfect for this application. Combined with a nano-servo for the rudder... you'd have a micro-weight radio. I'm sure you can locate a feather-weight receiver to do the job.
Look into the newer-technology receiver-batteries. There's some LiFe packs that are tiny... and would be perfect for this application. Combined with a nano-servo for the rudder... you'd have a micro-weight radio. I'm sure you can locate a feather-weight receiver to do the job.
 Re: Hydro-bat by Vic Smeed: engine probs
Thanks guys. Only the batteries have any weight. The small servo is very light and the 2.4 gHz receiver even lighter. Vic Smeed's model had a weight of 8 to 9 Oz. That's 230 to 250g. At this stage, it weights 81g.
For sealing, the article says to dope and cover in tissue the hull, then paint. I was thinking of doping the Inside and outside, then to coat with PU varnish all with sanding in between. I like to finish the model with Oracover.
For sealing, the article says to dope and cover in tissue the hull, then paint. I was thinking of doping the Inside and outside, then to coat with PU varnish all with sanding in between. I like to finish the model with Oracover.

OVERLORD- Diamond Member

- Posts : 1807
Join date : 2013-03-19
Age : 58
Location : Normandy, France
 Re: Hydro-bat by Vic Smeed: engine probs
OVERLORD wrote:Thanks guys. Only the batteries have any weight. The small servo is very light and the 2.4 gHz receiver even lighter. Vic Smeed's model had a weight of 8 to 9 Oz. That's 230 to 250g. At this stage, it weights 81g.
For sealing, the article says to dope and cover in tissue the hull, then paint. I was thinking of doping the Inside and outside, then to coat with PU varnish all with sanding in between. I like to finish the model with Oracover.
You may remember I bought a Hobbico 200mAh 6.6V 1C LiFe receiver battery a few years ago. Its weight is 15gr. It may require a regulator to drop the voltage to a safer 6V though. It's a TINY battery-pack...
See the below photo for a size-reference on the battery..
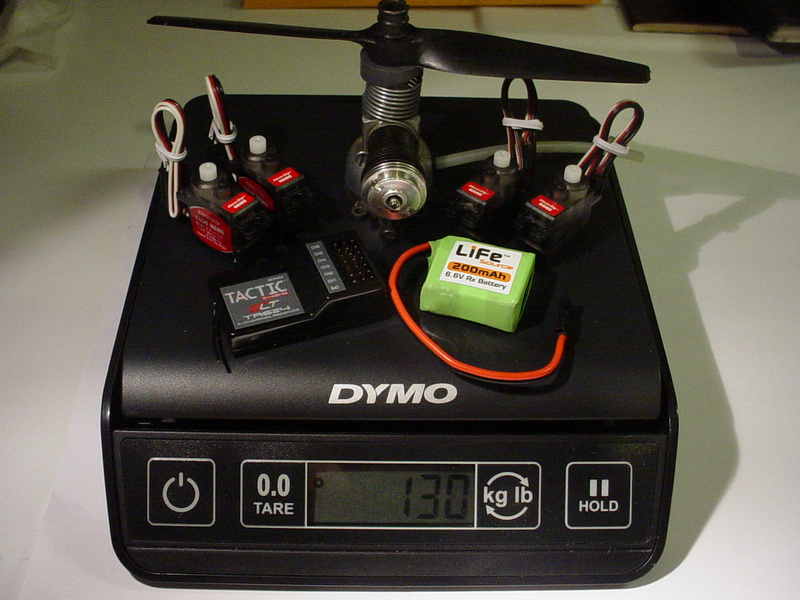
That's 130gr........ along with a Babe Bee engine, x4 nano-servos and 6ch receiver. I'm sure that your model could finish-out at well-under 200gr. and maybe even close to 150gr.
 Re: Hydro-bat by Vic Smeed: engine probs
That's a lightweight battery. I have a 1600 mAh battery and that weights about 100g. I had a look at the article again and noticed what I said about the model's weight is not correct. The 8 to 9 oz refers to the total weight of the RC gear. When I pile up the boat, servo, receiver, battery, engine and tank, the weight is at 270g for the moment.

OVERLORD- Diamond Member

- Posts : 1807
Join date : 2013-03-19
Age : 58
Location : Normandy, France
 Re: Hydro-bat by Vic Smeed: engine probs
Shaping up great Overlord, should be a real treat for you to run! 
Yes the rudder and turn fin was cut out using metal shears
filed sharp and buffed up to a shine. All ply design / build project.
Will post a vid when the water is calm.

Yes the rudder and turn fin was cut out using metal shears
filed sharp and buffed up to a shine. All ply design / build project.
Will post a vid when the water is calm.

1/2A Nut- Top Poster

- Posts : 3536
Join date : 2013-10-20
Age : 61
Location : Brad in Texas
 Re: Hydro-bat by Vic Smeed: engine probs
A small update. I'm working on the rudder and the fin. I decided to use a sheet of stainless steel. For that I bought a paint scraper at the DIY.
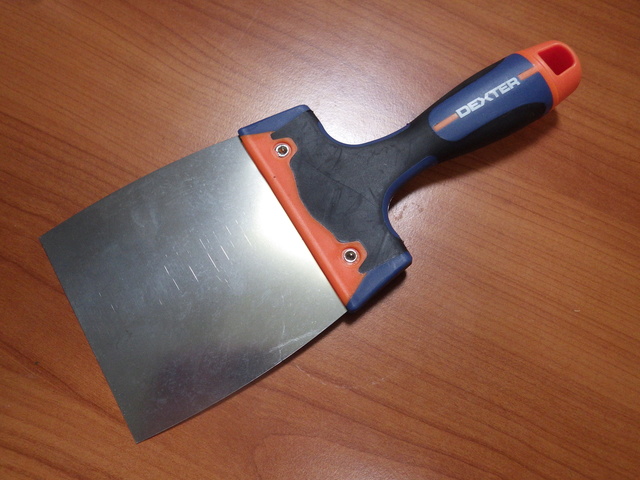
The rudder blade and the fin were cut out with a Dremel tool. For the rudder stock, i used a 2mm push rod with M2 thread on one end, cut to size. This was then silver soldered to the rudder blade. It looks a lot better when cleaned up!!


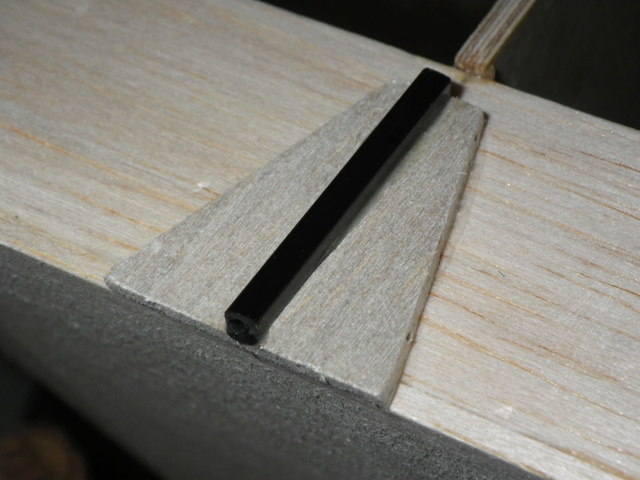
For the tube I used a piece of square carbon tube, epoxied to the transom. The 2mm rudder stock fits in there without play. The fact tht it's square makes it easy to glue and to keep in place.
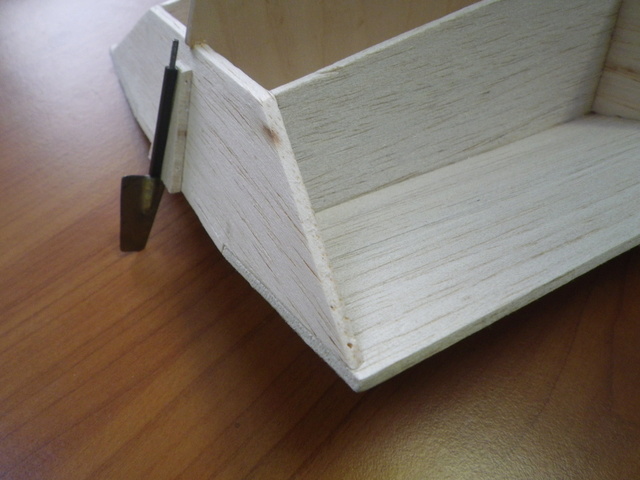
To fix the fin, I just cut the bottom hull and inserted the fin with époxy.
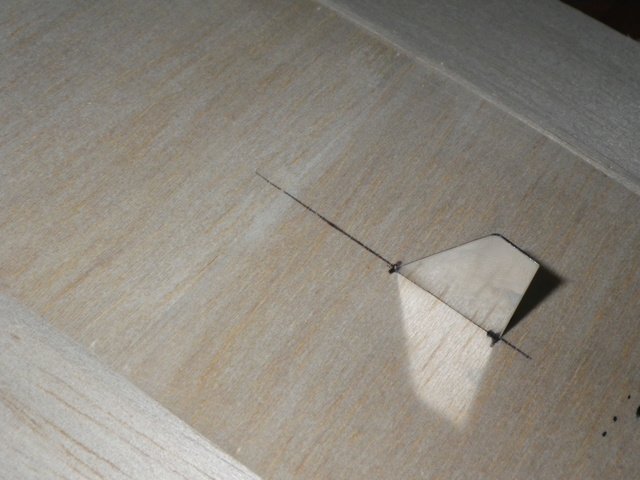
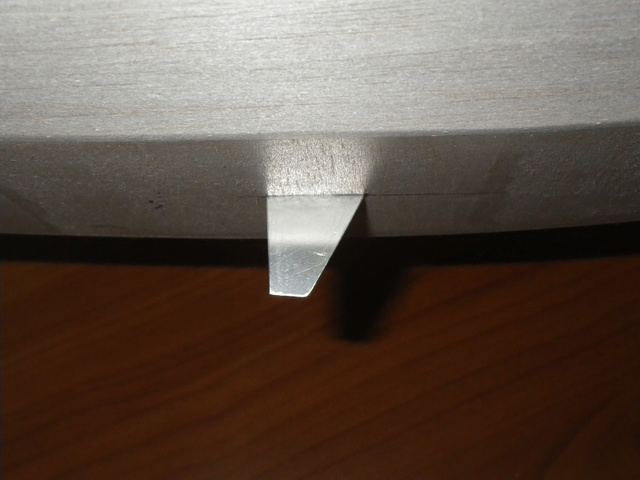
I'm waiting for some M2 nuts to arrive to fix the rudder horn. Then, the deck can be glued on.

The rudder blade and the fin were cut out with a Dremel tool. For the rudder stock, i used a 2mm push rod with M2 thread on one end, cut to size. This was then silver soldered to the rudder blade. It looks a lot better when cleaned up!!


For the tube I used a piece of square carbon tube, epoxied to the transom. The 2mm rudder stock fits in there without play. The fact tht it's square makes it easy to glue and to keep in place.


To fix the fin, I just cut the bottom hull and inserted the fin with époxy.


I'm waiting for some M2 nuts to arrive to fix the rudder horn. Then, the deck can be glued on.

OVERLORD- Diamond Member

- Posts : 1807
Join date : 2013-03-19
Age : 58
Location : Normandy, France
 Re: Hydro-bat by Vic Smeed: engine probs
Very nice Lieven! You always engineer your models.. I love that! Did you cut a SS rudder horn too? It would be nice to able to braze it on.. but that might distort /melt the carbon tube? Apparently CF tube is resistant to water exposure? If it can be easily-detached from the transom.. and horn brazed, it would be a solid no-slip link. Install a brass flat-washer followed by the M2 nuts first, to establish a bearing. Double-nut the m2's then jig the assembly for brazing the horn on, near the top. A horn need only be a strip approx. 6mm x 25mm (tab) with holes drilled on opposing ends for the shaft and a clevis/pushrod.
If you want to retain the gluing integrity of a square tube to the transom, you could opt to go all brass.. with a round-tube sleeve running inside it.
I'm sure whatever you come up with, will be a functional work of art. It always is!
If you want to retain the gluing integrity of a square tube to the transom, you could opt to go all brass.. with a round-tube sleeve running inside it.
I'm sure whatever you come up with, will be a functional work of art. It always is!
 Re: Hydro-bat by Vic Smeed: engine probs
Very nice craftmanship, watching with interest. 
I have also considered building this airboat, or the Swamp Buggy, but finding a place to navigate is not obvious due to the noise.
I have also considered building this airboat, or the Swamp Buggy, but finding a place to navigate is not obvious due to the noise.


Paul_BB- Bronze Member

- Posts : 59
Join date : 2015-03-16
Age : 61
Page 1 of 3 • 1, 2, 3 
 Similar topics
» cox Queen Bee
» Vic Smeed's Debutante
» Vic Smeed Ballerina with surestart with mods.
» Hydro Boat
» Hydro Blaster pictures and manual scans .
» Vic Smeed's Debutante
» Vic Smeed Ballerina with surestart with mods.
» Hydro Boat
» Hydro Blaster pictures and manual scans .
Page 1 of 3
Permissions in this forum:
You cannot reply to topics in this forum

 Rules
Rules


