Log in
Search
Latest topics
» My current avatar photoby roddie Today at 8:48 pm
» It's the X Wing that has a canard
by 1975 control line guy Today at 8:05 pm
» Cox 020 PeeWee rebuild questions
by balogh Today at 4:39 pm
» Free Flight Radio Assist
by TD ABUSER Today at 2:58 pm
» Pathé Modeling Videos
by Levent Suberk Today at 2:10 pm
» New Model Build
by rdw777 Today at 10:28 am
» My latest doodle...
by layback209 Today at 1:20 am
» Drones, pretty nifty...........
by rsv1cox Yesterday at 6:55 pm
» Project Cox .049 r/c & Citabrian Champion
by roddie Yesterday at 6:20 pm
» My N-1R build log
by roddie Yesterday at 3:27 pm
» Octura engines?
by UncleLumpy Yesterday at 8:16 am
» Tatone EM-7
by sosam117 Yesterday at 7:50 am
Cox Engine of The Month
Stalking about!
Page 1 of 1
 Stalking about!
Strange topic title but couldn't think of anything else.
I don't know that much about Stalker engines but recently - Stalker Modusa in the UK - started to sell off spare parts and once I realised that there were enough odd bits to form the basis of an engine build, I bought a sample.
When I say build, these are spare parts and need some "fettling" to assemble and there are a few missing and mismatched components but with a crankcase, head and a piston/liner assembly - I am off to trot.
So I bought the parts on offer for a Stalker Modusa Pro 40.
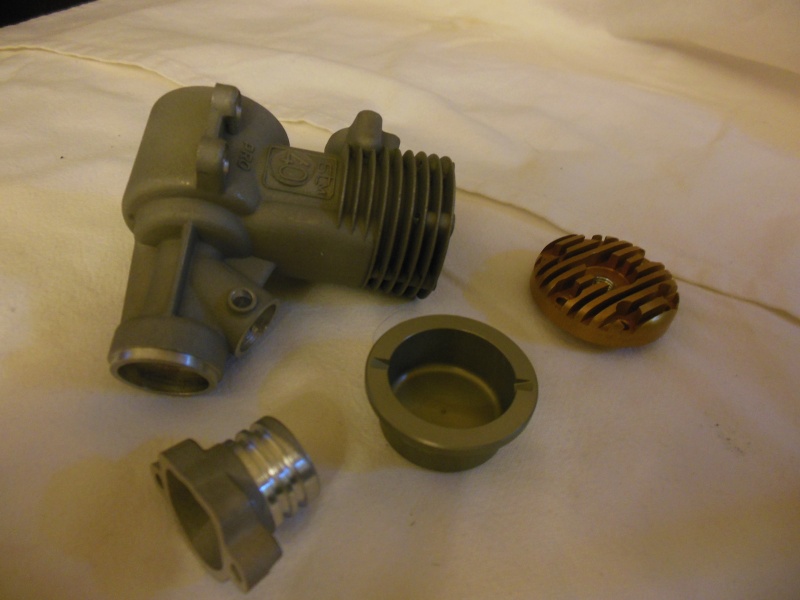
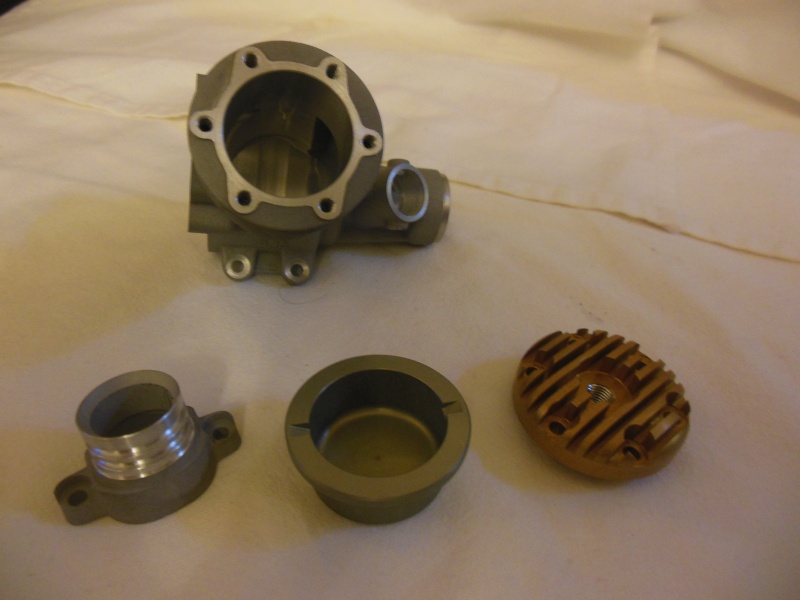
I was very impressed with the quality and the machining and so I made direct contact and bought up a load more spares and parts (after reading the Brian Turner Stalker build -
http://www.machineconcepts.co.uk/aeromodelling/brians_engine/stunt_engine_1.htm
and, by chance, I saw a snippet on a Windy video of him testing one)
Now I have two Stalker Pro 40s, a Stalker pro 51 and a Stalker Pro 55.
Here are the bits for the 51 and the 55
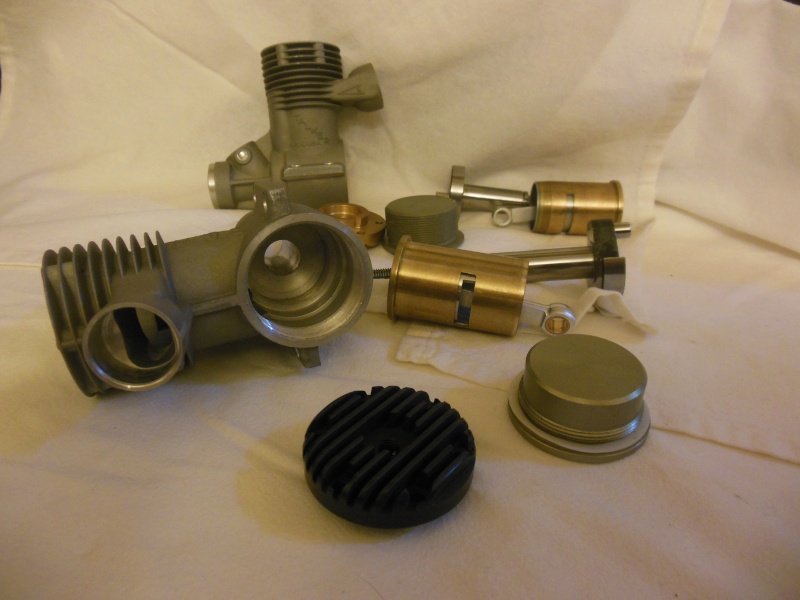
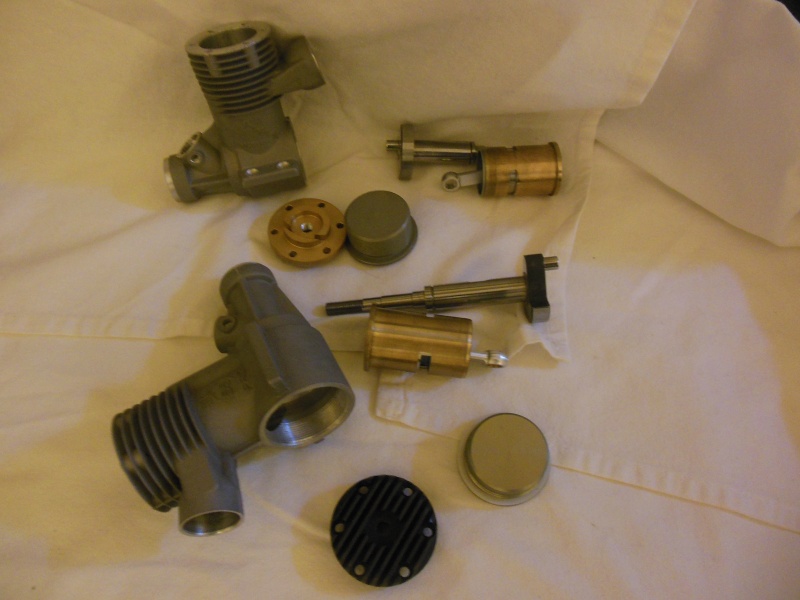
and my progress with the 40s
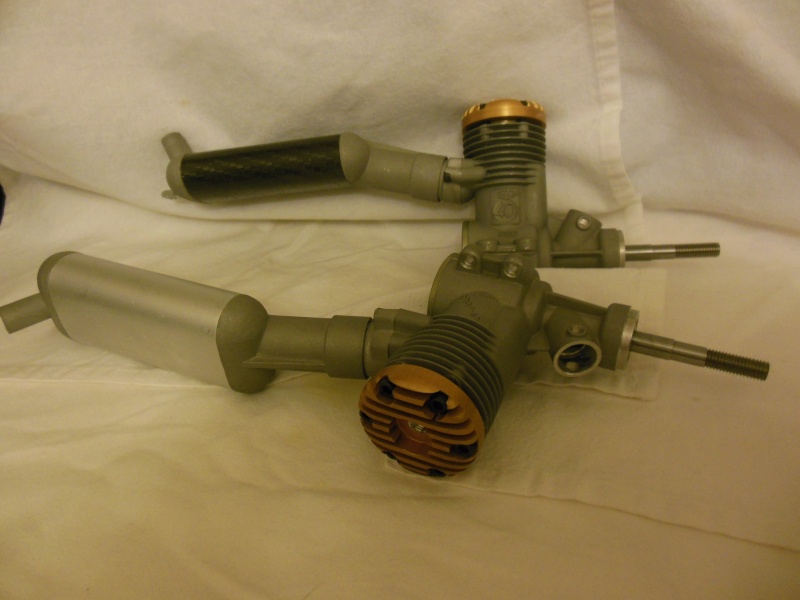
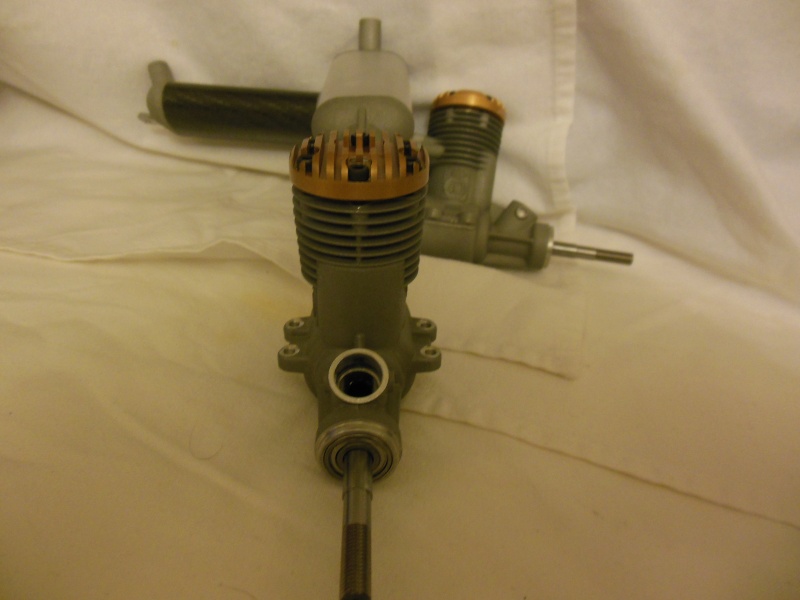
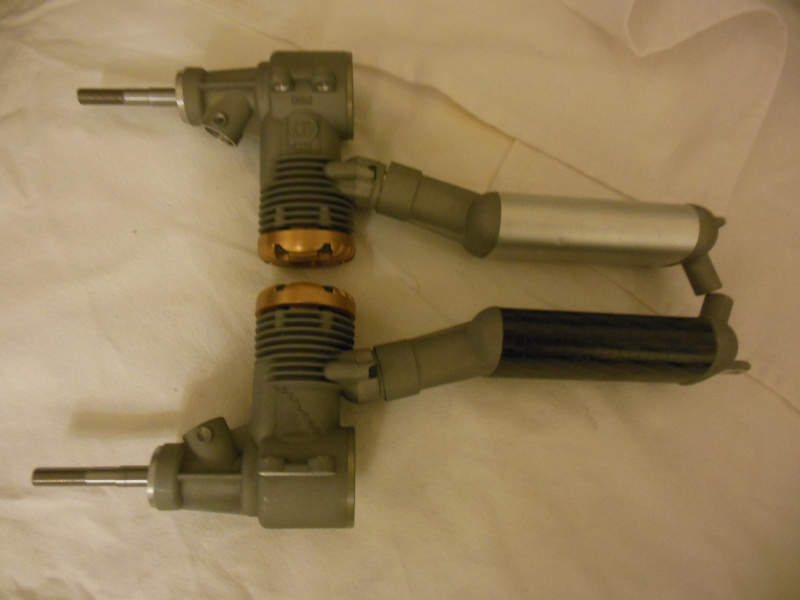
Completed engines were sold off years ago and now the chap is moving house and was keen to shift the spares. He is a very nice chap and you could tell that providing these engines was more a hobby than a business. I feel very fortunate to have swept up the pick of the litter and so far I have only had to do minor tweaking.
http://www.stalker-modusa.com/history_modusa.html
http://www.stalker-modusa.com/history_engines.html
I am now at the more time consuming stage - one of the back plates either needs re threading or remaking. I have four venturis to fettle and four NVAs to build. From the measurements I have obtained the NVAs are ST 2.5 equivalents (there or there abouts) and I have the drawings for those. They also match the NVA drawings that Brian Turner produced (there or there abouts). I have all the tooling for this.
I need to make the propeller drivers, washers and nuts. I can batch build these so once I have fettle one the rest will roll off my production line (delusions of grandeur!). The propeller driver will also need a split collet for retaining the crankshaft.
There are quite a few fine adjustments to be made and I have all the bearings that I need , the head bolts are metric and I need to make some head gaskets and back plate gaskets.
Watch this space!
I don't know that much about Stalker engines but recently - Stalker Modusa in the UK - started to sell off spare parts and once I realised that there were enough odd bits to form the basis of an engine build, I bought a sample.
When I say build, these are spare parts and need some "fettling" to assemble and there are a few missing and mismatched components but with a crankcase, head and a piston/liner assembly - I am off to trot.
So I bought the parts on offer for a Stalker Modusa Pro 40.


I was very impressed with the quality and the machining and so I made direct contact and bought up a load more spares and parts (after reading the Brian Turner Stalker build -
http://www.machineconcepts.co.uk/aeromodelling/brians_engine/stunt_engine_1.htm
and, by chance, I saw a snippet on a Windy video of him testing one)
Now I have two Stalker Pro 40s, a Stalker pro 51 and a Stalker Pro 55.
Here are the bits for the 51 and the 55


and my progress with the 40s


Completed engines were sold off years ago and now the chap is moving house and was keen to shift the spares. He is a very nice chap and you could tell that providing these engines was more a hobby than a business. I feel very fortunate to have swept up the pick of the litter and so far I have only had to do minor tweaking.
http://www.stalker-modusa.com/history_modusa.html
http://www.stalker-modusa.com/history_engines.html
I am now at the more time consuming stage - one of the back plates either needs re threading or remaking. I have four venturis to fettle and four NVAs to build. From the measurements I have obtained the NVAs are ST 2.5 equivalents (there or there abouts) and I have the drawings for those. They also match the NVA drawings that Brian Turner produced (there or there abouts). I have all the tooling for this.
I need to make the propeller drivers, washers and nuts. I can batch build these so once I have fettle one the rest will roll off my production line (delusions of grandeur!). The propeller driver will also need a split collet for retaining the crankshaft.
There are quite a few fine adjustments to be made and I have all the bearings that I need , the head bolts are metric and I need to make some head gaskets and back plate gaskets.
Watch this space!

ian1954- Diamond Member

- Posts : 2688
Join date : 2011-11-16
Age : 70
Location : England
 Re: Stalking about!
Very nice Ian! I didn't see bearings in the purchased-parts photos. Did you have ones that fit.. or did you need to do a little machining to fit some that were close to the size needed?
The silencers look great! Were they being offered along with the engine parts.. or are they retro-fit silencers?
The silencers look great! Were they being offered along with the engine parts.. or are they retro-fit silencers?
 Re: Stalking about!
I have a stock of bearings and together with some that were supplied with the engines, I have all I need. The two 40s were a nice press fit.
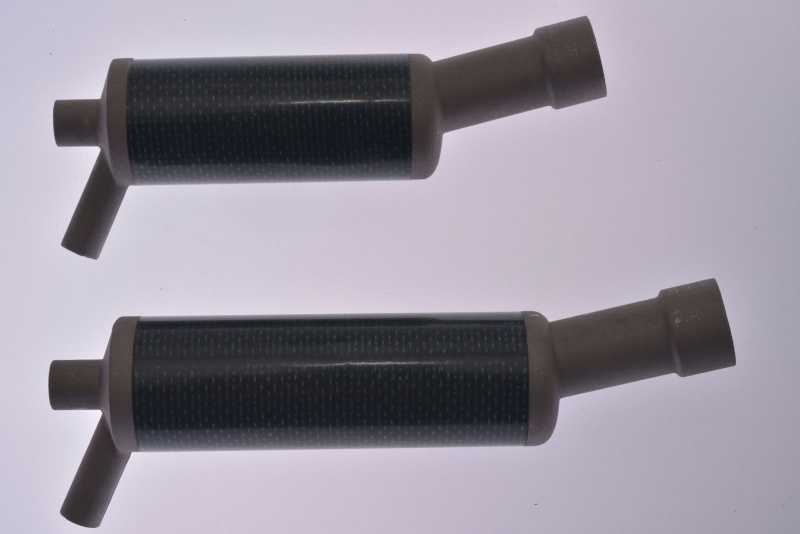
The silencers are Stalker silencers, they are the standard ones. When I got them, I realised that I can also get them to fit quite a few of my rear exhaust engines. They were the last of the standard ones and so I snaffled four lightweight mufflers. They are round in shape and carbon fibre.
I have all the metal I need to make everything and the head screws. The bearings are all metric.
The silencers are Stalker silencers, they are the standard ones. When I got them, I realised that I can also get them to fit quite a few of my rear exhaust engines. They were the last of the standard ones and so I snaffled four lightweight mufflers. They are round in shape and carbon fibre.

I have all the metal I need to make everything and the head screws. The bearings are all metric.

ian1954- Diamond Member

- Posts : 2688
Join date : 2011-11-16
Age : 70
Location : England
 Re: Stalking about!
Wow.. I'm excited for you. It must be nice to be able to build an engine.. without having to build the "whole" engine! Hopefully the parts that you "do" need to fabricate, will be straight-forward fitting-up. I assume that these will be "runners" and slated for airplanes in your building-queue?
The silencers were a good score.. especially where they fit other engines. All the Stalker parts look well made, as you said. Any thoughts on a throttle for one of the engines? I'm sure that you must have some RC carbs in waiting... (like the "pound-puppy") to have a new home!
The silencers were a good score.. especially where they fit other engines. All the Stalker parts look well made, as you said. Any thoughts on a throttle for one of the engines? I'm sure that you must have some RC carbs in waiting... (like the "pound-puppy") to have a new home!
 Re: Stalking about!
I carefully selected some aluminum to make the split collets, propeller drivers and venturies.
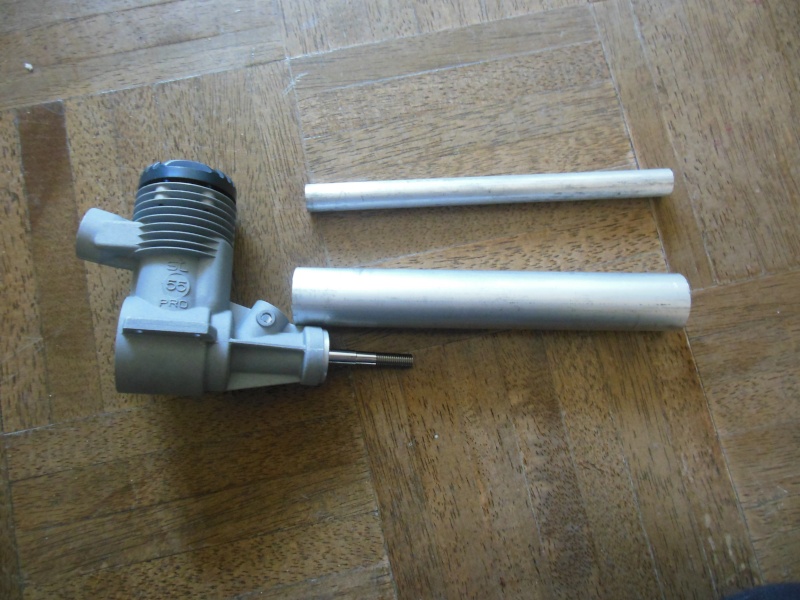
I measured them carefully
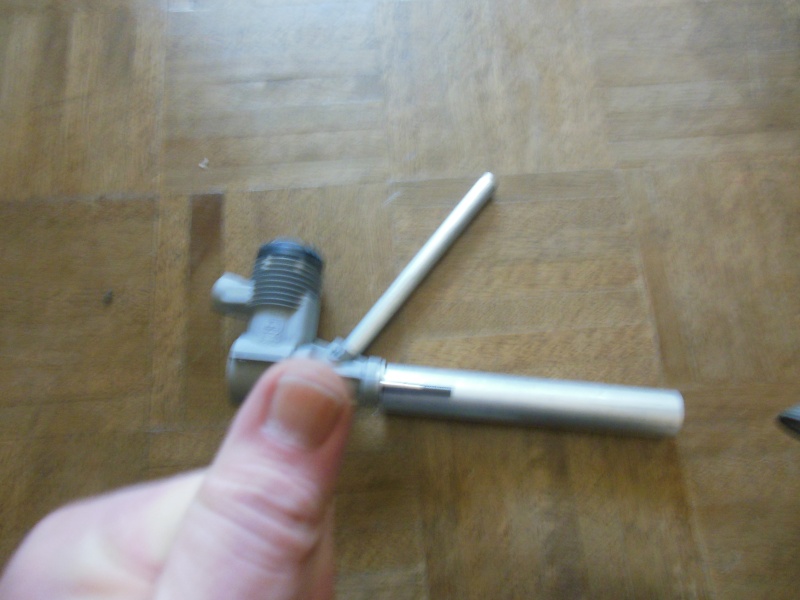
I decided to make the collets first - and set the tool height. This is one of my homemade devices that speeds this up.

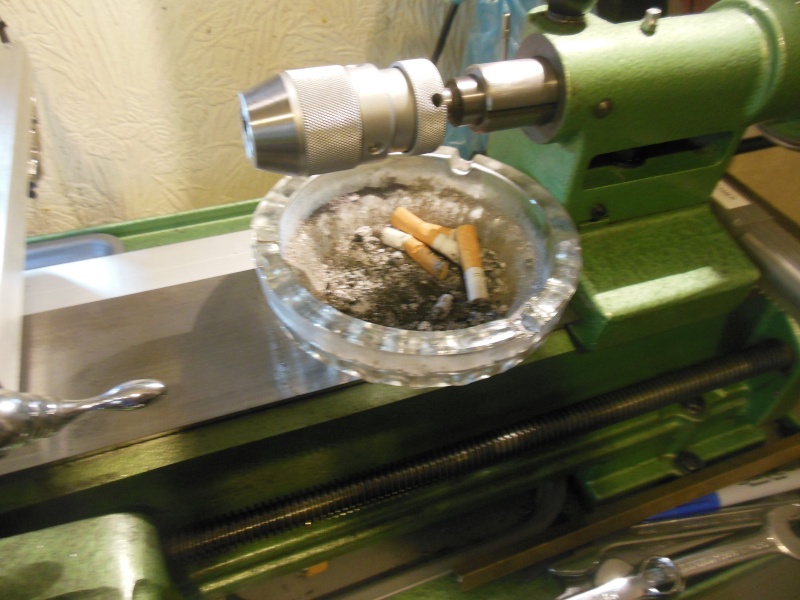
Always being mindful of health and safety, I put my ashtray in a safe place. I don't want to start a fire!
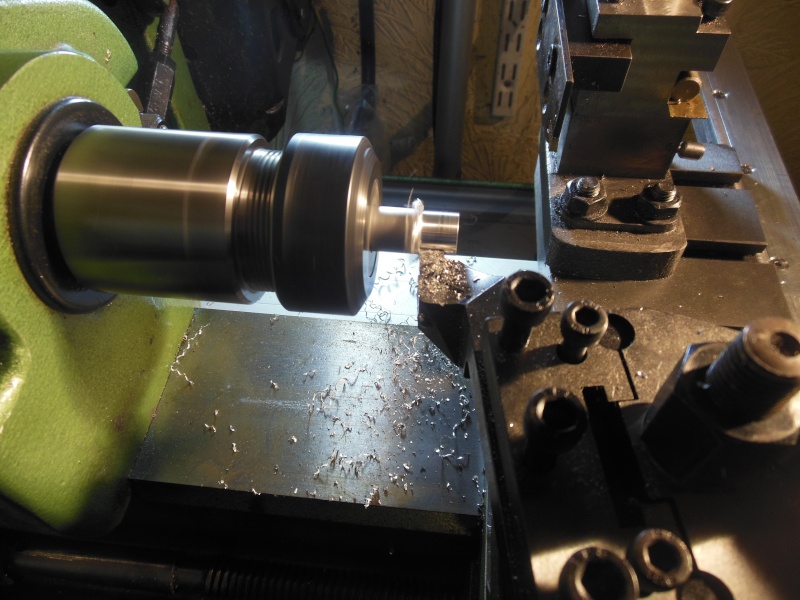
The bar stock was turned down to 11mm
Drilled and reamed to 7 mm
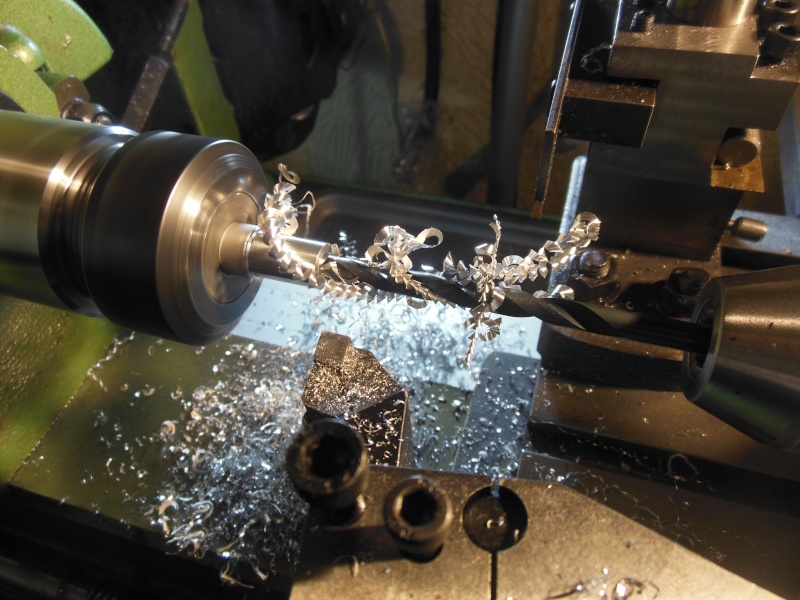
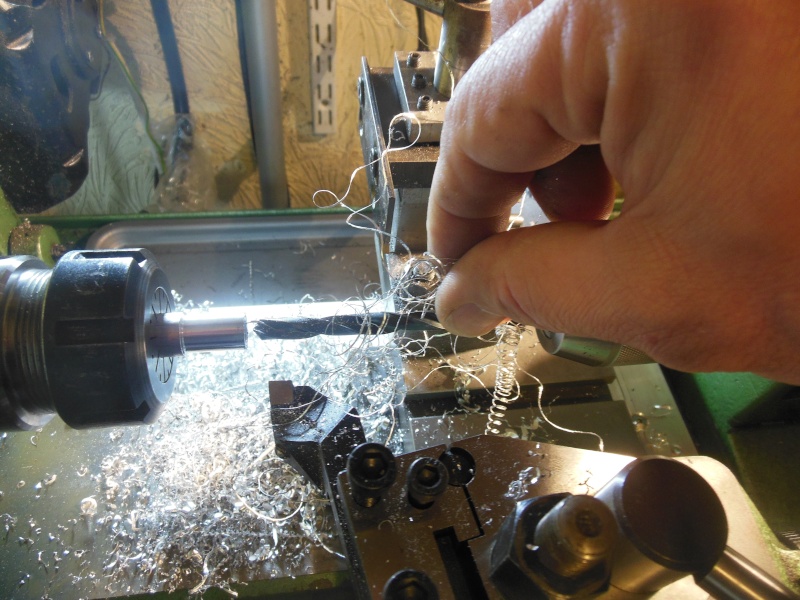
DO NOT DO THIS WHILE THE LATHE IS RUNNING. Swarf is razor sharp!
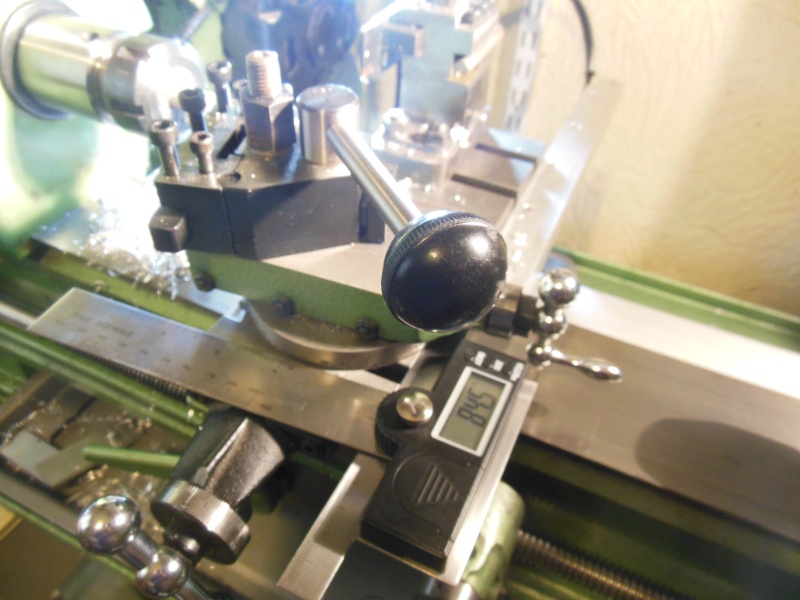
This is the tool I use to set the desired angle for the taper. Ignore the reading - I am just showing the angle gauge, I use 6.5deg - Why? Because I have found that angle works well for a split collet prop driver arrangement and I have made a D bit reamer for producing that angle in the driver.
All done - just needs slitting.
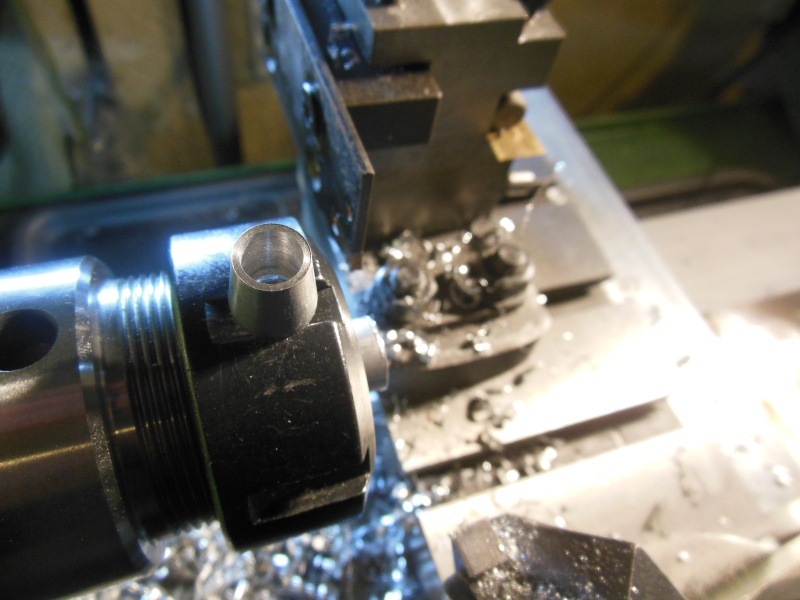
All four done in 15 minutes.

I measured them carefully

I decided to make the collets first - and set the tool height. This is one of my homemade devices that speeds this up.

Always being mindful of health and safety, I put my ashtray in a safe place. I don't want to start a fire!

The bar stock was turned down to 11mm

Drilled and reamed to 7 mm

DO NOT DO THIS WHILE THE LATHE IS RUNNING. Swarf is razor sharp!

This is the tool I use to set the desired angle for the taper. Ignore the reading - I am just showing the angle gauge, I use 6.5deg - Why? Because I have found that angle works well for a split collet prop driver arrangement and I have made a D bit reamer for producing that angle in the driver.

All done - just needs slitting.

All four done in 15 minutes.

ian1954- Diamond Member

- Posts : 2688
Join date : 2011-11-16
Age : 70
Location : England
 Re: Stalking about!
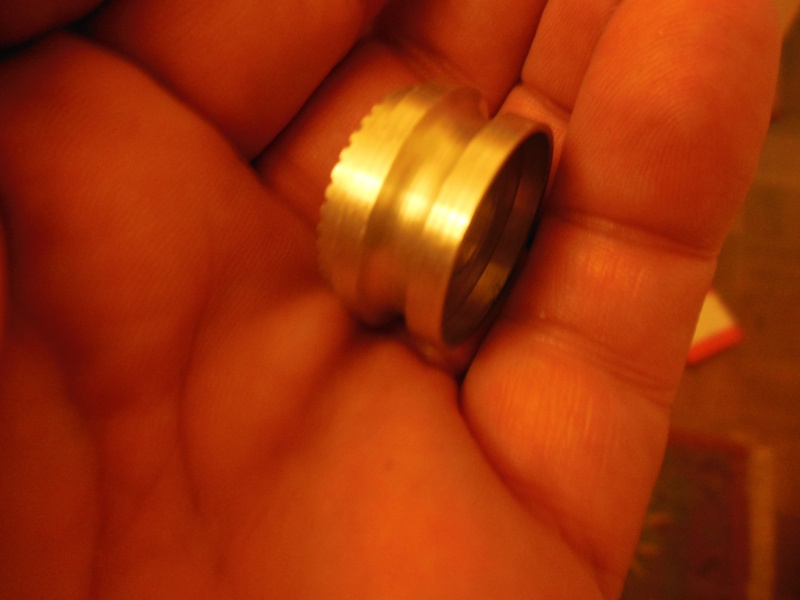
The venturis were simple turning jobs and they were soon done and adonised. Couldn't quite match the gold colour though but the blue was near enough.
Then it was time for the propeller drivers. Not quite so straight forward because of the shroud to protect the front bearing.
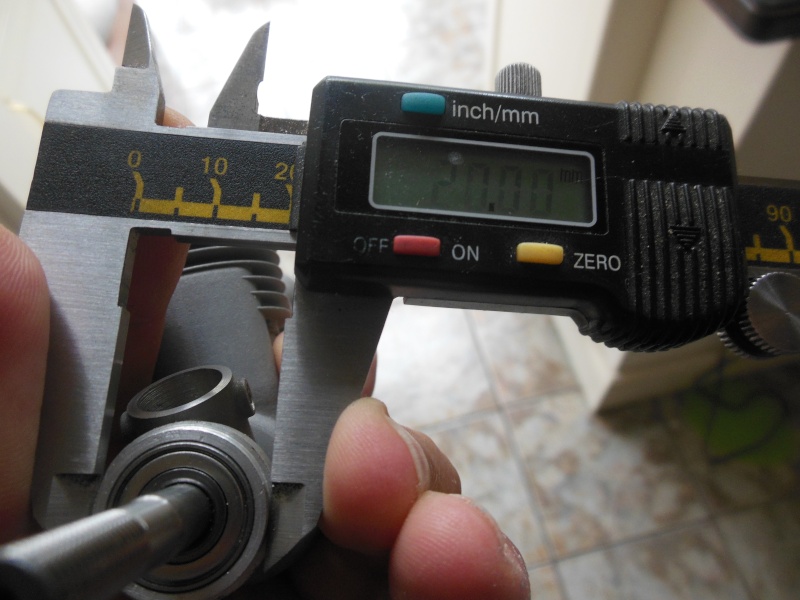
They were not all the same size - the engine in the picture is a 40 Pro - the other 40 Pro measured 20.5mm. The 51 and the 55 were different again.
I rough turned them - milled the serrations - and then it was backwards and forwards. Matching the tapered collet to the bearing shroud is trial and error. The tapered collet is slit and as it compresses the propeller driver moves backwards slightly. Sometimes too much and sometimes not enough!
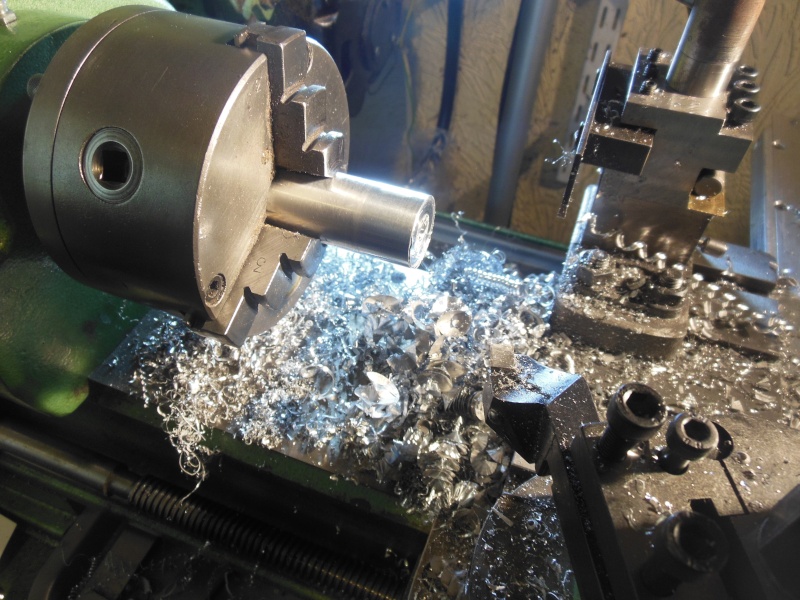
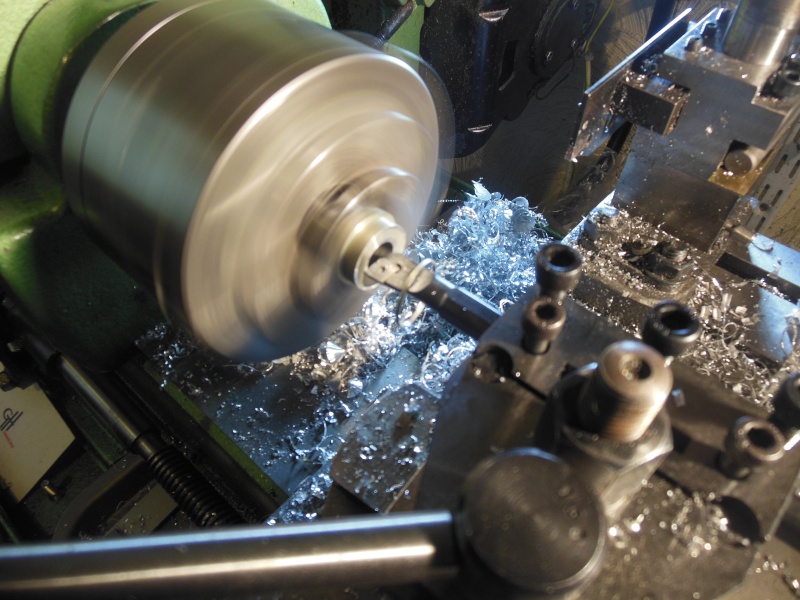
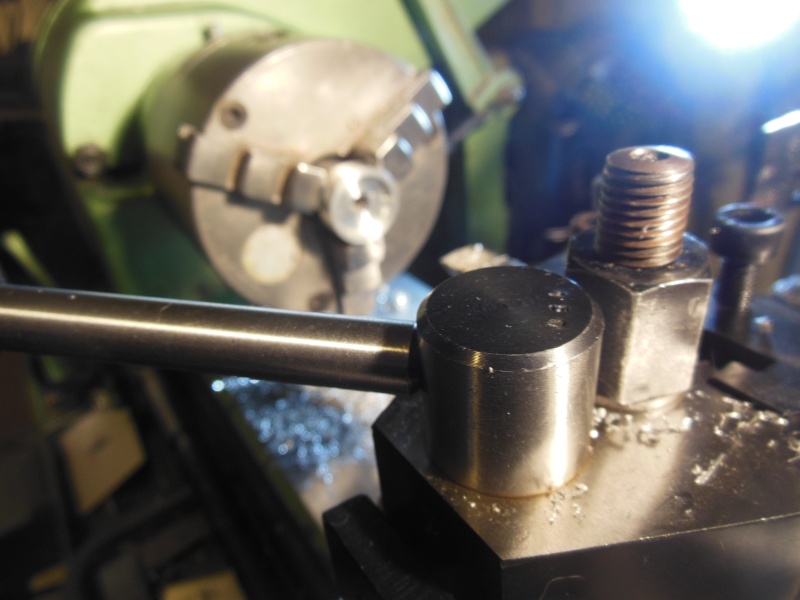
Adonising is an art rather than a science. I had trouble matching the gold heads that came with the motor parts. I did the venturis and the propeller drivers for the 40's and the 51 at the same time. The 51 parts came out darker than the 40 parts and yet they were larger!
Also on the 40's the raised section on the propeller drivers ended up patchy. I think that this was because I had machined them at finer settings. Need to think more next time but I don't do enough adonising to perfect my technique.
Technique?
Take the part, dip it in the tank - play with the voltage and the current until you see fine bubbles.
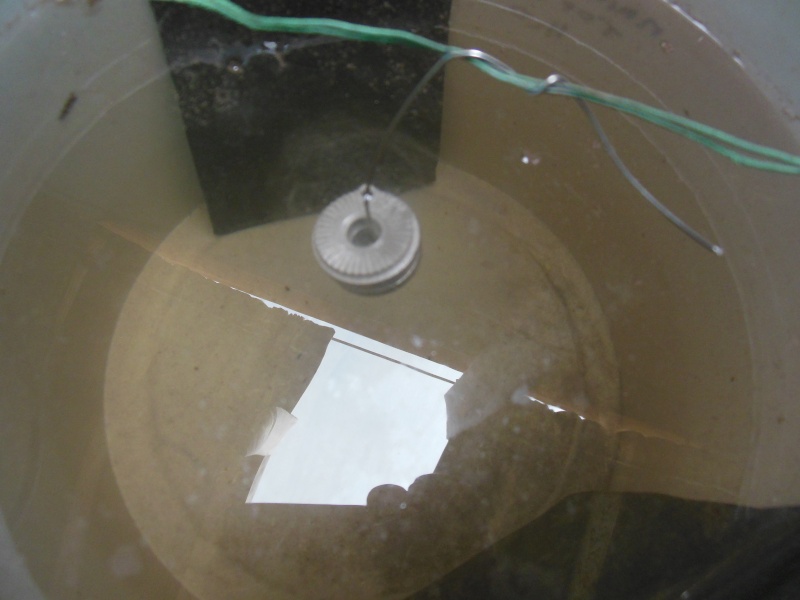
How long for? 20 to 40 minutes depending on size. Clean in distilled water and select a dye.
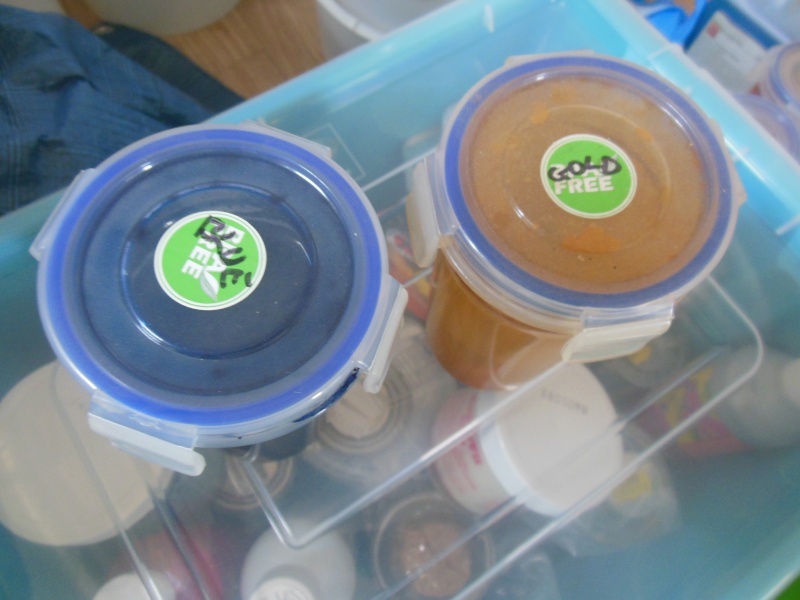
Warm up the dye to about 30 deg C and suspend the part in it.
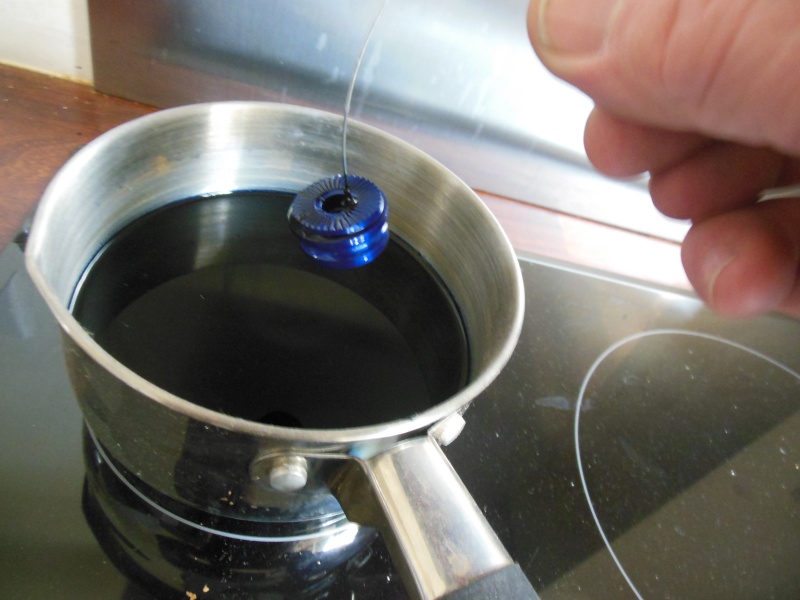
Keep an eye on it - the longer it is in there - the darker the colour will get.
Take out, rinse it and then seal it. I use anusol.
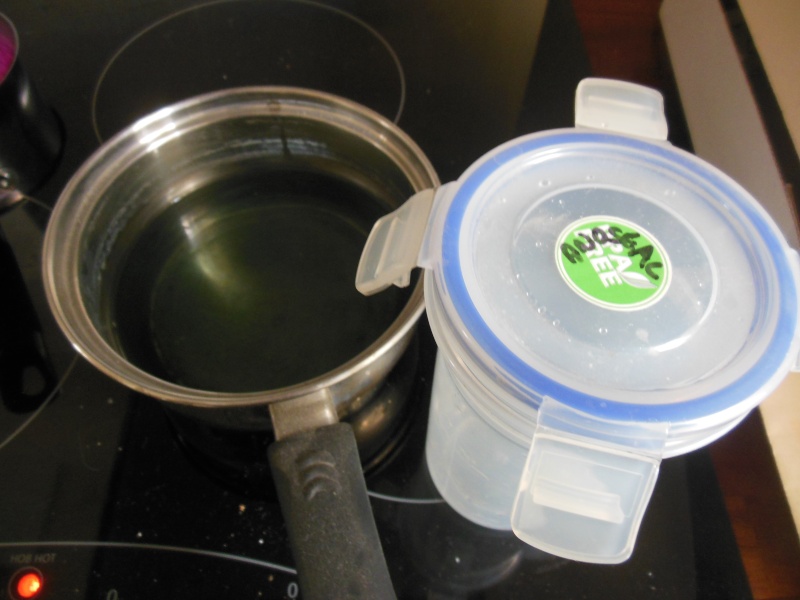
About 60 deg C for 30 minutes
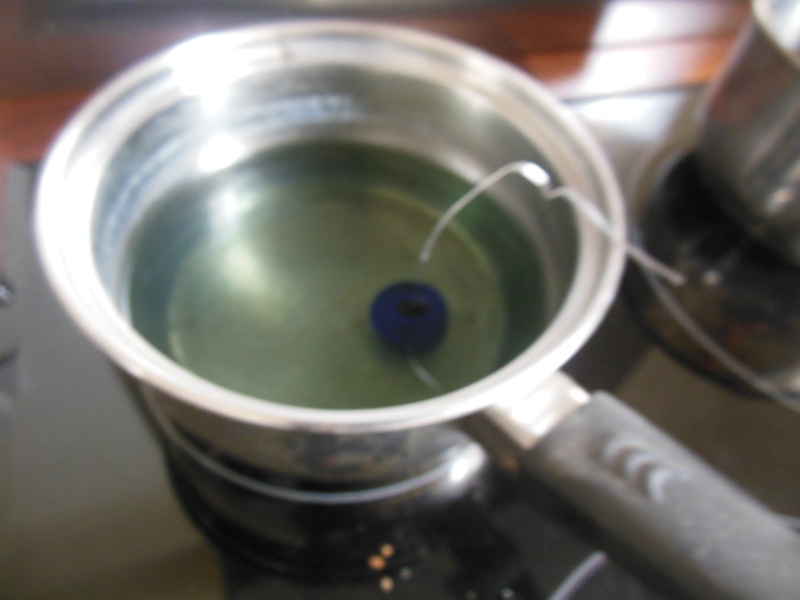
Then I dip it in boiling water to check that the dye has taken.
Fit it.
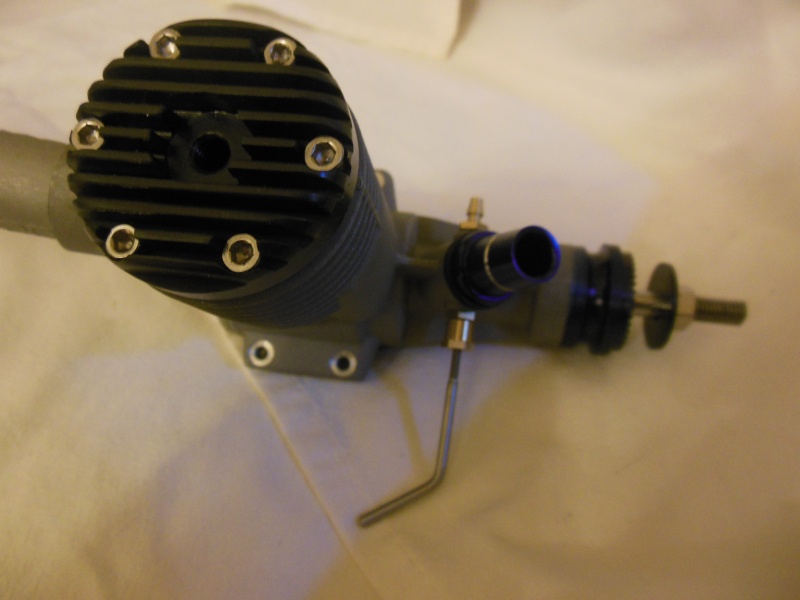
Then wonder why the head looks black in the photograph.
Where the dye didn't take on the gold propeller drivers - I just machined it again for a contrast.
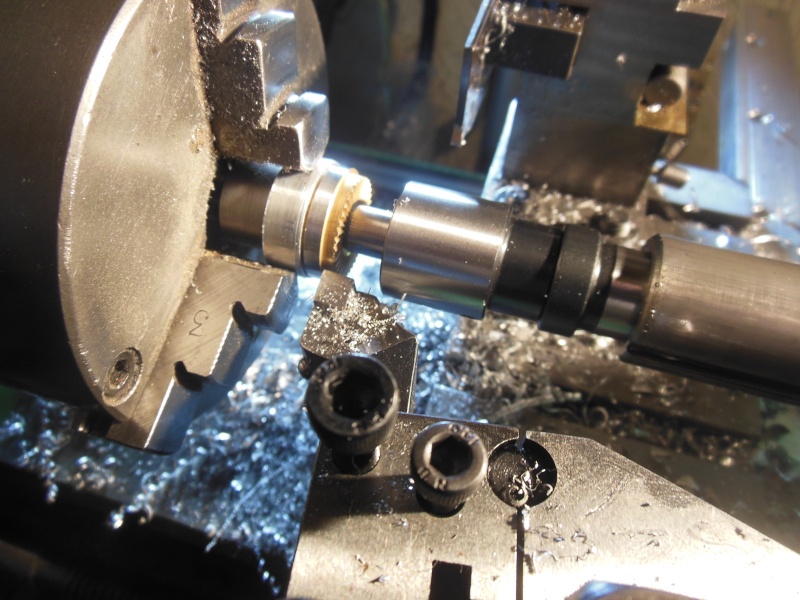
What is left to do?
Head gaskets - I have the copper but need to make some dies. I tried to take a short cut but the copper wasn't having it.
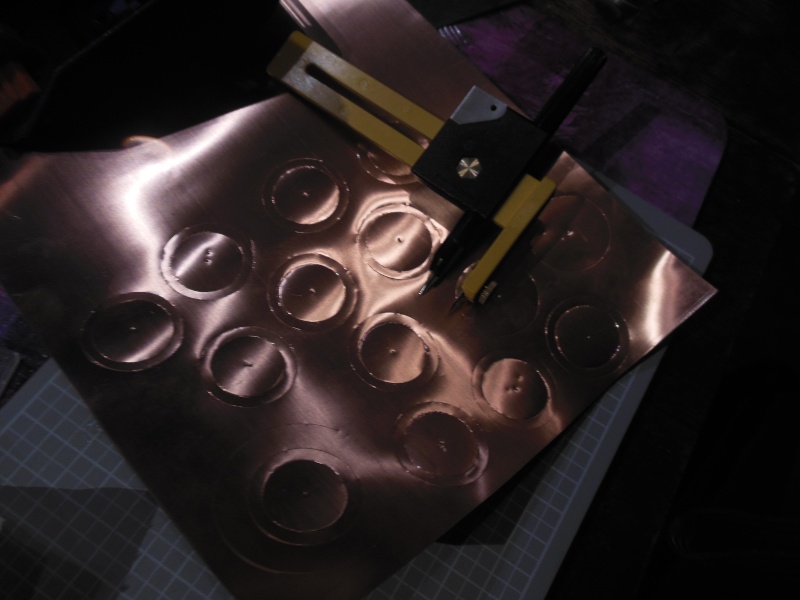
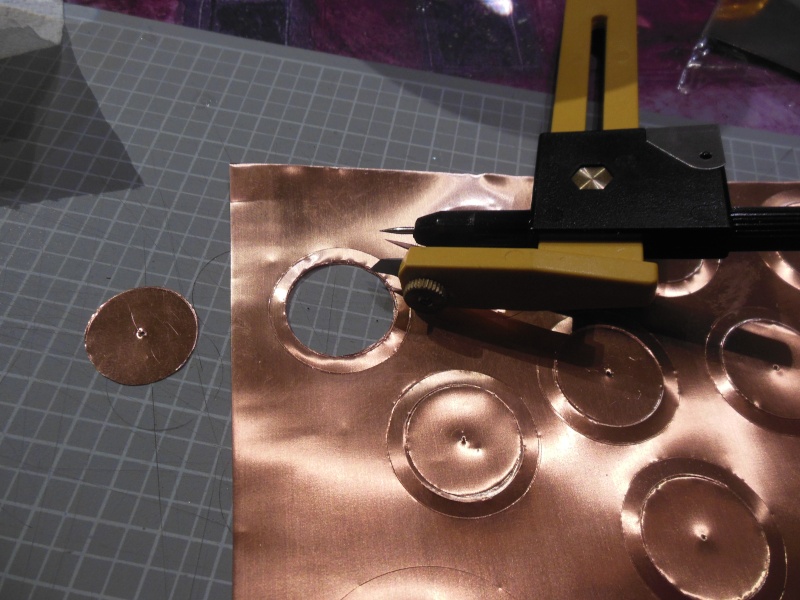
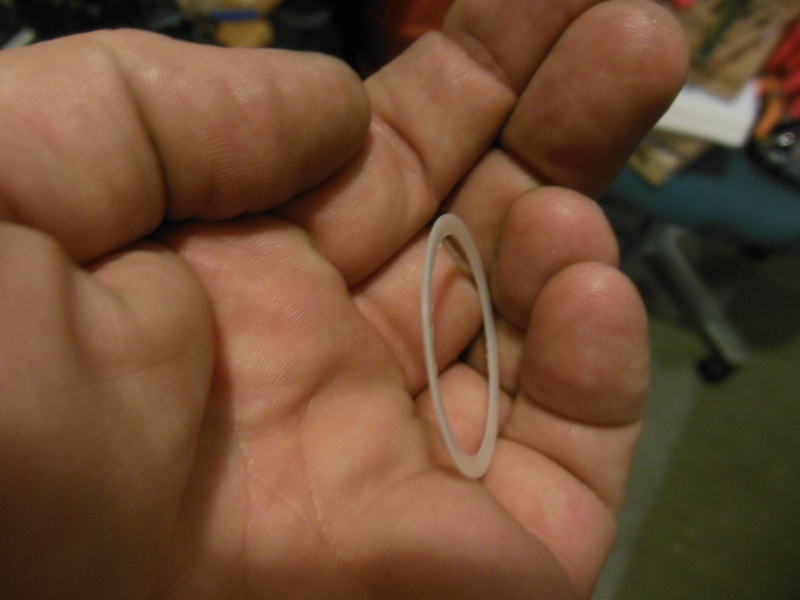
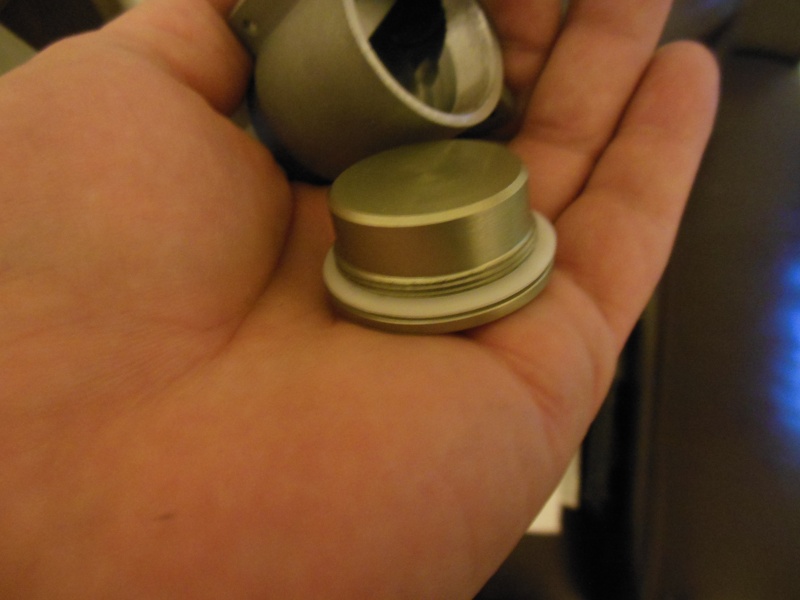
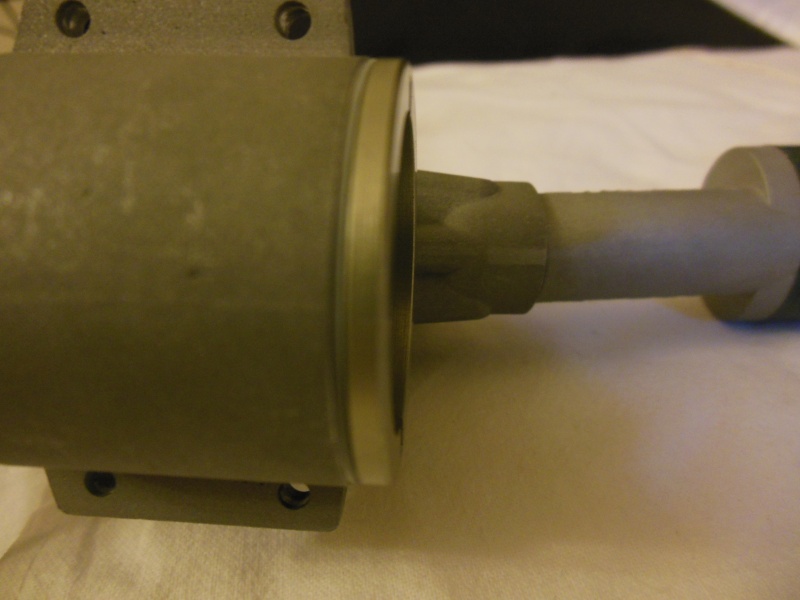
The 55 needed a gasket for the crankcase rear cover as it was binding with the crankshaft/con rod.
So I machined one out of PTFE.
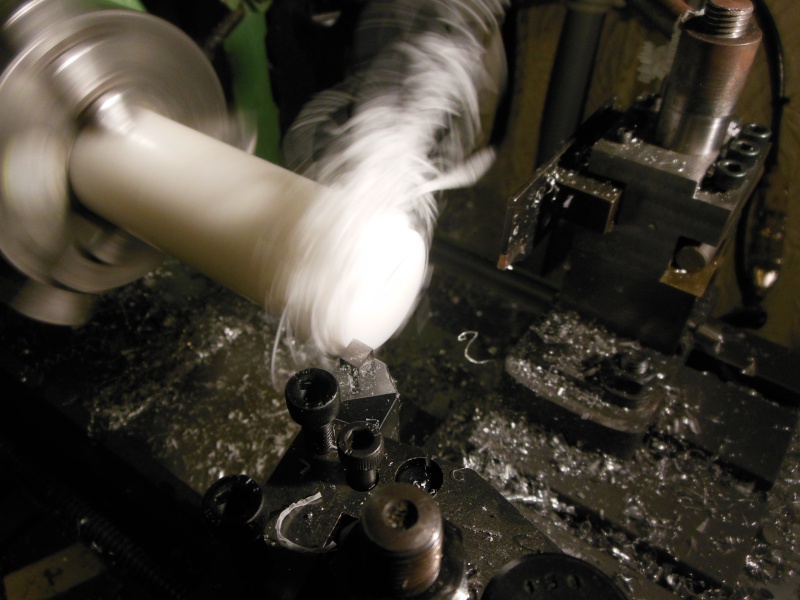
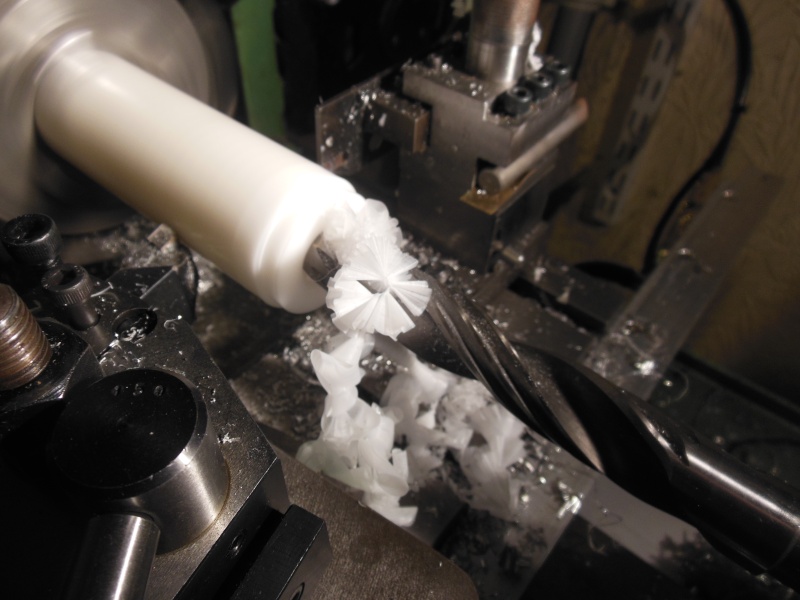
The rear cover for the 51 needs machining.
Apart from the head gaskets - the 55 is finished! One down - three to go.
Then it was time for the propeller drivers. Not quite so straight forward because of the shroud to protect the front bearing.

They were not all the same size - the engine in the picture is a 40 Pro - the other 40 Pro measured 20.5mm. The 51 and the 55 were different again.
I rough turned them - milled the serrations - and then it was backwards and forwards. Matching the tapered collet to the bearing shroud is trial and error. The tapered collet is slit and as it compresses the propeller driver moves backwards slightly. Sometimes too much and sometimes not enough!


Adonising is an art rather than a science. I had trouble matching the gold heads that came with the motor parts. I did the venturis and the propeller drivers for the 40's and the 51 at the same time. The 51 parts came out darker than the 40 parts and yet they were larger!

Also on the 40's the raised section on the propeller drivers ended up patchy. I think that this was because I had machined them at finer settings. Need to think more next time
 but I don't do enough adonising to perfect my technique.
Technique?
Take the part, dip it in the tank - play with the voltage and the current until you see fine bubbles.


How long for? 20 to 40 minutes depending on size. Clean in distilled water and select a dye.

Warm up the dye to about 30 deg C and suspend the part in it.

Keep an eye on it - the longer it is in there - the darker the colour will get.
Take out, rinse it and then seal it. I use anusol.

About 60 deg C for 30 minutes

Then I dip it in boiling water to check that the dye has taken.
Fit it.

Then wonder why the head looks black in the photograph.
Where the dye didn't take on the gold propeller drivers - I just machined it again for a contrast.

What is left to do?
Head gaskets - I have the copper but need to make some dies. I tried to take a short cut but the copper wasn't having it.


The 55 needed a gasket for the crankcase rear cover as it was binding with the crankshaft/con rod.
So I machined one out of PTFE.


The rear cover for the 51 needs machining.
Apart from the head gaskets - the 55 is finished! One down - three to go.

ian1954- Diamond Member

- Posts : 2688
Join date : 2011-11-16
Age : 70
Location : England
 Re: Stalking about!
Damn It Man Good Fun !! Thanks for sharing 


getback- Top Poster


Posts : 10430
Join date : 2013-01-18
Age : 67
Location : julian , NC
 Re: Stalking about!
Being able to machine your own parts is a wonderful skill to have if you are into Model Engines.
Great Job Ian!
Ron
Great Job Ian!
Ron

Cribbs74- Moderator


Posts : 11907
Join date : 2011-10-24
Age : 50
Location : Tuttle, OK
 Parting tool location
I see you run your parting tool "upside down" on the other side of the spindle. Do you have any problem with it "lifting" the saddle when parting off? Also, what make/size of lathe do you use?

706jim- Gold Member

- Posts : 471
Join date : 2013-11-29
 Re: Stalking about!
I missed this thread. I've got some good reading to do later tonight.
One of our fellow stunt ship builders supplies Stalker engines in the US, and wrote an article on them in a recent edition of Control Line World. I didn't pay it much mind at the time, but will look it up again now that you've given me a closeup look.
Rusty
One of our fellow stunt ship builders supplies Stalker engines in the US, and wrote an article on them in a recent edition of Control Line World. I didn't pay it much mind at the time, but will look it up again now that you've given me a closeup look.
Rusty
_________________
Don't Panic!
...and never Ever think about how good you are at something...
while you're doing it!
My Hot Rock & Blues Playlist
...and never Ever think about how good you are at something...
while you're doing it!
My Hot Rock & Blues Playlist

RknRusty- Rest In Peace

- Posts : 10869
Join date : 2011-08-10
Age : 68
Location : South Carolina, USA
 Re: Stalking about!
706jim wrote:I see you run your parting tool "upside down" on the other side of the spindle. Do you have any problem with it "lifting" the saddle when parting off? Also, what make/size of lathe do you use?
The lathe is an old Myford Speed 10.
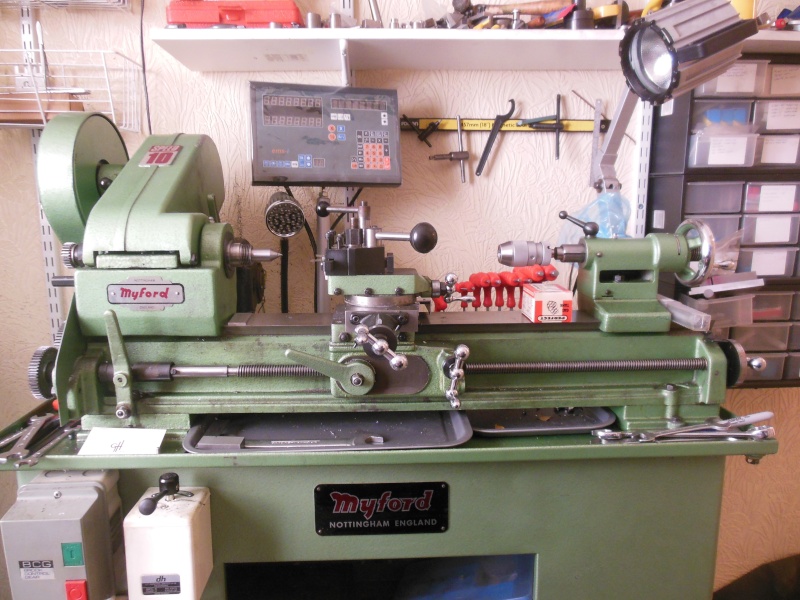
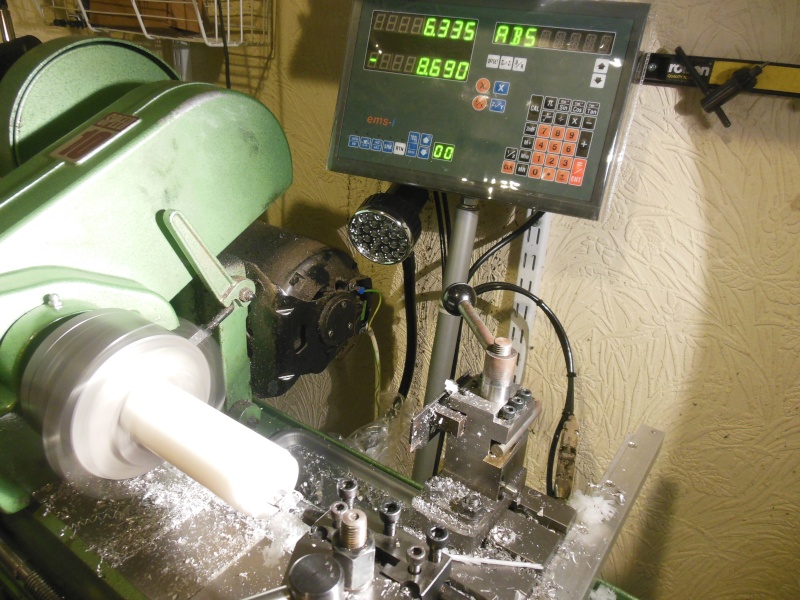
We differ with the USA on how we measure lathes - it has an 18" bed and 31/4" centre height. I bought it second hand many years ago and gradually built up the tooling for it. As you can see from the picture, I have also fitted a Digital Read Out system to it as I started making mistakes reading the dials.
There are great and often vitriolic debates on some engineering forums (I view but don't participate in) about front versus rear parting. I got fed up of changing tooling, checking centre height, getting the parting tool at right angles to the work and allowing for different widths of parting tool and so I replaced the cross slide with a longer one and built one of these.
http://www.hemingwaykits.com/acatalog/Rear_Tool_Post.html
These two books have been my machinists bibles
http://www.hemingwaykits.com/acatalog/Workshop_References.html
I have now made three heads for the rear tool post - each carrying two tools. So I have fast access to several parting tools and chamfering tools. The Myford Lathe is solid - I have had no issues with the chattering that I had when front parting - it is a smooth operation.
The only issue I have with it is that it can get in the way but should the need arise - it is easy to remove and replace.
When I first started machining - I built this
http://www.hemingwaykits.com/acatalog/Centre_Height_Gauge.html
What I found - very quickly - and this is a warning to potential lathe buyers - is that lathe tooling and lathe aids cost far in excess of the original lathe but they save time and are good to practice and self teach the art of machining.
I have another lathe - it is a Chinese import and supplied under various names in various configurations.
This one is a Sieg SC2.
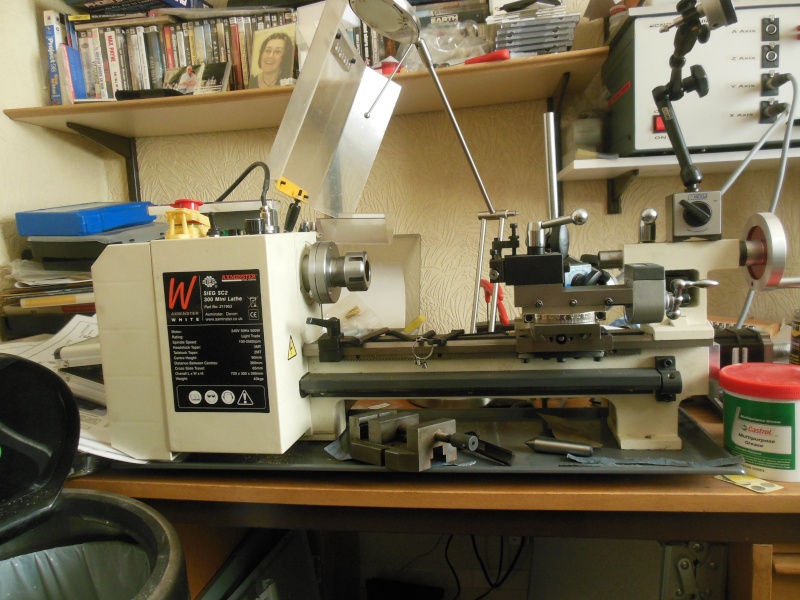
It is no where near as robust as the Myford. To you it is a 7 x 12 - to me it is a 31/2" centre height. I got this as a supplement to the Myford so that I could machine small parts when I had more complex items in the Myford.
It is a nice lathe and although it has a larger centre height - it is not robust enough for larger pieces of steel of cast iron. It will not take a raer tool post and the castings are a trifle unstable. I have to level it out on a regular basis.
I converted it to CNC and use it for curved items, ball turning and repetitive part machining.
I also configured it for screw turning but it only works with brass and aluminium. I spent hours wondering what I had done wrong as the parts I first worked on were steel. Then I realised that it was easy to bog the motor down and, as the motor changed speed (even ever so slightly) - I kept losing the match with the feed rate on the Z axis. Slow speed, soft metal - no problem.
The mini lathes are very useful but you get what you pay for.
Unfortunately for me, Myford ceased to exist a few years ago. Parts are still available but expensive. It will see me out - it is now over 30 years old and still pristine (apart from the paintwork!)
http://www.lathes.co.uk/myfordml10/

ian1954- Diamond Member

- Posts : 2688
Join date : 2011-11-16
Age : 70
Location : England
 Re: Stalking about!
Ian - I am Green with envy. Those are the kind of tools that once you have one, you want another, just because. ( I know, I have two or three really big hammers) Nice machines to do very nice work with and you certainly know how to use them. 

Marleysky- Top Poster


Posts : 3618
Join date : 2014-09-28
Age : 72
Location : Grand Rapids, MI
 Re: Stalking about!
If I had a do-over... yeah, I know, it couldn't go as desired... but if did, I would make sure I got some sort of machinist training and experience with this sort of craft. Fascinating stuff.
_________________
Don't Panic!
...and never Ever think about how good you are at something...
while you're doing it!
My Hot Rock & Blues Playlist
...and never Ever think about how good you are at something...
while you're doing it!
My Hot Rock & Blues Playlist

RknRusty- Rest In Peace

- Posts : 10869
Join date : 2011-08-10
Age : 68
Location : South Carolina, USA
 Re: Stalking about!
I love the Myford. The belt drive gives it all its charm. About 15 years ago, I bought a Super 7 in Antwerp. It is the long bed version. Unfortunately, it hasn't got the Norton box but I have all the gears and table to cut threads. As a base, I used a steel welding table. Between the table and the lathe base, I fixed a self made tray with slanted wire edged sides to easy remove the swarf. It's running on 380V.

OVERLORD- Diamond Member

- Posts : 1807
Join date : 2013-03-19
Age : 58
Location : Normandy, France
 Re: Stalking about!
I like the Super 7 and often wished that I had bought the long bed Super 7B with the gearbox. The gear box would be a great time saver from changing individual gears for threading but they were very expensive and I never saw myself taking to machining as I have.
I find it relaxing and because you have to concentrate (not very wise not to concentrate) and plan the various steps - it takes your mind away from mundane problems.
The more you use a machine the more limitations you come across. The first decision is always what you can afford (or not) and although I like the belt drive - changing speed can be a pain and there is no variation between the fixed speeds that it offers. On the other hand - the direct drive motors ten to bog down on heavy cuts even though the RPM is infinitely adjustable (between limits)
Fitting a new belt on many lathes is a task not to be undertaken lightly. On the ML10 and the Speed 10 - the drive shaft had to be dismantled and then reaasembled. This is not easy - bearings have to be adjusted and the head unit re shimmed.
When mine wore - I read the instructions and was horrified - I reckon it would have taken me days. Then a chap points me in the direction of the Fenner Powertwist belts. I bout a length of Z10 and a length of A12 - 15 minutes later I had new belts installed.
I see you have the three phase motor which can (technically - depending on the type) let you vary the motor speed. (with the right equipment and know how).
As shown here
Although, usually after I have made a mistake machining, I consider replacing it - I have grown attached to it. I can't say that for my other lathe! With the DRO system, I really like using it and for manual machining (the majority!) it is ideal.
My next move with it as it has a single phase motor which is giving me the signs of end of life and could do with a little more power will be to fit an inverter and speed control unit, as shown above, and replace the motor with a three phase 440v jobby but run it off the 240v household supply.
(We have real electrickery in the UK - higher voltage but lower current. Somewhat safer when it come to wires burning out!)
There are various units and I am still mulling it over (and have been for two years now!)
I refuse to advise anyone on a lathe purchase. I decided a long time ago that it is a constant learning process and you don't know what you want until you use one for quite a long period.
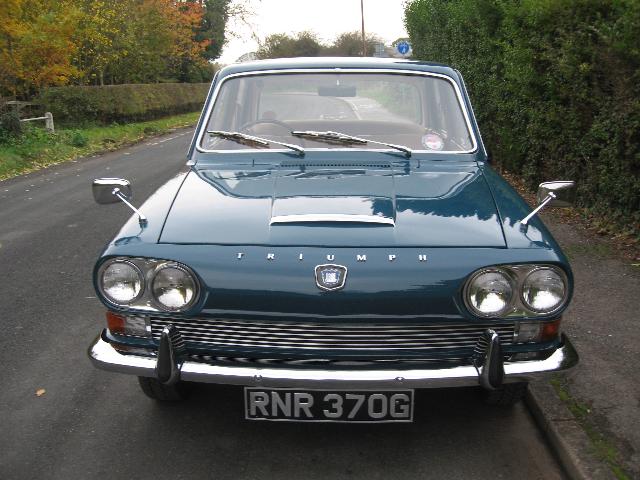
Ronald Valentine crafts the worlds smallest engines on a manual lathe. An enormous Triumph 2000. (British - naturally!)
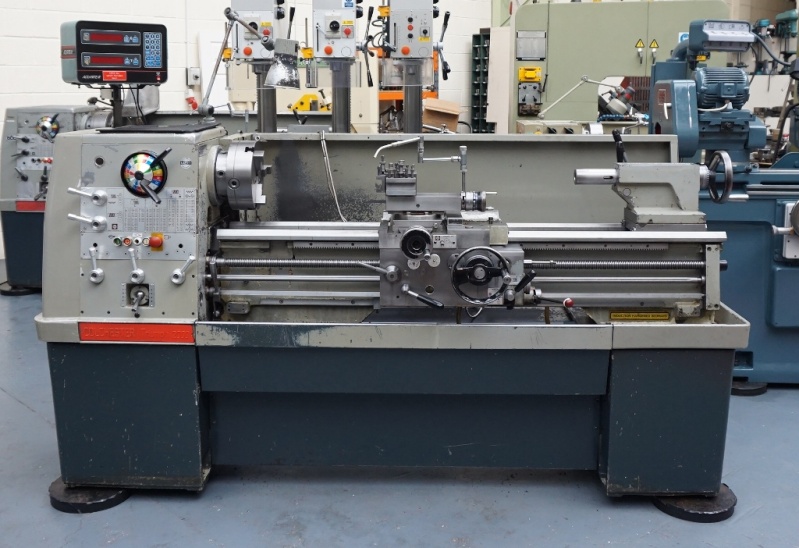
When he first told me I thought he was talking about his car!
There is a chap, in his eighties, who makes NVAs and uses a tiny Pultra lathe. No modern conveniences.
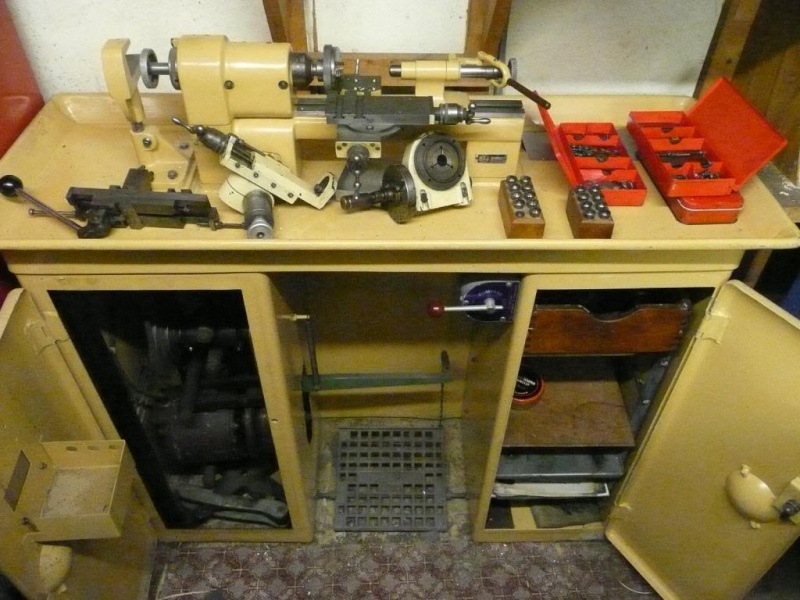
I find it relaxing and because you have to concentrate (not very wise not to concentrate) and plan the various steps - it takes your mind away from mundane problems.
The more you use a machine the more limitations you come across. The first decision is always what you can afford (or not) and although I like the belt drive - changing speed can be a pain and there is no variation between the fixed speeds that it offers. On the other hand - the direct drive motors ten to bog down on heavy cuts even though the RPM is infinitely adjustable (between limits)
Fitting a new belt on many lathes is a task not to be undertaken lightly. On the ML10 and the Speed 10 - the drive shaft had to be dismantled and then reaasembled. This is not easy - bearings have to be adjusted and the head unit re shimmed.
When mine wore - I read the instructions and was horrified - I reckon it would have taken me days. Then a chap points me in the direction of the Fenner Powertwist belts. I bout a length of Z10 and a length of A12 - 15 minutes later I had new belts installed.
I see you have the three phase motor which can (technically - depending on the type) let you vary the motor speed. (with the right equipment and know how).
As shown here
Although, usually after I have made a mistake machining, I consider replacing it - I have grown attached to it. I can't say that for my other lathe! With the DRO system, I really like using it and for manual machining (the majority!) it is ideal.
My next move with it as it has a single phase motor which is giving me the signs of end of life and could do with a little more power will be to fit an inverter and speed control unit, as shown above, and replace the motor with a three phase 440v jobby but run it off the 240v household supply.
(We have real electrickery in the UK - higher voltage but lower current. Somewhat safer when it come to wires burning out!)
There are various units and I am still mulling it over (and have been for two years now!)
I refuse to advise anyone on a lathe purchase. I decided a long time ago that it is a constant learning process and you don't know what you want until you use one for quite a long period.
Ronald Valentine crafts the worlds smallest engines on a manual lathe. An enormous Triumph 2000. (British - naturally!)

When he first told me I thought he was talking about his car!

There is a chap, in his eighties, who makes NVAs and uses a tiny Pultra lathe. No modern conveniences.


ian1954- Diamond Member

- Posts : 2688
Join date : 2011-11-16
Age : 70
Location : England
 Re: Stalking about!
I recognize the Triumph 2000 (both of them). That's a Colchester lathe. They all have this round coloured selector. I learned a lot working with them when I was following the vehicle restoration course at the Colchester Insitute in Colchester, Essex equipped with Colchester lathes, of course!
Colchester was also a car make. Cars were produced around the turn of the century but it is believed that none of them survived.
Colchester was also a car make. Cars were produced around the turn of the century but it is believed that none of them survived.

OVERLORD- Diamond Member

- Posts : 1807
Join date : 2013-03-19
Age : 58
Location : Normandy, France
 My engine lathe
This is the lathe I've been using for my 4 stroke marine engine conversions. A bit of overkill, but a lovely clutch start geared head machine with 500mm gap capacity. New 1969 from what I've heard.
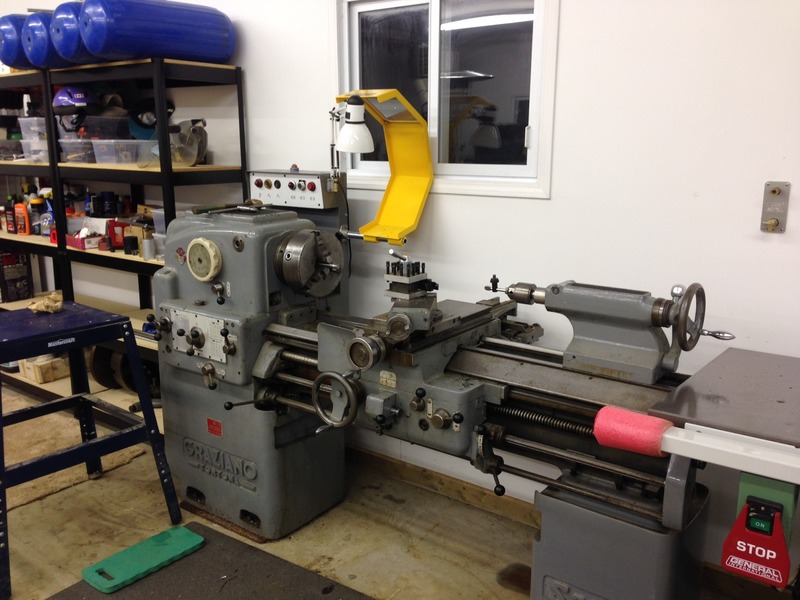


706jim- Gold Member

- Posts : 471
Join date : 2013-11-29
 Re: Stalking about!
That is a good looking and sturdy lathe. I am convinced that the bigger the lathe the easier it is to use.
You can take deeper cuts and the lathe remains stable. A big drawback though is that the tooling is more expensive.
You can take deeper cuts and the lathe remains stable. A big drawback though is that the tooling is more expensive.

ian1954- Diamond Member

- Posts : 2688
Join date : 2011-11-16
Age : 70
Location : England
 Re: Stalking about!
I went to a Trade Show years a go when that link belt came out and I always thought that was the stuff they said (( for on the road repairs ) got a sample some where?// Never ran a metal lathe but got a cheap wood one I just got as close as I am going too , feel by hand , until done These baby's .... 

 still got to cut / drill and string them. getback


 still got to cut / drill and string them. getback

getback- Top Poster


Posts : 10430
Join date : 2013-01-18
Age : 67
Location : julian , NC
 Re: Stalking about!
The 40s are now finished
https://www.coxengineforum.com/t9741-stalker-modusa-40re-pro-tbr#123592
Still have the 51 to finish - I need to machine a backplate for it.
https://www.coxengineforum.com/t9741-stalker-modusa-40re-pro-tbr#123592
Still have the 51 to finish - I need to machine a backplate for it.

ian1954- Diamond Member

- Posts : 2688
Join date : 2011-11-16
Age : 70
Location : England
Page 1 of 1
Permissions in this forum:
You cannot reply to topics in this forum

 Rules
Rules


