Log in
Search
Latest topics
» Purchased the last of any bult engines from Ken Enyaby getback Today at 7:24 am
» My N-1R build log
by rsv1cox Today at 7:05 am
» Funny what you find when you go looking
by rsv1cox Yesterday at 3:21 pm
» Landing-gear tips
by 1975 control line guy Yesterday at 8:17 am
» Cox NaBOO - Just in time for Halloween
by rsv1cox Tue Nov 19, 2024 6:35 pm
» Canada Post strike - We are still shipping :)
by Cox International Tue Nov 19, 2024 12:01 pm
» Duende V model from RC Model magazine 1983.
by getback Tue Nov 19, 2024 6:08 am
» My current avatar photo
by roddie Mon Nov 18, 2024 9:05 pm
» My latest doodle...
by TD ABUSER Mon Nov 18, 2024 11:30 am
» Brushless motors?
by rsv1cox Sun Nov 17, 2024 6:40 pm
» Free Flight Radio Assist
by rdw777 Sun Nov 17, 2024 6:03 pm
» Tribute Shoestring build
by amurphy6812 Sun Nov 17, 2024 5:43 pm
Cox Engine of The Month
Shrike X3 Experimental
Page 2 of 2
Page 2 of 2 •  1, 2
1, 2
 Re: Shrike X3 Experimental
Thanks Roddie.
That design of yours should cut a good turn of speed, not a lot of frontal resistance there. I guess you can make the wheel diameter bigger to get more speed if you need it. I'm looking forward to see it turning circles.
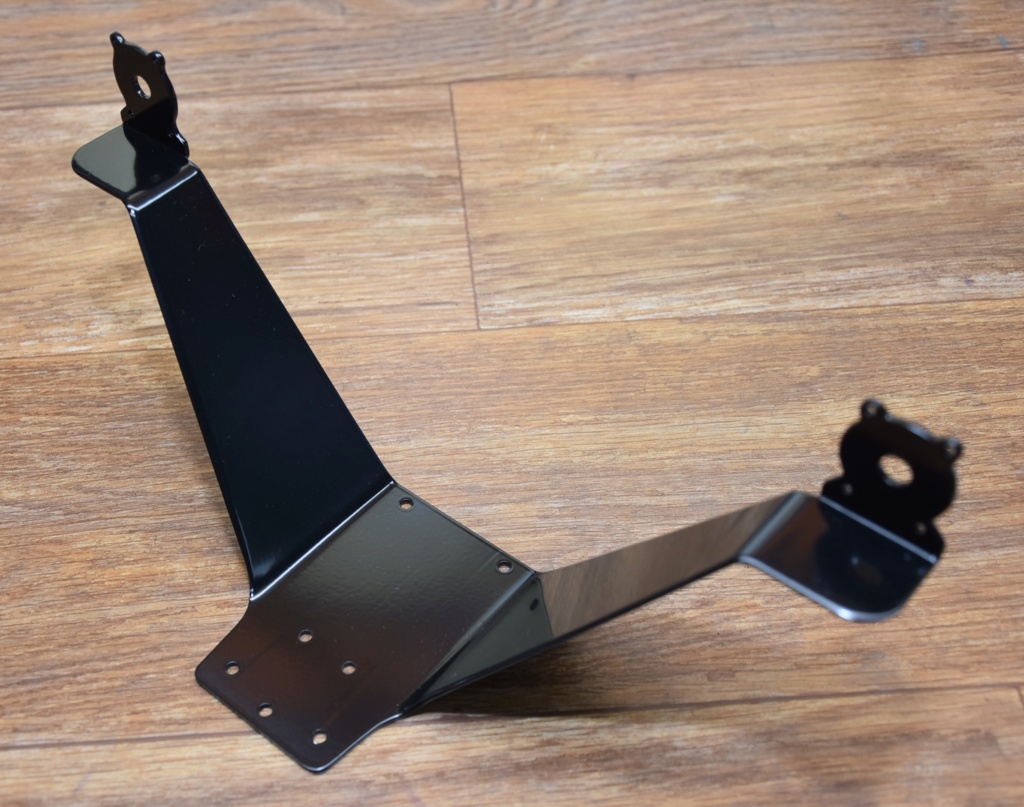
I was going to have the twin engine mount anodised but the nearest anodiser is 2hrs drive away and I was worried that they might not be able to get it back to me within the week.
So Friday (Saturday here as I'm writing this) I went to see a mate who does powder coating (we get a lot of our bike stuff done there). After some discussion we settled on satin black anti-graffiti with clearcoat which apparently is resistant to a lot of solvents.
It will be interesting to see how it handles glow fuel.
The other deciding factor was he is doing a run of black on Monday so decision made.
I spent the rest of Friday polishing.
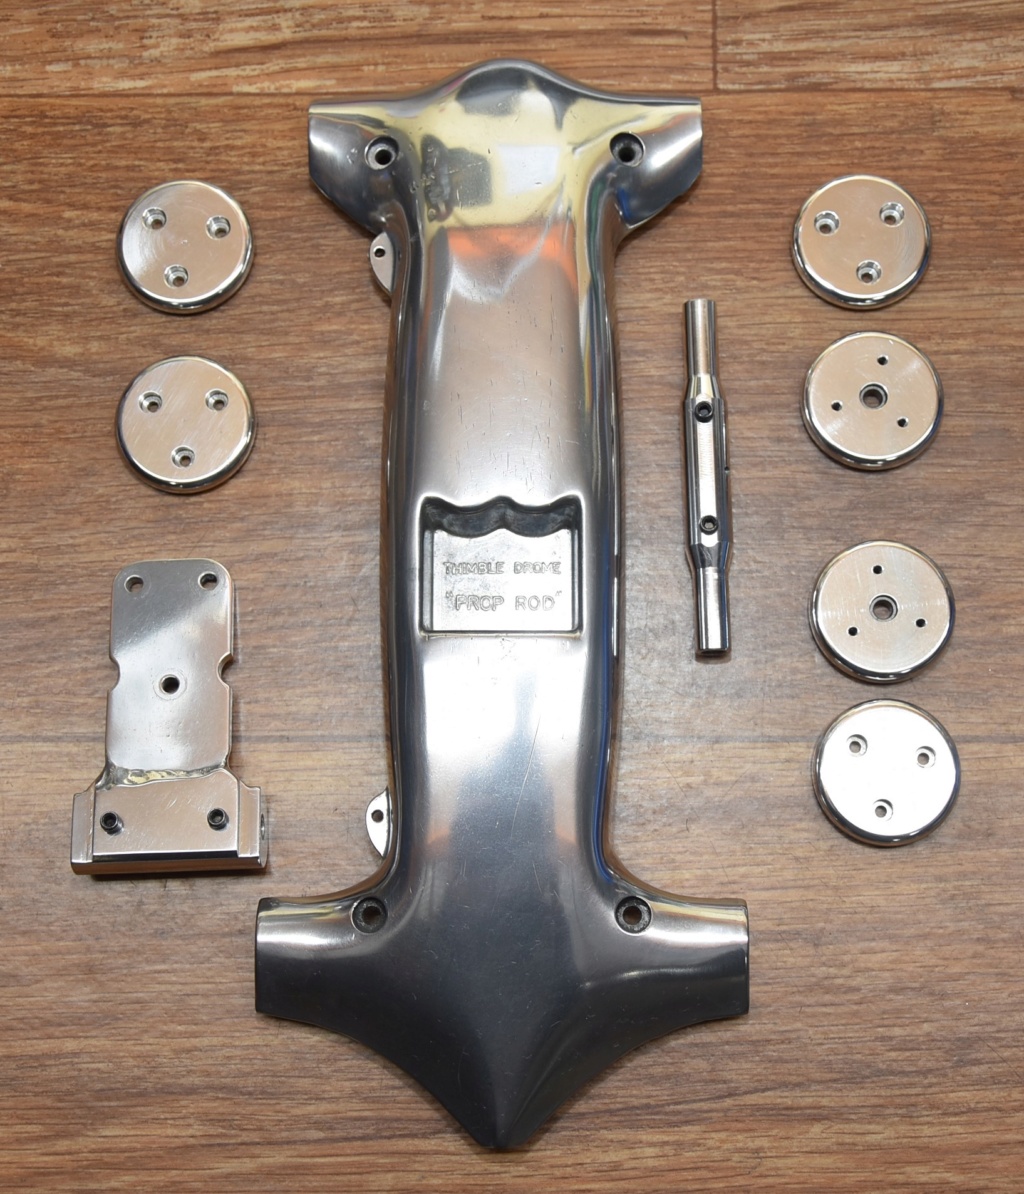


Davenz13- Platinum Member

- Posts : 597
Join date : 2013-11-28
Age : 69
Location : Palmerston North, New Zealand
 Re: Shrike X3 Experimental
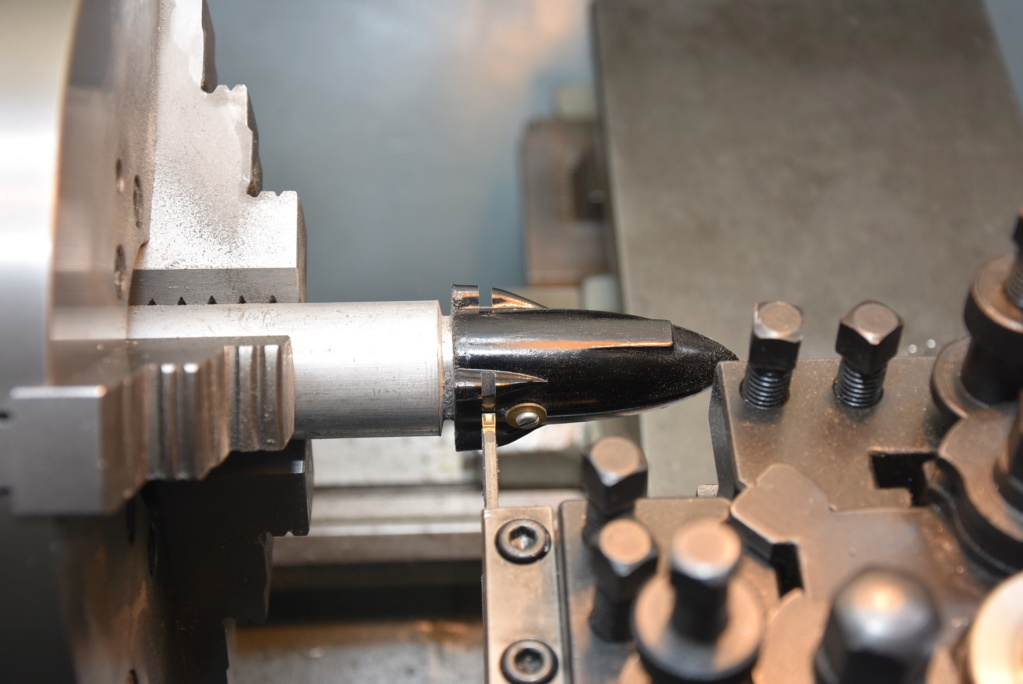
The cox nacelles for the other two engines arrived from Red Venom Repro’s this morning so I got them straight into the lathe for modifying.
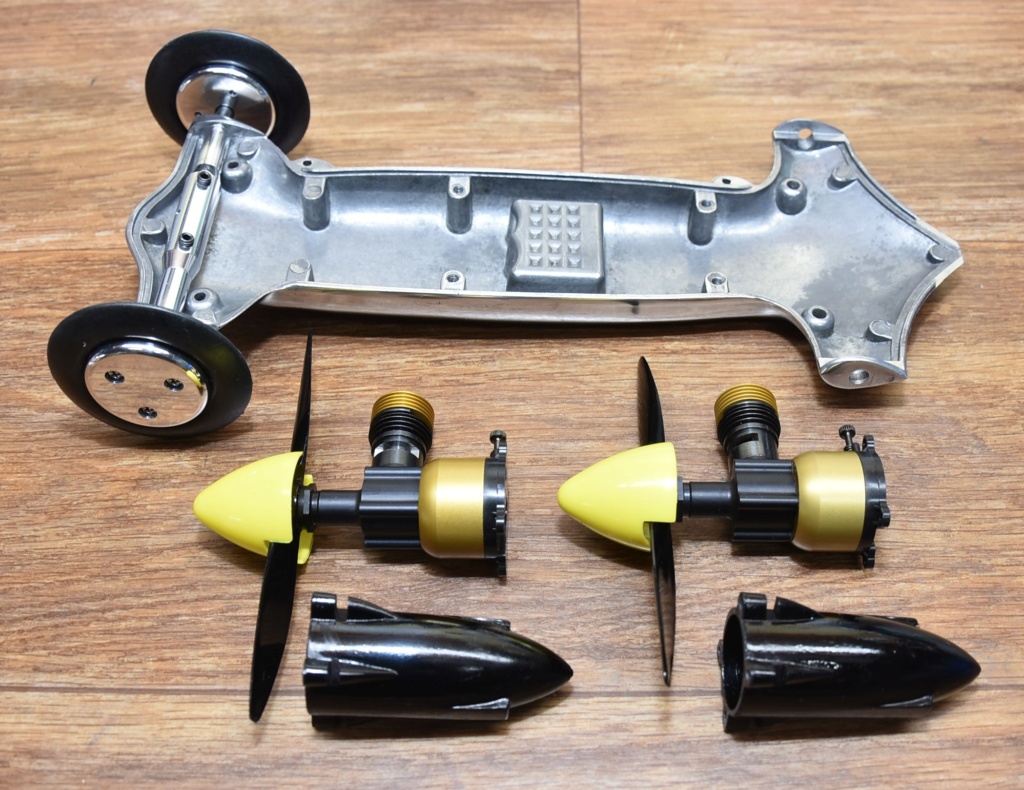
The two front facing engines are engines propped 5 x 4 and ready for fitting.
Chassis assembled as far as I can go until I get the twin engine mount back from the painters.
I need eight 2.5mm x 12.5mm screws so I had to cut them down from 20mm long ones.
Easy enough to cut the surplus off but no easy feat for my big fingers to hold onto them while dressing the ends on the linisher.
There was more than one that flicked out of my grip and disappeared into those places where disappearing things go but, I managed to hang onto eight
eventually.

The two front facing engines are engines propped 5 x 4 and ready for fitting.
Chassis assembled as far as I can go until I get the twin engine mount back from the painters.

I need eight 2.5mm x 12.5mm screws so I had to cut them down from 20mm long ones.
Easy enough to cut the surplus off but no easy feat for my big fingers to hold onto them while dressing the ends on the linisher.
There was more than one that flicked out of my grip and disappeared into those places where disappearing things go but, I managed to hang onto eight
eventually.


Davenz13- Platinum Member

- Posts : 597
Join date : 2013-11-28
Age : 69
Location : Palmerston North, New Zealand
 Re: Shrike X3 Experimental
Wow That is a really slick setup!

Frizzen- Moderate Poster

- Posts : 29
Join date : 2018-12-30
 Re: Shrike X3 Experimental
Looking good my friend! I too have lost screws while either cutting them shorter on the band saw or having them bounce off the floor never to be seen again! I know that they are some place on my basement floor,but where?

David S- Gold Member

- Posts : 176
Join date : 2015-06-23
Age : 64
Location : New Jersey
 Re: Shrike X3 Experimental
Daven that is looking Fantastic my friend you have put the fun in the work you do !! As the other racer you built it will look fast just sitting there  The bumble bee are nice and will bee quit fawst i am sure , have you broken in the engines yet ?


getback- Top Poster


Posts : 10437
Join date : 2013-01-18
Age : 67
Location : julian , NC
 Re: Shrike X3 Experimental
Hi Eric
No they're not broken in yet but after the competition I'll break them in.
I finished my engine dyno a while back but haven't used it yet so I'll try them on that once the engines have had their break in runs.
Then the car will get a run to see how it goes.
No they're not broken in yet but after the competition I'll break them in.
I finished my engine dyno a while back but haven't used it yet so I'll try them on that once the engines have had their break in runs.
Then the car will get a run to see how it goes.

Davenz13- Platinum Member

- Posts : 597
Join date : 2013-11-28
Age : 69
Location : Palmerston North, New Zealand
 Re: Shrike X3 Experimental
Got the engine mount back from the painters. Very happy with how it turned out.
With the engines mounted.
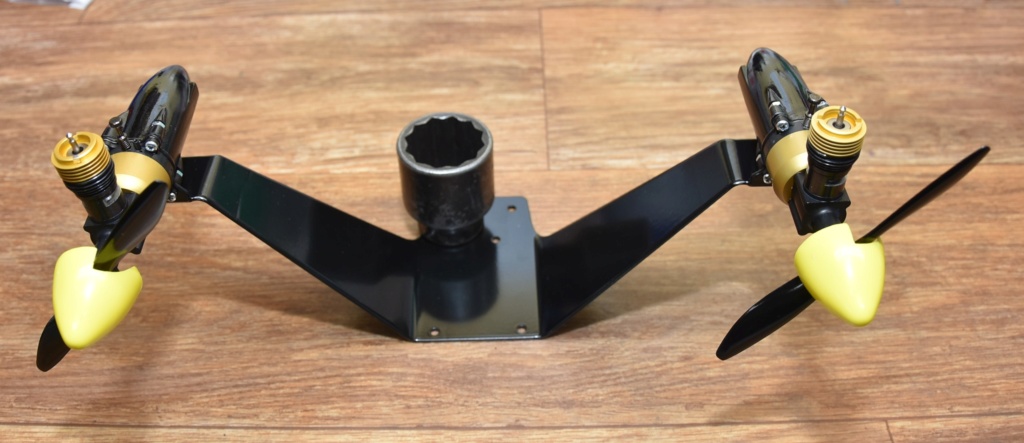
Mounted on the chassis.
Just waiting for the black button head screws that hold the body on to arrive. If they don’t get here in time, I’ll use silver ones and paint the heads black.
Otherwise finished!
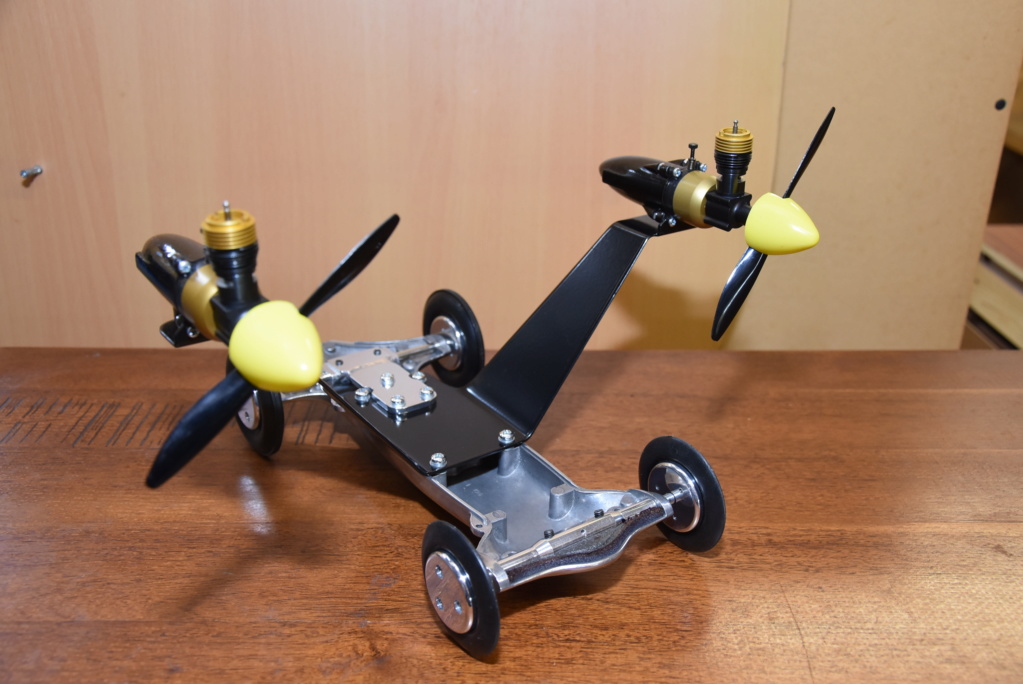

With the engines mounted.

Mounted on the chassis.
Just waiting for the black button head screws that hold the body on to arrive. If they don’t get here in time, I’ll use silver ones and paint the heads black.
Otherwise finished!


Davenz13- Platinum Member

- Posts : 597
Join date : 2013-11-28
Age : 69
Location : Palmerston North, New Zealand
 Re: Shrike X3 Experimental
Great job, I like the hidden nuts in both cones. 


OVERLORD- Diamond Member

- Posts : 1807
Join date : 2013-03-19
Age : 58
Location : Normandy, France
 Re: Shrike X3 Experimental
Wow! Looking good! I am waiting to see the body mounted to the chassie.You did an excellent job on your modified Shrike!

David S- Gold Member

- Posts : 176
Join date : 2015-06-23
Age : 64
Location : New Jersey
 Re: Shrike X3 Experimental
Hot Damn now thats a Racer , Powder coat does looks good and those skinny wheels are going to Scream!! 


getback- Top Poster


Posts : 10437
Join date : 2013-01-18
Age : 67
Location : julian , NC
 Re: Shrike X3 Experimental
As usual, I'm blown away by your work.
Fantastic!
Bob
Fantastic!
Bob

rsv1cox- Top Poster


Posts : 11245
Join date : 2014-08-18
Location : West Virginia
 Re: Shrike X3 Experimental
Thank you all for compliments.
There is such a wealth of talent in the forum I am pleased to be in such company.
It makes me try harder too.
Well the last job is to screw the body to the belly pan but, as the black socket button head screws have not arrived, I had to go to plan B.
Not having much luck with mail at the moment and as the first of June is less than sixteen hours away for me, I need to finish up.
Because it’s not a flat surface where the rear mounting screws now go completely through the body, I bent the heads of the screws to follow the contour. Not exactly best engineering practice but as my old engineering tutor has long since left this world he will never know.
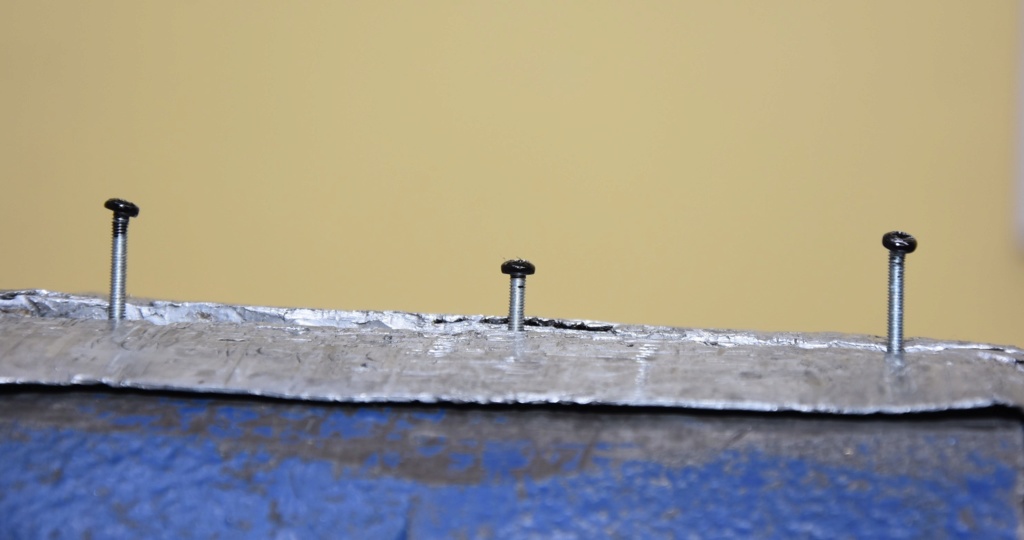
I painted the heads black and with a fat little o-ring underneath I think I might get away with it.
Just noticed I had the wrong picture here. This is what it should have been.
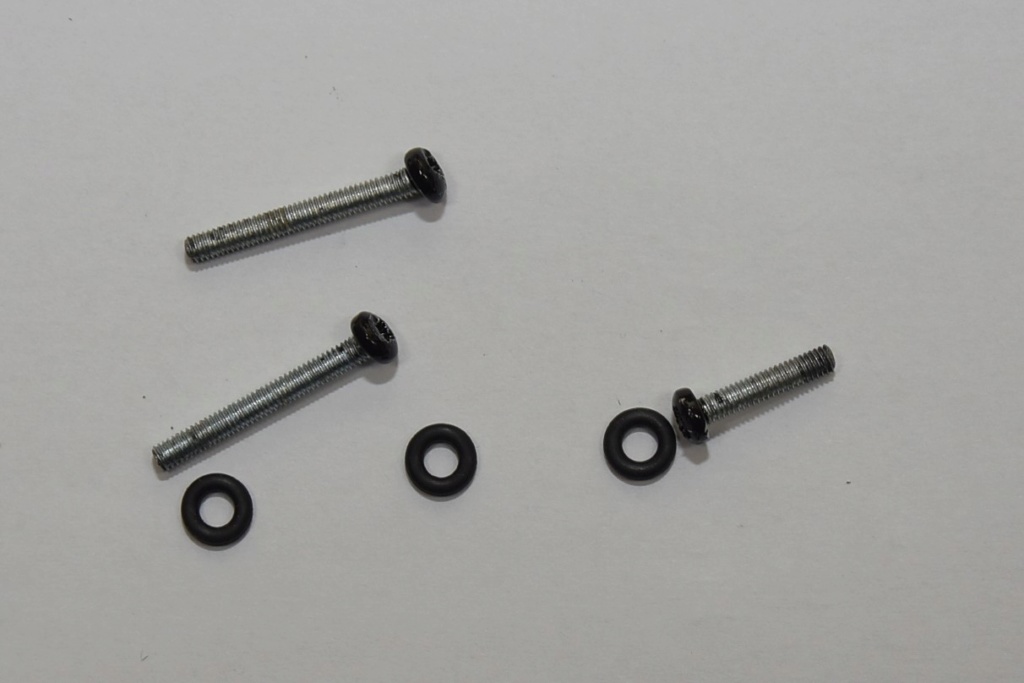
Finally, all finished. I’ll get a picture posted as soon as I can.
There is such a wealth of talent in the forum I am pleased to be in such company.
It makes me try harder too.
Well the last job is to screw the body to the belly pan but, as the black socket button head screws have not arrived, I had to go to plan B.
Not having much luck with mail at the moment and as the first of June is less than sixteen hours away for me, I need to finish up.
Because it’s not a flat surface where the rear mounting screws now go completely through the body, I bent the heads of the screws to follow the contour. Not exactly best engineering practice but as my old engineering tutor has long since left this world he will never know.

I painted the heads black and with a fat little o-ring underneath I think I might get away with it.
Just noticed I had the wrong picture here. This is what it should have been.

Finally, all finished. I’ll get a picture posted as soon as I can.

Davenz13- Platinum Member

- Posts : 597
Join date : 2013-11-28
Age : 69
Location : Palmerston North, New Zealand
 Re: Shrike X3 Experimental
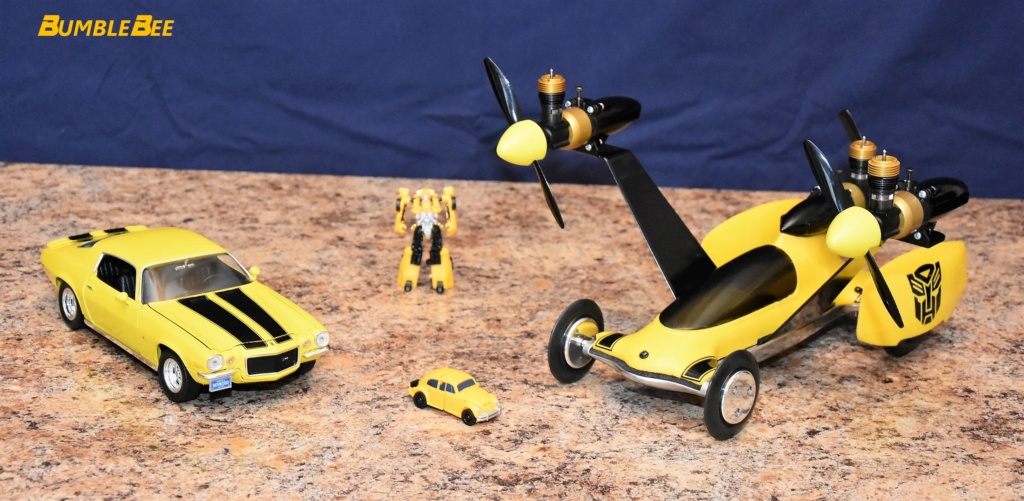
Well it’s finally finished with hours to spare.
I mentioned earlier that there was a theme to this build, which I like to do with blank canvas builds. I find it keeps me focused on the outcome.
I thought someone might have picked up on the theme as the engine name is a bit of a clue along with the yellow and black colour scheme.
My grandson is to blame as he took me to see the movie of the same name.
And yes I know a Z/28 is not a Mopar Bumble Bee but in the movie, BumbleBee (the transformer) changes from a VW to a 77 Camaro.
Why they choose a 77 model I don't know, I think the 70 would have been a much better choice but that's just me.


Davenz13- Platinum Member

- Posts : 597
Join date : 2013-11-28
Age : 69
Location : Palmerston North, New Zealand

akjgardner- Diamond Member


Posts : 1600
Join date : 2014-12-28
Age : 65
Location : Greensberg Indiana
 Re: Shrike X3 Experimental
You WIN !!!Very nice and inventive , you have made the magic come to the screen now for the road . Can't wait to see this baby in ACTION !! 


getback- Top Poster


Posts : 10437
Join date : 2013-01-18
Age : 67
Location : julian , NC
 Re: Shrike X3 Experimental
Looking good! It sure looks fast just sitting there! It will be interesting too see what it's top speed will be on the tether!

David S- Gold Member

- Posts : 176
Join date : 2015-06-23
Age : 64
Location : New Jersey
 Re: Shrike X3 Experimental
I'm not completely happy with the twin engine mount, the engines are too high. I'll make another which has the engines a bit lower.
I reckon they could come down by two inches which would still give the props an inch and a half ground clearance and make the car look sleeker too.
I reckon they could come down by two inches which would still give the props an inch and a half ground clearance and make the car look sleeker too.

Davenz13- Platinum Member

- Posts : 597
Join date : 2013-11-28
Age : 69
Location : Palmerston North, New Zealand
Page 2 of 2 •  1, 2
1, 2
 Similar topics
» Medallion .000 cu. in. engine
» Co Shrike Run
» There was an R/C Shrike?
» Cox .049 Experimental "Crystal" reeds are now available
» experimental reed-valve test 5-5-18
» Co Shrike Run
» There was an R/C Shrike?
» Cox .049 Experimental "Crystal" reeds are now available
» experimental reed-valve test 5-5-18
Page 2 of 2
Permissions in this forum:
You cannot reply to topics in this forum

 Rules
Rules


