Log in
Search
Latest topics
» My N-1R build logby roddie Today at 12:32 am
» Happy 77th birthday Andrew!
by akjgardner Today at 12:27 am
» TEE DEE Having issues
by TD ABUSER Yesterday at 9:43 pm
» Landing-gear tips
by roddie Yesterday at 6:17 pm
» Roger Harris revisited
by TD ABUSER Yesterday at 2:13 pm
» Tee Dee .020 combat model
by Ken Cook Yesterday at 1:41 pm
» Retail price mark-up.. how much is enough?
by Ken Cook Yesterday at 1:37 pm
» My latest doodle...
by roddie Yesterday at 10:43 am
» Chocolate chip cookie dough.........
by roddie Fri Nov 22, 2024 1:13 pm
» Purchased the last of any bult engines from Ken Enya
by sosam117 Fri Nov 22, 2024 11:32 am
» Free Flight Radio Assist
by rdw777 Fri Nov 22, 2024 9:24 am
» Funny what you find when you go looking
by rsv1cox Wed Nov 20, 2024 3:21 pm
Cox Engine of The Month
Chambers R-1 build
Page 1 of 4
Page 1 of 4 • 1, 2, 3, 4 
 Chambers R-1 build
I'm getting started on my entry for the "Tuscon" 1cc scale contest and thought I would do a build thread. I'll be doing a Chambers R-1 Chambermaid for the single engine plank category. Wingspan will be just shy of 18" with a prop face to back of rudder length of about 21 3/4", wing area about 80 square inches. Should fly like a dream. 
I'm going to do all separated control surfaces and copy any panel lines with surface contours, no ink lines on this one.
Power will be a Norvel Big Mig .061.
All I have so far is my 3 view drawings and a wing blank butt gluing together, I'll keep you posted.

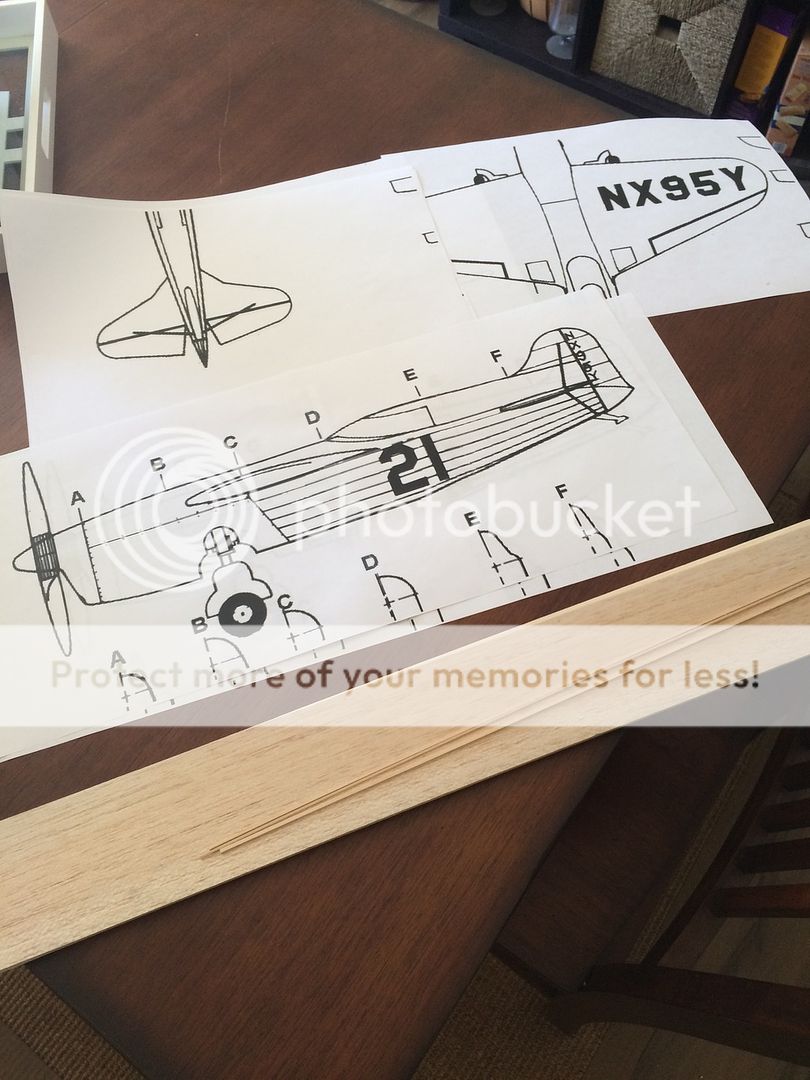

I'm going to do all separated control surfaces and copy any panel lines with surface contours, no ink lines on this one.
Power will be a Norvel Big Mig .061.
All I have so far is my 3 view drawings and a wing blank butt gluing together, I'll keep you posted.


Last edited by JPvelo on Tue Oct 25, 2016 11:21 am; edited 2 times in total

JPvelo- Diamond Member

- Posts : 1972
Join date : 2011-12-02
Age : 57
Location : Colorado
 Re: Chambers R-1 build
I hope you are going to do a build thread on this one. I am guessing that you will be cutting stringers for the rear part of the fuselage and ribs for the rudder.

ian1954- Diamond Member

- Posts : 2688
Join date : 2011-11-16
Age : 70
Location : England
 Re: Chambers R-1 build
ian1954 wrote:I hope you are going to do a build thread on this one. I am guessing that you will be cutting stringers for the rear part of the fuselage and ribs for the rudder.
Ian,
That's exactly what I had in mind, I'm currently trying to source 1/32 square basswood strip.
Jim

JPvelo- Diamond Member

- Posts : 1972
Join date : 2011-12-02
Age : 57
Location : Colorado
 Re: Chambers R-1 build
If you lived near me I would machine it up for you.
If I look at the picture though and scale that to 21" - 1/32 looks too small - the stringers look quite pronounced.
Try enlarging the picture and measure before you buy - just to be sure. The ribbed look seems to be a key feature.
Could be my eyes though!
If I look at the picture though and scale that to 21" - 1/32 looks too small - the stringers look quite pronounced.
Try enlarging the picture and measure before you buy - just to be sure. The ribbed look seems to be a key feature.
Could be my eyes though!

ian1954- Diamond Member

- Posts : 2688
Join date : 2011-11-16
Age : 70
Location : England
 Re: Chambers R-1 build
Ian,
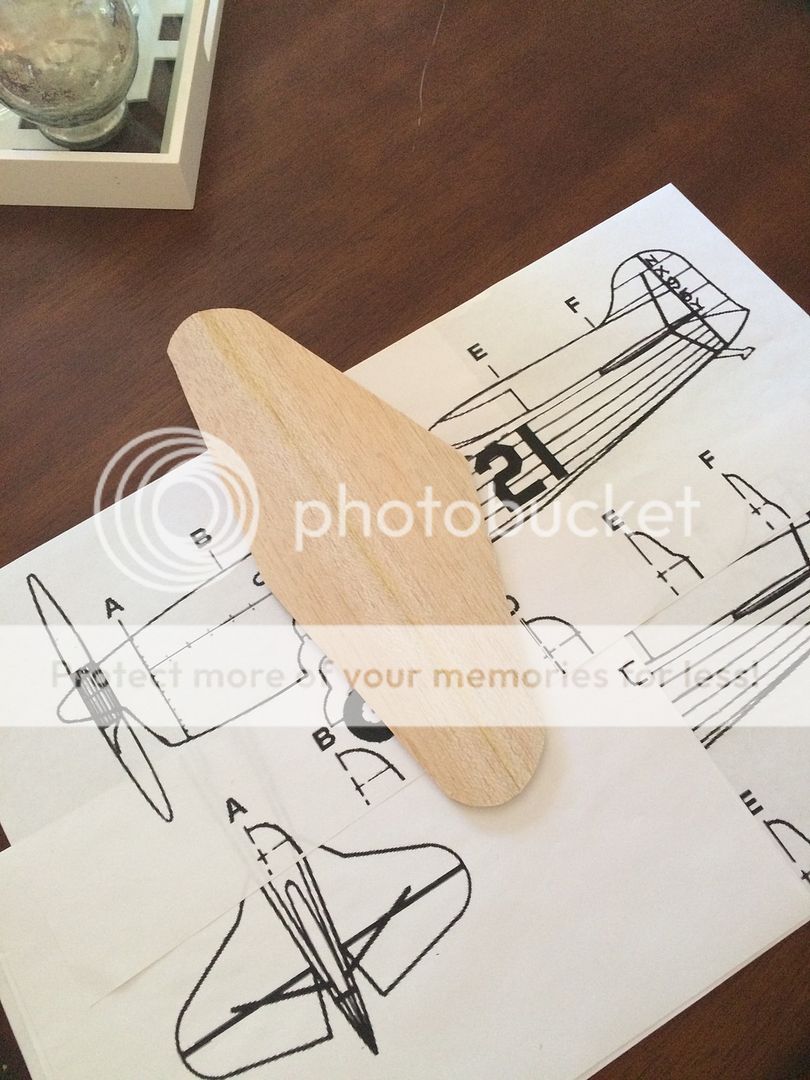
In scale competition any line that is on the three view drawing needs to represented on the model. As this is a 1/4" thick profile fuselage model I won't be building up stringers to apply covering over. The common practice would be to draw the stringers on with a fine line pen after paint and then clear coat the model. I want to avoid ink lines as models can tend to start looking like a caricature of an airplane. I plan on using very thin wood strip instead of ink lines. We'll see how it turns out. Now I'm trying to get my mind around laying the "21" decal over such a setup.
Anyway, got the wing glued up and cut out today. Next step is 1/16" basswood strip all around and sanding to an airfoil.


JPvelo- Diamond Member

- Posts : 1972
Join date : 2011-12-02
Age : 57
Location : Colorado
 Re: Chambers R-1 build
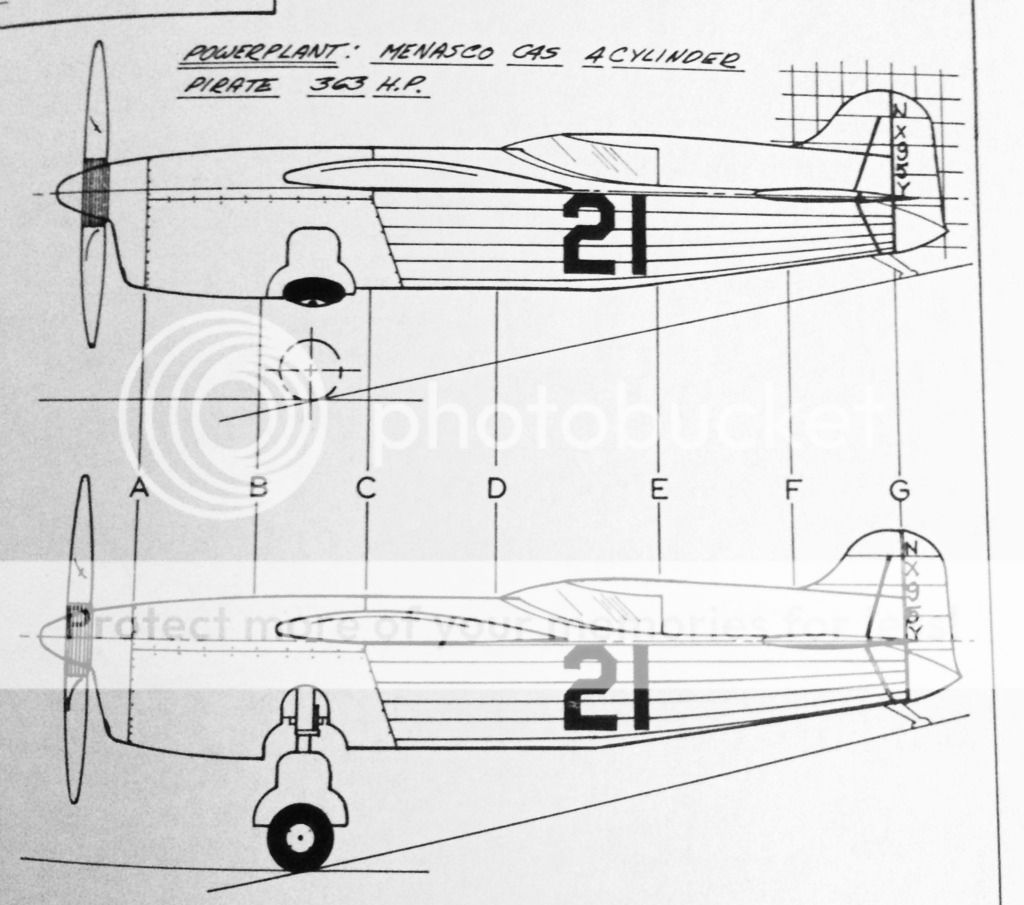
Here's more shots of the prototype. This and the one in the original post are all I can find. Sure wish I had one of the front.



JPvelo- Diamond Member

- Posts : 1972
Join date : 2011-12-02
Age : 57
Location : Colorado
 Re: Chambers R-1 build
That's a really interesting plane. The landing gear is unique too... to me anyway. Looks like a challenge, and I look forward to seeing your build.
Rusty
Rusty
_________________
Don't Panic!
...and never Ever think about how good you are at something...
while you're doing it!
My Hot Rock & Blues Playlist
...and never Ever think about how good you are at something...
while you're doing it!
My Hot Rock & Blues Playlist

RknRusty- Rest In Peace

- Posts : 10869
Join date : 2011-08-10
Age : 68
Location : South Carolina, USA
 Re: Chambers R-1 build
RknRusty wrote:That's a really interesting plane. The landing gear is unique too... to me anyway.
Rusty
Yeah it's different. It's a retractable gear that pulls the wheels tight to the fuselage but leaves them exposed.

JPvelo- Diamond Member

- Posts : 1972
Join date : 2011-12-02
Age : 57
Location : Colorado
 Re: Chambers R-1 build
The gear looks a lot like the type the PBY Catalina and Grumman Goose used.
Phil
Phil

pkrankow- Top Poster

- Posts : 3025
Join date : 2012-10-02
Location : Ohio
 Re: Chambers R-1 build
Hi Jim, Man.. that's a tough airplane to find pictures of. I checked all three of my "big-book" encyclopedias.. and it wasn't even listed. 
I did have an idea for the stringers though.. "Angel-Hair" spaghetti.. or Capelli d'angelo is available at your local supermarket for about $1.50/box. Full length pieces should be more than long enough for where you need them. Glue them on.. and cover with tissue; brushed-on over them. Average OD is about 1/32". It will give the fuse a more 3-D look.. and being round; might make it easier to apply the "21" graphic over. It wouldn't be too hard to form fillets along the stringers, by using your finger with a little white-glue. This would provide a solid (void-free) base for applying tissue afterward.
Capellini wiki

If it doesn't work out.. boil them up and serve with a nice marinara gravy...
I did have an idea for the stringers though..
 "Angel-Hair" spaghetti.. or Capelli d'angelo is available at your local supermarket for about $1.50/box. Full length pieces should be more than long enough for where you need them. Glue them on.. and cover with tissue; brushed-on over them. Average OD is about 1/32". It will give the fuse a more 3-D look.. and being round; might make it easier to apply the "21" graphic over. It wouldn't be too hard to form fillets along the stringers, by using your finger with a little white-glue. This would provide a solid (void-free) base for applying tissue afterward.
Capellini wiki

If it doesn't work out.. boil them up and serve with a nice marinara gravy...

 Re: Chambers R-1 build
Thanks Roddie,
When I was finishing the Bellanca I purchased tubbetti to use as exhaust stacks. It ended up being to big but I made a a great minestrone with it!
I found this, it's between 1/64" and 1/32". I'm going to see if my local hobby shop can order it for me so I avoid the shipping charges:
http://www.hobbylinc.com/cgi-bin/s8.cgi?cat_s=RCE&p=4

JPvelo- Diamond Member

- Posts : 1972
Join date : 2011-12-02
Age : 57
Location : Colorado
 Re: Chambers R-1 build
JPvelo wrote:Thanks Roddie,
When I was finishing the Bellanca I purchased tubbetti to use as exhaust stacks. It ended up being to big but I made a a great minestrone with it!
I found this, it's between 1/64" and 1/32". I'm going to see if my local hobby shop can order it for me so I avoid the shipping charges:
http://www.hobbylinc.com/cgi-bin/s8.cgi?cat_s=RCE&p=4
I knew that someone had posted pics of elbow macaroni for use as exhaust pipes.. but couldn't find them. I have pics of most of your builds too.. but not the Bellanca

It's great that you can get what you want to use for the stringers. It might be lighter in weight than the pasta would be too.
 Re: Chambers R-1 build
Roddie, Bellanca build photos are on the bottom of this thread:
https://www.coxengineforum.com/t8898-tucson-1cc-multi-engine-scale-contest-report
https://www.coxengineforum.com/t8898-tucson-1cc-multi-engine-scale-contest-report

JPvelo- Diamond Member

- Posts : 1972
Join date : 2011-12-02
Age : 57
Location : Colorado
 Re: Chambers R-1 build
JPvelo wrote:Roddie, Bellanca build photos are on the bottom of this thread:
https://www.coxengineforum.com/t8898-tucson-1cc-multi-engine-scale-contest-report
Oh yea!!!! (nice shirt!
 ) Thanks Jim. New folder created!
  Re: Chambers R-1 build
Macaroni! what a great idea. I'm going to try that on my Yak. Poor thing's been waiting for pipes for two years now.
Adding Marconi to shopping list 10-4 Elenor.
Rusty
Adding Marconi to shopping list 10-4 Elenor.
Rusty
_________________
Don't Panic!
...and never Ever think about how good you are at something...
while you're doing it!
My Hot Rock & Blues Playlist
...and never Ever think about how good you are at something...
while you're doing it!
My Hot Rock & Blues Playlist

RknRusty- Rest In Peace

- Posts : 10869
Join date : 2011-08-10
Age : 68
Location : South Carolina, USA
 Re: Chambers R-1 build
Went to the hobby shop on the way home from work to have them order wood for my stringers and they had it in stock. Already made up a test patch to see how I'm going to work this.
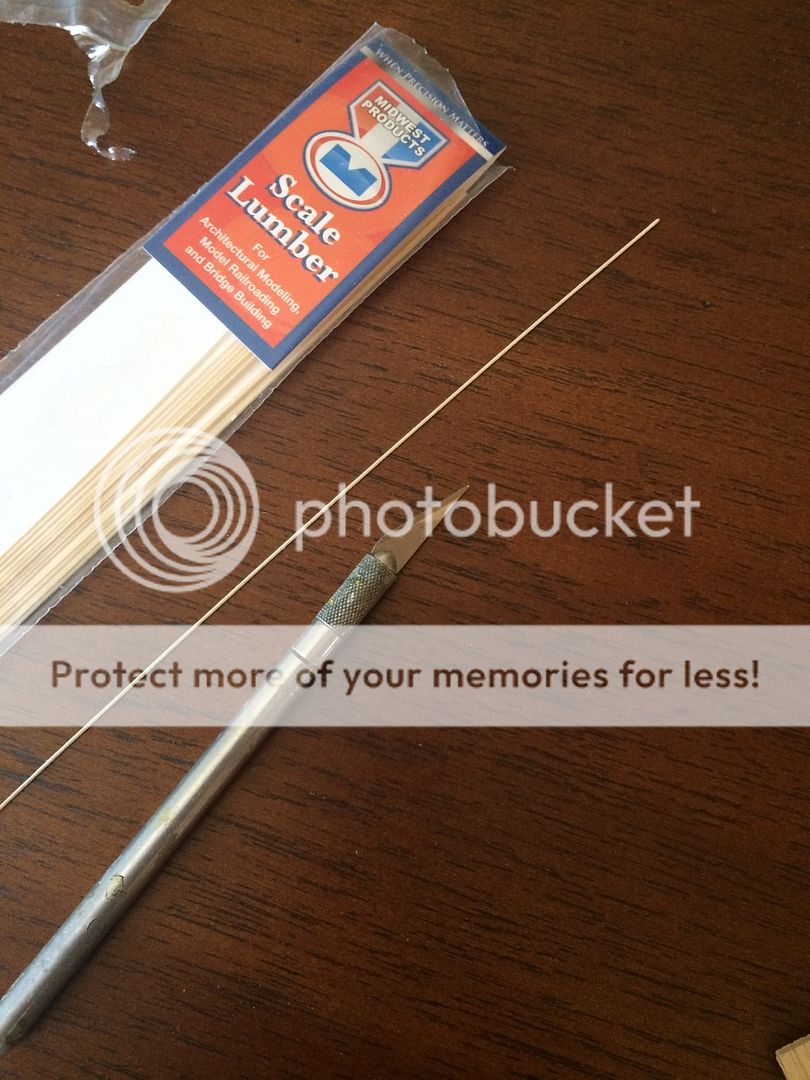

I have the leading and trailing edges soaking so I can laminate at least the leading edge tomorrow.
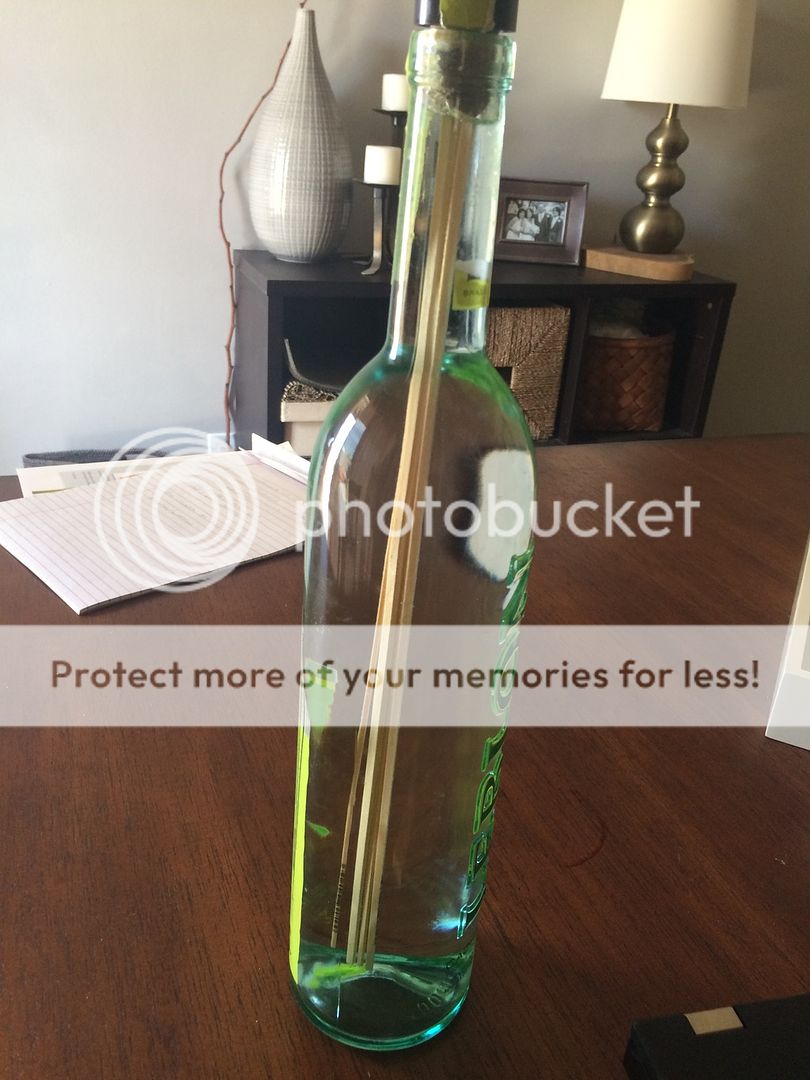


I have the leading and trailing edges soaking so I can laminate at least the leading edge tomorrow.


JPvelo- Diamond Member

- Posts : 1972
Join date : 2011-12-02
Age : 57
Location : Colorado
 Re: Chambers R-1 build
Coolest racer ever, tiny thing. Had a four banger Menasco. I almost bought 4 of those engines one day but gave up in a moment of weakness. That has to have a full cowling, right? All 1/4 slabs carved into shape? Super cool.
Chris...
Chris...

stuntflyr- Gold Member

- Posts : 266
Join date : 2012-01-18
Age : 65
Location : Tucson, Arizona
 Re: Chambers R-1 build
Yep, nothing thicker than 1/4", 3/8" with doublers to the mid point of the wing.
Jim
Jim

JPvelo- Diamond Member

- Posts : 1972
Join date : 2011-12-02
Age : 57
Location : Colorado
 Re: Chambers R-1 build
After soaking for 24hrs the basswood leading edge is laminated on. Tommorow I'll cut and sand off the excess then glue the trailing edge on. This weekend I'll sand to shape and cut the ailerons out.



JPvelo- Diamond Member

- Posts : 1972
Join date : 2011-12-02
Age : 57
Location : Colorado
 Re: Chambers R-1 build
A). What did you soak it in?JPvelo wrote:After soaking for 24hrs the basswood leading edge is laminated on. Tommorow I'll cut and sand off the excess then glue the trailing edge on. This weekend I'll sand to shape and cut the ailerons out.
B). How do you glue it on wet?
or
C). Do you tape it on to dry to shape & then glue it?

Oldenginerod- Top Poster

- Posts : 4018
Join date : 2012-06-15
Age : 62
Location : Drouin, Victoria
 Re: Chambers R-1 build
Oldenginerod wrote:A). What did you soak it in?JPvelo wrote:After soaking for 24hrs the basswood leading edge is laminated on. Tommorow I'll cut and sand off the excess then glue the trailing edge on. This weekend I'll sand to shape and cut the ailerons out.
B). How do you glue it on wet?
or
C). Do you tape it on to dry to shape & then glue it?
Rod,
Loved your article in the Cox Quarterly, funny how things work out sometimes.
To answer your questions the basswood is soaked In water and glued on wet.
Jim

JPvelo- Diamond Member

- Posts : 1972
Join date : 2011-12-02
Age : 57
Location : Colorado
 Re: Chambers R-1 build
Yeah Jim, Bernie was struggling for articles, so I thought I'd give a rundown of my Tach Race experience. Note articles from CEF compatriots Kim Stricker & Paul Gibeault also.
I'm sure everyone here knows about it, but I'm still a little shocked about my win even after all this time. I haven't been game to install the engine on any plane yet. Haven't even run it since Kim shipped it home. I do have plans to use the Black Widow prize engine on my Ringmaster Bipe kit I got from Roger. It ran third in the race so should haul it around nice & quick. I'll have to find a bigger flying field so I can use longer lines than the 30' I currently use or it will screw me into the ground.
Hey what sort of glue is that which will stick to wet wood? I thought that would be a big no no, that's why I asked. It looks like the wing is just flat, not shaped at all. I guess it just has to go round & round so flight performance isn't so critical

Oldenginerod- Top Poster

- Posts : 4018
Join date : 2012-06-15
Age : 62
Location : Drouin, Victoria
 Re: Chambers R-1 build
If you can hold the shape long enough any PVA type glue will work well, but won't bond till mostly dry. This would be white school glue, or Titebond, or Elmer's wood glue (among a large number of others)
If you can hold the shape till fully dry the shape should stay in so you can use your choice of glue later.
Phil
If you can hold the shape till fully dry the shape should stay in so you can use your choice of glue later.
Phil

pkrankow- Top Poster

- Posts : 3025
Join date : 2012-10-02
Location : Ohio
 Re: Chambers R-1 build
Rod,
I use Titebond wood glue, like Phil suggest. I dry and glue all in one step.
Yes it's a flat 1/4" airfoil, I'll sand some shape into it later. The contest I'm building for has a "plank" category.
The rules are here:
http://stunthanger.com/smf/12-a-building/2016-'tuscon'-1cc-multi-engine-scale/?action=dlattach;attach=249924

JPvelo- Diamond Member

- Posts : 1972
Join date : 2011-12-02
Age : 57
Location : Colorado
 Re: Chambers R-1 build
Allright,
Got everything dry and the tape off:
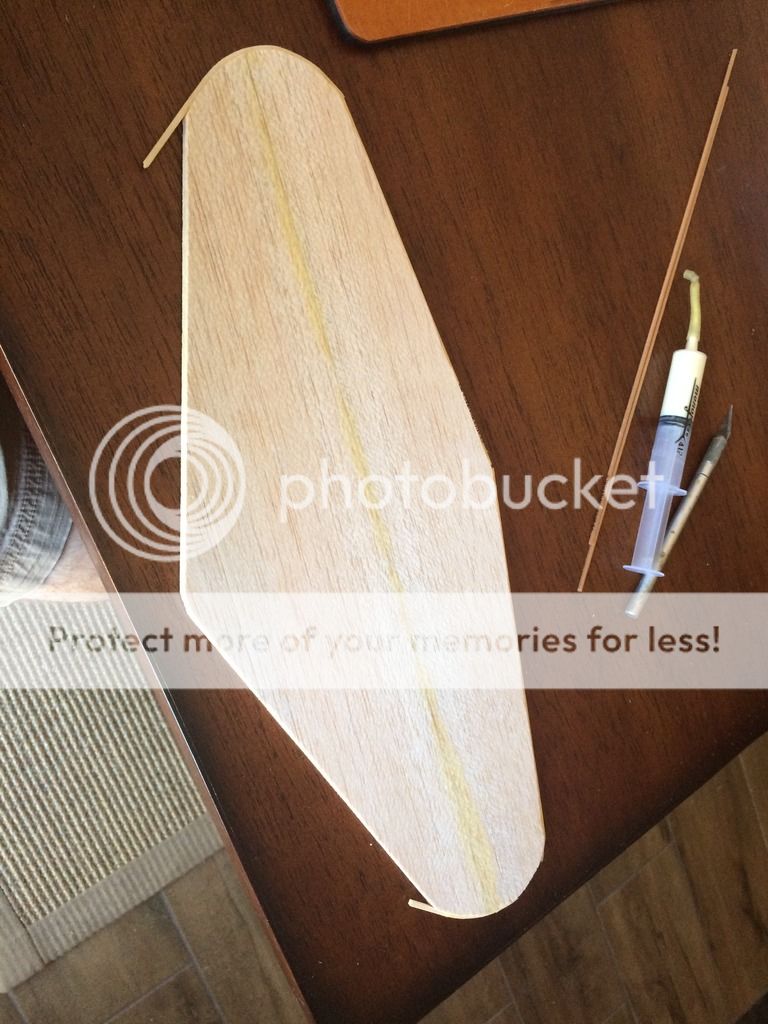
Used a router to make a pocket for tip weight, plugged it with hard balsa:


Plug clamped and trailing edge taped:
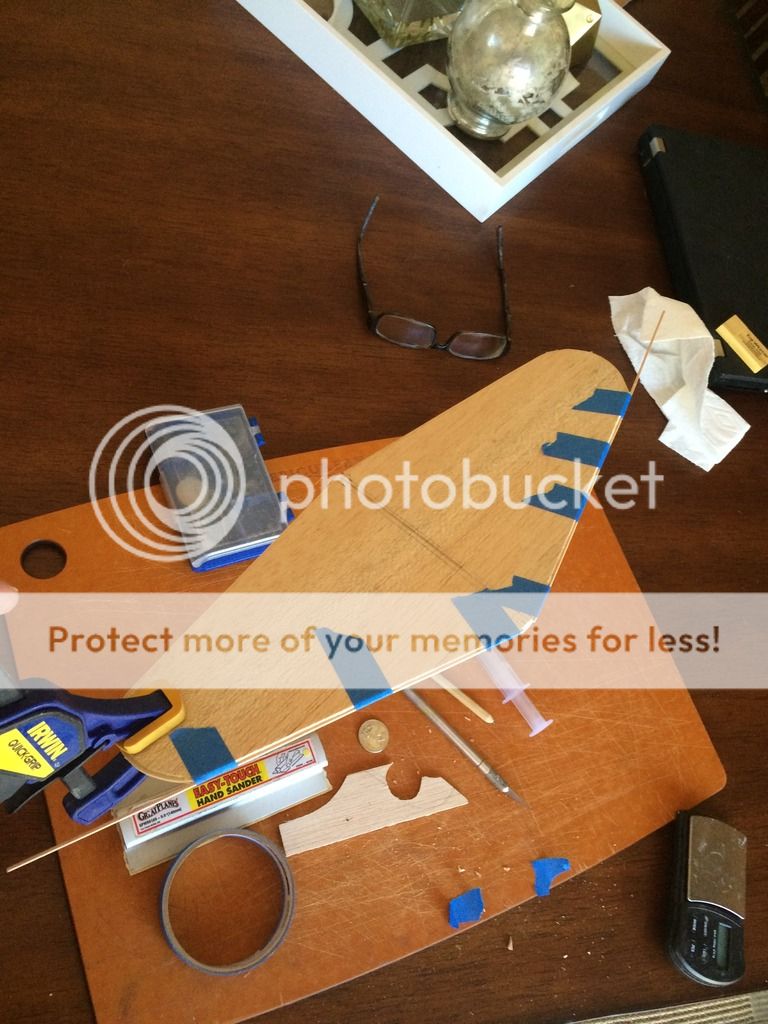
I'll get it sanded and looking like a wing tomorrow. I hope to get the main portion of the fuselage cut out tomorrow and get the engine bearers and landing gear mount installed.
Jim
Got everything dry and the tape off:

Used a router to make a pocket for tip weight, plugged it with hard balsa:


Plug clamped and trailing edge taped:

I'll get it sanded and looking like a wing tomorrow. I hope to get the main portion of the fuselage cut out tomorrow and get the engine bearers and landing gear mount installed.
Jim

JPvelo- Diamond Member

- Posts : 1972
Join date : 2011-12-02
Age : 57
Location : Colorado
Page 1 of 4 • 1, 2, 3, 4 
 Similar topics
» Guillows Cessna 150 build circa 1970 (Build Log)
» Looking for first RC build...
» Help Deciding on Kit
» look what rkflyer sent me and jack AGAIN!
» The RMH Bipe build thread
» Looking for first RC build...
» Help Deciding on Kit
» look what rkflyer sent me and jack AGAIN!
» The RMH Bipe build thread
Page 1 of 4
Permissions in this forum:
You cannot reply to topics in this forum

 Rules
Rules


