Log in
Search
Latest topics
» Tee Dee .020 combat modelby roddie Today at 1:34 pm
» Chocolate chip cookie dough.........
by roddie Today at 1:13 pm
» Purchased the last of any bult engines from Ken Enya
by sosam117 Today at 11:32 am
» Free Flight Radio Assist
by rdw777 Today at 9:24 am
» My latest doodle...
by batjac Yesterday at 9:47 pm
» My N-1R build log
by roddie Yesterday at 8:50 pm
» Funny what you find when you go looking
by rsv1cox Wed Nov 20, 2024 3:21 pm
» Landing-gear tips
by 1975 control line guy Wed Nov 20, 2024 8:17 am
» Cox NaBOO - Just in time for Halloween
by rsv1cox Tue Nov 19, 2024 6:35 pm
» Canada Post strike - We are still shipping :)
by Cox International Tue Nov 19, 2024 12:01 pm
» Duende V model from RC Model magazine 1983.
by getback Tue Nov 19, 2024 6:08 am
» My current avatar photo
by roddie Mon Nov 18, 2024 9:05 pm
Cox Engine of The Month
The RMH Bipe build thread
Page 1 of 4
Page 1 of 4 • 1, 2, 3, 4 
 The RMH Bipe build thread
It might be nice if we all posted our build efforts here, or go off on your own. Here's mine:
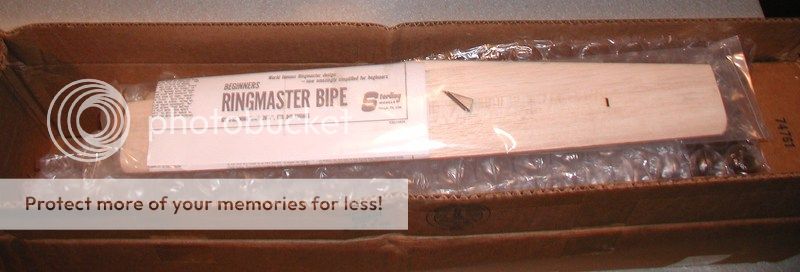
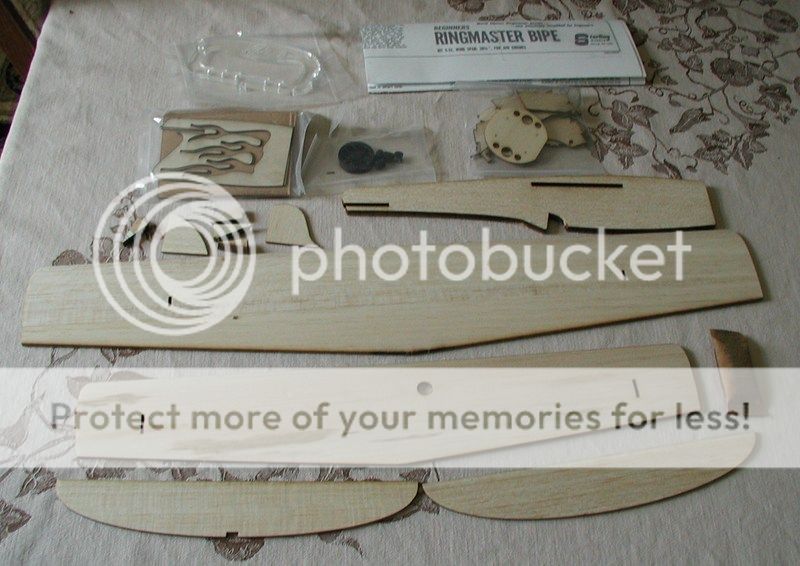
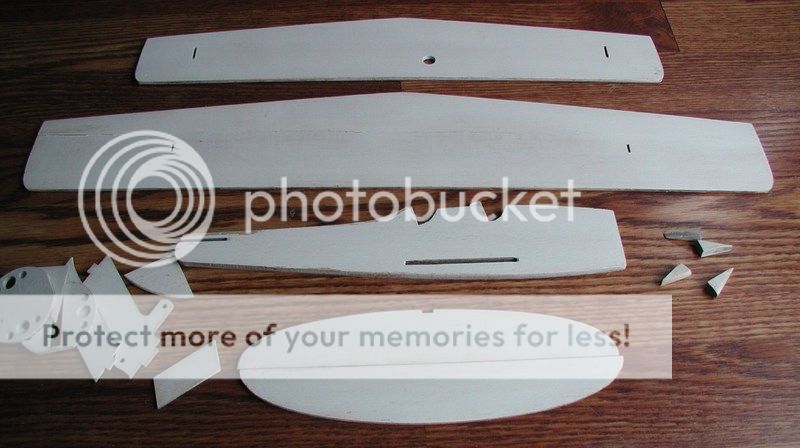
Got mine a couple of days ago. Parts check. Yup, all there and more:
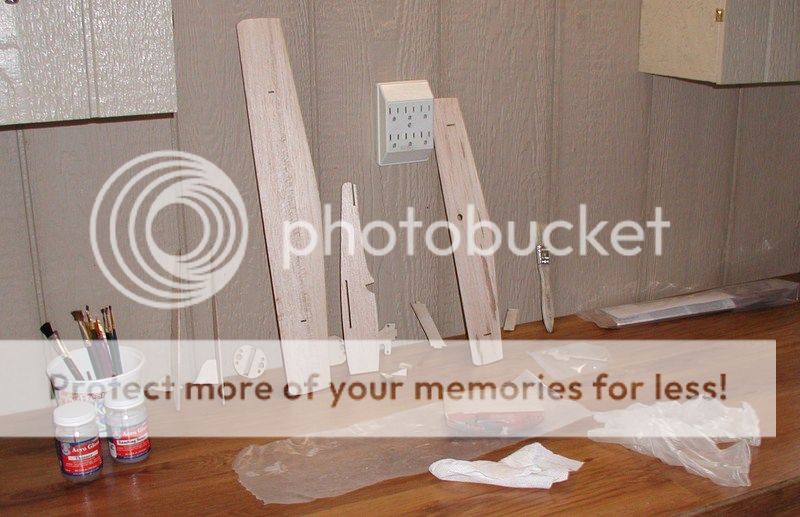
Applied a third coat of sanding sealer to all parts this morning, all applications lightly sanded between coats.
I have decided to model this one as a "Yellow Peril" trainer, so I may not use the enclosed machine gun. Next comes an application of Top Flights LusteKote spray primer, then yellow and maybe a touch of blue.
Then again at the last minute I may decide to go with camouflage colors. Decisions, decisions.
Got mine a couple of days ago. Parts check. Yup, all there and more:


Applied a third coat of sanding sealer to all parts this morning, all applications lightly sanded between coats.

I have decided to model this one as a "Yellow Peril" trainer, so I may not use the enclosed machine gun. Next comes an application of Top Flights LusteKote spray primer, then yellow and maybe a touch of blue.
Then again at the last minute I may decide to go with camouflage colors. Decisions, decisions.

rsv1cox- Top Poster


Posts : 11247
Join date : 2014-08-18
Location : West Virginia
 Re: The RMH Bipe build thread
it will bee cool to watch and see how they come out! i have been itching to get out and fly mine more. fun little plane.
BTW... I don't recall if i mentioned it but, i did add 3 or so degrees of right thrust and it really helped.
the original...
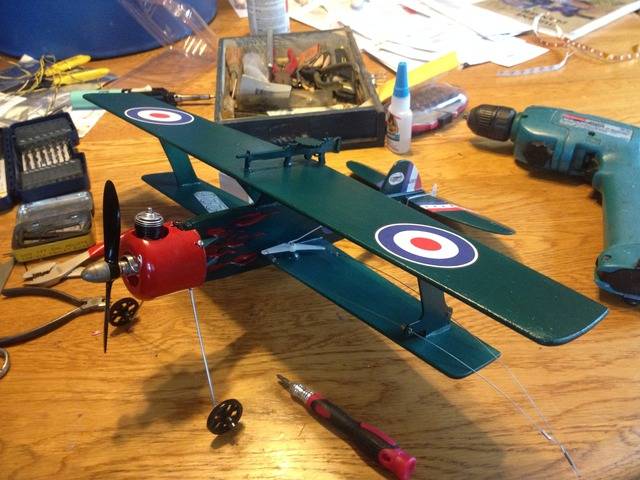
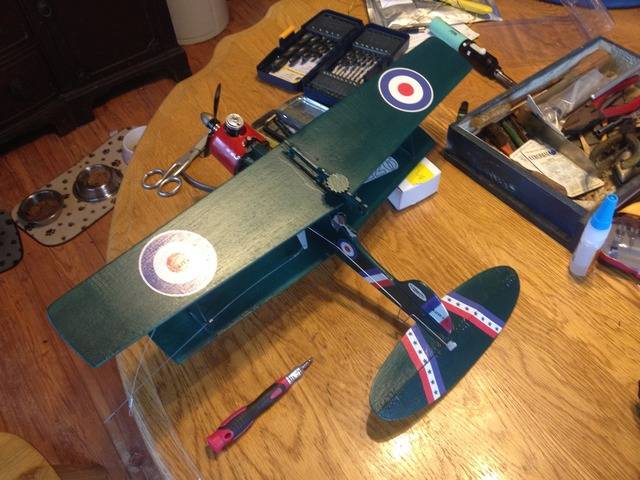
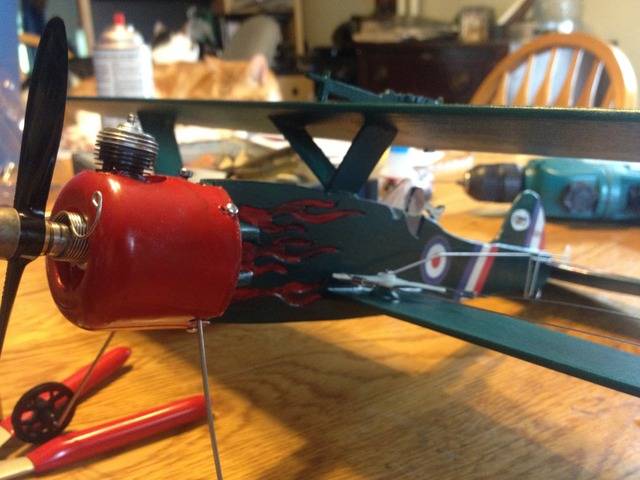
BTW... I don't recall if i mentioned it but, i did add 3 or so degrees of right thrust and it really helped.
the original...


rogermharris- Platinum Member

- Posts : 503
Join date : 2015-03-17
Age : 61
Location : Long Branch, New Jersey
 Re: The RMH Bipe build thread
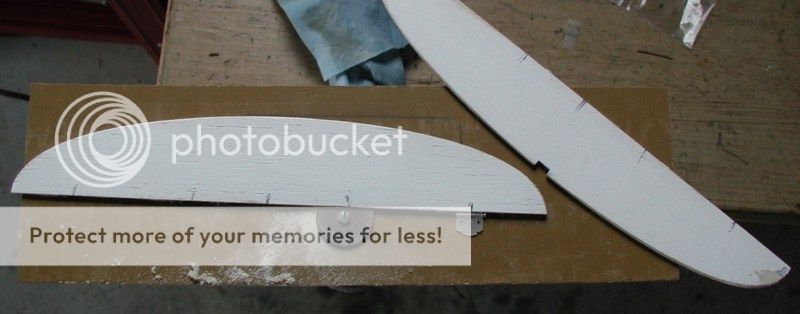
First coat of LusteKote primer applied after three applications of Aero gloss sanding sealer and a 24 hour wait time. Primer makes a big difference if your using LusteKote spray colors.
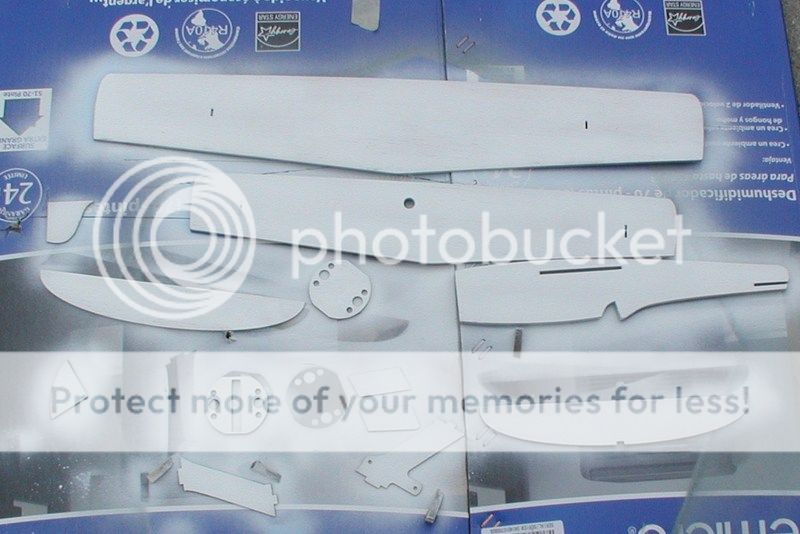
Pinning the small pieces holds them secure. I forgot to, and they scattered. Next time.
Allowing for drying really extends the build time. I still have to do the other sides. Will be sunday before I can start to apply color.

Pinning the small pieces holds them secure. I forgot to, and they scattered. Next time.
Allowing for drying really extends the build time. I still have to do the other sides. Will be sunday before I can start to apply color.

rsv1cox- Top Poster


Posts : 11247
Join date : 2014-08-18
Location : West Virginia
 Re: The RMH Bipe build thread
Looking Great so far.
Are we all going to post our builds on this thread or start our own? I like the idea of all on one, but its not my thread.
Are we all going to post our builds on this thread or start our own? I like the idea of all on one, but its not my thread.

duke.johnson- Diamond Member

- Posts : 1734
Join date : 2012-11-05
Age : 53
Location : Rochester, Washington
 Re: The RMH Bipe build thread
duke.johnson wrote:Looking Great so far.
Are we all going to post our builds on this thread or start our own? I like the idea of all on one, but its not my thread.
It was my idea to have all of them in one thread just to see how everyone completes their bipe so feel free to post your build here.

rogermharris- Platinum Member

- Posts : 503
Join date : 2015-03-17
Age : 61
Location : Long Branch, New Jersey
 Re: The RMH Bipe build thread
Well looks like Bipe Freak Bob is in the lead for now till he poops out 
 Looking good man , Eric


getback- Top Poster


Posts : 10441
Join date : 2013-01-18
Age : 67
Location : julian , NC
 Re: The RMH Bipe build thread
Gimmie time Eric, gimmie time. I may poop out yet, my attention span isn't what it used to be. 

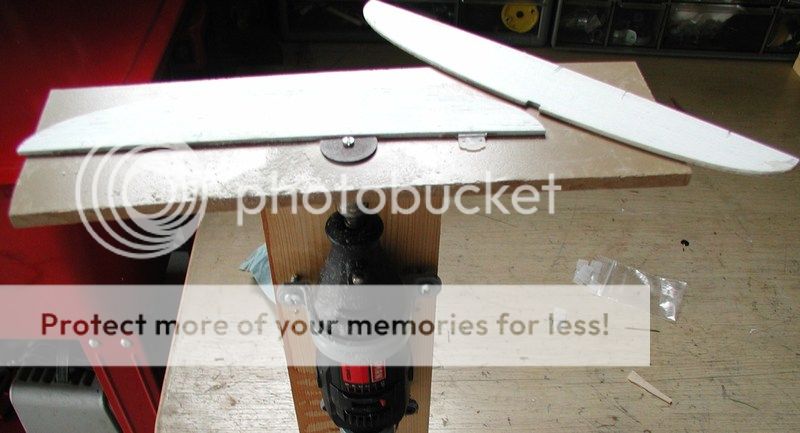
I used my handy dandy Dremel hinge slot cutter. Cut eight perfect slots in less than a minute.
Cut the forward cockpit for this trainer version of Rogers Bipe.
It's loosely based on and will be painted like this:

Final sanded with 320 grit, Next to assemble, add one last coat of primer, then color.
Poor neglected F4U. Up on the shelf for now.
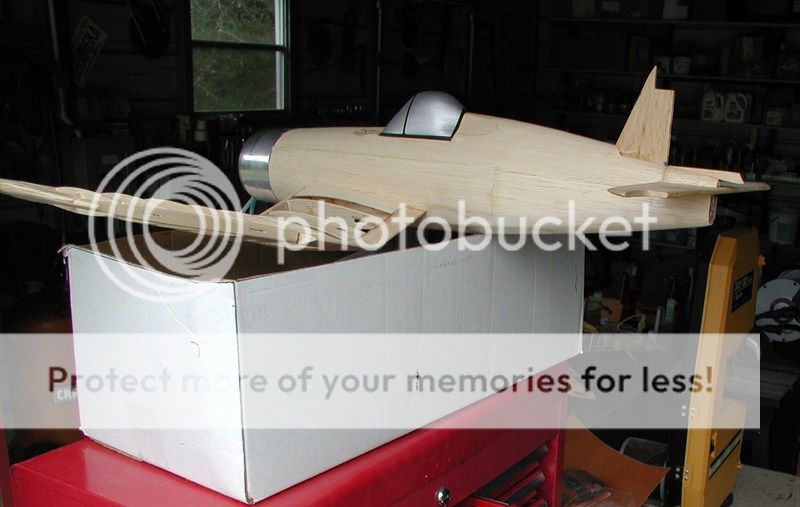
I used my handy dandy Dremel hinge slot cutter. Cut eight perfect slots in less than a minute.


Cut the forward cockpit for this trainer version of Rogers Bipe.

It's loosely based on and will be painted like this:

Final sanded with 320 grit, Next to assemble, add one last coat of primer, then color.
Poor neglected F4U. Up on the shelf for now.


rsv1cox- Top Poster


Posts : 11247
Join date : 2014-08-18
Location : West Virginia
 Re: The RMH Bipe build thread
Well it's moving along!
Looks like a should have sent a second pilot..
Looks like a should have sent a second pilot..

rogermharris- Platinum Member

- Posts : 503
Join date : 2015-03-17
Age : 61
Location : Long Branch, New Jersey
 Re: The RMH Bipe build thread
rsv1cox wrote:
Cut the forward cockpit for this trainer version of Rogers Bipe.
Bob, where does the center "V" support for the top wing mount? Will it be in-between the two cockpits? On Roger's model, it looks to be right where your front cockpit is.. but it's hard to tell. Just an observation..
 Re: The RMH Bipe build thread
That mite slow him down a bit  And I believe you is right !! Roddie
 And I believe you is right !! Roddie
getback- Top Poster


Posts : 10441
Join date : 2013-01-18
Age : 67
Location : julian , NC
 Re: The RMH Bipe build thread
We shall see... I put mine a bit forward of center. I figured it could use the support closer to the LE. Mabee there should bee a dog in the forward cockpit...

rogermharris- Platinum Member

- Posts : 503
Join date : 2015-03-17
Age : 61
Location : Long Branch, New Jersey
 Re: The RMH Bipe build thread
As in Snoopy? I already have him pencilled in for the Camel. 

roddie, the plans show the center strut located just in front of the cockpit so I left enough room. But, it's the only part of the design that I didn't care for. I'm thinking struts coming out at an angle from either the bottom wing root or midway up.
My big disappointment though is that I can't use the flames. I really like them. Can't use the machine gun either, another disappointment. Maybe I will cut out another Bipe from on-hand balsa...or perhaps RMH has a return (unlikely) or a spare cutting laying about.
Yes, Roger another pilot would be nice. I have full profile examples, but they are like goldilocks porridge not "just right."
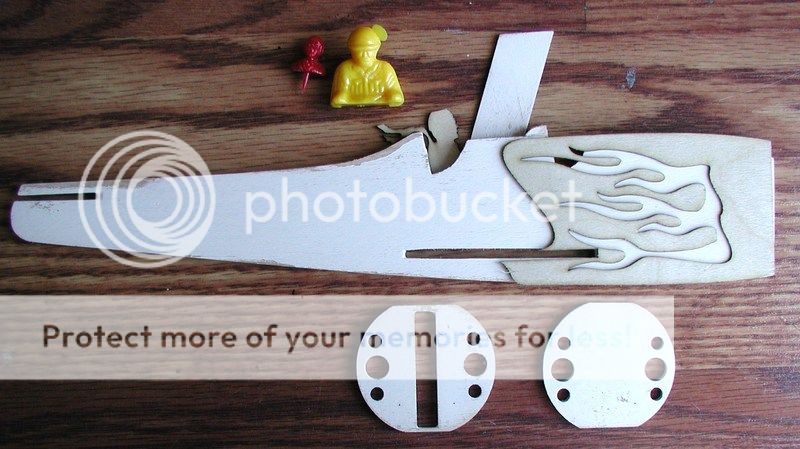
Edit - Oh yes, the firewall. Two provided, one I guess if your using something other than a tanked Bee, or are they used together? I can't recover your first thread on this. I'm think a standard old 350 Babe Bee on mine.
Figured it out, the slotted wall slips over the fuse, the other one in front. . Hadn't got that far yet.
Bob

roddie, the plans show the center strut located just in front of the cockpit so I left enough room. But, it's the only part of the design that I didn't care for. I'm thinking struts coming out at an angle from either the bottom wing root or midway up.
My big disappointment though is that I can't use the flames. I really like them. Can't use the machine gun either, another disappointment. Maybe I will cut out another Bipe from on-hand balsa...or perhaps RMH has a return (unlikely) or a spare cutting laying about.
Yes, Roger another pilot would be nice. I have full profile examples, but they are like goldilocks porridge not "just right."

Edit - Oh yes, the firewall. Two provided, one I guess if your using something other than a tanked Bee, or are they used together? I can't recover your first thread on this. I'm think a standard old 350 Babe Bee on mine.
Figured it out, the slotted wall slips over the fuse, the other one in front.
Bob

rsv1cox- Top Poster


Posts : 11247
Join date : 2014-08-18
Location : West Virginia
 Re: The RMH Bipe build thread
Bob you could trim the flames back to clear the forward cockpit. I would bee happy to cut a pilot or dog and toss it in an envelope. The firewall.. I gave everyone the original shaped one and the round set to use with the zep foaming window cleaner cap for a cowl.
It's easy enough to cut another complete kit out if you would like another. Or I can leave out the parts you are not using on this build as well.
Ill check my balsa stock on Monday and see what I can spare. I have another kit to cut out next week
It's easy enough to cut another complete kit out if you would like another. Or I can leave out the parts you are not using on this build as well.
Ill check my balsa stock on Monday and see what I can spare. I have another kit to cut out next week

rogermharris- Platinum Member

- Posts : 503
Join date : 2015-03-17
Age : 61
Location : Long Branch, New Jersey
 Re: The RMH Bipe build thread
Good, I'm glad we'll have all the build info in one thread.. Now for the first dumb question(s):
Bob - I see you've sealed, sanded, sealed and primed the fuse, wings and small parts all in the flat. That looks easy to do, but what happens when you go to glue it all together? Will the glue you use adhere a painted surface to a painted surface? Or in the next step do you sand off the paint in the areas to be joined, so you have a balsa to balsa joint ?
I thought I'd follow Kim' method of glueing the plane together, and using the "plane on a stick" to do the painting :
https://www.coxengineforum.com/t7942-feeling-very-scientific-or-maybe-black-hawkish#100428

Marleysky- Top Poster


Posts : 3618
Join date : 2014-09-28
Age : 72
Location : Grand Rapids, MI
 Re: The RMH Bipe build thread
I have used that "plane on a stick" method before. Works great when your spraying. It allows you to move the plane around to prevent runs if you get to close with the spray can. I am a little concerned about coating the top under-wing, but think I can manage it.
The reason I did it unassembled is that it's easier to sand the aero gloss sanding sealer (3 coats) and the first primer coat while it's disassembled. Put's way to much stress on the parts when sanding while fully assembled.
Yes, as you can see sanding removes the high spots usually around the seams. Also I use ladies nail files to get in the slots cleaning them out. I use CA mostly which "wicks" into the joints. Then if suspect I reinforce with epoxy fillets.
When fully assembled I will over spray with LusteKote primer, lightly sand (maybe, as after the second coat it's quite smooth), then add at least two coats of color.
Roger, if you have a spare pilot I sure would use it, but I can always cut one out on the jig saw. If you do another Bipe run, sign me up.
What do you think of sandwiching the landing gear between the firewalls after routing out a bit of wood from each to fit? I have scads of landing gear wire. Something in a triangular shape maybe.
Bob
BTW Marley, I love the wooden wheels that roddie referenced in that thread.

rsv1cox- Top Poster


Posts : 11247
Join date : 2014-08-18
Location : West Virginia
 Re: The RMH Bipe build thread
Bob,
I'm pretty sure I have some pilots already cut at work. Either way I will put a couple in an envelope and send them to ya.. If I have material left after my next project I will cut a couple more bipe kits.
Should bee nice and clean if you sandwich the landing gear between the firewalls.
I was wondering about the paint it first method. I'm new to ca glue for assembly.
I tried to make all the joints a good dry
fit so you may need to clean some of the joints out to get them in place for gluing. On the other hand I would imagine the tighter the better for ca glue joints

rogermharris- Platinum Member

- Posts : 503
Join date : 2015-03-17
Age : 61
Location : Long Branch, New Jersey
 Re: The RMH Bipe build thread
Today I mounted, trued, and CA'ed the lower wing in place. Later I formed the landing gear and sandwiched it between the two firewalls after grooving out the two surfaces to accommodate it. Then epoxied it in place.
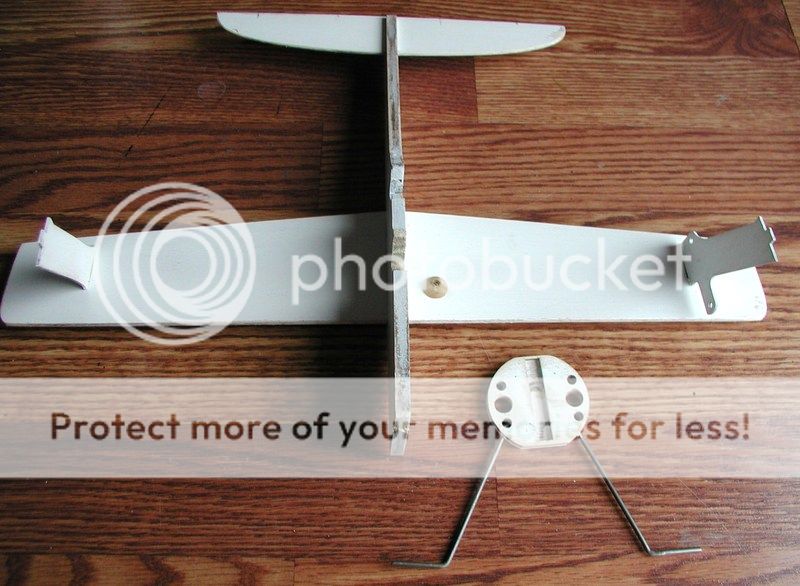
It’s a done deal now, hopefully I will never have to replace it. There are advantages and disadvantages. Advantages are a nice flat surface to mount the Babe Bee, and that gear is not going to move, but can still be carefully bent back into shape after a rough landing.
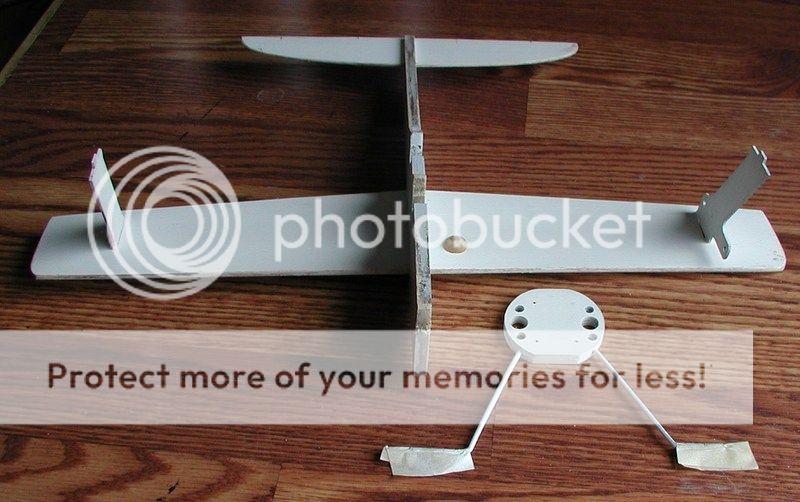
Disadvantages....It’s a done deal...and grooving those two surfaces weakens them a bit, but the liberal use of epoxy should fill the gaps.
I will glue up the rest of the stuff tomorrow. Mount the carcass “On a stick” and add the last coat of primer.
Bob

It’s a done deal now, hopefully I will never have to replace it. There are advantages and disadvantages. Advantages are a nice flat surface to mount the Babe Bee, and that gear is not going to move, but can still be carefully bent back into shape after a rough landing.

Disadvantages....It’s a done deal...and grooving those two surfaces weakens them a bit, but the liberal use of epoxy should fill the gaps.
I will glue up the rest of the stuff tomorrow. Mount the carcass “On a stick” and add the last coat of primer.
Bob

rsv1cox- Top Poster


Posts : 11247
Join date : 2014-08-18
Location : West Virginia
 Re: The RMH Bipe build thread
Holly Donkie duky That looks like FUN!!!

getback- Top Poster


Posts : 10441
Join date : 2013-01-18
Age : 67
Location : julian , NC
 Re: The RMH Bipe build thread
got my replacement wing (upper) from Roger today e-mailed him Thanks too 
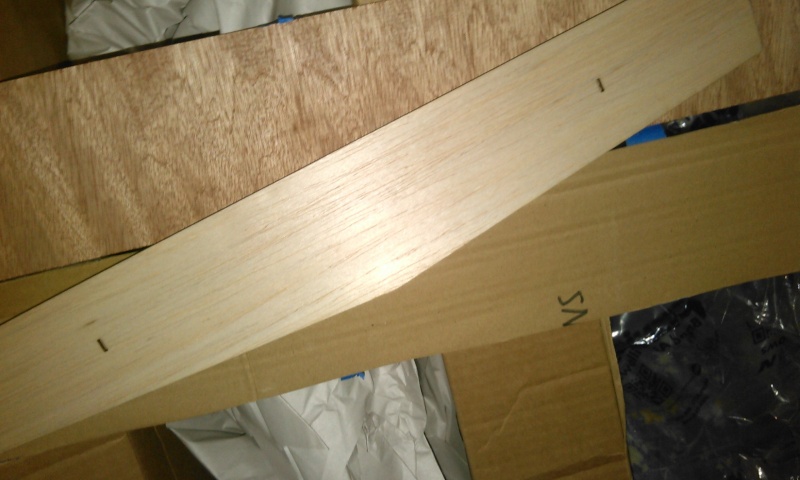 Nice ,packed supportive
  stupit wish I could spell like Rusty , Ian , 1/2 a nut and you newbies I love you all !! getback

 Nice ,packed supportive
  stupit wish I could spell like Rusty , Ian , 1/2 a nut and you newbies I love you all !! getback
getback- Top Poster


Posts : 10441
Join date : 2013-01-18
Age : 67
Location : julian , NC
 Re: The RMH Bipe build thread
getback wrote:Holly Donkie duky That looks like FUN!!!
Well get to it Eric!
I'm trying to get the guy that bought a kit locally from me to join the forum. Hoping we can get something started locally.

rogermharris- Platinum Member

- Posts : 503
Join date : 2015-03-17
Age : 61
Location : Long Branch, New Jersey
 Re: The RMH Bipe build thread
I didn't know that you needed a replacement top wing Eric. Looks like Roger packed it well with a Luan reenforcement.
My top wing had a long seam that needed some filler but no problem as it sanded out fine. Household chores kept me from working on my Bipe yesterday. Hopefully I will make some progress today.
Bob
My top wing had a long seam that needed some filler but no problem as it sanded out fine. Household chores kept me from working on my Bipe yesterday. Hopefully I will make some progress today.
Bob

rsv1cox- Top Poster


Posts : 11247
Join date : 2014-08-18
Location : West Virginia
 Re: The RMH Bipe build thread
ok OK I 've been busy out in this smoking Hot weather we have had trying to make that O-mity buck , I should at least get a dry fit today and some sanding of the chard cut . yes the upper wing got a bad trip here on the first box , but at least the Scout was not hurt , the wing was cracked all the way across and a bad dent in it , Roger was nice enough to send me the replacement  So its time to get with it
  Eric
Eric
 So its time to get with it
getback- Top Poster


Posts : 10441
Join date : 2013-01-18
Age : 67
Location : julian , NC
 Re: The RMH Bipe build thread
Everything glued up, waiting for final primer. I decided not to use the supplied center struts. I tacked them in but didn't like the look for a trainer version of the Ringmaster Bipe. So I relieved both the top wing and the fuselage for the new struts made with sanded luan, tacked them in with CA and reenforced with epoxy.
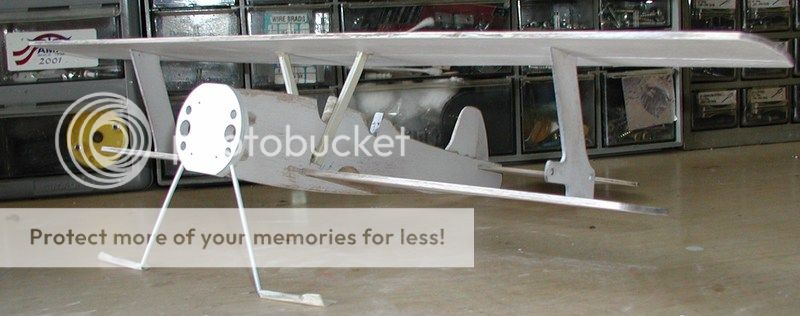
I might have a mite too much rudder deflection. The better to hang you out on the lines my dear.
Top wing seam was quite pronounced, but filler and primer helped it to all but disappear.
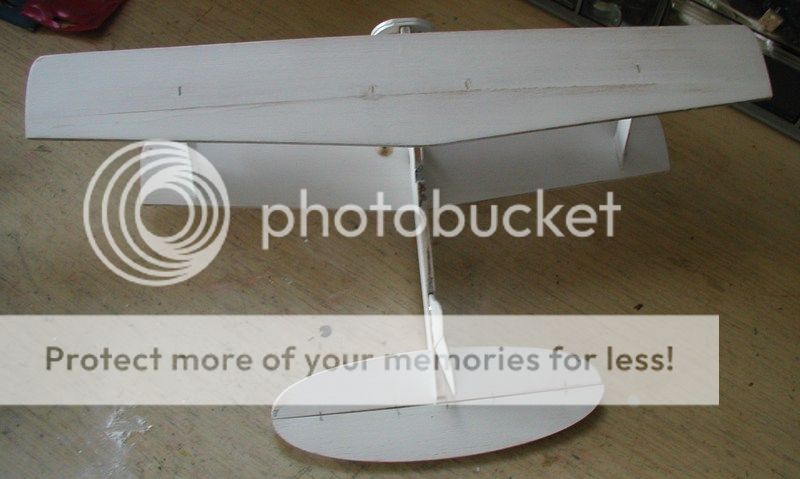
Big nose. My "Plane on a stick" painting aid. Final coat of primer applied.
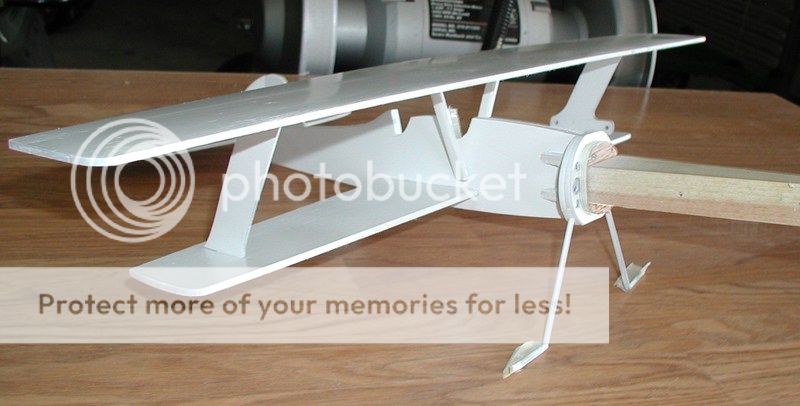
One of these engines will provide the go power. A thin wall, "thick" wall, QZ, or a later version with a spring starter.
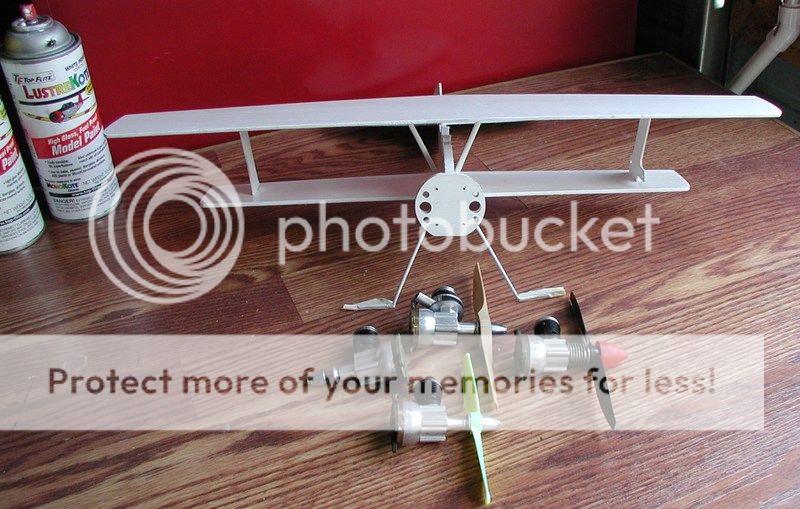
Years from now I will know how I painted this model.
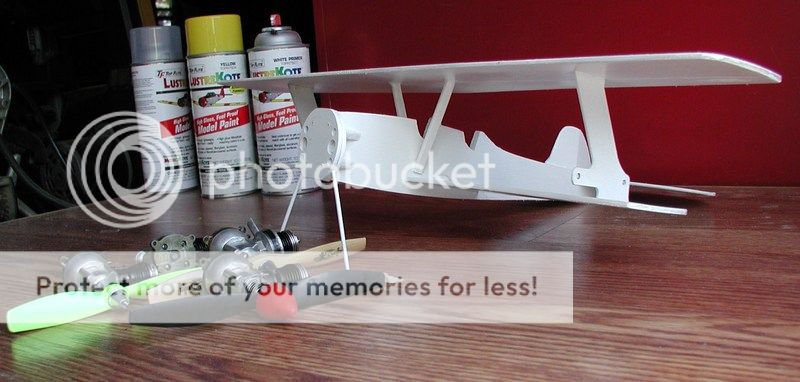
After a 24 hour cure, color coats go on.
Bob

I might have a mite too much rudder deflection. The better to hang you out on the lines my dear.
Top wing seam was quite pronounced, but filler and primer helped it to all but disappear.

Big nose. My "Plane on a stick" painting aid. Final coat of primer applied.

One of these engines will provide the go power. A thin wall, "thick" wall, QZ, or a later version with a spring starter.

Years from now I will know how I painted this model.

After a 24 hour cure, color coats go on.
Bob

rsv1cox- Top Poster


Posts : 11247
Join date : 2014-08-18
Location : West Virginia
 Re: The RMH Bipe build thread
i like the center struts that way. probably could have come right down to the top of the lower wing. i will have to look at the when i get around to cutting some more but was trying to stay with the original design on the first batch.
i know i did not put enough right rudder into mine but, at the time i was just checking fitment and was not thinking of finishing the prototype. i also put a couple degrees of right thrust into mine also after a couple failed launch attempts in some wind.
it's a nice day here and am planning on going flying as soon as i get home. been 2 1/2 weeks. need to fly the bipe!!

rogermharris- Platinum Member

- Posts : 503
Join date : 2015-03-17
Age : 61
Location : Long Branch, New Jersey
 Re: The RMH Bipe build thread
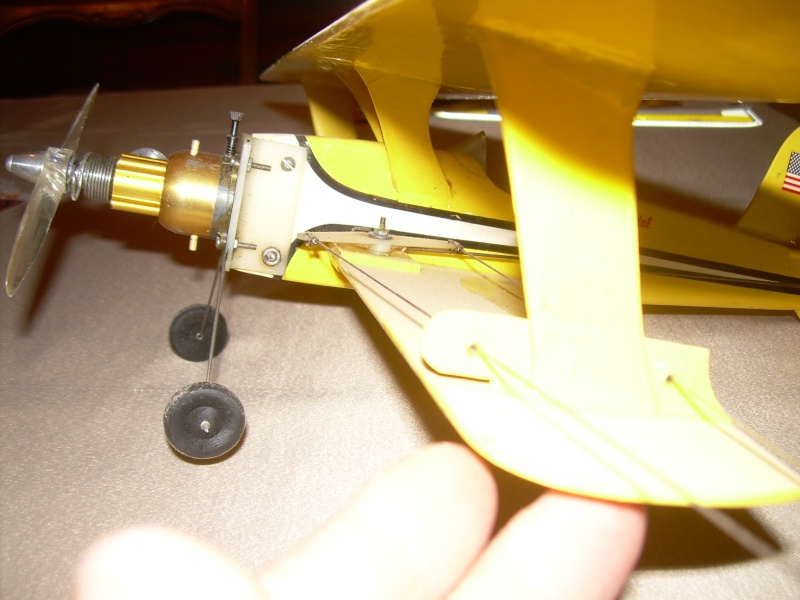
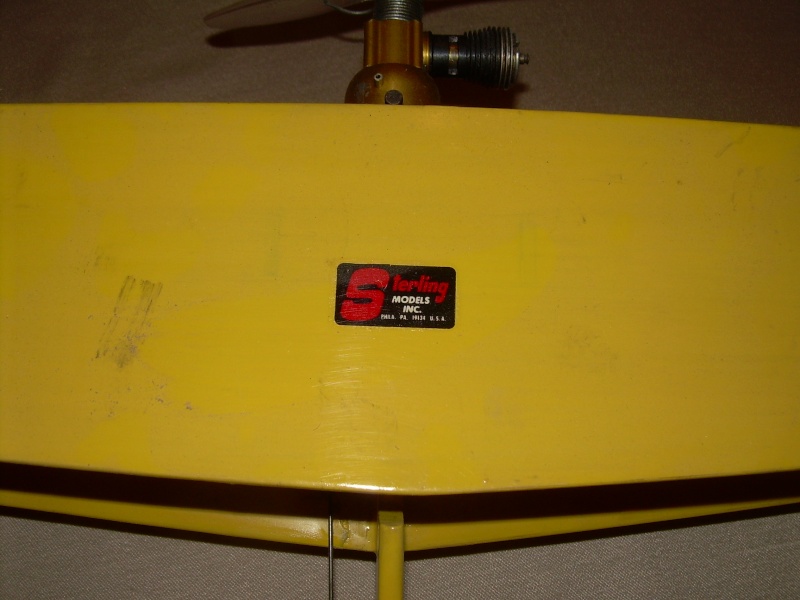
My original Sterling Ring bipe was quite maneuverable. I found it could fly inverted quite well not to mention outside loops which surprised me. I still own it after all these years and seeing this post generate over the past few weeks made me visit it and it's dust. This was from the 80's which used the nylon mount. Looking at the prop, I see it has a clear Grish Tornado. Looks cool, I would never make an attempt to try it today. Ken


Ken Cook- Top Poster

- Posts : 5637
Join date : 2012-03-27
Location : pennsylvania
Page 1 of 4 • 1, 2, 3, 4 
 Similar topics
» SIG Wonder build thread - ASP12 vs COX TD09
» Anyone have plans for the Blink?
» Dragonfly Build Thread
» "Honker" build thread
» Scratch built Sig Staggerwing build thread.. Version 3.0
» Anyone have plans for the Blink?
» Dragonfly Build Thread
» "Honker" build thread
» Scratch built Sig Staggerwing build thread.. Version 3.0
Page 1 of 4
Permissions in this forum:
You cannot reply to topics in this forum

 Rules
Rules


