Log in
Search
Latest topics
» Tee Dee .020 combat modelby Ken Cook Today at 5:09 am
» Roger Harris revisited
by TD ABUSER Today at 2:30 am
» My latest doodle...
by batjac Yesterday at 10:05 pm
» Retail price mark-up.. how much is enough?
by gkamysz Yesterday at 9:29 pm
» Happy 77th birthday Andrew!
by roddie Yesterday at 9:22 pm
» My N-1R build log
by GallopingGhostler Yesterday at 3:04 pm
» Chocolate chip cookie dough.........
by roddie Yesterday at 1:13 pm
» Purchased the last of any bult engines from Ken Enya
by sosam117 Yesterday at 11:32 am
» Free Flight Radio Assist
by rdw777 Yesterday at 9:24 am
» Funny what you find when you go looking
by rsv1cox Wed Nov 20, 2024 3:21 pm
» Landing-gear tips
by 1975 control line guy Wed Nov 20, 2024 8:17 am
» Cox NaBOO - Just in time for Halloween
by rsv1cox Tue Nov 19, 2024 6:35 pm
Cox Engine of The Month
Toxic Skyraider flys in
Page 1 of 1
 Toxic Skyraider flys in
Box could use some work. Warm iron, inside masking tape and some Elmers. Box covers both designations....AD-6 (as I remember it) and the later A1.
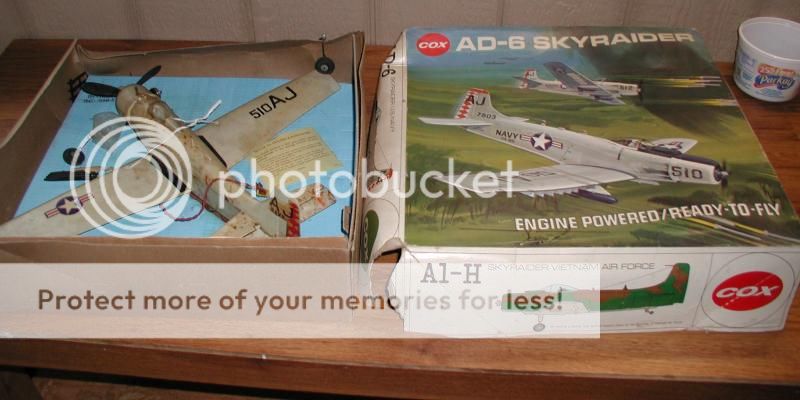
Covered with a mixture of spent fuel, dirt, and cat hairs.
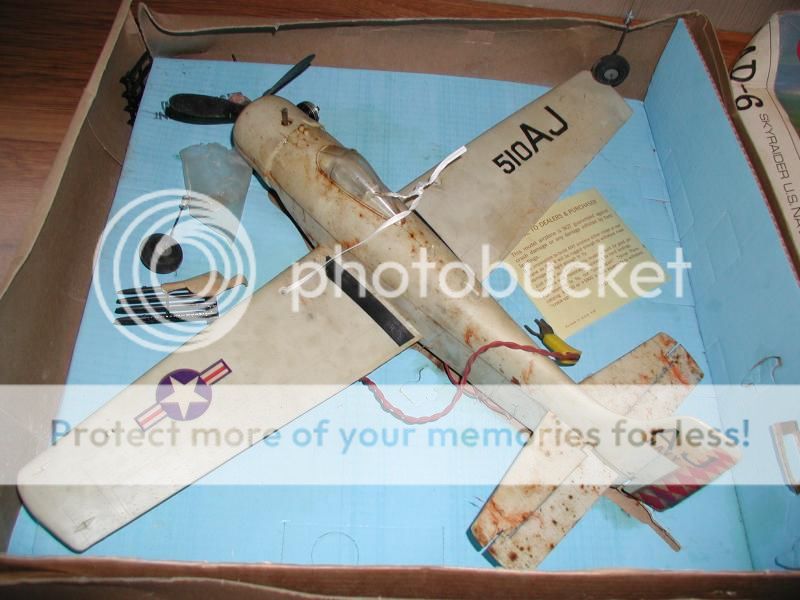
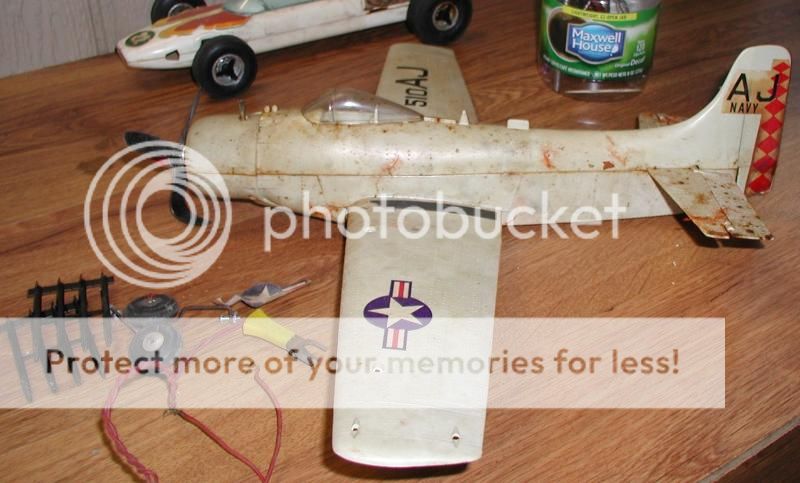
But no cracks and more or less complete. Started cleaning it in the garage. Simple Green and fine steel wool loosened most of it. Brought it in the kitchen and gave it another hot wash in Palmolive liquid and a rinse. Got off the top three layers, two more to go.
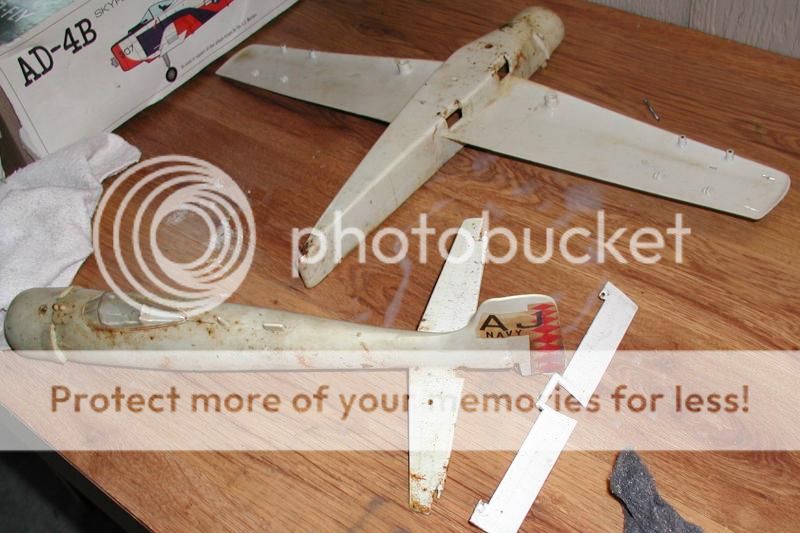
The interior was more gummed up than the exterior, and found out why. The fuel tube had broken off the fuel tank and they just kept pumping fuel into it. Notice the three mounting pylons. I got one of the screws out, the other two broke off inside the pylons. The engine pylon, no problem. The center bell-crank pylon, big problem. The rest of the screw is broken off in there.
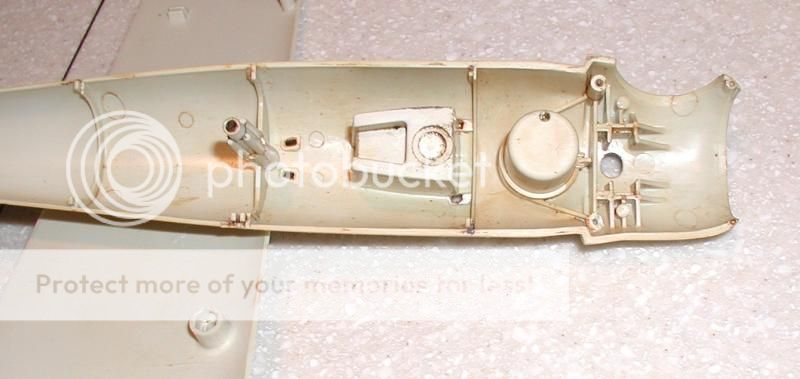
All in all it didn't turn out to bad. I still have to remove the decals, take off a couple more layers, either paint or add decals as is and clean and mount the engine.
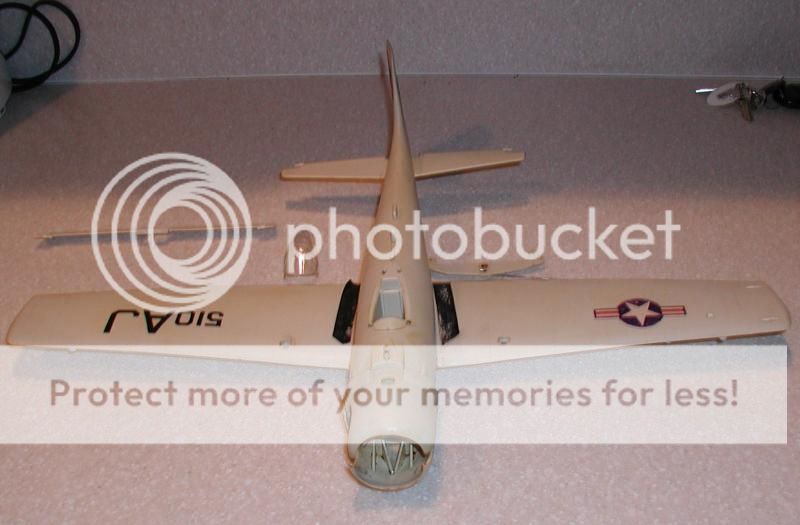
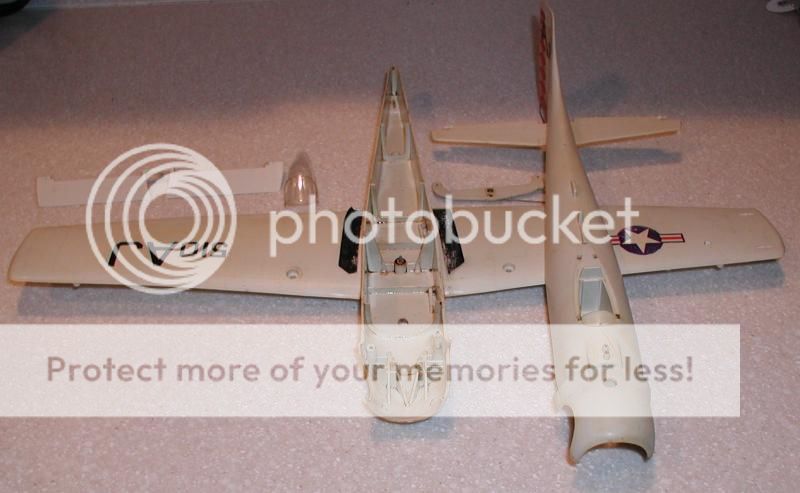
Ideas on how to remove that center pylon screw without damage would be appreciated......

Covered with a mixture of spent fuel, dirt, and cat hairs.


But no cracks and more or less complete. Started cleaning it in the garage. Simple Green and fine steel wool loosened most of it. Brought it in the kitchen and gave it another hot wash in Palmolive liquid and a rinse. Got off the top three layers, two more to go.

The interior was more gummed up than the exterior, and found out why. The fuel tube had broken off the fuel tank and they just kept pumping fuel into it. Notice the three mounting pylons. I got one of the screws out, the other two broke off inside the pylons. The engine pylon, no problem. The center bell-crank pylon, big problem. The rest of the screw is broken off in there.

All in all it didn't turn out to bad. I still have to remove the decals, take off a couple more layers, either paint or add decals as is and clean and mount the engine.


Ideas on how to remove that center pylon screw without damage would be appreciated......

rsv1cox- Top Poster


Posts : 11248
Join date : 2014-08-18
Location : West Virginia
 Re: Toxic Skyraider flys in
Hi Bob, That's a lousy place for that to have happen.. but you could try to file the plastic stand-off down enough to get a bite on the broken screw with small locking pliers.. if the screw's not rusted too far down. If this works, you can re-dress the stand-off flat-smooth and install a washer or two under the bellcrank if needed.
 Re: Toxic Skyraider flys in
Pretty cool, I got my throttle working. Have to go to dinner I will try and post pictures soon.
Mine cleaned up nice I used bleach and hot water after a wipe down with some hoppies number 9.
It is missing the rockets the needle valve black cap and I'll have to make one landing gear the eyelet was rusted thru.
Mine cleaned up nice I used bleach and hot water after a wipe down with some hoppies number 9.
It is missing the rockets the needle valve black cap and I'll have to make one landing gear the eyelet was rusted thru.

schiada96- Moderate Poster

- Posts : 16
Join date : 2014-11-23
 Re: Toxic Skyraider flys in
Another idea to remove the broken screw is get a thin piece of K&S brass tubing, with the inside diameter the same as the screw's outside diameter. Serrate the end of the tubing to make a poor man's hole saw. I've done this with hardwood bound screws broken off and it works pretty good. I usually chuck the tube into a drill press to remove the wood/screw, but if this is Styrene plastic, you could probably twirl it with your fingers to remove the plastic, or use a VSR hand drill. It'll leave a hole bigger than the screw (or the size of the OD of the tubing), then fill the hole with epoxy and bore it out for a replacement screw.
I recently resorted to this to replace a tail-light bulb on my 2004 Trailblazer - rusted screw sheared off when I tried to remove it. I found the drill press method worked pretty fast, but tended to melt the plastic - probably some sort of vinyl plastic. A few minutes later, troweled 5-min epoxy in there, then bored it out one hour later. No problem.
Hope this helps.

statorvane- Moderate Poster

- Posts : 22
Join date : 2013-11-10
Location : Upstate New York
 Re: Toxic Skyraider flys in
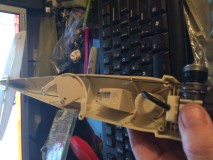
The throttle linkage

schiada96- Moderate Poster

- Posts : 16
Join date : 2014-11-23
 Re: Toxic Skyraider flys in
That's cool stuff I am putting that in my memory bank , Thanksstatorvane wrote:Another idea to remove the broken screw is get a thin piece of K&S brass tubing, with the inside diameter the same as the screw's outside diameter. Serrate the end of the tubing to make a poor man's hole saw. I've done this with hardwood bound screws broken off and it works pretty good. I usually chuck the tube into a drill press to remove the wood/screw, but if this is Styrene plastic, you could probably twirl it with your fingers to remove the plastic, or use a VSR hand drill. It'll leave a hole bigger than the screw (or the size of the OD of the tubing), then fill the hole with epoxy and bore it out for a replacement screw.
I recently resorted to this to replace a tail-light bulb on my 2004 Trailblazer - rusted screw sheared off when I tried to remove it. I found the drill press method worked pretty fast, but tended to melt the plastic - probably some sort of vinyl plastic. A few minutes later, troweled 5-min epoxy in there, then bored it out one hour later. No problem.
Hope this helps.

getback- Top Poster


Posts : 10441
Join date : 2013-01-18
Age : 67
Location : julian , NC
 Re: Toxic Skyraider flys in
Yes, me too. I have gathered the stuff necessary to do the job, although I may substitue a jewelers triangle file.


rsv1cox- Top Poster


Posts : 11248
Join date : 2014-08-18
Location : West Virginia
 Re: Toxic Skyraider flys in
Sounds like you got'er handled...I like to use a Dremel with the really thin cutting stone and cut a really thin slot, using a small screw driver to remove.
http://www.dremel.com/en-us/Accessories/Pages/ProductDetail.aspx?pid=420
http://www.dremel.com/en-us/Accessories/Pages/ProductDetail.aspx?pid=420
 Re: Toxic Skyraider flys in
I tried the made up brass tube "drill" chucked in a dremel set on low on a piece of scrap and it worked well - to a point. It tended to overheat the plastic and would only go down about 1/8th inch before bottoming out.
I cured the overheat by running the drill bit/plastic under cold water which worked fine. Now I have to cut the brass tube with a dremel cut-off in an X patten deeper than the present jewelers file cuts and try that.

Hopeful
I cured the overheat by running the drill bit/plastic under cold water which worked fine. Now I have to cut the brass tube with a dremel cut-off in an X patten deeper than the present jewelers file cuts and try that.

Hopeful

rsv1cox- Top Poster


Posts : 11248
Join date : 2014-08-18
Location : West Virginia
 Re: Toxic Skyraider flys in
I got the broken end of the screw out of the Skyraiders pylon.
I decided against using a made-up drill bit around the bitter end of the screw as there just isn't enough material around the relieved end of the pylon that the bell-crank sits on.
Instead I used a razor saw all around the pylon to cut it, then unscrewed the free end to expose the broken screw then used pliers to extract that. Worked great.
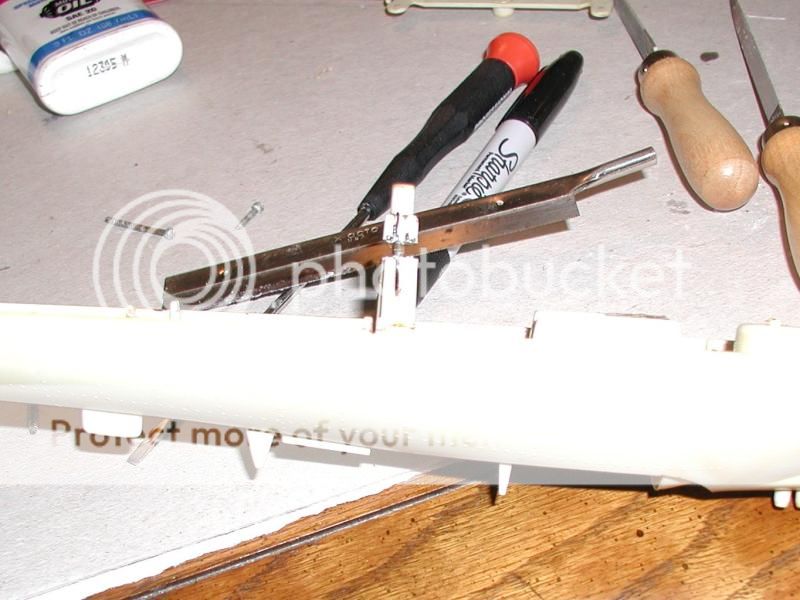
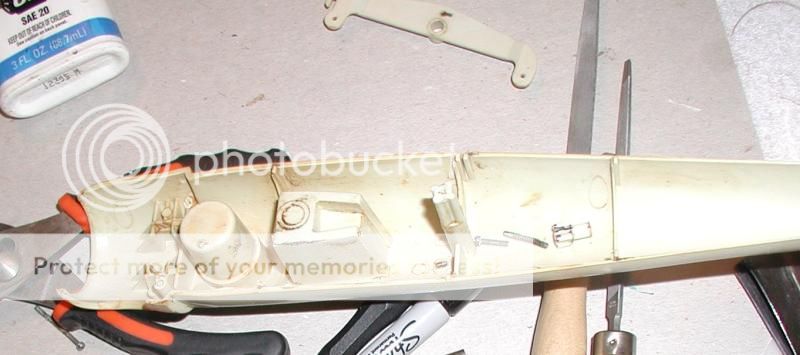
I think I will hog out the freed end then glue it back in place using a guide. I had marked a witness line on the pylon to ensure I got it back correctly. It may be a trifle shorter, but there is flash on both ends that should help in the gluing process and make up the difference. Razor saws are pretty thin anyway.
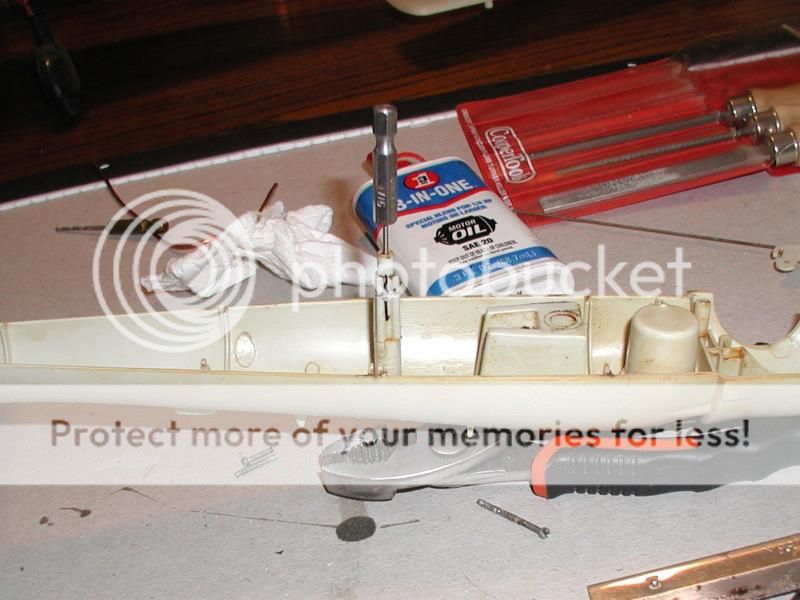
I could use a 2/56 machine screw to replace the broken special purpose but will probably look for a self tapping screw to do the job. Most of the replacement screw will go deep into the unaltered fixed end of the plyon.
Anyway, I was sweating this one out. Those broken in place screws can be a problem. Two out of the three were broken in place. Easy, as they are thin above the threads to begin with.
I decided against using a made-up drill bit around the bitter end of the screw as there just isn't enough material around the relieved end of the pylon that the bell-crank sits on.
Instead I used a razor saw all around the pylon to cut it, then unscrewed the free end to expose the broken screw then used pliers to extract that. Worked great.


I think I will hog out the freed end then glue it back in place using a guide. I had marked a witness line on the pylon to ensure I got it back correctly. It may be a trifle shorter, but there is flash on both ends that should help in the gluing process and make up the difference. Razor saws are pretty thin anyway.

I could use a 2/56 machine screw to replace the broken special purpose but will probably look for a self tapping screw to do the job. Most of the replacement screw will go deep into the unaltered fixed end of the plyon.
Anyway, I was sweating this one out. Those broken in place screws can be a problem. Two out of the three were broken in place. Easy, as they are thin above the threads to begin with.

rsv1cox- Top Poster


Posts : 11248
Join date : 2014-08-18
Location : West Virginia
 Re: Toxic Skyraider flys in
This is turning out to be the hard-luck Skyraider. While my other one disassembled, cleaned-up and went back together fine, this one is living up to it's toxic name.
From the broken screws, to the acne finish, and busted pylons I found a broken nipple on the fuel tank, fuel tank oozing a brown/orange substance, subsequent broken fuel tank and a seized engine with a probable out of round cylinder. For starters.....
I solved the broken pylons and screws then moved on to the fuel tank which was dripping the mentioned fluid. I knew it had to be cleaned but it wouldn’t come off. Sooo I applied a little compressed air, not a great move as the two filler nipples were blocked with this ooze so when I applied the air to the fuel outlet hole it blew the tank in half....
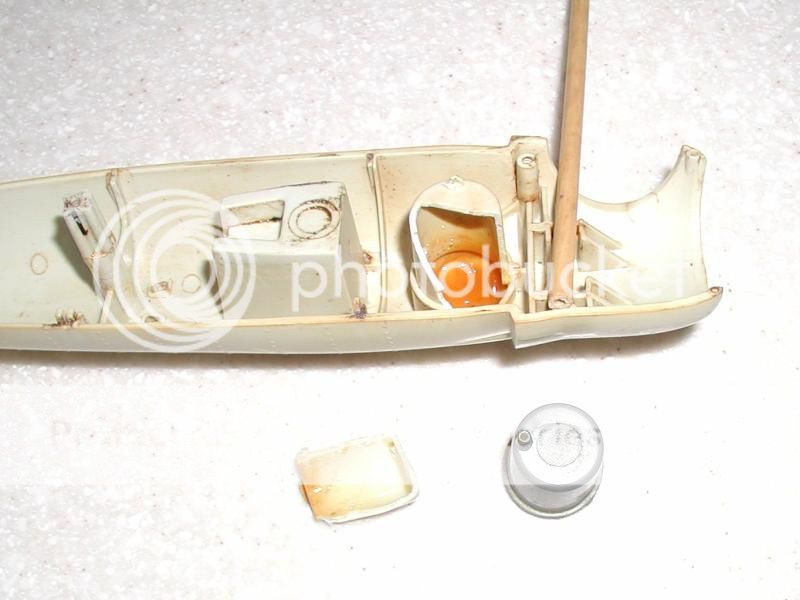
Ok, I had a spare tank, but I couldn’t use it because the attaching lip still had plastic on it from the donor aircraft which would not come off, but it did supply a nipple.
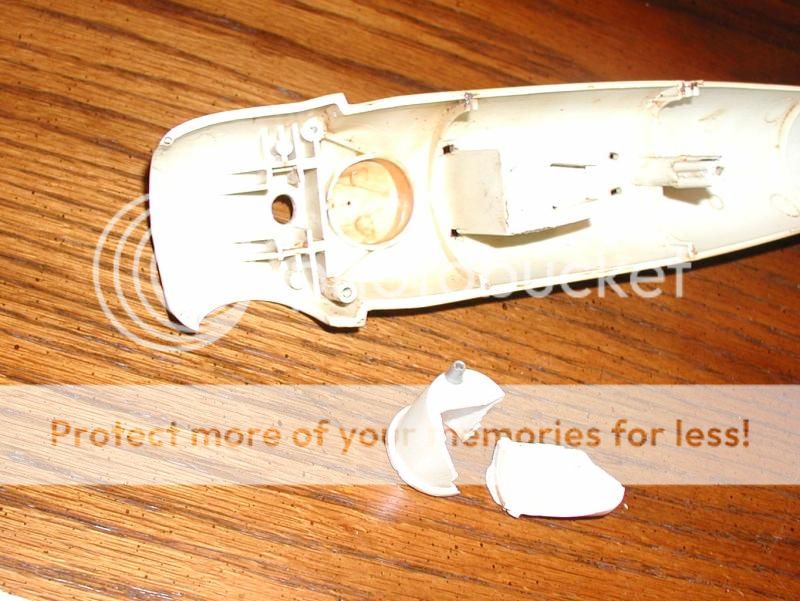
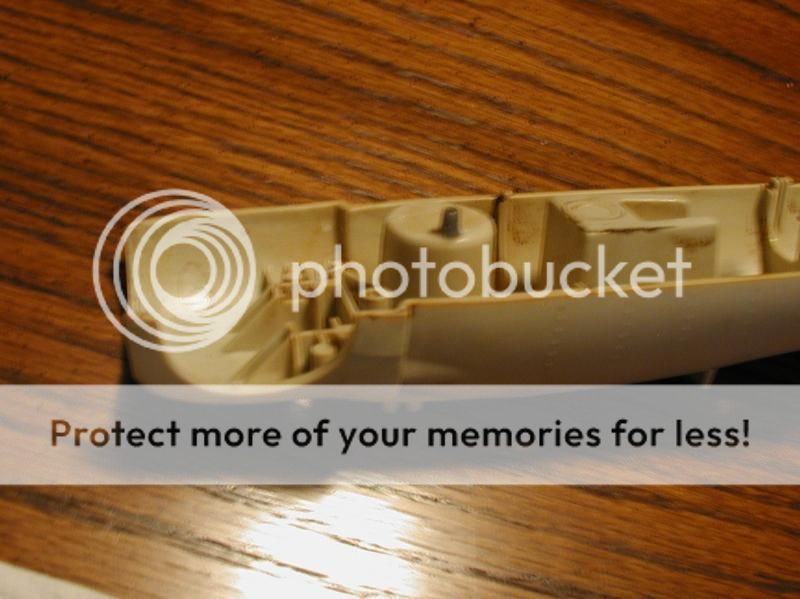
Got the tank glued back together and mounted and moved on to the engine. Like the rest of the Skyraider it was a mess. Got it disassembled after a hot Simple Green soak only to discover that the cylinder is out of round. No problem, I have new cylinders.
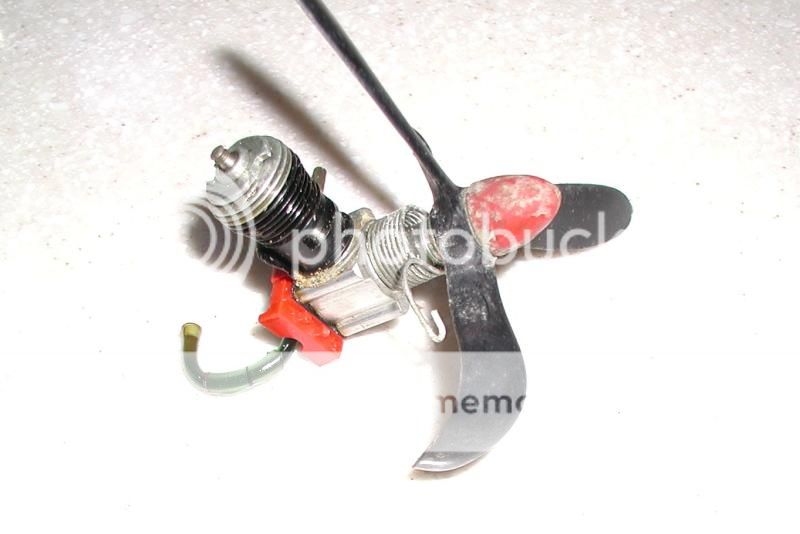
Notice the unused fuel in the line and the broken off nipple still in the silicone. I think the propeller was bent from years sitting on that blade in some hot attic somewhere. Wonder if I can apply heat and bend it back?????
From the broken screws, to the acne finish, and busted pylons I found a broken nipple on the fuel tank, fuel tank oozing a brown/orange substance, subsequent broken fuel tank and a seized engine with a probable out of round cylinder. For starters.....
I solved the broken pylons and screws then moved on to the fuel tank which was dripping the mentioned fluid. I knew it had to be cleaned but it wouldn’t come off. Sooo I applied a little compressed air, not a great move as the two filler nipples were blocked with this ooze so when I applied the air to the fuel outlet hole it blew the tank in half....

Ok, I had a spare tank, but I couldn’t use it because the attaching lip still had plastic on it from the donor aircraft which would not come off, but it did supply a nipple.


Got the tank glued back together and mounted and moved on to the engine. Like the rest of the Skyraider it was a mess. Got it disassembled after a hot Simple Green soak only to discover that the cylinder is out of round. No problem, I have new cylinders.

Notice the unused fuel in the line and the broken off nipple still in the silicone. I think the propeller was bent from years sitting on that blade in some hot attic somewhere. Wonder if I can apply heat and bend it back?????

rsv1cox- Top Poster


Posts : 11248
Join date : 2014-08-18
Location : West Virginia
 Similar topics
» Cox Skyraider - No longer toxic
» Don't inhale toxic fumes.
» Differtent PT-19, P-40, and a Skyraider......
» Testors Skyraider, not Cox
» New project - Cox AD-4/6 - AKA A1 Skyraider and box
» Don't inhale toxic fumes.
» Differtent PT-19, P-40, and a Skyraider......
» Testors Skyraider, not Cox
» New project - Cox AD-4/6 - AKA A1 Skyraider and box
Page 1 of 1
Permissions in this forum:
You cannot reply to topics in this forum

 Rules
Rules


