Log in
Search
Latest topics
» Cox films/videos...by Coxfledgling Today at 4:46 am
» Purchased the last of any bult engines from Ken Enya
by Coxfledgling Today at 4:18 am
» My N-1R build log
by roddie Today at 12:32 am
» Happy 77th birthday Andrew!
by akjgardner Today at 12:27 am
» TEE DEE Having issues
by TD ABUSER Yesterday at 9:43 pm
» Landing-gear tips
by roddie Yesterday at 6:17 pm
» Roger Harris revisited
by TD ABUSER Yesterday at 2:13 pm
» Tee Dee .020 combat model
by Ken Cook Yesterday at 1:41 pm
» Retail price mark-up.. how much is enough?
by Ken Cook Yesterday at 1:37 pm
» My latest doodle...
by roddie Yesterday at 10:43 am
» Chocolate chip cookie dough.........
by roddie Fri Nov 22, 2024 1:13 pm
» Free Flight Radio Assist
by rdw777 Fri Nov 22, 2024 9:24 am
Cox Engine of The Month
"Phred's Phault"
Page 4 of 7
Page 4 of 7 •  1, 2, 3, 4, 5, 6, 7
 Re: "Phred's Phault"
OK I see now y u cut the wing in 1/2 I must have missed something , It 's coming together just takes time . Could you cut a plastic round cylinder to fit the hole for strength ? I would have to look back to see why the hole was cut to begin with , Just a thought . Eric 

getback- Top Poster


Posts : 10442
Join date : 2013-01-18
Age : 67
Location : julian , NC
 Re: "Phred's Phault"
getback wrote:OK I see now y u cut the wing in 1/2 I must have missed something , It 's coming together just takes time . Could you cut a plastic round cylinder to fit the hole for strength ? I would have to look back to see why the hole was cut to begin with , Just a thought . Eric
That large hole is for the bellcrank.. which is enclosed in the wing.. along with the lead-outs. A "thru-hole" just seemed to be easier than trying to carve-out the foam down to a certain level.
I had previously thought about your recommendation for sleeving the hole with something. Probably just the front section.. which would need a slot cut for the forward lead-out to pass through.
 Re: "Phred's Phault"
yes I've been stalled-out on this build.. but the wheels are slowly turning. I will be testing on a block of foam for slotting areas on the inboard wing-panel that require it. This will be the lead-out channels and bell-crank platform location.. which have different depths. The pushrod-slot I'm going to melt-in using a heated large nail held with locking pliers.
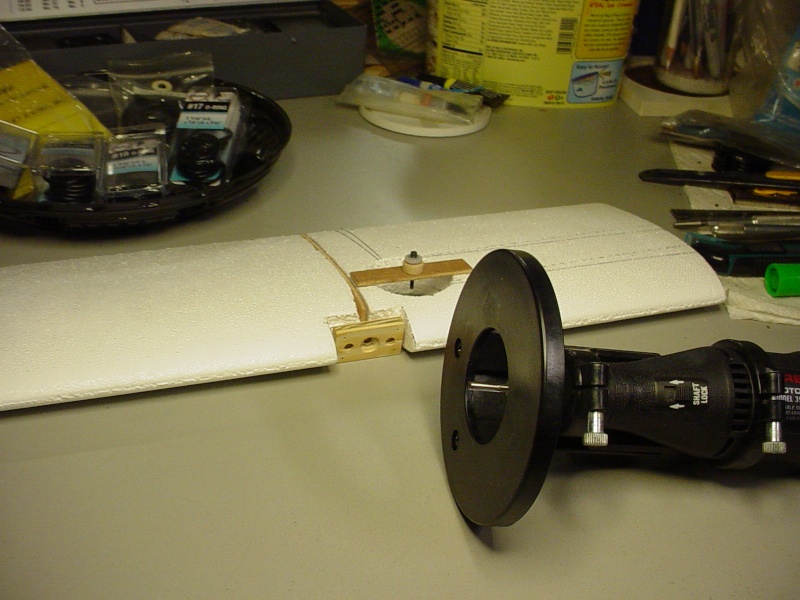
Maybe I can embarrass myself into picking up the pace. A central ply rib has been made, and cut back for the firewall to butt-up against with a pair of 3/4" long, 3/8" sq. spruce blocks epoxied vertically on the backside.
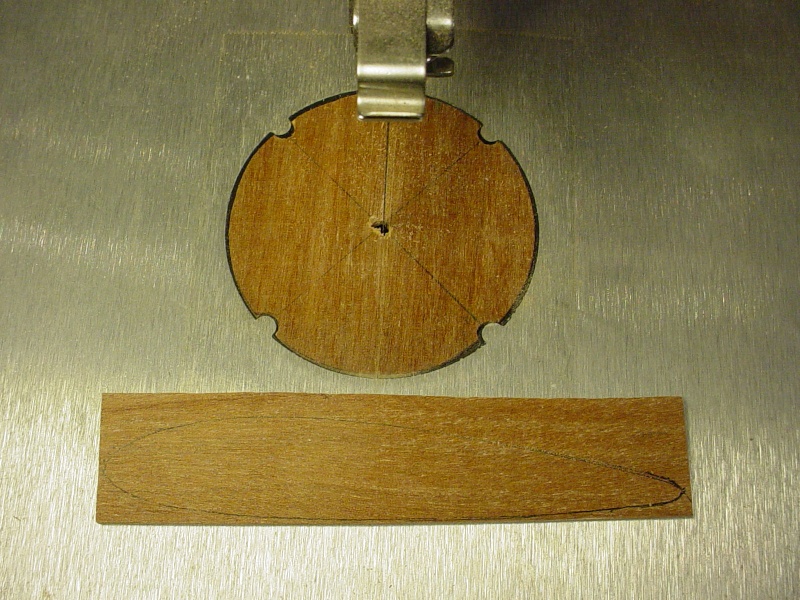
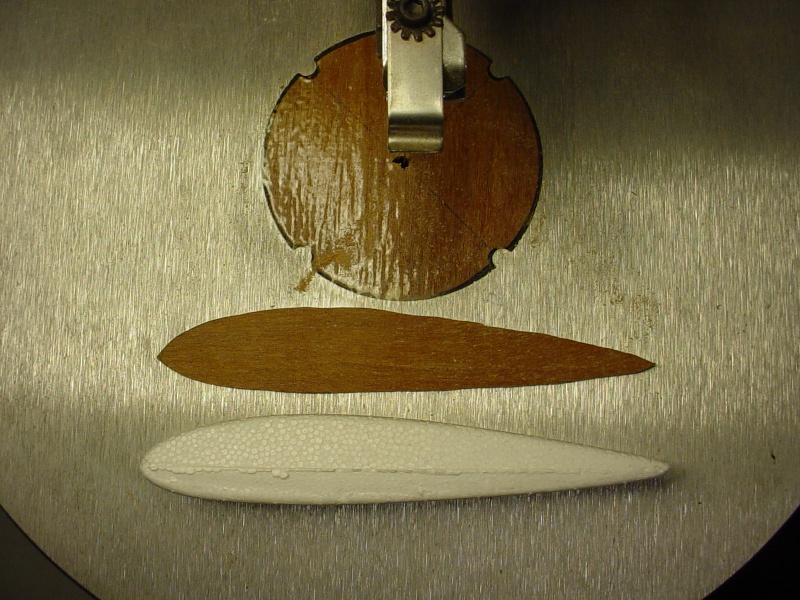
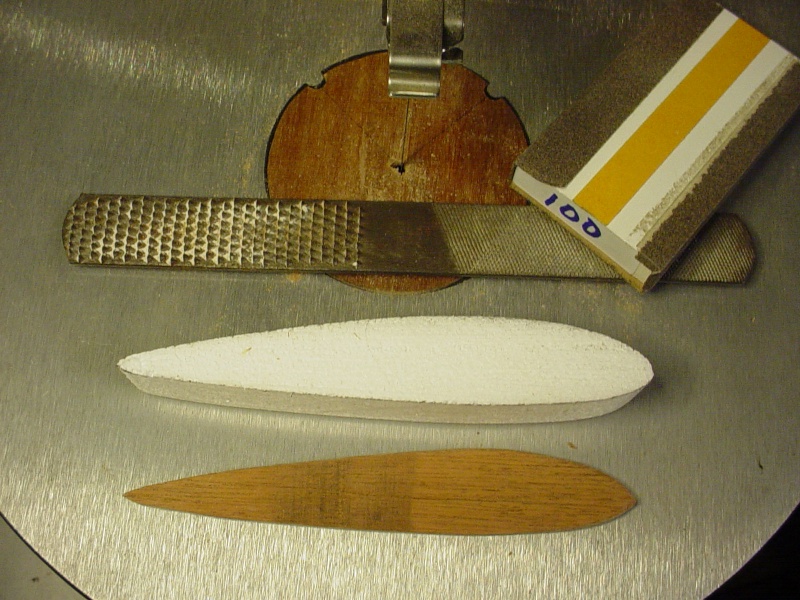
The bell-crank platform needs to be re-made longer on the inside, and a slot cut in the ply-rib to accept it. These combined joints will hopefully add some strength where the model needs it most.
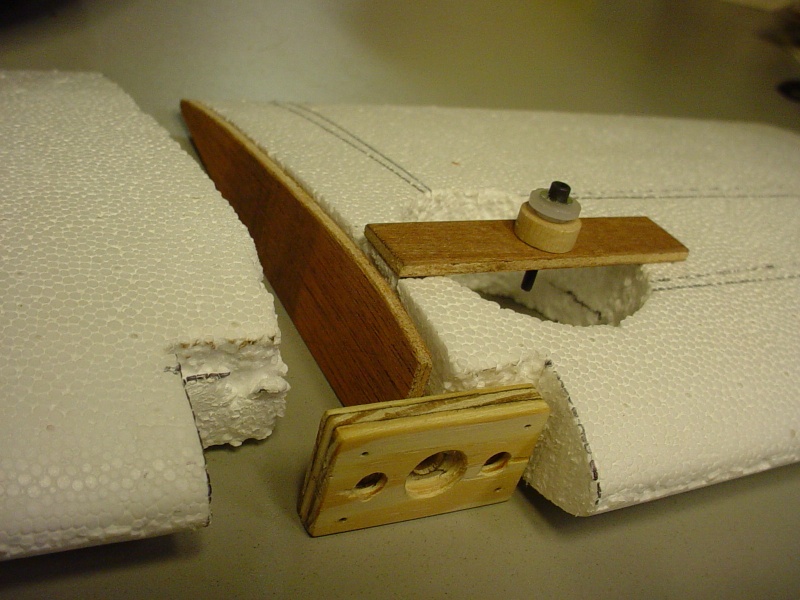
There's a couple crevices on the under side of the outboard wing. It happened when I cut the wing in half.. and I need to fill them. Maybe balsa dust mixed with white glue? I can't really afford to buy anything else right now.

Maybe I can embarrass myself into picking up the pace. A central ply rib has been made, and cut back for the firewall to butt-up against with a pair of 3/4" long, 3/8" sq. spruce blocks epoxied vertically on the backside.


The bell-crank platform needs to be re-made longer on the inside, and a slot cut in the ply-rib to accept it. These combined joints will hopefully add some strength where the model needs it most.

There's a couple crevices on the under side of the outboard wing. It happened when I cut the wing in half.. and I need to fill them. Maybe balsa dust mixed with white glue? I can't really afford to buy anything else right now.
 Re: "Phred's Phault"
How about a handful (or less) of styrofoam crumbs mixed with glue? If you still have that circular piece you cut out to make the chamber for the bellcrank, that would probably be enough.

KariFS- Diamond Member

- Posts : 2044
Join date : 2014-10-10
Age : 53
 Re: "Phred's Phault"
KariFS wrote:How about a handful (or less) of styrofoam crumbs mixed with glue? If you still have that circular piece you cut out to make the chamber for the bellcrank, that would probably be enough.
Yes.. thanks! I will be making foam dust when I use the router. It's a small total area of about .5 sq. inches. I thought about acrylic caulking too. I'll have to do a few tests to see how they sand-out. It will be covered at finish, with white Econo-Kote.
 Re: "Phred's Phault"
Working things out to-scale on paper, sometimes helps me to move forward with a scratch-build in a more practical sequence.. while also bringing to light; issues in areas of the design that I may not have put enough thought into.
The left hand drawing shows a cutaway of the foam core with my proposed central plywood rib and lengthened bellcrank platform which runs through a slot in the rib.
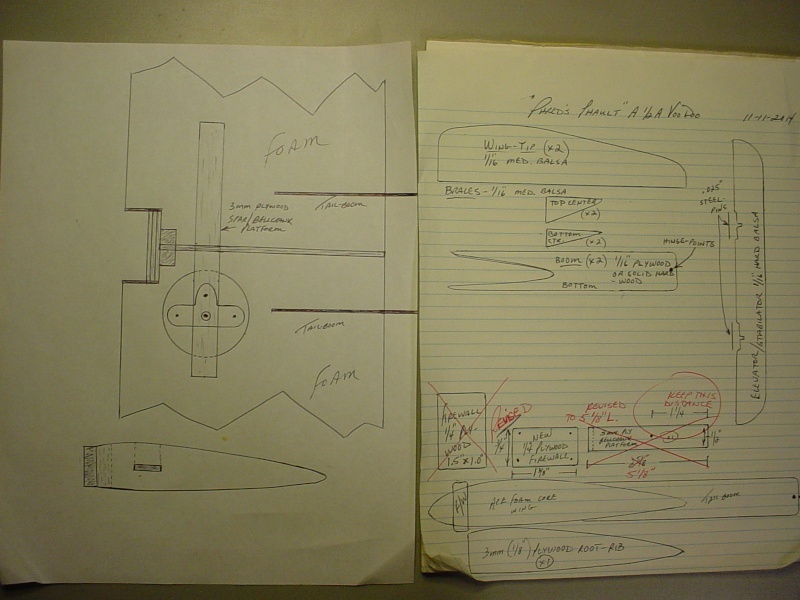
The 1/4" plywood firewall will butt against the front of the 3mm ply-rib and will have blocks on the backside for support. This establishes a central frame and spreads-out some of the stress-points enough (hopefully) to be more crash resistant. Besides being a much stronger bellcrank mount, this assembly may also help to dampen engine vibrations. The central rib also offers a good firm point on the underside, for bladder stand-offs.
The left hand drawing shows a cutaway of the foam core with my proposed central plywood rib and lengthened bellcrank platform which runs through a slot in the rib.

The 1/4" plywood firewall will butt against the front of the 3mm ply-rib and will have blocks on the backside for support. This establishes a central frame and spreads-out some of the stress-points enough (hopefully) to be more crash resistant. Besides being a much stronger bellcrank mount, this assembly may also help to dampen engine vibrations. The central rib also offers a good firm point on the underside, for bladder stand-offs.
 Re: "Phred's Phault"
I redesigned the blocks behind the firewall for better support and glue contact area.. and cut a slot in the central rib for the bellcrank mount which now doubles as a spar.


 Re: "Phred's Phault"
I'm no expert, but that does look good to me. Now you will have your bellcrank and engine tied together with hardwood structure. This is pretty much the same structure I have come up in my own trainer design, although mine is going to be 1/4" balsa sheet after all, the styro cores I mentioned earlier were too thick. But now, if your plane should happen to disintegrate mid air for any reason, at least your engine should stay in the end of the control lines and not fly away 
You might want to consider options to somehow tie the tail booms into this main structure too, that way your styro wing cores would not have to carry that much force. Or maybe glue some strips of very thin plywood along the edges of the cut-outs?
You might want to consider options to somehow tie the tail booms into this main structure too, that way your styro wing cores would not have to carry that much force. Or maybe glue some strips of very thin plywood along the edges of the cut-outs?

KariFS- Diamond Member

- Posts : 2044
Join date : 2014-10-10
Age : 53
 Re: "Phred's Phault"
KariFS wrote:I'm no expert, but that does look good to me. Now you will have your bellcrank and engine tied together with hardwood structure. This is pretty much the same structure I have come up in my own trainer design, although mine is going to be 1/4" balsa sheet after all, the styro cores I mentioned earlier were too thick. But now, if your plane should happen to disintegrate mid air for any reason, at least your engine should stay in the end of the control lines and not fly away
You might want to consider options to somehow tie the tail booms into this main structure too, that way your styro wing cores would not have to carry that much force. Or maybe glue some strips of very thin plywood along the edges of the cut-outs?
I think I'll be ok with the tail-booms.. as they're notched (like the full-size VooDoo) as opposed to slotting the T/E to accept them (I think that's what you meant?) Still.. it's something to think about. I like Ken's method of installing a fuel-bladder inside the wing... but that's no longer an option with the mods I've made. I am also totally new to bladder-use and it's probably better anyway.. for it to be external until I get use to flying with one.
 Re: "Phred's Phault"
I got a little more done today. I'd been wanting to build my wingtips, since the main pieces had been cut.. (I still need to install the gussets).. The inboard tip needed a slot cut for the part of the guide that will hold the lead-outs at their optimal position.
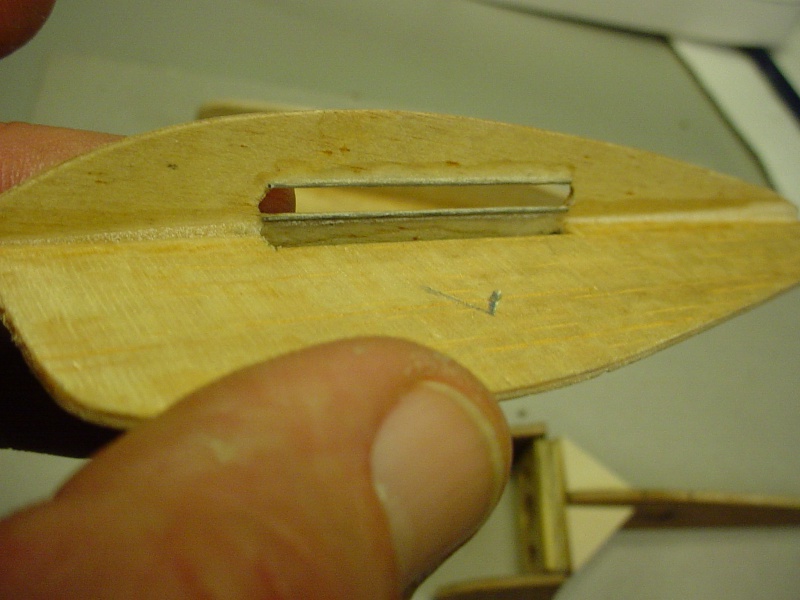
I plan on using a small safety-pin "vertically" through which both lines will run. The bottom "eye" of the safety-pin will be anchored into the foam using a long "hat-pin".. and the top.. well something that I hope will also allow for repositioning. The top has no foam behind the rib to anchor to.. because of the routed-out channel for the lead-out cables. Possibly a short #1 machine-screw/nut.
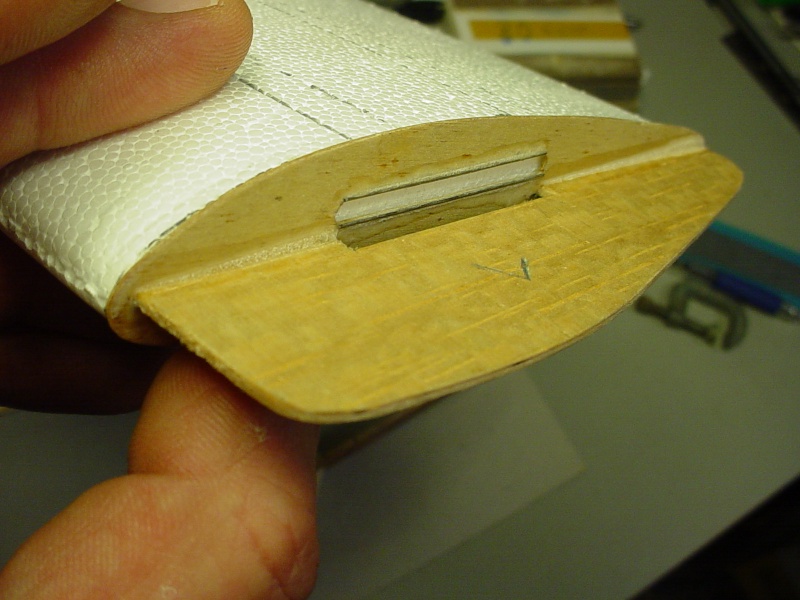
I cut two 3mm ply rib-shaped nose-blocks that will protect the leading-edge at the junction of the inset engine bay.. and will straddle the 1/4" ply engine mount and butt-up against the triangular blocks behind the mount. This all keys into the central 3mm ply-rib and bell-crank plate.
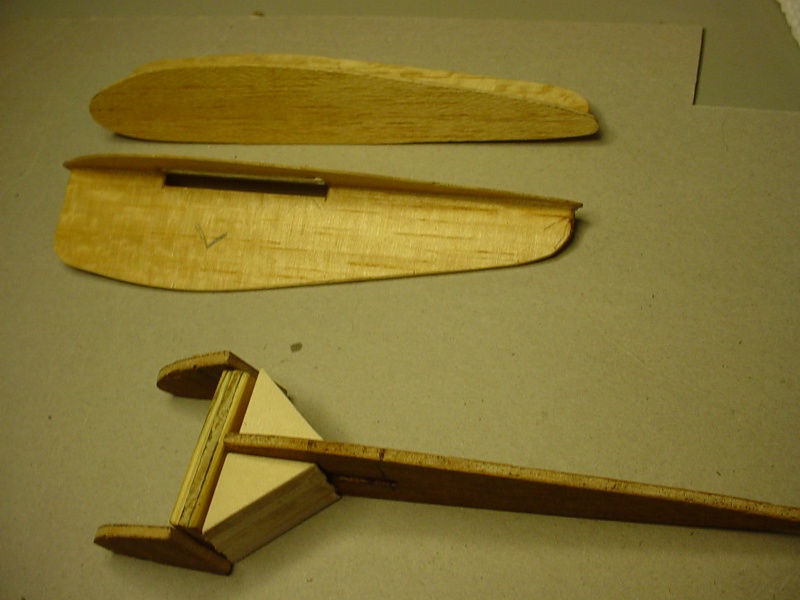
I need to trim the cores for the triangle braces and router the slots for the bell-crank plate to fit down into.. as well as the channel for the lead-outs running out to the inboard tip. Once the cores are glued to the central-rib, I can use my fixture to align and install the tail-boom/stab. assy.

I plan on using a small safety-pin "vertically" through which both lines will run. The bottom "eye" of the safety-pin will be anchored into the foam using a long "hat-pin".. and the top.. well
 something that I hope will also allow for repositioning. The top has no foam behind the rib to anchor to.. because of the routed-out channel for the lead-out cables. Possibly a short #1 machine-screw/nut.
I cut two 3mm ply rib-shaped nose-blocks that will protect the leading-edge at the junction of the inset engine bay.. and will straddle the 1/4" ply engine mount and butt-up against the triangular blocks behind the mount. This all keys into the central 3mm ply-rib and bell-crank plate.

I need to trim the cores for the triangle braces and router the slots for the bell-crank plate to fit down into.. as well as the channel for the lead-outs running out to the inboard tip. Once the cores are glued to the central-rib, I can use my fixture to align and install the tail-boom/stab. assy.
 Re: "Phred's Phault"
That should become a solid wing. Just a question: is your wing profile assymetrical?
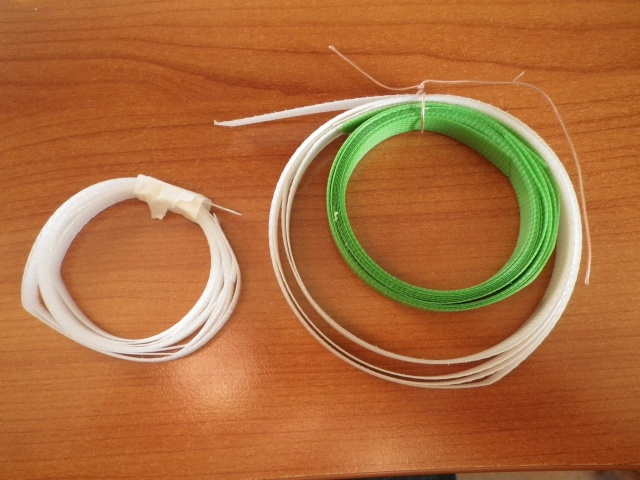
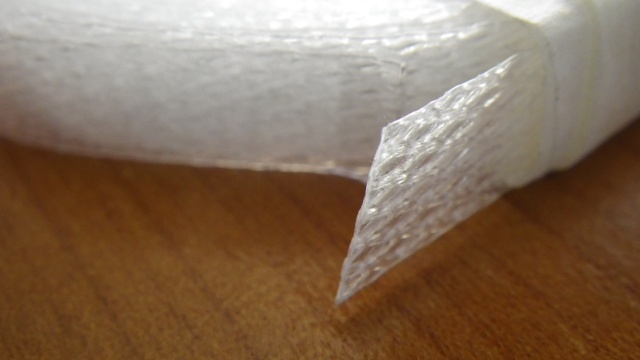
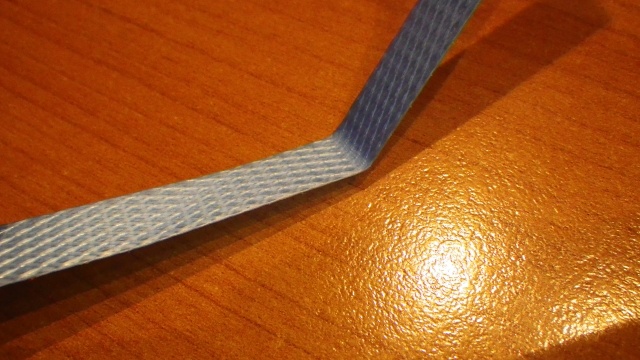
I just want to jump back to this post above. A few weeks ago, I had to witness a cross stuffing of 2.500 cartons with frozen meat. While trying to forget the cold, I decided to do a test with the wrapping bands. When bending them with a radius of approx 3mm, it flips back quiet naturally, but when bending 30 to 50 times when held very close between the fingers, it remains in position and doesn't go back by itself anymore. However, no cracks or deterioration was visible. So I don't know if it can be used as a hinge material, maybe more suited for RC use?
I tried to glue that with CA but that isn't any good because of the rough surface. It's better to use epoxy.
Lieven
roddie wrote:OVERLORD wrote:Hi Roddie,
Good to see you're getting along well with your build. For hinges, I keep on collecting plastic bands for wrapping of cartons. They come in different sizes, widths and thicknesses. They should resist to a lot of bending, I suppose.
Lieven
Those look cool Lieven. Have you tested adhesives that will work? I like the fiberglass screen for my app.. because of the weave. I can use thin CA to attach.. fill the weave afterward with a sandable filler.. and then feather-in to the stab.
I just want to jump back to this post above. A few weeks ago, I had to witness a cross stuffing of 2.500 cartons with frozen meat. While trying to forget the cold, I decided to do a test with the wrapping bands. When bending them with a radius of approx 3mm, it flips back quiet naturally, but when bending 30 to 50 times when held very close between the fingers, it remains in position and doesn't go back by itself anymore. However, no cracks or deterioration was visible. So I don't know if it can be used as a hinge material, maybe more suited for RC use?
I tried to glue that with CA but that isn't any good because of the rough surface. It's better to use epoxy.

Lieven

OVERLORD- Diamond Member

- Posts : 1807
Join date : 2013-03-19
Age : 58
Location : Normandy, France
 Re: "Phred's Phault"
Hi Lieven, yes.. the airfoil has more camber on the top than the bottom. If you look back in this thread on the 1st page, you'll note my concerns with this. I was assured by a few modelers, that it shouldn't be a big deal. I just have to make sure that both panels have an equal angle of incidence when I join them at the central root-rib.
As far as your hinge material is concerned.. We try to strive toward building "longevity" into our models.. not wanting to see the failure of any components.. or having them prematurely wear-out. You have to wonder if it's worth the time and effort.. when an aircraft can certainly meet an untimely demise due to other circumstances.. long before any of it's components wear out.. or the finish shows signs of degrading.
The learning-curve on this particular build for me, can be compared to the distance it takes for a jumbo-jet to make a U-turn..
 Re: "Phred's Phault"
roddie wrote:KariFS wrote:
You might want to consider options to somehow tie the tail booms into this main structure too, that way your styro wing cores would not have to carry that much force. Or maybe glue some strips of very thin plywood along the edges of the cut-outs?
I think I'll be ok with the tail-booms.. as they're notched (like the full-size VooDoo) as opposed to slotting the T/E to accept them (I think that's what you meant?) Still.. it's something to think about.
Yes, you're right. I thought you had made the cuts into the wing core, sorry about the confusion.

KariFS- Diamond Member

- Posts : 2044
Join date : 2014-10-10
Age : 53
 Did this project stall like mine did?
Lats winter I started playing with the ace foam core wing panels and after a PITA with Brodak Black covering got busy with Lil Hackers

Four planes here, 2 are Corehouse Lil Hackers on hold waiting on me to stop being so busy with a major bathroom remodel (SWMBO sez she is wants that project to be my priority)
On the left is a 18" span by 6" wide home brew from Ace semi symmetrical foam core that I sanded on the top to sort of make it more symmetrical. The black mess on the right uses the wing panel as Ace made it. Both have balsa trailing edge grafted on to increase the chord
I plan on .049 TeeDee power for both
The Norvel .049 aero with radial mount from Texas timers is for one of the hackers
For some reason, when I ironed on the Brodak black film it never stuck down ( I tried hotter, I tried colder) frustrated, I peeled off the covering and got a sticky gooey mess
I figure this fall / winter I will finish this project as I believe these will be pretty stout for me to let my son and grandson bash the hell out of them

fredvon4- Top Poster


Posts : 4012
Join date : 2011-08-26
Age : 69
Location : Lampasas Texas
 Re: "Phred's Phault"
fredvon4 wrote:Lats winter I started playing with the ace foam core wing panels and after a PITA with Brodak Black covering got busy with Lil Hackers
Four planes here, 2 are Corehouse Lil Hackers on hold waiting on me to stop being so busy with a major bathroom remodel (SWMBO sez she is wants that project to be my priority)
On the left is a 18" span by 6" wide home brew from Ace semi symmetrical foam core that I sanded on the top to sort of make it more symmetrical. The black mess on the right uses the wing panel as Ace made it. Both have balsa trailing edge grafted on to increase the chord
I plan on .049 TeeDee power for both
The Norvel .049 aero with radial mount from Texas timers is for one of the hackers
For some reason, when I ironed on the Brodak black film it never stuck down ( I tried hotter, I tried colder) frustrated, I peeled off the covering and got a sticky gooey mess
I figure this fall / winter I will finish this project as I believe these will be pretty stout for me to let my son and grandson bash the hell out of them
Hi Fred, is the bathroom finished?
I hope I don't have the trouble that you experienced with the covering. I'm going to try some "Tower-Kote" (white) and see how it goes.. although that step is a ways off. I'm pretty confident that the "t-structured" central ply-rib/firewall/bell-crank plate that I came up with, will give this model a more rigid core. The extended bell-crank plate forms a 4" long by 1/2" wide stub-spar to reinforce the wing-panels where they join to the central rib. Next step would be re-measuring for the channels to be router-cut into the foam, for the bell-crank plate. The depth needs to be slightly deeper than 1/2 the airfoil thickness. Soft-balsa plugs will be epoxied-in over the plate afterward.. and contour-sanded flush. Maybe I'll work on it some more soon. Not being a "kit".. I tend to think too many steps into it at a time, which stalls me.
 Damn Roddie you need to get the hell out of my head! BIG GRIN
Just TODAY I pulled the ace wing semi JR Satan projects off the shelf and decided to get them both done.
Over the summer the black mess finally got hard enough for me to consider recovering with SLC and leave it ugly under neath the clear light film...This will be the plane my son or grand son can auger into the ground time and time again with me not cringing
I only finished one of the three Core House hackers and have not flown it yet
I am just about to put a flight on the 1/2a Ringmaster Bipe and need to get photos of how the finish came out
Since my training, age, and skill/reflexes/ability are never going to let me compete in Big Block (120MPH) combat I have refocused some on me and my son/grand son sport flying.
That said, I am acquiring and planning to build over the winter several OLD school vintage combat planes like the sneaker, voodoo, big iron, T square etc and hope to attend one or more of the vintage combat graffiti meets next year

fredvon4- Top Poster


Posts : 4012
Join date : 2011-08-26
Age : 69
Location : Lampasas Texas
 Re: "Phred's Phault"
Get him Fred  Roddie what is the hold up the wing was already done !! I had to look back through the tread to see what it was about
  Time sure flys when your having FUN

 Eric
Eric
 Roddie what is the hold up the wing was already done !! I had to look back through the tread to see what it was about

 Eric
Eric 
getback- Top Poster


Posts : 10442
Join date : 2013-01-18
Age : 67
Location : julian , NC
 Re: "Phred's Phault"
Fred, tomorrow is vintage combat in New Jersey. Essentially this is the east coast version. Larry Scarinzi will be present and within the contest, we have a award for the fastest baffle piston engine. I hope to be a competitor. Here's some of my lineup for the day.
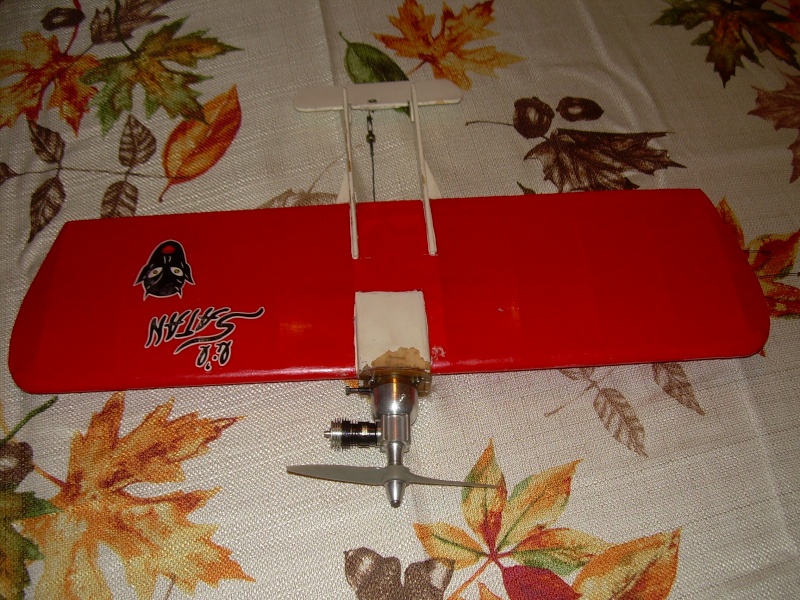
Here's my Lil Satan, the only survivor of many and it runs real good. Nothing fancy just a Black Widow in mill finish You have to love high nitro as you can see the paint washing off of the engine nacelle
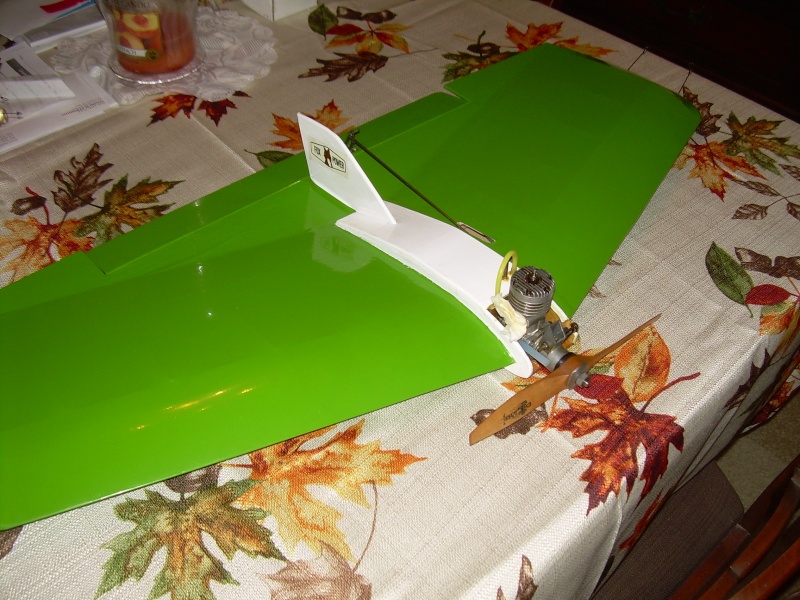
Consolidated WOW Fox Combat Special early series bolt on front end
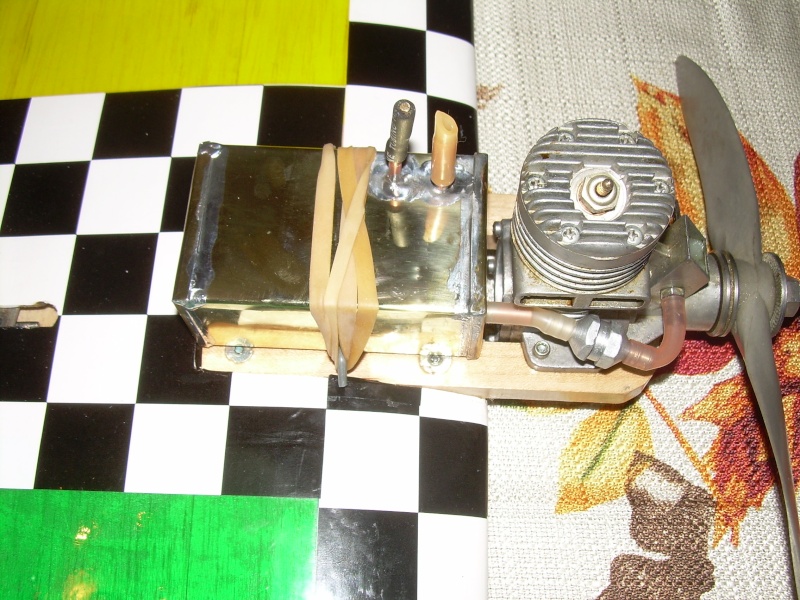
T-Square Walter Umland kit Fox .36X I made the tank this morning and it's unflown Both the T-Square and Half Fast are Walter Umland's actual prototype planes as seen on his website. Both built by Walter and covered by a fellow club member of mine for the photoshoot. Engines provided by myself
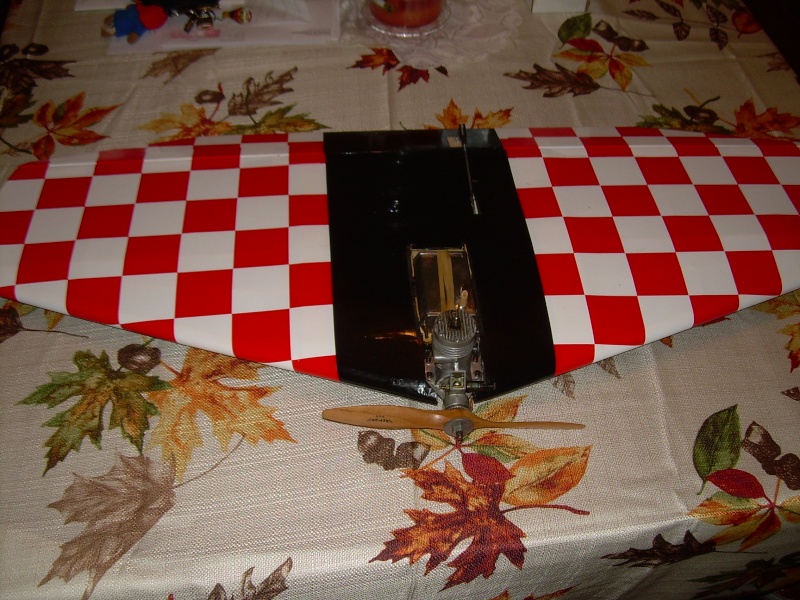
Walter Umland Half Fast, Fox .35X Blue Ribbon Special Repaired the tank this morning Veco pressure tank which was absolutely horrendous inside. Model is also unflown. I'm hoping to see 95 mph with this tommorrow.
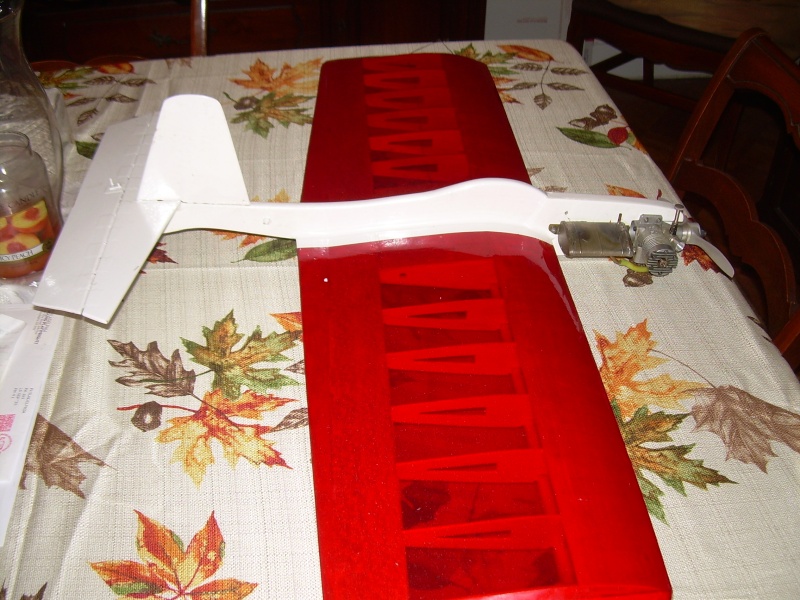
1955 Consolidated Jubilee. Amazing plane for it's year and flies excellent FP.20 powered and is a very capable plane. This outflies any Ringmaster I have and is on the same level as a Flite Streak A bit over 400 sq"

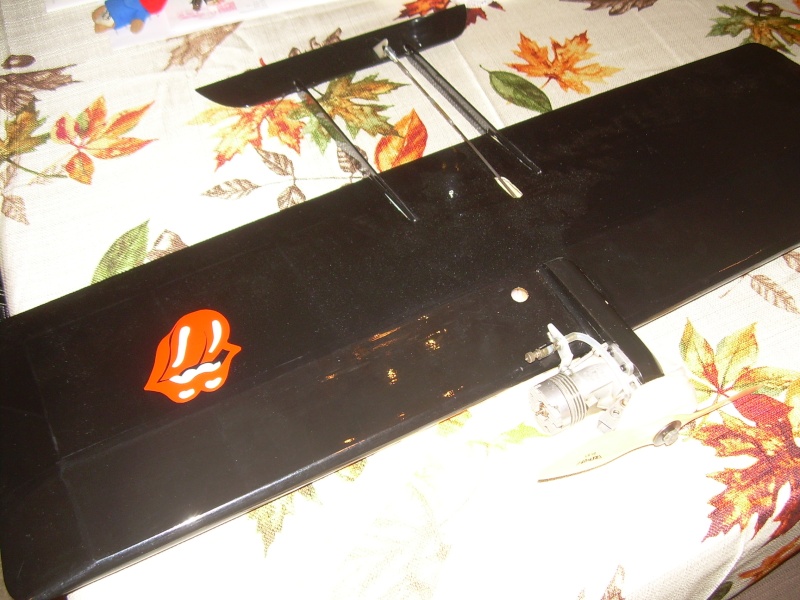
Long Boom Demon with Fox MK series IV with VI internals
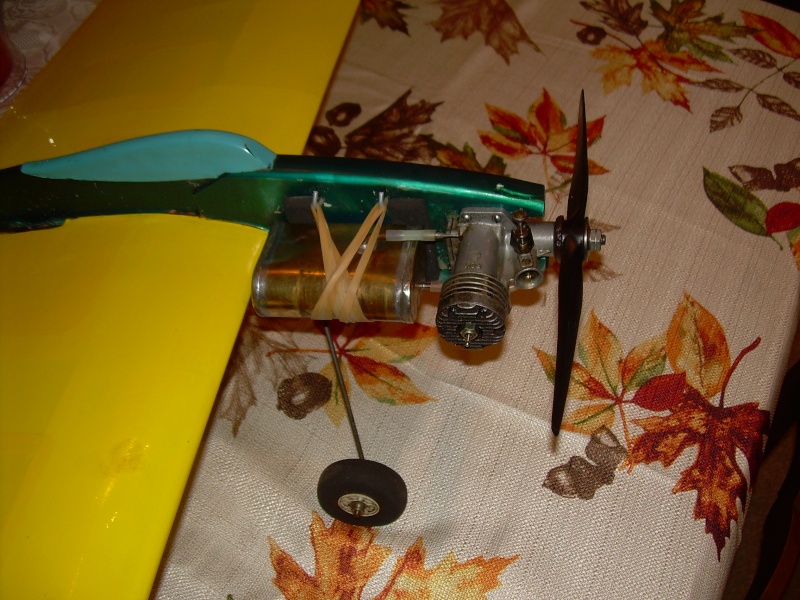
Ringmaster with first series Black head Combat Special I spend the morning with this tank as well. It suffered a tragic fate when it crunched up. Fortunately, the tank was a 4.5 oz tank and I was able to cut it down some to comfortably fit on the front of the Ring. This should haul the mail as well

Here's my Lil Satan, the only survivor of many and it runs real good. Nothing fancy just a Black Widow in mill finish You have to love high nitro as you can see the paint washing off of the engine nacelle

Consolidated WOW Fox Combat Special early series bolt on front end

T-Square Walter Umland kit Fox .36X I made the tank this morning and it's unflown Both the T-Square and Half Fast are Walter Umland's actual prototype planes as seen on his website. Both built by Walter and covered by a fellow club member of mine for the photoshoot. Engines provided by myself

Walter Umland Half Fast, Fox .35X Blue Ribbon Special Repaired the tank this morning Veco pressure tank which was absolutely horrendous inside. Model is also unflown. I'm hoping to see 95 mph with this tommorrow.

1955 Consolidated Jubilee. Amazing plane for it's year and flies excellent FP.20 powered and is a very capable plane. This outflies any Ringmaster I have and is on the same level as a Flite Streak A bit over 400 sq"


Long Boom Demon with Fox MK series IV with VI internals

Ringmaster with first series Black head Combat Special I spend the morning with this tank as well. It suffered a tragic fate when it crunched up. Fortunately, the tank was a 4.5 oz tank and I was able to cut it down some to comfortably fit on the front of the Ring. This should haul the mail as well

Ken Cook- Top Poster

- Posts : 5640
Join date : 2012-03-27
Location : pennsylvania
 Met Riley Wooten
Ken
I have been following Andre Ming's thread on Stunthanger about the 3rd vintage combat Festival being held on September 20 at the Garden State Circle Burners field----and the "What is best vintage combat plane" thread
Saw your line up there among other folks planning to attend...Sounds like I am going to miss a great event
I don't have any of the 50s 60s engines but Marvin Denny sold be quite a few of his MK IVs with MK VI internals
Love what Bob Hunt did building the Sweet Sweep
Riley asked if anyone is interested in a VooDoo re-kit with laser parts, of course I said I was in for a few
My Mongoose (1972~1973?) is not really vintage but next year if I get to travel to these event(s) one will be with me

fredvon4- Top Poster


Posts : 4012
Join date : 2011-08-26
Age : 69
Location : Lampasas Texas
 Re: "Phred's Phault"
Hi Roddie, good to see that you're taking up the build and the thread again. I hope it will be finished soon and that you can try out the plane before wintertime begins.

OVERLORD- Diamond Member

- Posts : 1807
Join date : 2013-03-19
Age : 58
Location : Normandy, France
 Re: "Phred's Phault"
OVERLORD wrote:Hi Roddie, good to see that you're taking up the build and the thread again. I hope it will be finished soon and that you can try out the plane before wintertime begins.
Been home with a lame butt.. so I got the urge to build the central rib assy.
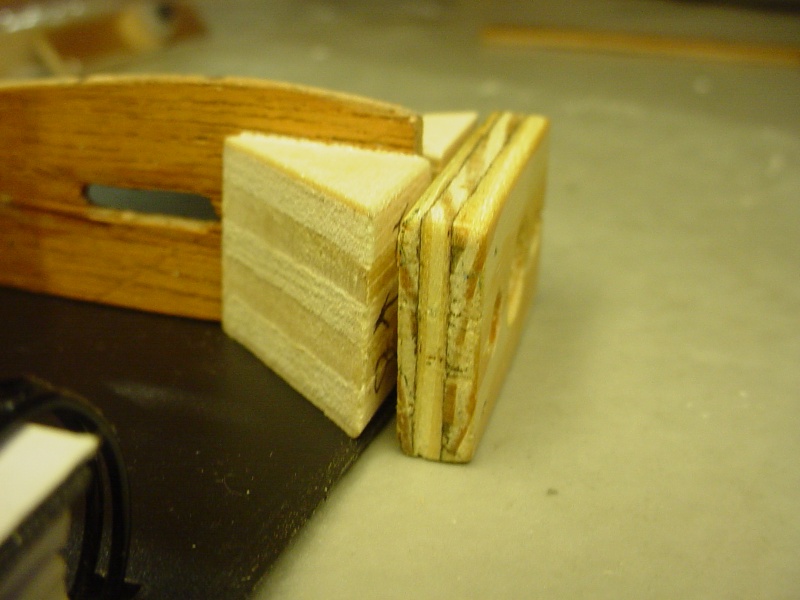
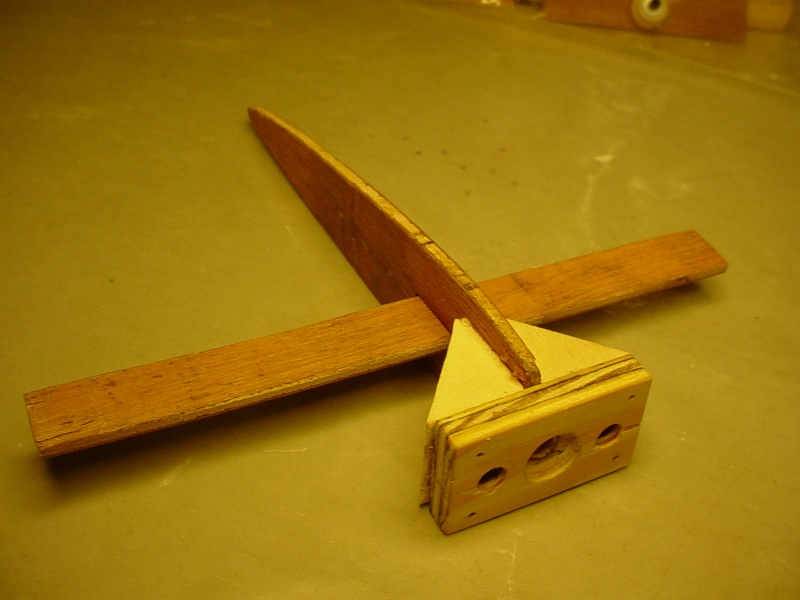
That "T" serves as a stub-spar/bell-crank platform for enclosed controls. It will float in the rib-slot until the wing panels are attached at which point it fits down into channels in the foam, about 1/2 the airfoils' depth.
(exploded view)

I've gotta trim some foam to fit those triangular firewall supports. Once the wings are attached.. the void above the spar will be plugged with soft balsa laminated to 3/8" thickness.. which will fair-in to the airfoil.
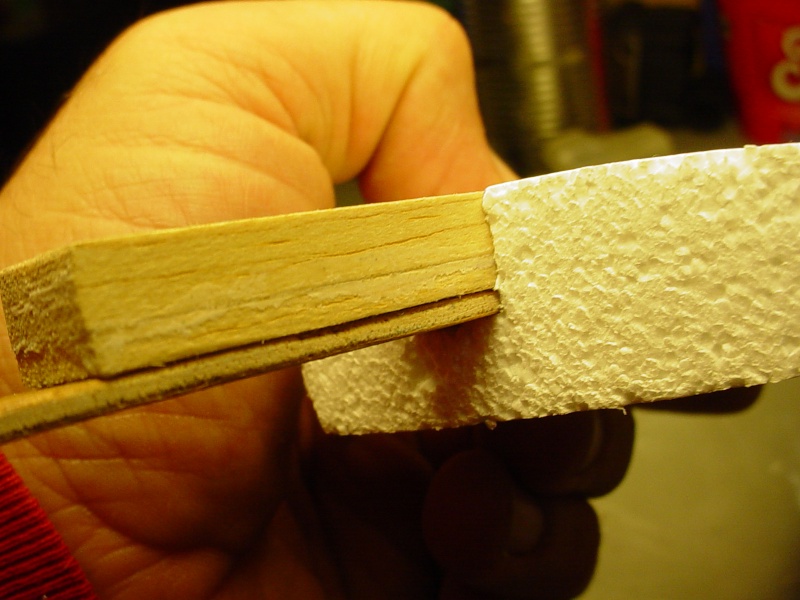
I still need to rout those lead-out channels into the top of the inboard wing panel. It's tricky.. I'm using buttons on the bellcrank.. and had intended to install them facing down. They "can" face up.. and clear the covering. The latter would only require a shallow channel.. but the lead-out guide at the inboard wingtip, is on the airfoils centerline. That's the way I wanted it.. as symmetrical as possible. The bellcrank bay is a through-hole.. so it's accessible from either top or bottom for access to the buttons.
 Re: "Phred's Phault"
Good to see you got some time to get back to the build , looking forward to the finished product ,, It appears that foam is more work than working with balsa . Never worked with it just my observation, but you seem to adapt to it with out much problems you cant figure out . Looking good ! Eric 

getback- Top Poster


Posts : 10442
Join date : 2013-01-18
Age : 67
Location : julian , NC
 Re: "Phred's Phault"
getback wrote:Good to see you got some time to get back to the build , looking forward to the finished product ,, It appears that foam is more work than working with balsa . Never worked with it just my observation, but you seem to adapt to it with out much problems you cant figure out . Looking good ! Eric
Thanks Eric. Yea.. foam..
 It's a different animal for sure. This model would have been a lot easier to scratch-build from balsa. This original Goldberg VooDoo plan is drawn at 50% scale.
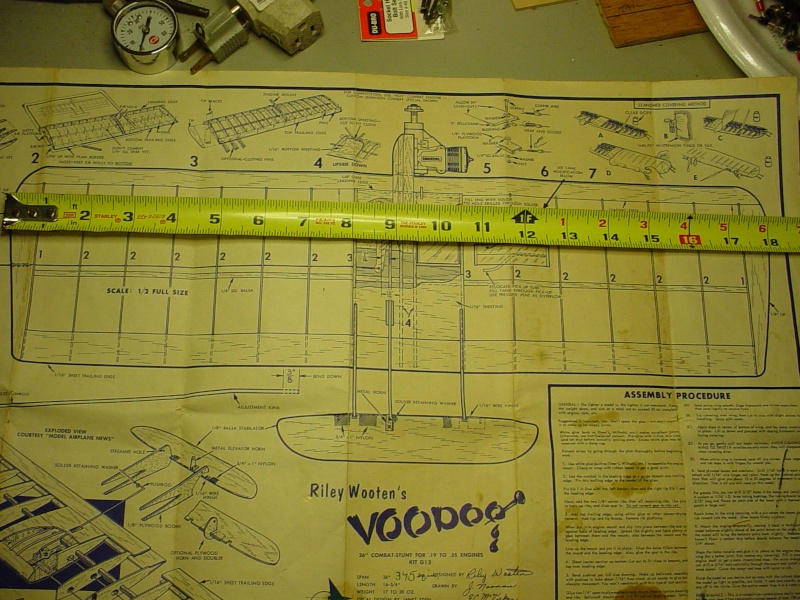
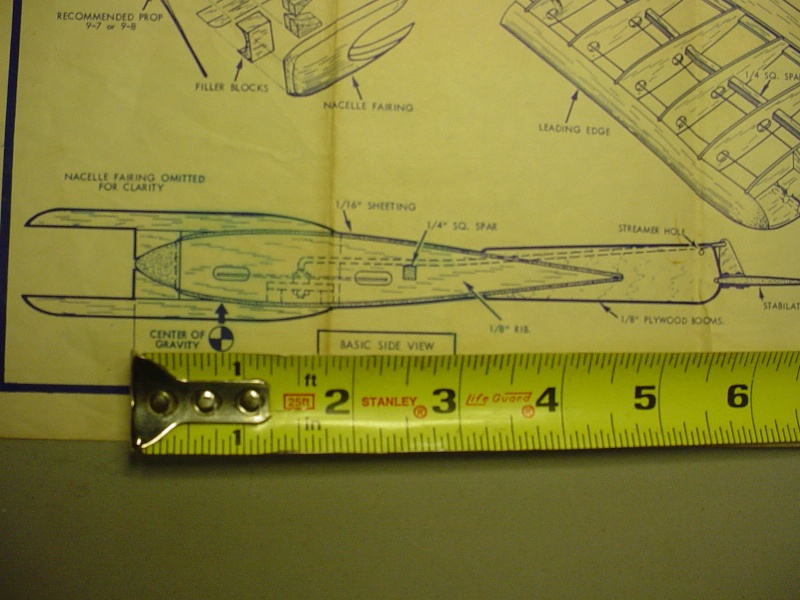
I'm sure it's been done by somebody before. This Goldberg plan was my first inspiration to build it 1/2 scale, from the moment it was given to me a long time ago.
 Re: "Phred's Phault"
Checking fit.. There's a lot of joints that could fit better.. but it seems to have the potential of going together straight.
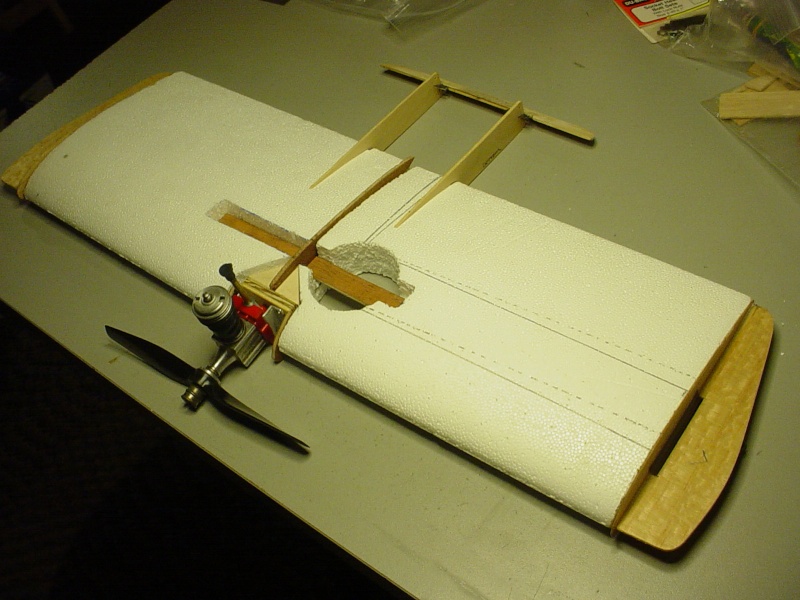
My stab. looks small in this pic.. but I think it's gonna be ok.

My stab. looks small in this pic.. but I think it's gonna be ok.
 Re: "Phred's Phault"
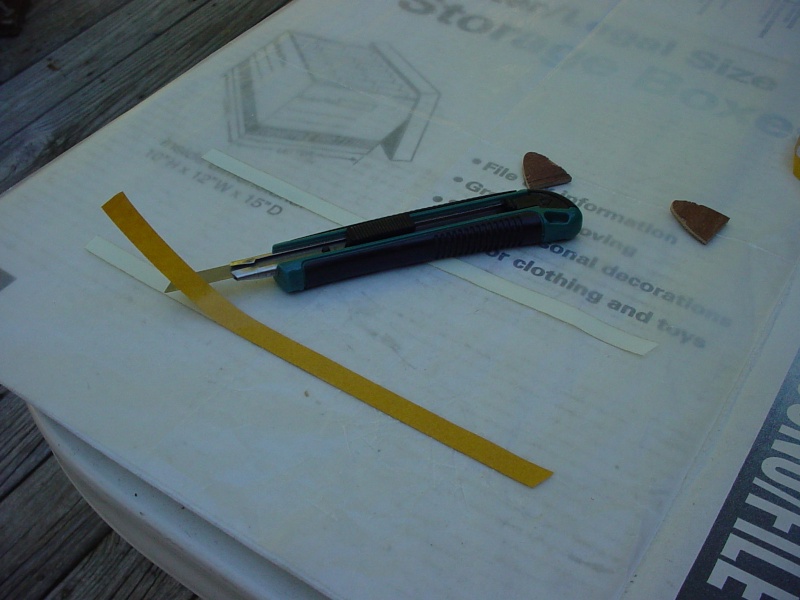
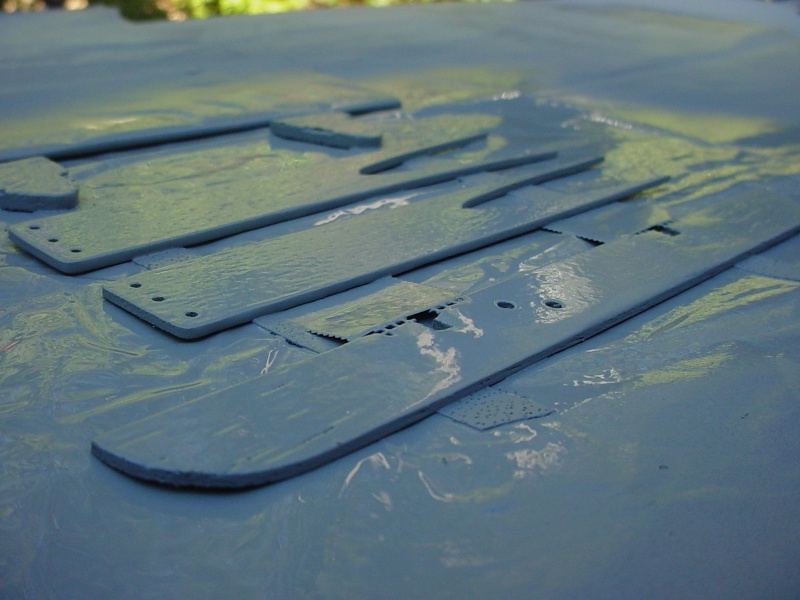
It was a nice day to paint outside.. so I did some priming.
Double-stick tape on wax paper, to prevent flyaway when spraying.
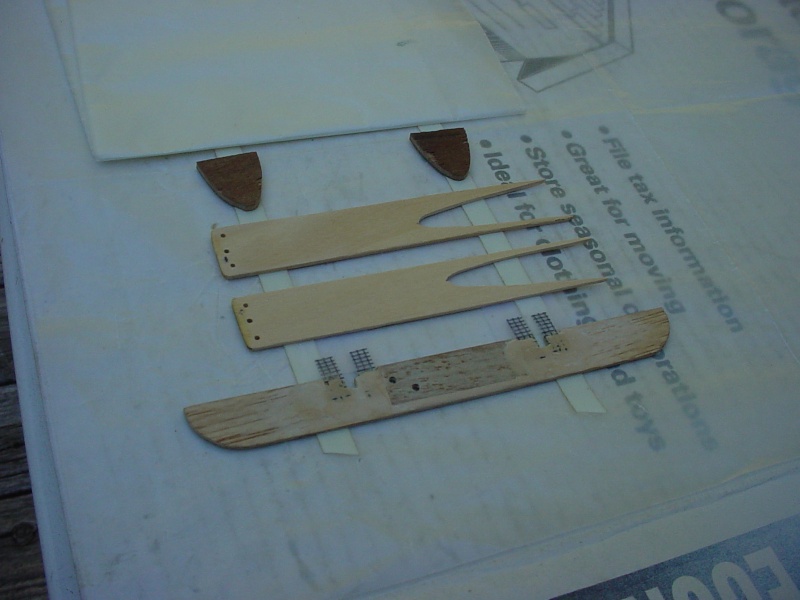
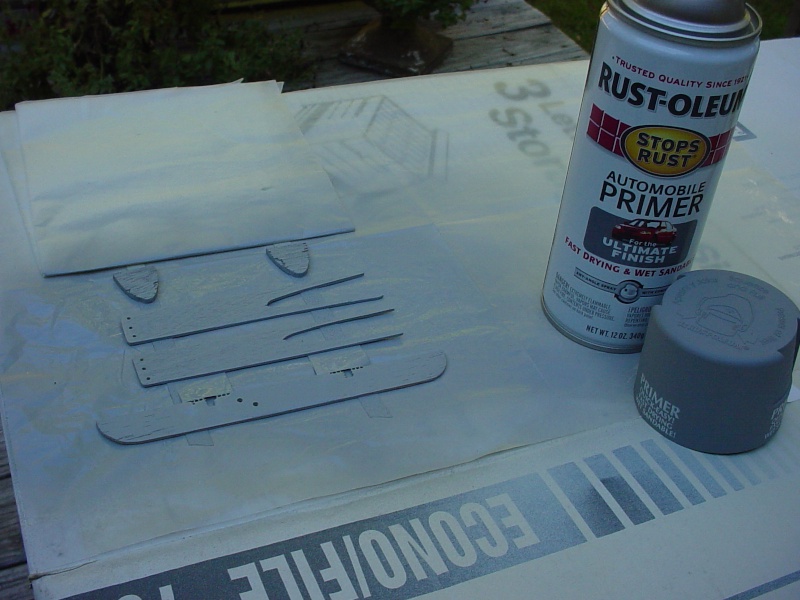
It also lifts the part slightly, preventing a paint-ridge from forming.
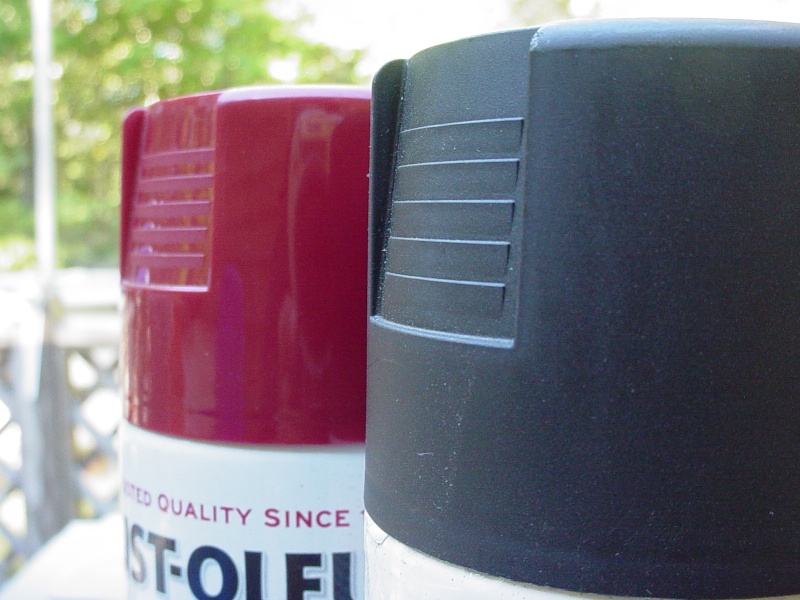
I'm going with gloss-red on the stab and firewall.. and satin-black for the booms and nacelle riblets.
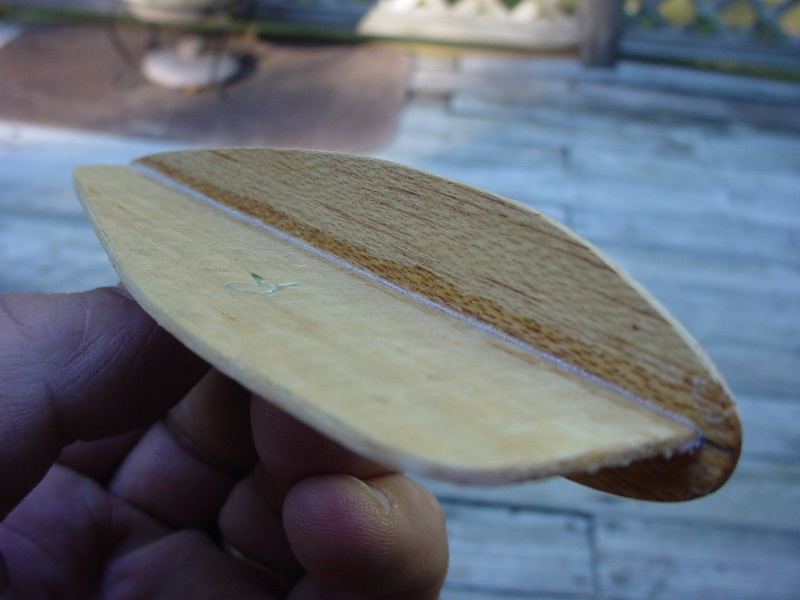
This wingtip was found split along the grain last night.. I guess I'm used to rough & tumble 1/8" sheet balsa parts.. This tip is 1/16" sheet construction.. and extremely lightweight. If I'd installed the gussets.. it wouldn't have happened. Thin CA mended it back together.
Double-stick tape on wax paper, to prevent flyaway when spraying.


It also lifts the part slightly, preventing a paint-ridge from forming.

I'm going with gloss-red on the stab and firewall.. and satin-black for the booms and nacelle riblets.

This wingtip was found split along the grain last night..

Page 4 of 7 •  1, 2, 3, 4, 5, 6, 7
Page 4 of 7
Permissions in this forum:
You cannot reply to topics in this forum

 Rules
Rules


