Log in
Search
Latest topics
» Tee Dee .020 combat modelby Ken Cook Today at 3:23 am
» My latest doodle...
by batjac Yesterday at 9:47 pm
» My N-1R build log
by roddie Yesterday at 8:50 pm
» Free Flight Radio Assist
by rdw777 Yesterday at 4:51 pm
» Purchased the last of any bult engines from Ken Enya
by getback Yesterday at 12:05 pm
» Funny what you find when you go looking
by rsv1cox Wed Nov 20, 2024 3:21 pm
» Landing-gear tips
by 1975 control line guy Wed Nov 20, 2024 8:17 am
» Cox NaBOO - Just in time for Halloween
by rsv1cox Tue Nov 19, 2024 6:35 pm
» Canada Post strike - We are still shipping :)
by Cox International Tue Nov 19, 2024 12:01 pm
» Duende V model from RC Model magazine 1983.
by getback Tue Nov 19, 2024 6:08 am
» My current avatar photo
by roddie Mon Nov 18, 2024 9:05 pm
» Brushless motors?
by rsv1cox Sun Nov 17, 2024 6:40 pm
Cox Engine of The Month
Push button stooge
Page 2 of 2
Page 2 of 2 •  1, 2
1, 2
 Re: Push button stooge
So, lots of changes in the design. I had gone through a couple or three iterations of the original set up and was never satisfied with the action of the attendant components. Upgrading to the 12V battery sent me back to the drawing board. No more bellcrank, for starters. Focused on direct throw, if that makes sense, and how to make that work. The short throw of the solenoid piston really limited my options. Found some alum. channel that was practical and went from there. Then had to deal with capturing/containing the solenoid piston. Getting the geometry right, up/down, side/side, length and so on. FINALLY came down to this:

Firstly, the remote receiver is contained in a handy dandy bullet tray. Not sure if blow back fuel would corrupt it's electronics but settled on this box to protect it and the wiring connections.

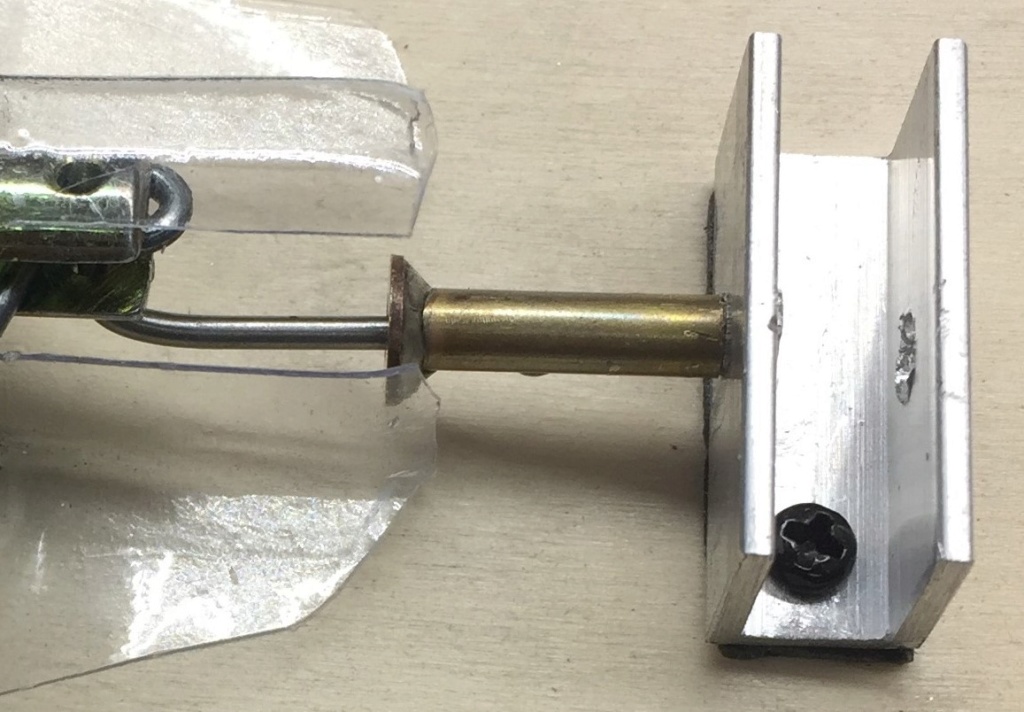
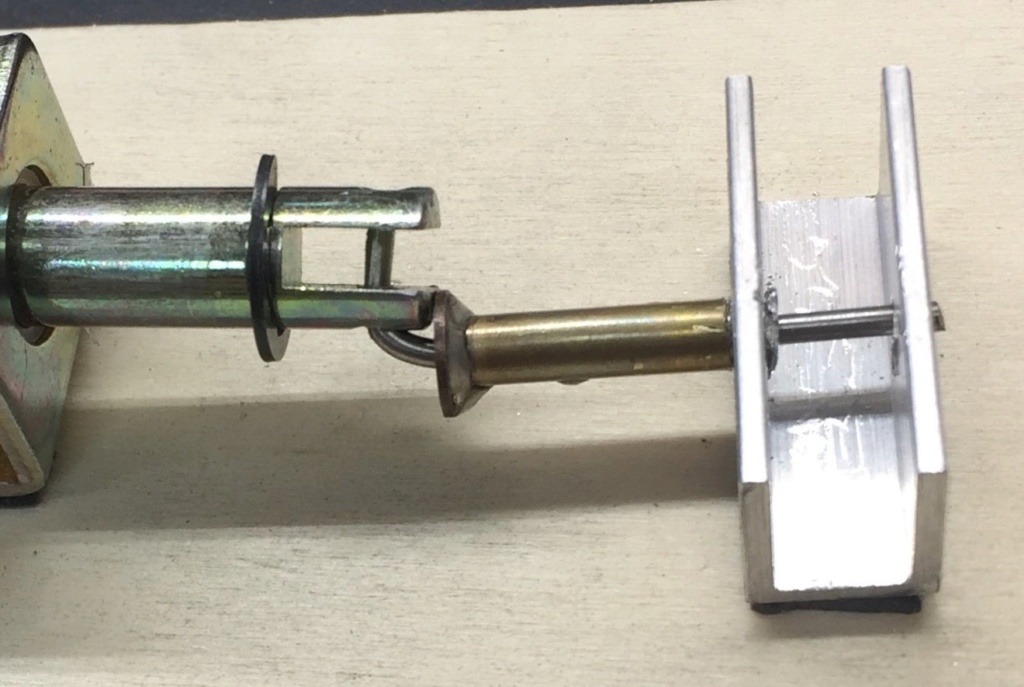
Soldered a washer to a piece of tubing that just fit over the rivet head "guide tube" to act as a stop for the solenoid piston. Placement of the solenoid, relative to the launch channel was critical, as might be expected. A very intolerant, close enough, fit with those components. Made use of double backed tape for easier adjustments.
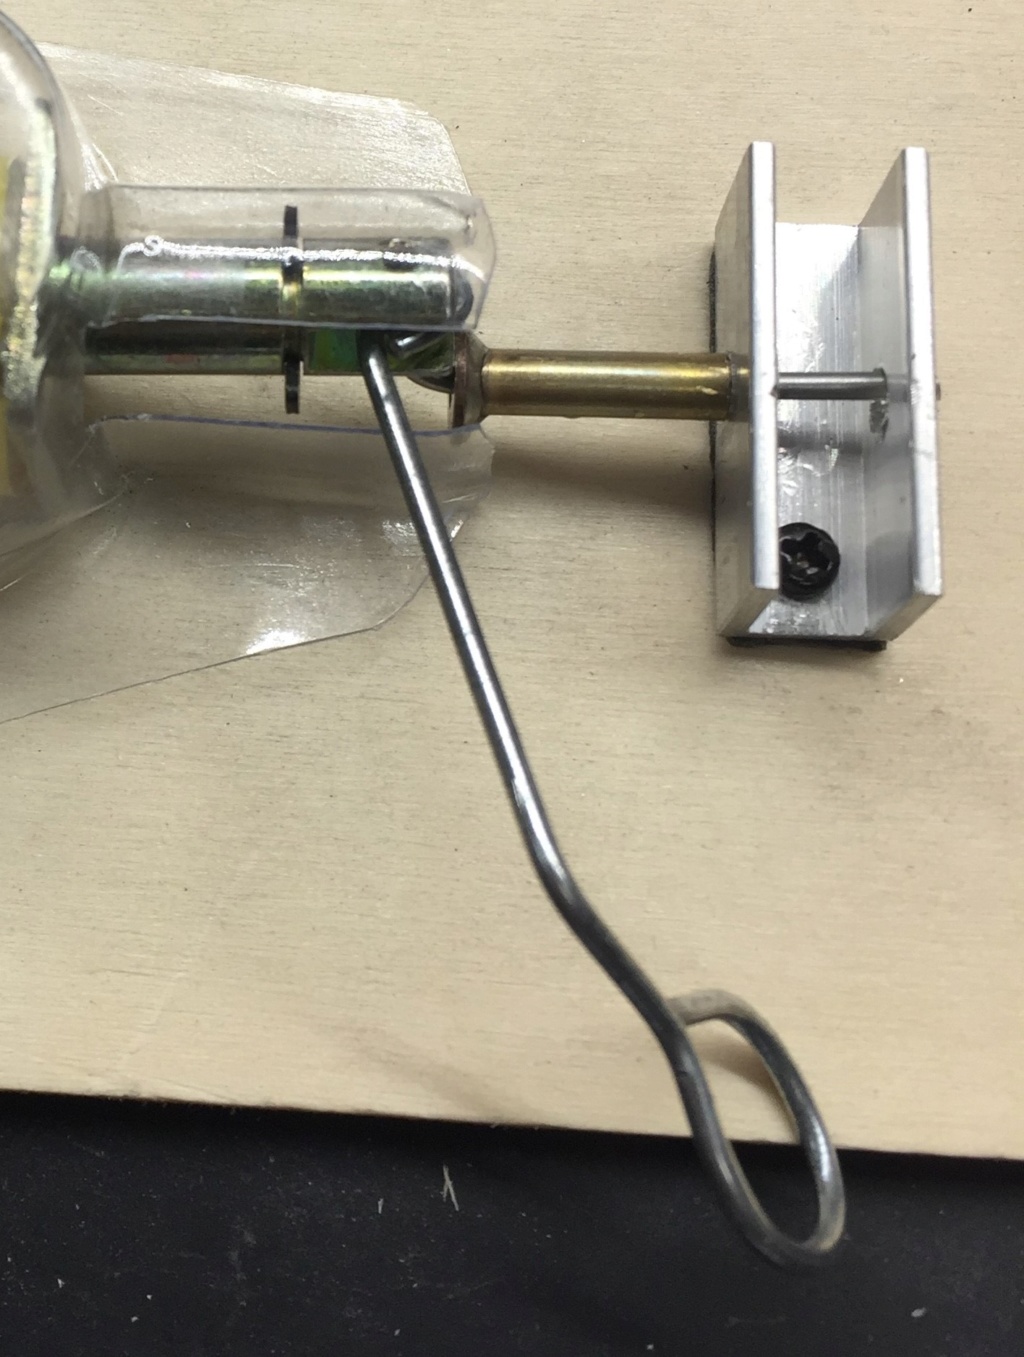
Assorted contraptions, including springs and not, were tried in an attempt to "arm" the catch pin. Ended up crafting a piece of wire that sticks out enough to grab and use to slide to piston/pin to and fro. Seems to work the best. So far.
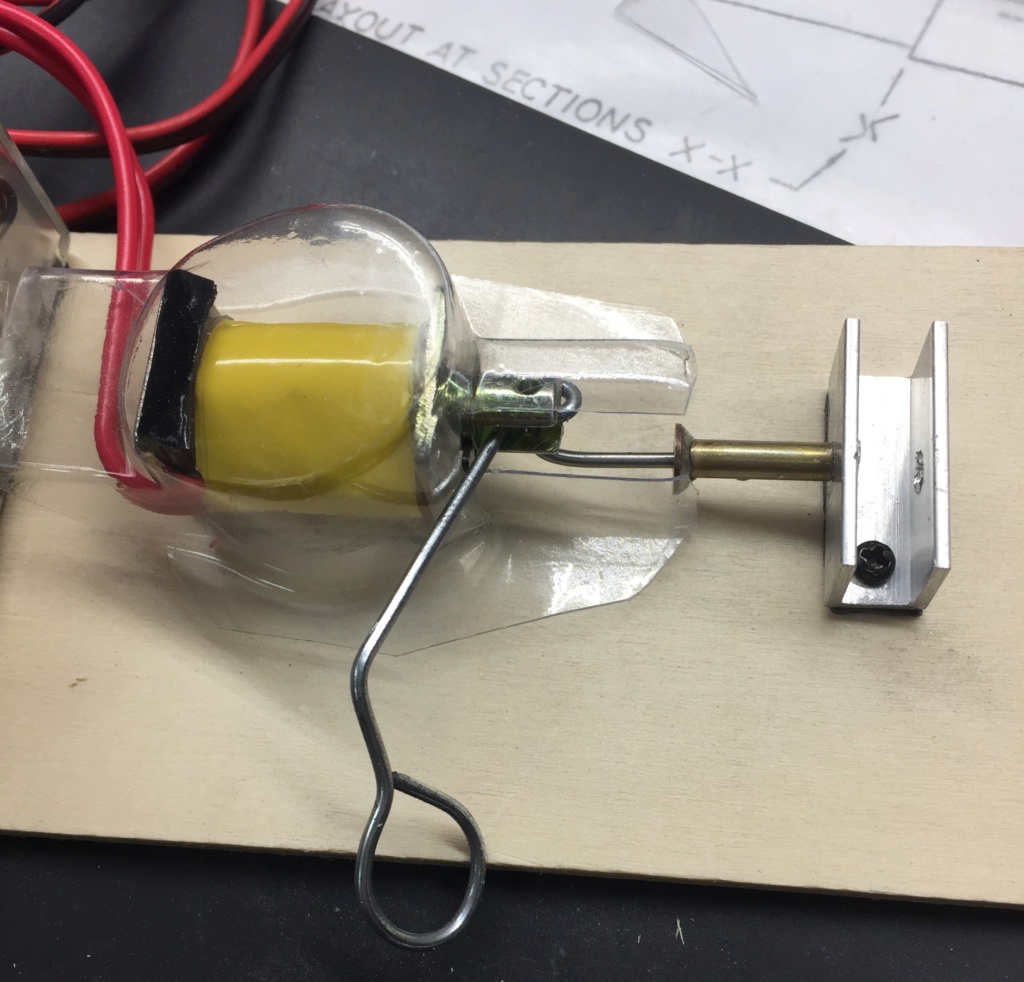
Again, considering the blow back fuel, I figured it'd be best to protect the solenoid and contraption as much as possible. Found a divider, in its protective bubble pack that fit like it was made for it. Just enough to keep the bulk of contaminants from reaching the working parts and low enough to fit under the horizontal stab of any airplane I might need to launch. A little trimming and fitting and VOILA!
Closing in on finishing a Brodak P-51. A couple more coats of dope, some Monokote, and I'll be ready to test out my stooge.

Firstly, the remote receiver is contained in a handy dandy bullet tray. Not sure if blow back fuel would corrupt it's electronics but settled on this box to protect it and the wiring connections.

Soldered a washer to a piece of tubing that just fit over the rivet head "guide tube" to act as a stop for the solenoid piston. Placement of the solenoid, relative to the launch channel was critical, as might be expected. A very intolerant, close enough, fit with those components. Made use of double backed tape for easier adjustments.


Assorted contraptions, including springs and not, were tried in an attempt to "arm" the catch pin. Ended up crafting a piece of wire that sticks out enough to grab and use to slide to piston/pin to and fro. Seems to work the best. So far.

Again, considering the blow back fuel, I figured it'd be best to protect the solenoid and contraption as much as possible. Found a divider, in its protective bubble pack that fit like it was made for it. Just enough to keep the bulk of contaminants from reaching the working parts and low enough to fit under the horizontal stab of any airplane I might need to launch. A little trimming and fitting and VOILA!

Closing in on finishing a Brodak P-51. A couple more coats of dope, some Monokote, and I'll be ready to test out my stooge.

Slick049- Moderate Poster

- Posts : 25
Join date : 2018-12-26
 Re: Push button stooge
I like that iteration! I was thinking of the same idea, and using the bullet connectors to connect.to the power panelnon my field box for more "oomph!"
My concern is the side load on the pin when the plane is pulling on it. The solenoid has to overcome this friction.
The action only needs to move the retaining ounce enough to allow the tail skid to pull clear. So I've been thinking of using a bellcrank to decrease throw, but increase the pin-pull of the solenoid. I'm thinking close to 2:1 gives twice as much pull for 1/2 as much throw.
Over on RCG or SH a guy used a door pull solenoid with sear-safety latches activated by the same receiver you used.
I will continue to watch in anticipation.
Thanks for the updates!
944_Jim- Diamond Member


Posts : 2022
Join date : 2017-02-08
Age : 59
Location : NE MS
 Re: Push button stooge
Thats looking good and so is your plane that looks kinda like a stuntman 23 , all but the wing area . This push button would work good for two wanting to fly some comat (fun) , the only drawback is the batt. i have a1 field bow but would need a smaller setup for another ,, i use 4" alum. spikes to hold mine (stooge) in place , drill 3 holes and push the stakes through to the ground . Hope you get to try it soon keep us updated . 


getback- Top Poster


Posts : 10439
Join date : 2013-01-18
Age : 67
Location : julian , NC
Page 2 of 2 •  1, 2
1, 2
 Similar topics
» Pushrod for PT19
» What about the "Thanks" button
» Was the "LIKE"button yesterday an experiment?
» What happened to the "Thanks" button?
» CEF speed contest Design Discussions
» What about the "Thanks" button
» Was the "LIKE"button yesterday an experiment?
» What happened to the "Thanks" button?
» CEF speed contest Design Discussions
Page 2 of 2
Permissions in this forum:
You cannot reply to topics in this forum

 Rules
Rules


