Log in
Search
Latest topics
» Free Flight Radio Assist by GallopingGhostler Today at 12:54 pm
» My N-1R build log
by akjgardner Today at 12:39 pm
» Purchased the last of any bult engines from Ken Enya
by getback Today at 12:05 pm
» Funny what you find when you go looking
by rsv1cox Yesterday at 3:21 pm
» Landing-gear tips
by 1975 control line guy Yesterday at 8:17 am
» Cox NaBOO - Just in time for Halloween
by rsv1cox Tue Nov 19, 2024 6:35 pm
» Canada Post strike - We are still shipping :)
by Cox International Tue Nov 19, 2024 12:01 pm
» Duende V model from RC Model magazine 1983.
by getback Tue Nov 19, 2024 6:08 am
» My current avatar photo
by roddie Mon Nov 18, 2024 9:05 pm
» My latest doodle...
by TD ABUSER Mon Nov 18, 2024 11:30 am
» Brushless motors?
by rsv1cox Sun Nov 17, 2024 6:40 pm
» Tribute Shoestring build
by amurphy6812 Sun Nov 17, 2024 5:43 pm
Cox Engine of The Month
My PT-19 Entry for The Official "International Cox PT-19 Fly It If You Got It Day!"
Page 1 of 1
 My PT-19 Entry for The Official "International Cox PT-19 Fly It If You Got It Day!"
Greetings fellow PT-19er's!! Well it's done and ready for the event. As some of you know, I asked if I could scratch build an entry for the event and I received a green light. As I progress through the build, I wondered if I should do a build log and again I received a green light. So here it is .... my PT-19 build log. It may take me awhile to get the whole thing posted because I did it as a Microsoft Word doc and I incorporated photos as I went along. This format requires the photos to be uploaded separately from the text and that's a bit more time consuming to try putting the photos in order within the text.
Profile PT-19 Build Log
Sunday, August 26, 2018
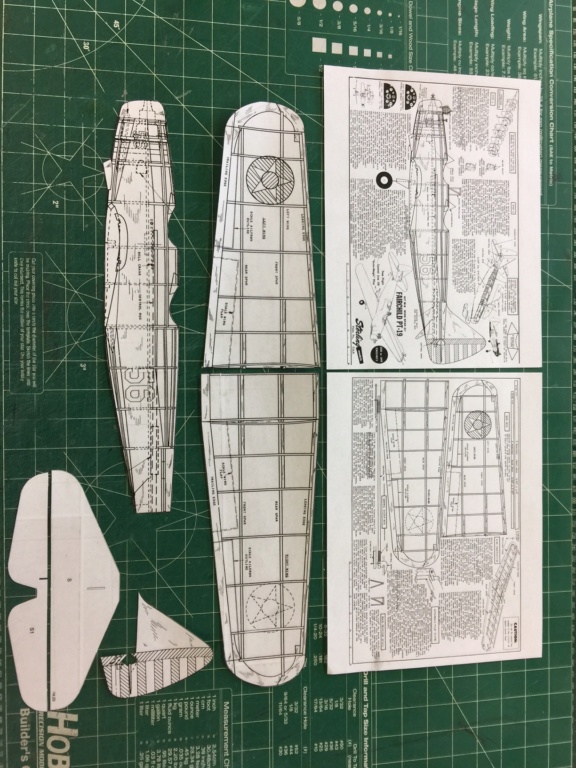
I took a few minutes to print out the plans for a Sterling PT-19 that I downloaded from the Outerzone website so I could build one in time for the "International Cox PT-19 Fly It If You Got It Day!"
Monday, August 27, 2018
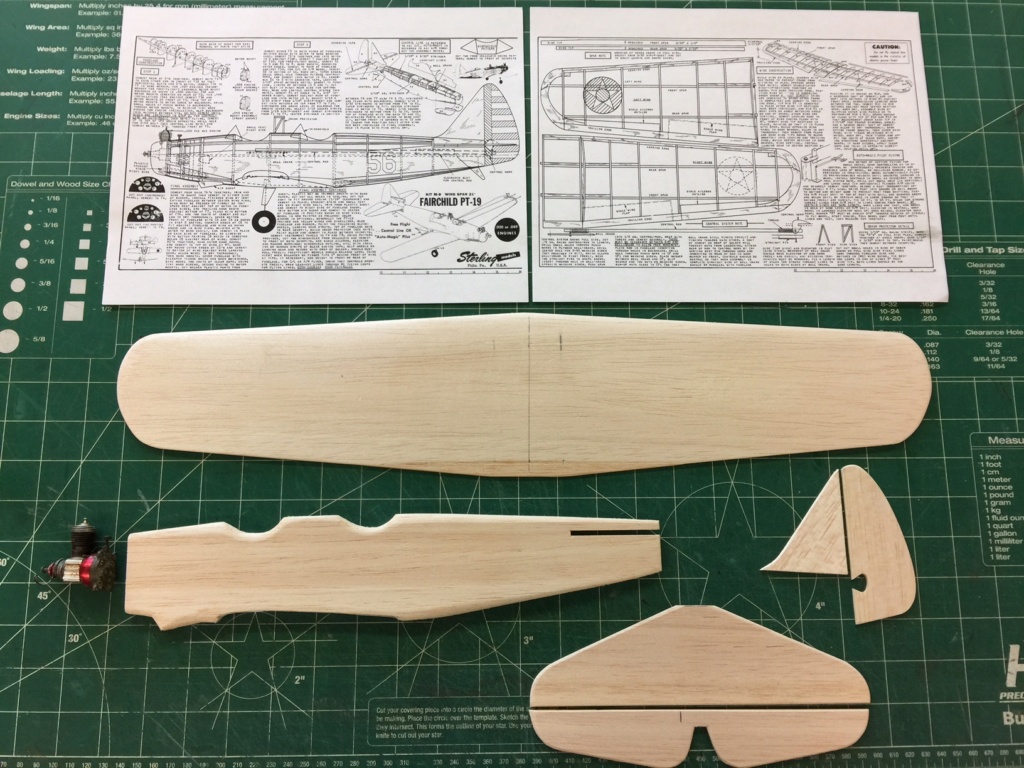
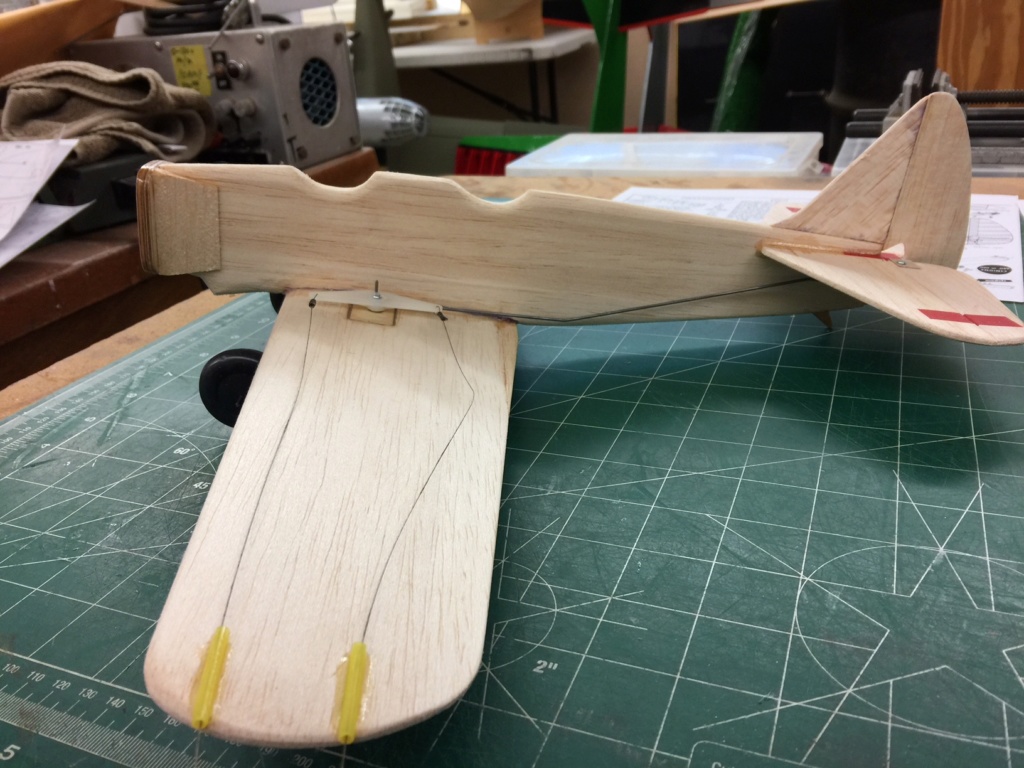
I decided to tape the plans for the Sterling PT-19 together before I began covering anything. From there I began marking then cutting and shaping the pieces for the PROFILE PT-19. I cut the fuselage from some 3/8” balsa, the wing was cut from a piece of ¼” x 4” pre-shaped balsa from SIG MFG, the horizontal stab and elevator were cut from some 1/8” balsa and the vertical stab and rudder were cut from some 3/32” balsa. Tomorrow I’ll cut the firewall from a piece of 1/8” plywood with some triangle doublers for strength. I’m not sure if this thing will fry with a Cox .020 or not but a Baby Bee 049 should certainly be enough. I’ll take some photos tomorrow for the log. Just for the heck of it I saved all the templates just in case I ever get the compulsion to build an actual Sterling PT-19. I need to give credit to the website when I write up the build article. Anyway, it’s now 1945 and I’m tired and hungry so I decided to shut down for the evening.
Tuesday, August 28, 2018
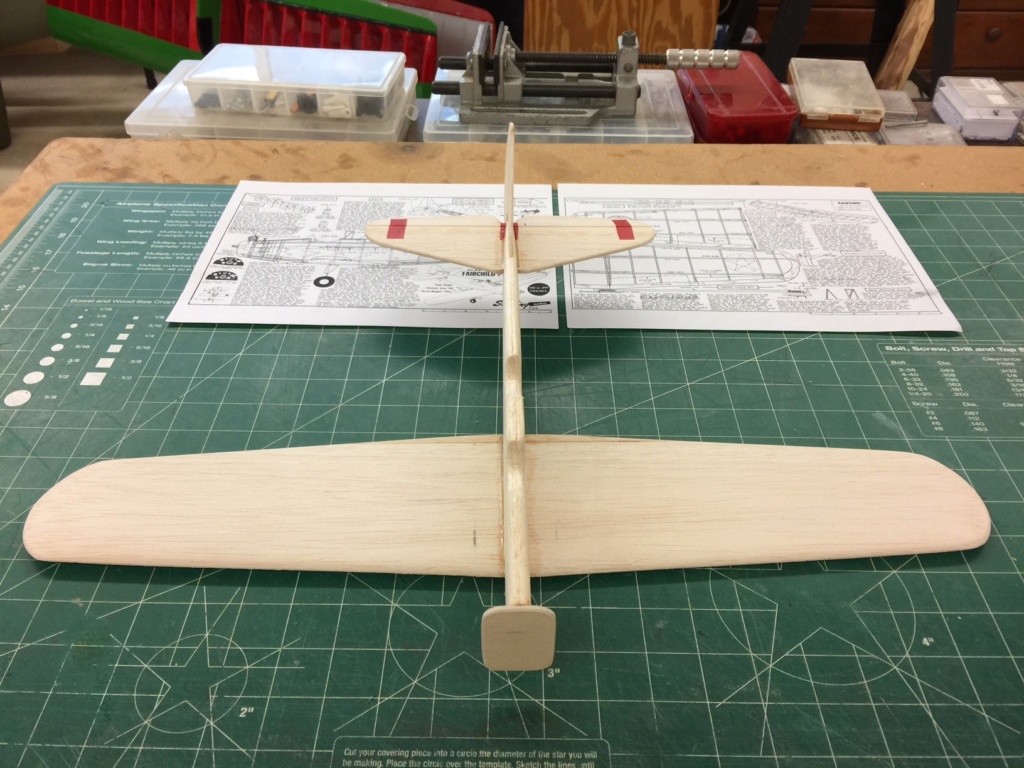
I took a few pictures of the PROFILE PT-19 that I started yesterday. I wanted to update the log and begin preparing a post on the Cox Forum. I came back into the workshop and resumed work on the PROFILE PT-19. I worked until about 1900 or so and by the time I was ready to quit, I had completed the assembly of the plane. I’m not sure if I want to build the dihedral into the wings.
While it may look kool, I doubt it will have any impact on the flight characteristics. After updating the log and photo file I decide to shut down for the day.
Wednesday, August 29, 2018
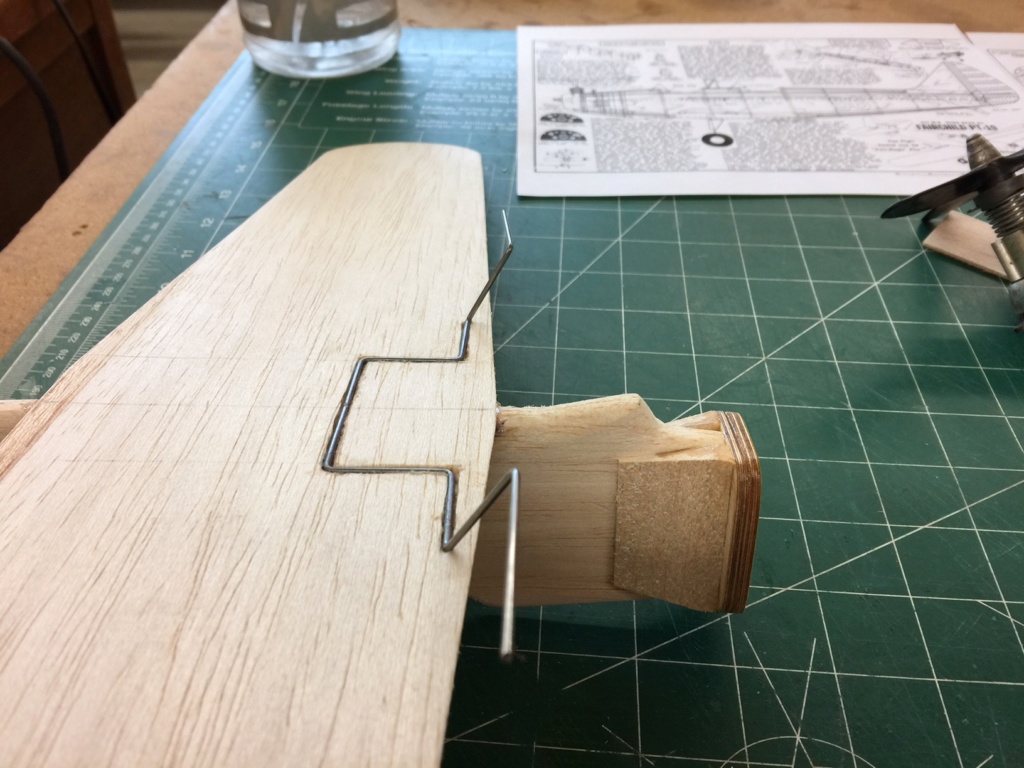
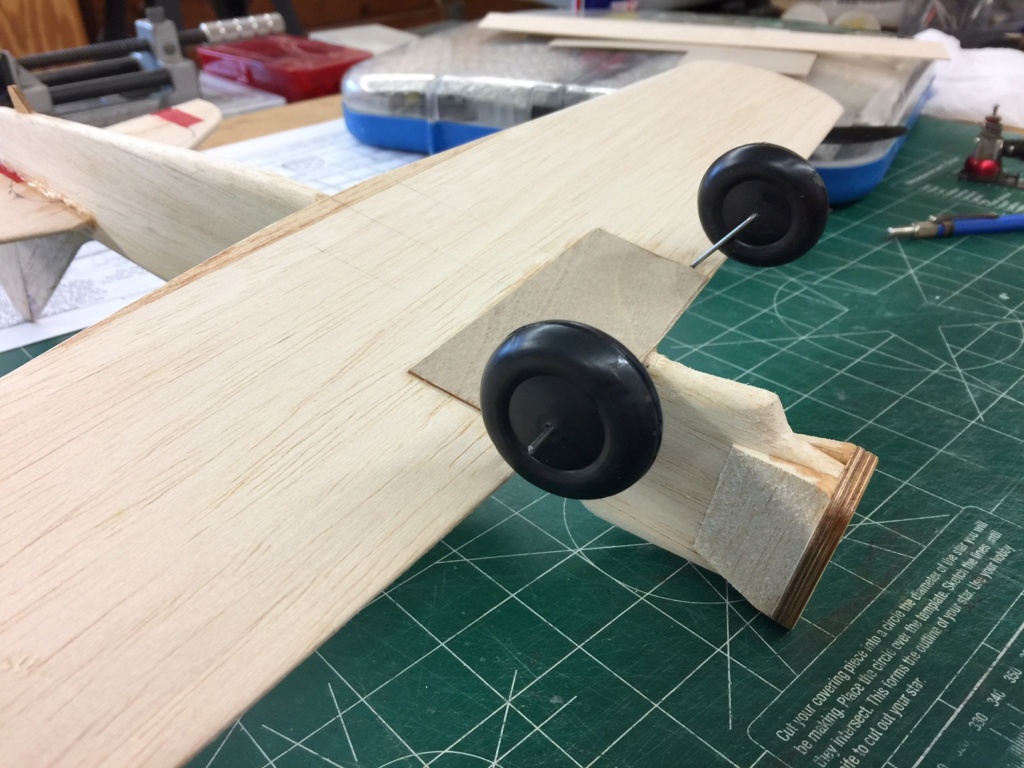
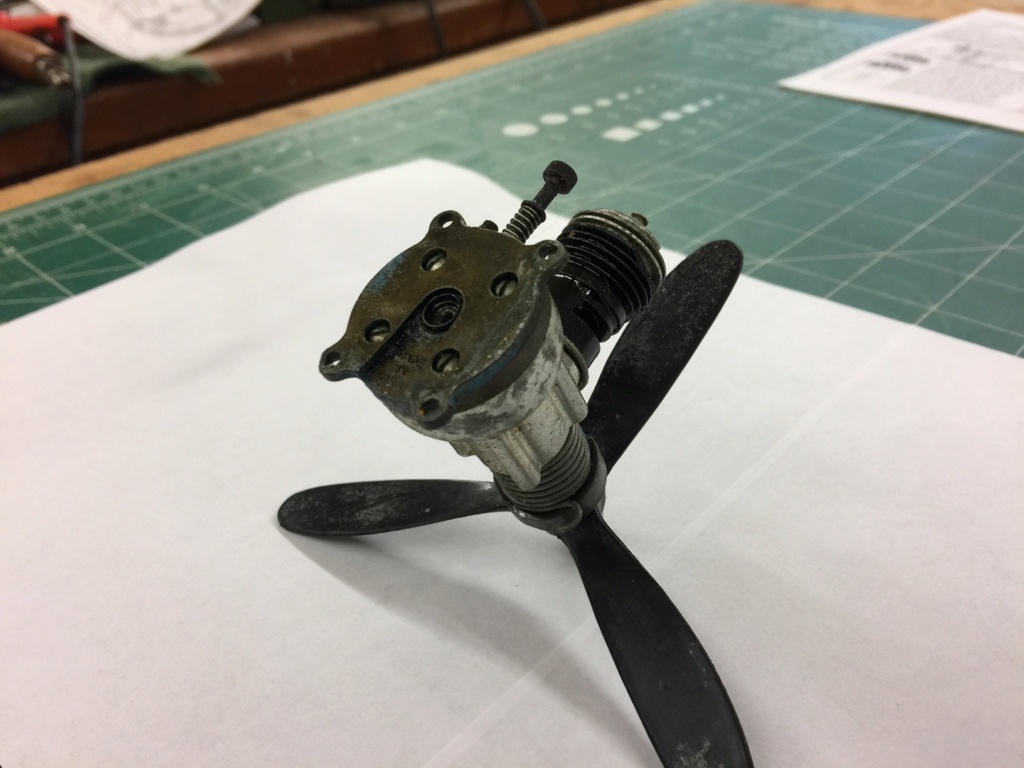
Around 1330, I was able to come into the workshop where I resumed work on the PROFILE PT-19. I decided to laminate an additional piece of 1/8” plywood to the motor mount along with some triangle shaped balsa to strengthen the joint at the fuselage. Then I took a piece of music wire and bent it into the shape for a landing gear. I recessed the wire and then overlaid it with a piece of 1/64” plywood. The next thing I focused on was fabricating the control lines and elevator pushrod assemblies. I had it done by 1930 or so and it was working nice and smooth. I recessed a piece of 1/8” plywood into the top of the wing, mounted the bellcrank, fabricated the pushrod and attached it to the elevator. I had to spend a few minutes posting a question to the Cox Forum because the engine I have doesn’t have a screen in the middle of the backplate and I want to know if it’s necessary for flying. Plus, at some point in the not too distant future, I’m going to need some glow heads for future use but I didn’t order them just yet.
Thursday, August 30, 2018
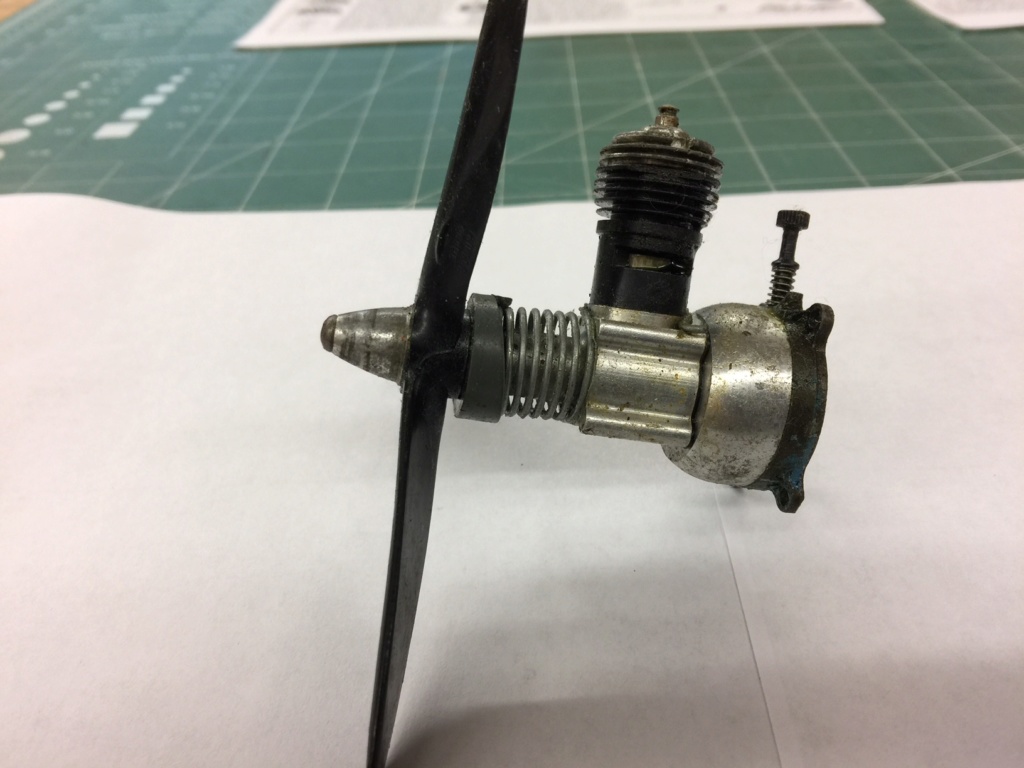
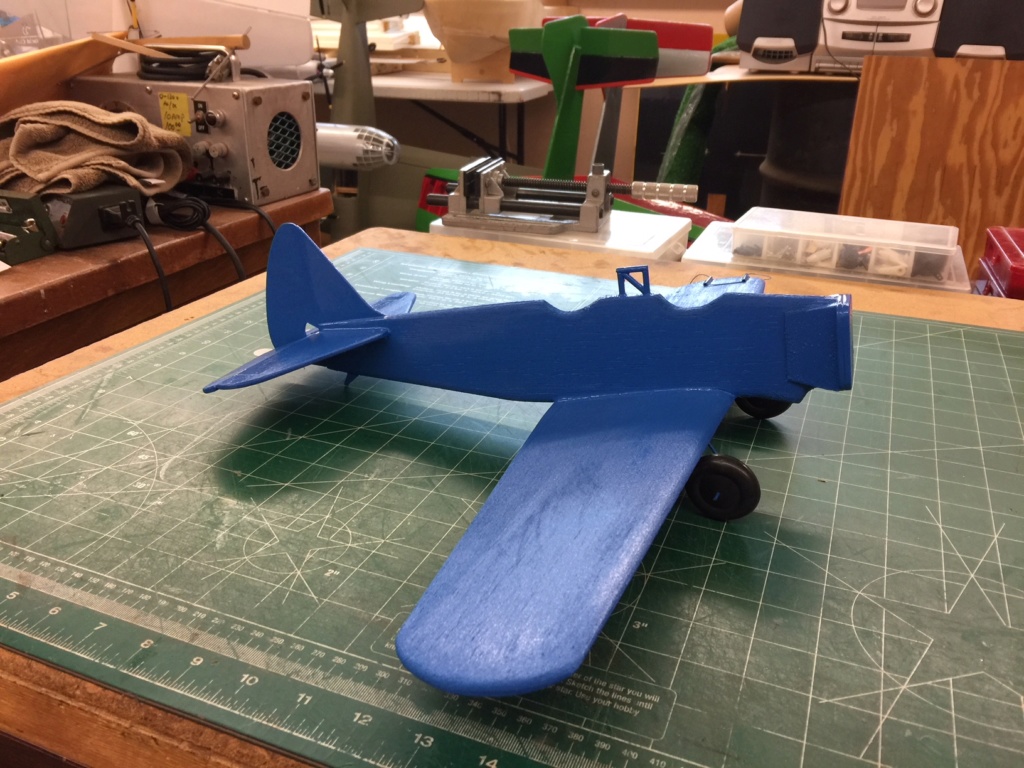
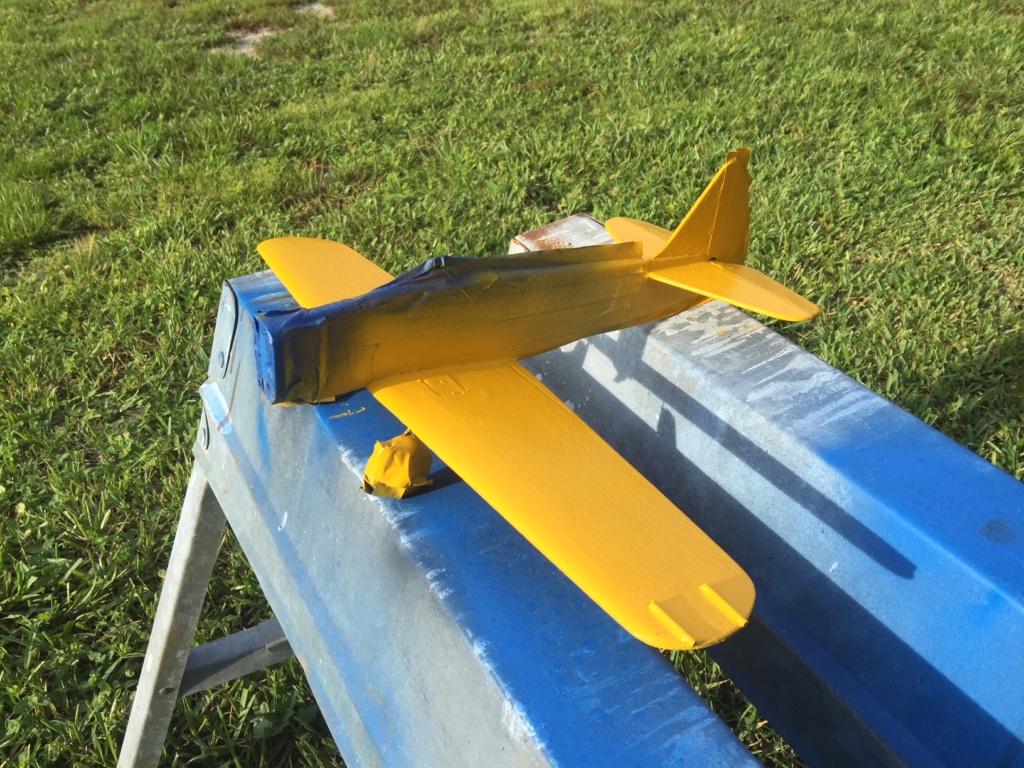
It’s now 1128 and I just finished the emails and postings but I still have to put a build log together for the PROFILE PT-19. I took a few photos of the Baby Bee .049 that I hope to use but I needed to know if I needed the screen. I looked at one of the website email responses and it appears it may not be necessary. I used some .015 cable to make the leadouts from the Brodak 1/2A Bellcrank assembly, p/n BB-390 which I fed through a couple of pieces of scrap nyrod. The pushrod was fabricated using a piece of .054 music wire. I used some 1/8” dowel to make the crash protector between the two cockpits then took it outside and sprayed it with a coat of Krylon . It will probably need two of even three coats to make it look good but at least it’s in the final phase. Since it had stopped raining, I decided to bring the PROFILE PT-19 inside, wipe it down and let it stay inside to dry. It seems to be alright. I wish I had made the landing gear another ½” longer for the sake of looks, but so be it! I decided to go ahead and add a 1/2 ounce lead weight to the outboard wing. For this, I took a 1/2ounce fishing sinker and beat it as flat and thin as I could then super glue it to the underside of the wing. Then I decided to temporarily mount the engine for a photo op. Once it’s completely dry, I suppose I could sand it nice and smooth then apply a couple more coats to fill the grain and give it a really fine finish. However, on the other hand, I could and probably apply some paint to finish the colors scheme then just mount the engine and controls then go fly it! I took a few minutes to search out the proper color scheme for a PT-19. Guess what …. I messed up already! I hope I don’t have to sand the wings and horizontal empennage completely down to bare wood but I’ve got to get some yellow paint.
Friday, August 31, 2018
Well, I started the day around 0700 or so and after the normal stuff of the morning, I took a few minutes to mask the PROFILE PT-19 for a second coat of blue paint on the fuselage, only, this time I didn’t want any on the rest of the plane. I ran my errands it was also, my intention to get a can of yellow paint for the PROFILE PT-19. When I returned home, I brought the PROFILE PT-19 into the workshop for the evening then decided to quit for the evening around 1930 or so.
Saturday, September 1, 2018
Around 1245 or so, I came into the workshop and started the session by removing the masking tape from the PROFILE PT-19 and set it outside to cure and dry a bit more before masking the fuselage so I can spray on the yellow paint.
Monday, September 3, 2018
Happy Labor Day!! I started the day around 0720 and I had to make a quick run to Home Depot so I could replace a can of yellow paint because the one I bought previously wouldn’t spray. I need it so I could apply the yellow to the PT-19. When I returned home, I applied a coat of paint and sat it outside to dry.
Tuesday, September 4, 2018
Around 0700 or so, I started the day. I took care of the morning stuff then went in the yard and applied a second coat of paint to the PT-19. That was a mistake! According to the instructions for the paint, I should have waited 48 hours because in a matter of minutes, I could see the paint beginning to crinkle. I was so disgusted with myself for not paying more attention. I had no choice but to leave it sit outside to cure and just hope that it doesn’t become a real mess. I checked later in the day and the crinkling appears to have settled down a bit and it doesn’t look too bad at this point. Around 1938, I brought the PT-19 in to let it sit overnight.
Wednesday, September 5, 2018
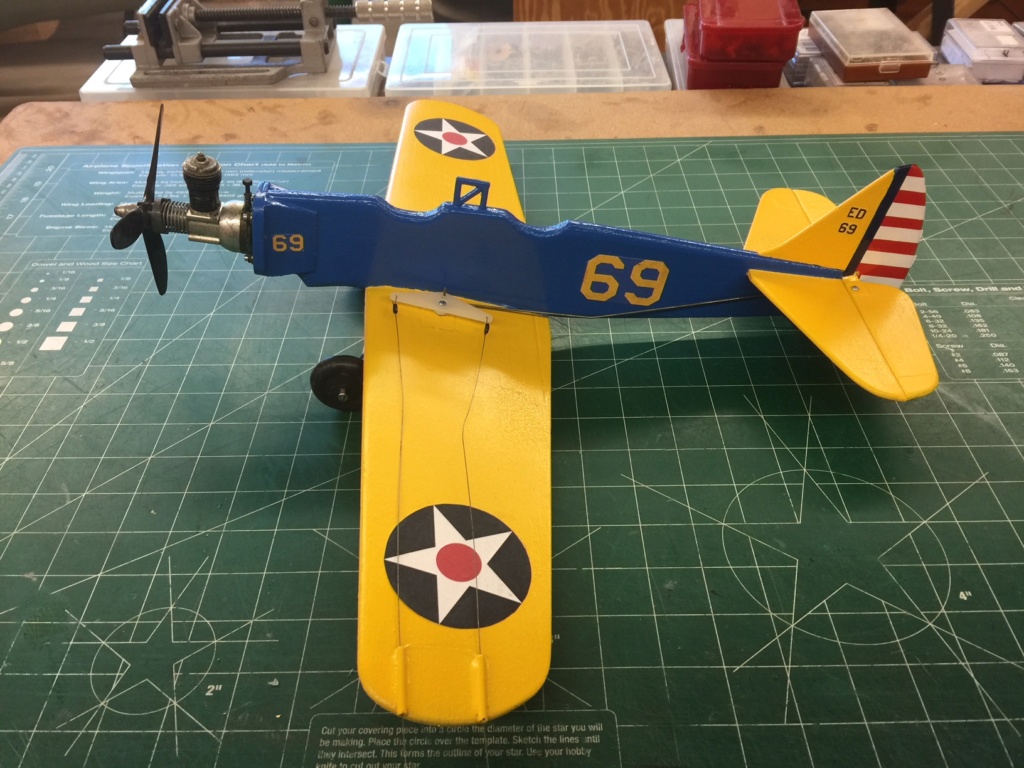
Around 1700 or so, I came into the workshop. I began the session by removing the masking tape from the PROFILE PT-19 then using some of the blue paint, sprayed into a measuring cup, to touchup some of the flaws. With that done, I went ahead and mounted the Baby Bee .049 and took a couple more photos to document the build and update the log. It’s certainly going to be challenging to make some suitable decals for it. Then I decided to finish with the PROFILE PT-19 and mounted the bellcrank and control system then for a change.
Thursday, September 6, 2018
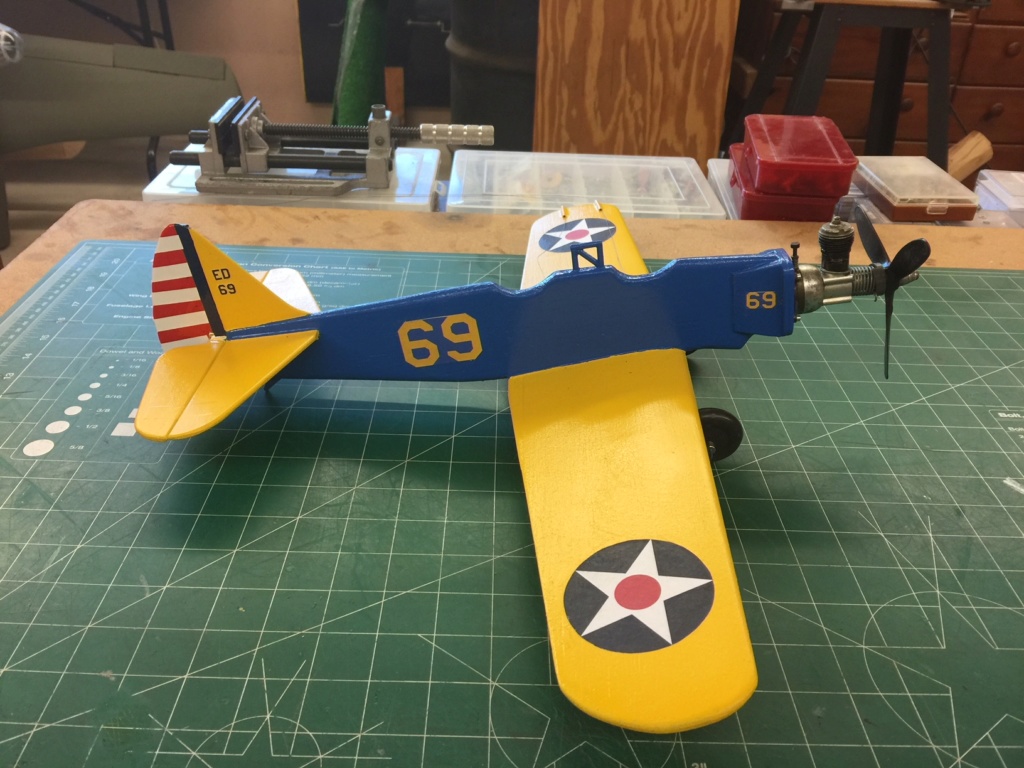
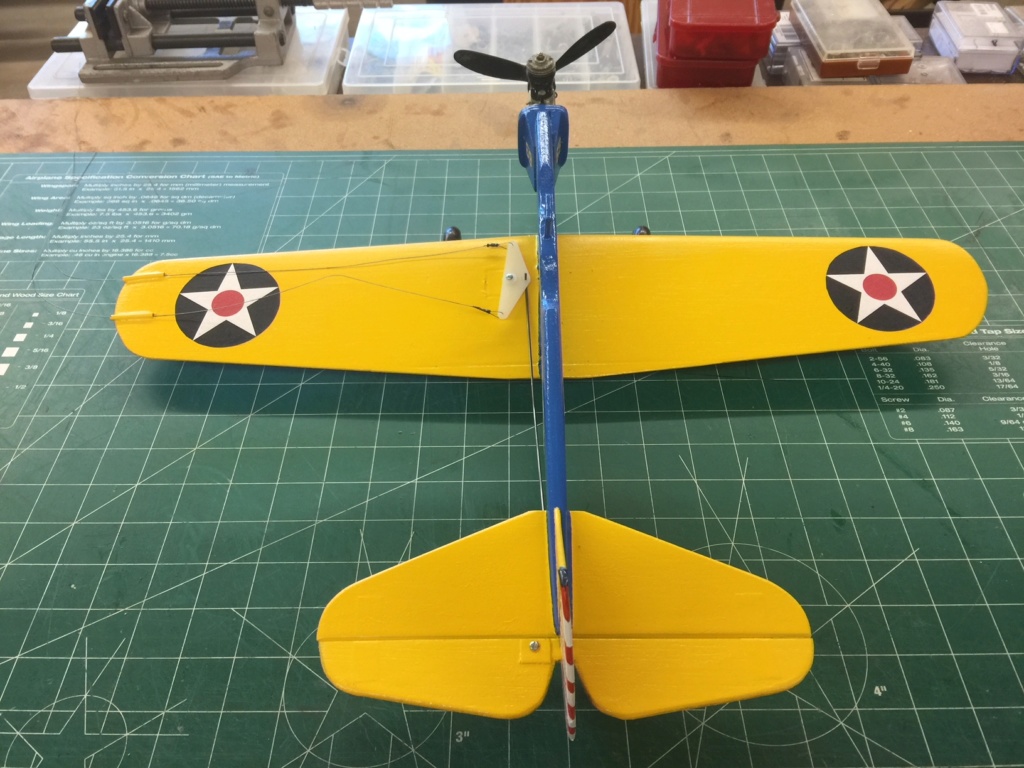
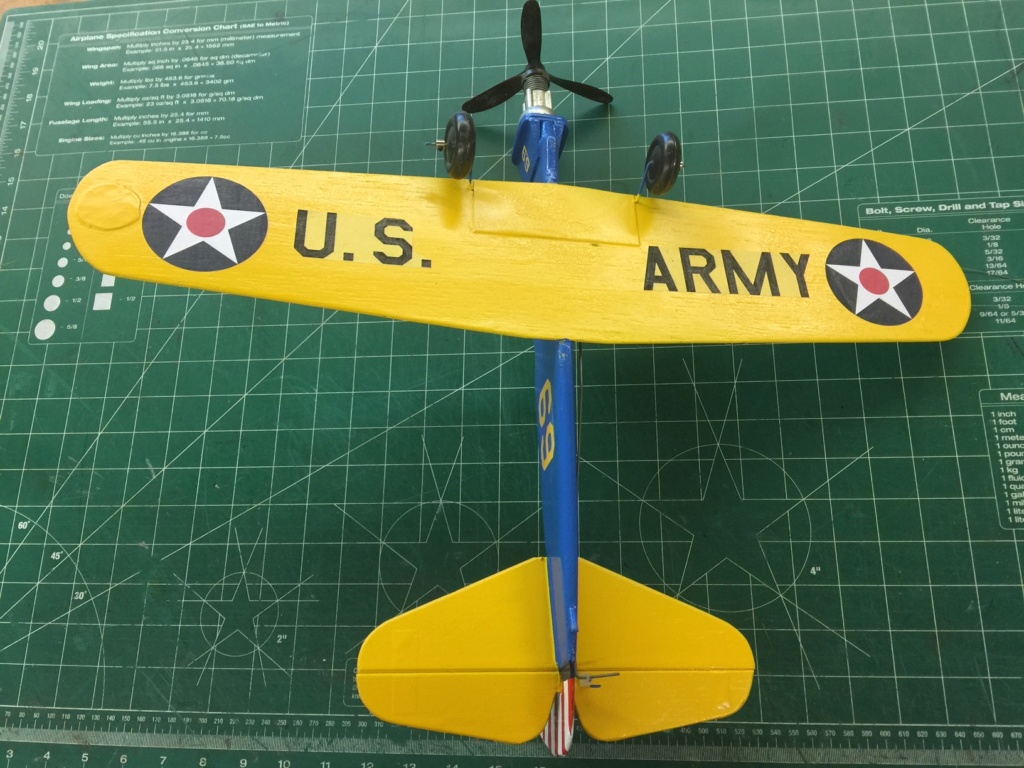
Well, I started the day around 0745 or so, and after a few things in the house, I came straight to the workshop where I started the session adding the trim colors to the rudder of the PROFILE PT-19. I really didn’t have the desire to paint but as I was given the thought as I prepared to come into the shop, that I could and should use monokote trim sheet colors. Honestly, that thought had not come to mind before so I decided to try it. By 1100 or so, it was done and really, it didn’t look too bad. I used a dab of thick super glue over the joints and everything seemed to be just fine. After that, I spent some time surfing to find some templates for the other markings. I’ll probably just print them on paper and glue them in place rather than cutting them from monokote. I set my self to print, cut, paste and apply the paper insignia to the fuselage and by 1420 or so it was done and looking just like a PT-19 should, with the exception that the landing gear seems about ½” too short but otherwise, I’m pleased with the result. Once the glue has had a chance to set, I can go back and apply either a clear coat of Krylon or just cover the decals with clear monokote. I straightened up a bit then took a few more photos of the PROFILE PT-19.
Friday, September 7, 2018
I spent a few minutes creating the build log for the PROFILE PT-19.
Saturday, September 8, 2018
I bought a can of the matt clear coat to spray over the PROFILE PT-19. When I returned home, I sprayed the PROFILE PT-19. After about ½ hour, I sprayed a second coat thinking that I could leave it outside to dry for the rest of the day. Well, I came in the house, had a bit to eat, watched some TV and around 1345 it started raining. I was going to get the plane and take it inside but I got to thinking, with the clear coat, the plane is supposed to be fuel and water proof so I left it outside. I went ahead and updated the logs. Around 1700 or I came into the workshop and started the session by bringing the PROFILE PT-19 inside and drying it off. I noticed some running of the ink on some of the insignia but I’m not sure if it was the rain or the clearcoat. Nevertheless, I reassembled it, weighed it, 7.5 oz, added the leadout terminations and it is all ready to fly.


Last edited by modelbuilder49 on Sun Mar 08, 2020 3:53 pm; edited 1 time in total

modelbuilder49- Gold Member

- Posts : 290
Join date : 2013-09-12
Age : 75
Location : Titusville Florida
 Re: My PT-19 Entry for The Official "International Cox PT-19 Fly It If You Got It Day!"
Hubba, hubba, hubba!
Wow, that's sharp!
Flight report minutes after the flight, please. Or better yet, film op!
Wow, that's sharp!
Flight report minutes after the flight, please. Or better yet, film op!
944_Jim- Diamond Member


Posts : 2022
Join date : 2017-02-08
Age : 59
Location : NE MS
 Re: My PT-19 Entry for The Official "International Cox PT-19 Fly It If You Got It Day!"
Wow! Nice job, really looks good. 


TLAnderson- Gold Member

- Posts : 243
Join date : 2016-07-21
Location : Northern Wisconsin
 Re: My PT-19 Entry for The Official "International Cox PT-19 Fly It If You Got It Day!"
Super nice scratch build on the PT-19!!!... 
Thanks for the build log and pictures along the way. I enjoyed the read.
Jeff

Thanks for the build log and pictures along the way. I enjoyed the read.

Jeff

FlipStart- Gold Member

- Posts : 161
Join date : 2018-09-05
Location : Phoenix, Arizona
 Re: My PT-19 Entry for The Official "International Cox PT-19 Fly It If You Got It Day!"
Well done, Jim, that looks really good paint and all. I bet it is a really good flier and being lighter outdoes the original Cox RTF in flight.

GallopingGhostler- Top Poster


Posts : 5722
Join date : 2013-07-13
Age : 70
Location : Clovis NM or NFL KC Chiefs

Oldenginerod- Top Poster

- Posts : 4018
Join date : 2012-06-15
Age : 62
Location : Drouin, Victoria
 Re: My PT-19 Entry for The Official "International Cox PT-19 Fly It If You Got It Day!"
SIR !!!!
Your dedication and discipline are somewhat intimidating!!!! Way to stay on a project ! It Looks Great !
Your dedication and discipline are somewhat intimidating!!!! Way to stay on a project ! It Looks Great !

Kim- Top Poster


Posts : 8625
Join date : 2011-09-06
Location : South East Missouri

londke3- Gold Member

- Posts : 177
Join date : 2011-12-30
Age : 57
Location : nashville TN
 Re: My PT-19 Entry for The Official "International Cox PT-19 Fly It If You Got It Day!"
super cool. Just so you know, we have 3 days= Sept 14, 15 & 16. To fly em if you got em day. You’ve got a Great one!! 


Marleysky- Top Poster


Posts : 3618
Join date : 2014-09-28
Age : 72
Location : Grand Rapids, MI
 Re: My PT-19 Entry for The Official "International Cox PT-19 Fly It If You Got It Day!"
Man, you guys are just too kind  ! Thanks for all the kind words
  . It was a fun build and it is my hope to get a video of it in the air for the event.

modelbuilder49- Gold Member

- Posts : 290
Join date : 2013-09-12
Age : 75
Location : Titusville Florida
 PT-19
PT-19
Hi y'all ! I received a message the other day asking whether my PT-19 had ever flown and I responded but then I went back through the thread and noticed that I had never posted a link to the actual flight video  . Well, here it is! I know it's late but I hope it's still acceptable
  !!
!!
Jim Carter
 . Well, here it is! I know it's late but I hope it's still acceptable
 Jim Carter

modelbuilder49- Gold Member

- Posts : 290
Join date : 2013-09-12
Age : 75
Location : Titusville Florida
 Re: My PT-19 Entry for The Official "International Cox PT-19 Fly It If You Got It Day!"
WooHoo! That was awesome.

944_Jim- Diamond Member


Posts : 2022
Join date : 2017-02-08
Age : 59
Location : NE MS
 Re: My PT-19 Entry for The Official "International Cox PT-19 Fly It If You Got It Day!"
Didn't even test the "break apart" feature!...Awesome!.....Whats all that green stuff?

OhBee- Platinum Member

- Posts : 698
Join date : 2016-03-23
Age : 73
Location : Minnesota
 Re: My PT-19 Entry for The Official "International Cox PT-19 Fly It If You Got It Day!"
Applause! I missed this back then somehow.
Great build, great flight. But what is that B-29/B-36 creature sticking it's nose out from behind that O-Scope looking box in picture #8?
I remember Florida with great affection. Spent a lot of a fifty year span there.
Great build, great flight. But what is that B-29/B-36 creature sticking it's nose out from behind that O-Scope looking box in picture #8?
I remember Florida with great affection. Spent a lot of a fifty year span there.

rsv1cox- Top Poster


Posts : 11245
Join date : 2014-08-18
Location : West Virginia
 Re: My PT-19 Entry for The Official "International Cox PT-19 Fly It If You Got It Day!"
I am glad you got to fly her it really performs , good flight !!

getback- Top Poster


Posts : 10439
Join date : 2013-01-18
Age : 67
Location : julian , NC
 Re: My PT-19 Entry for The Official "International Cox PT-19 Fly It If You Got It Day!"
Aah....the rest of the story! No wonder it flew so good. I should build one of those. Don't really want to risk my pristine mid 60's original!

OhBee- Platinum Member

- Posts : 698
Join date : 2016-03-23
Age : 73
Location : Minnesota
 Re: My PT-19 Entry for The Official "International Cox PT-19 Fly It If You Got It Day!"
I've always wondered...what is that framework between the cockpits on a PT-19? Roll bar?....it WAS a trainer!

OhBee- Platinum Member

- Posts : 698
Join date : 2016-03-23
Age : 73
Location : Minnesota
 Re: My PT-19 Entry for The Official "International Cox PT-19 Fly It If You Got It Day!"
OhBee,
I like this one for you. You get to build a quick-knock-together while you (re)learn your building skills. This one screams for a cheap wood sealer, a quick Rust-Oleum color coat (wait two weeks to cure), and a quick coat of poly-urethane for fuel proofing.
Then fling, crash fix, repeat until you are ready to move on to built-up wings, dope, and tissue!
Bravo to the OP for a great execution.

944_Jim- Diamond Member


Posts : 2022
Join date : 2017-02-08
Age : 59
Location : NE MS
 Re: My PT-19 Entry for The Official "International Cox PT-19 Fly It If You Got It Day!"
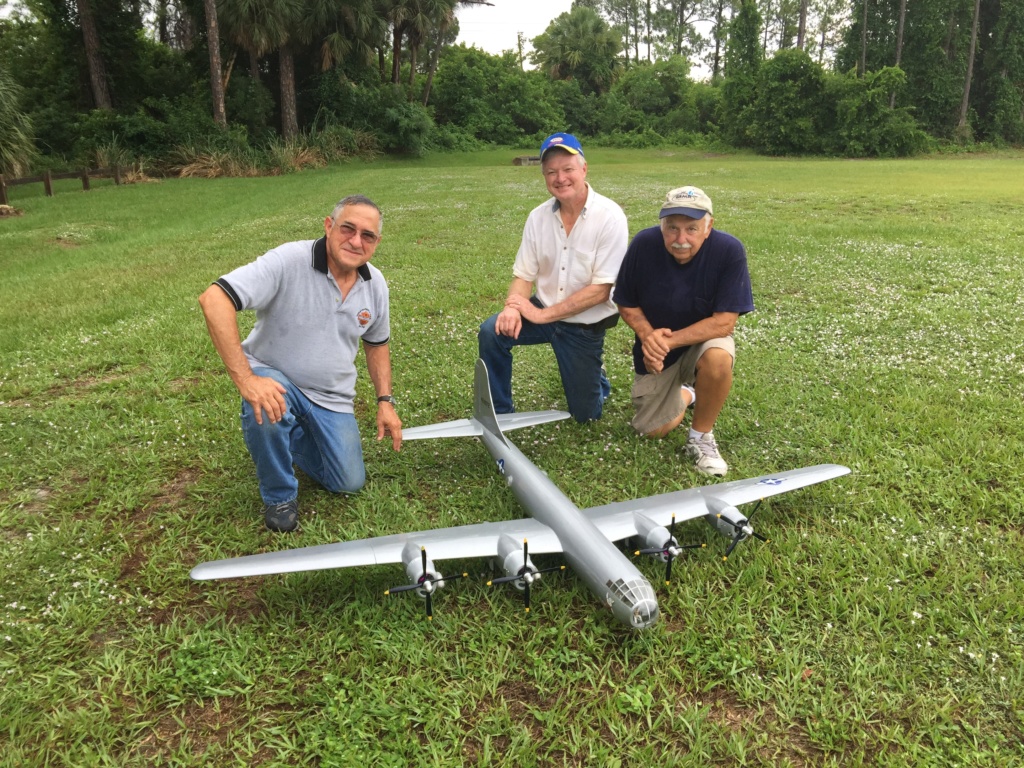
This is so embarrassing ... but I was just going back through some old threads and noticed that I didn't respond to your question. Well, although it's been awhile ... yes that is my KYO B-29 that I built a few years ago. It is powered with 4x throttle controlled OS .25 r/c engines on 70' lines. The other device is actually my 0-120v AC/DC 10 amp power supply.rsv1cox wrote:Applause! I missed this back then somehow.
Great build, great flight. But what is that B-29/B-36 creature sticking it's nose out from behind that O-Scope looking box in picture #8?
I remember Florida with great affection. Spent a lot of a fifty year span there.
Jim

modelbuilder49- Gold Member

- Posts : 290
Join date : 2013-09-12
Age : 75
Location : Titusville Florida
 Re: My PT-19 Entry for The Official "International Cox PT-19 Fly It If You Got It Day!"
OhBee wrote:I've always wondered...what is that framework between the cockpits on a PT-19? Roll bar?....it WAS a trainer!
You're correct. It was an attempt to prevent the instructor and student from being trapped in the aircraft if it were to flip onto it's back...not an unheard of situation, I'm told.

Kim- Top Poster


Posts : 8625
Join date : 2011-09-06
Location : South East Missouri
 Re: My PT-19 Entry for The Official "International Cox PT-19 Fly It If You Got It Day!"
modelbuilder49 wrote:This is so embarrassing ... but I was just going back through some old threads and noticed that I didn't respond to your question. Well, although it's been awhile ... yes that is my KYO B-29 that I built a few years ago. It is powered with 4x throttle controlled OS .25 r/c engines on 70' lines. The other device is actually my 0-120v AC/DC 10 amp power supply.rsv1cox wrote:Applause! I missed this back then somehow.
Great build, great flight. But what is that B-29/B-36 creature sticking it's nose out from behind that O-Scope looking box in picture #8?
I remember Florida with great affection. Spent a lot of a fifty year span there.
Jim
As with Paul Harvey's "The Rest of the Story," better late than never.
Beautiful aircraft Jim. Must have been a sight in the air and the sound of those four engines in sync. fabulous.
Thanks for sharing,
Bob

rsv1cox- Top Poster


Posts : 11245
Join date : 2014-08-18
Location : West Virginia
 Re: My PT-19 Entry for The Official "International Cox PT-19 Fly It If You Got It Day!"
Anybody thinking about a date for this year??????

Kim- Top Poster


Posts : 8625
Join date : 2011-09-06
Location : South East Missouri
 Re: My PT-19 Entry for The Official "International Cox PT-19 Fly It If You Got It Day!"
That B-29 is control line? How do you hang on to that sucker?...tie yourself to a pole in the center of the flying circle?

OhBee- Platinum Member

- Posts : 698
Join date : 2016-03-23
Age : 73
Location : Minnesota
 Re: My PT-19 Entry for The Official "International Cox PT-19 Fly It If You Got It Day!"
[/quote]
As with Paul Harvey's "The Rest of the Story," better late than never.
Beautiful aircraft Jim. Must have been a sight in the air and the sound of those four engines in sync. fabulous.
Thanks for sharing,
Bob[/quote]
Absolutely !! Thanks for the kind words. Yes it was quite a thrill and surprisingly the pull wasn't at all as bad as I anticipated. It was and is a wonderful experience to put it in the air!!
As with Paul Harvey's "The Rest of the Story," better late than never.
Beautiful aircraft Jim. Must have been a sight in the air and the sound of those four engines in sync. fabulous.
Thanks for sharing,
Bob[/quote]
Absolutely

modelbuilder49- Gold Member

- Posts : 290
Join date : 2013-09-12
Age : 75
Location : Titusville Florida
 Re: My PT-19 Entry for The Official "International Cox PT-19 Fly It If You Got It Day!"
OhBee wrote:That B-29 is control line? How do you hang on to that sucker?...tie yourself to a pole in the center of the flying circle?

modelbuilder49- Gold Member

- Posts : 290
Join date : 2013-09-12
Age : 75
Location : Titusville Florida
 Similar topics
» My PT-19 Entry for The Official "International Cox PT-19 Fly It If You Got It Day!"
» Gentlemen, start your engines!!!!
» The Official "International Cox PT-19 Fly It If You Got It Day!" Thread
» Purple Plane Factory documents the RWYB entry.
» 2019 Official Cars Are The Stars entry submission thread LOCKED!
» Gentlemen, start your engines!!!!
» The Official "International Cox PT-19 Fly It If You Got It Day!" Thread
» Purple Plane Factory documents the RWYB entry.
» 2019 Official Cars Are The Stars entry submission thread LOCKED!
Page 1 of 1
Permissions in this forum:
You cannot reply to topics in this forum

 Rules
Rules


