Log in
Search
Latest topics
» My N-1R build logby roddie Today at 12:32 am
» Happy 77th birthday Andrew!
by akjgardner Today at 12:27 am
» TEE DEE Having issues
by TD ABUSER Yesterday at 9:43 pm
» Landing-gear tips
by roddie Yesterday at 6:17 pm
» Roger Harris revisited
by TD ABUSER Yesterday at 2:13 pm
» Tee Dee .020 combat model
by Ken Cook Yesterday at 1:41 pm
» Retail price mark-up.. how much is enough?
by Ken Cook Yesterday at 1:37 pm
» My latest doodle...
by roddie Yesterday at 10:43 am
» Chocolate chip cookie dough.........
by roddie Fri Nov 22, 2024 1:13 pm
» Purchased the last of any bult engines from Ken Enya
by sosam117 Fri Nov 22, 2024 11:32 am
» Free Flight Radio Assist
by rdw777 Fri Nov 22, 2024 9:24 am
» Funny what you find when you go looking
by rsv1cox Wed Nov 20, 2024 3:21 pm
Cox Engine of The Month
BH models Mosquito build
Page 1 of 4
Page 1 of 4 • 1, 2, 3, 4 
 BH models Mosquito build
Procrastinator in Chief. I finally got through putting it off and started this kit that I have had for over a year. Got another one coming.
Nice kit as usual for Black Hawk models. Very complete with nice balsa. You can just jump right in and build out of the box, but I decided to actually read and follow the instructions. A variation will be substituting flat Dubro hinges for the cloth hinges provided.
First thing I did was lay everything out on the plans, lot's of little bits here that are not clearly identified, fillers I suspect.

Then epoxied the connecting dowel to the elevators:
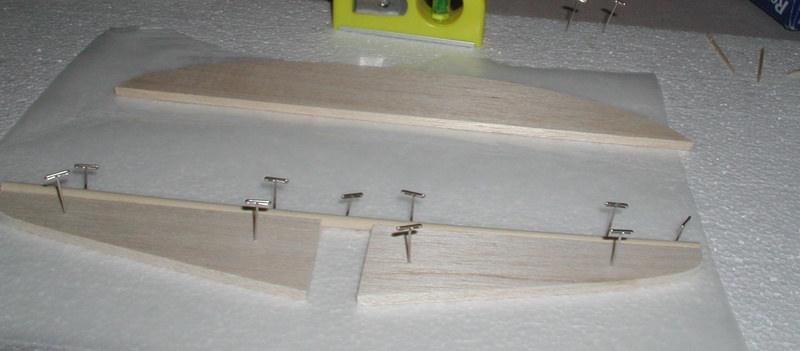
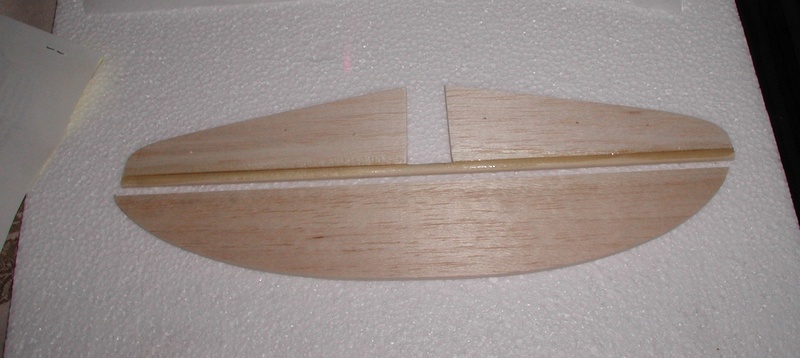
Then the wing using wood glue which is a little more forgiving than my 5 minute epoxy. Six pieces brushed on glue on all connecting surfaces assembled and aligned.
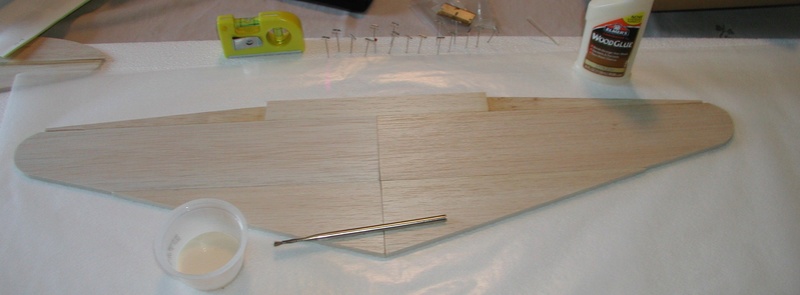
A waxed paper sandwich and flat glass weight.

A little more weight never hurts.
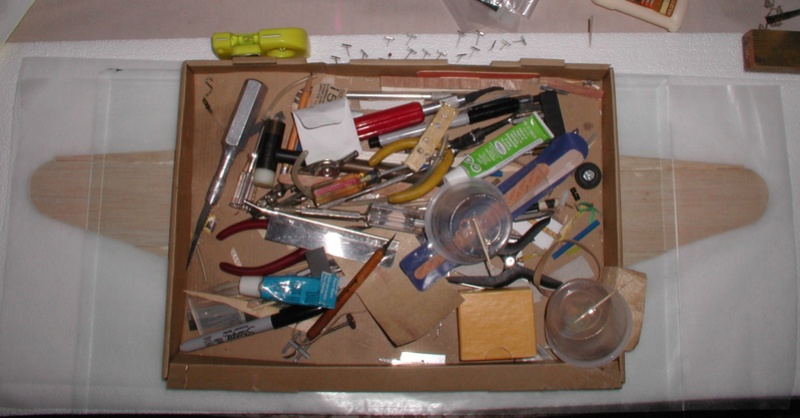
Fuselage and nacelles next. Power will be two Enya .09's. Can't wait.
Bob
Nice kit as usual for Black Hawk models. Very complete with nice balsa. You can just jump right in and build out of the box, but I decided to actually read and follow the instructions. A variation will be substituting flat Dubro hinges for the cloth hinges provided.
First thing I did was lay everything out on the plans, lot's of little bits here that are not clearly identified, fillers I suspect.

Then epoxied the connecting dowel to the elevators:


Then the wing using wood glue which is a little more forgiving than my 5 minute epoxy. Six pieces brushed on glue on all connecting surfaces assembled and aligned.

A waxed paper sandwich and flat glass weight.

A little more weight never hurts.

Fuselage and nacelles next. Power will be two Enya .09's. Can't wait.
Bob

rsv1cox- Top Poster


Posts : 11250
Join date : 2014-08-18
Location : West Virginia
 Re: BH models Mosquito build
Looking GOOD ! Good to see someone is getting some building in , those BHM do usually go together pretty easy and fast . Be watching 


getback- Top Poster


Posts : 10442
Join date : 2013-01-18
Age : 67
Location : julian , NC
 Re: BH models Mosquito build
getback wrote:Looking GOOD ! Good to see someone is getting some building in , those BHM do usually go together pretty easy and fast . Be watching
Thanks Eric.
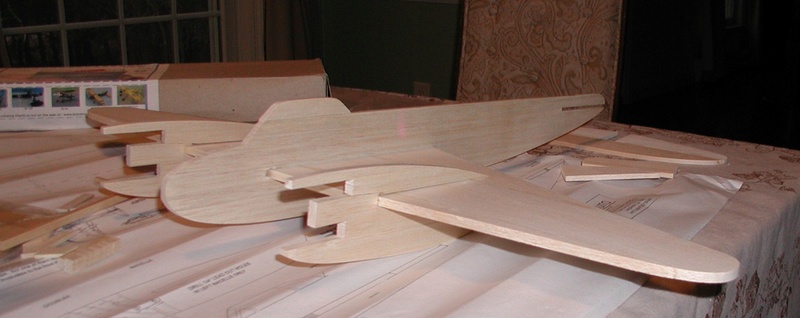
Who can resist a little "test fitting".
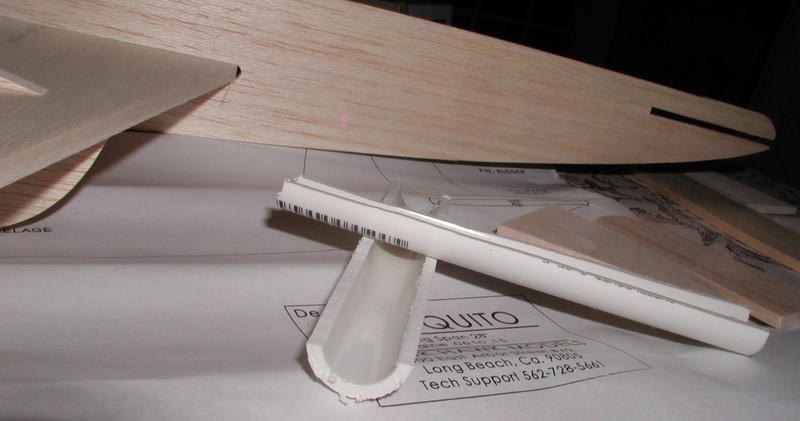
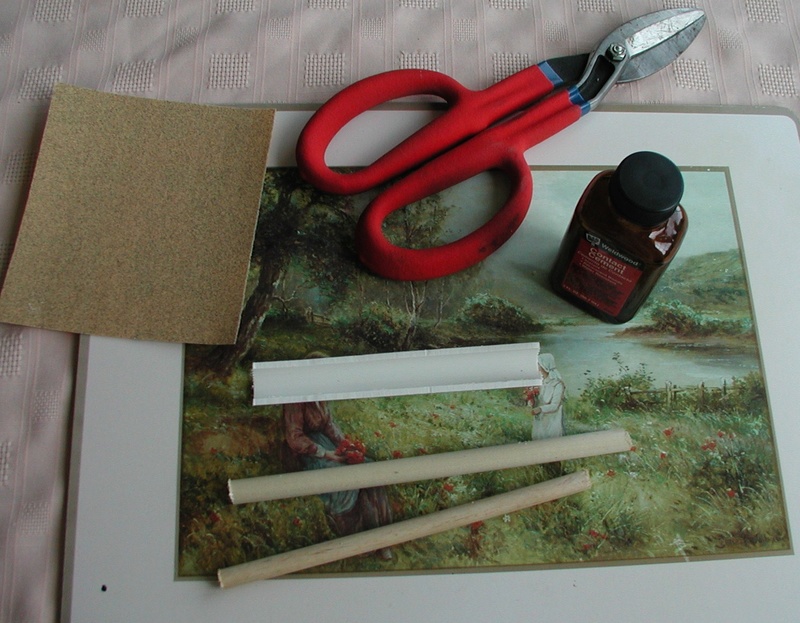
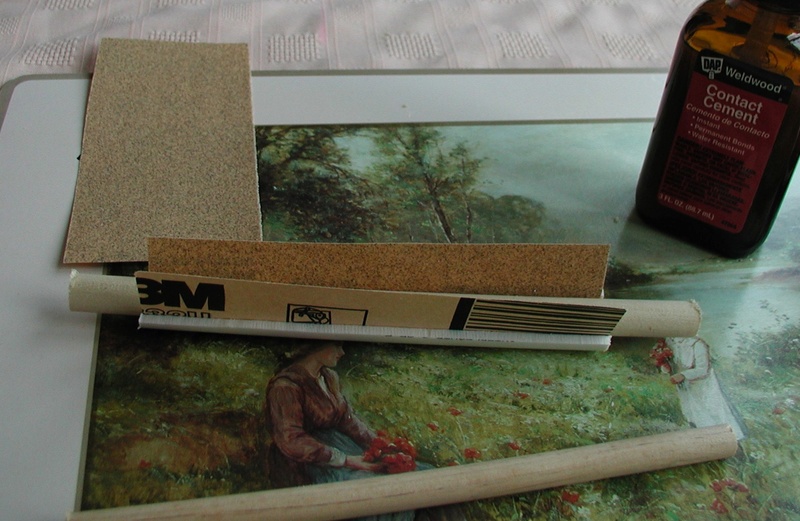
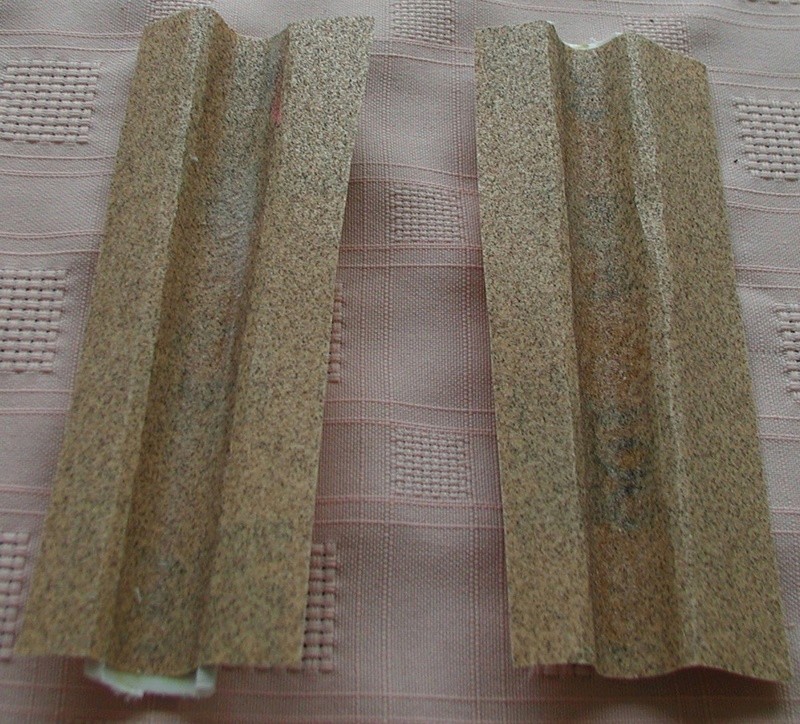
I'm looking at a lot of leading and trailing edge sanding and thought of roddies "sanding" thread. Found a short piece of PVC and cut it in half, a little contact cement and 150 grit used on a test sample may reduce the effort. If it works I will cut a longer piece.
Bob

rsv1cox- Top Poster


Posts : 11250
Join date : 2014-08-18
Location : West Virginia
 Re: BH models Mosquito build
Great build Bob, particularly seeing that the original mosquito was also made from Balsa Wood. Pretty much the fastest aircraft of WW11. Watch out! 
The following is from www.fighter-planes.com
"Construction
The genius of the aircraft's construction lay in the innovative and somewhat unorthodox use of seemingly commonplace materials and techniques. The bulk of the Mosquito was made of plywood. Stronger and lighter than most grades of plywood, this special plywood was produced by a combination of 3/8" sheets of Ecuadorean balsawood sandwiched between sheets of Canadian birch plywood. Like a deck of cards, sheets of wood alternated with sheets of a special casein-based (later formaldehyde) wood glue.
Forming the fuselage was done in concrete molds. Left and right sides of the fuselage were fitted with bulkheads and structural members separately while the glue cured. Reinforcing was done with hundreds of small brass wood screws. This arrangement greatly simplified the installation of hydraulic lines and other fittings, as the two halves of the fuselage were open for easy access by workers. The two halves of the fuselage were then glued and bolted together, and covered with doped Madapolam fabric.
The wings were also made of wood. To increase strength, the wings were made as one single assembly, onto which the fuselage, once both halves had been mated, was lowered and attached. Metal was used sparingly in the construction of structural elements. It was mostly used in engine mounts and fairings, control surfaces, and of course, brass screws.
The glue used was initially casein-based. It was changed to a formaldehyde-based preparation when the Mosquito was introduced to fighting in semi-tropical and tropical climates, after some unexplained crashes led to the suspicion that the glue was unable to withstand the climate. De Havilland also developed a technique to accelerate the glue drying by heating it using radio waves.
The specialized wood veneer used in the construction of the Mosquito was made by Roddis Manufacturing in Marshfield, Wisconsin, United States. Hamilton Roddis had teams of dexterous young women ironing the (unusually thin) strong wood veneer product before shipping to the UK."

Oldenginerod- Top Poster

- Posts : 4018
Join date : 2012-06-15
Age : 62
Location : Drouin, Victoria
 Re: BH models Mosquito build
Bob, here I am looking at your work, I really like that step by step job.
I imagine the model with both Enya 09! .... is going to look great !, I was inspired to do something with my Cox 010, maybe in the future make a twin for the 0.010 !!! .... there will be some Flat ?, or will I have to do something on my own?!, Who knows !?
Look Bob, just in a page of my country there is an ENYA for sale zero kilometer, that is, new, that announcement made me agree to You !.
Greetings, Mauricio.-
http://articulo.mercadolibre.com.ar/MLA-651808463-motor-enya-19v-antiguo-glow-coleccion-_JM#D[S:HOME,L:HISTORY,V:6]

MauricioB- Top Poster

- Posts : 3712
Join date : 2016-02-16
Age : 53
Location : ARG
 Re: BH models Mosquito build
rsv1cox wrote:
I decided to actually read and follow the instructions.
Well, that's a novel approach
 Seems to work out great too

KariFS- Diamond Member

- Posts : 2044
Join date : 2014-10-10
Age : 53
 Re: BH models Mosquito build
Bob the test fit looks nice i think this is going to be a very fine model in the end , with a 28" W/S it should really schoot if you decide to fly it and i hope you do ! 


getback- Top Poster


Posts : 10442
Join date : 2013-01-18
Age : 67
Location : julian , NC
 Re: BH models Mosquito build
It is with a great deal of trepidation and courage that I even attempt to start a build thread here knowing that for the most part I'm in the company of experts when it comes to model building. That said I am not adverse to comments both positive and negative regarding this admittedly simple effort. So I press on. 
I tried out the PVC idea on the wings leading/trailing edges with mixed results but I quickly switched over to my long used sanding block and 100 grit to start with 400 grit finish. Sanding sealer, primer, base coat, and finish coats yet to come.

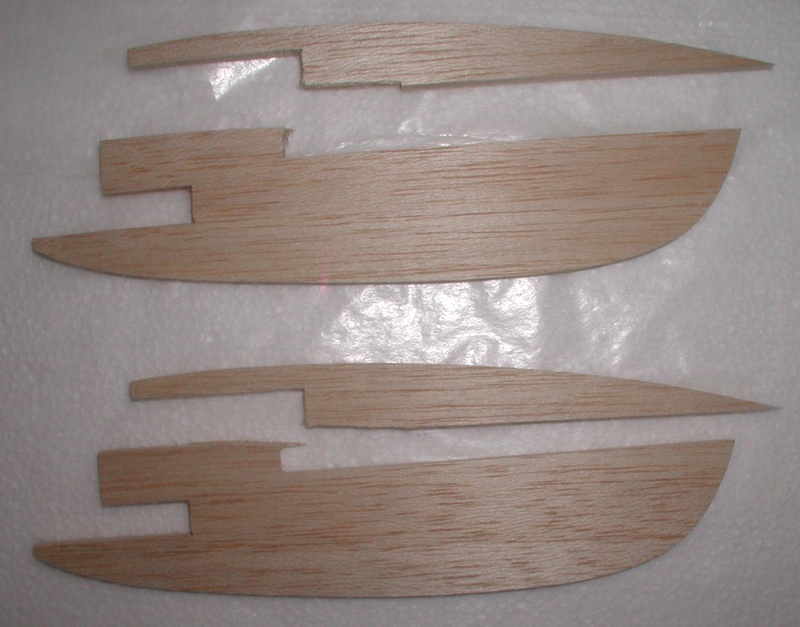
Plans said the nacelles were fragile, and they both arrived broken in the package.
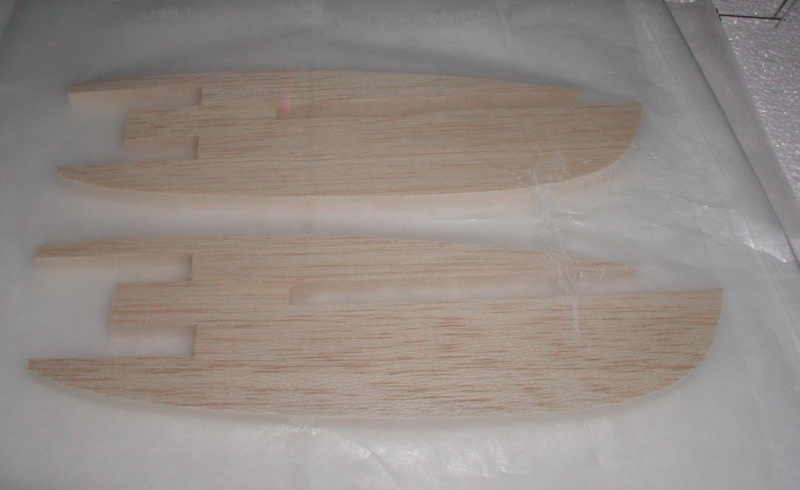
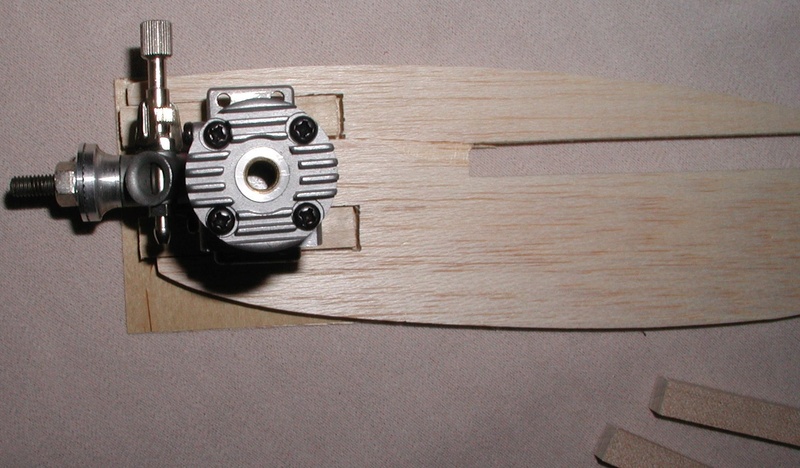
Picked out the engines, mounting structure looks weak, might have to strengthen it up a bit.
I have no idea as to what to use for a fuel tank or how/where to mount it. I guess a couple of 1-1 1/2 oz triangles would do. Cross that bridge when I get there.
Yes Rod, I have been living on a youtube Mosquito diet. Lot's of good information on an aircraft that I'm mostly unfamiliar with. A favorite for obvious reasons.
https://www.youtube.com/watch?v=MGvjQbBNEE0
Thanks Eric. And Maurico thanks for the support and the link. If that was $1300.00 USD I would run away.
Bob
I tried out the PVC idea on the wings leading/trailing edges with mixed results but I quickly switched over to my long used sanding block and 100 grit to start with 400 grit finish. Sanding sealer, primer, base coat, and finish coats yet to come.


Plans said the nacelles were fragile, and they both arrived broken in the package.


Picked out the engines, mounting structure looks weak, might have to strengthen it up a bit.

I have no idea as to what to use for a fuel tank or how/where to mount it. I guess a couple of 1-1 1/2 oz triangles would do. Cross that bridge when I get there.
Yes Rod, I have been living on a youtube Mosquito diet. Lot's of good information on an aircraft that I'm mostly unfamiliar with. A favorite for obvious reasons.
https://www.youtube.com/watch?v=MGvjQbBNEE0
Thanks Eric. And Maurico thanks for the support and the link. If that was $1300.00 USD I would run away.
Bob

rsv1cox- Top Poster


Posts : 11250
Join date : 2014-08-18
Location : West Virginia
 Re: BH models Mosquito build
[quote And Maurico thanks for the support and the link. If that was $1300.00 USD I would run away. 
Bob[/quote]
Oh no no Bob!, if they were dollars I would also run away! Haha , the account is like this:
$ 1300 / US$16.4 = US$ 79.26.
Bob[/quote]
Oh no no Bob!, if they were dollars I would also run away! Haha , the account is like this:
$ 1300 / US$16.4 = US$ 79.26.

MauricioB- Top Poster

- Posts : 3712
Join date : 2016-02-16
Age : 53
Location : ARG
 Re: BH models Mosquito build
Looking really good. also thanks for the lesson on the building of the real Mosquito.

akjgardner- Diamond Member


Posts : 1602
Join date : 2014-12-28
Age : 65
Location : Greensberg Indiana
 Re: BH models Mosquito build
Fueling ideas
But first...Bob...we have seen a lot of examples of your work and craftsmanship...you need Zero trepidation and have plenty enough courage
Tin tank..or tanks..begs where?
Two under wing inside of each engine pylon seem much too low from a pickup to C/L of venturi POV.. above wing is too high
Common tin tank on main Fuselage has same above or below wing VS venturi C/L and adds a LOT of fuel line to each engine
Pressure bladders make the most sense EXCEPT one is real fiddly and TWO would drive me nutz trying to start and go fly so I would opt for One central bladder
A third option is where I most likely would experiment with--- is a common balloon tank hiding outboard above wing center fuselage inside a cigar tube

fredvon4- Top Poster


Posts : 4012
Join date : 2011-08-26
Age : 69
Location : Lampasas Texas
 Re: BH models Mosquito build
Thanks Fred, I have never ran bladders and would not know where to start.
I'm thinking two of the smaller wedges hung on the proper side under the wing on the nacelles.
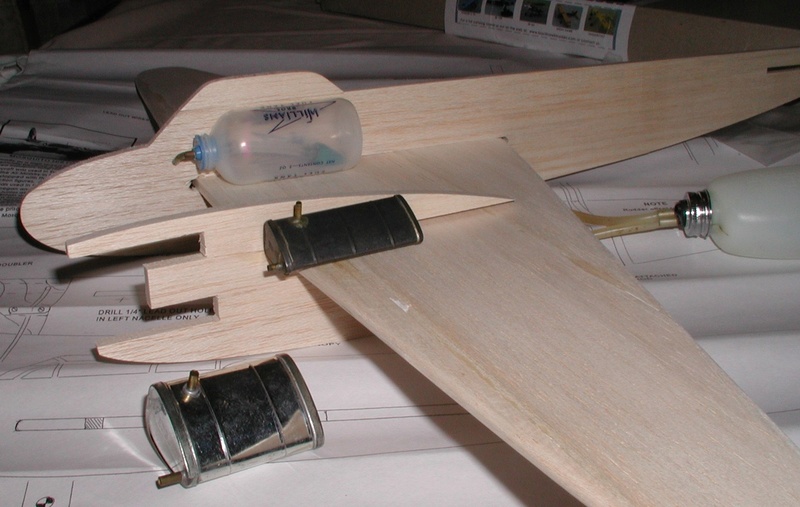
This small flat tank would work under the canopy inside the fuselage but that means long fuel lines.. Also the tank is a clunk and scheduled for my yet to be finished Corsair, and it should be used while upright.
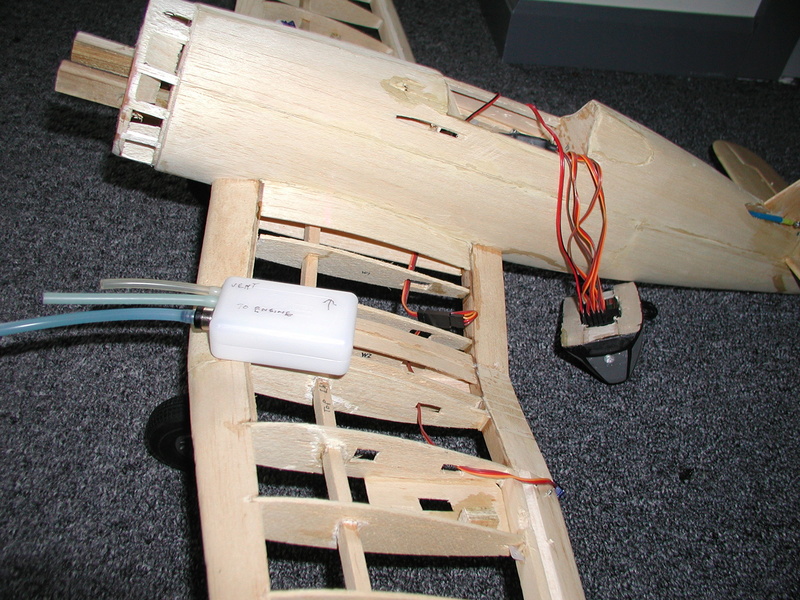
That small wedge tank would not allow for much air time, but with my dizzies that's not a bad thing. Looking for early spring finish time. Going to be some outside spraying and the weather must warm.
Bob
I'm thinking two of the smaller wedges hung on the proper side under the wing on the nacelles.

This small flat tank would work under the canopy inside the fuselage but that means long fuel lines.. Also the tank is a clunk and scheduled for my yet to be finished Corsair, and it should be used while upright.

That small wedge tank would not allow for much air time, but with my dizzies that's not a bad thing. Looking for early spring finish time. Going to be some outside spraying and the weather must warm.
Bob

rsv1cox- Top Poster


Posts : 11250
Join date : 2014-08-18
Location : West Virginia
 Re: BH models Mosquito build
Looking good Bob! Those nacelles worry me though. Do you have any 1/64" plywood that you could "skin" the sides with?
 Re: BH models Mosquito build
akjgardner wrote:Looking really good. also thanks for the lesson on the building of the real Mosquito.
Sorry to detract from Bob's build thread, but it really is a fascinating aircraft. All wood for lightness, meaning greater speed. Lack of skilled metalworkers or aluminium in Britain, but numerous craftsmen who were skilled in wood. The air mistery completely rejected the concept of the plane but De Haviland pushed on privately without military funding to complete the project in 22 months from the first concept drawings to full production. The air ministery were absolutely blown away with the aircraft's performance and embraced it, thankfully.

Oldenginerod- Top Poster

- Posts : 4018
Join date : 2012-06-15
Age : 62
Location : Drouin, Victoria
 Re: BH models Mosquito build
roddie wrote:Looking good Bob! Those nacelles worry me though. Do you have any 1/64" plywood that you could "skin" the sides with?
Me too roddie, in fact I woke up last night thinking about it as I'm working on those nacelles today. They did supply 1/64" doublers and hardwood bearers in the kit but I'm not sure they are strong enough to handled the .09's.
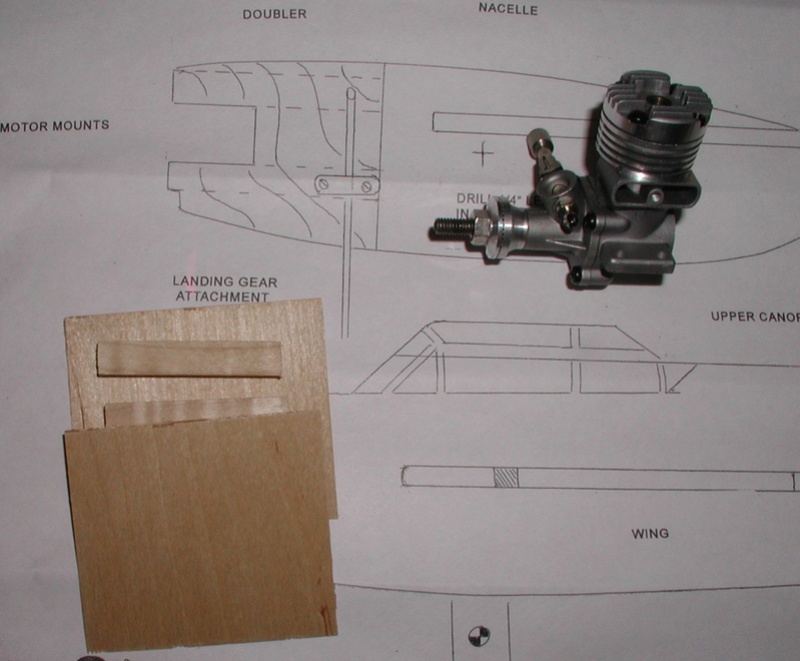
Besides, the bearers are not a tight fit inside the balsa.
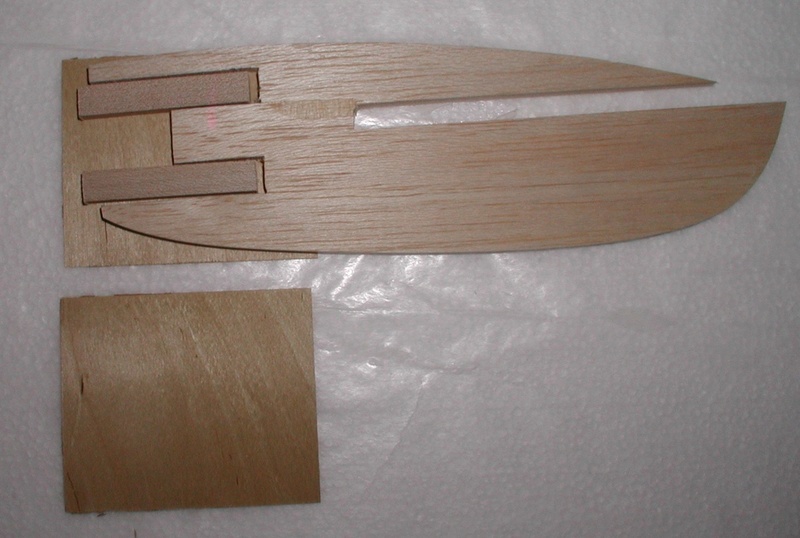
I have some thin luan plywood and have had good luck sanding off a layer or two to use as doublers in the past. They say to trace out the doublers then cement on to the balsa and bearers, but I think I will just epoxy as a unit then trim to fit. If I don't like the strength then I will back it up with one sheet of luan.
I am only going to very lightly sand the nacelles and may not even airfoil them or the fuselage.
Not a detraction at all Rod, jump right in the waters fine. I'm learning respect for these "Wooden Wonders." They were made in Australia too. Wasn't there a very similar "Beaufighter?
Edit add: I had to google my own question.
https://en.wikipedia.org/wiki/Bristol_Beaufighter
Bob

rsv1cox- Top Poster


Posts : 11250
Join date : 2014-08-18
Location : West Virginia
 Re: BH models Mosquito build
Because of the way it was built, the Mosquito is also a lot smoother on the surface than many metal-clad planes. That obviously helps to improve the top speed. If a flat paintjob "costs" several mph (see http://www.wwiiaircraftperformance.org/mosquito/mosquito.html ), imagine how all the little rivets and gaps must affect to drag on high speeds.
Look at this Spitfire for example and compare it to the surface of a Mosquito:
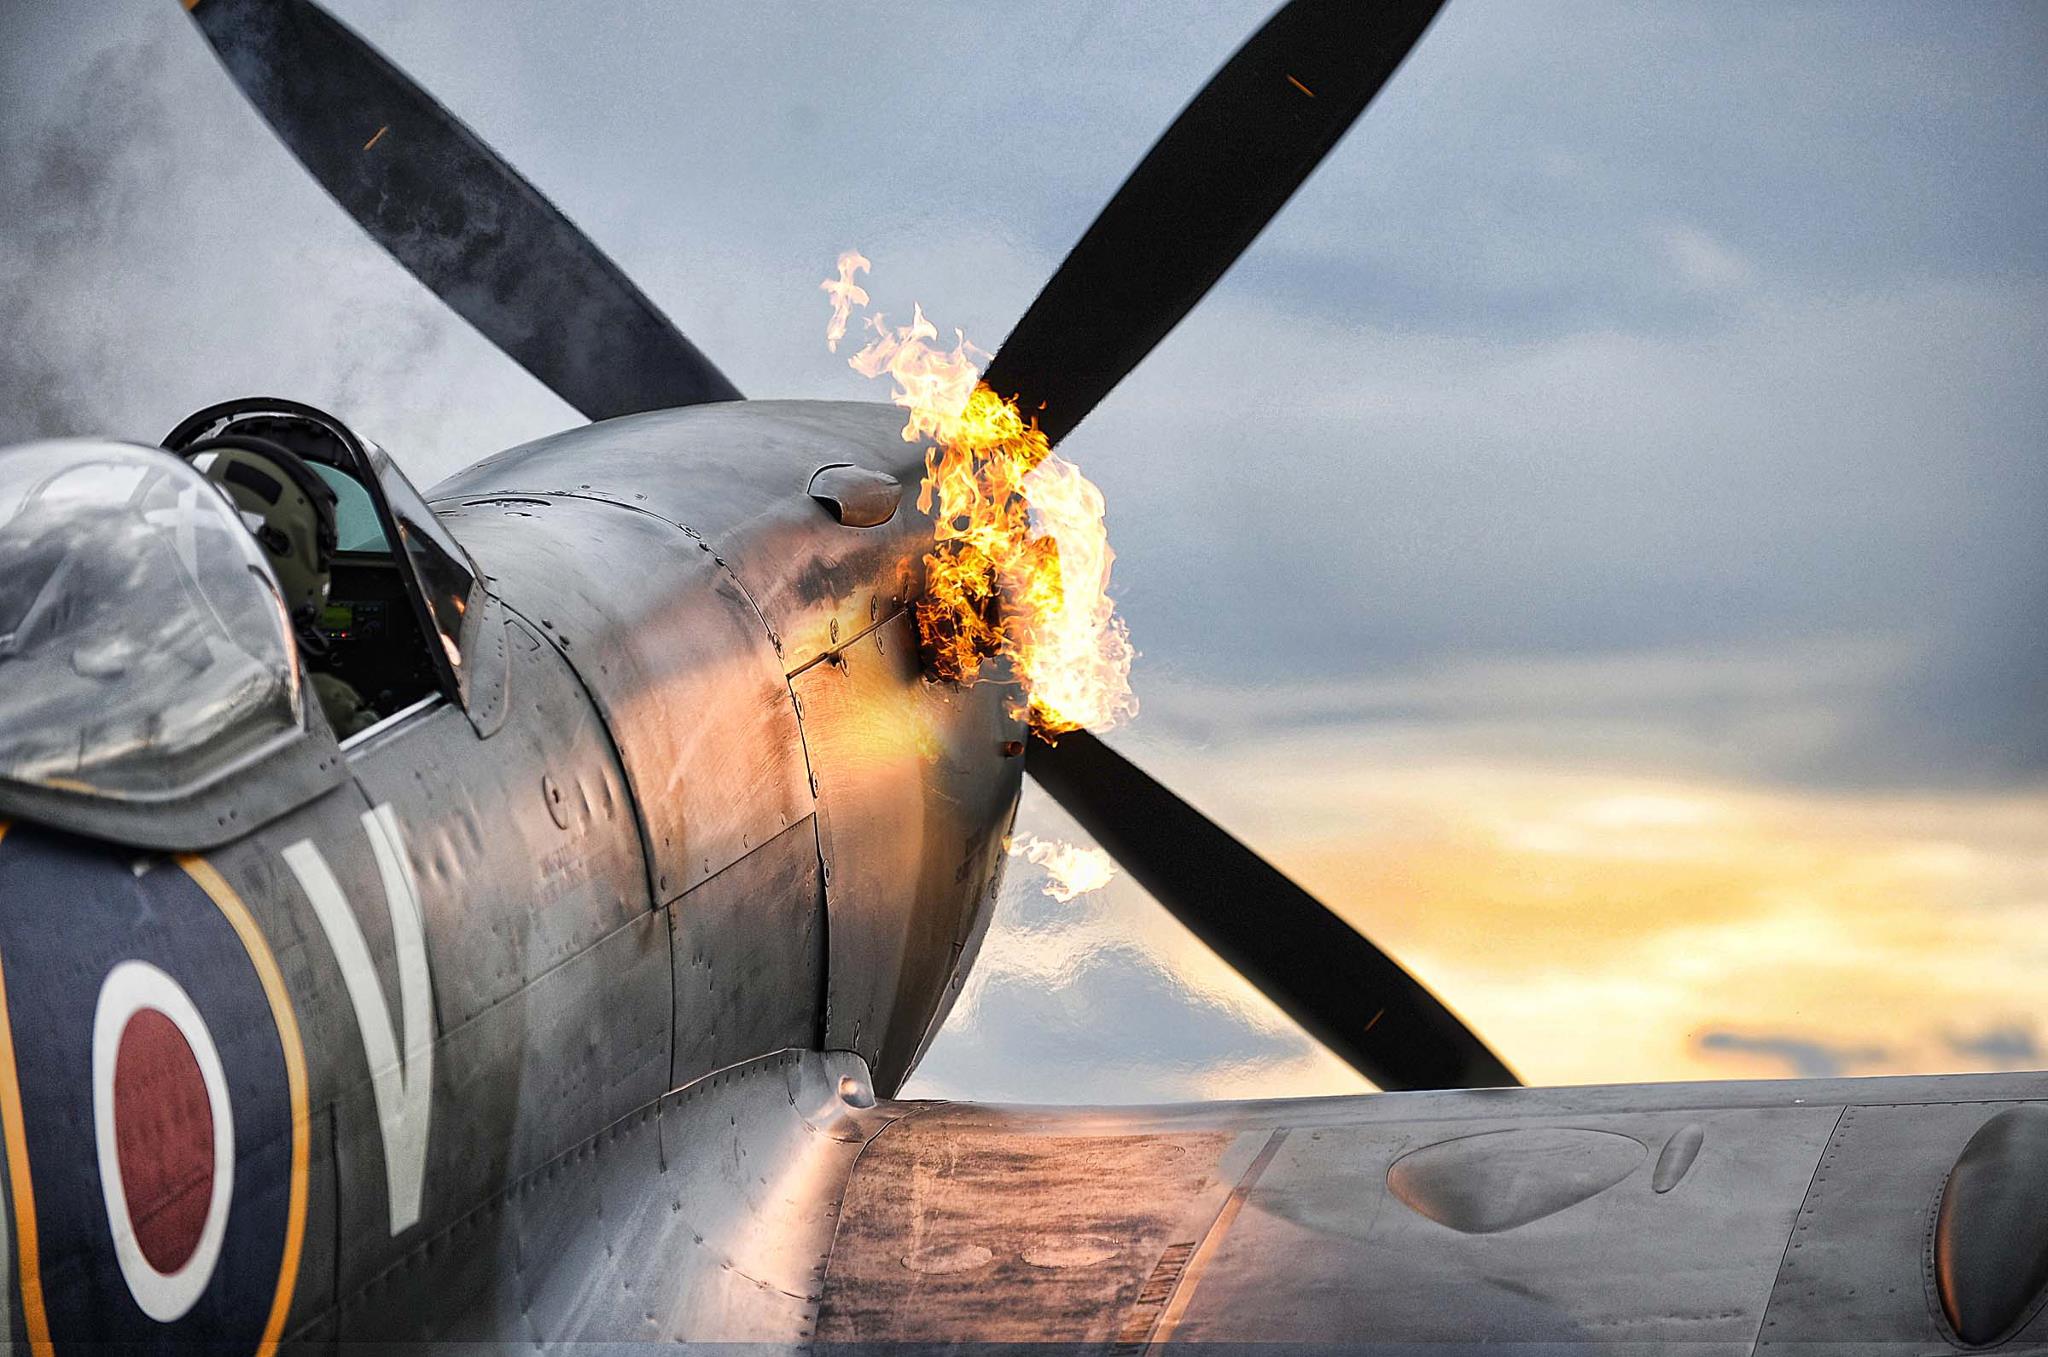
Look at this Spitfire for example and compare it to the surface of a Mosquito:

Last edited by KariFS on Mon Feb 06, 2017 7:23 am; edited 1 time in total

KariFS- Diamond Member

- Posts : 2044
Join date : 2014-10-10
Age : 53
 Re: BH models Mosquito build
KariFS wrote:rsv1cox wrote:
I decided to actually read and follow the instructions.
Well, that's a novel approachSeems to work out great too

BTW Kari, It didn't take me long to deviate from the plans.
In the second paragraph they said to mount the wing on the fuselage then sand, I didn't like that at all so I sanded the wing au natural. Third paragraph regards the nacelles and you know what I'm doing with that. 10 more paragraphs to go.
PS. Like the picture Kari. Reminds me of Jet pilots expression of "Kick the tires and light the fires." Applies to Spitfires too I guess.
Bob

rsv1cox- Top Poster


Posts : 11250
Join date : 2014-08-18
Location : West Virginia
 Re: BH models Mosquito build
I love this picture of a Beaufighter cockpit partly because I had one of those Brit canteens, you could wet the fabric covering to keep the contents cool.

Isn't that a flotation device above the pilots head serving double duty as head padding?
Hijacking my own thread here.
Edit add> Well, a similar canteen.
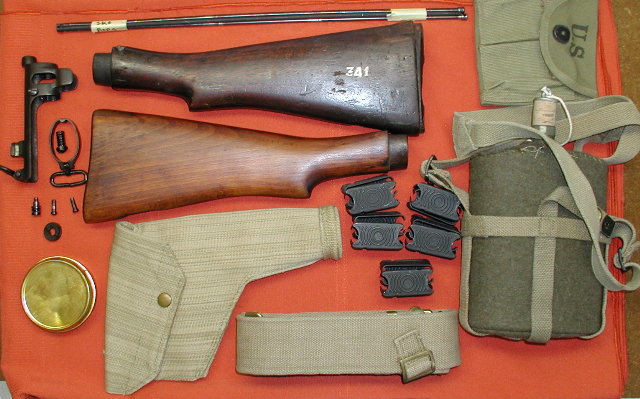

Isn't that a flotation device above the pilots head serving double duty as head padding?
Hijacking my own thread here.
Edit add> Well, a similar canteen.

Last edited by rsv1cox on Mon Feb 06, 2017 7:44 am; edited 1 time in total (Reason for editing : Add picture)

rsv1cox- Top Poster


Posts : 11250
Join date : 2014-08-18
Location : West Virginia
 Re: BH models Mosquito build
Today I cut the slots for the elevator hinges using my handy dandy slot cutter. Cut a dozen slots accurately within two minutes, turned them over and cut again equalizing any irregularities. Had to use the saw blade instead of the slightly thinner disks because of the harder dowel.
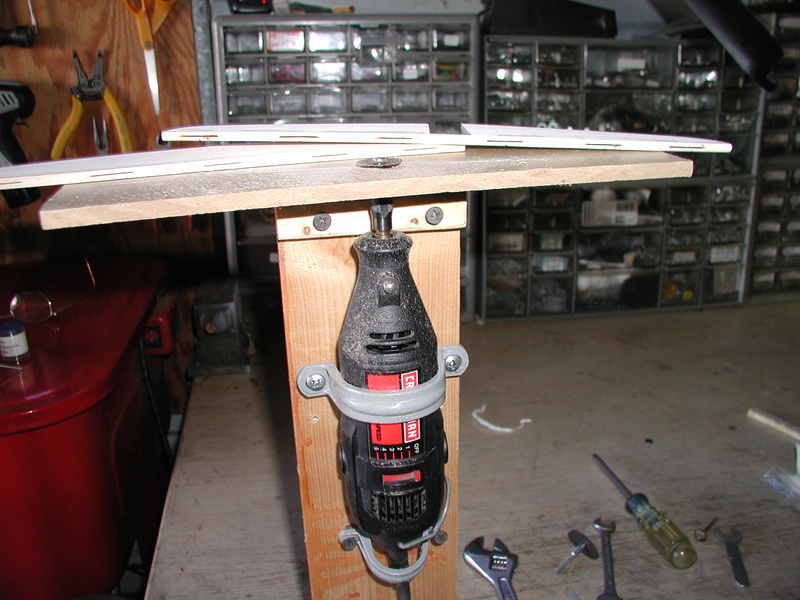
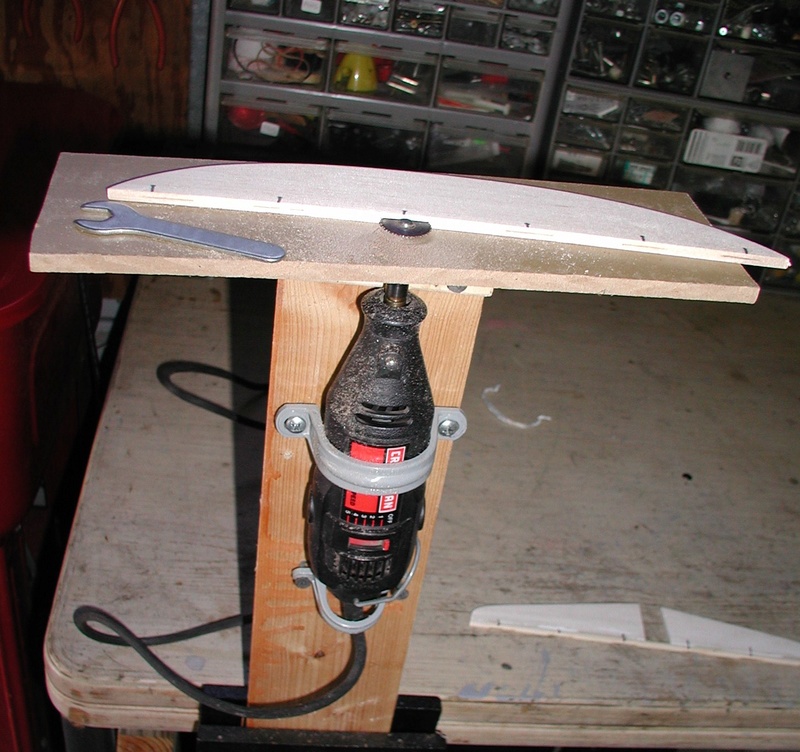
I round off the hinges glue and pin when installing.
Bob


I round off the hinges glue and pin when installing.
Bob

rsv1cox- Top Poster


Posts : 11250
Join date : 2014-08-18
Location : West Virginia
 Re: BH models Mosquito build
Oldenginerod wrote:akjgardner wrote:Looking really good. also thanks for the lesson on the building of the real Mosquito.
Sorry to detract from Bob's build thread, but it really is a fascinating aircraft. All wood for lightness, meaning greater speed. Lack of skilled metalworkers or aluminium in Britain, but numerous craftsmen who were skilled in wood. The air mistery completely rejected the concept of the plane but De Haviland pushed on privately without military funding to complete the project in 22 months from the first concept drawings to full production. The air ministery were absolutely blown away with the aircraft's performance and embraced it, thankfully.
Rod - Hey thanks for the movie. That's quite a story. Undereducated American, I always assumed the Misquito was just a downsized British version of the P-38 Lightning. Oop's was I wrong.

Marleysky- Top Poster


Posts : 3618
Join date : 2014-09-28
Age : 72
Location : Grand Rapids, MI
 Re: BH models Mosquito build
Double that Rene. It showed the DH Dragon in flight, worth the price of admission alone.
Started on the nacelles, roughed them out and pinned them together for a final sanding. Also set up the engine mount cutouts along the thrust line.
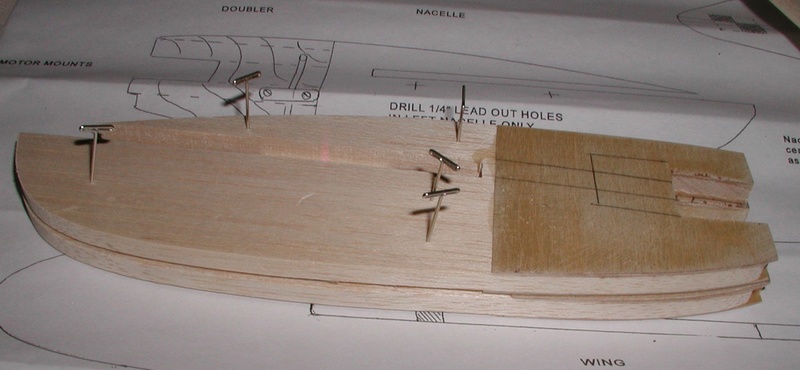
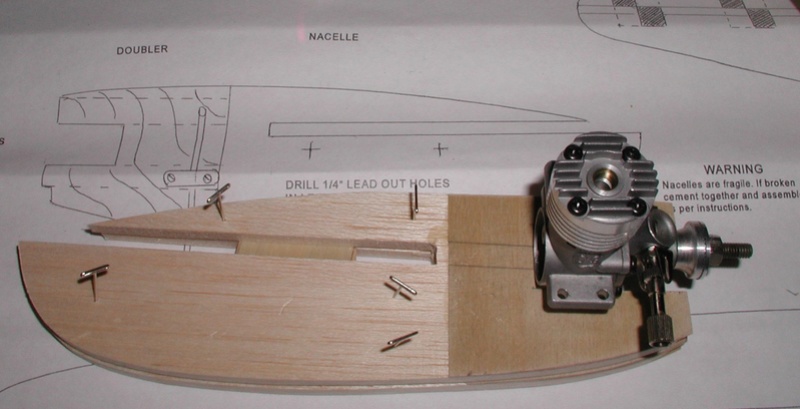
Next step is to glue on all the ancillaries sand and finish.
Bob
Started on the nacelles, roughed them out and pinned them together for a final sanding. Also set up the engine mount cutouts along the thrust line.


Next step is to glue on all the ancillaries sand and finish.
Bob

rsv1cox- Top Poster


Posts : 11250
Join date : 2014-08-18
Location : West Virginia
 Re: BH models Mosquito build
I'm trying to figure out how to position the engines. Conventional wisdom says to mount them both outboard to the control line, but I kind of like both of them positioned inboard to the fuselage. What do you think?


rsv1cox- Top Poster


Posts : 11250
Join date : 2014-08-18
Location : West Virginia
 Re: BH models Mosquito build
I like this myself.. 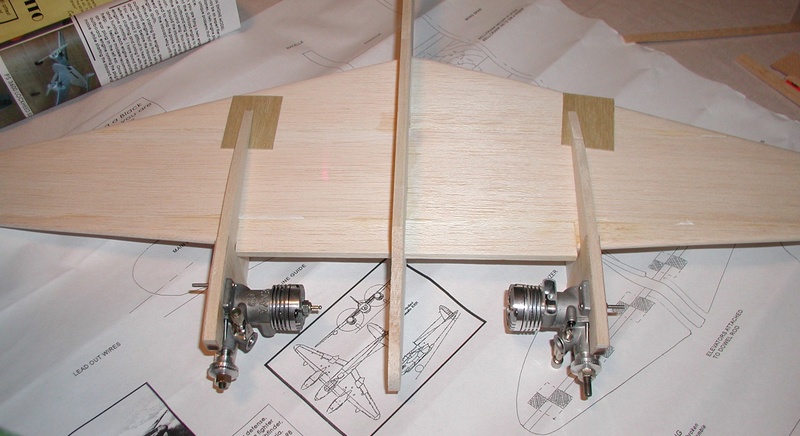
My guess is you're NOT using mufflers on these? Can you change the NVA so they both point up ? With this configuration i would use some tip weight ! And as far as the tank one tank duel feed from a T ,better chance they cut out the same time , Just my


My guess is you're NOT using mufflers on these? Can you change the NVA so they both point up ? With this configuration i would use some tip weight ! And as far as the tank one tank duel feed from a T ,better chance they cut out the same time , Just my


getback- Top Poster


Posts : 10442
Join date : 2013-01-18
Age : 67
Location : julian , NC
 Re: BH models Mosquito build
Nope, no mufflers Eric, extra weight and drag. The NVA's can be set up or down, I will position them up. First coat of sanding sealer on this morning, probably the only one I will apply.
Some one else agrees with us on engine positions.
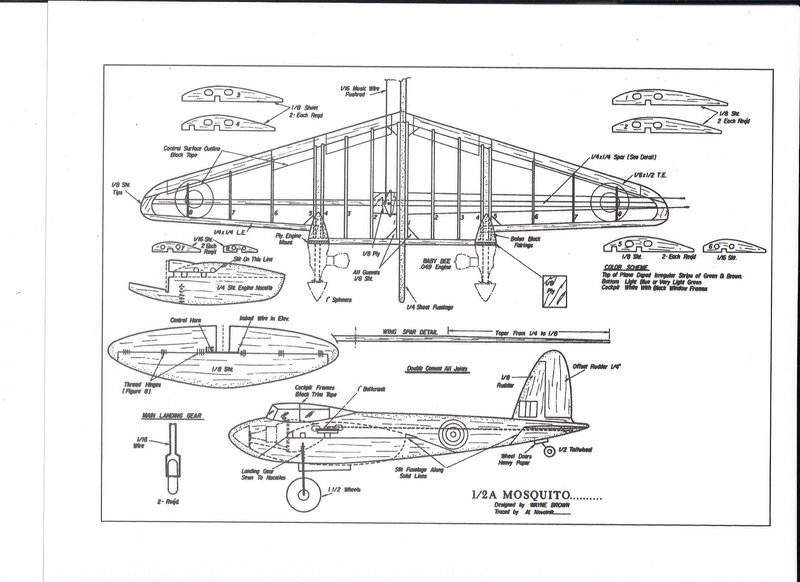
I thought about just mounting a couple of Cox .049's on it, but I have all these Enyas going to waste.
Bob
Some one else agrees with us on engine positions.

I thought about just mounting a couple of Cox .049's on it, but I have all these Enyas going to waste.
Bob

rsv1cox- Top Poster


Posts : 11250
Join date : 2014-08-18
Location : West Virginia
 Re: BH models Mosquito build
Me Toogetback wrote:I like this myself..
My guess is you're NOT using mufflers on these? Can you change the NVA so they both point up ? With this configuration i would use some tip weight ! And as far as the tank one tank duel feed from a T ,better chance they cut out the same time , Just my

akjgardner- Diamond Member


Posts : 1602
Join date : 2014-12-28
Age : 65
Location : Greensberg Indiana
Page 1 of 4 • 1, 2, 3, 4 
 Similar topics
» BHM Mosquito in MS-build
» East Build Models Commando
» Engines for Models by Berkeley Models PDF
» Twin 049 c/l Pics or plans
» Mosquito, finished
» East Build Models Commando
» Engines for Models by Berkeley Models PDF
» Twin 049 c/l Pics or plans
» Mosquito, finished
Page 1 of 4
Permissions in this forum:
You cannot reply to topics in this forum

 Rules
Rules


