Log in
Search
Latest topics
» Chocolate chip cookie dough.........by rsv1cox Today at 10:20 am
» Tee Dee .020 combat model
by rsv1cox Today at 10:07 am
» Free Flight Radio Assist
by rdw777 Today at 9:24 am
» My latest doodle...
by batjac Yesterday at 9:47 pm
» My N-1R build log
by roddie Yesterday at 8:50 pm
» Purchased the last of any bult engines from Ken Enya
by getback Yesterday at 12:05 pm
» Funny what you find when you go looking
by rsv1cox Wed Nov 20, 2024 3:21 pm
» Landing-gear tips
by 1975 control line guy Wed Nov 20, 2024 8:17 am
» Cox NaBOO - Just in time for Halloween
by rsv1cox Tue Nov 19, 2024 6:35 pm
» Canada Post strike - We are still shipping :)
by Cox International Tue Nov 19, 2024 12:01 pm
» Duende V model from RC Model magazine 1983.
by getback Tue Nov 19, 2024 6:08 am
» My current avatar photo
by roddie Mon Nov 18, 2024 9:05 pm
Cox Engine of The Month
Camera Pods/Attachments
Page 1 of 1
 Camera Pods/Attachments
Thought I'd post some photos of my camera pod installations for those of you feeling a need to put your cherished aircraft at risk with extra gadgetry!
This first one is the set-up I use with the rotating Key Fob camera and it's lightweight aluminum arrow shaft. You can greatly simplify this by omitting the servo, manually adjusting the camera in a fixed position, and then making multiple flights to get different angles.
This thing is really boiled down from some of the Rube Goldberg designs I tried early on. "Less is More"! You can reverse it's strap-down direction for shots from behind the wing, and depending on the planform of your plane, strap it to the fuselage or eppenage. To save time and frustration, you should shoot your first movies in the safety of your shop, to see what your taping ahead of time, since the camera has no viewfinder.
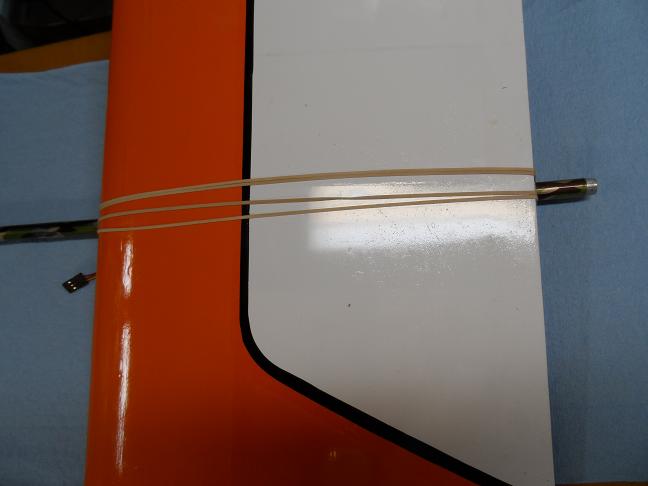
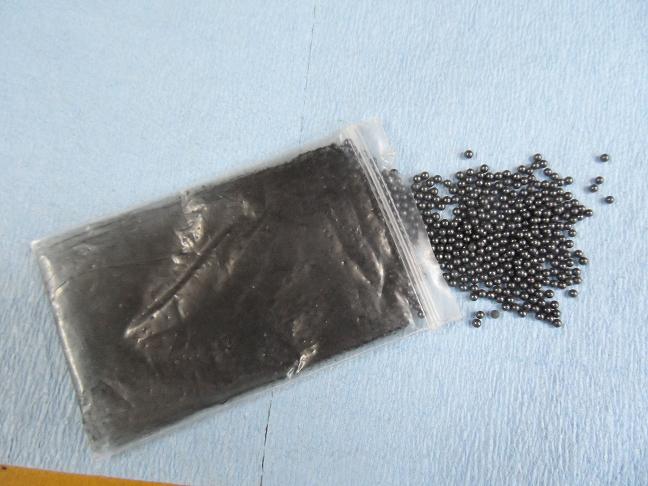
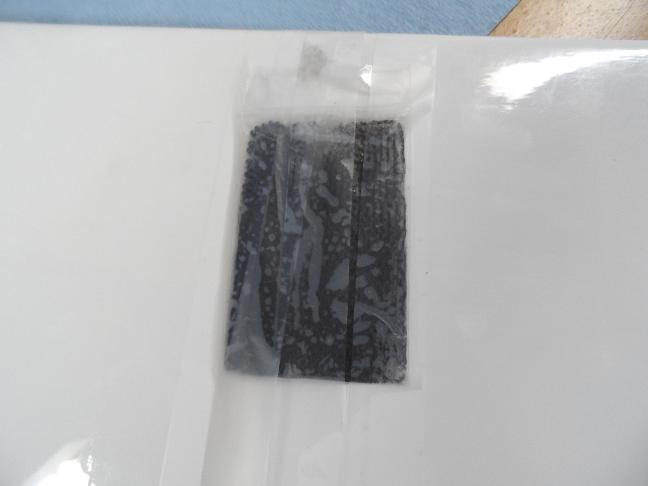
Above and beyond all else !!!! : Make SURE that your plane is re-ballasted to get the C.G. back home!!!! I use small ziplock packets and lead bird shot lead, scotch-taped to the opposite wing, tail, or wherever it's needed.
I think the photos pretty much explain the whole deal, but I'd be glad to try to answer any questions if you want to try this.
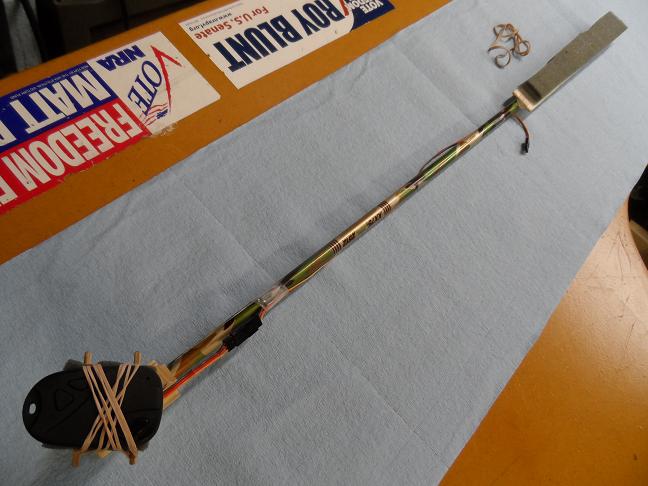
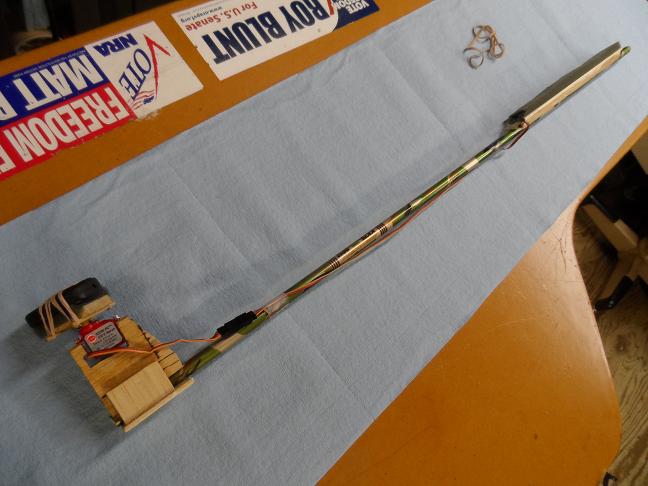
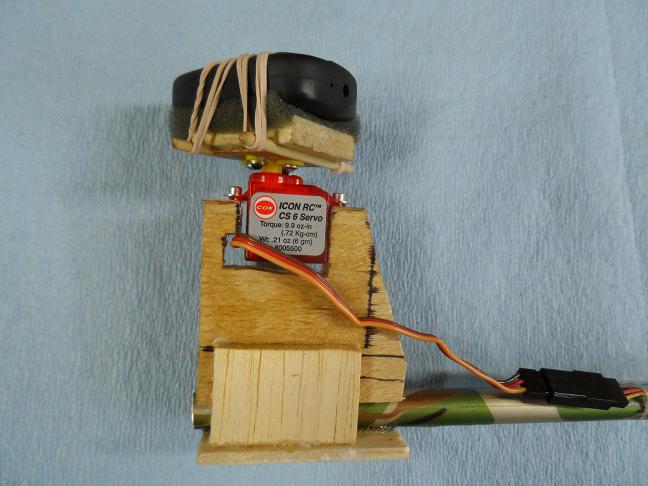
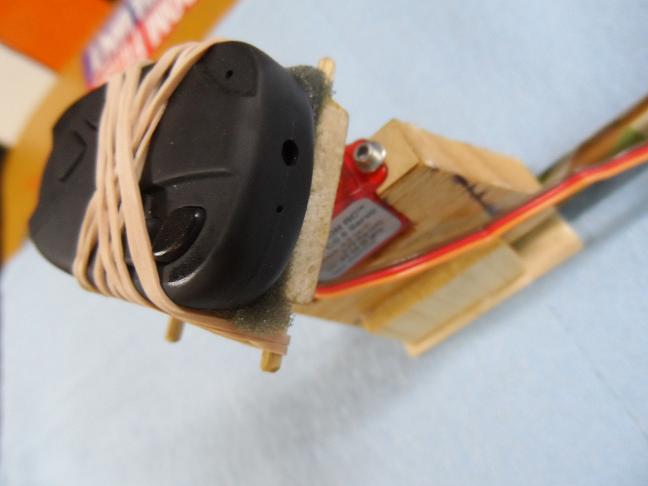
You can run a "Safety Thread" through the Key Fob hole and attach it to the arrow shaft, just in case the servo neck or rubber bands break, but I haven't had this happen...yet.
Lastly...KEEP IN MIND....that you're adding another layer of required attention to your flying, and distractions can lead you to sitting in the front yard, hoping someone found the sailplane that you launched with it's radio still turned off! ALWAYS do a final control check before launch to make sure your creation is listening to you!
The author shall not be held responsible for flyaways, power outages, vice-squad arrests, or gunfire resulting from use/abuse of this information!!!
This first one is the set-up I use with the rotating Key Fob camera and it's lightweight aluminum arrow shaft. You can greatly simplify this by omitting the servo, manually adjusting the camera in a fixed position, and then making multiple flights to get different angles.
This thing is really boiled down from some of the Rube Goldberg designs I tried early on. "Less is More"! You can reverse it's strap-down direction for shots from behind the wing, and depending on the planform of your plane, strap it to the fuselage or eppenage. To save time and frustration, you should shoot your first movies in the safety of your shop, to see what your taping ahead of time, since the camera has no viewfinder.
Above and beyond all else !!!! : Make SURE that your plane is re-ballasted to get the C.G. back home!!!! I use small ziplock packets and lead bird shot lead, scotch-taped to the opposite wing, tail, or wherever it's needed.
I think the photos pretty much explain the whole deal, but I'd be glad to try to answer any questions if you want to try this.


You can run a "Safety Thread" through the Key Fob hole and attach it to the arrow shaft, just in case the servo neck or rubber bands break, but I haven't had this happen...yet.


Lastly...KEEP IN MIND....that you're adding another layer of required attention to your flying, and distractions can lead you to sitting in the front yard, hoping someone found the sailplane that you launched with it's radio still turned off! ALWAYS do a final control check before launch to make sure your creation is listening to you!
The author shall not be held responsible for flyaways, power outages, vice-squad arrests, or gunfire resulting from use/abuse of this information!!!
Last edited by Kim on Fri Jul 13, 2012 11:43 am; edited 5 times in total

Kim- Top Poster


Posts : 8625
Join date : 2011-09-06
Location : South East Missouri
 Re: Camera Pods/Attachments
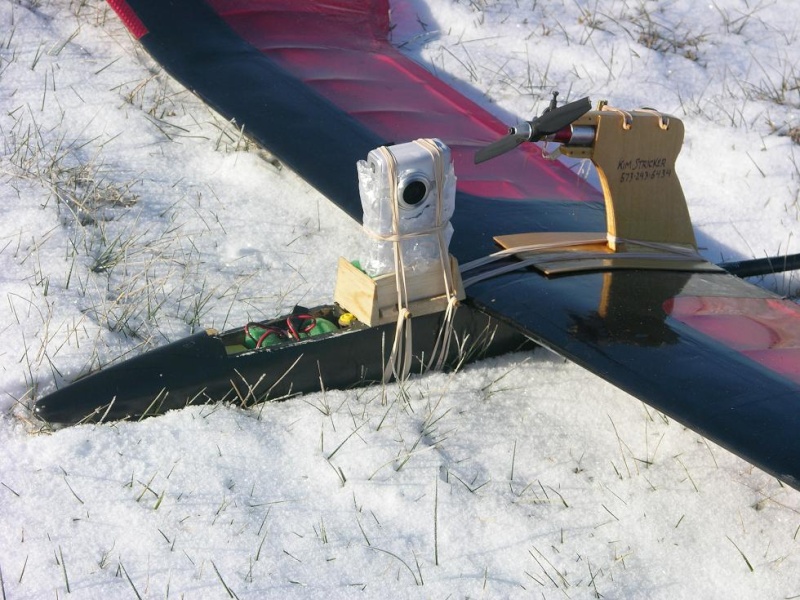
To carry the much heavier HD "Flip" style cameras, I use a simple tray and retain the camera with #33 rubberbands:
A video frame from one of these cameras can be converted to a pretty good photo:


A video frame from one of these cameras can be converted to a pretty good photo:


Kim- Top Poster


Posts : 8625
Join date : 2011-09-06
Location : South East Missouri
 Similar topics
» 2015 bucket list - I made it!!
» Camera needed
» Ringmaster with onboard camera
» Camera question for Kim
» Getting Ready for the September 20th "International Cox PT-19 Fly It If You Got It Day"!
» Camera needed
» Ringmaster with onboard camera
» Camera question for Kim
» Getting Ready for the September 20th "International Cox PT-19 Fly It If You Got It Day"!
Page 1 of 1
Permissions in this forum:
You cannot reply to topics in this forum

 Rules
Rules


