Log in
Search
Latest topics
» Roger Harris revisitedby rsv1cox Today at 10:46 am
» Duende V model from RC Model magazine 1983.
by MauricioB Today at 10:29 am
» A Little 400 Mile Hop for Some Memory Lane Stuff, and to Hit a Swap Meet.
by getback Today at 7:48 am
» Free Flight Radio Assist
by getback Today at 6:39 am
» Happy 77th birthday Andrew!
by Kim Yesterday at 9:18 am
» Promote the forum with flyers!
by Admin Yesterday at 1:35 am
» Engine choice
by GallopingGhostler Mon Nov 25, 2024 4:03 pm
» My N-1R build log
by roddie Mon Nov 25, 2024 9:19 am
» Night flying at Walters RC park
by 1975 control line guy Sun Nov 24, 2024 7:29 pm
» Cox films/videos...
by GallopingGhostler Sun Nov 24, 2024 7:07 pm
» Cox 020 PeeWee rebuild questions
by LooseSpinner99 Sun Nov 24, 2024 6:13 pm
» Did you spot the Cox engine in this NASA research video?
by balogh Sun Nov 24, 2024 5:08 pm
Cox Engine of The Month
New P-38 profile scratch build log
Page 3 of 5
Page 3 of 5 •  1, 2, 3, 4, 5
 Re: New P-38 profile scratch build log
getback wrote:Looks like you got it all figured out , and coming along Nicely , I have never tried those kind of hinges but do have them .. I got to get on my mess pretty soon again the weather is going to bee good for a little while here maybe hot at 80 FI got to put a water pump on my truck now and the tengien idler has a prob. on and on got the bees away from the log splitter and now need to fix the gas leak and Oh yea the trimmer don't want to run right Flooding .. Home sweet Home ... Did get the elect. fixed 1 wire (my wire) outside replaced $210 have a nice day !!

Sounds like a typical day at my house too Eric.

rsv1cox- Top Poster


Posts : 11260
Join date : 2014-08-18
Location : West Virginia
 Re: New P-38 profile scratch build log
Attached the landing gear this afternoon and wanted to check weight and balance.

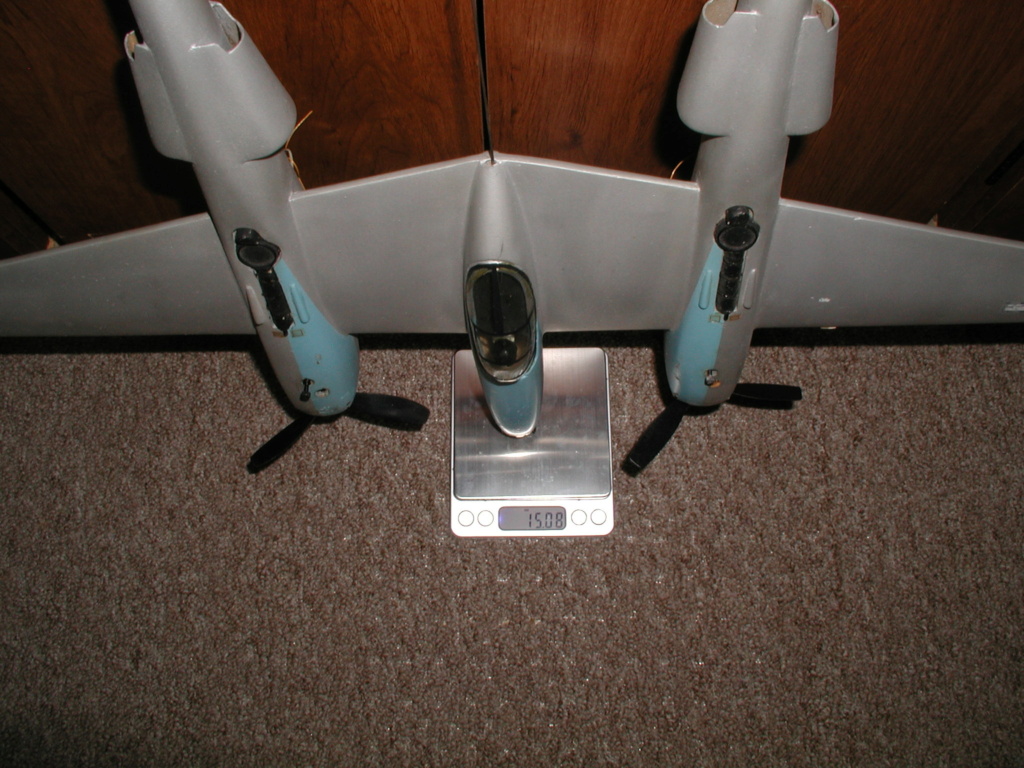
1508/1107
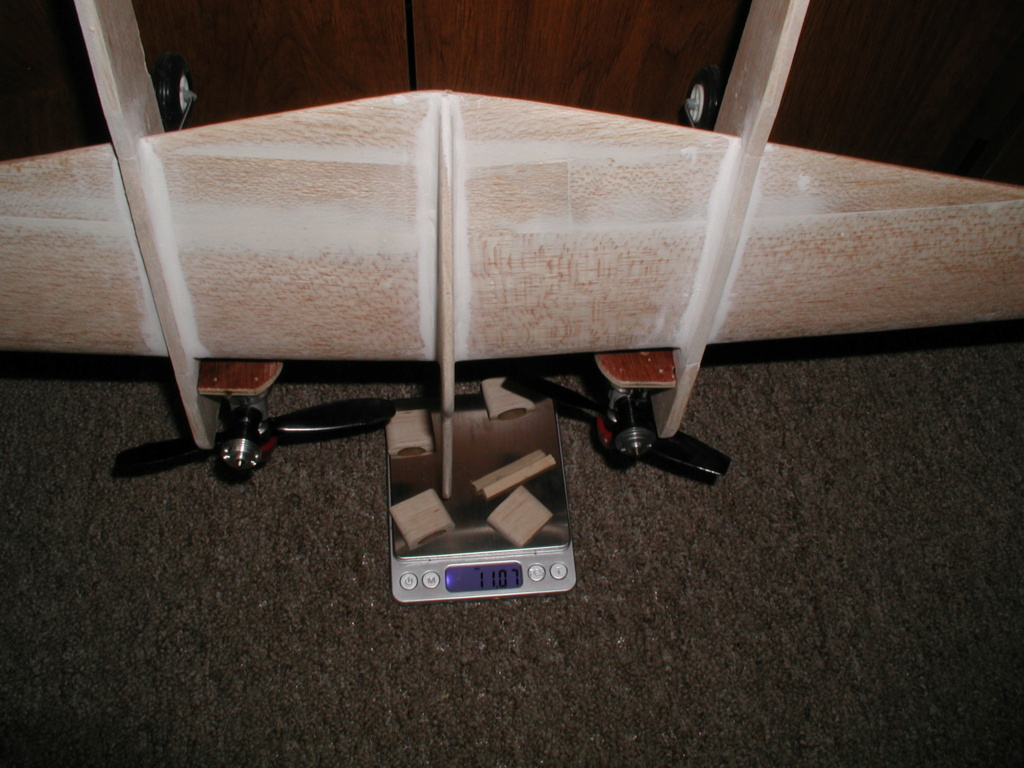

Hard to say with a tapered wing but I think the balance will be ok. Bigger plane weighs less but still must be painted. (Babe Bee's vice Golden Bees) The plane was built by eyeball. I can't remember pulling a tape on anything. and.........my eyeball isn't that good. I might have got the wing to horizontal stab moment a little long but that was intentional.
Control line/bellcrank hook-up.......? I have no idea.
Still, much to do.


1508/1107


Hard to say with a tapered wing but I think the balance will be ok. Bigger plane weighs less but still must be painted. (Babe Bee's vice Golden Bees) The plane was built by eyeball. I can't remember pulling a tape on anything. and.........my eyeball isn't that good. I might have got the wing to horizontal stab moment a little long but that was intentional.
Control line/bellcrank hook-up.......? I have no idea.
Still, much to do.

rsv1cox- Top Poster


Posts : 11260
Join date : 2014-08-18
Location : West Virginia
 Re: New P-38 profile scratch build log
Looks like you're making excellent headway. I like your engine mounts -- they really let you maintain a good profile for the booms.
As we tend to say around here, "Boy, you done good!".
a--
As we tend to say around here, "Boy, you done good!".
a--
 Re: New P-38 profile scratch build log
andrew wrote:Looks like you're making excellent headway. I like your engine mounts -- they really let you maintain a good profile for the booms.
As we tend to say around here, "Boy, you done good!".
a--
Thanks Andrew, and thank Duane for the mounts it was his idea and I really like it. Hides the engines a bit and gets them slightly more inboard. Not a bad idea either.
Bob

rsv1cox- Top Poster


Posts : 11260
Join date : 2014-08-18
Location : West Virginia
 Re: New P-38 profile scratch build log
I'm still giving you the credit.  .....were it not for you I would never have known about it. Love your plane and engine position, cylinder to the outside and the needle through the fuselage. I still have the option of positioning the engines cylinder up or down.. Thinking about that.
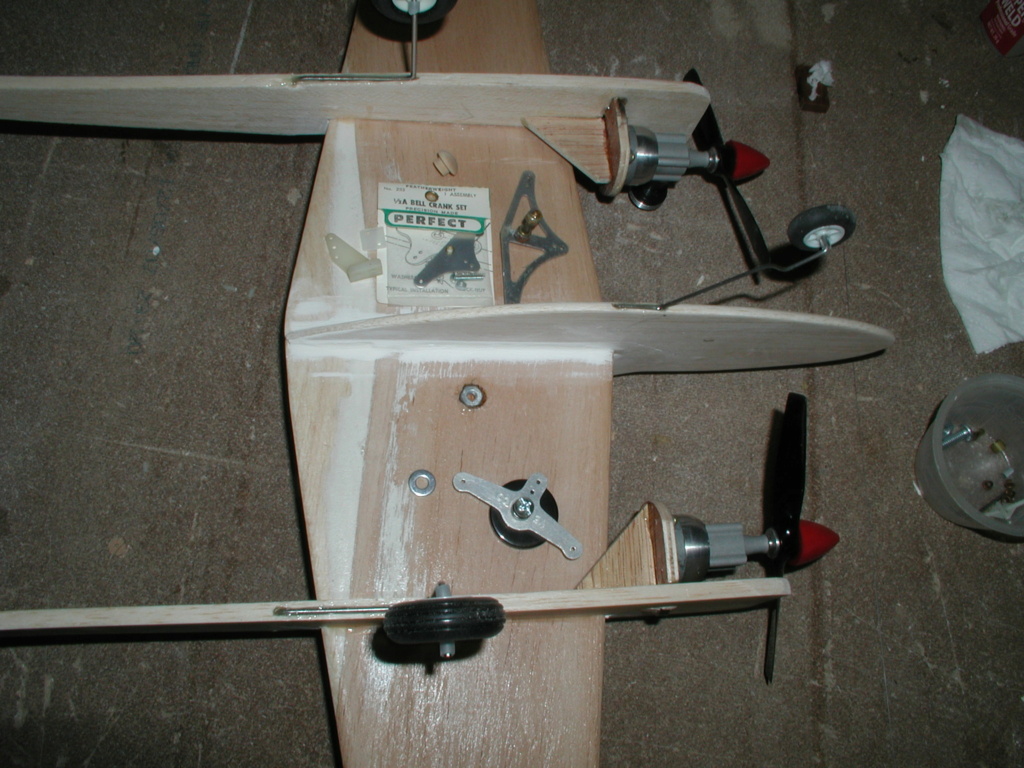
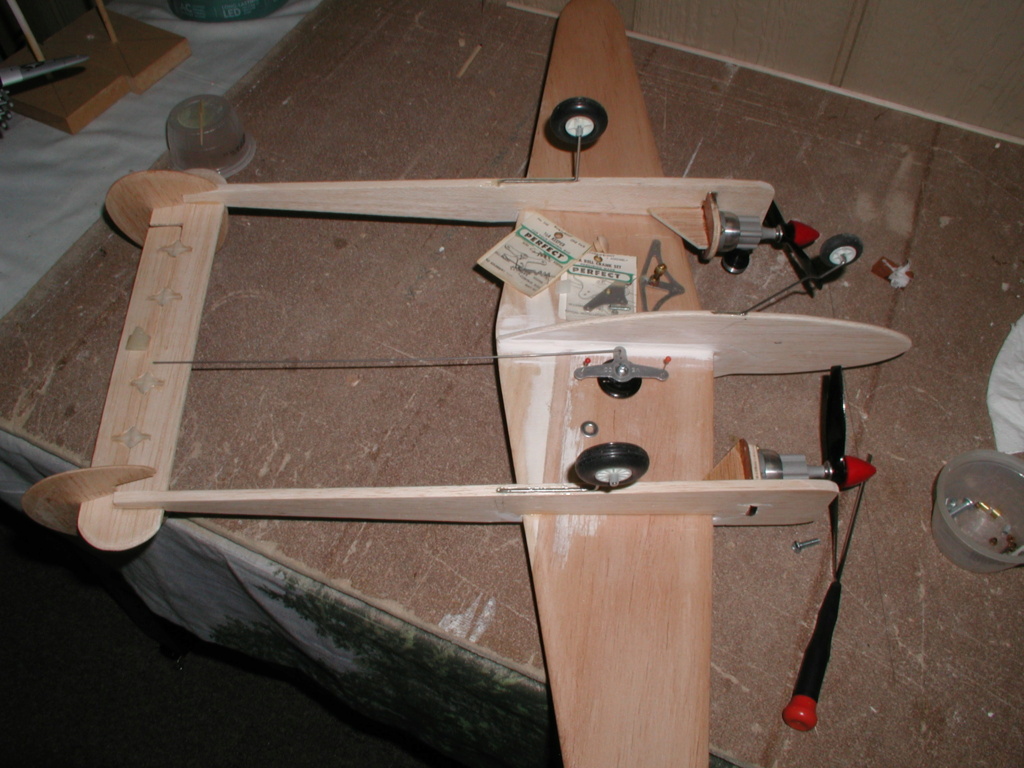
Ken is the authority on bellcrank position and I try to follow his advice. My attempt but I'm sure he would have done it differently. Got it all set only to find the control rod (12") to short. Balsa carved to the shape of the nut and CA'd in. I will cement the black base over it. Pivot had to be bushed but there is still some slop.
Had a choice of a 1/2A bellcrank or a large lightened example. Went with the medium sized Veco crank.


rsv1cox- Top Poster


Posts : 11260
Join date : 2014-08-18
Location : West Virginia
 Re: New P-38 profile scratch build log
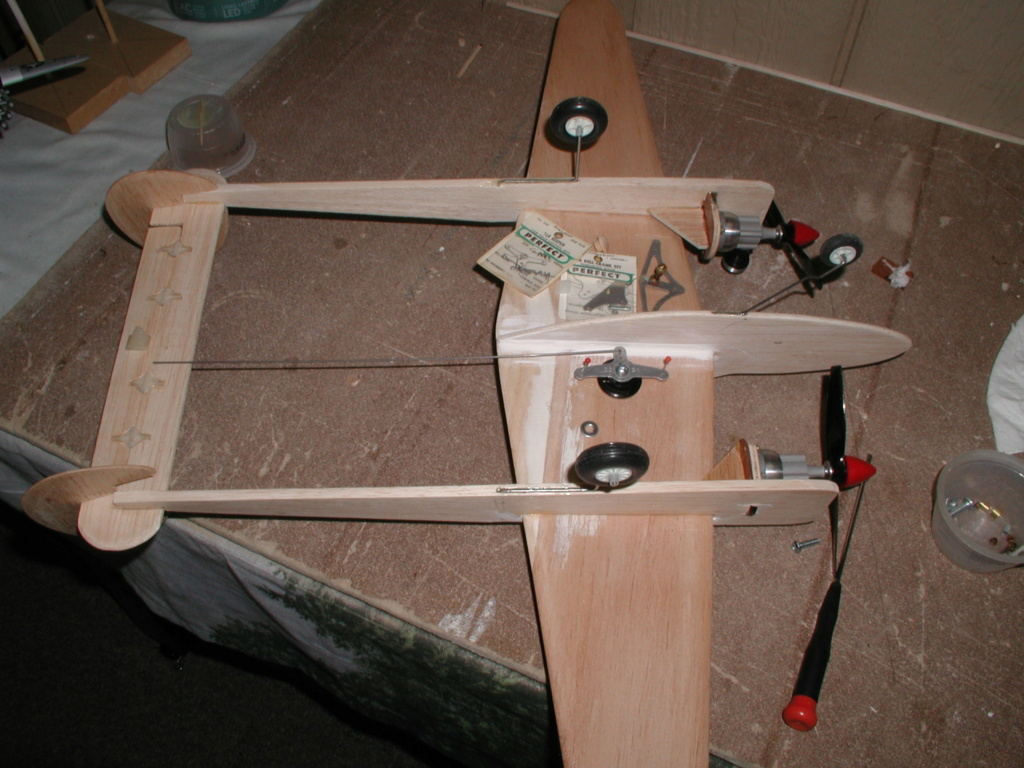
Robert, I think that there's too much distance between the bellcrank and horn to use an unsupported pushrod. Even with a 1/16" dia. music-wire rod that's long enough; would be rolling the dice.. to assume that it wouldn't flex under load.
A possible solution for a pushrod might be to use a "Sullivan" Gold-N-Rod from kit (#503) or a similar type. This would be an unusual application.. but it's one that I would try. It's basically a plastic rod running inside a plastic tube. The inner-rod is hollow.. and accepts a 2-56 threaded stud for a clevis. A stud-driver tool, studs and clevises are included in the Sullivan kit which has X2 SETS of 36" long rods. Cut to desired length and install. The Sullivan kit is much more than you need... but you could use the leftover stock for other model project linkages.
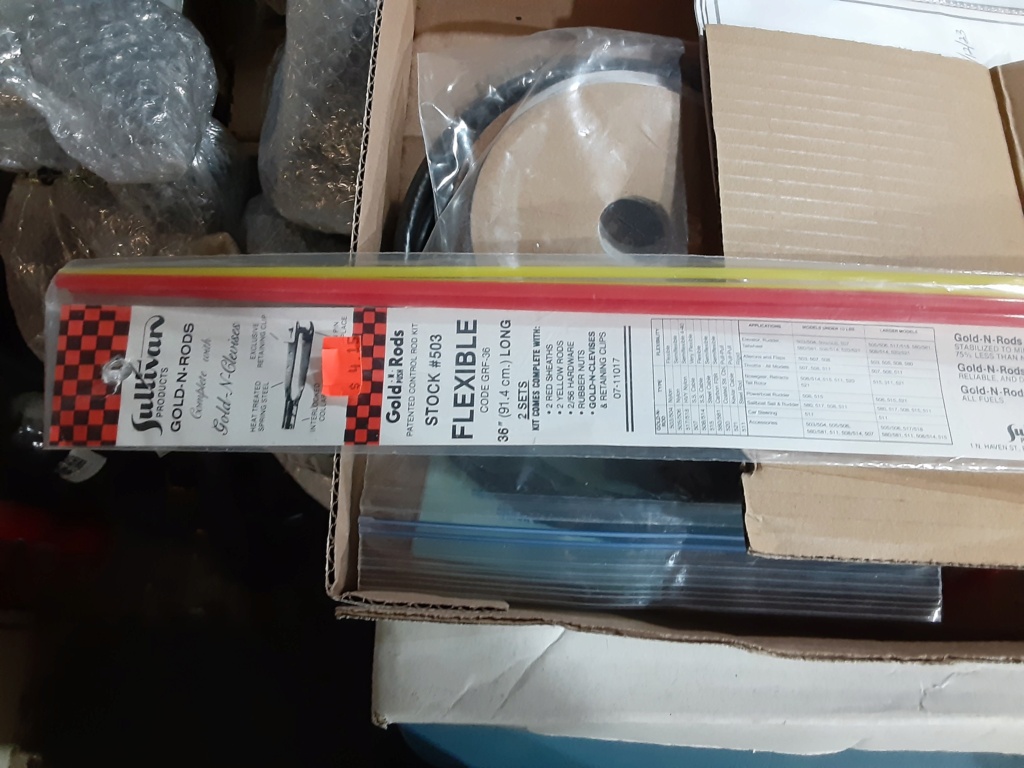
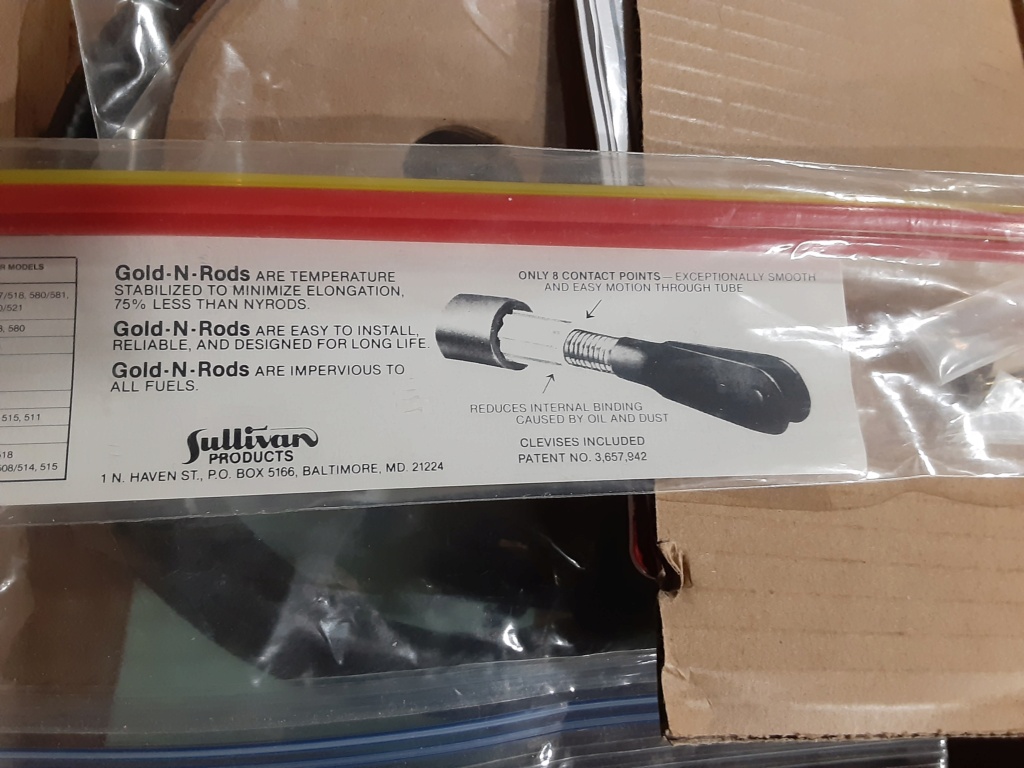
The outer-tube would be rigidly fastened to the stabilizer and wing. The inner plastic rod is "star-shaped" (similar to some of the weed-whacker/string-trimmer line) to minimize binding from debris entering the outer tube.
I haven't tried this method Robert.. so I can't say if it will work for this application.. but if it was "me"... I would try using epoxy to fasten/anchor the outer-tube to the stab. and wing. You'll obviously need to dry-fit the assembly.. to make sure that you have enough "throw" with both clevises in position on the elevator horn and bellcrank.
 Re: New P-38 profile scratch build log
I share your concern roddie and have been working on a solution. The control rod is already too short. I called my local hobby shop asking if they stocked music wire, they don't. So out of necessity I added a small section to one end which will be crimped and soldered.
Thought - why not just also add a slighty larger diameter wire that would traverse the center section of the control rod stiffening it. In total it covers more than half the length of the rod. I think it will work but I will test it well before flight.
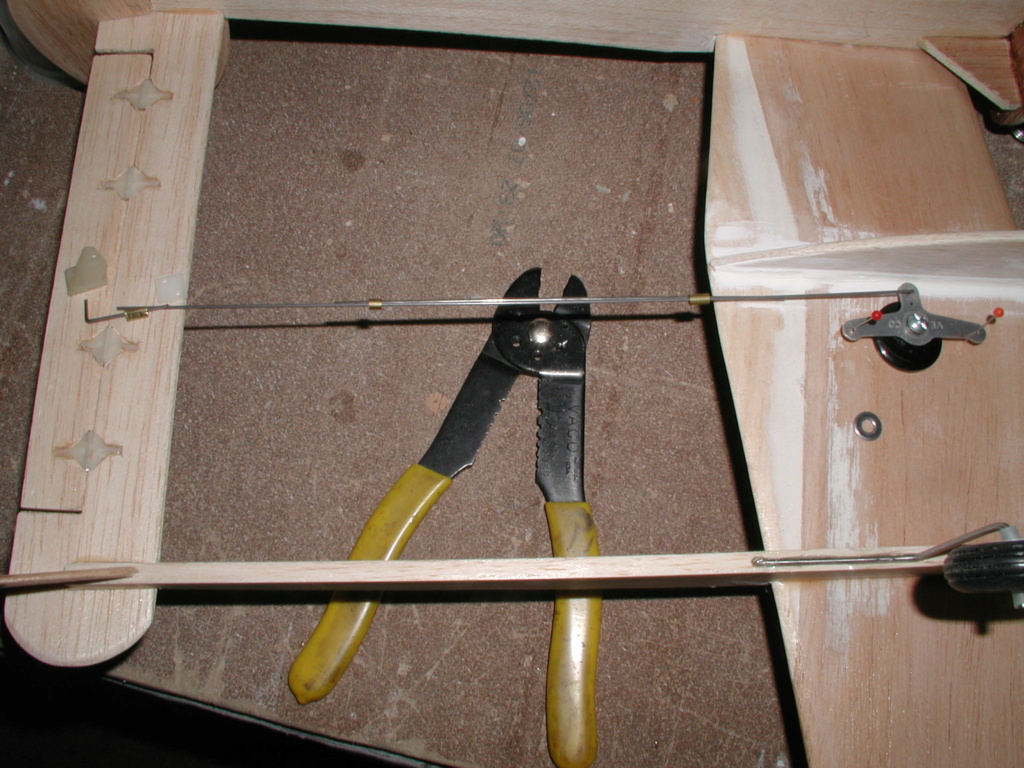

My original used the same diameter rod but it had a shorter travel and was somewhat constrained by the trailing edge of the pod. Didn't present a problem in flight.
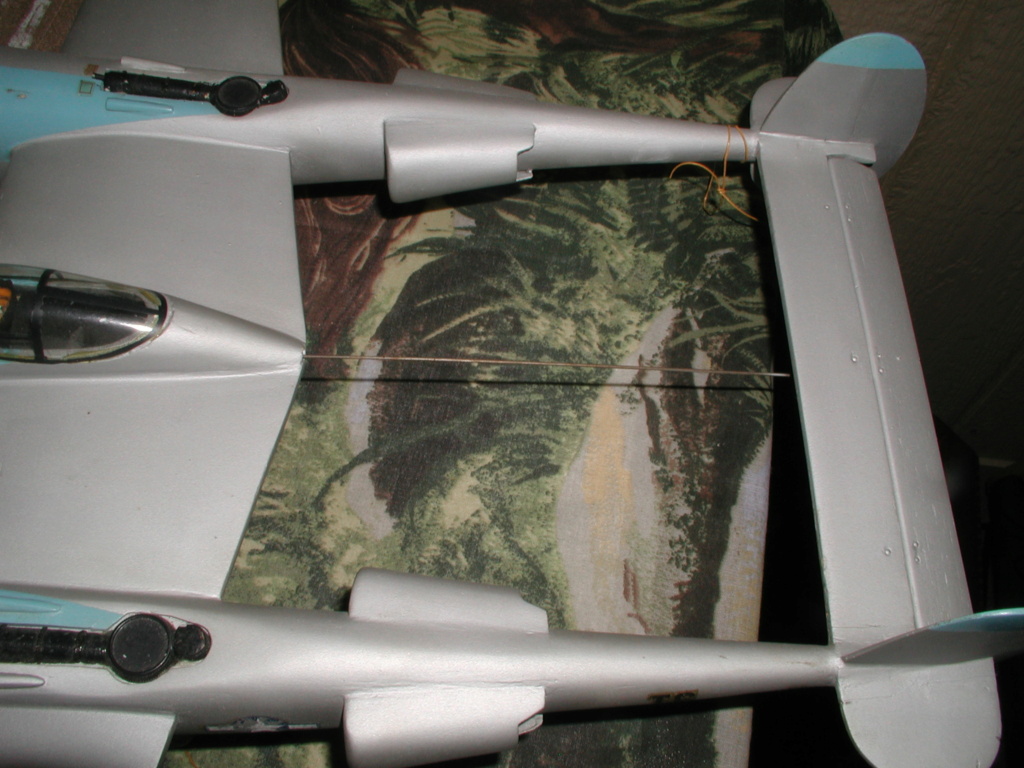
Edit...
Thanks again roddie. A bell just went off. I have a package of that Sullivan Golden-Rod. I bet it has just what I need.
Thought - why not just also add a slighty larger diameter wire that would traverse the center section of the control rod stiffening it. In total it covers more than half the length of the rod. I think it will work but I will test it well before flight.


My original used the same diameter rod but it had a shorter travel and was somewhat constrained by the trailing edge of the pod. Didn't present a problem in flight.

Edit...
Thanks again roddie. A bell just went off. I have a package of that Sullivan Golden-Rod. I bet it has just what I need.

rsv1cox- Top Poster


Posts : 11260
Join date : 2014-08-18
Location : West Virginia
 Re: New P-38 profile scratch build log
Hey Robert, another idea would be to use a length (maybe 8"??) of 3/32" brass or copper tube with your 1/16" wire silver-soldered into each end.. with either "Z" or "L" bends for the elevator horn and bellcrank. You could cut your 12" piece into two 6" sections.. or make them shorter to save some weight. The K & S seamless brass tube is pretty rigid.
 Re: New P-38 profile scratch build log
Over the years I have used many of your ideas in my builds. And, what I'm using is a variation of your idea above. Just cutoffs crimped and soldered into place. As is, at full extension there is no bending of the rod.
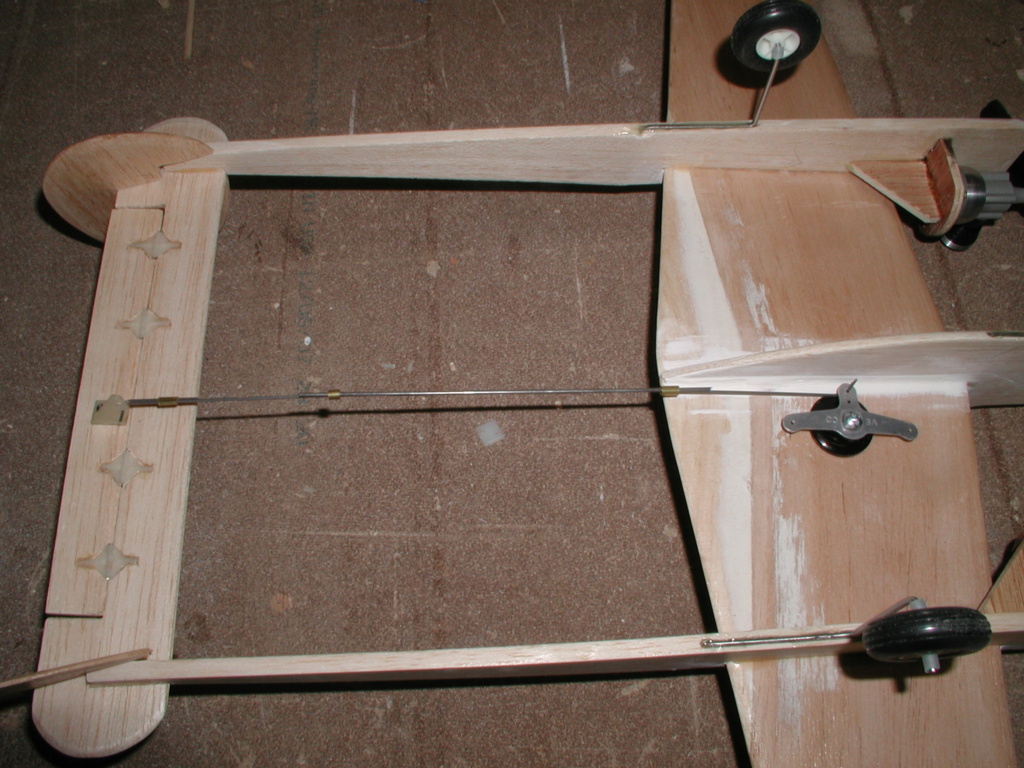
I just tried it by temporarily dropping some C/A onto the extension and the stiffening bar. Works great. Later I wlll crimp the brass and solder. Everything comes off to prime and paint anyway. L angles and keepers, I can't do decent Z's.
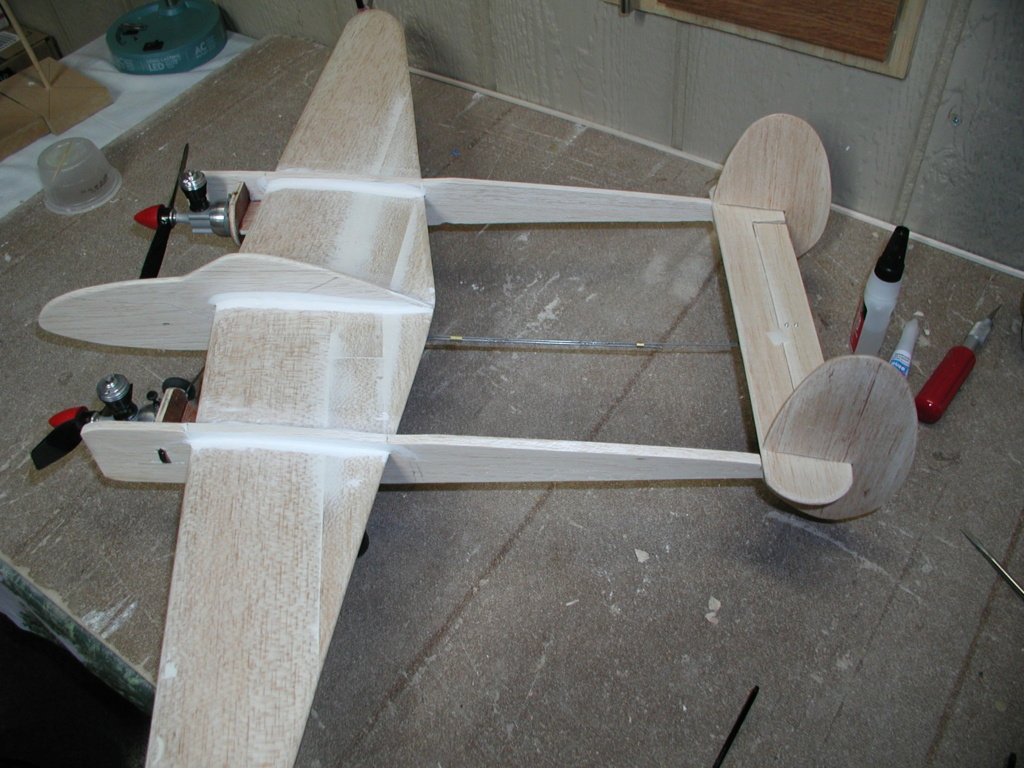
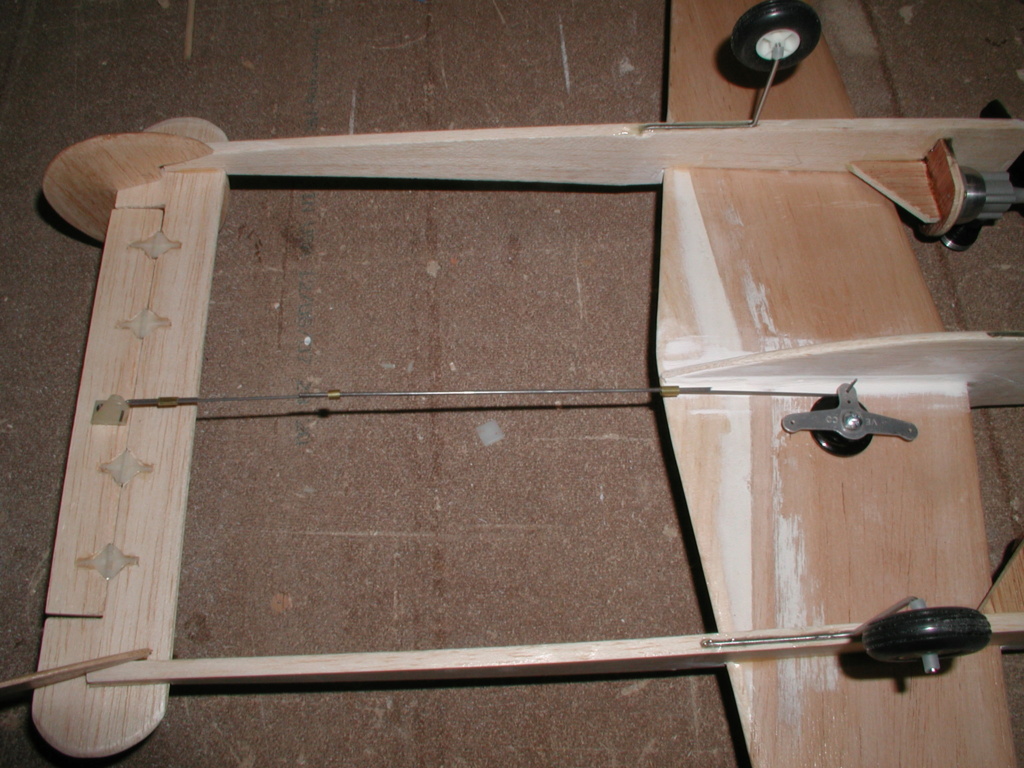

Also, I eyeballed the fins too large and it's been bothering me. Tomorrow I'm heading to the woodworking shop and sanding them down a bit using the Craftsman disk sander. Brutal but it saves time and I think will do a better job.
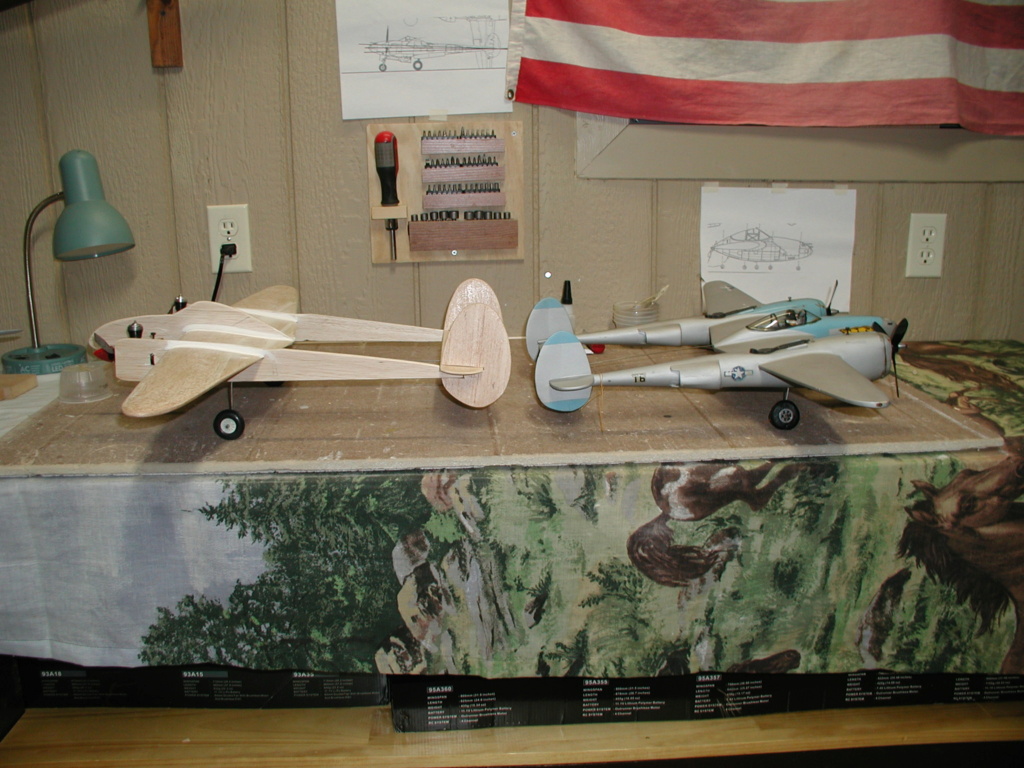

Still debating whether or not to add deflection to the fins.............???????? I set the engine mounts at zero/zero, (E/W - N/S) but I can always add shims under the engines mounting screws.
I am a little worried about the power of the Babe Bee's flying this larger but lighter plane. I might have to strap some Black Widows in there.
I just tried it by temporarily dropping some C/A onto the extension and the stiffening bar. Works great. Later I wlll crimp the brass and solder. Everything comes off to prime and paint anyway. L angles and keepers, I can't do decent Z's.


Also, I eyeballed the fins too large and it's been bothering me. Tomorrow I'm heading to the woodworking shop and sanding them down a bit using the Craftsman disk sander. Brutal but it saves time and I think will do a better job.


Still debating whether or not to add deflection to the fins.............???????? I set the engine mounts at zero/zero, (E/W - N/S) but I can always add shims under the engines mounting screws.
I am a little worried about the power of the Babe Bee's flying this larger but lighter plane. I might have to strap some Black Widows in there.

rsv1cox- Top Poster


Posts : 11260
Join date : 2014-08-18
Location : West Virginia
 Re: New P-38 profile scratch build log
I have zero offset in my rudder/fins and zero offset in my engine mounts. I "do" have a slight rearward "rake" in my lead-out guide location out near the inboard wingtip. Their spaced apart; the same 2.125" as the Sig nylon bellcrank that I'm using. I will use that same spacing at the handle.. which is important.
You definitely DON'T want your fins angled the way that they are in these photos.. (yawing the model inward-circle)
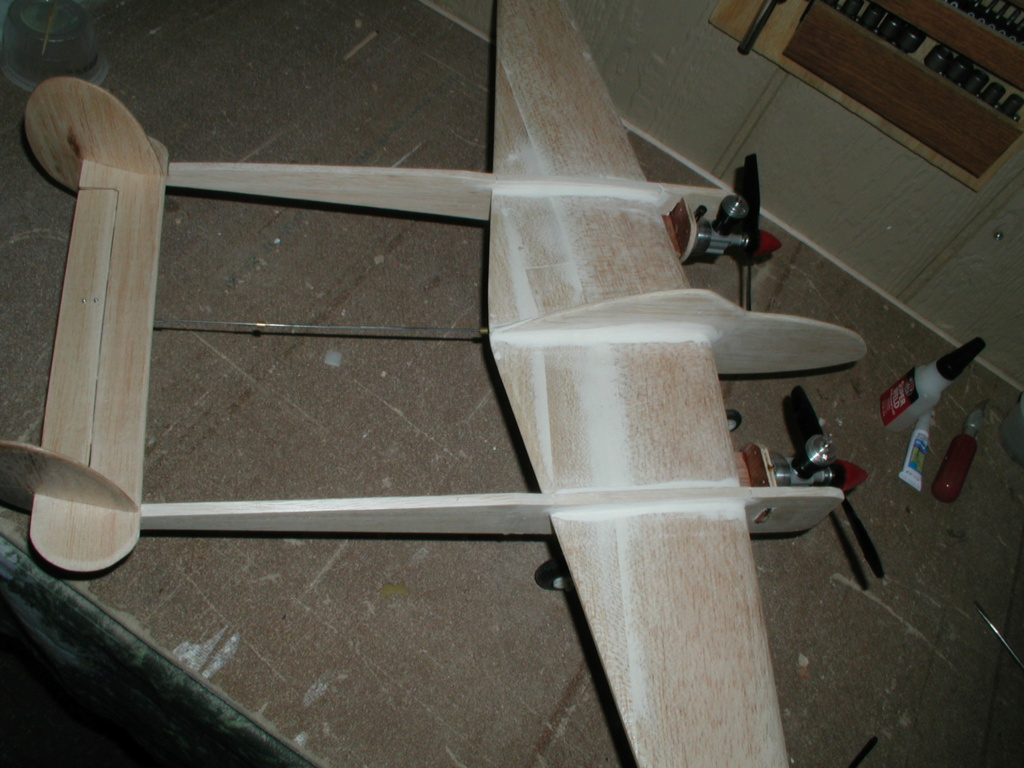
Centrifugal force alone helps to promote line-tension. As you mentioned; you can apply some outboard thrust-offsets to the engines for peace of mind on the initial 1st flights.
You definitely DON'T want your fins angled the way that they are in these photos.. (yawing the model inward-circle)


Centrifugal force alone helps to promote line-tension. As you mentioned; you can apply some outboard thrust-offsets to the engines for peace of mind on the initial 1st flights.
 Re: New P-38 profile scratch build log
I hadn't cemented them in yet roddie. I still had sanding to do and being ham handed as I tend to be I didn't want to break them as they are quite vunerable.
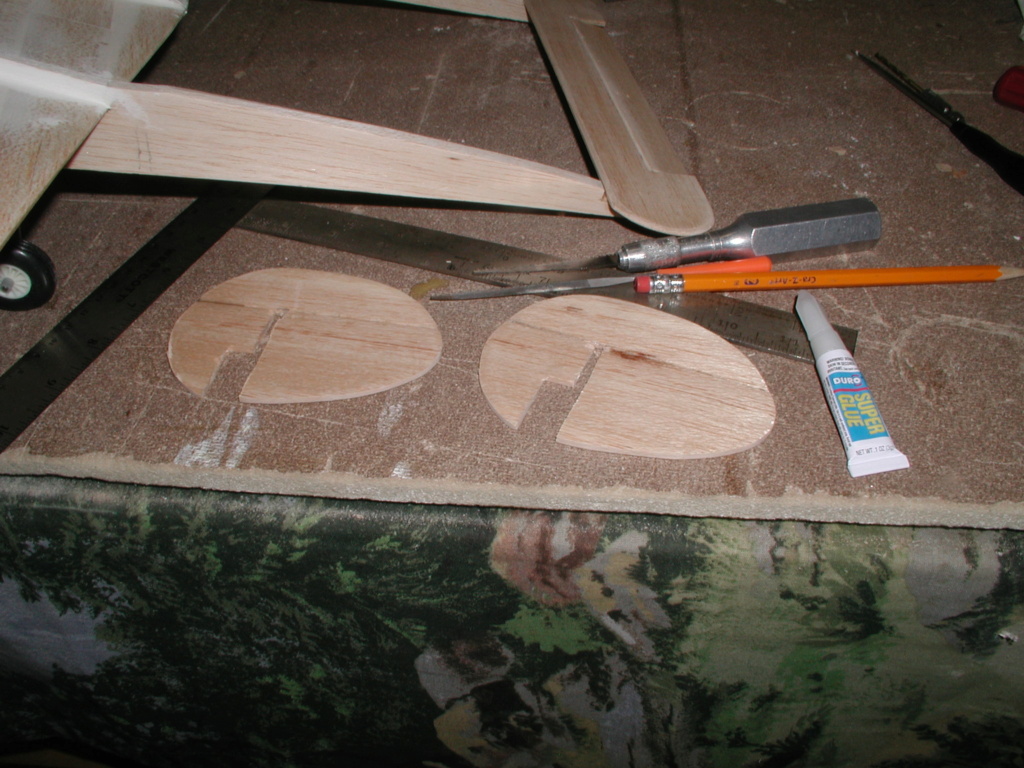
Thought long and hard, but I wound up putting in a little deflection. Not much, and I don't cut them all the way through. I used a saw blade, not the fine narrow one found on most hobby saws and only cut the balsa half way through, then I angle with a tri square jewelers file and break over a narrow device, this time a metal rule.
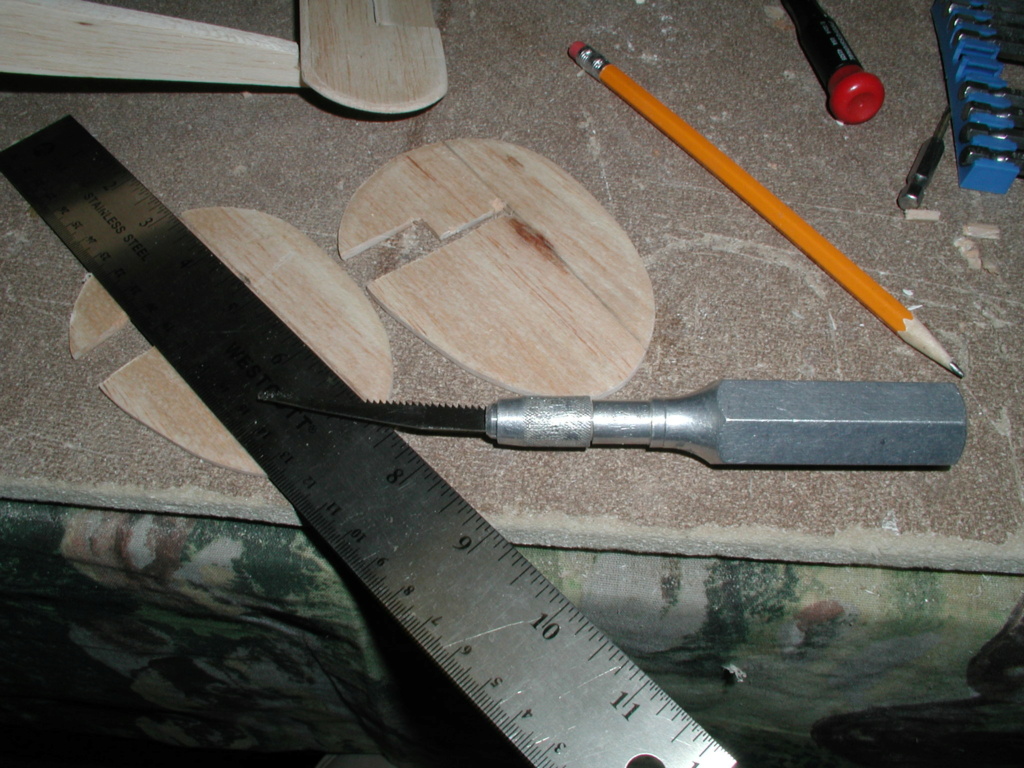
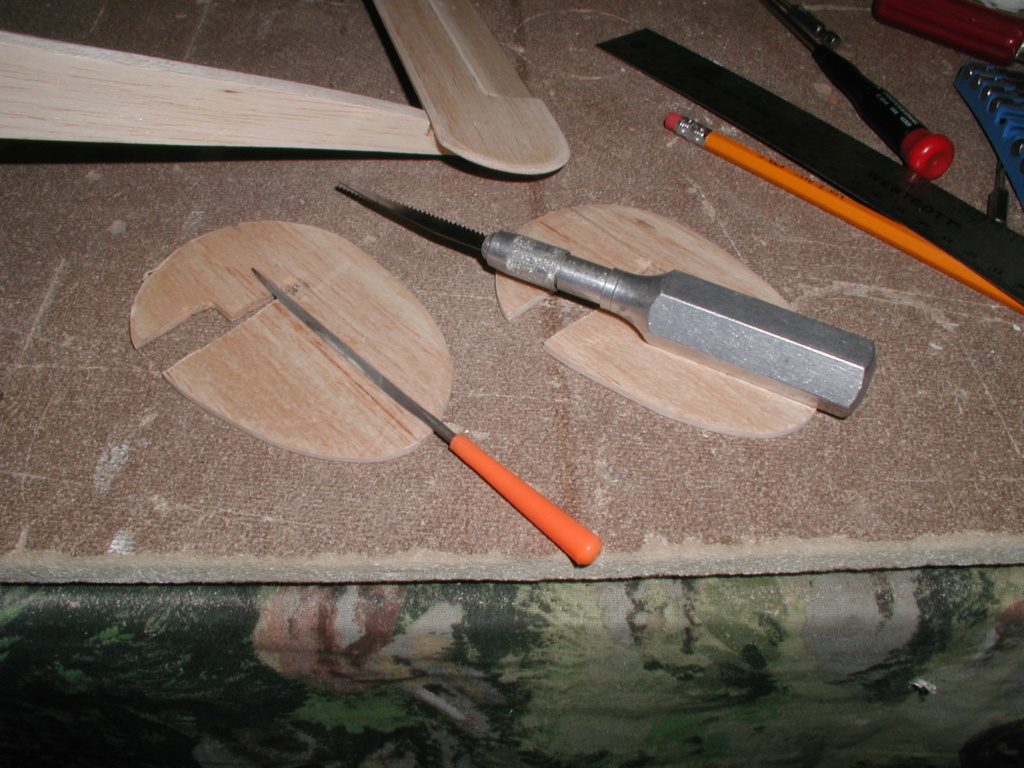
You can set the deflection by positioning the device in close (max deflection) or on the outer edge - minimum deflection. Then pushing down on the vertical stab snap the rudder into position. Done right it gives a nice little snap.
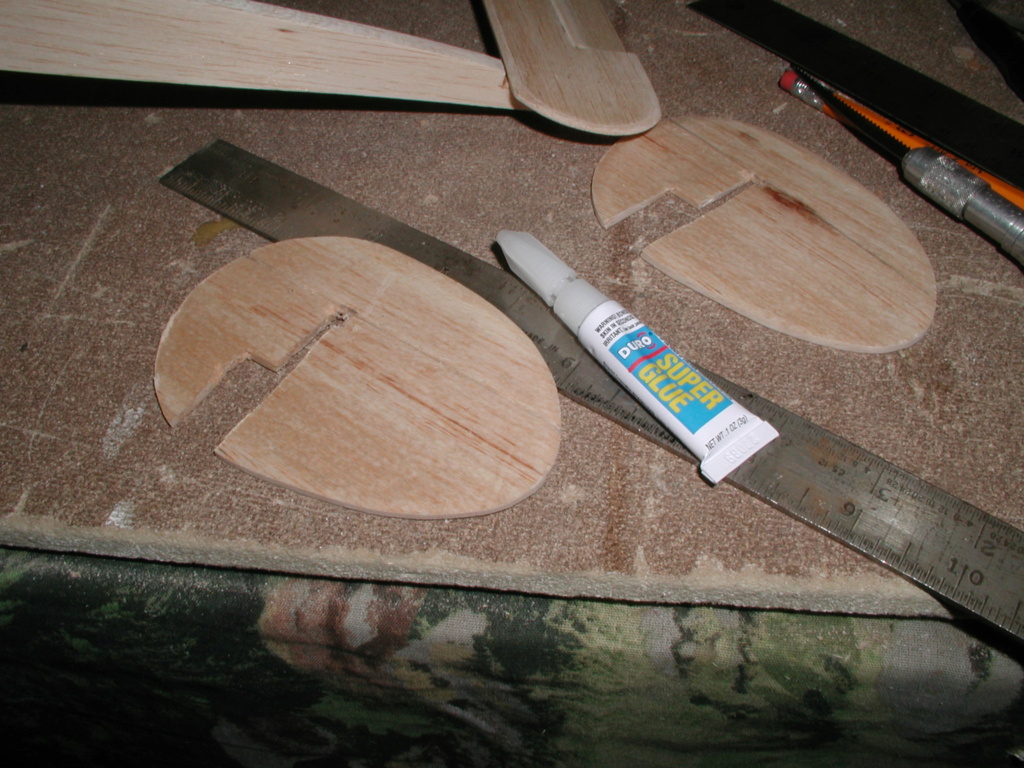
Works well and there is no seam on the opposite side as the two sides fold into the groove made by the tri-square file. While I have it split I use CA to secure the angle then back it up with carpenters glue evened out with a finger.
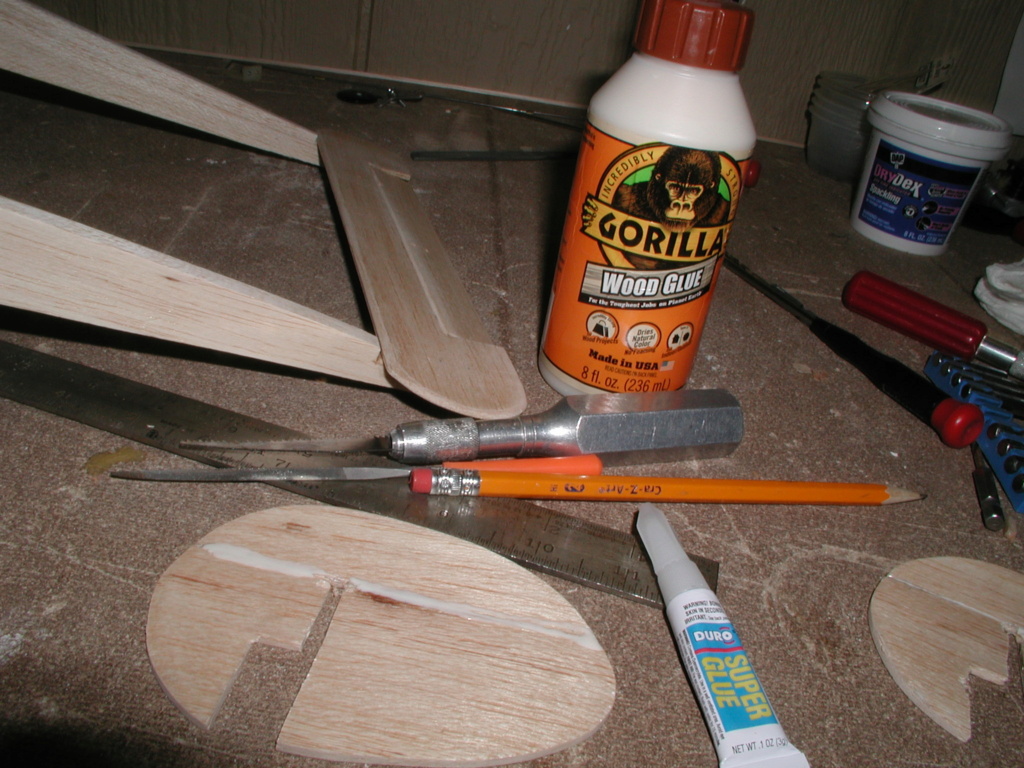
I think the CA would hold it alone, but I feel more comfortable with the glue backing it up, besides it acts a a filler.
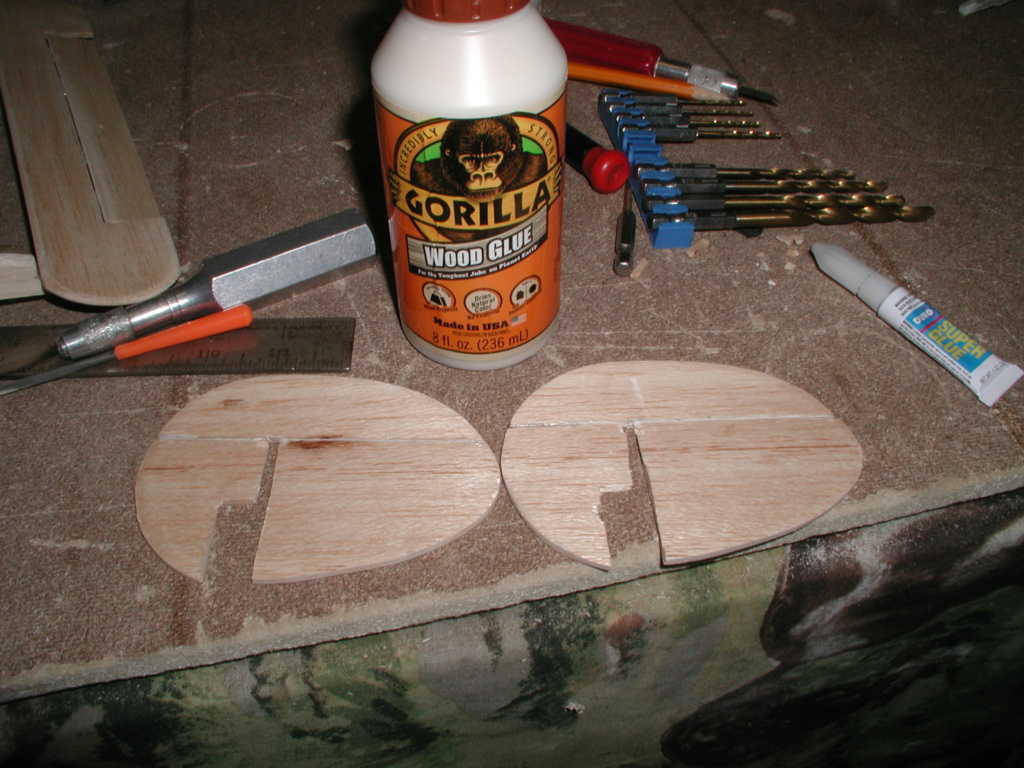
Edit add:
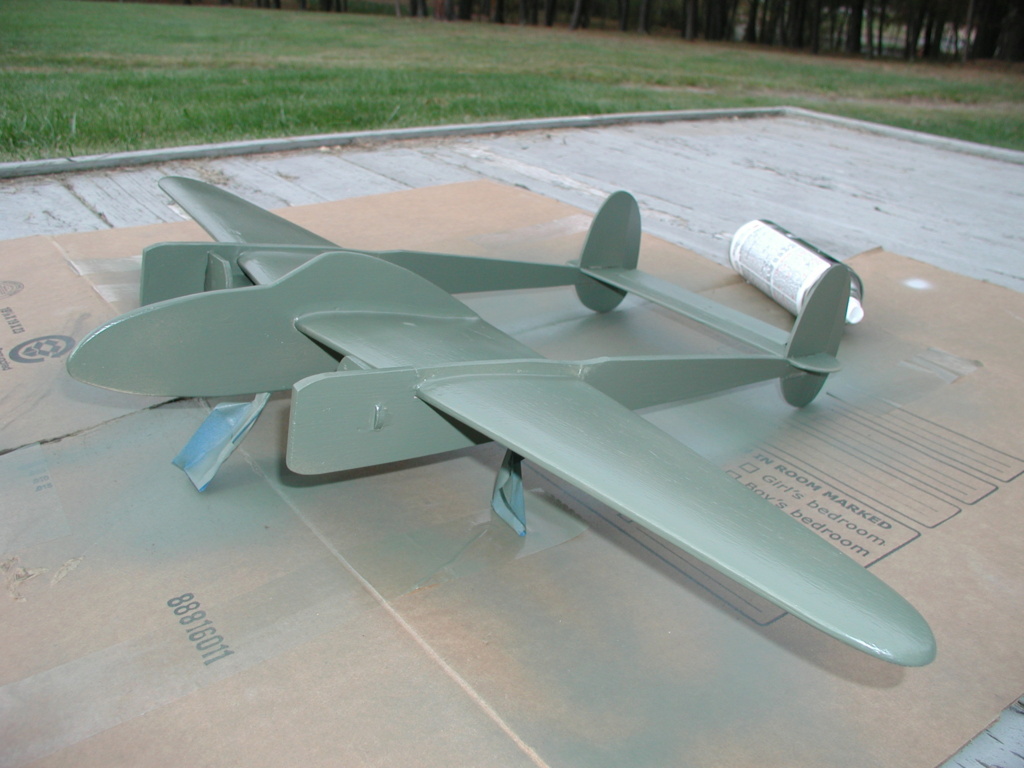
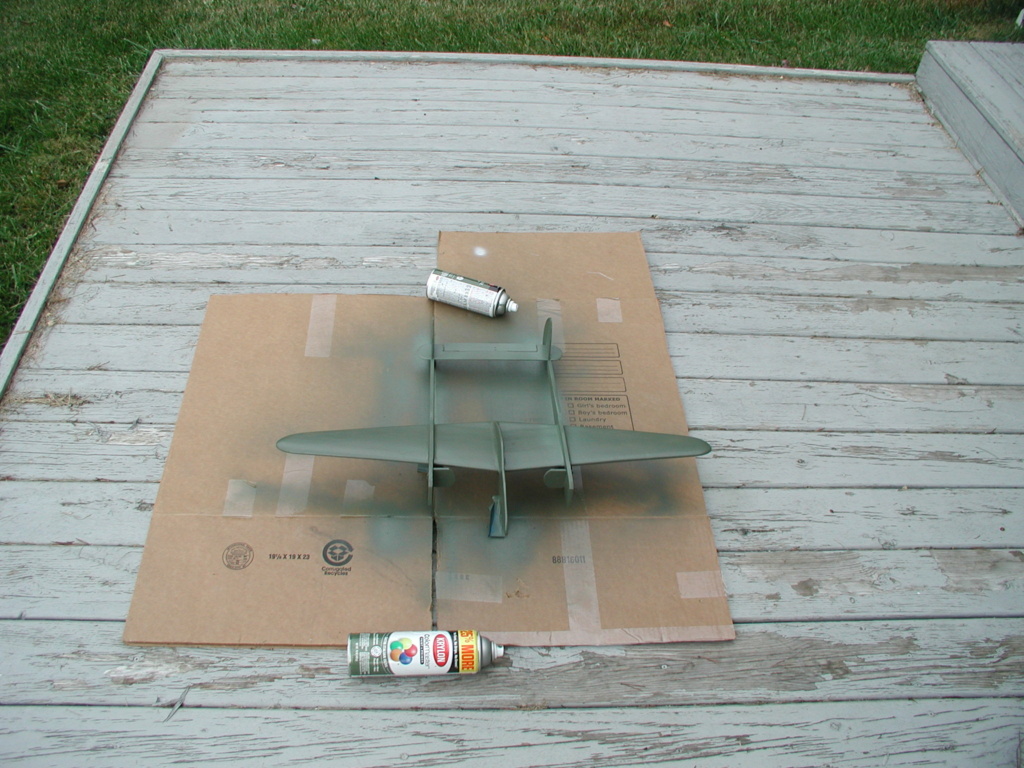
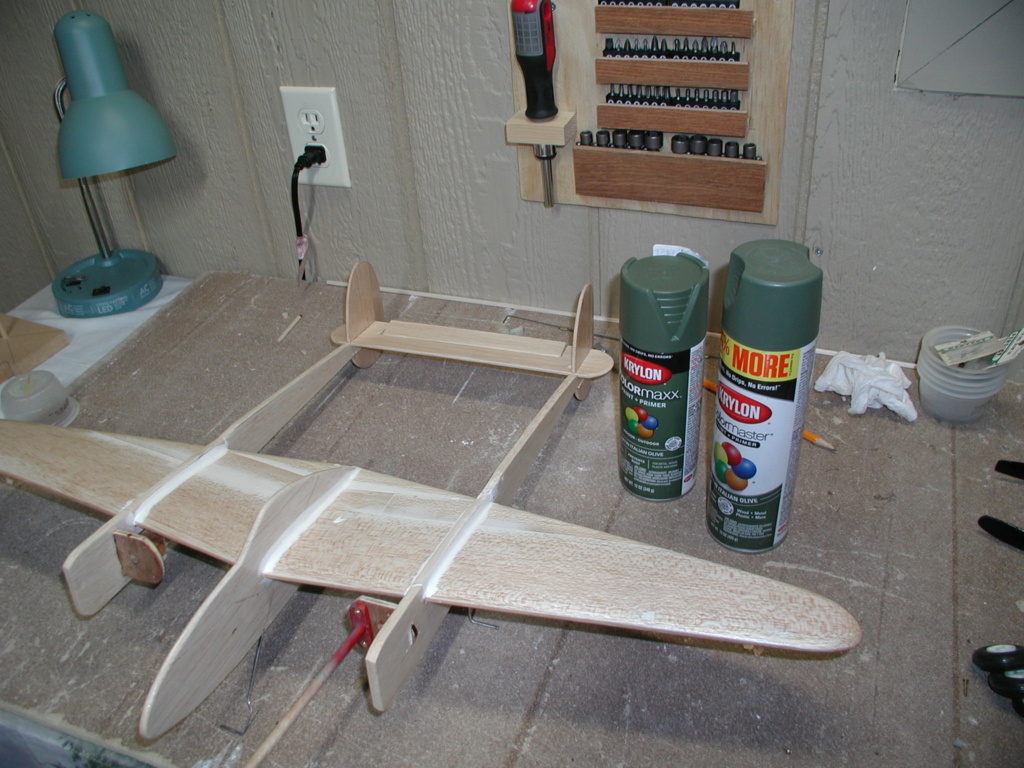
Fins all cemented in and aligned. Kim's "paint stick" attached for paint tomorrow. Got the minisander today. It's going to be a big help in sanding balsa/luan. Vacuum attachment to keep the dust down.
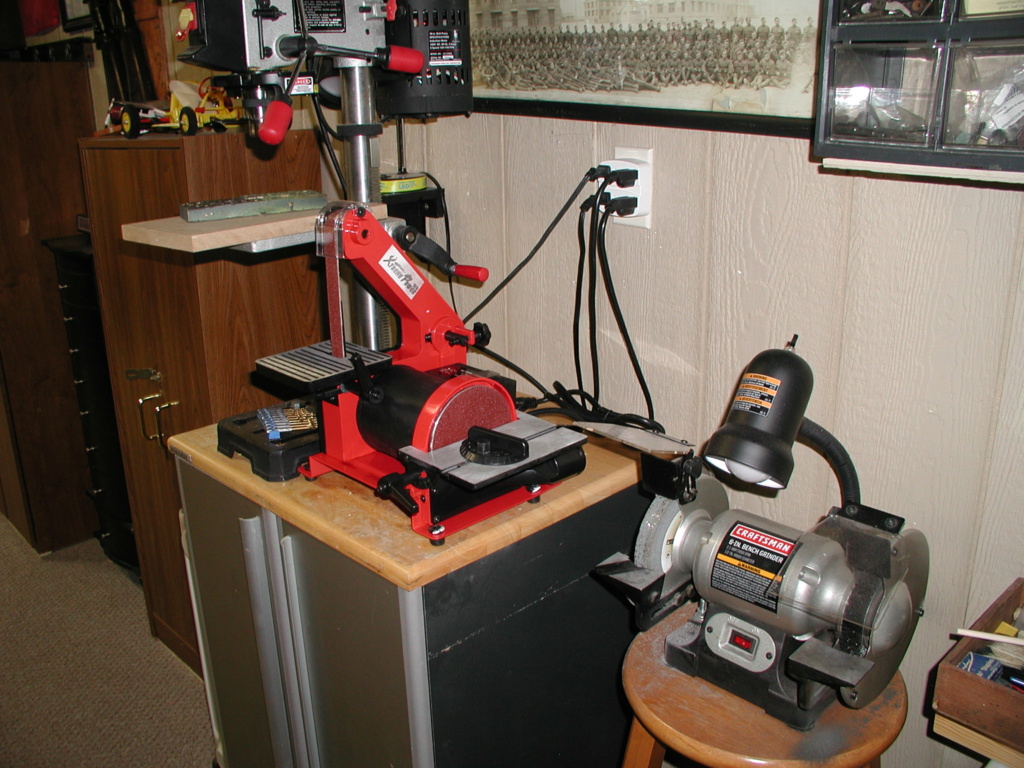
Thought long and hard, but I wound up putting in a little deflection. Not much, and I don't cut them all the way through. I used a saw blade, not the fine narrow one found on most hobby saws and only cut the balsa half way through, then I angle with a tri square jewelers file and break over a narrow device, this time a metal rule.


You can set the deflection by positioning the device in close (max deflection) or on the outer edge - minimum deflection. Then pushing down on the vertical stab snap the rudder into position. Done right it gives a nice little snap.

Works well and there is no seam on the opposite side as the two sides fold into the groove made by the tri-square file. While I have it split I use CA to secure the angle then back it up with carpenters glue evened out with a finger.


I think the CA would hold it alone, but I feel more comfortable with the glue backing it up, besides it acts a a filler.

Edit add:
Fins all cemented in and aligned. Kim's "paint stick" attached for paint tomorrow. Got the minisander today. It's going to be a big help in sanding balsa/luan. Vacuum attachment to keep the dust down.


rsv1cox- Top Poster


Posts : 11260
Join date : 2014-08-18
Location : West Virginia
 Re: New P-38 profile scratch build log
Looking Good Bob , see you got it figured out ,, But I do like ur sander too mine is craftsman 6" disc combo 4" belt over the top rolling sander works good with squaring up wood and Fast .

getback- Top Poster


Posts : 10448
Join date : 2013-01-18
Age : 67
Location : julian , NC
 Re: New P-38 profile scratch build log
getback wrote:Looking Good Bob , see you got it figured out ,, But I do like ur sander too mine is craftsman 6" disc combo 4" belt over the top rolling sander works good with squaring up wood and Fast .
I have that same Craftsman sander Eric. Had it for years and works great. Can't wear it out. But it's out in the shed, you know the one with the pretty lattice around the bottom.....
I could have used this one last week when making the super charger inlets for the P-38. Built up out of five pieces of balsa and glued together it needed some finishing. Took me many minutes by hand. With the sander, seconds and a far better job. Engine mounts for the .049's too, I cut them by hand out of luan. They are not squared off top and bottom.
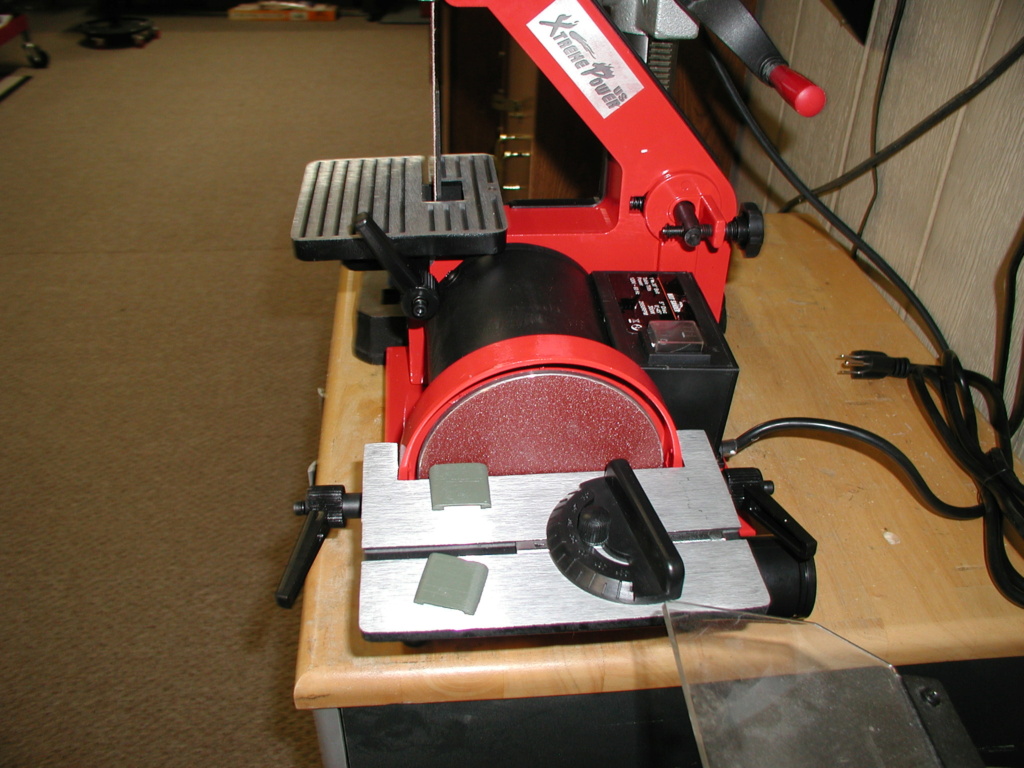
But, it came with a 80 grit disc, I need to find something less aggressive.
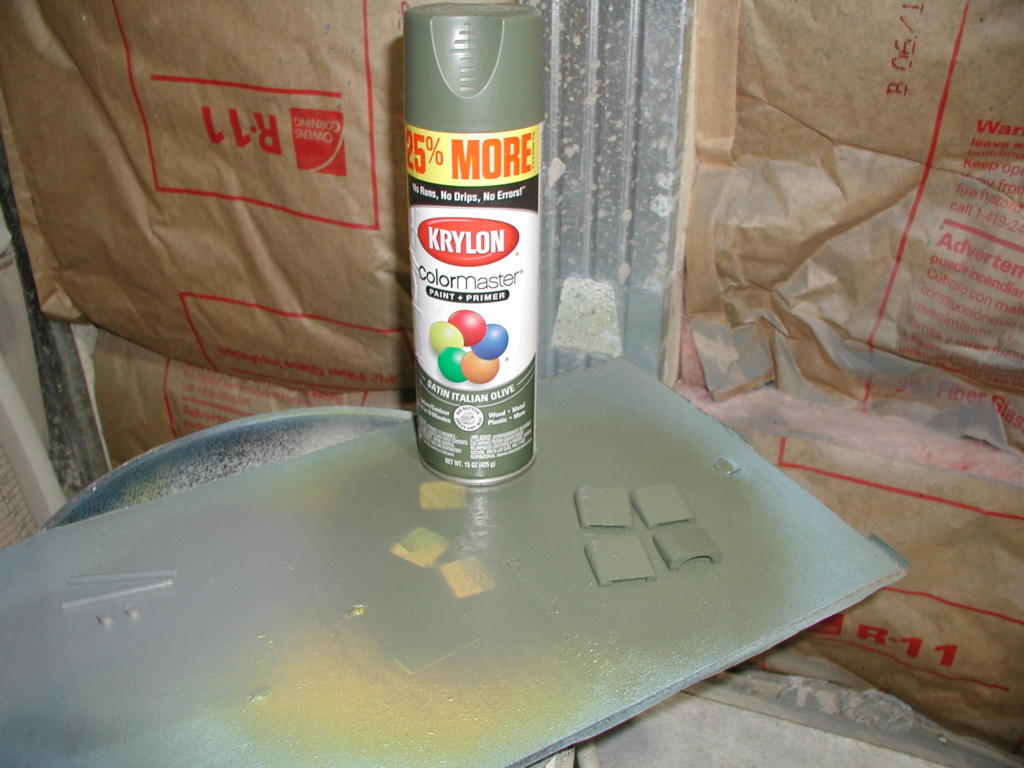
Did some painting this morning. "Supercharger" inlets off to the left.

rsv1cox- Top Poster


Posts : 11260
Join date : 2014-08-18
Location : West Virginia

rsv1cox- Top Poster


Posts : 11260
Join date : 2014-08-18
Location : West Virginia
 Re: New P-38 profile scratch build log
Application of color made it come alive Bob, The stars and bars will really set it off…. Making them pretty in the end is the best part!…. Wishing you a success on first flights…. Get them motors tuned and sinced good 

rdw777- Diamond Member


Posts : 1723
Join date : 2021-03-11
Location : West Texas
 Re: New P-38 profile scratch build log
rdw777 wrote:Application of color made it come alive Bob, The stars and bars will really set it off…. Making them pretty in the end is the best part!…. Wishing you a success on first flights…. Get them motors tuned and sinced good
Thanks Robert. Paint also brings out all the flaws. Carefully photographed so not to show them.

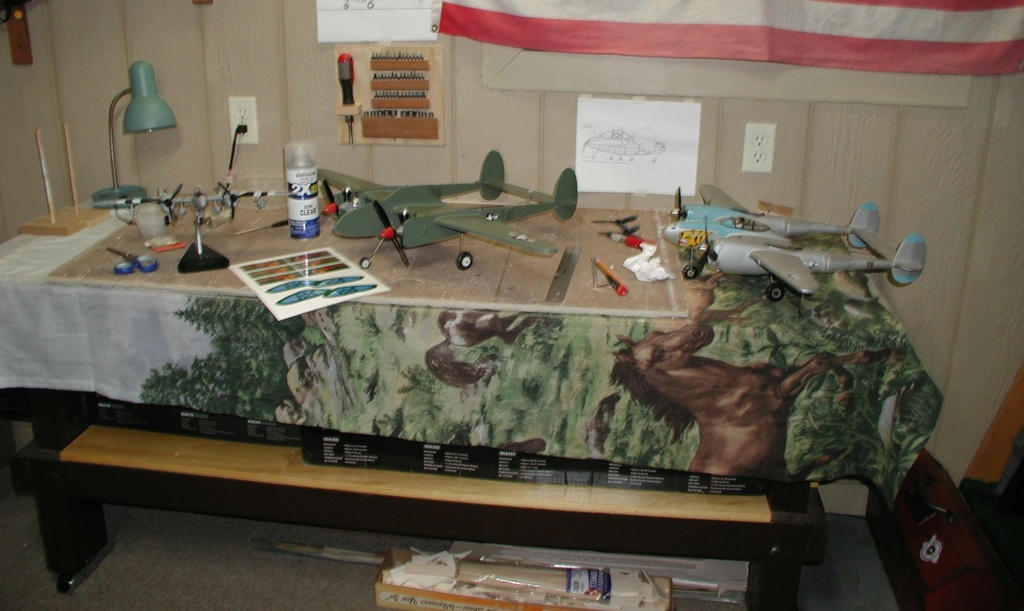
Engines are next. Both tuned at once on a single mount. I can't remember if I ever ran them after I cleaned them. I did replace the glow heads with shiney new one's. My Cox 25 and 35% fuels are pretty old. I will have to crack the seal on some new. SIG 5% I think. Maybe not enough juice.

Last edited by rsv1cox on Sat Oct 28, 2023 3:25 pm; edited 1 time in total

rsv1cox- Top Poster


Posts : 11260
Join date : 2014-08-18
Location : West Virginia
 Re: New P-38 profile scratch build log
That looks great Bob

akjgardner- Diamond Member


Posts : 1603
Join date : 2014-12-28
Age : 65
Location : Greensberg Indiana

GallopingGhostler- Top Poster


Posts : 5735
Join date : 2013-07-13
Age : 70
Location : Clovis NM or NFL KC Chiefs
 Re: New P-38 profile scratch build log
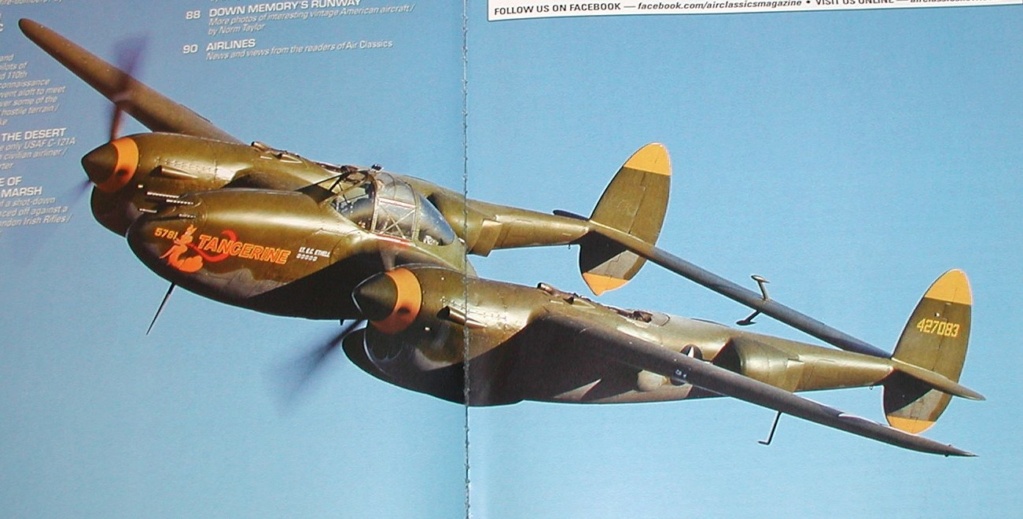
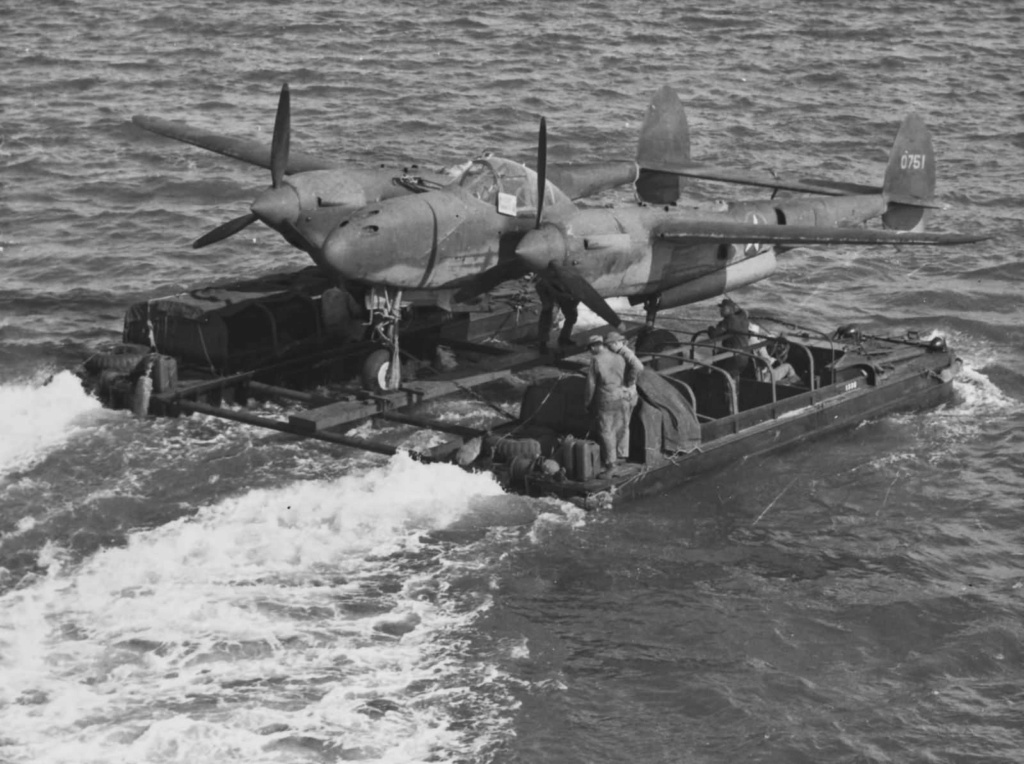
Such a contrast George yet so similar.
Two engines, twin fins, all around vision canopy, and firepower in the nose. I would love to fly both, top of my list.
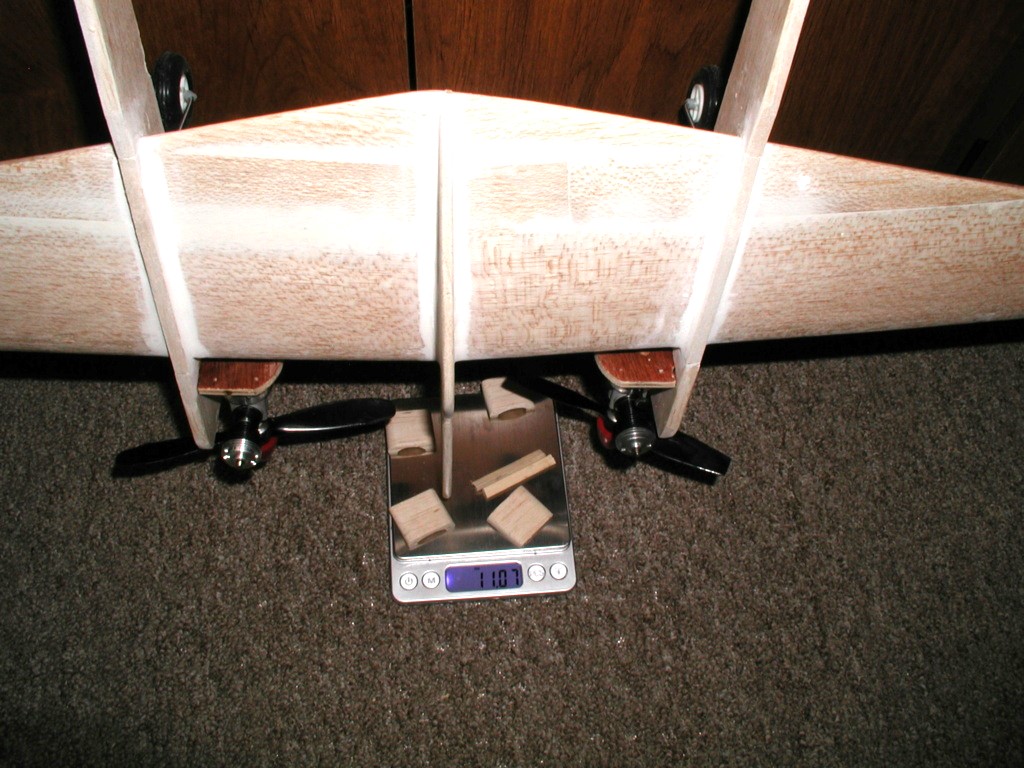
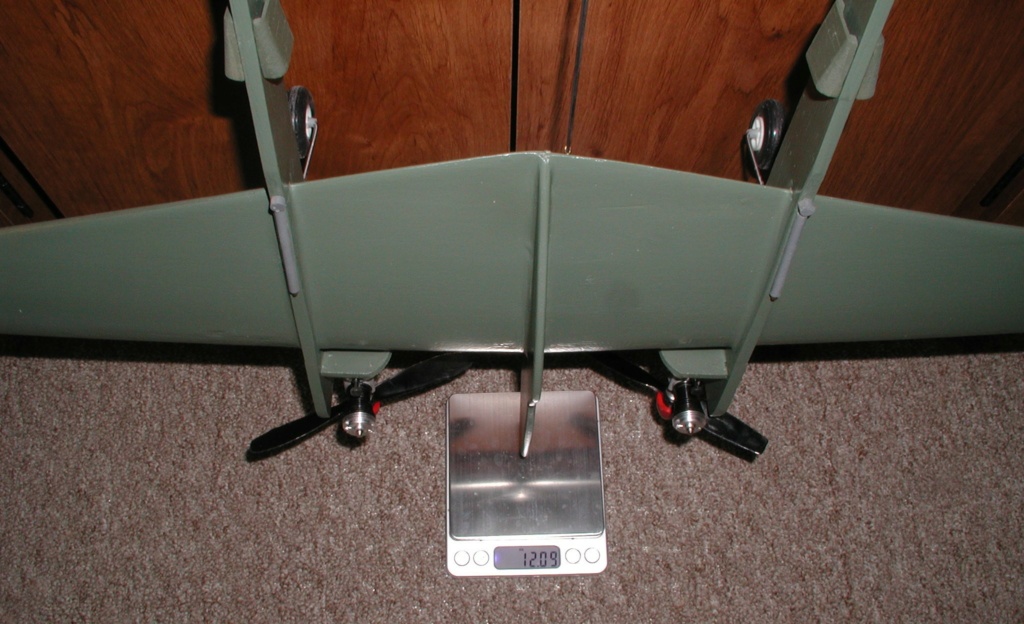
I was eager to see how the completed P-38 balanced and weighed after everyhing was attached. Balance moved back about 3/8th of an inch probably due to the C/L hardware and the added supercharger inlets. Weight up to 1209 oz. mostly 3 coats of sanding sealer (much sanded off) and two coats of paint.
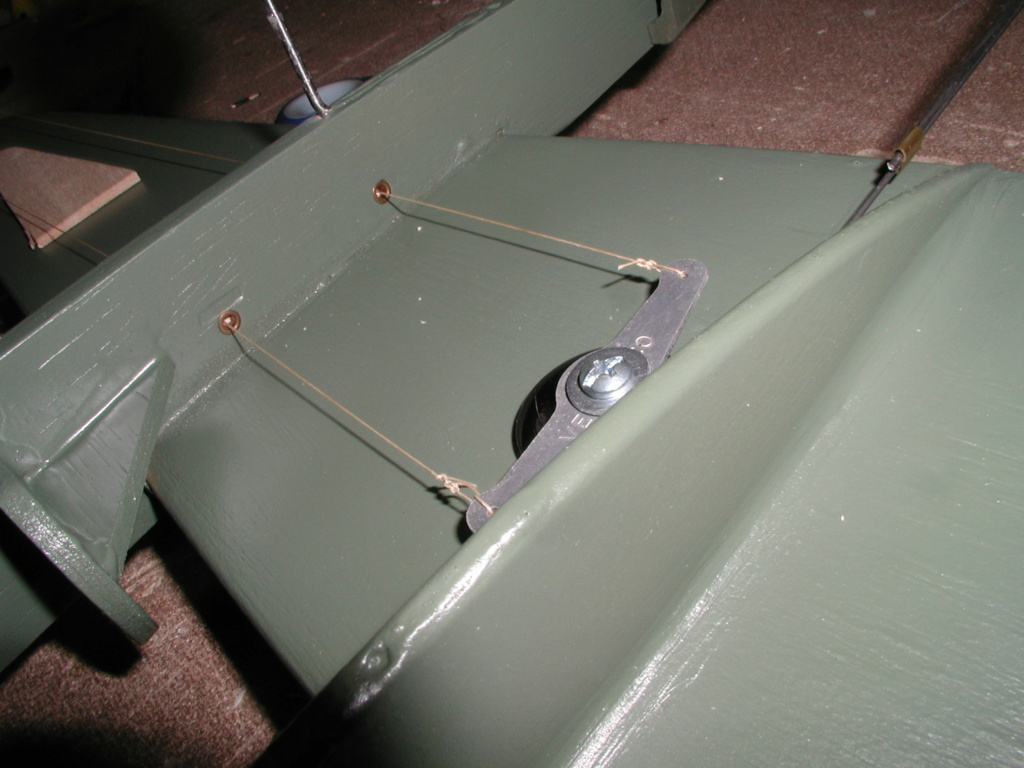
I have a problem with the lead-outs, all my music wire will be too short once I get the bends in them, I will have to go with (groan) dacron.

Props and spinners, what to do what to do.........

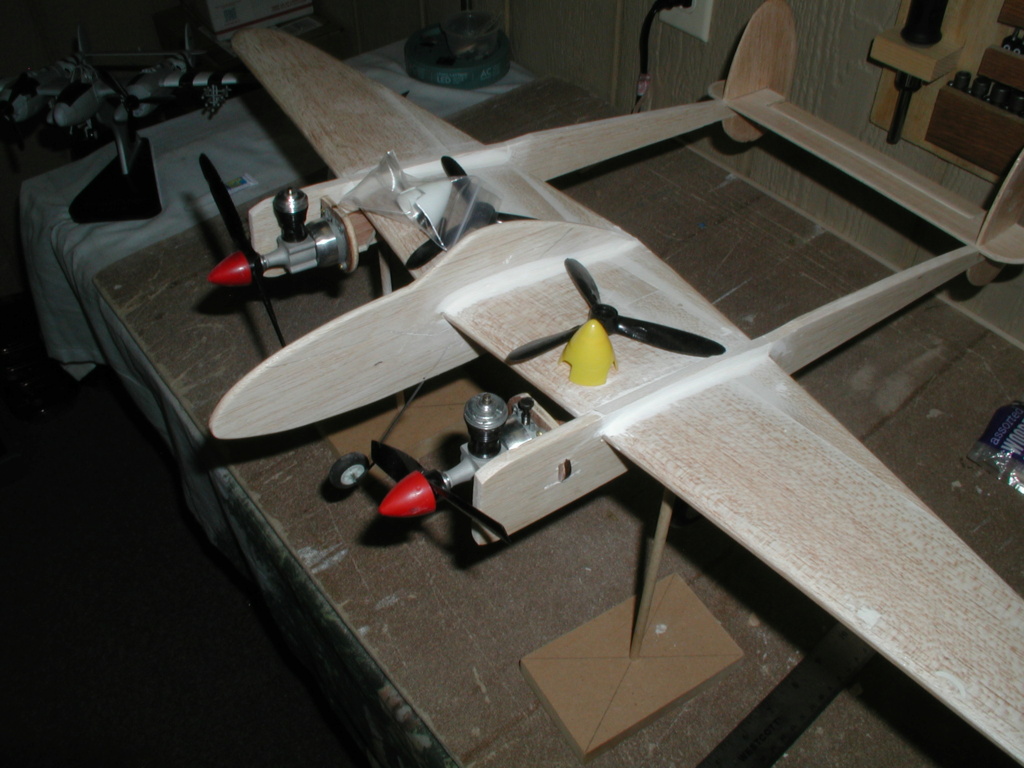
I thought I better check the engines prior to testing. As I mentioned they were a mess when I got them, so much so that I had to media blast the cases. Seems I saved one metal star reed but replaced the other with mylar. I should have replaced the pickups at the same time. If I have a problem with either I will replace them.
Early Babe Bee's with no intake screen, tapered cases and thin cylinders. May have been bought as a pair years ago (I did the same in the 1950's) and stayed together. Wish I could find the "as-bought" pictures.

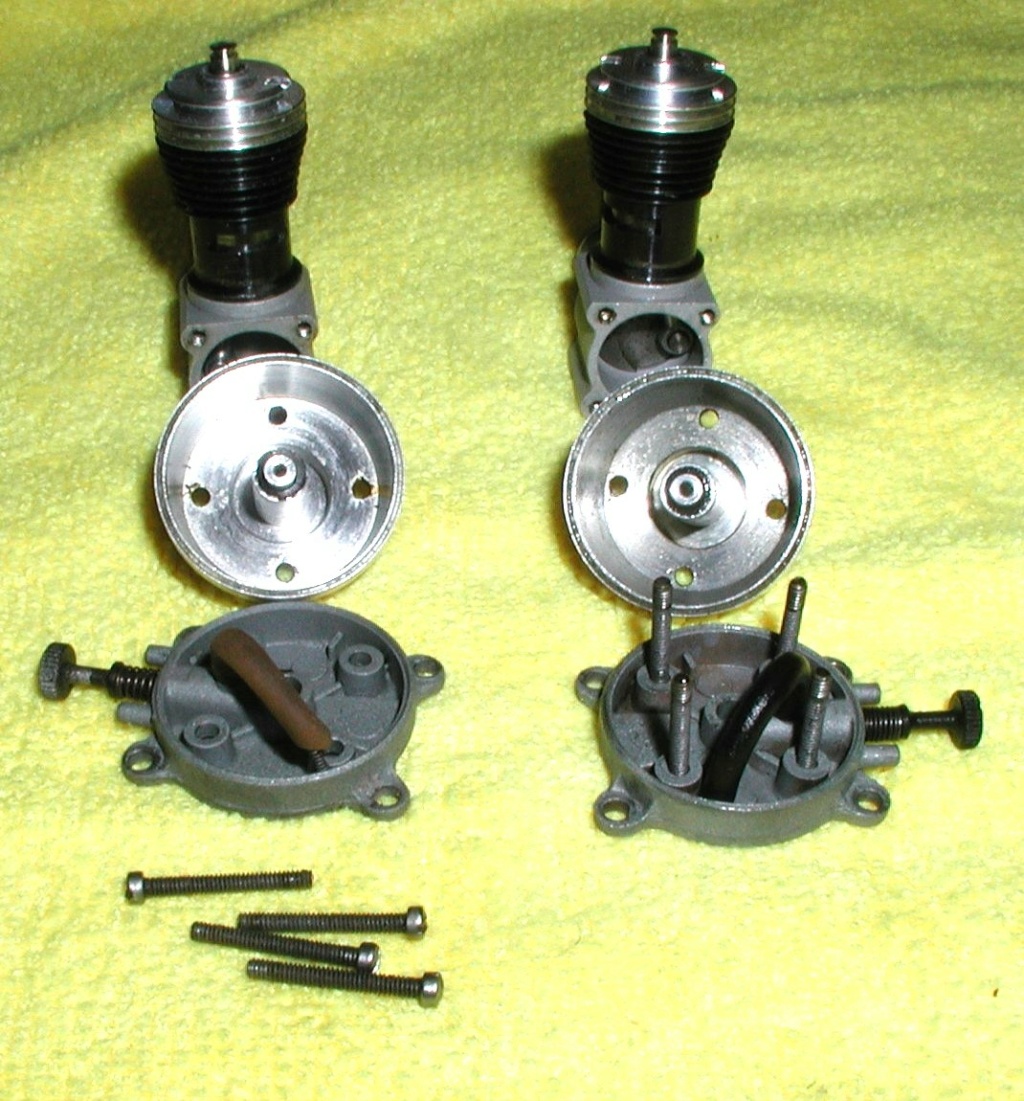
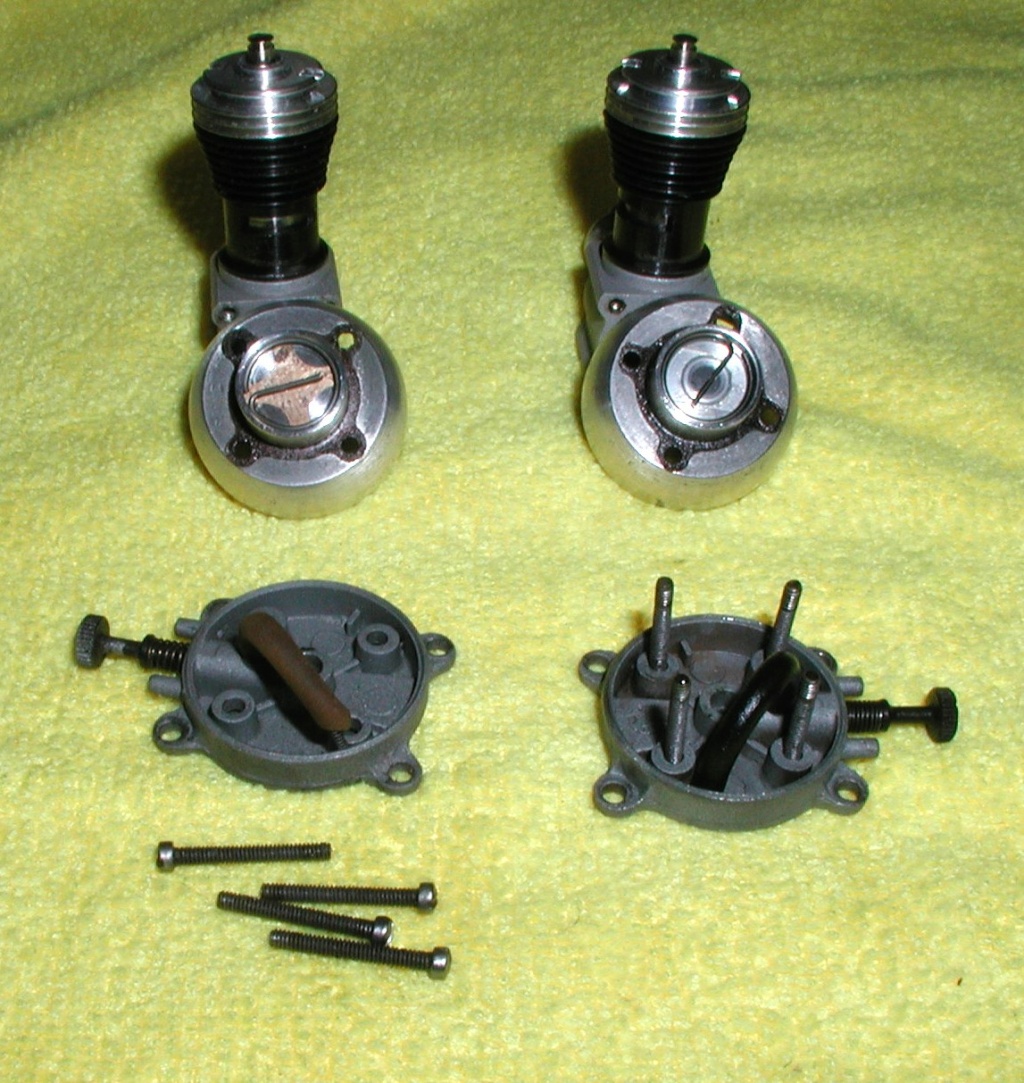
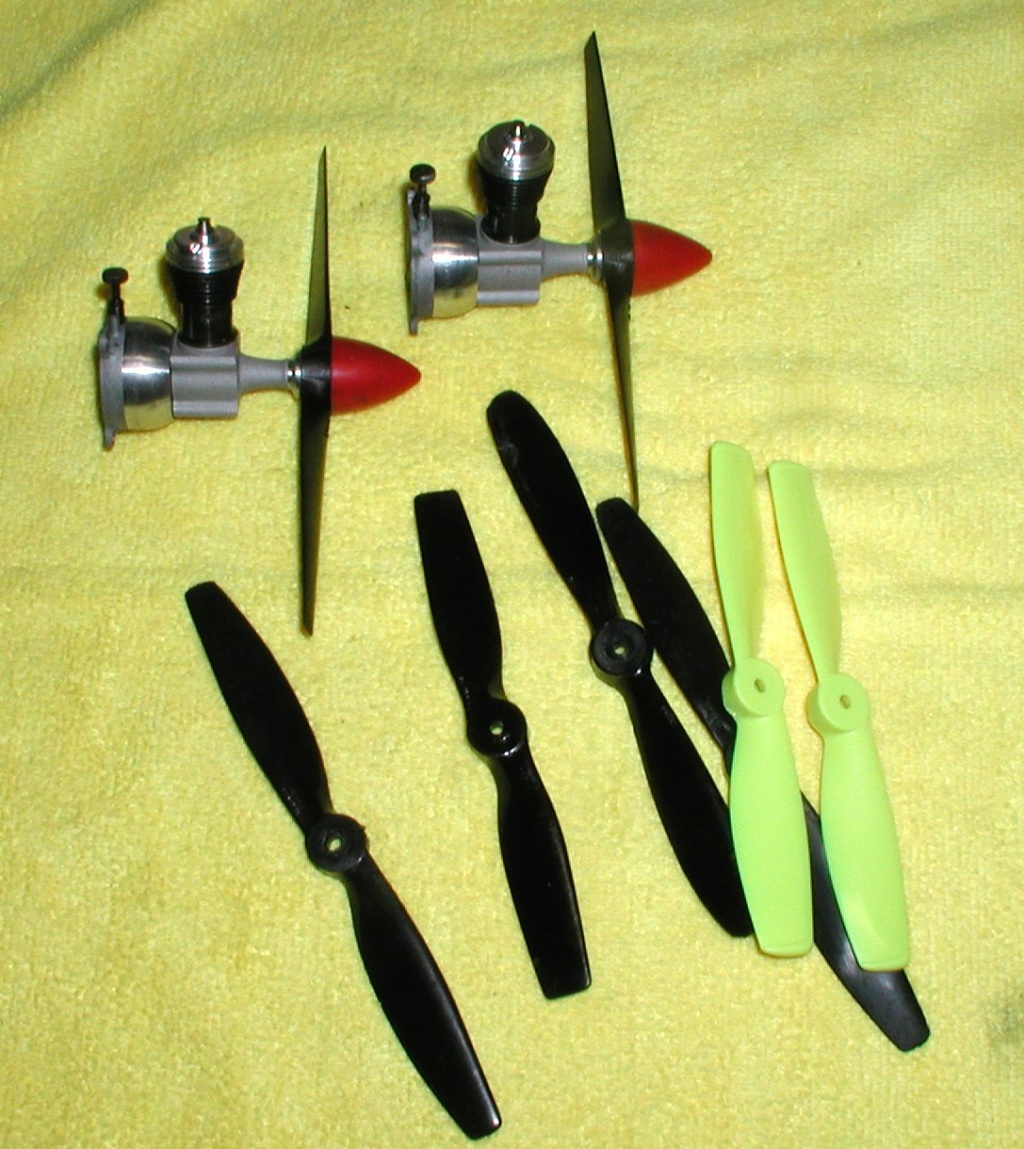
Decided on the props, for testing anyway. Matched pair of 5/5-4 Windsors replacing the worn and mismatched Cox propellers.
Edit add: Thanks roddie, we were posting at he same time...
Two engines, twin fins, all around vision canopy, and firepower in the nose. I would love to fly both, top of my list.
I was eager to see how the completed P-38 balanced and weighed after everyhing was attached. Balance moved back about 3/8th of an inch probably due to the C/L hardware and the added supercharger inlets. Weight up to 1209 oz. mostly 3 coats of sanding sealer (much sanded off) and two coats of paint.


I have a problem with the lead-outs, all my music wire will be too short once I get the bends in them, I will have to go with (groan) dacron.

Props and spinners, what to do what to do.........

I thought I better check the engines prior to testing. As I mentioned they were a mess when I got them, so much so that I had to media blast the cases. Seems I saved one metal star reed but replaced the other with mylar. I should have replaced the pickups at the same time. If I have a problem with either I will replace them.
Early Babe Bee's with no intake screen, tapered cases and thin cylinders. May have been bought as a pair years ago (I did the same in the 1950's) and stayed together. Wish I could find the "as-bought" pictures.


Decided on the props, for testing anyway. Matched pair of 5/5-4 Windsors replacing the worn and mismatched Cox propellers.

Edit add: Thanks roddie, we were posting at he same time...
Last edited by rsv1cox on Sun Oct 29, 2023 12:11 pm; edited 1 time in total

rsv1cox- Top Poster


Posts : 11260
Join date : 2014-08-18
Location : West Virginia
 Re: New P-38 profile scratch build log
Bob-
I'm sure you have a collection of small ID brass tubing laying around. Pick a piece that fits snugly on your music wire and splice your leadouts. A brass coupling 3/8" long will be more than sufficient when sweat soldered on. Stagger the splice locations if you're worried about them interfering with each other.
I tossed my dacron a long time ago and went with Spiderwire (or any of the other Spectra lines). It's almost zero stretch and about 1/3 the diameter for an equivalent weight dacron line. The downside is that it is very slick and you have to take care when tying it.
a--
 Re: New P-38 profile scratch build log
Bob, your leadout wire will be fine. Just make them as long as you can, then place the leadout guide inboard as far as required. No rule says it has to be at the wingtip.

duaneh- Gold Member

- Posts : 227
Join date : 2019-04-06
 Re: New P-38 profile scratch build log
Thanks Andrew/Duane you might have saved me.
I have all that hardware, and it did cross my mind. But, I have lived on the edge most of my life and have the broken bones to prove it. So the Dacron. To make it even more exciting I'm using old Dacron taken from one of my ebay buy control handles and connecting it with multiple granny knots secured with a drop of C/A.
Ken is turning blue........... But I think my index finger extending the Dacron is telling me............"Don't do it!"
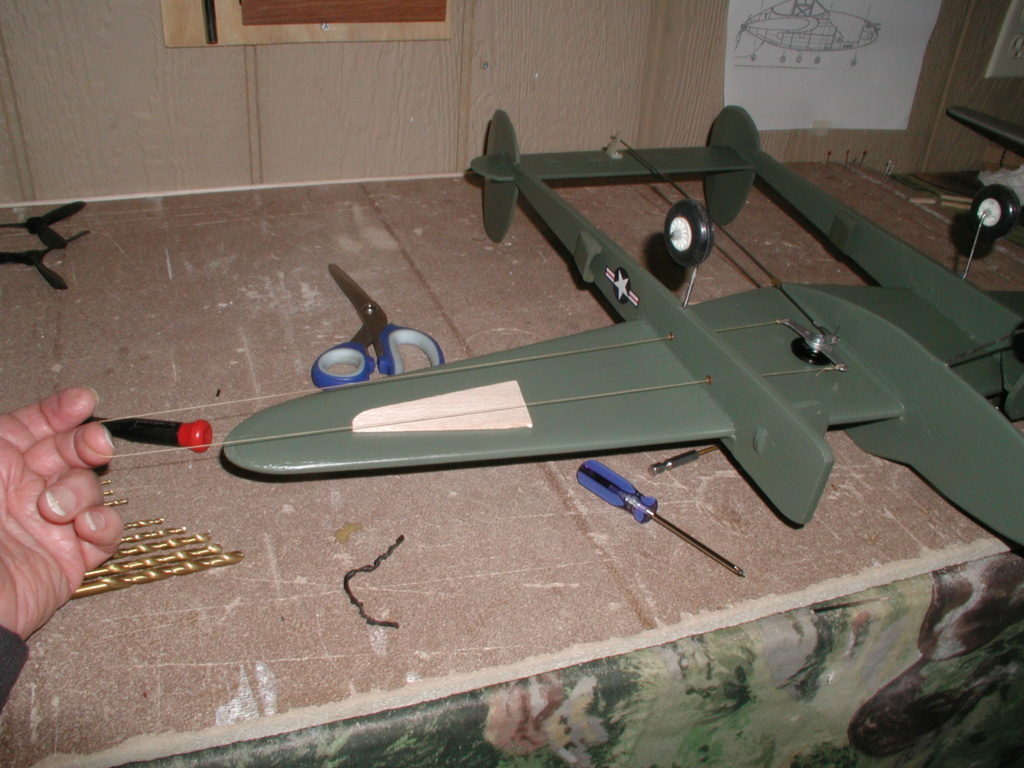
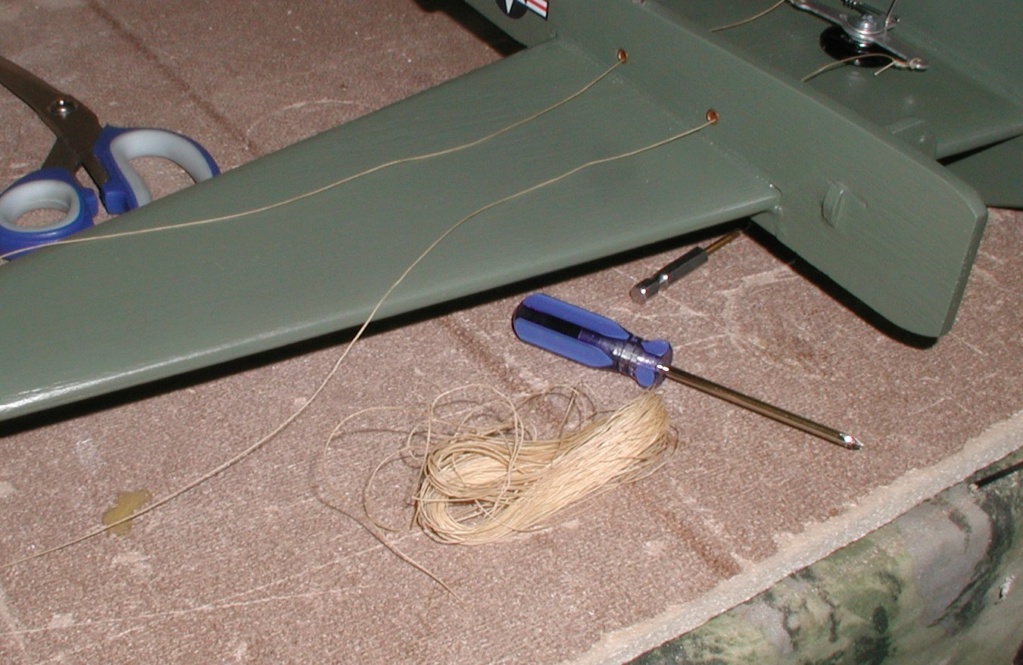
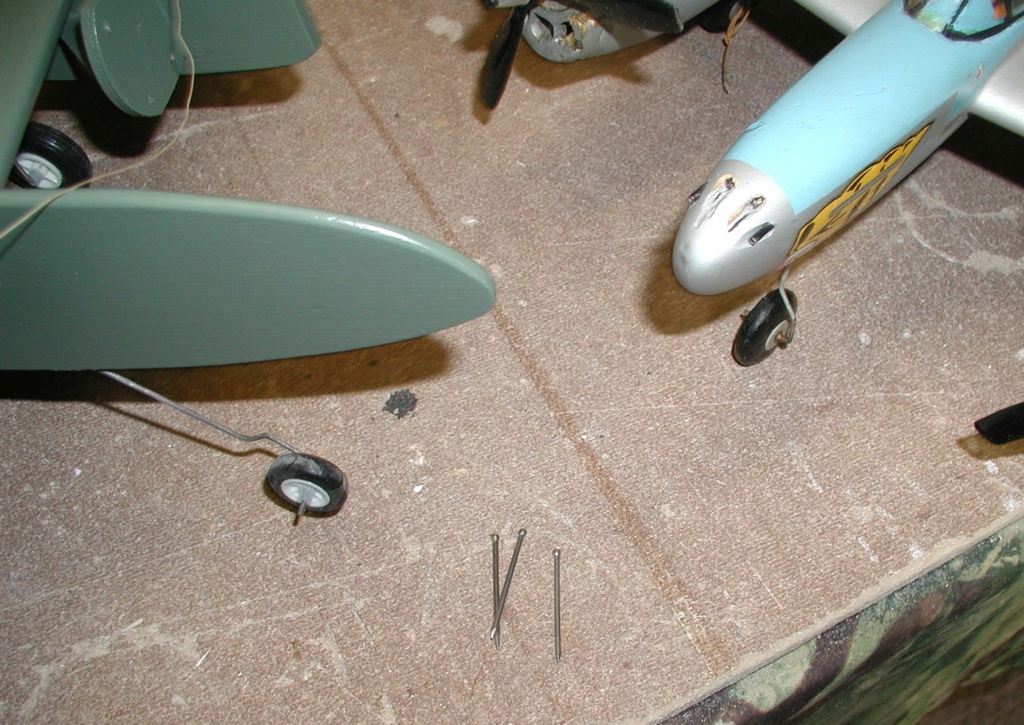
Solution for my tail heavy balance problem. On the original I used aerosal straws for the "machine guns" some missing laying in the fields of Virginia. I'm substituting finish nails for this one in the nose. About three ought to do it.
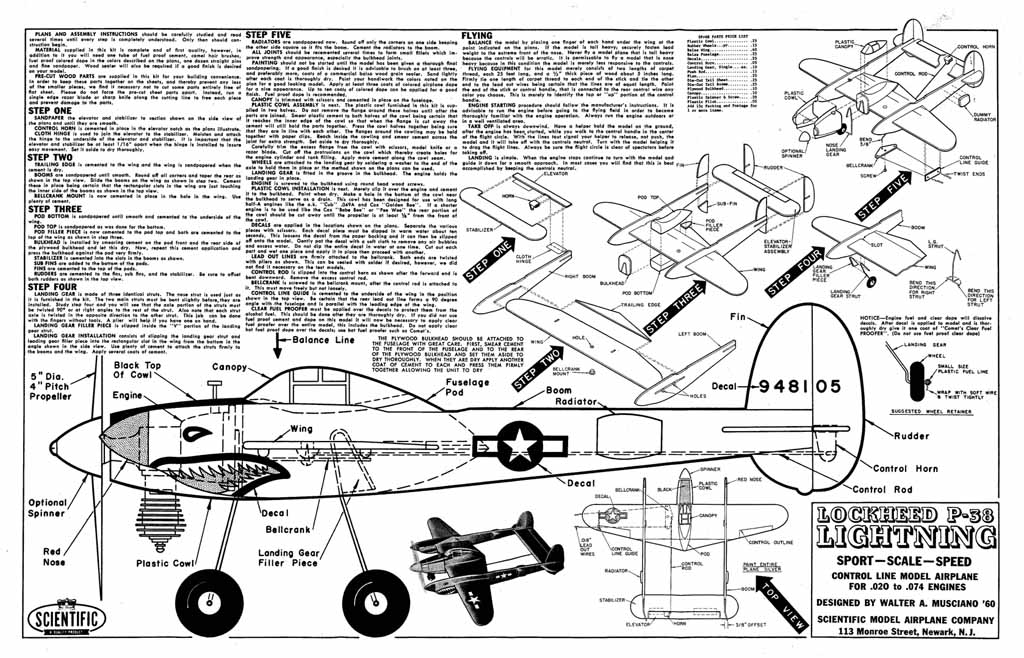
Some of my favorite P-38 pictures...........

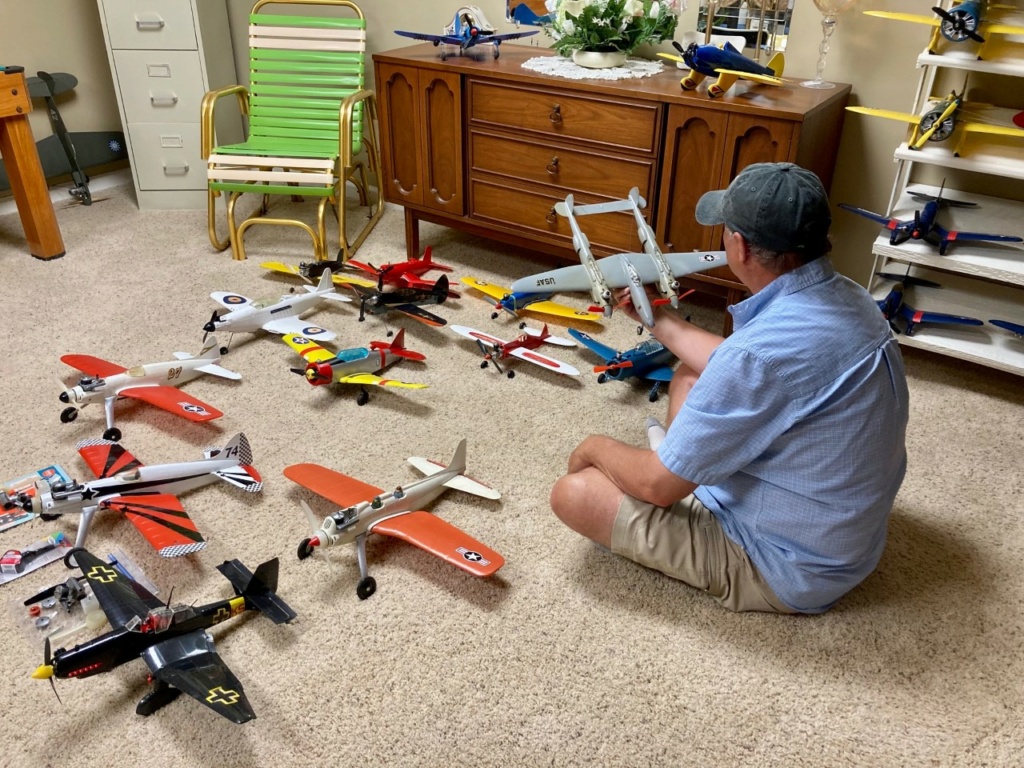
I have all that hardware, and it did cross my mind. But, I have lived on the edge most of my life and have the broken bones to prove it. So the Dacron. To make it even more exciting I'm using old Dacron taken from one of my ebay buy control handles and connecting it with multiple granny knots secured with a drop of C/A.
Ken is turning blue...........


Solution for my tail heavy balance problem. On the original I used aerosal straws for the "machine guns" some missing laying in the fields of Virginia. I'm substituting finish nails for this one in the nose. About three ought to do it.

Some of my favorite P-38 pictures...........


rsv1cox- Top Poster


Posts : 11260
Join date : 2014-08-18
Location : West Virginia
 Re: New P-38 profile scratch build log

Thought you might be working on those engines today. It started raining here around 9:30 this morning.. and forecast to rain through Monday. Great weather to run some glow engines in the shed or garage with the doors open.
Your engines fuel pick-ups... I'd replace those.. unless you know that their both free-flowing. Running them is the only way to check that. I've used Dubro sm. size silicone fuel line to make a new pick-up tube.
I had to do it on the engine I recently put together for my current build. Note the angle-cut on the inlet end. This helps prevent blockage.
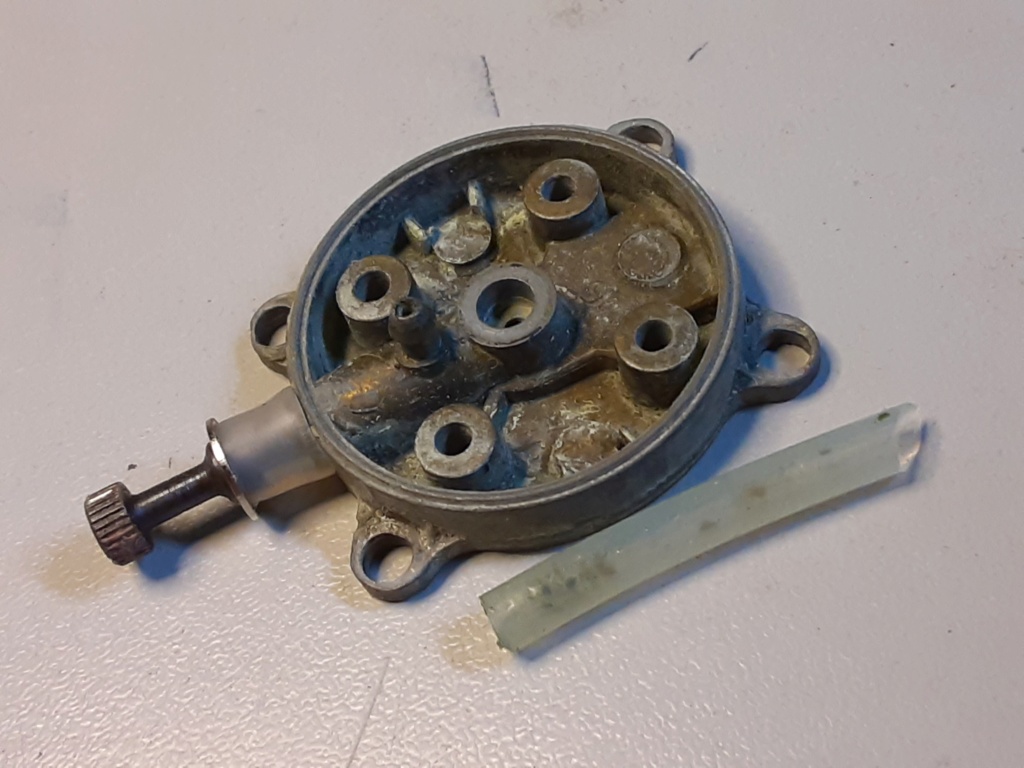
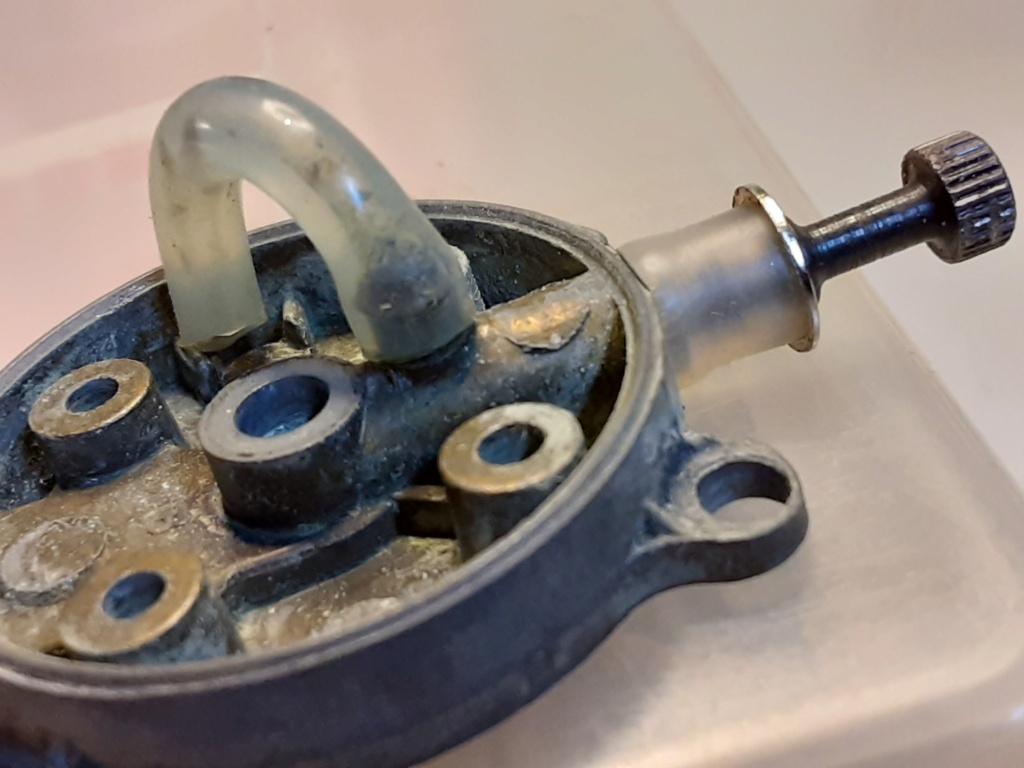
I replaced a dried-out/hardened venturi gasket too. I had some.. but I've also made my own when I needed to.
This one shown below is from Ex Model engines..
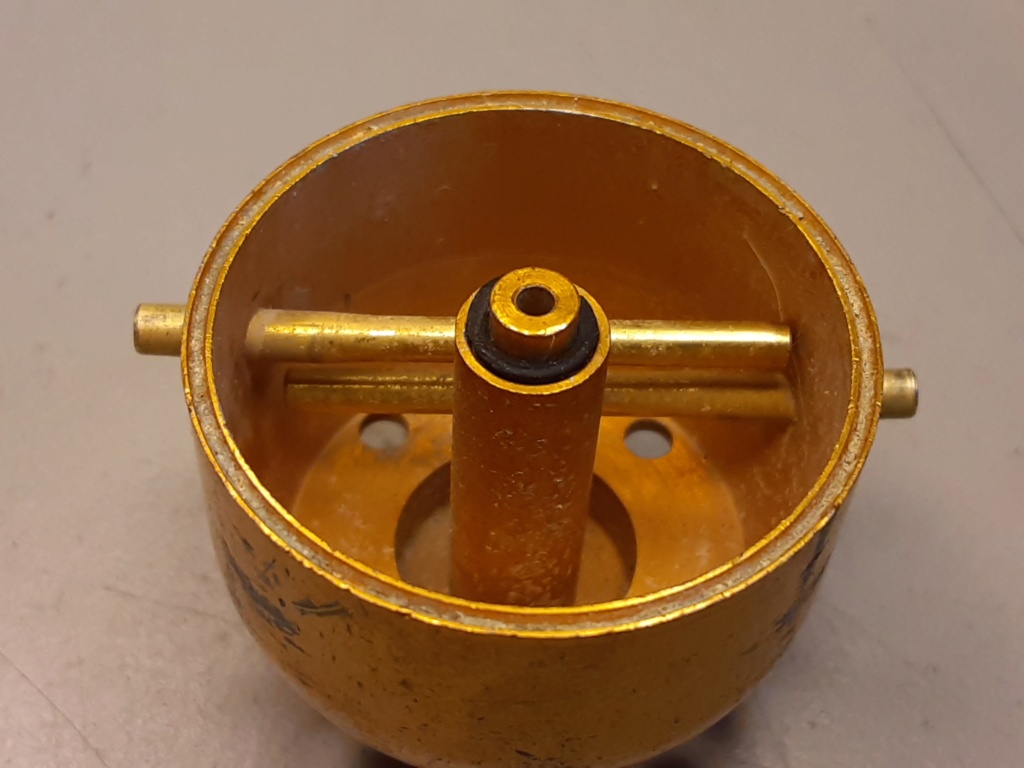
Below photo shows a "paper" gasket. Make some by drilling or punching 9/64" (.140") holes along the edge of your gasket material.. then line-up the "eye" of a hole-punch on center with one of the holes and punch-out your gasket.

Renewing those two components can save you a lot of headaches.
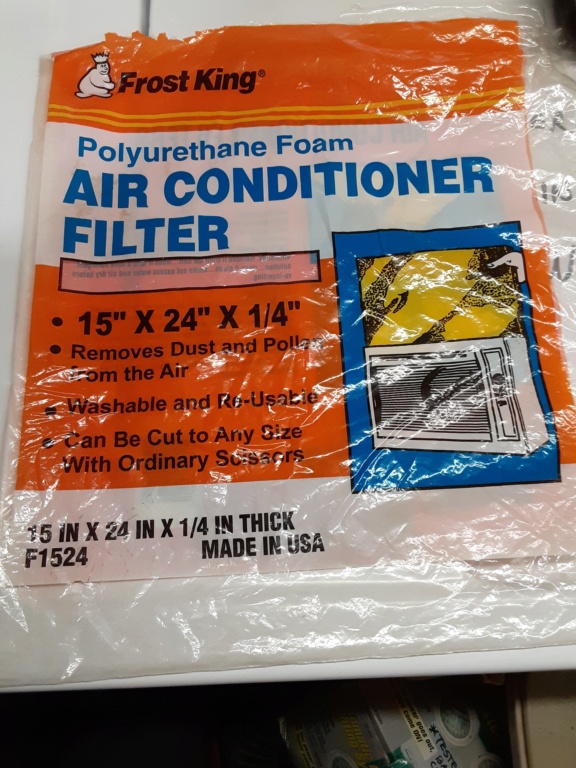
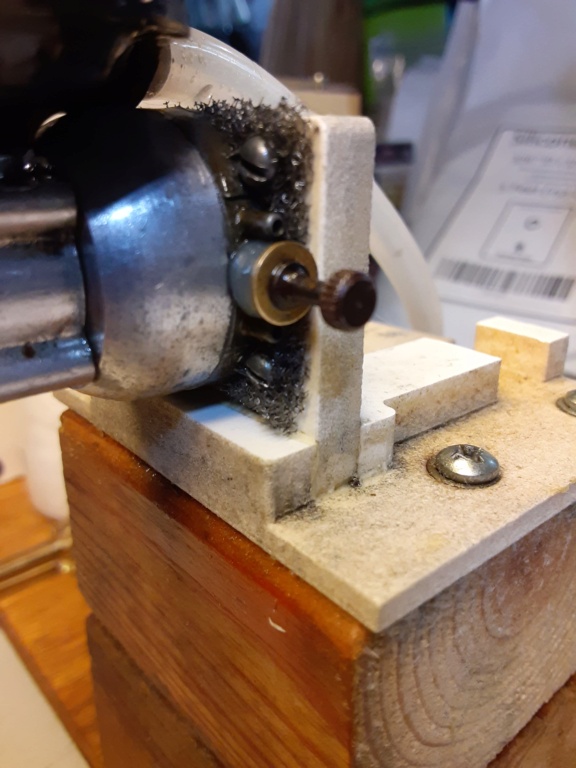
Do you have anything that you could use as air filter media? I've used air-conditioner filter-media (Polyurethane) for this. Grit will find it's way into the venturi.. without anything to stop it.

Page 3 of 5 •  1, 2, 3, 4, 5
 Similar topics
» Hybrid-Profile Flite Streak/Cox Hyper Viper scratch build
» cowled fuse-kits for 1/2A profile scratch-building
» La Stick Scratch Build for Cox Pee Wee .020
» Qtee scratch build
» My Latest Scratch build Cox powered car
» cowled fuse-kits for 1/2A profile scratch-building
» La Stick Scratch Build for Cox Pee Wee .020
» Qtee scratch build
» My Latest Scratch build Cox powered car
Page 3 of 5
Permissions in this forum:
You cannot reply to topics in this forum

 Rules
Rules


