Log in
Search
Latest topics
» Roger Harris revisitedby rsv1cox Today at 10:46 am
» Duende V model from RC Model magazine 1983.
by MauricioB Today at 10:29 am
» A Little 400 Mile Hop for Some Memory Lane Stuff, and to Hit a Swap Meet.
by getback Today at 7:48 am
» Free Flight Radio Assist
by getback Today at 6:39 am
» Happy 77th birthday Andrew!
by Kim Yesterday at 9:18 am
» Promote the forum with flyers!
by Admin Yesterday at 1:35 am
» Engine choice
by GallopingGhostler Mon Nov 25, 2024 4:03 pm
» My N-1R build log
by roddie Mon Nov 25, 2024 9:19 am
» Night flying at Walters RC park
by 1975 control line guy Sun Nov 24, 2024 7:29 pm
» Cox films/videos...
by GallopingGhostler Sun Nov 24, 2024 7:07 pm
» Cox 020 PeeWee rebuild questions
by LooseSpinner99 Sun Nov 24, 2024 6:13 pm
» Did you spot the Cox engine in this NASA research video?
by balogh Sun Nov 24, 2024 5:08 pm
Cox Engine of The Month
New P-38 profile scratch build log
Page 2 of 5
Page 2 of 5 •  1, 2, 3, 4, 5
 Re: New P-38 profile scratch build log
Thanks Eric and roddie.
Got your PM and answered.
This build is more "guess" then the original. I have to scale everything up a bit to match the longer wing. I could do ratio and proportion but I'm just eye-balling it............."That looks about right."
I may regret it but I'm going with the twin Babe Bees that came to me in a horrible state. Rebuilt both, they need to stay together as they are a matched pair. I'm using Duane's side mount method so once the die is cast.....it's cast!

rsv1cox- Top Poster


Posts : 11260
Join date : 2014-08-18
Location : West Virginia

Levent Suberk- Diamond Member

- Posts : 2265
Join date : 2017-12-24
Location : Türkiye
 Re: New P-38 profile scratch build log
Beautiful Levent. Now I can make out what the nose art is. I could not tell from the magazine picture. It will work great canopy too.
Bob
Bob

rsv1cox- Top Poster


Posts : 11260
Join date : 2014-08-18
Location : West Virginia

rsv1cox- Top Poster


Posts : 11260
Join date : 2014-08-18
Location : West Virginia
 Re: New P-38 profile scratch build log
rsv1cox wrote:
I may regret it but I'm going with the twin Babe Bees that came to me in a horrible state. Rebuilt both, they need to stay together as they are a matched pair. I'm using Duane's side mount method so once the die is cast.....it's cast!
I see now what you were referring to with Duane's "side-mounts".
 Re: New P-38 profile scratch build log
Looking good Bob

akjgardner- Diamond Member


Posts : 1603
Join date : 2014-12-28
Age : 65
Location : Greensberg Indiana
 Re: New P-38 profile scratch build log
akjgardner wrote:Looking good Bob
Thanks Joe. Rainy day today so I can get some inside work done. Planes, trains, and Go Karts.............
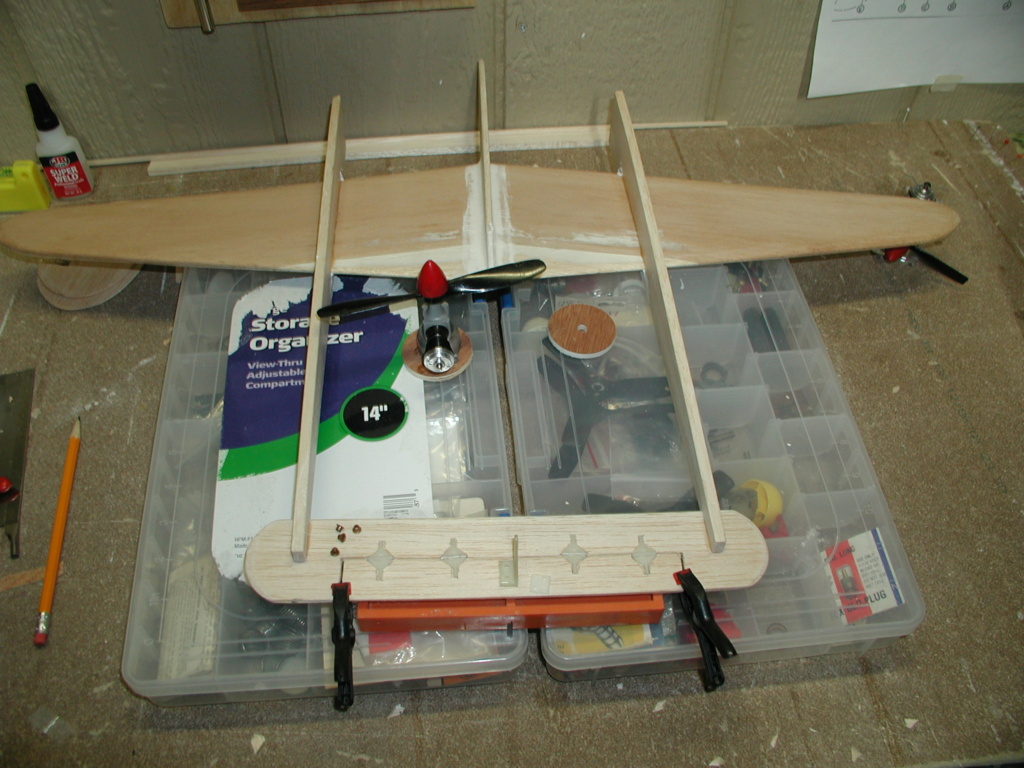
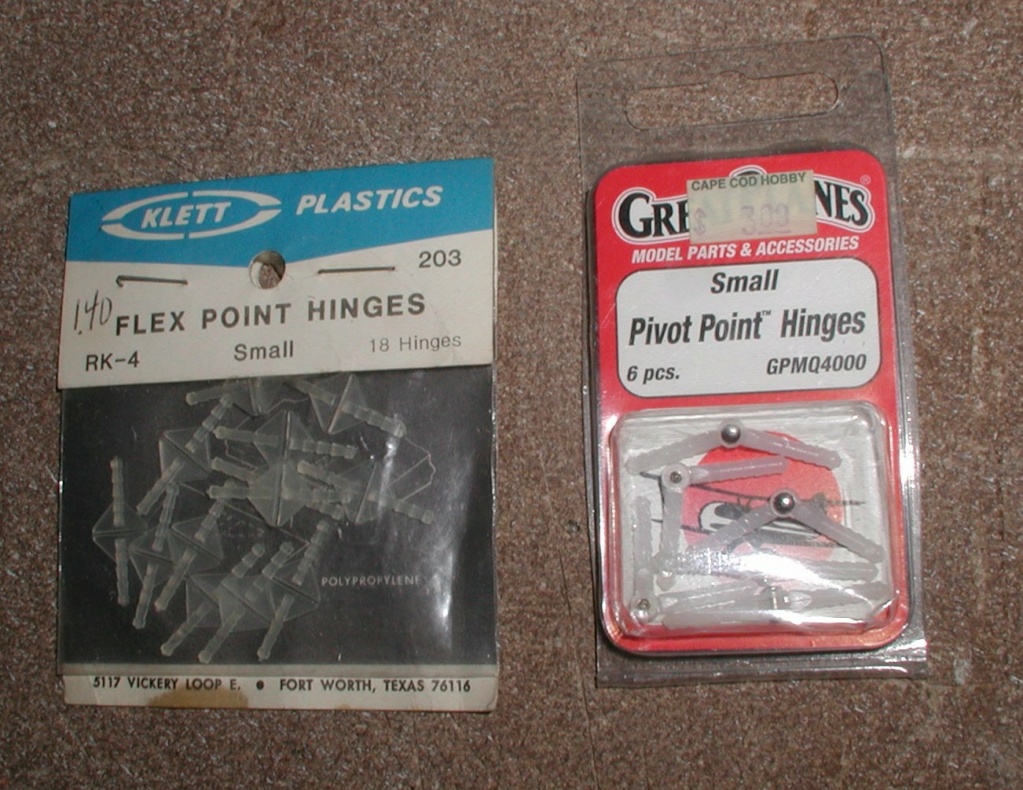
I have never tried these hinges before but I'm out of my preferred DuBros. Seem to work ok.
Locomotives are all about pulling power and traction. This Cox GP-9 has neither. Once around the track was painful, spinning wheels and slow.
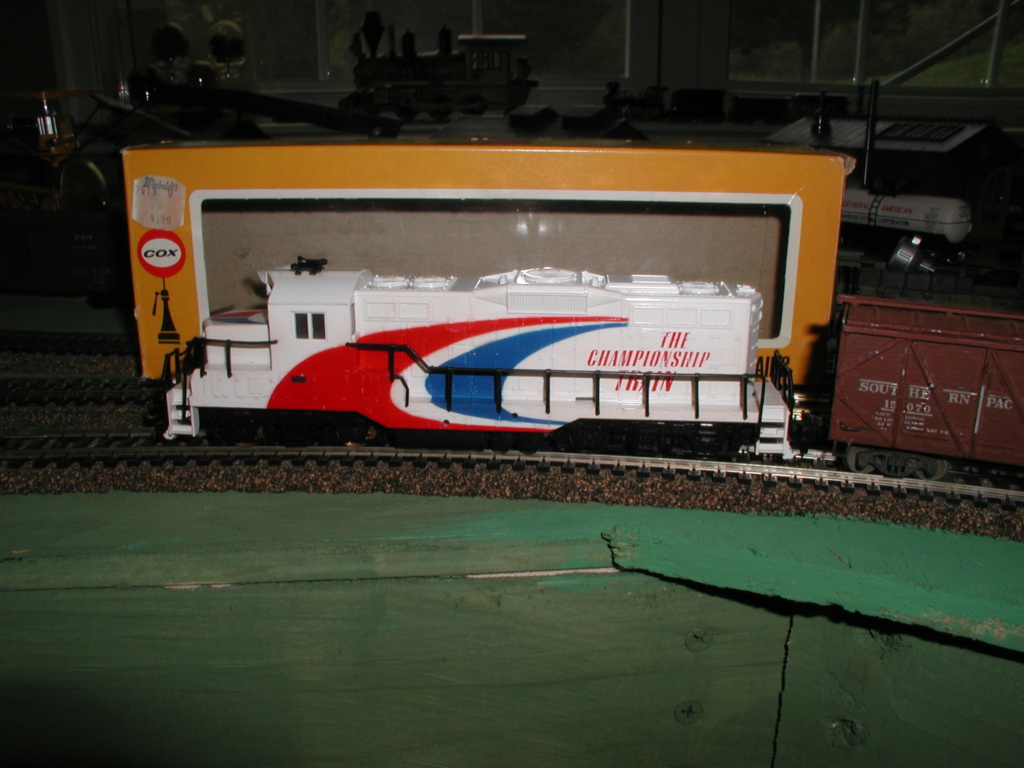

Somewhere in there is a new motor mount. Arn't those treads backwards?


rsv1cox- Top Poster


Posts : 11260
Join date : 2014-08-18
Location : West Virginia
 Re: New P-38 profile scratch build log
really like this build Bob.  The red spinners on the engines look great
 The red spinners on the engines look great
Yabby- Platinum Member


Posts : 712
Join date : 2021-06-08
Location : Yorke Peninsula South Australia
 Re: New P-38 profile scratch build log
Clamps, tongue depressers, wax paper and wood glue backed up with C/A gel.
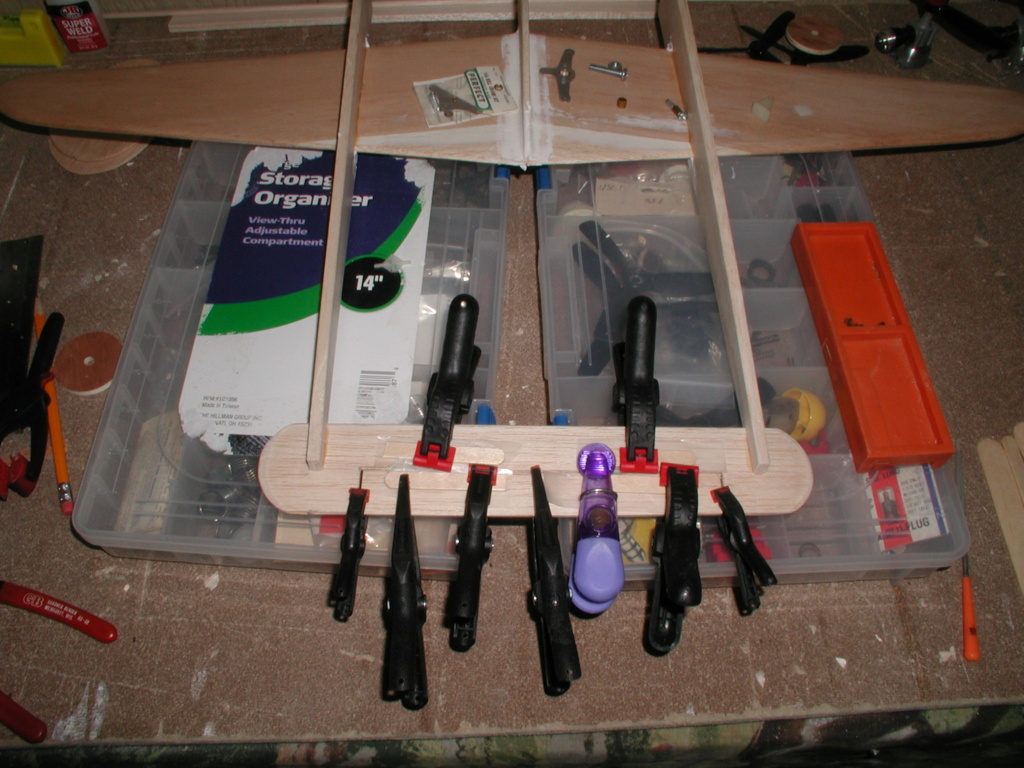


Both scratch builds, guestimates with fingers crossed. Definate dip in the booms for the superchargers seems to be at the extreme depth at the trailing edge of the wing. Not much to go on except this picture. Wood rasp made quick work. Days to go before detailing.
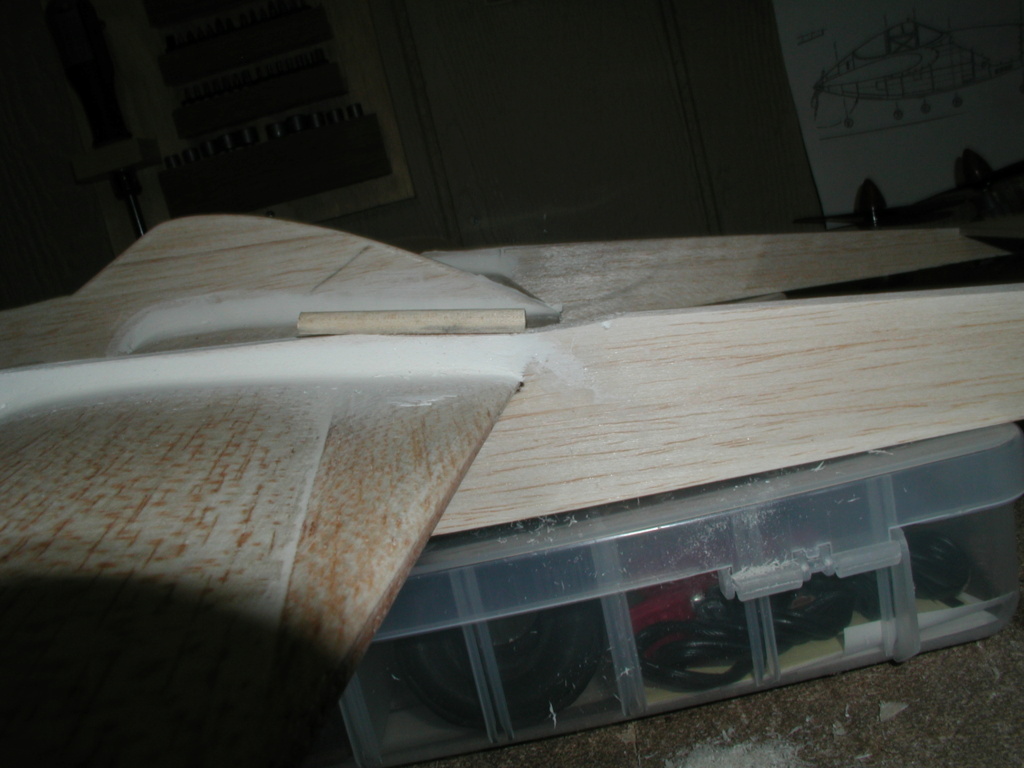

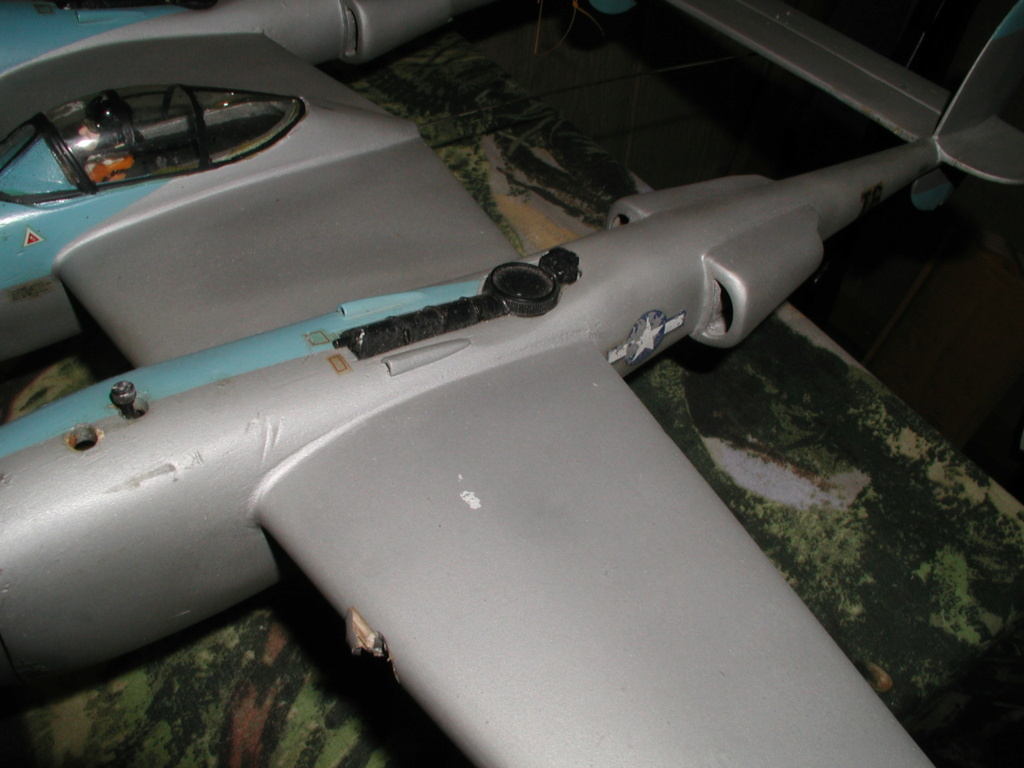
But, motor mount calls. Heading toward the wood shop.


Both scratch builds, guestimates with fingers crossed. Definate dip in the booms for the superchargers seems to be at the extreme depth at the trailing edge of the wing. Not much to go on except this picture. Wood rasp made quick work. Days to go before detailing.


But, motor mount calls. Heading toward the wood shop.


rsv1cox- Top Poster


Posts : 11260
Join date : 2014-08-18
Location : West Virginia
 Re: New P-38 profile scratch build log
That's looking really swell, Bob!
Can you provide details regarding the hinges? They aren't familiar to me. Thanks in advance.
Can you provide details regarding the hinges? They aren't familiar to me. Thanks in advance.
_________________
Never enough time to build them all...always enough time to smash them all!
944_Jim- Diamond Member


Posts : 2023
Join date : 2017-02-08
Age : 59
Location : NE MS
 Re: New P-38 profile scratch build log
944_Jim wrote:That's looking really swell, Bob!
Can you provide details regarding the hinges? They aren't familiar to me. Thanks in advance.
They come in three sizes Jim and styles. I used medium for the P-38. But they are a pain to install. First you have to drill a straight hole without breaking through the balsa, a pin vice is good here, then you have to cut a slot. Then you have to apply glue without it spreading back to the link when inserting the hinge.
I took the easy way out for the P-38. I had glued two pieces of 1/16" balsa together because I couldn't find my 1/8th" (found it later) which made it easy to hog out the spaces for the hinges. I had previously rounded the leading edge of the elevator.
With a tooth pick I dropped wood glue into each opening staying away from the hinge, put wax paper over the hinges then tongue depressers compressed with clamps over the hinges. Later I backed up the glue with C/A. I might sand them down smooth, however there is very little to none showing above the balsa and fill with spackling. Might not, probably not.
Do like they way they look.....Star Wars........


rsv1cox- Top Poster


Posts : 11260
Join date : 2014-08-18
Location : West Virginia
 Re: New P-38 profile scratch build log
Ahah! The diamond cut in your tail feathers threw me off. Thanks for that info.
_________________
Never enough time to build them all...always enough time to smash them all!

944_Jim- Diamond Member


Posts : 2023
Join date : 2017-02-08
Age : 59
Location : NE MS
 Re: New P-38 profile scratch build log
I like that “C” grain sheet wing Bob…. Laminated to straight grain sheet on the bottom?…. Should be very strong and warp resistant 


rdw777- Diamond Member


Posts : 1723
Join date : 2021-03-11
Location : West Texas
 Re: New P-38 profile scratch build log
rdw777 wrote:I like that “C” grain sheet wing Bob…. Laminated to straight grain sheet on the bottom?…. Should be very strong and warp resistant
Thanks Robert, If I did it correctly it was probably by accident.
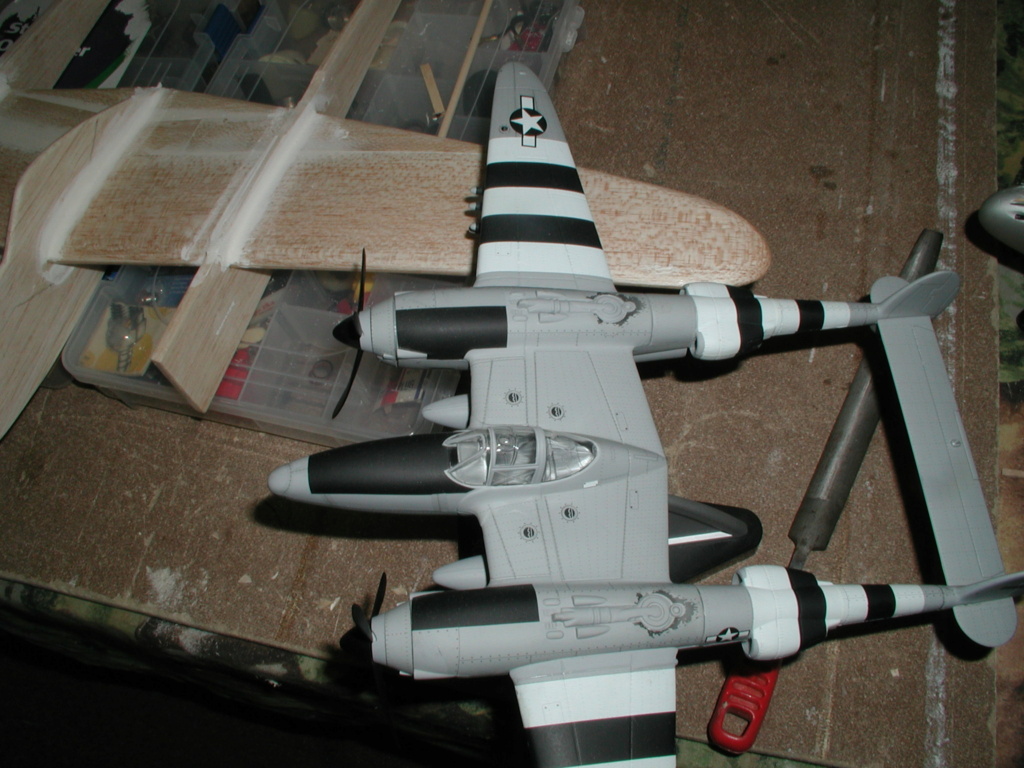
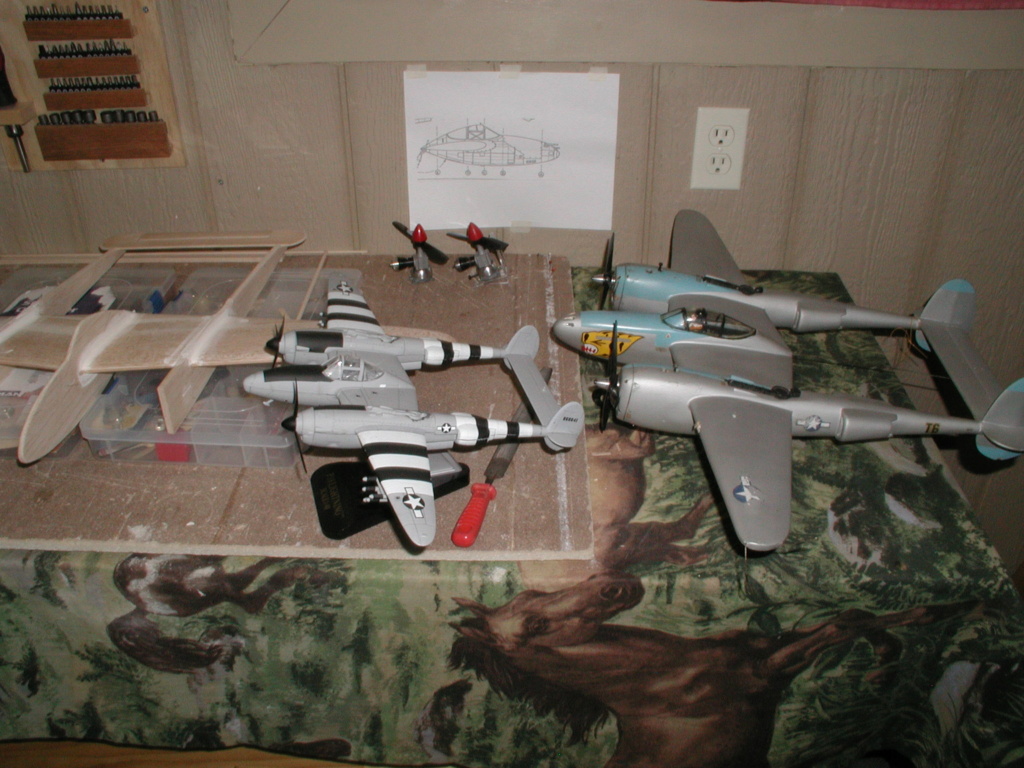
I rediscovered this Chinese made P-38 that Mark gave me years ago, he finds these at flea markets. Really nicely done, heavy amd detailed. It will help in doing the add-on's, 3D beats pictures. I had added landing gear doors on my original but the first landing took care of those.


rsv1cox- Top Poster


Posts : 11260
Join date : 2014-08-18
Location : West Virginia
 Re: New P-38 profile scratch build log
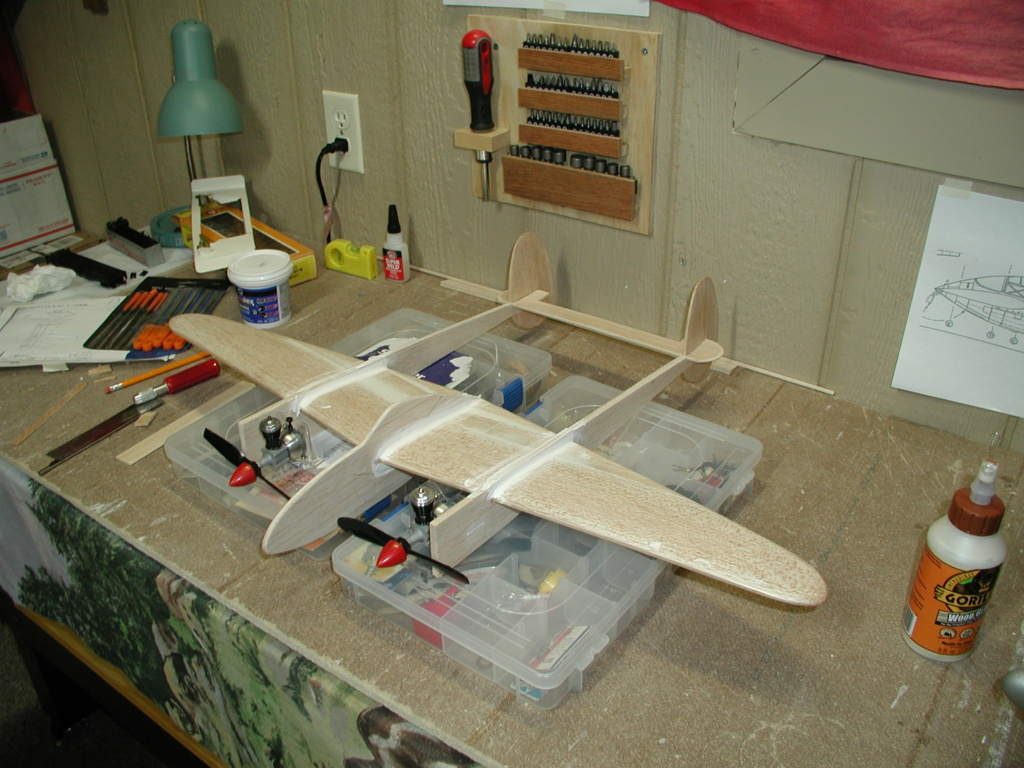
I roughed out the radiator air intakes today, off scale but this is profile. Getting closer to building the engine mounts and determing G or J.
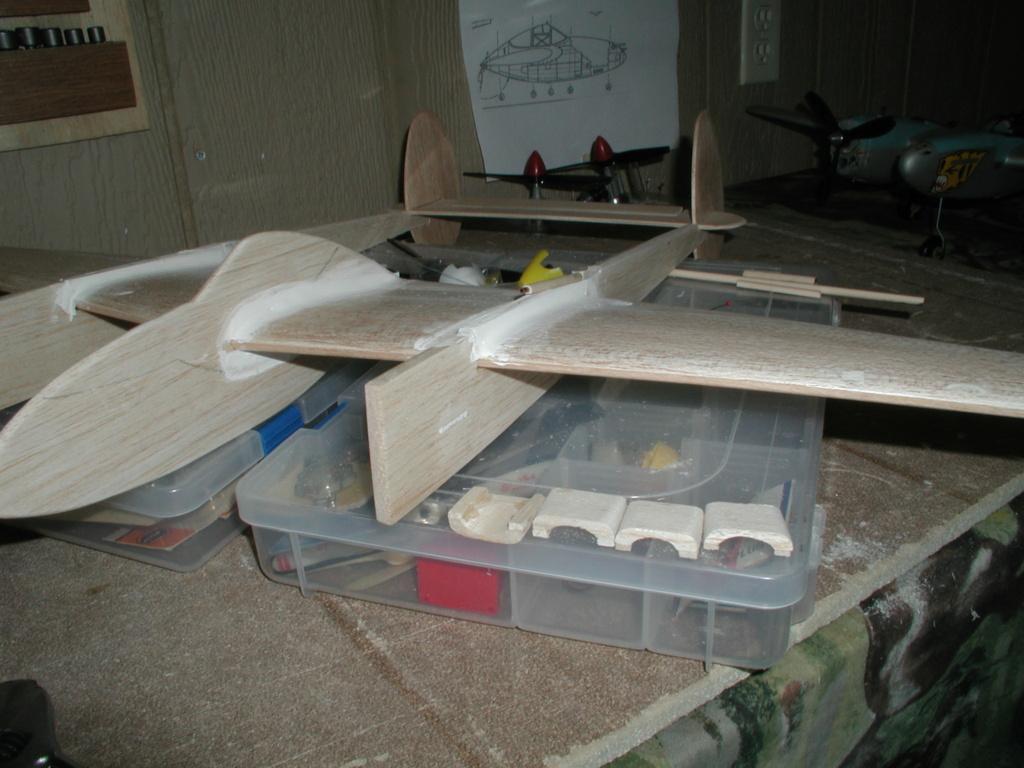
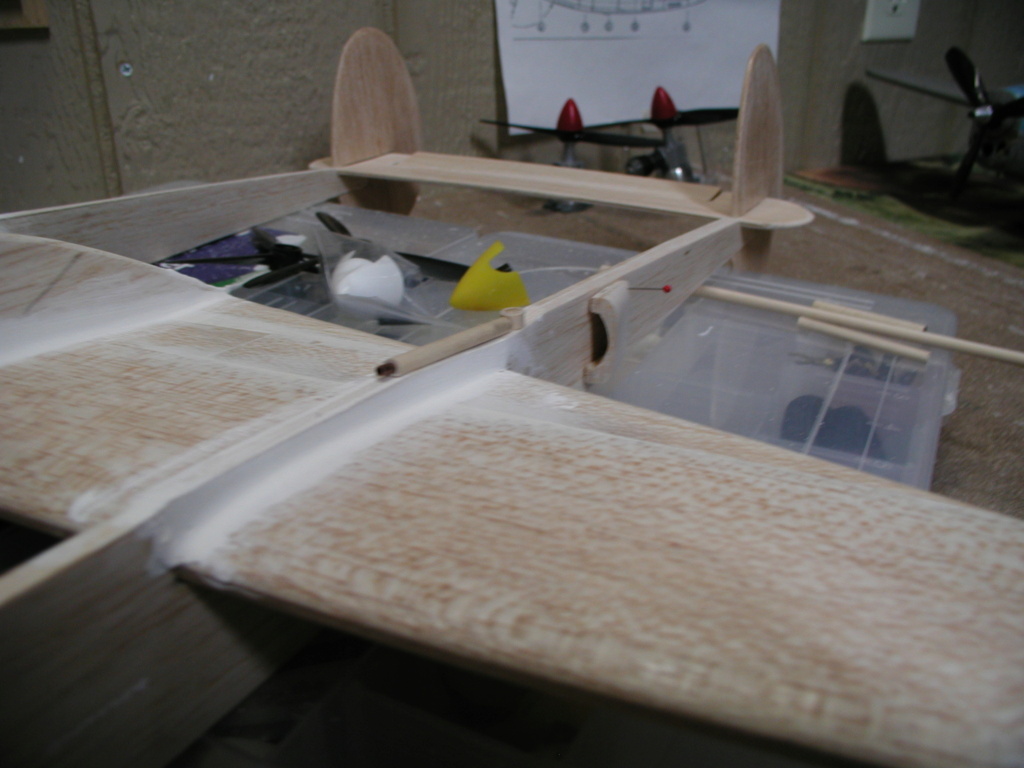
Landing gear is a puzzle with profile. Custom bent and must be strong. Mains a couple of inches long buried into the balsa with an up dog leg at the end ought to do it. Pod gear - Thinking but probably the same. With the orignial, the gear is built well into the pod and booms. No way was I going to lose it and it survived many a hard landing.


Landing gear is a puzzle with profile. Custom bent and must be strong. Mains a couple of inches long buried into the balsa with an up dog leg at the end ought to do it. Pod gear - Thinking but probably the same. With the orignial, the gear is built well into the pod and booms. No way was I going to lose it and it survived many a hard landing.

rsv1cox- Top Poster


Posts : 11260
Join date : 2014-08-18
Location : West Virginia
 Re: New P-38 profile scratch build log
Landing gear location, subject to interpretation.
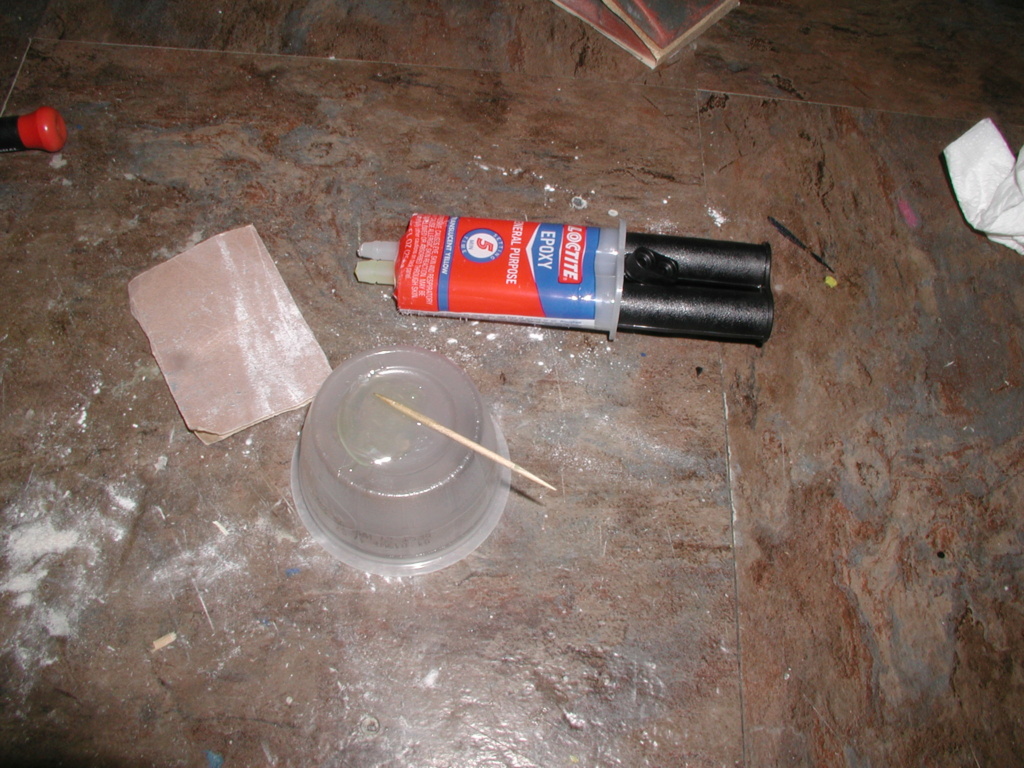
Depending on which source you use. The best is an actual picture of a real-life P-38. I'm betting at a forward leaning angle just ahead of the trailing end of the wing. The picture shows wheels that I got from Cox Int. that are almost exact duplicates. Valley the boom about 1/4" deep, drill a hole for the dog leg and epoxy.


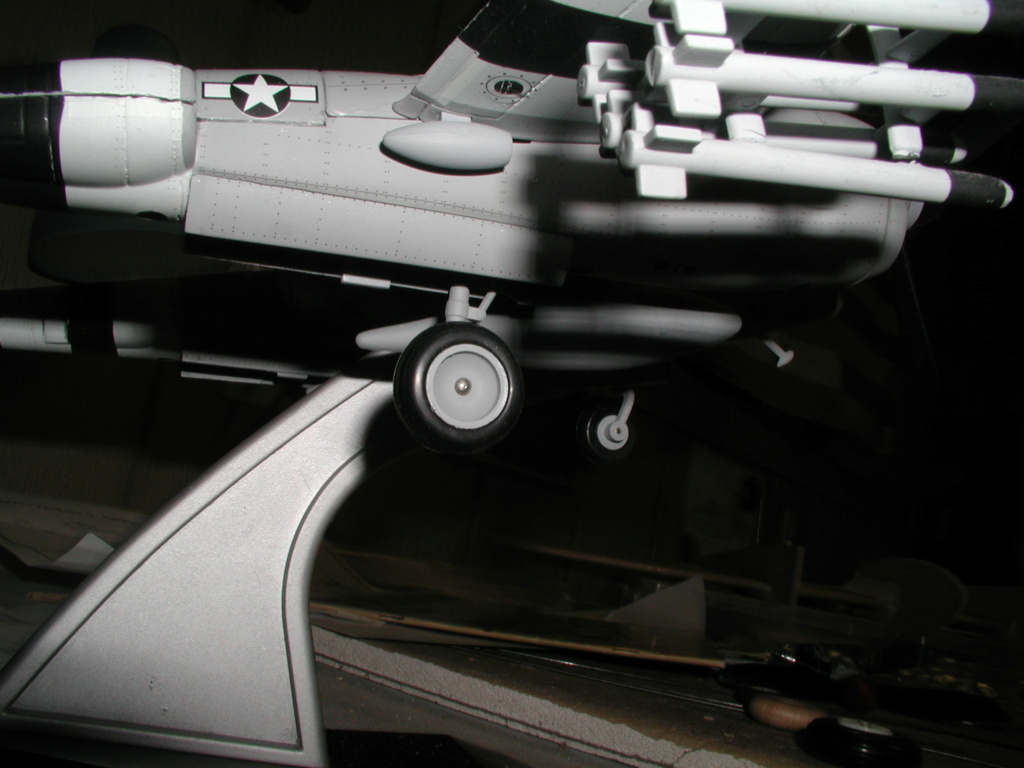

I'm going to mortise the engine mount into the boom and secure with epoxy. Back it up with tri-angled luan and hope. Unless someone has a better idea?
I do like these media blasted cases and backplates. Had no choice, they were a mess when I got them.
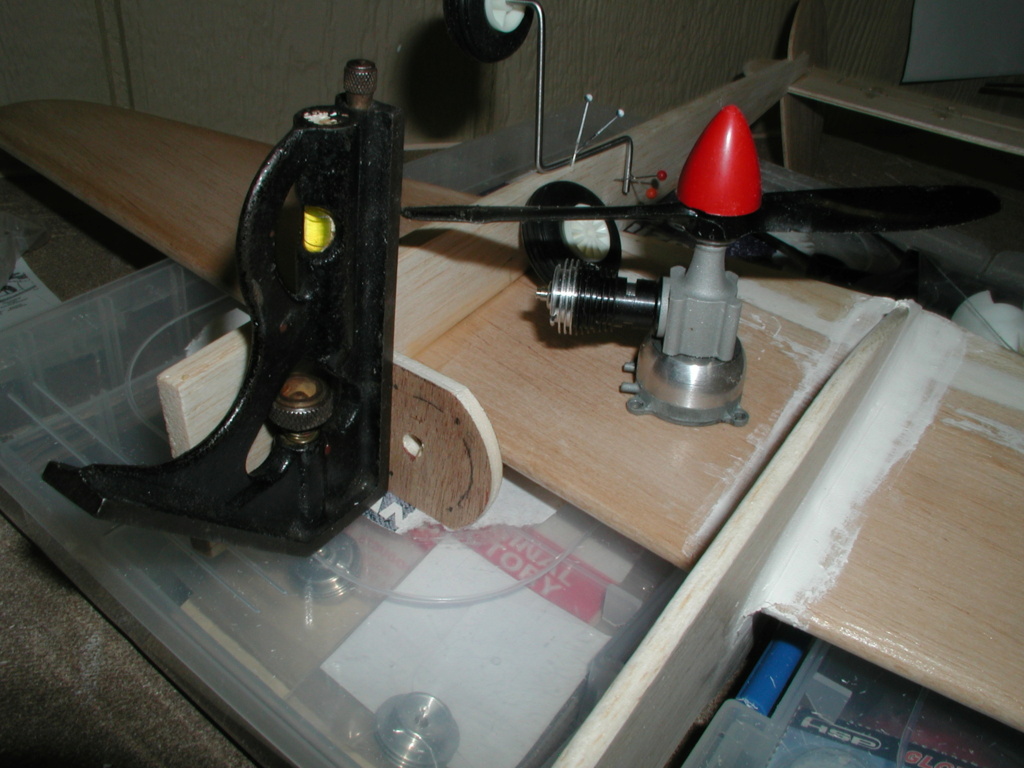
Excuse the excess, I'm having fun putting this thing together...........................
Depending on which source you use. The best is an actual picture of a real-life P-38. I'm betting at a forward leaning angle just ahead of the trailing end of the wing. The picture shows wheels that I got from Cox Int. that are almost exact duplicates. Valley the boom about 1/4" deep, drill a hole for the dog leg and epoxy.


I'm going to mortise the engine mount into the boom and secure with epoxy. Back it up with tri-angled luan and hope. Unless someone has a better idea?
I do like these media blasted cases and backplates. Had no choice, they were a mess when I got them.

Excuse the excess, I'm having fun putting this thing together...........................

rsv1cox- Top Poster


Posts : 11260
Join date : 2014-08-18
Location : West Virginia
 Re: New P-38 profile scratch build log
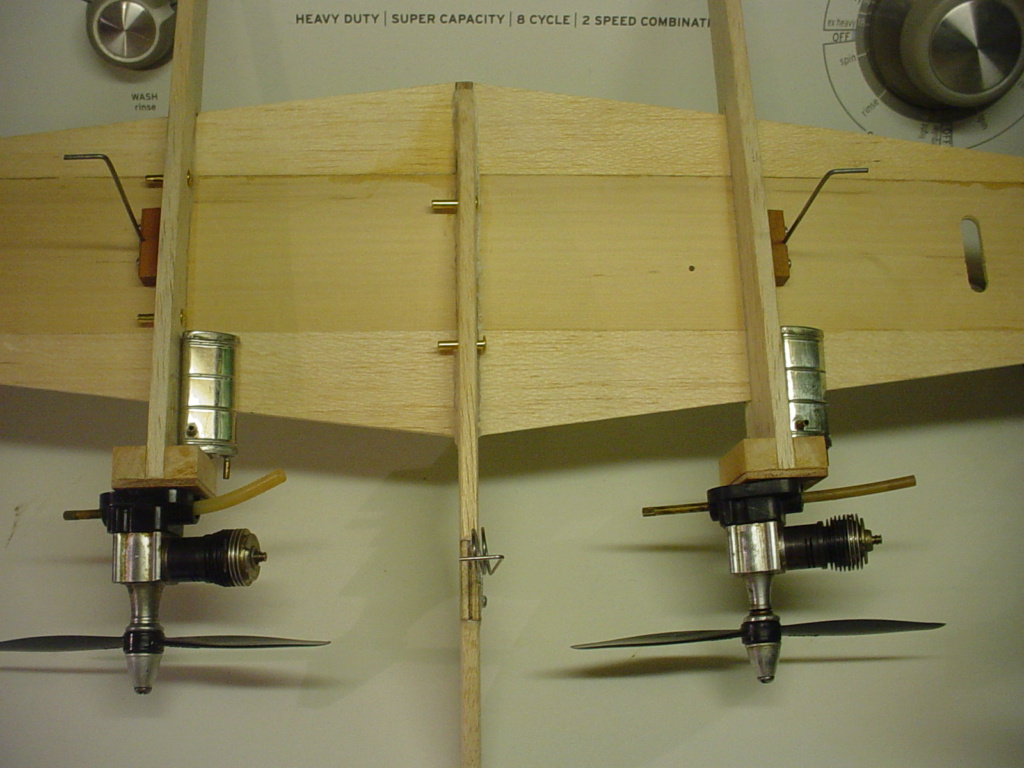
Just some ideas for you in how I did the gear-legs on my P38. I used 1/16" (.062") music-wire on all three legs. I also had gear-straps on hand.. but you could make those from steel-banding material if you had to. Then you need hardwood for mounting blocks.
I used a hard hardwood (not fir) stick that was 3/8" square and cut two 1" long pieces for the mains.
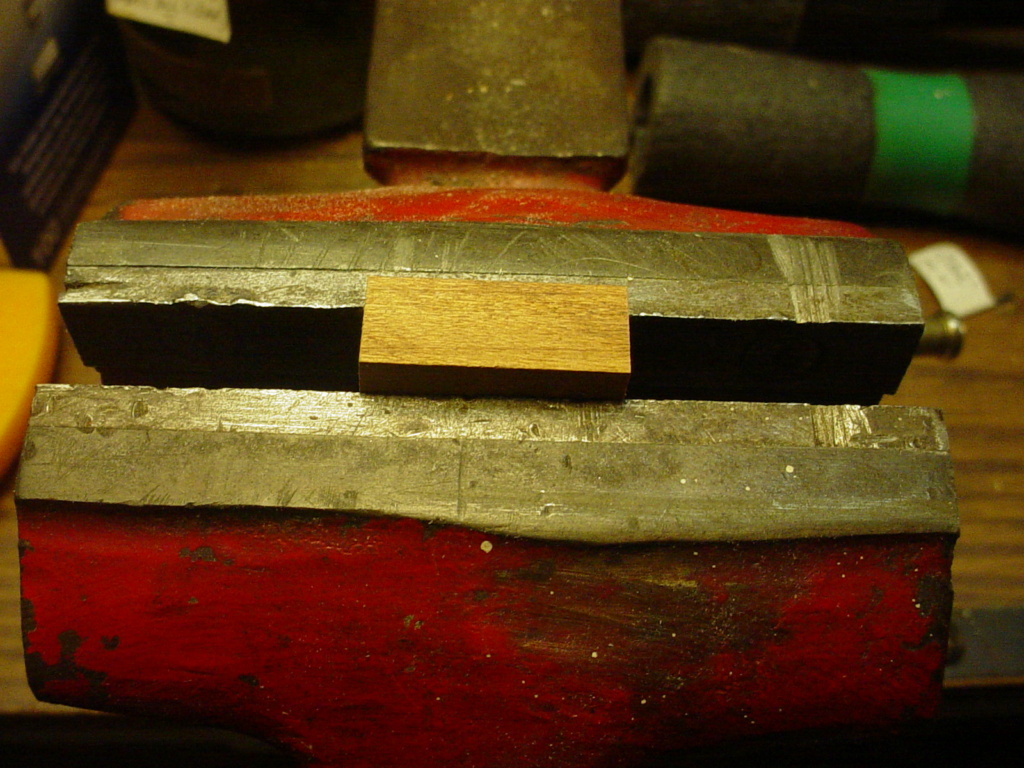
then filed a "V" notch (not too deep) about half the wire diameter in depth.

Then I cut two lengths of music-wire long enough to accommodate the strut-length.. plus enough for an axle L-bend (check your wheel-width at the hub plus enough for a collar/retainer) and an opposing and shorter L-bend to fit into the hardwood block. You can see what I mean in the below photo.
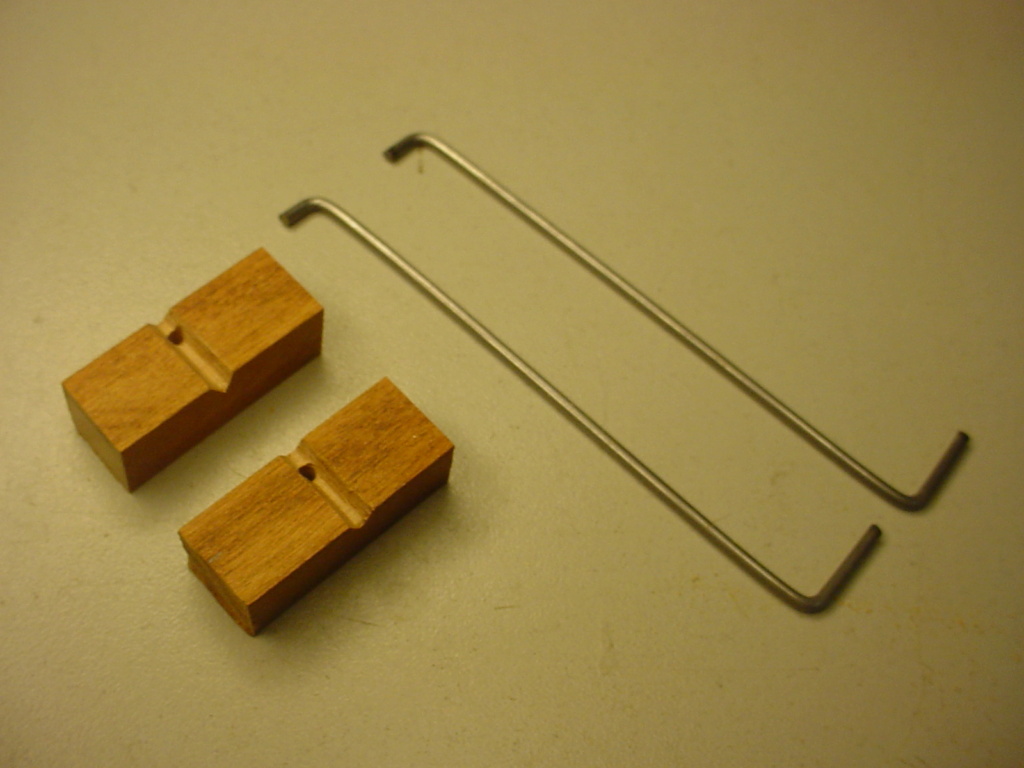
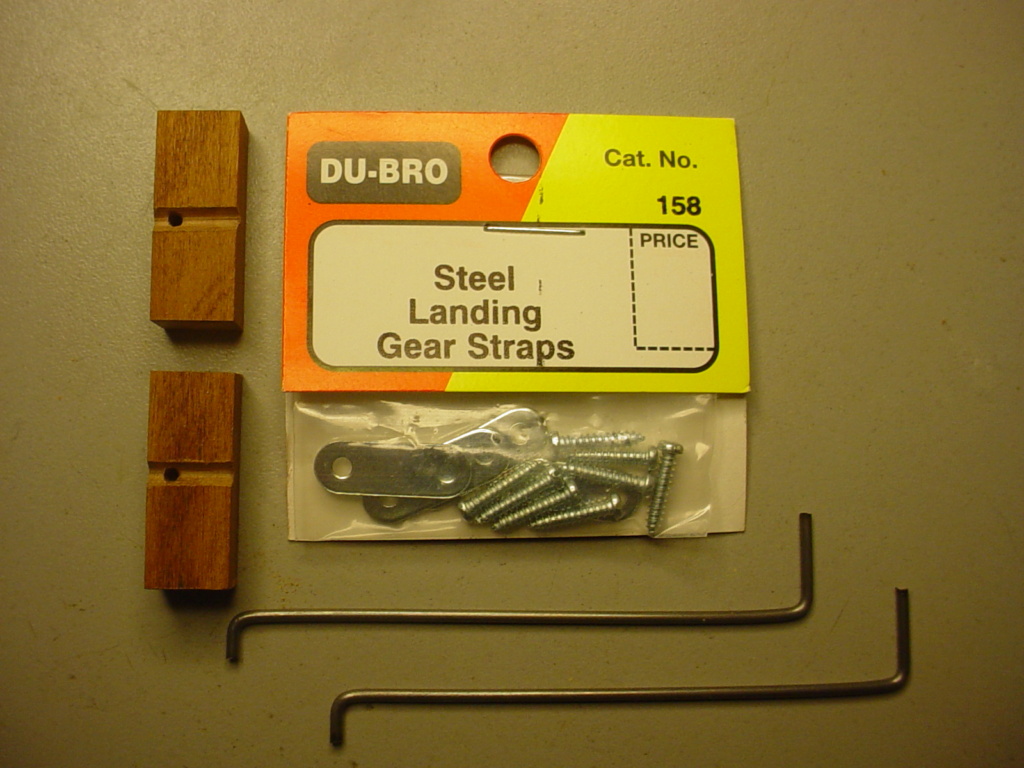

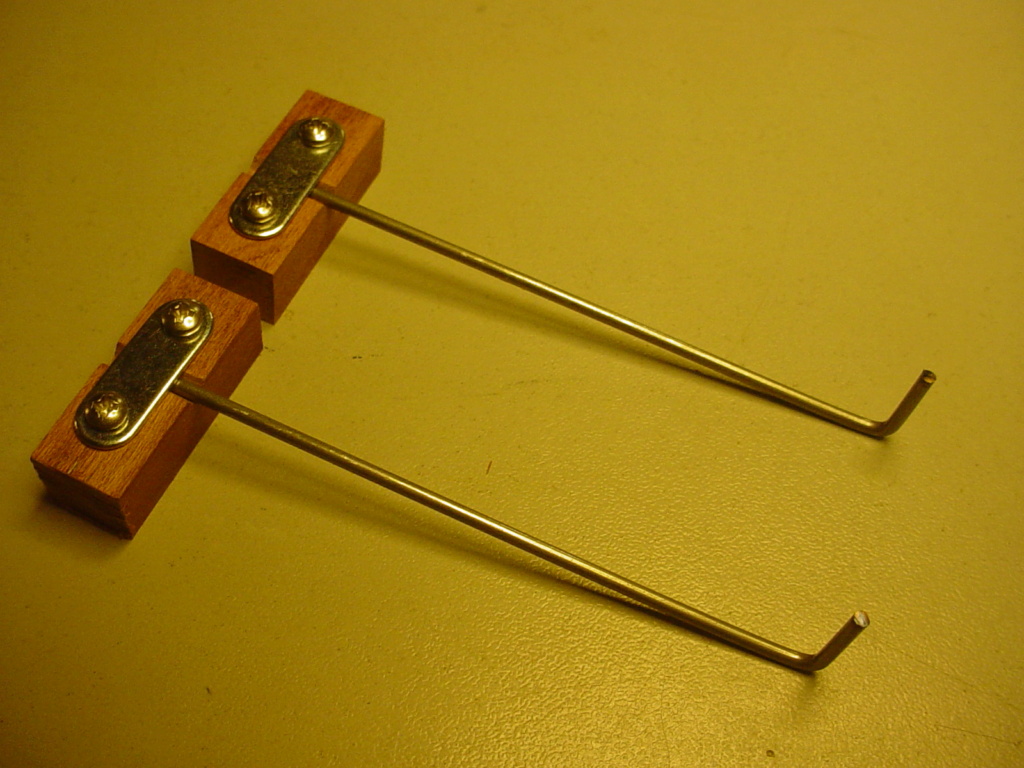
The main-blocks got glued into the wing/boom intersection which allows two surfaces for glue to bear-on.
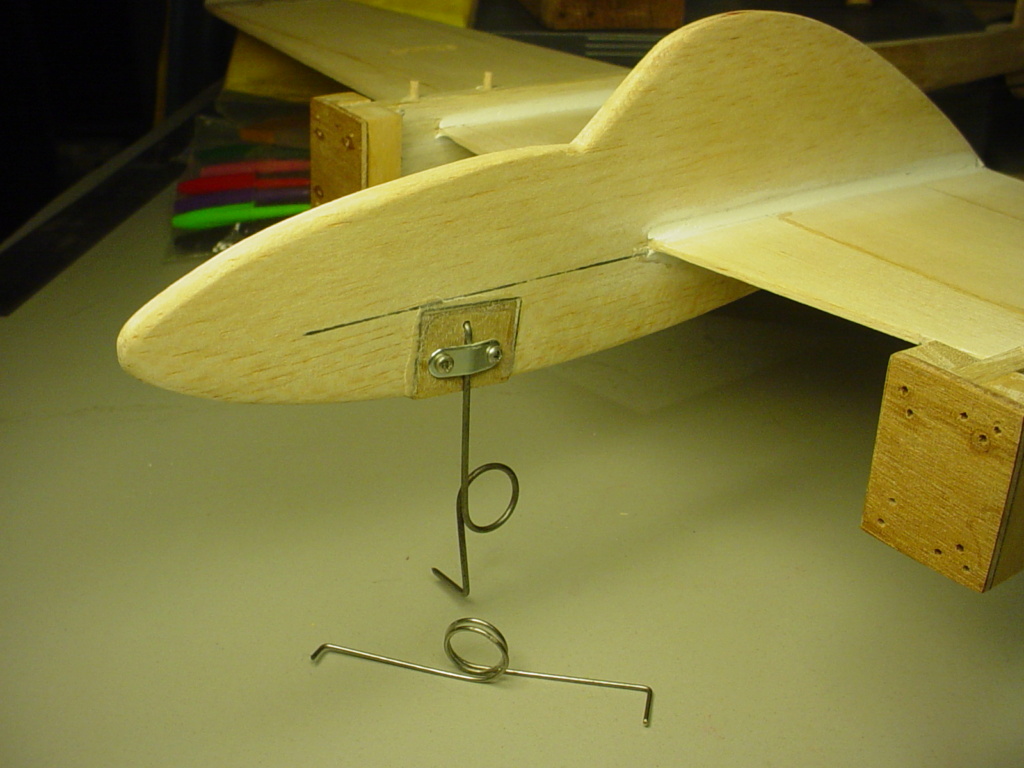
As for the nose-gear; I had a piece of plywood that was the same thickness as my central balsa pod.. so I "spliced" (for lack of a better word..) a piece of plywood into the balsa.. for the nose gear mounting. My pod (and booms...) are constructed from 1/4" (.250") balsawood.. so the plywood block was made from 1/4" ply.. 1" x 5/8". I wound a "single coil" midway on the nose-strut's .062" music-wire for "shock-absorbing" action. My 1st nose-strut was of a smaller diameter music-wire. I didn't think it was up to the task.. so I went with the same wire with all three struts.
Here's some photos that show the gear all done.
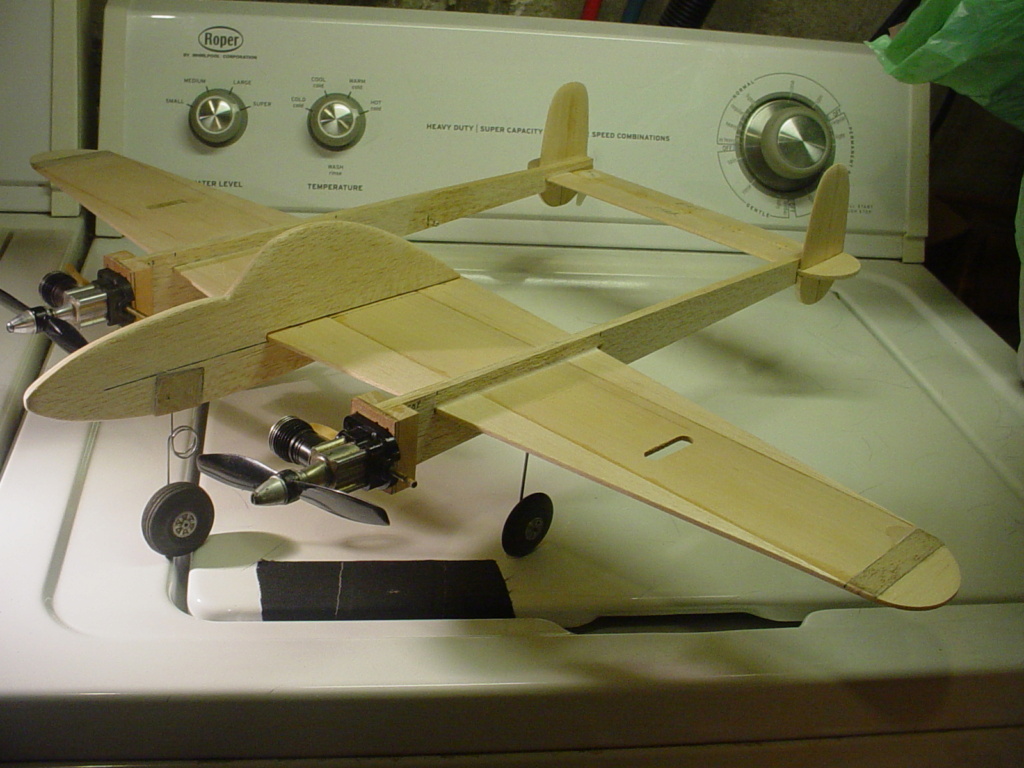

You can "bush" the hubs of those wheels to use smaller wire/axles.. while also using less wire.
The model is looking AWESOME Robert!
I used a hard hardwood (not fir) stick that was 3/8" square and cut two 1" long pieces for the mains.

then filed a "V" notch (not too deep) about half the wire diameter in depth.

Then I cut two lengths of music-wire long enough to accommodate the strut-length.. plus enough for an axle L-bend (check your wheel-width at the hub plus enough for a collar/retainer) and an opposing and shorter L-bend to fit into the hardwood block. You can see what I mean in the below photo.


The main-blocks got glued into the wing/boom intersection which allows two surfaces for glue to bear-on.

As for the nose-gear; I had a piece of plywood that was the same thickness as my central balsa pod.. so I "spliced" (for lack of a better word..) a piece of plywood into the balsa.. for the nose gear mounting. My pod (and booms...) are constructed from 1/4" (.250") balsawood.. so the plywood block was made from 1/4" ply.. 1" x 5/8". I wound a "single coil" midway on the nose-strut's .062" music-wire for "shock-absorbing" action. My 1st nose-strut was of a smaller diameter music-wire. I didn't think it was up to the task.. so I went with the same wire with all three struts.

Here's some photos that show the gear all done.


You can "bush" the hubs of those wheels to use smaller wire/axles.. while also using less wire.
The model is looking AWESOME Robert!
 Re: New P-38 profile scratch build log
Nice roddie, so typical of your meticulous well thought-out builds.
But you're too late, I stumbled through on my original plan.
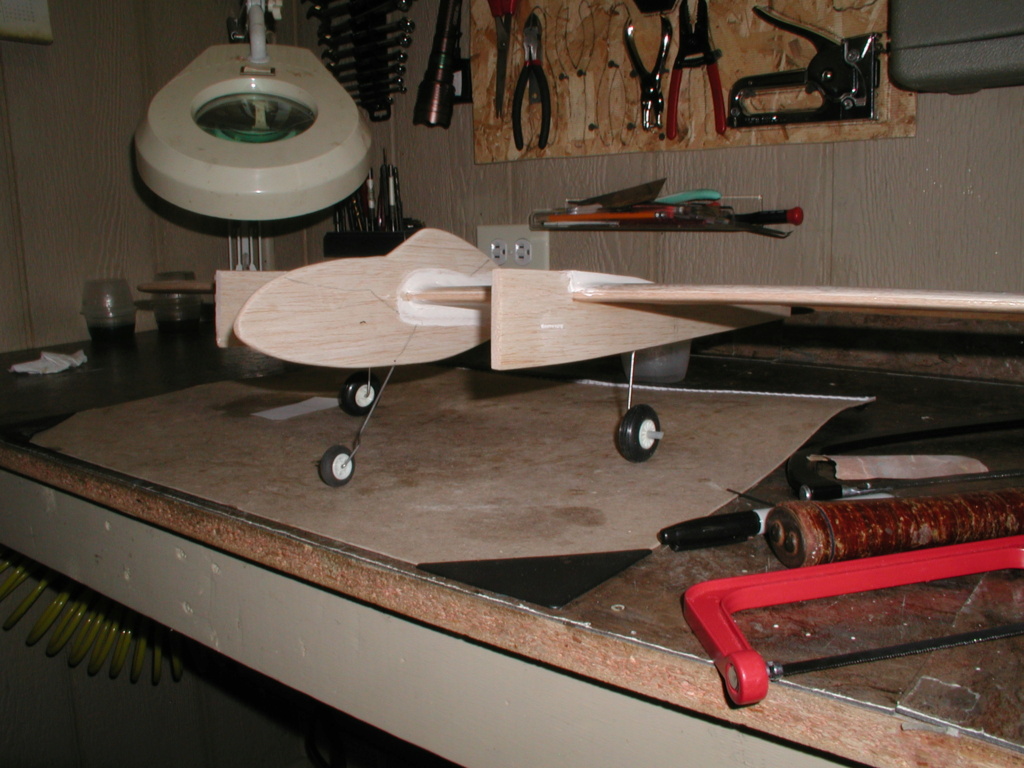

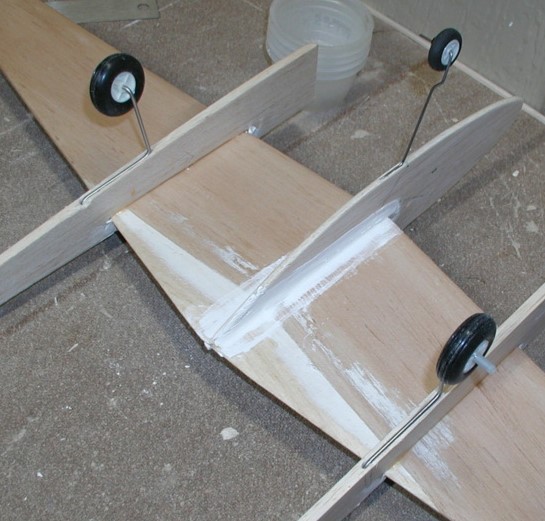
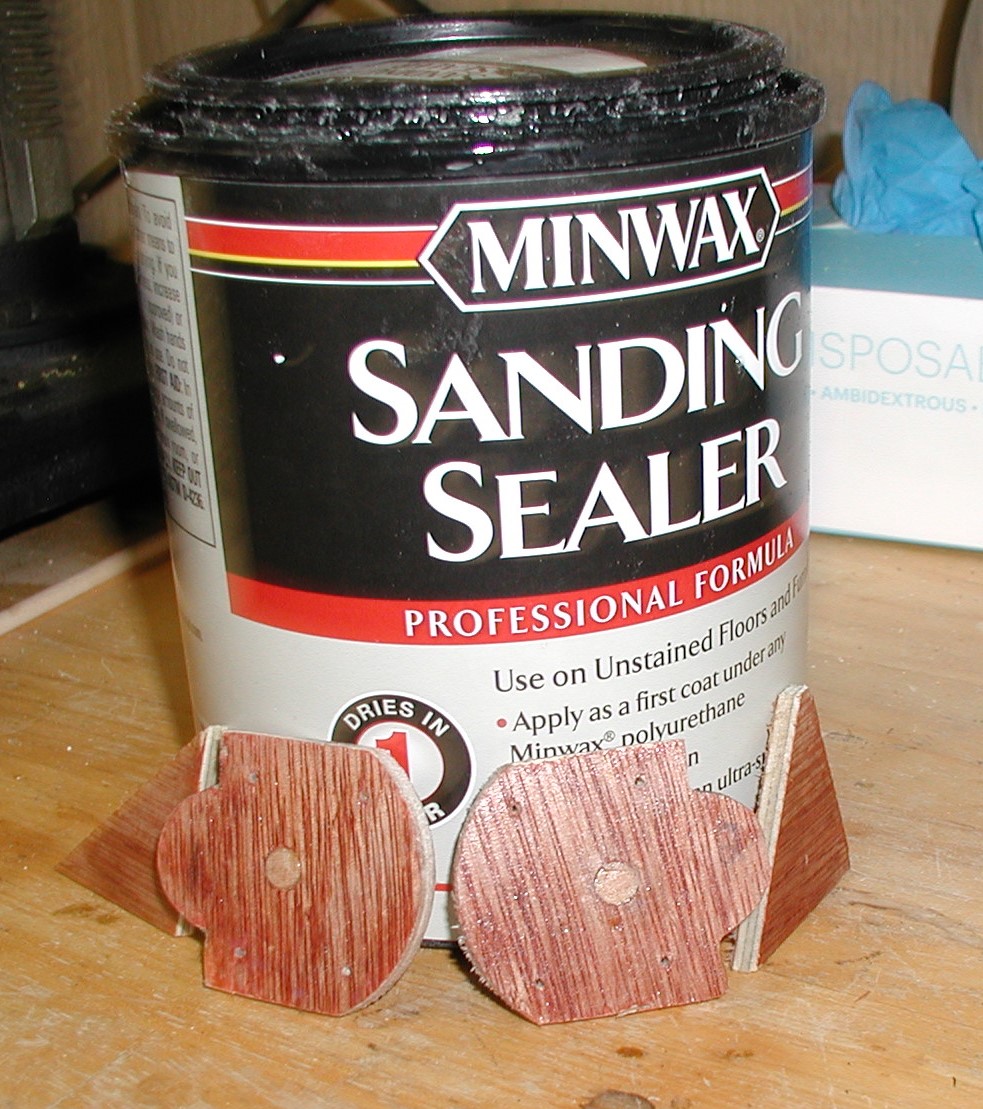
Still, a lot of tweaking (bending) to do to get this thing to sit straight. Next are the motor mounts and trimming the booms. Add the controls, then a lot of sanding. 90% of the filler will be sanded away. Overall coat of sanding sealer, then paint.
But you're too late, I stumbled through on my original plan.


Still, a lot of tweaking (bending) to do to get this thing to sit straight. Next are the motor mounts and trimming the booms. Add the controls, then a lot of sanding. 90% of the filler will be sanded away. Overall coat of sanding sealer, then paint.

rsv1cox- Top Poster


Posts : 11260
Join date : 2014-08-18
Location : West Virginia
 Re: New P-38 profile scratch build log
WOW! They look great Robert! I was thinking while posting my stuff.. that you were working on the gear... and you obviously were! It's not an easy part of the model to get done. Kudos Robert!
 Built to fail
roddie wrote:WOW! They look great Robert! I was thinking while posting my stuff.. that you were working on the gear... and you obviously were! It's not an easy part of the model to get done. Kudos Robert!
Thanks roddie. I will valley the grooves a little deeper, fill the dog-leg holes and grooves with epoxy replace the gear and sand smooth when cured. I will have to mask off the gear when I paint. Took a litle more of the angle out of the front gear too. Sits better now.
But, I have a problem with the wing. It sat for a couple of years and developed a bend that I did not notice when I cemented it to the booms. I can compensate but it is now and always will be there bothering me. Not a big deal, as this plane was built to fail anyway. Kind of my control line swan song.
I lost my "edge" flying these some 40 years ago when I gave it up for other things. Tried it again a few years back and developed the dizzy's that put me on the ground. (pictured here on the forum some time ago). I just want to experience the sound of those Cox twins in sync and see it go around from inside the circle for a few laps as I once did with the original without risking it. One last time.
I imagine that it will end up as splinters and without regret.

rsv1cox- Top Poster


Posts : 11260
Join date : 2014-08-18
Location : West Virginia
 Re: New P-38 profile scratch build log
I don't think so Robert. I see creativity here.. and I like it. I haven't seen this side of you. Show me more.
 Re: New P-38 profile scratch build log
hey Robert, plane is coming along great. If you are going to fly the plane is it worth doing some practicing rotations without the plane to help prepare maybe. And maybe you could have someone else in the circle with you that you can hand the controls to after a couple of laps when you fly it
 that way you can enjoy flying the plane and it doesnt need to end up as splinters and with you flat on your back.


Yabby- Platinum Member


Posts : 712
Join date : 2021-06-08
Location : Yorke Peninsula South Australia
 Re: New P-38 profile scratch build log
roddie wrote:I don't think so Robert. I see creativity here.. and I like it. I haven't seen this side of you. Show me more.
I'm not complaining roddie, I have lived a charmed life. Not my doing, but through the benevolence of others, my wife mostly. "I'd rather be lucky than good" - that's me.
Being hit by a car at four and spending six weeks in the hospital had its benefits. Not being mobile for weeks Mom read to me a lot and taught me my ABC's - she was a schoolteacher. By the time I entered first grade I was reading and writing at a third-grade level. I became bored with school and turned to other things. I became a troublemaker and was suspended a few times. Dad to the rescue, got me back in and I think he was a little proud of me. This little beat-up kid standing up to authority.
Reading became my sanctuary. I read everything, and still do.
But..............
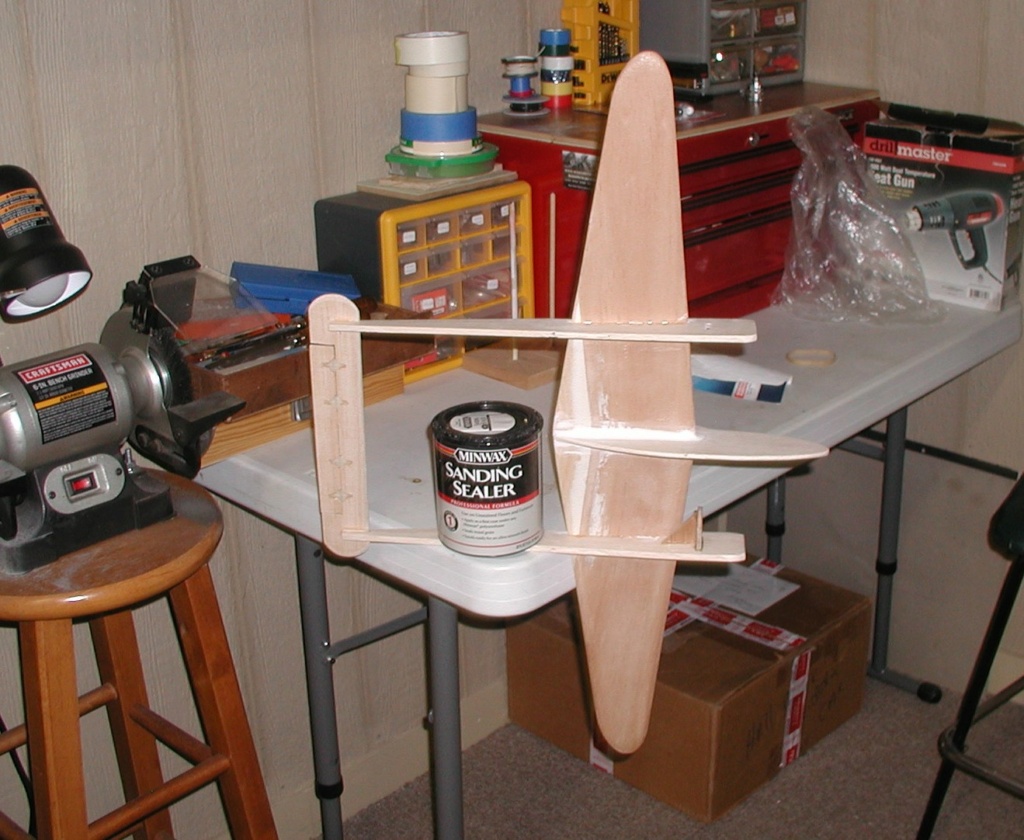
Fixed my wing problem, or at least compensated for it. Mortised one engine mount into the left boom at least temporarily.


and..........thanks Yabby, but it's me and the plane.

rsv1cox- Top Poster


Posts : 11260
Join date : 2014-08-18
Location : West Virginia

rsv1cox- Top Poster


Posts : 11260
Join date : 2014-08-18
Location : West Virginia
 Re: New P-38 profile scratch build log
Looks like you got it all figured out , and coming along Nicely , I have never tried those kind of hinges but do have them .. I got to get on my mess pretty soon again the weather is going to bee good for a little while here maybe hot at 80 F  I got to put a water pump on my truck now and the tengien idler has a prob. on and on got the bees away from the log splitter and now need to fix the gas leak and Oh yea the trimmer don't want to run right Flooding .. Home sweet Home ... Did get the elect. fixed 1 wire (my wire) outside replaced $210 have a nice day !!
 I got to put a water pump on my truck now and the tengien idler has a prob. on and on got the bees away from the log splitter and now need to fix the gas leak and Oh yea the trimmer don't want to run right Flooding .. Home sweet Home ... Did get the elect. fixed 1 wire (my wire) outside replaced $210 have a nice day !!

getback- Top Poster


Posts : 10448
Join date : 2013-01-18
Age : 67
Location : julian , NC
Page 2 of 5 •  1, 2, 3, 4, 5
 Similar topics
» Hybrid-Profile Flite Streak/Cox Hyper Viper scratch build
» cowled fuse-kits for 1/2A profile scratch-building
» La Stick Scratch Build for Cox Pee Wee .020
» Qtee scratch build
» My Latest Scratch build Cox powered car
» cowled fuse-kits for 1/2A profile scratch-building
» La Stick Scratch Build for Cox Pee Wee .020
» Qtee scratch build
» My Latest Scratch build Cox powered car
Page 2 of 5
Permissions in this forum:
You cannot reply to topics in this forum

 Rules
Rules


