Log in
Search
Latest topics
» TEE DEE Having issuesby TD ABUSER Today at 9:43 pm
» Landing-gear tips
by roddie Today at 6:17 pm
» Roger Harris revisited
by TD ABUSER Today at 2:13 pm
» Tee Dee .020 combat model
by Ken Cook Today at 1:41 pm
» Retail price mark-up.. how much is enough?
by Ken Cook Today at 1:37 pm
» Happy 77th birthday Andrew!
by getback Today at 11:52 am
» My latest doodle...
by roddie Today at 10:43 am
» My N-1R build log
by GallopingGhostler Yesterday at 3:04 pm
» Chocolate chip cookie dough.........
by roddie Yesterday at 1:13 pm
» Purchased the last of any bult engines from Ken Enya
by sosam117 Yesterday at 11:32 am
» Free Flight Radio Assist
by rdw777 Yesterday at 9:24 am
» Funny what you find when you go looking
by rsv1cox Wed Nov 20, 2024 3:21 pm
Cox Engine of The Month
OCD TV-a pictorial of modeling madness
Page 1 of 2
Page 1 of 2 • 1, 2 
 OCD TV-a pictorial of modeling madness
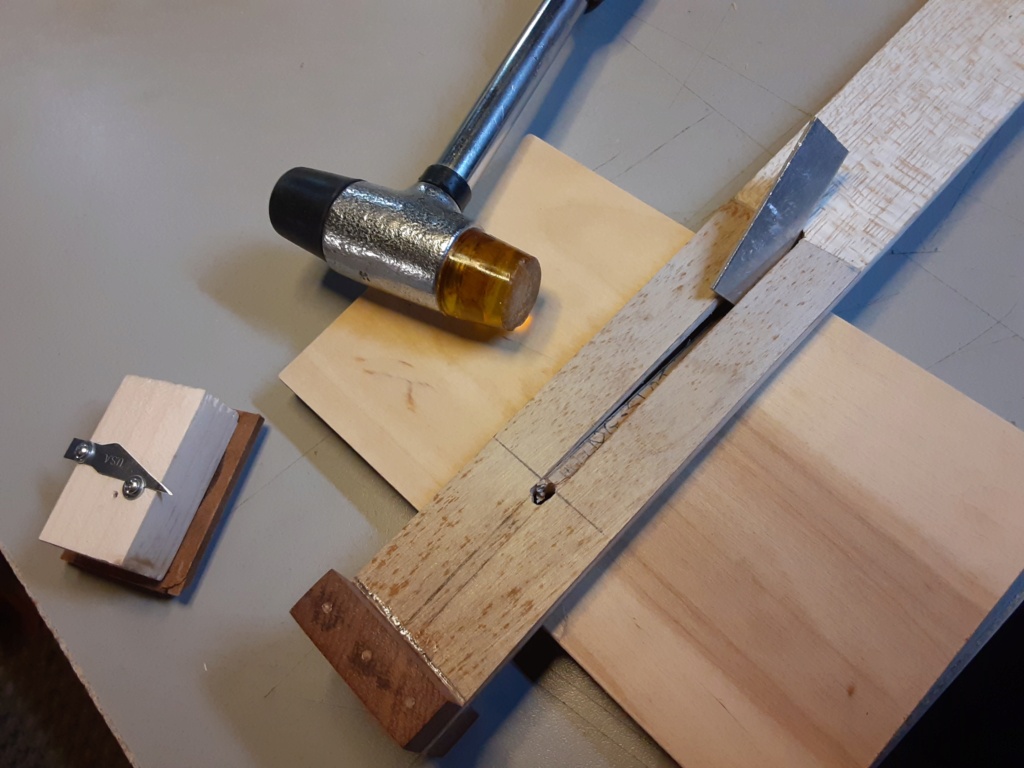
I'll go first.. I needed to cut a slot in the profile fuse of my current TBD1 design, for its 1/8" (3.18mm) balsa sheet-wing to fit into. The fuse is 3/16" balsa; faced both-sides with 1/64" plywood nose-doublers.
The slot is on the center-line of the fuse.. and the fuse's top and bottom are parallel.

I made a tool consisting of a small wooden block with a fence attached, to bear on the fuse.. with the block-component having the proper offset for a #11 hobby-blade to be attached so as to "score" the 1/64" plywood on both sides; top and bottom.
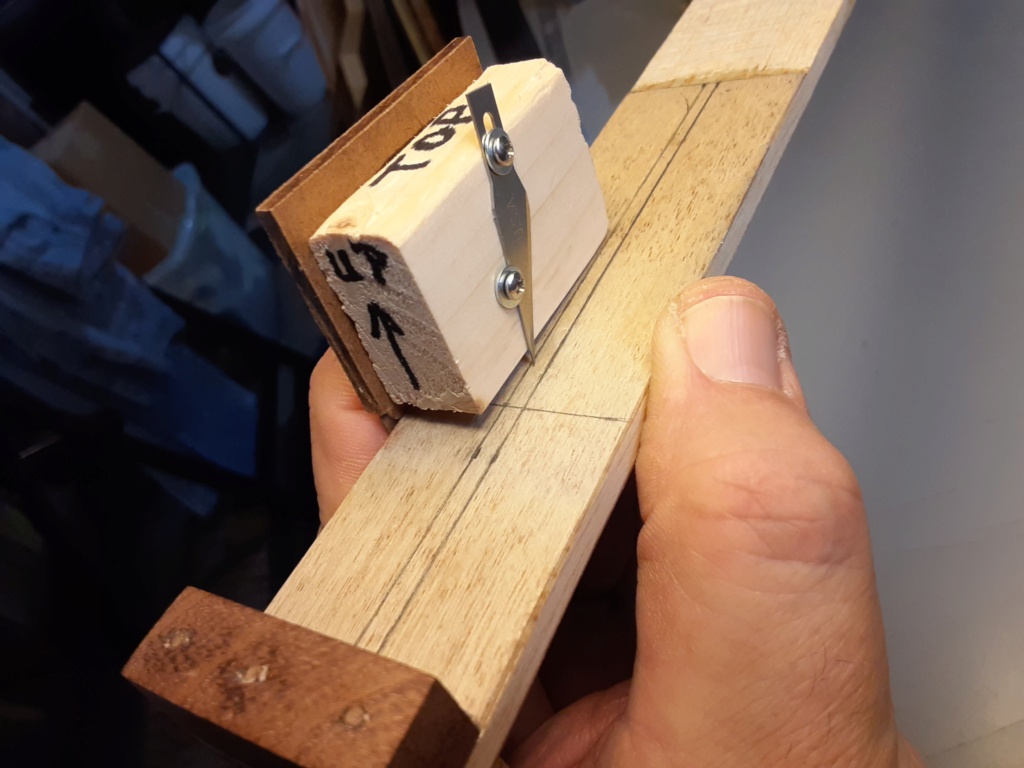

There are multiple depth-settings for the knife.
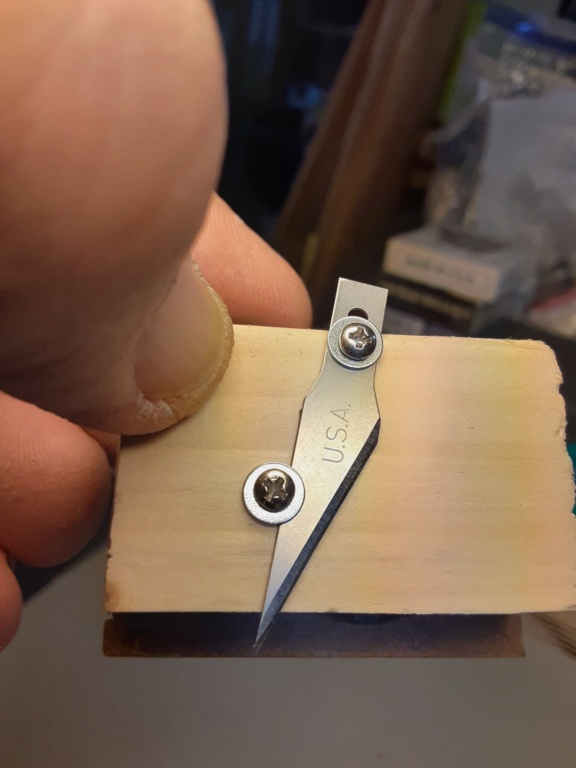
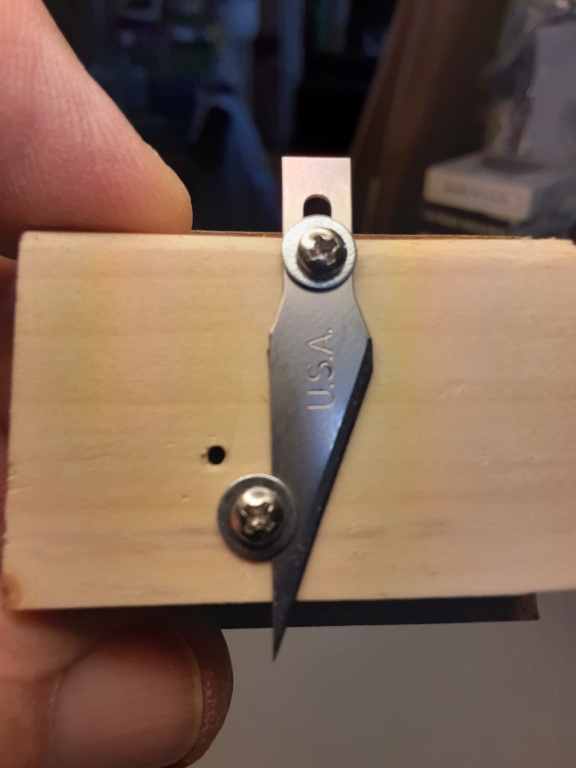
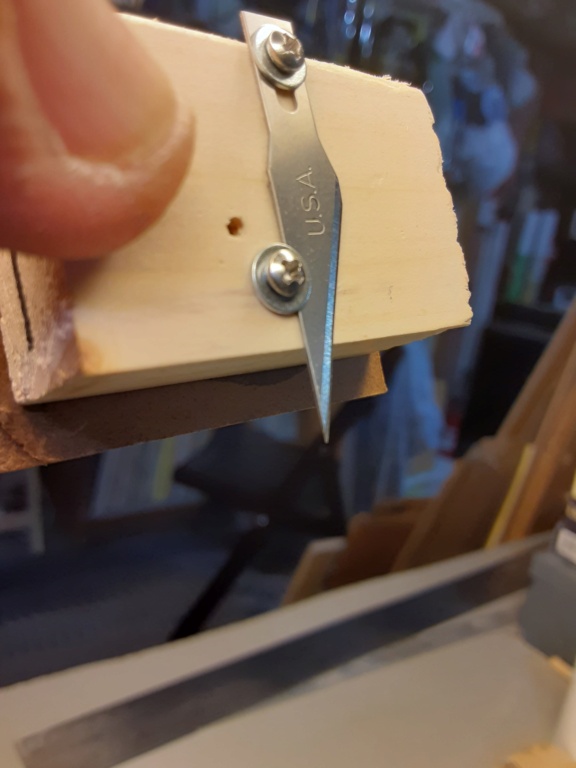
This same tool will be used to cut the slot for the stab. prior to my tapering the fuse's tail geometry.
The slot is on the center-line of the fuse.. and the fuse's top and bottom are parallel.

I made a tool consisting of a small wooden block with a fence attached, to bear on the fuse.. with the block-component having the proper offset for a #11 hobby-blade to be attached so as to "score" the 1/64" plywood on both sides; top and bottom.


There are multiple depth-settings for the knife.


This same tool will be used to cut the slot for the stab. prior to my tapering the fuse's tail geometry.
 Re: OCD TV-a pictorial of modeling madness
When there is no specialty tool for the job….. Then one is created…. Mark of a good engineer….Good job Roddie 
Robert
Robert

rdw777- Diamond Member


Posts : 1718
Join date : 2021-03-11
Location : West Texas
 Re: OCD TV-a pictorial of modeling madness
Hey Roddie, thats insane man! 
 Brilliant tool you have designed. I envy people with the mind that can come up with a tool that is able to do a job jsut perfectly rather than the rough manual way. Congrats on that.
  Your build logs are awesome teaching tools in themselves.


GaryB
'Yabby'
 Your build logs are awesome teaching tools in themselves.
GaryB
'Yabby'

Yabby- Platinum Member


Posts : 712
Join date : 2021-06-08
Location : Yorke Peninsula South Australia
 Re: OCD TV-a pictorial of modeling madness
rdw777 wrote:When there is no specialty tool for the job….. Then one is created…. Mark of a good engineer….Good job Roddie
Robert
Thank You Robert! The slot was a bit wider than I'd have liked.. but it will make it easier to set the wing perpendicular to the fuse.. which can be a PIA with a tighter slot. I'd rather have some room for epoxy in that joint.. otherwise it can be a weak-spot under certain/unfortunate conditions.. where a gram of prevention.. is worth an ounce of cure.
Last edited by roddie on Tue Feb 07, 2023 3:08 pm; edited 1 time in total
 Re: OCD TV-a pictorial of modeling madness
Yabby wrote:Hey Roddie, thats insane man!
Brilliant tool you have designed. I envy people with the mind that can come up with a tool that is able to do a job jsut perfectly rather than the rough manual way. Congrats on that.
Your build logs are awesome teaching tools in themselves.


GaryB
'Yabby'
Exactly Gary!!! I'm crazy.. but I enjoy the craziness..

rsv1cox- Top Poster


Posts : 11250
Join date : 2014-08-18
Location : West Virginia
 Re: OCD TV-a pictorial of modeling madness
Ahh yes.. the Douglas TBD Devestator torpedo-bomber.. Designed in the early "30's".. and very advanced for when it entered serviced for the US Navy in 1937. Short-lived though.. decommissioned from active-service.. 1n 1942 after the battle of Midway, and completely in 1944............ for a multitude of problems later attributed to the USN's Mark 13 torpedo.. and was replaced by the Grumman TBF Avenger.  (I site Wikipedia for the aforementioned info.)
Fascinating history when you start looking into these WW2 aircraft..
Fascinating history when you start looking into these WW2 aircraft..
 Re: OCD TV-a pictorial of modeling madness
roddie wrote:Ahh yes.. the Douglas TBD Devestator torpedo-bomber.. Designed in the early "30's".. and very advanced for when it entered serviced for the US Navy in 1937. Short-lived though.. decommissioned from active-service.. 1n 1942 after the battle of Midway, and completely in 1944............ for a multitude of problems later attributed to the USN's Mark 13 torpedo.. and was replaced by the Grumman TBF Avenger.(I site Wikipedia for the aforementioned info.)
Fascinating history when you start looking into these WW2 aircraft..
Bob

rsv1cox- Top Poster


Posts : 11250
Join date : 2014-08-18
Location : West Virginia
 Re: OCD TV-a pictorial of modeling madness
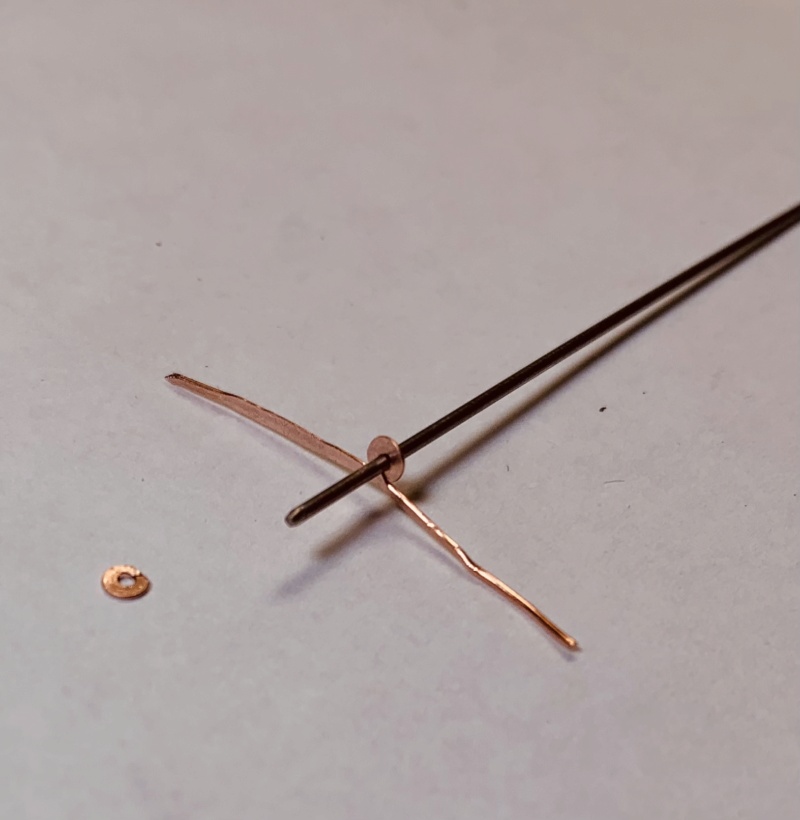
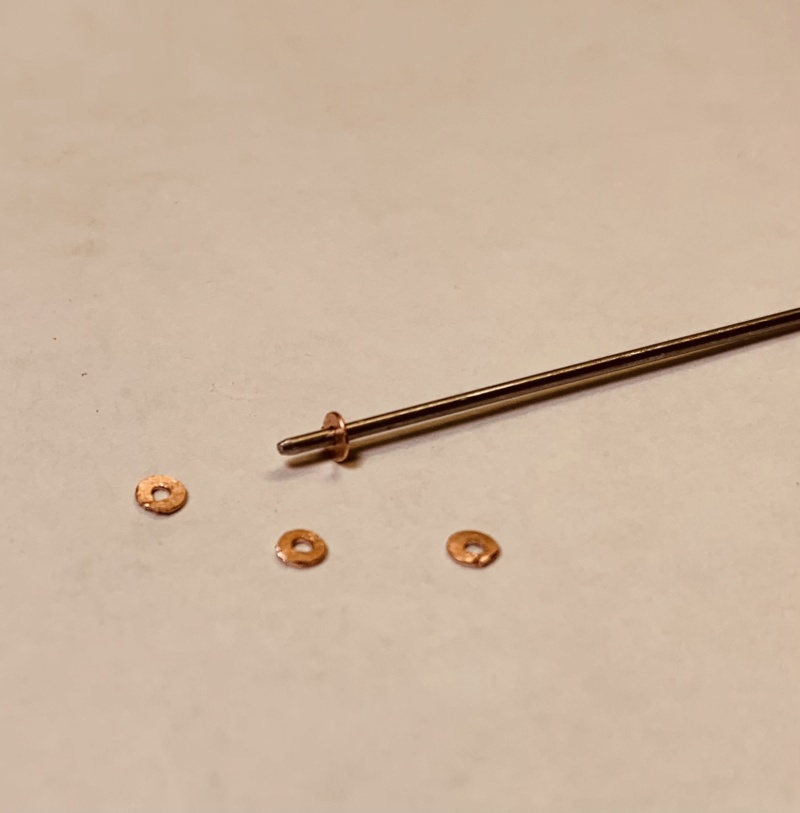
Was thinking about your thread last night Roddie and think I fit some of those…. I love to strain at a gnat so to speak and enjoy getting in that zone….Here’s a contribution to the madness…. I can never find the right size little washers to solder on the landing gear to hold the wheels on (or other stuff) so I make my own from copper wire…. Coil it around a wire then hammer flat …. Cut it off and clean up with small files….


rdw777- Diamond Member


Posts : 1718
Join date : 2021-03-11
Location : West Texas
 Re: OCD TV-a pictorial of modeling madness
Those washers are brilliant, RDW!
While a picture is worth a thousand words, could you provide a few details?
Are you using solid copper, or tightly twisted strand?
How do you keep the inner hole from collapsing into nothing? I would expect as the copper gets flattened, that it would grow in both inward (shrinking the hole) and outward directions.
No more staring at #0 washers and wishing they were brass or copper. Or cutting tin with a hole punch and drilling with my pin vise...I'll be doing "R(eally) D(one) W(ell) wheel retainers" once I try this!
Thanks much.
Last edited by 944_Jim on Wed Feb 08, 2023 7:41 am; edited 1 time in total (Reason for editing : Syntax)
_________________
Never enough time to build them all...always enough time to smash them all!
944_Jim- Diamond Member


Posts : 2022
Join date : 2017-02-08
Age : 59
Location : NE MS
 Re: OCD TV-a pictorial of modeling madness
That is one way to do it, Robert, good going, once sweat soldered onto the music wire axle would seal the overlapping ends for a sturdy wheel retainer. I was lazy and went the Dubro and CG way, bought their retainers when still available. The CG ones used spring steel wire with backing washer, were at the time inexpensive and I used quite a few. Your forming method reminds me of the flattened pennies you could buy at truck stops and souvenir shops 20 - 30 years ago.

Official US Government photo.
To me, it is a beautiful aircraft. This is 1930's technology, what our military was flying at the start of the war. The better stuff came later. I saved various plans of it from Outerzone and I think Hip Pocket Aeronautics downloads, with intentions to later make a half-A profile C/L aircraft for two .049's.
Regarding other to be determined, I came across this photo from WW2, a pre-war Martin B-10 flying over Oahu around the time of Pearl Harbor attack.

Official US Government photo.
To me, it is a beautiful aircraft. This is 1930's technology, what our military was flying at the start of the war. The better stuff came later. I saved various plans of it from Outerzone and I think Hip Pocket Aeronautics downloads, with intentions to later make a half-A profile C/L aircraft for two .049's.

GallopingGhostler- Top Poster


Posts : 5724
Join date : 2013-07-13
Age : 70
Location : Clovis NM or NFL KC Chiefs
 Re: OCD TV-a pictorial of modeling madness
Hi Guys, Glad you like the washers!!! A few more details;
You’re right Jim, The holes do shrink up as you peen them flat on a hard surface (I use the flat anvil-ish thing on the back of my vice and a small tack hammer)….. Use a bigger form ( sometimes I use close hanger wire) than the intended finish size….. As it’s shaped being from being
peened flat keep checking the hole size against your landing gear wire…. If you happen to get it too tight you can bore it out a little with a round needle file….Spin the directions that would tighten the gap… Use the tails for something to hold on to
When it’s close snip the tails off as close as possible…. The round needle file makes a good holder while you dress the outside edge….. An alternative would be to leave one or both tails, Solder it on, Then dress it out…. I usually finish the washer and install as normal…. 18 - 22 gauge solid (not stranded) wire is about right for 1/16 music landing gear….About the size you would find maybe in a thermostat control cable….. If you happen to have an electrician buddy individual strands from cutoffs from # 4 or 6 copper are good too…. Just keep your eyes open for scrap copper wire…. Something should pop up…
Love that Martin B-10 George…. Looked at some of the color photos on the net… Beautiful and graceful…. Profile 1/2 A - CL would be the perfect way to model it too!!!
You’re right Jim, The holes do shrink up as you peen them flat on a hard surface (I use the flat anvil-ish thing on the back of my vice and a small tack hammer)….. Use a bigger form ( sometimes I use close hanger wire) than the intended finish size….. As it’s shaped being from being

peened flat keep checking the hole size against your landing gear wire…. If you happen to get it too tight you can bore it out a little with a round needle file….Spin the directions that would tighten the gap… Use the tails for something to hold on to
When it’s close snip the tails off as close as possible…. The round needle file makes a good holder while you dress the outside edge….. An alternative would be to leave one or both tails, Solder it on, Then dress it out…. I usually finish the washer and install as normal…. 18 - 22 gauge solid (not stranded) wire is about right for 1/16 music landing gear….About the size you would find maybe in a thermostat control cable….. If you happen to have an electrician buddy individual strands from cutoffs from # 4 or 6 copper are good too…. Just keep your eyes open for scrap copper wire…. Something should pop up…
Love that Martin B-10 George…. Looked at some of the color photos on the net… Beautiful and graceful…. Profile 1/2 A - CL would be the perfect way to model it too!!!

rdw777- Diamond Member


Posts : 1718
Join date : 2021-03-11
Location : West Texas
 Re: OCD TV-a pictorial of modeling madness
"Love that Martin B-10 George…. Looked at some of the color photos on the net… Beautiful and graceful…. Profile 1/2 A - CL would be the perfect way to model it too!!!"
I thought the same Robert, complex design to be accomplished by someone more talented than me. Air Classics did a piece on one awhile back, I will have to dig it out.
I was thinking about your copper washers. As kids we would place a penny on the railroad tracks hide and wait for the train to pass. Pressed very thin. Drill a few holes, center a quality 1/4" hole punch over each hole and hit with a hammer. Voila, a copper washer.

rsv1cox- Top Poster


Posts : 11250
Join date : 2014-08-18
Location : West Virginia
 Re: OCD TV-a pictorial of modeling madness
Very nice "life-hack" on the copper flat-washers Robert! The big "+" is being able to solder them in place. That's a wheel-retainer simplified.. that won't inadvertently come apart.. or loosen. That's what we strive for in our flying-machines. Components that don't break.. but need to be checked periodically for wear and replaced; once worn to a certain measurable point.
 Re: OCD TV-a pictorial of modeling madness
Hello once again.. and welcome back to "OCD TV" your humble host "Roddie" here.
What we currently have for your viewing pleasure... is a hack on a flux-brush; an item commonly used by plumbers.. or wanna be plumbers...
A thin rolled metal tube with brush/bristles crimped-onto one end.. and about 6" long.
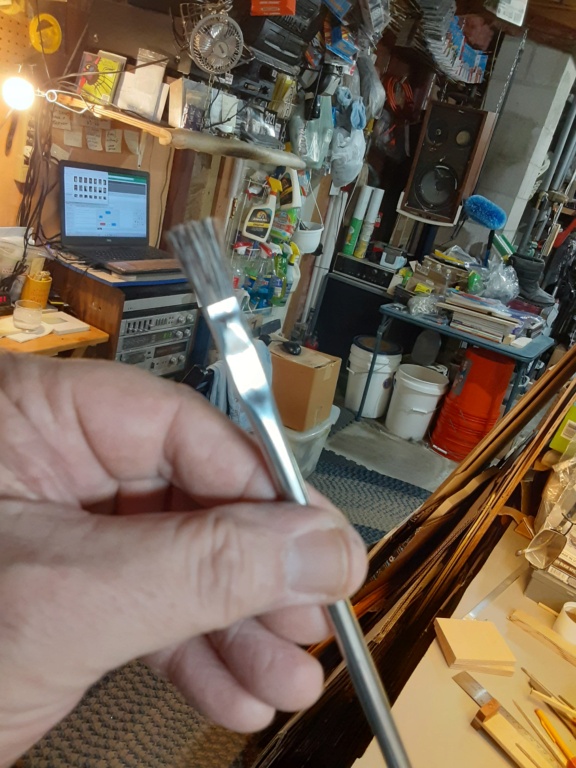
I use these brushes to spread epoxy.. but first I trim the bristles shorter.. by approximately 50%...
I wrap masking-tape around the bristles..

and then cut them shorter with good sharp scissors.
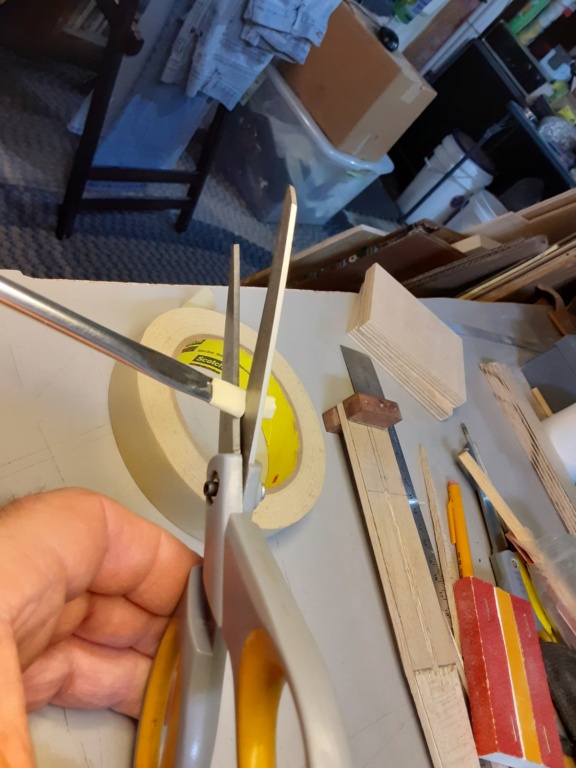
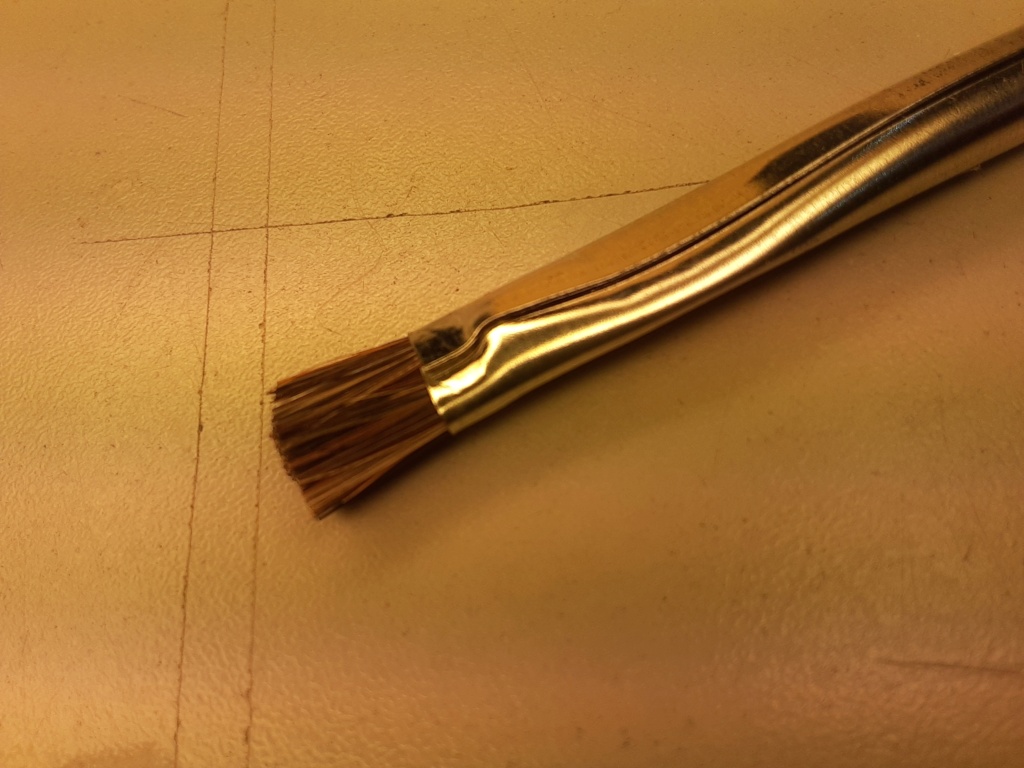
The shorter bristles really help to control the spreading of epoxy. When your using 5-minute pot-life glue; control is important.
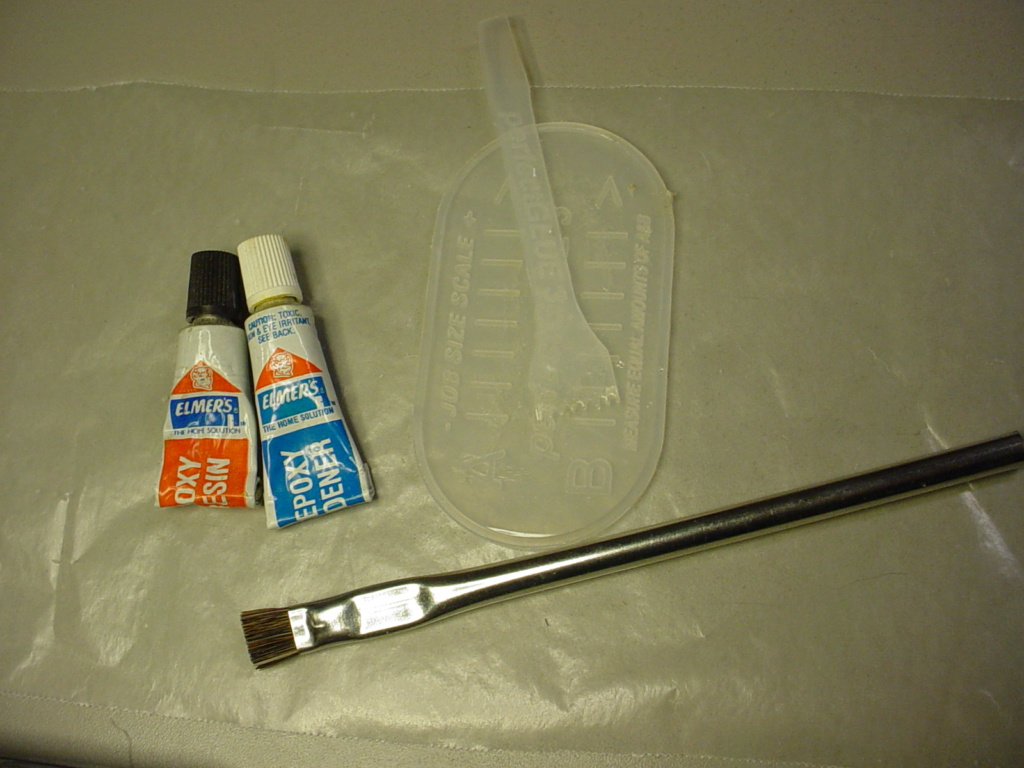
What we currently have for your viewing pleasure... is a hack on a flux-brush; an item commonly used by plumbers.. or wanna be plumbers...
A thin rolled metal tube with brush/bristles crimped-onto one end.. and about 6" long.

I use these brushes to spread epoxy.. but first I trim the bristles shorter.. by approximately 50%...
I wrap masking-tape around the bristles..

and then cut them shorter with good sharp scissors.


The shorter bristles really help to control the spreading of epoxy. When your using 5-minute pot-life glue; control is important.

 Re: OCD TV-a pictorial of modeling madness
Nice Roddie, I’m sure the brush gives a lot of control on applying epoxy…. Never thought about trimming one for even better results…. Noted!!!…. I’ll have to grab a few next trip to the hardware store!!!
My team was doing a remodel at on of the schools I worked at a couple of years ago and part of the demo was to remove a couple of windows that had roll up bamboo blinds on them…. The blinds were going to thrown away… I thought to myself, No, Them’s airplane parts!!!
The round sections are a little less than 1/8 dia and the flats a little less than 1/4….36” long… I use them for poor boy carbon fiber reinforcements, pushrods, dowels, glue mixer’s, etc, etc, …. I have a life time supply of this stuff ….


rdw777- Diamond Member


Posts : 1718
Join date : 2021-03-11
Location : West Texas

rsv1cox- Top Poster


Posts : 11250
Join date : 2014-08-18
Location : West Virginia
 alignment madness...
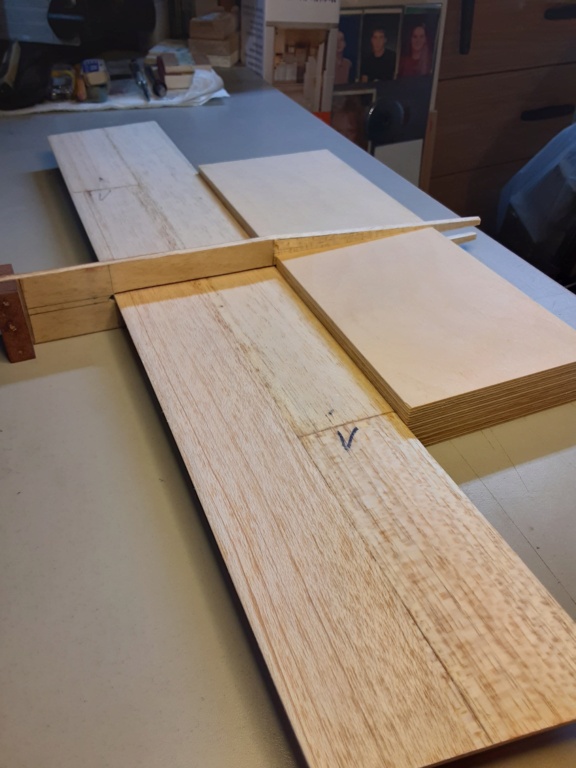
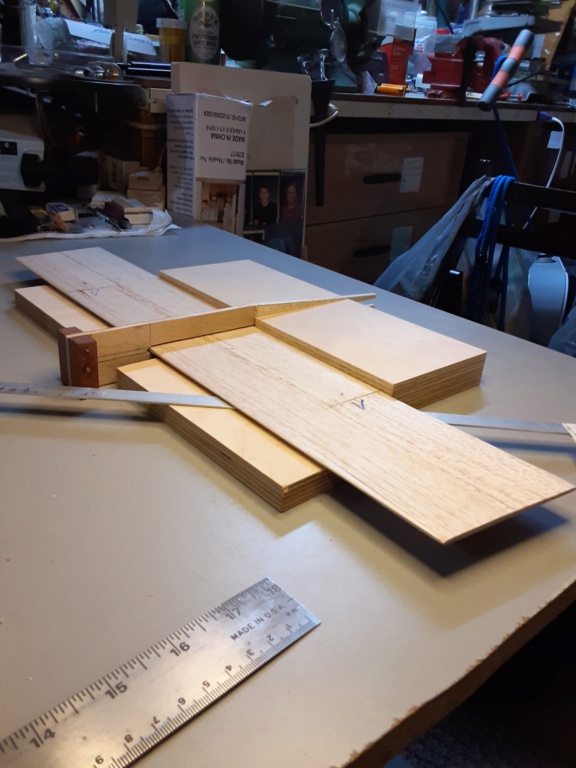
my current build.. before it was too late...  I tapered the leading and trailing-edges of my sheet-wing before proceeding in the alignment process.. and before applying the 5-min epoxy to the joint.
Still no glue; I've regressed back to my childhood, and am playing with blocks..
not bad..
better...
better still...
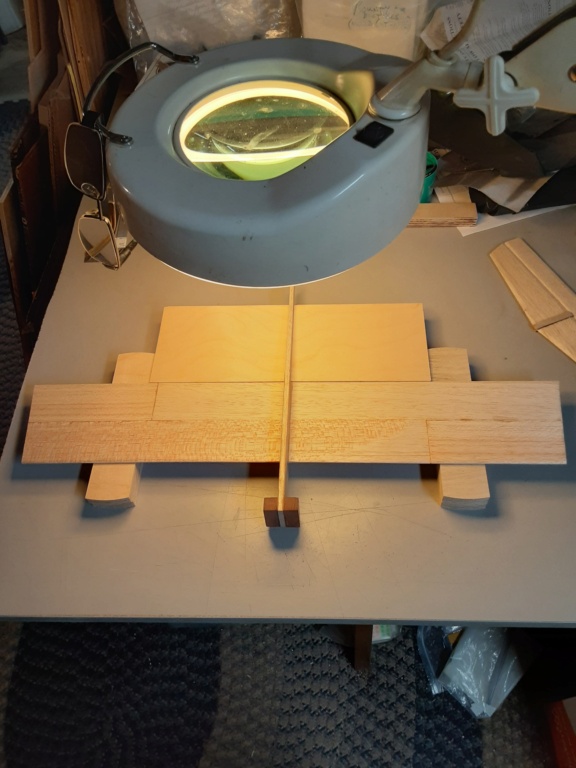
now if I can just find my T-pins..
 I tapered the leading and trailing-edges of my sheet-wing before proceeding in the alignment process.. and before applying the 5-min epoxy to the joint.
 Still no glue; I've regressed back to my childhood, and am playing with blocks..
not bad..

better...

better still...

now if I can just find my T-pins..

rsv1cox- Top Poster


Posts : 11250
Join date : 2014-08-18
Location : West Virginia
 Re: OCD TV-a pictorial of modeling madness
rsv1cox wrote:OCD roddie you bring it!.........
So, when are you going to let us know..............power? and final configuration?
 I had a reply Robert.. and it somehow slipped away into cyberspace..
 attempt #2
Yea.. so.. The name of this design is T-Bee-D1.. and was meant for Cox .049 reed-valve glow power. Not necessarily integrally-tanked engines.. but definitely reed-valve induction.
more OCD madness making a fin template....

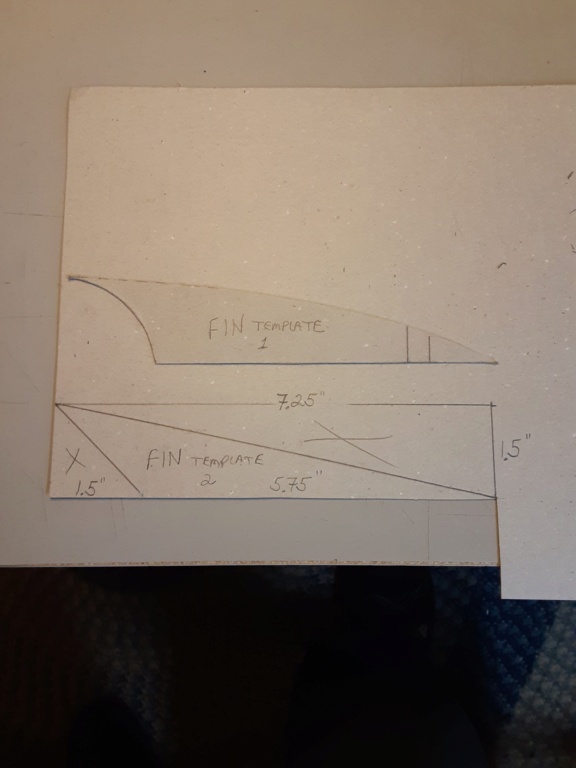
Fin-template #1 just doesn't fit with the rest of the design-geometry..
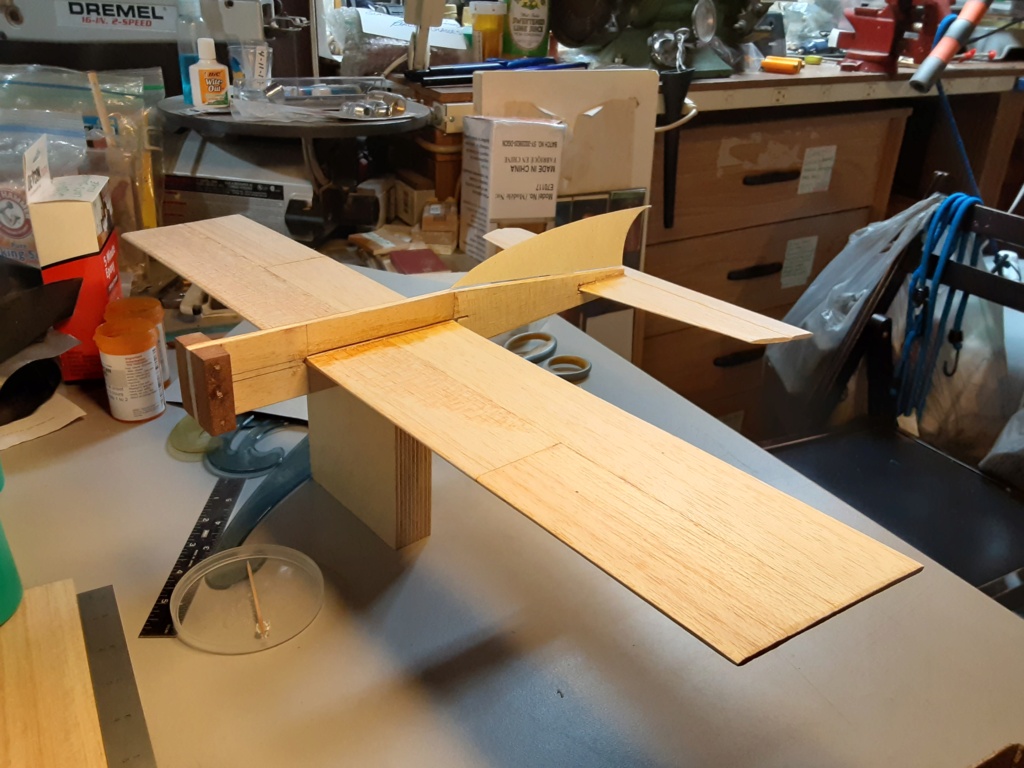
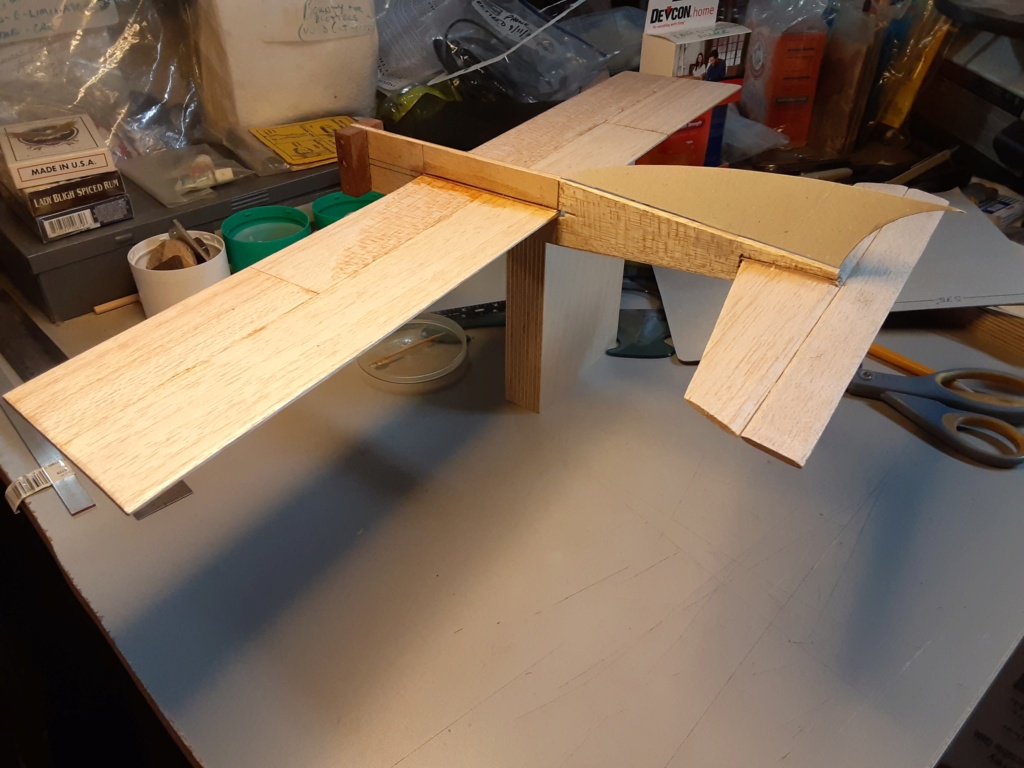
so I'll save the French-Curves for if I go with a canopy-profile.
Here's fin-template #2..
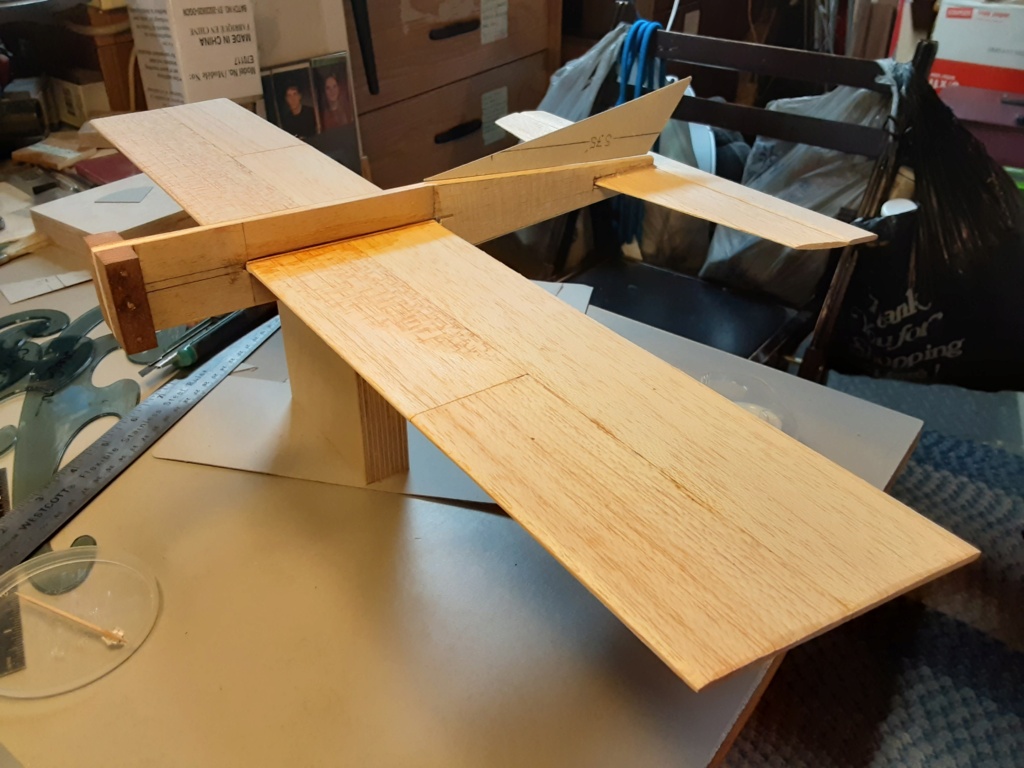
 Re: OCD TV-a pictorial of modeling madness
Aha........rectangles and sharp corners morph into a very appealing curved sail..............I like temp #1, but, I could go for #2............

rsv1cox- Top Poster


Posts : 11250
Join date : 2014-08-18
Location : West Virginia
 Re: OCD TV-a pictorial of modeling madness
rsv1cox wrote:Aha........rectangles and sharp corners morph into a very appealing curved sail..............I like temp #1, but, I could go for #2............
Thank you Robert!

 Sig SH234 bellcrank bushing-mod
I recently sourced some small nylon bellcranks from Sig Manufacturing Co. In Iowa (USA). Sig has long been a great source for aeromodeling supplies, and I'm happy to report that the company is in the process of relocating to a larger/state of the art facility. They will however continue to fulfill orders for "in-stock" items, until the new facility is up and running.
Amongst a few other somewhat related items; I ordered X8 pieces of their #SH234 "1/2A Nylon Bellcrank with control horn assembly.
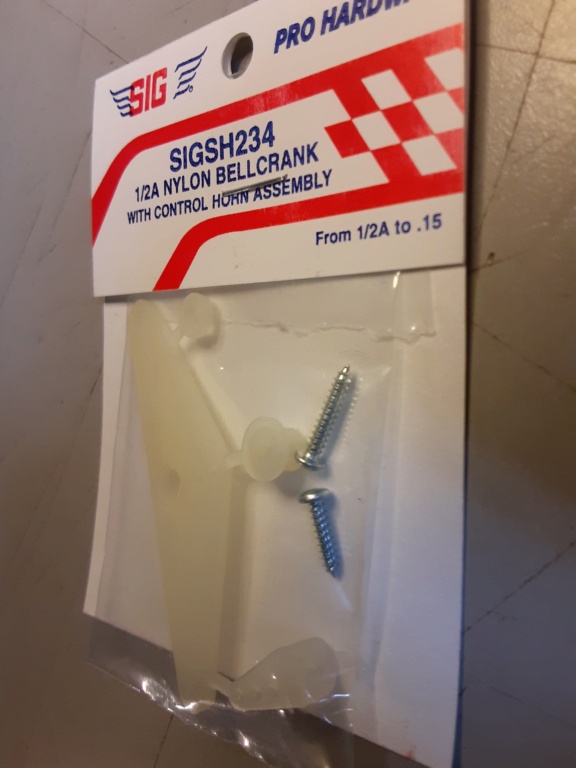
Many of my models utilize this bellcrank.. but none of them utilize the supplied wood-screw for retention. My earlier builds utilize a 2-56 machine-screw/hex-nut combo with either a "lock-nut".. or some other means to "lock" the hex-nut from loosening. I've used CA as a thread-locker.
The fact is; the Sig #234 assembly's nylon bushing has an ID measurement of .089" and a 2-56 machine-screw's OD is .084" which works fine despite there being .0025" of concentric-slop in the bushing..
So............. I decided to increase the .089" dia. bore-size of the nylon bushing to .098" which is the OD of a 3-48 machine-screw which I have a supply of on-hand. This was done with a #40 (wire-guage) drill.
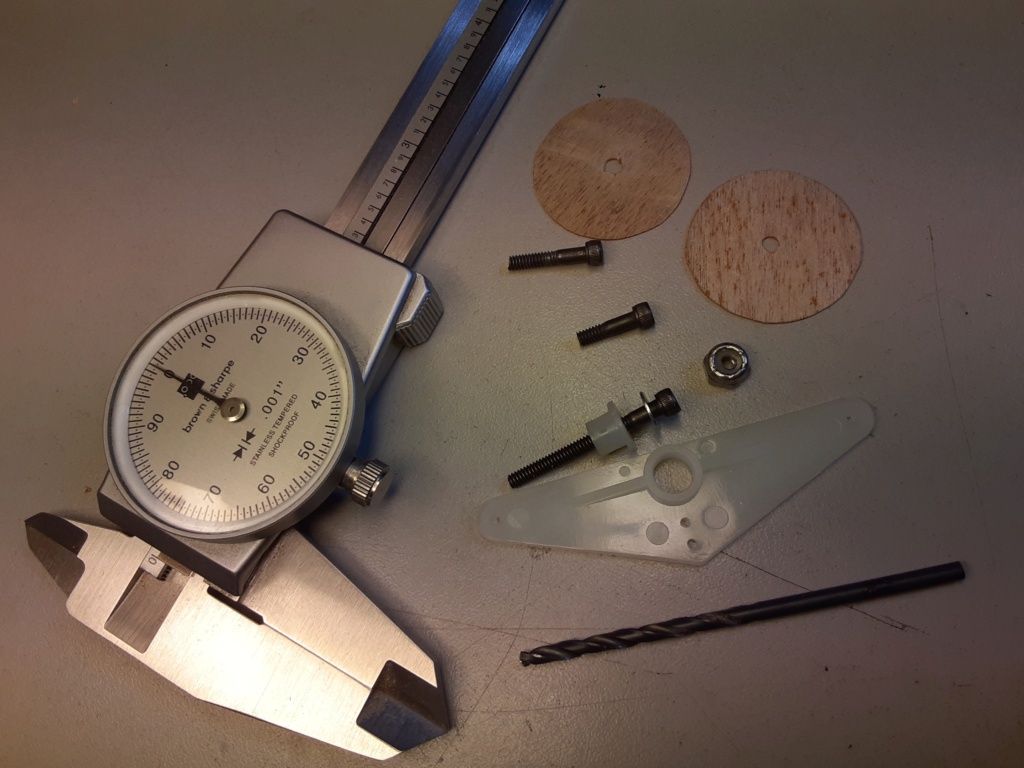
It's a snug fit.. which I like.. but also notice; I'm using a 3-48 "cap-screw" which has approx. 3/16" of non-threaded shank below the head. Just a little OCDetail that I wanted to point out.
The wood-discs are 1.000" dia. 1/64" 3-ply for the bellcrank-mount to bear-on.. top/bottom of a 1/8" balsawood sheet-wing.
Amongst a few other somewhat related items; I ordered X8 pieces of their #SH234 "1/2A Nylon Bellcrank with control horn assembly.

Many of my models utilize this bellcrank.. but none of them utilize the supplied wood-screw for retention. My earlier builds utilize a 2-56 machine-screw/hex-nut combo with either a "lock-nut".. or some other means to "lock" the hex-nut from loosening. I've used CA as a thread-locker.
The fact is; the Sig #234 assembly's nylon bushing has an ID measurement of .089" and a 2-56 machine-screw's OD is .084" which works fine despite there being .0025" of concentric-slop in the bushing..
So............. I decided to increase the .089" dia. bore-size of the nylon bushing to .098" which is the OD of a 3-48 machine-screw which I have a supply of on-hand. This was done with a #40 (wire-guage) drill.

It's a snug fit.. which I like.. but also notice; I'm using a 3-48 "cap-screw" which has approx. 3/16" of non-threaded shank below the head. Just a little OCDetail that I wanted to point out.
The wood-discs are 1.000" dia. 1/64" 3-ply for the bellcrank-mount to bear-on.. top/bottom of a 1/8" balsawood sheet-wing.
Last edited by roddie on Sat Mar 04, 2023 3:43 pm; edited 1 time in total (Reason for editing : clarification)
 Re: OCD TV-a pictorial of modeling madness
Roddie, did you actually purchase from SIG very recently, or from a 3rd party or another website selling SIG? Feedback from Stunt Hangar has someone hanging in limbo because apparently, SIG shipped him Epoxy that already appears to be hardened, basically "new" old stock.
https://stunthanger.com/smf/open-forum/sig-selling/msg653011/#msg653011
RCU Clubhouse: Old Timers Look Here, Must Be 50, Post #12760646
However, if you have more up-to-date facts, then may be you can enlighten us, because others are saying different, to include a kit maker who was using SIG parts in his kits.
https://stunthanger.com/smf/open-forum/sig-selling/msg653011/#msg653011
There is a trail of history (for lack of a better term) in the thread, if you follow back. And,Chuck Matheny on March 02, 2023 wrote:SIG recently sent me 5 minute epoxy with Part A about the same consistency as cheese. I notified them about 2 weeks ago and so far they have not replied to my complaint. If this happened to me I wonder how many other customers have recently experienced the same thing ? In the mean time they will continue to lose my business until they make amends.
RCU Clubhouse: Old Timers Look Here, Must Be 50, Post #12760646
From what I heard, they are discontinuing a lot of items and going to be an ARF distributor hence forth, relocating from Montezuma, Iowa to the Chicago area or somewhere thereabouts.FlyerInOKC on Feb. 1, 2023 wrote:I just got a newsletter from Old School Models, here is what I read: Secondly, our supply of CA hinges has dried up and it’s taken a bit of time a negotiation to find a substitute. I’ve found another supplier that I hope will be a good replacement.
But the biggest problem has been the loss of Sig Mfg. There's a lot of rumors going around as to what's going on with them - well I can tell you that as of 1/31, they have ceased all manufacturing and what's left will be an importer of ARF kits, moving somewhere up in the Chicago area. That's a shame, as there's a massive history and knowledge base that's apparently going to be lost. As you may or may not know, I purchase a good deal of items from Sig which are included in our own kits. Some wood, landing gear (music) wire, nose gear assemblies, etc. Their shutdown has sent me scrambling to find other suppliers. I'm well on the way to solving some of these, but let's just say it's taking ALL of my free time to make sure things are still shipping on time.
However, if you have more up-to-date facts, then may be you can enlighten us, because others are saying different, to include a kit maker who was using SIG parts in his kits.

GallopingGhostler- Top Poster


Posts : 5724
Join date : 2013-07-13
Age : 70
Location : Clovis NM or NFL KC Chiefs
 Re: OCD TV-a pictorial of modeling madness
GallopingGhostler wrote:...............
From what I heard, they are discontinuing a lot of items and going to be an ARF distributor hence forth, relocating from Montezuma, Iowa to the Chicago area or somewhere thereabouts.
However, if you have more up-to-date facts, then may be you can enlighten us, because others are saying different, to include a kit maker who was using SIG parts in his kits.
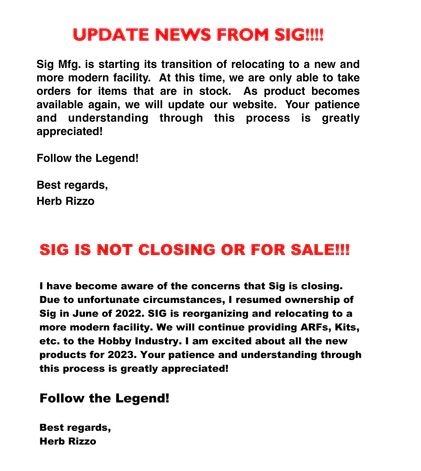
It would be nice to know what the situation is, particularly WRT to wood and building products. I've heard stories similar to those George has posted. The following is on the home page of their site:
Page 1 of 2 • 1, 2 
 Similar topics
» Nice B-17G Pictorial Gallery
» Half A Starter Question
» slow news day?
» Where is the modeling "chatter" from Washington (state)?
» The best modeling supplier on eBay is OmniModels
» Half A Starter Question
» slow news day?
» Where is the modeling "chatter" from Washington (state)?
» The best modeling supplier on eBay is OmniModels
Page 1 of 2
Permissions in this forum:
You cannot reply to topics in this forum

 Rules
Rules


