Log in
Search
Latest topics
» Tee Dee .020 combat modelby roddie Today at 1:34 pm
» Chocolate chip cookie dough.........
by roddie Today at 1:13 pm
» Purchased the last of any bult engines from Ken Enya
by sosam117 Today at 11:32 am
» Free Flight Radio Assist
by rdw777 Today at 9:24 am
» My latest doodle...
by batjac Yesterday at 9:47 pm
» My N-1R build log
by roddie Yesterday at 8:50 pm
» Funny what you find when you go looking
by rsv1cox Wed Nov 20, 2024 3:21 pm
» Landing-gear tips
by 1975 control line guy Wed Nov 20, 2024 8:17 am
» Cox NaBOO - Just in time for Halloween
by rsv1cox Tue Nov 19, 2024 6:35 pm
» Canada Post strike - We are still shipping :)
by Cox International Tue Nov 19, 2024 12:01 pm
» Duende V model from RC Model magazine 1983.
by getback Tue Nov 19, 2024 6:08 am
» My current avatar photo
by roddie Mon Nov 18, 2024 9:05 pm
Cox Engine of The Month
RC build of a Guillows Porter PC-6 for .020 Pee Wee
Page 2 of 2
Page 2 of 2 •  1, 2
1, 2
 Re: RC build of a Guillows Porter PC-6 for .020 Pee Wee
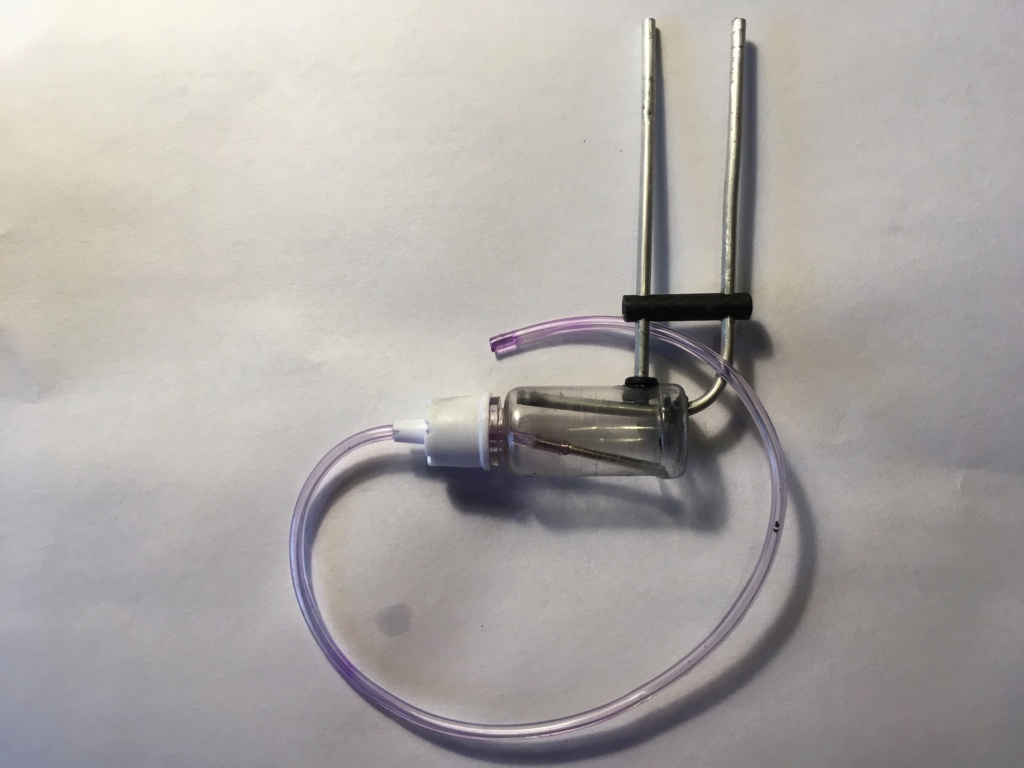
I have been waiting for some of the components to arrive, so in the meantime I have been making a fuel tank.
I want to use a plastic clunk tank, but the smallest commercial one I could find is 20ml and I only want 10ml.
So, I made one .
The clunk pickup is the end of a ball point pen. I have tested it for leaks using pressurised mentholated spirits.
The piece of 6mm Carbon tube is to support the filler tube.
I shall cut the 3 pipes to length when I have sorted the model.
Most of the components I need have arrived:
Carbon tubes, bearings, epoxy, etc. The universal joint coupling has not arrived which is surprising as it is only coming from the UK.
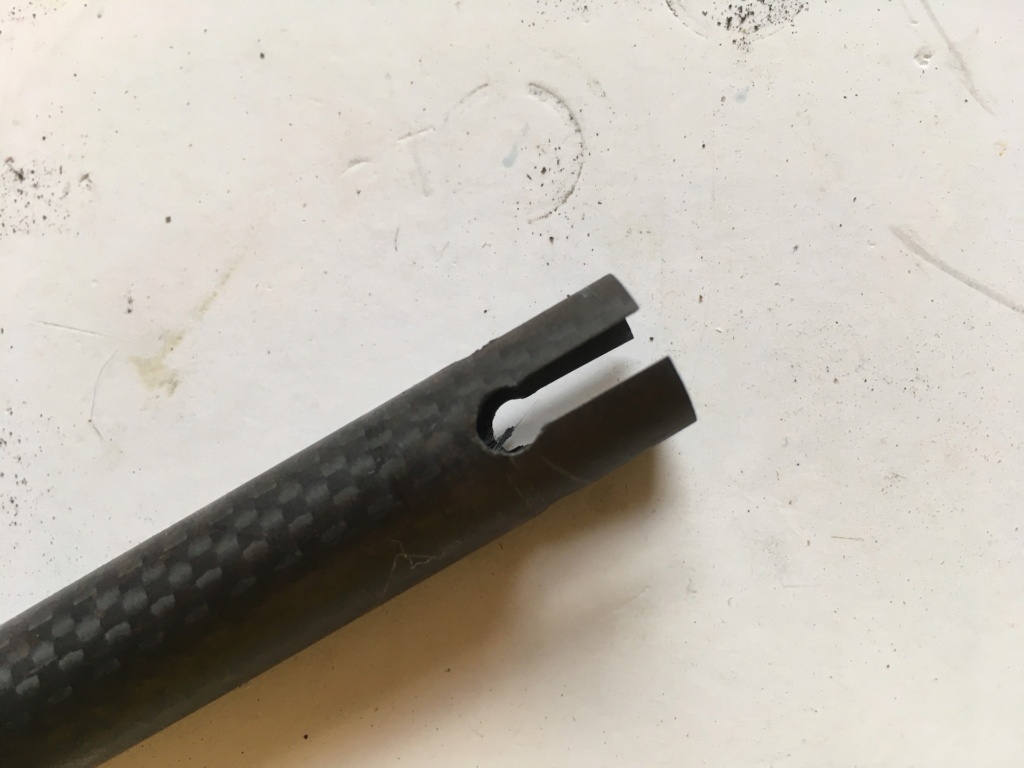
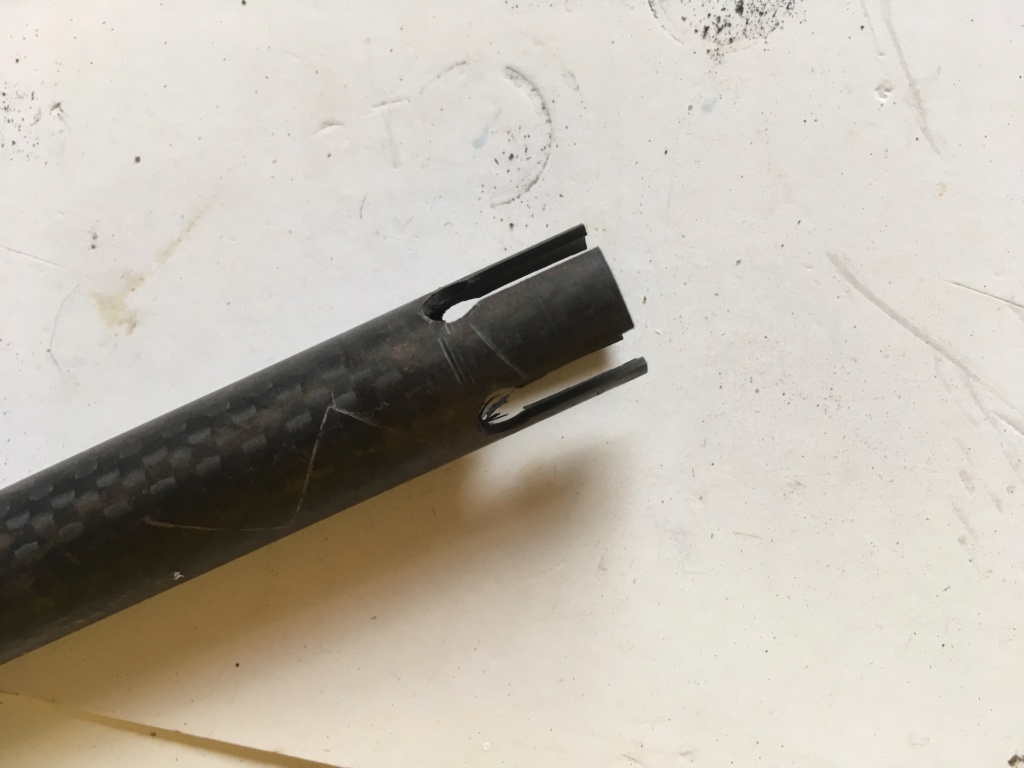
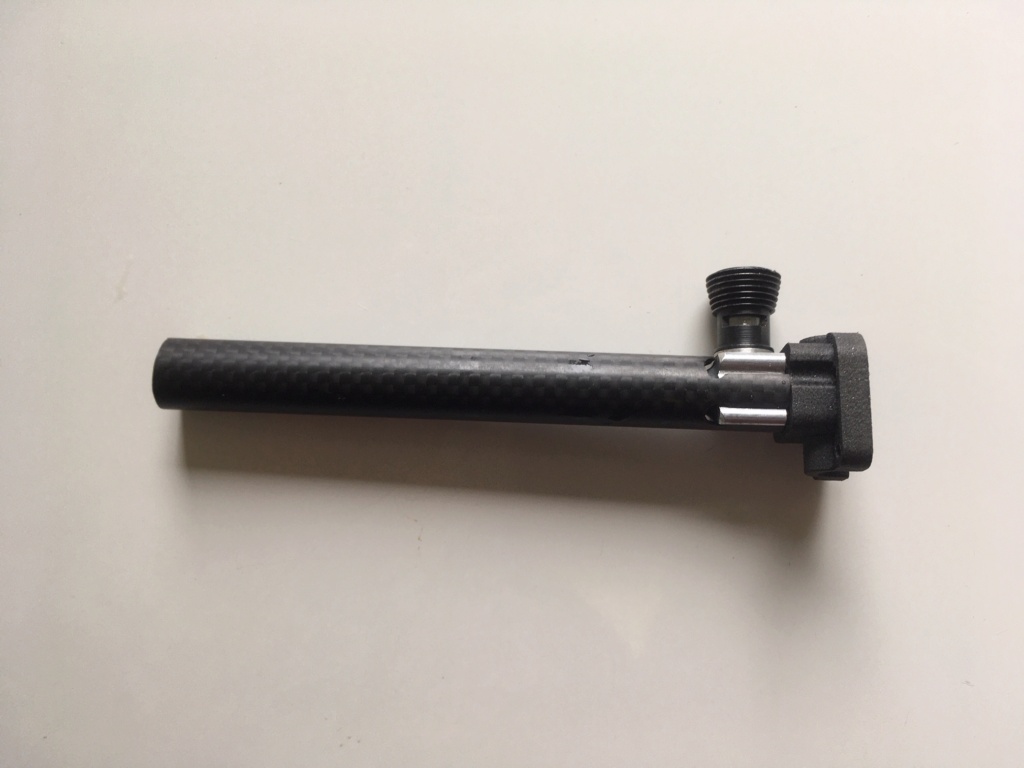
The biggest problem I have is how to attach the main tube to the backplate holes close to the cylinder. There is very little space available. Certainly not enough to use full M2.5 nuts.
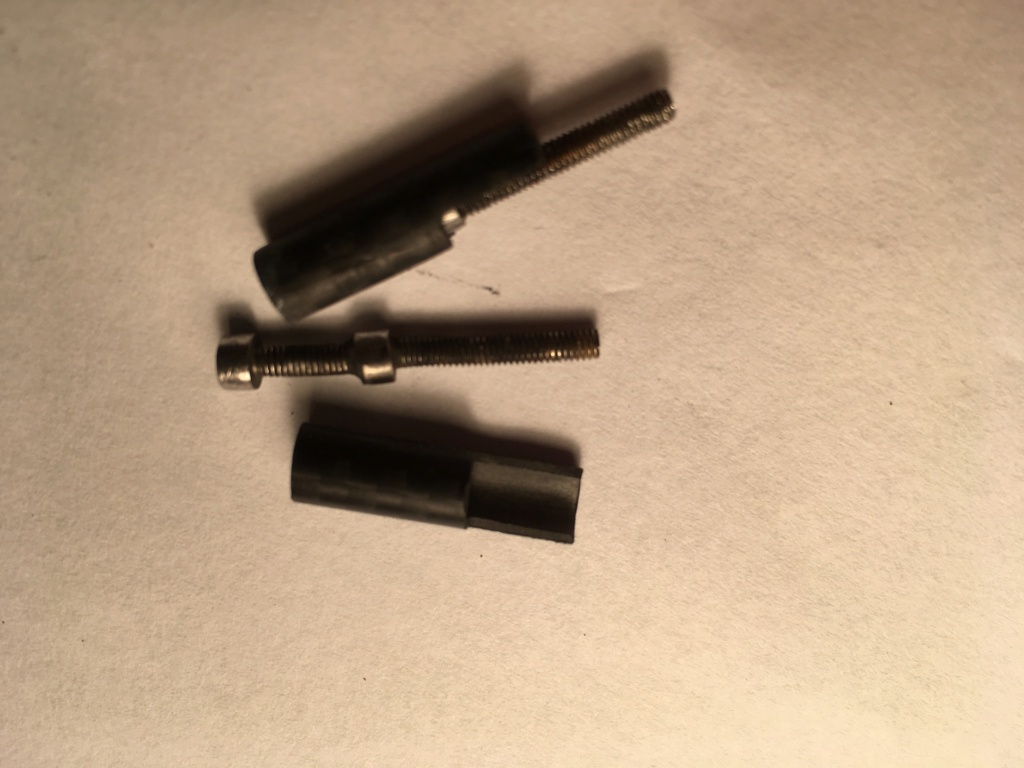
My first idea was to use a piece of 6mm Carbon tube cut and carved to fit. In the tube a a pair of M2.5 cap screws, silver soldered together. were to be fitted and the assembly glued to the 14mm main tube with epoxy.
It sort of works, but I am concerned about the epoxy joint being strong enough!?
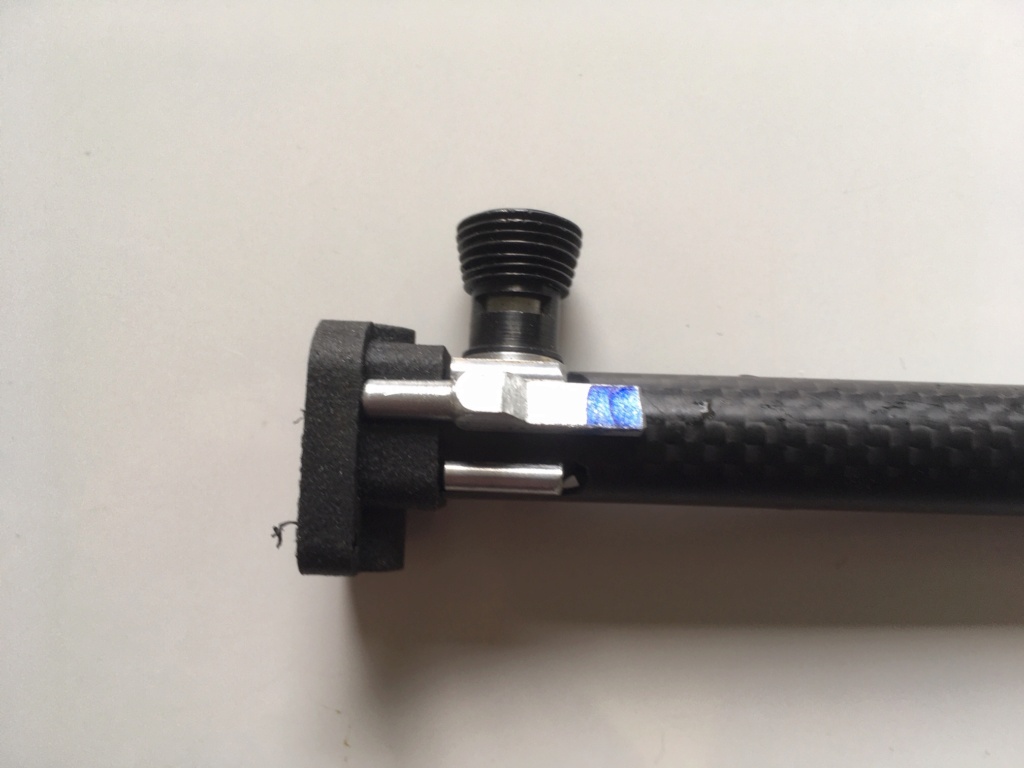
The latest idea is to carve a bracket from alloy square rod.
I have begun this task, but there is still quite a bit of filing to do to bring it down the a smaller profile.
I shall tap the end M2.5, and where it is 'blued' drill through for a M2 screw.
Hopefully epoxy and the screw will give me confidence .
For the other two mounting hole I shall make a bracket from 2mm alloy plate cut, carved and bent to fit.
Again, epoxy and a small screw will be used.
I want to use a plastic clunk tank, but the smallest commercial one I could find is 20ml and I only want 10ml.
So, I made one .
The clunk pickup is the end of a ball point pen. I have tested it for leaks using pressurised mentholated spirits.
The piece of 6mm Carbon tube is to support the filler tube.
I shall cut the 3 pipes to length when I have sorted the model.

Most of the components I need have arrived:
Carbon tubes, bearings, epoxy, etc. The universal joint coupling has not arrived which is surprising as it is only coming from the UK.


The biggest problem I have is how to attach the main tube to the backplate holes close to the cylinder. There is very little space available. Certainly not enough to use full M2.5 nuts.
My first idea was to use a piece of 6mm Carbon tube cut and carved to fit. In the tube a a pair of M2.5 cap screws, silver soldered together. were to be fitted and the assembly glued to the 14mm main tube with epoxy.
It sort of works, but I am concerned about the epoxy joint being strong enough!?

The latest idea is to carve a bracket from alloy square rod.
I have begun this task, but there is still quite a bit of filing to do to bring it down the a smaller profile.
I shall tap the end M2.5, and where it is 'blued' drill through for a M2 screw.
Hopefully epoxy and the screw will give me confidence .
For the other two mounting hole I shall make a bracket from 2mm alloy plate cut, carved and bent to fit.
Again, epoxy and a small screw will be used.


Daligh- Gold Member

- Posts : 101
Join date : 2020-06-28
Age : 75
Location : Sligo - Ireland

Levent Suberk- Diamond Member

- Posts : 2265
Join date : 2017-12-24
Location : Türkiye
 Re: RC build of a Guillows Porter PC-6 for .020 Pee Wee
Thanks Levent.
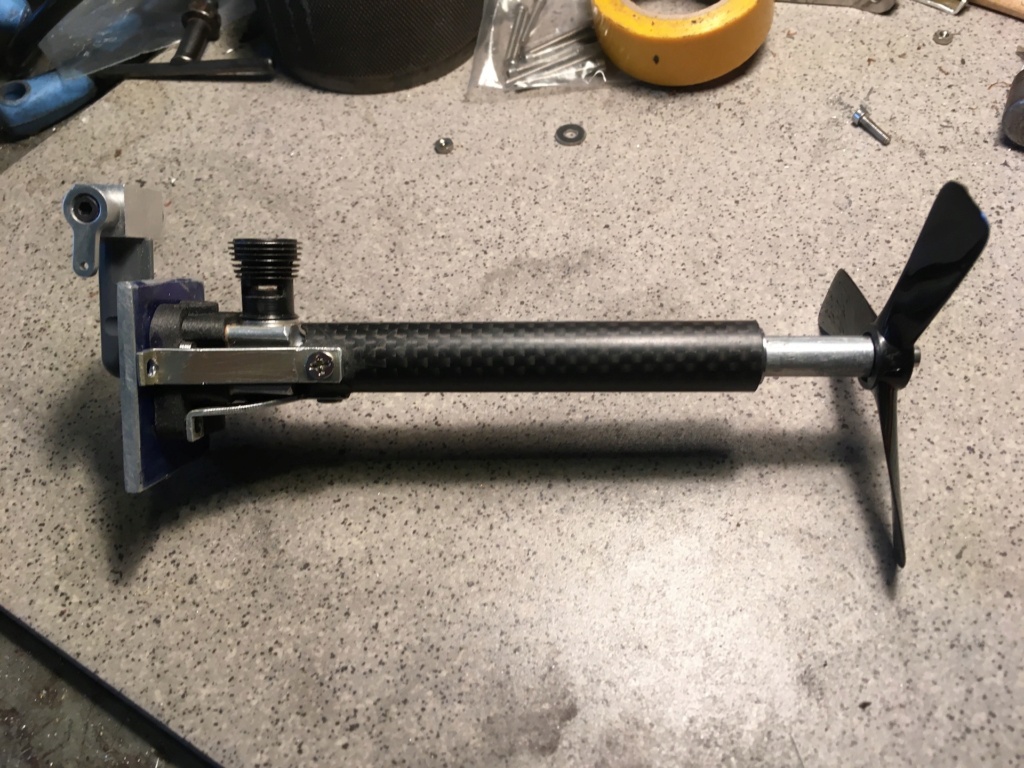
I have thought a lot about mounting the main tube to the engine and decided to use simple alloy brackets.
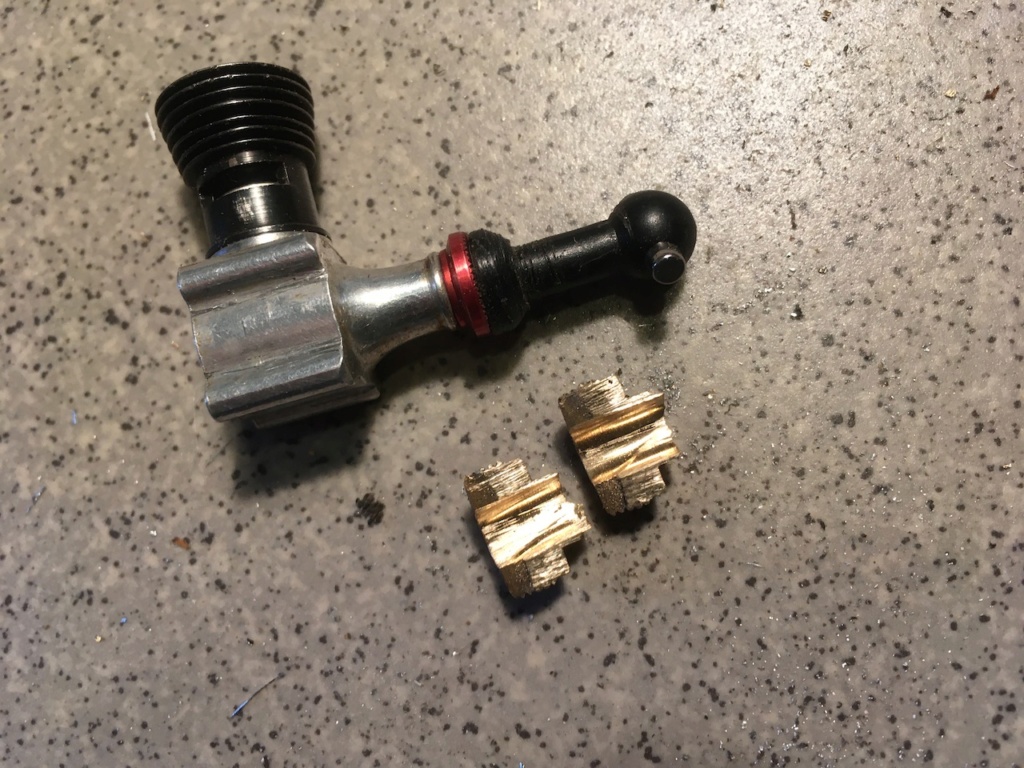
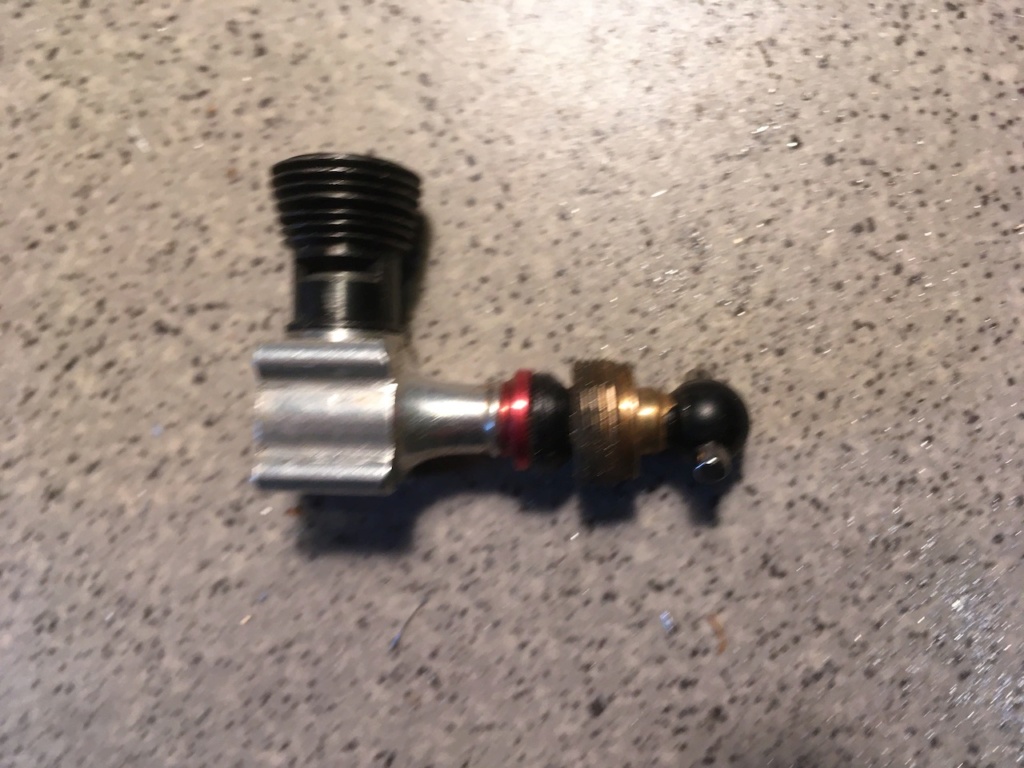
The couplings arrived at last! For some reason they were sent from the UK via New Zealand!!!
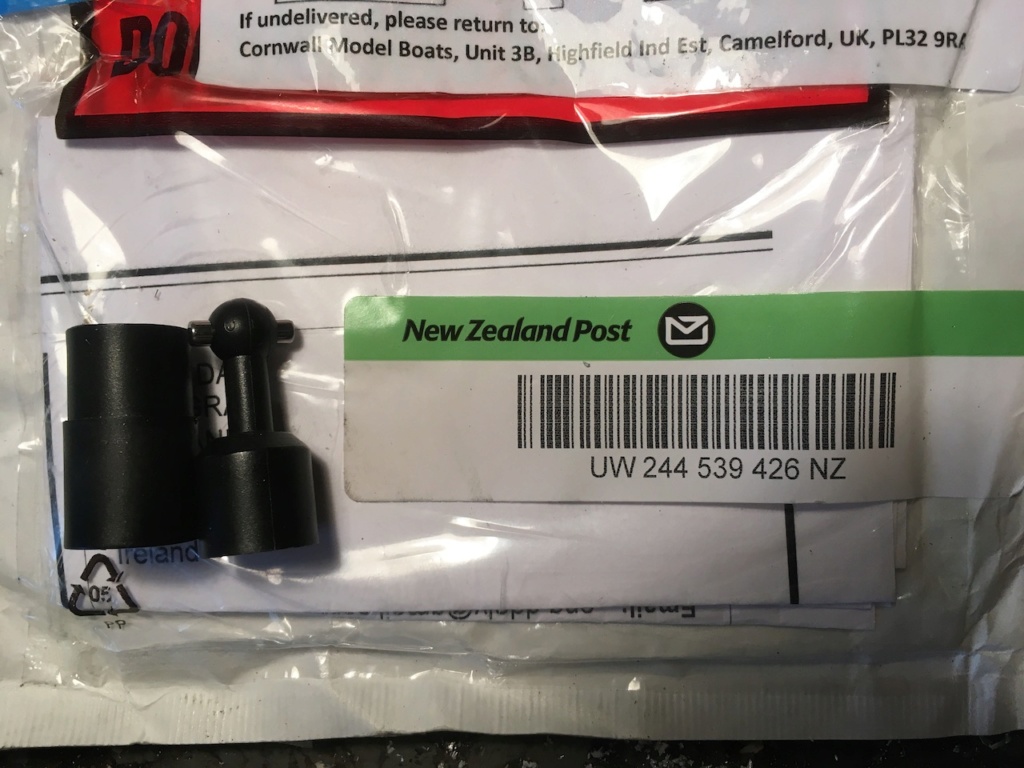
I modified them to suit using a split bush to hold the drive part in the drill to reduce it.
I drilled the end and fitted a prop screw.
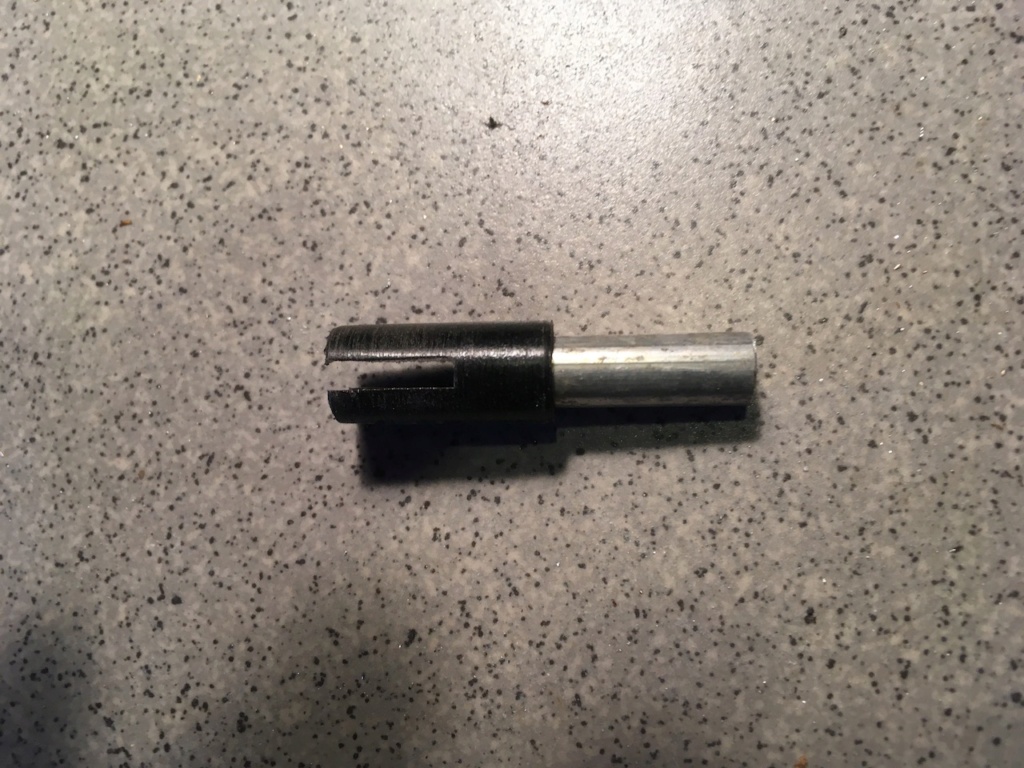
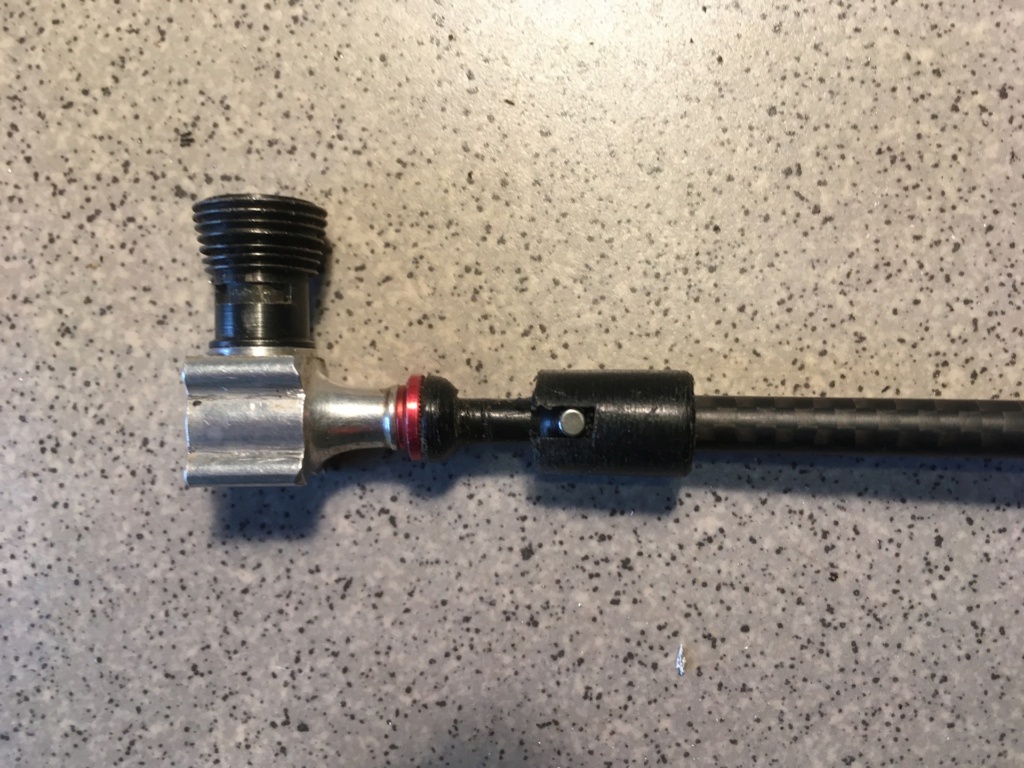
I did a similar job with the driven half, using a piece of alloy tube to fit to the drive tube.
THEN . I changed my mind!
I reasoned that the system of concentric tubes was accurate enough that the coupling was unnecessary.
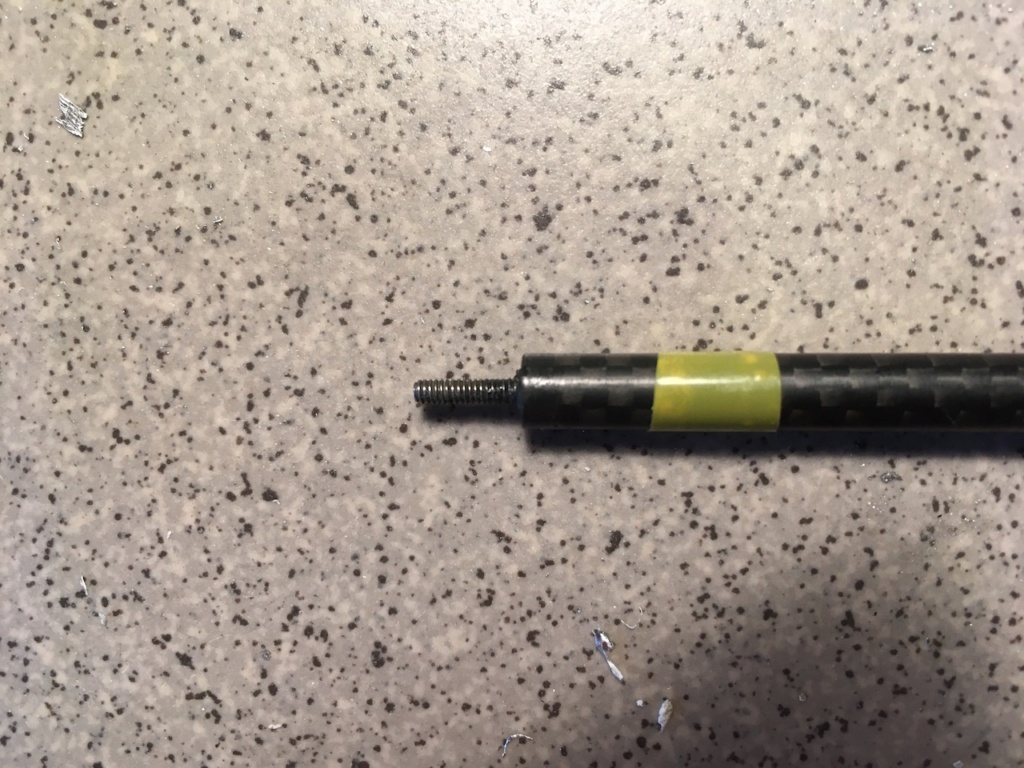
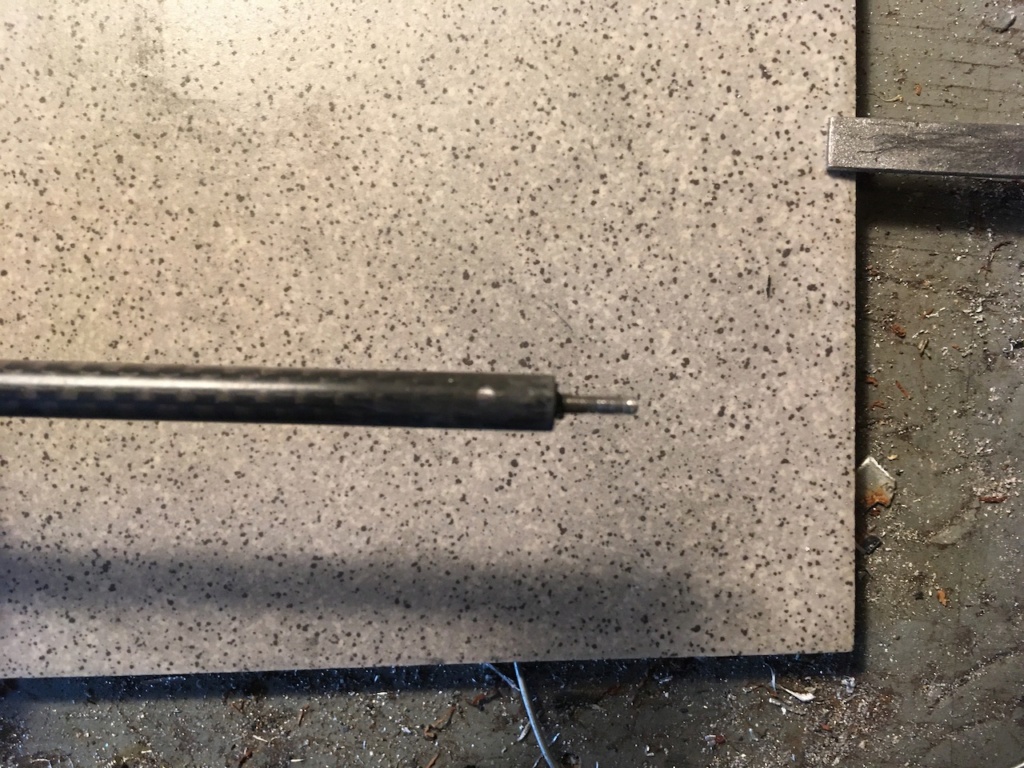
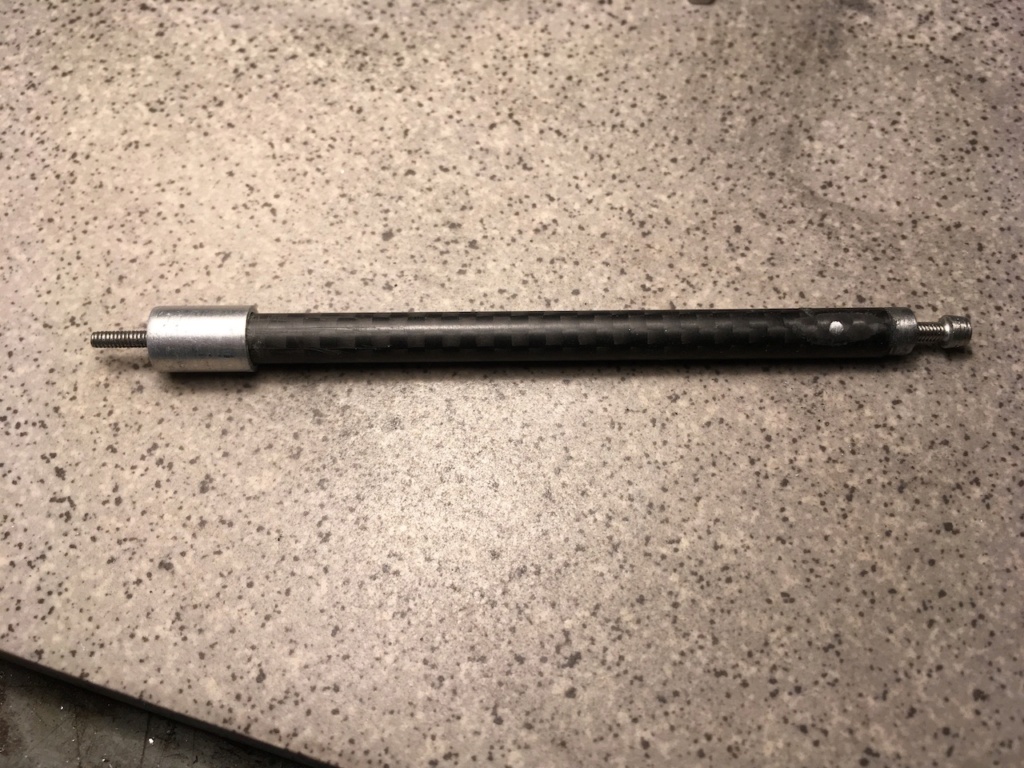
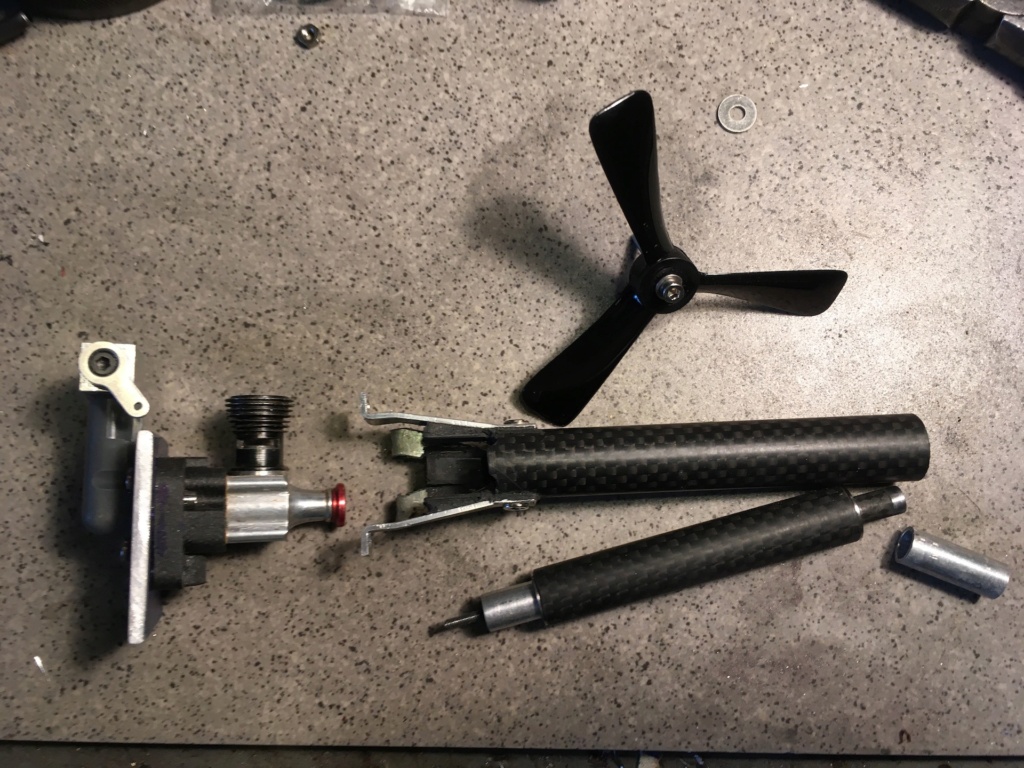
So I made the 6mm prop tube as a solid drive.
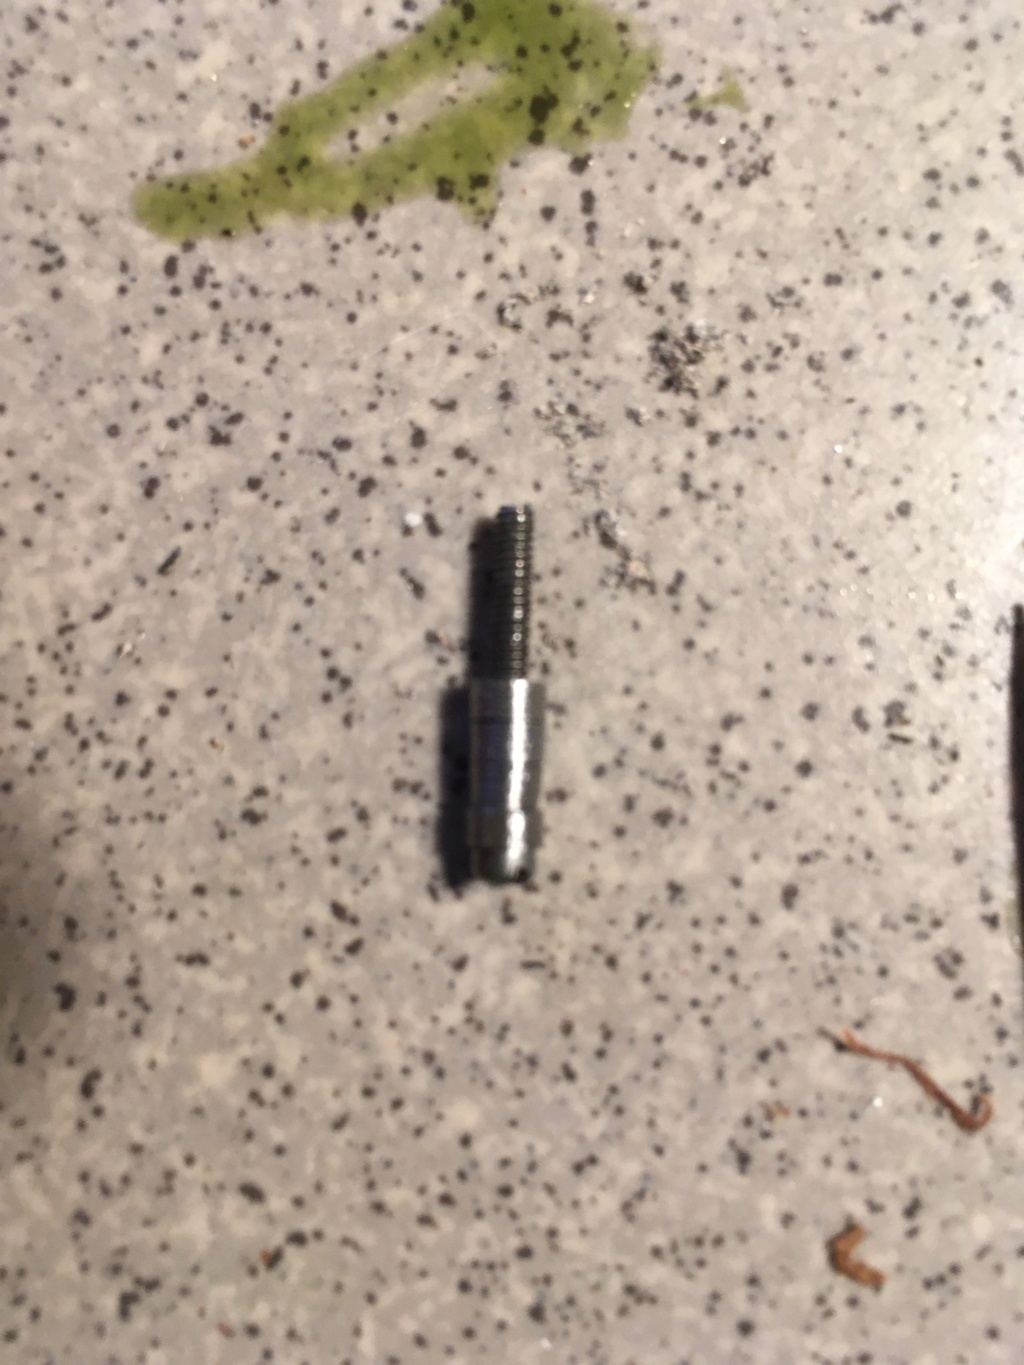
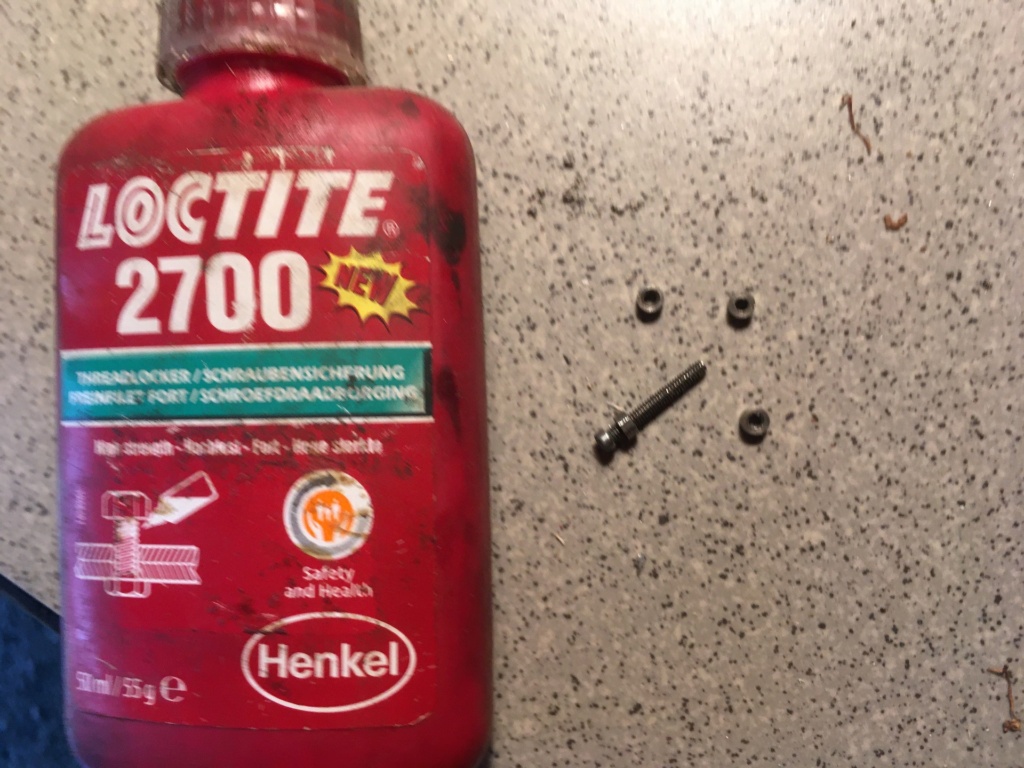
The engine end uses a prop screw fitted with Loctited nuts. The nuts were reduced to circular to fit in the tube and glued in with Sealfix.
A 1.2mm hole was drilled through the tube and screw head and a piece of steel wire riveted in.
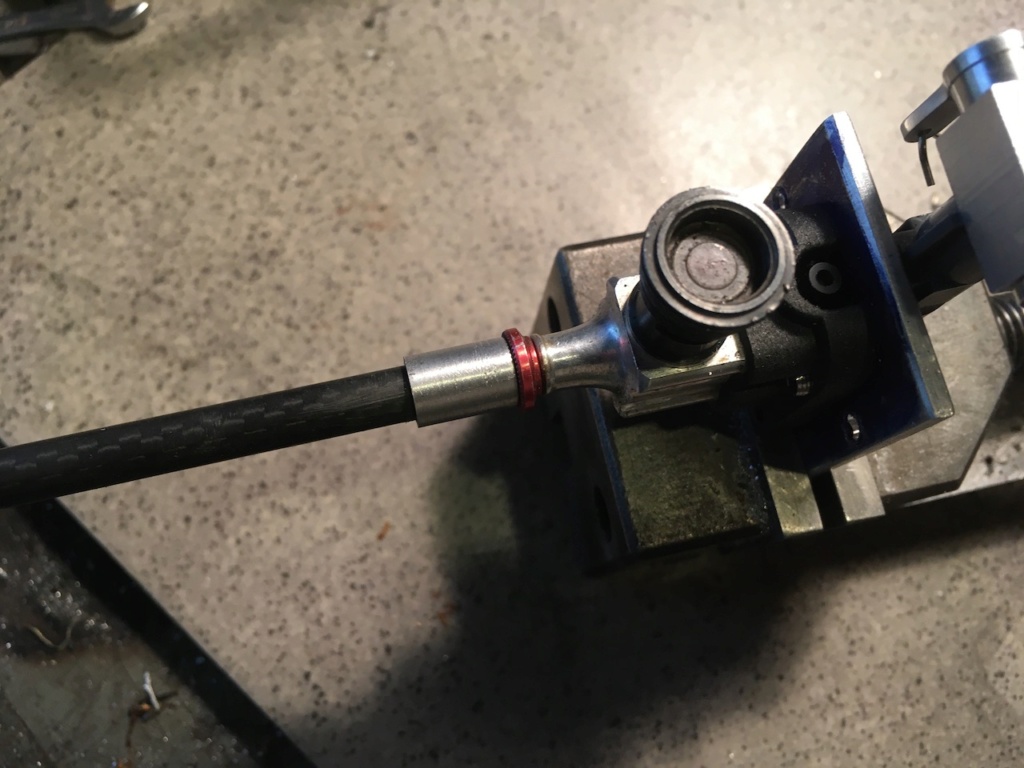
A piece of alloy tube acts as a spacer between the engine crank flange and the bearing.
I performed a similar job at the prop end using an M4 screw which was drilled through and tapped M2.5.
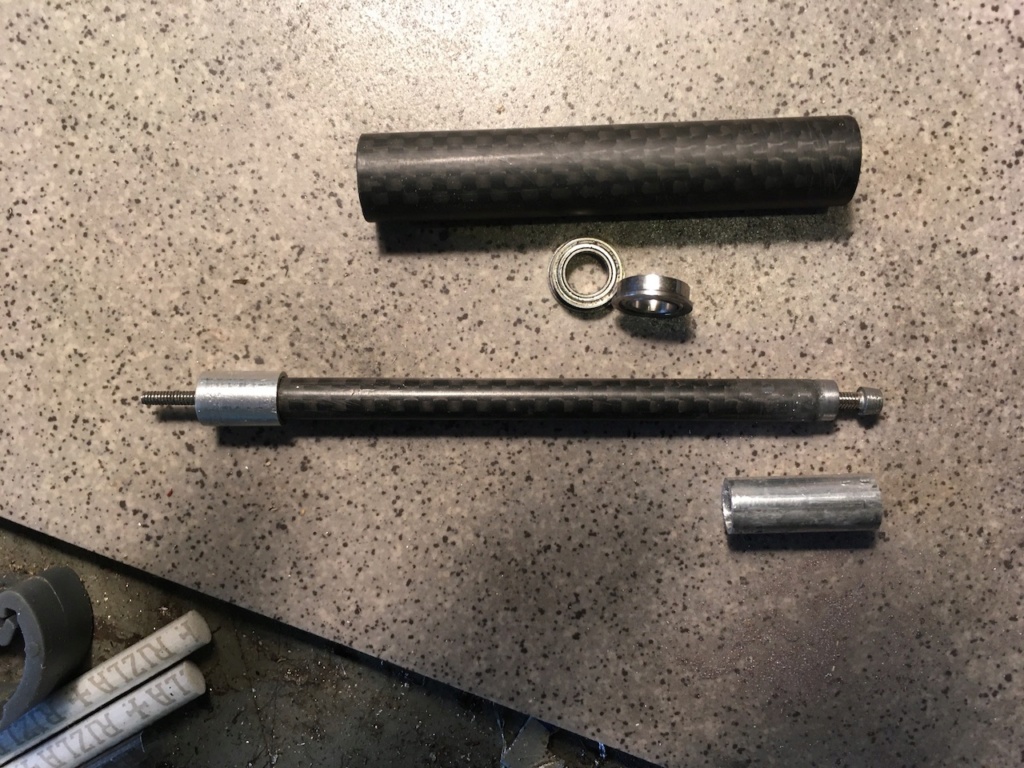
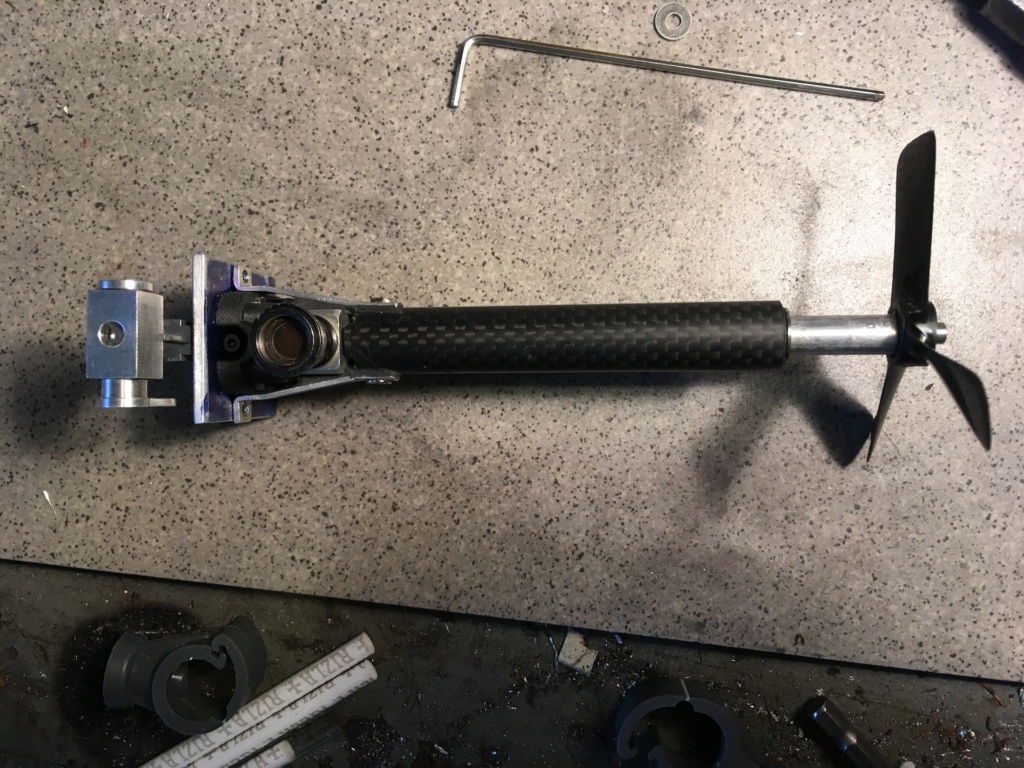
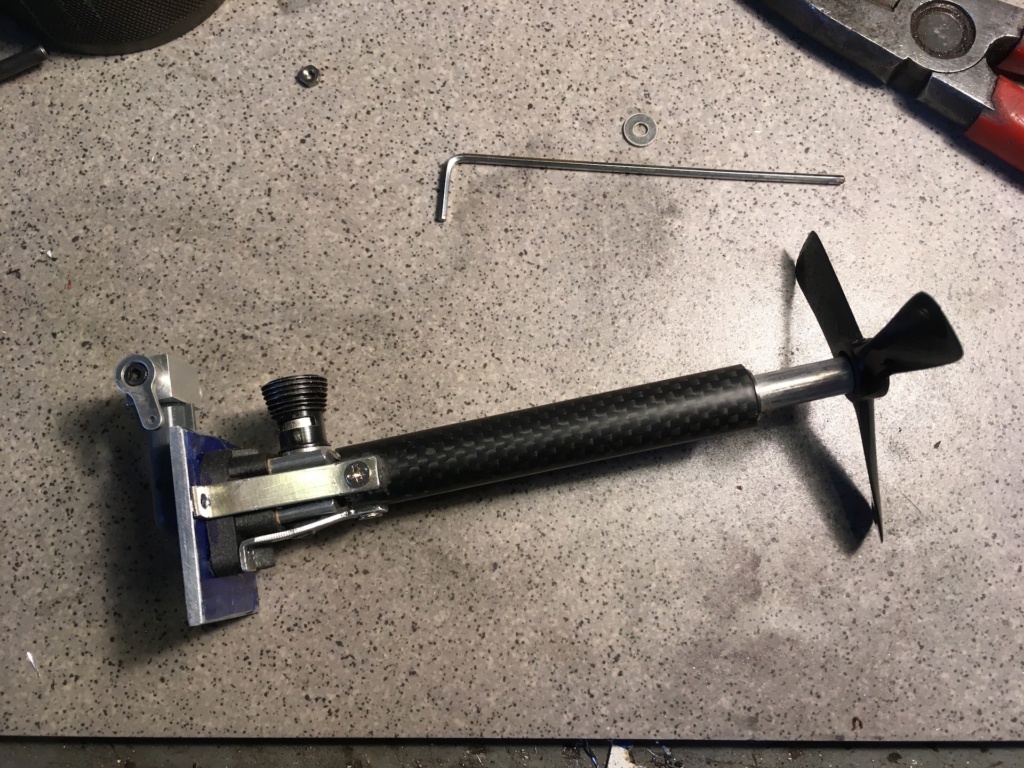
Here's how it all goes together.
The brackets are fixed with Sealfix and a self tapping screw. Where the self tappers are there is a piece of 12mm tube inserted and glued to provide extra thickness.
NOW.
It looks like I need to reduce the height of the throttle tube to gat the assembly into the fuselage!?
I shall contact Bernie to find out how the throttle body is fitted to the plastic tube.
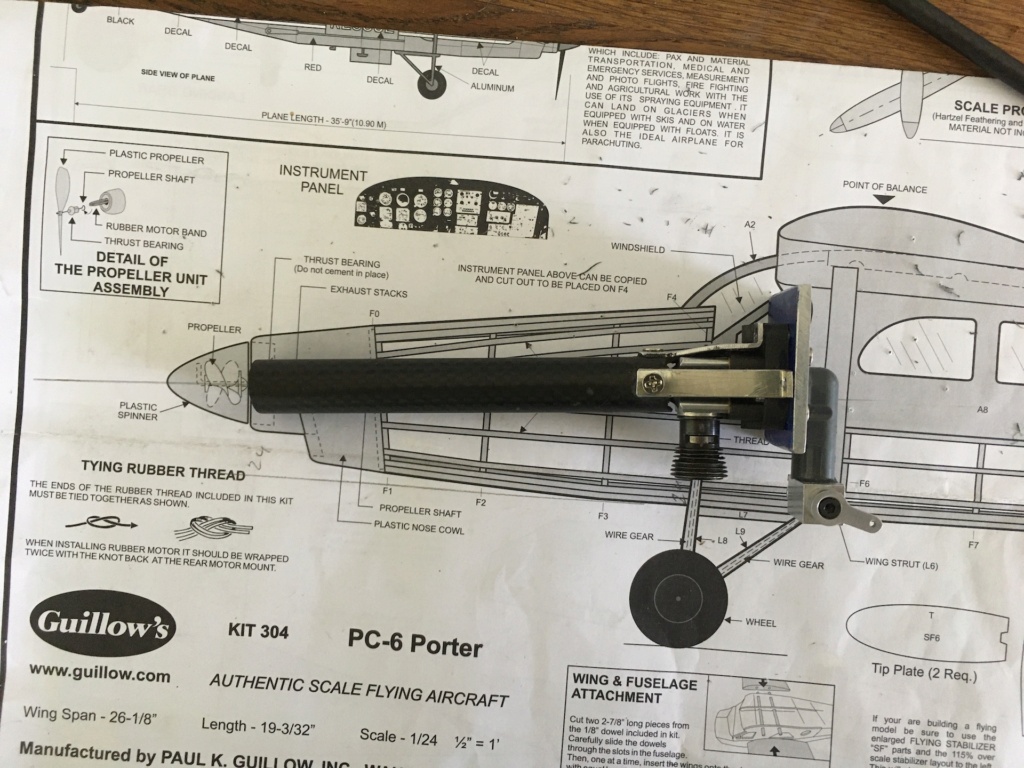
I have thought a lot about mounting the main tube to the engine and decided to use simple alloy brackets.
The couplings arrived at last! For some reason they were sent from the UK via New Zealand!!!

I modified them to suit using a split bush to hold the drive part in the drill to reduce it.
I drilled the end and fitted a prop screw.


I did a similar job with the driven half, using a piece of alloy tube to fit to the drive tube.


THEN . I changed my mind!
I reasoned that the system of concentric tubes was accurate enough that the coupling was unnecessary.
So I made the 6mm prop tube as a solid drive.
The engine end uses a prop screw fitted with Loctited nuts. The nuts were reduced to circular to fit in the tube and glued in with Sealfix.
A 1.2mm hole was drilled through the tube and screw head and a piece of steel wire riveted in.
A piece of alloy tube acts as a spacer between the engine crank flange and the bearing.
I performed a similar job at the prop end using an M4 screw which was drilled through and tapped M2.5.


Here's how it all goes together.
The brackets are fixed with Sealfix and a self tapping screw. Where the self tappers are there is a piece of 12mm tube inserted and glued to provide extra thickness.


NOW.
It looks like I need to reduce the height of the throttle tube to gat the assembly into the fuselage!?
I shall contact Bernie to find out how the throttle body is fitted to the plastic tube.


Daligh- Gold Member

- Posts : 101
Join date : 2020-06-28
Age : 75
Location : Sligo - Ireland
 Re: RC build of a Guillows Porter PC-6 for .020 Pee Wee
Nice part like the carbon fiber direct drive Good work 


davidll1984- Diamond Member

- Posts : 2327
Join date : 2020-02-12
Age : 39
Location : shawinigan
 Re: RC build of a Guillows Porter PC-6 for .020 Pee Wee
Perfect!  Engineering masterpiece
  I have no doubt about performance, it will work with no hassle

Levent Suberk- Diamond Member

- Posts : 2265
Join date : 2017-12-24
Location : Türkiye
 Re: RC build of a Guillows Porter PC-6 for .020 Pee Wee
Bit of a problem!
As I was tightening the assembly, the prop shaft spun in the engine crank threads.
I had used an old screw which it turns out had corroded threads and was thus undersize.
I had to strip the shaft assembly.
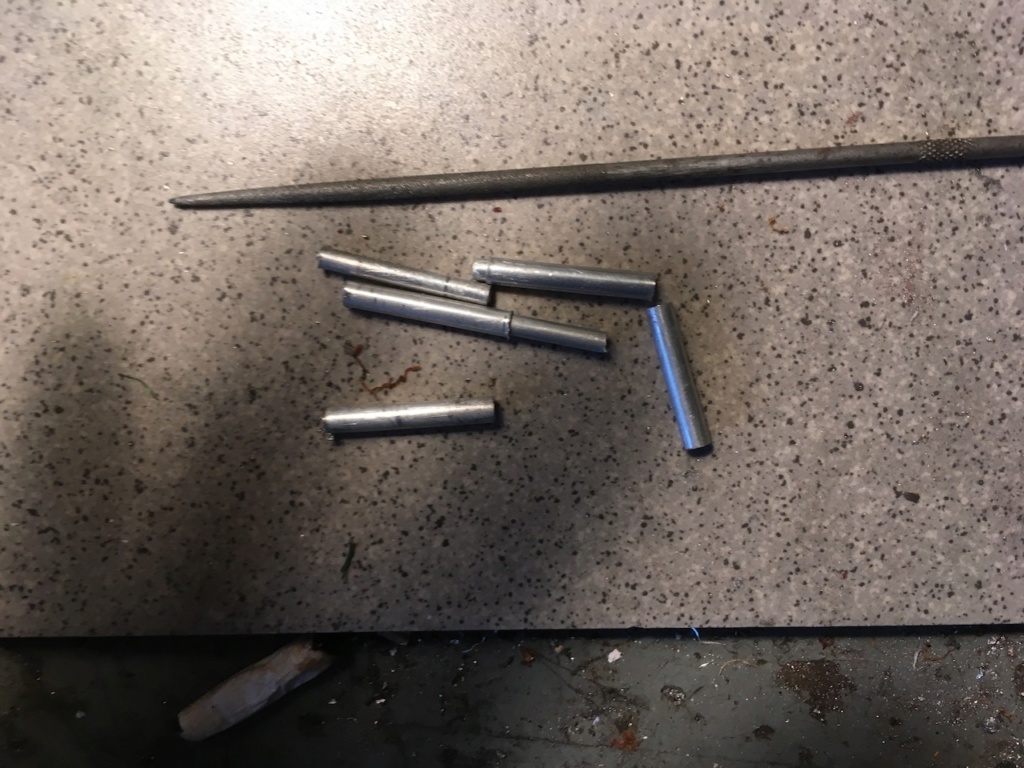
I made a punch and removed the pins.
Because the adhesive is of a 'rubber' type I was able to remove the inserts by heating it.
Turns out that it may not have been such a bad thing to happen, as I had missed the screw head and drilled through the shank!
It came out in two parts!
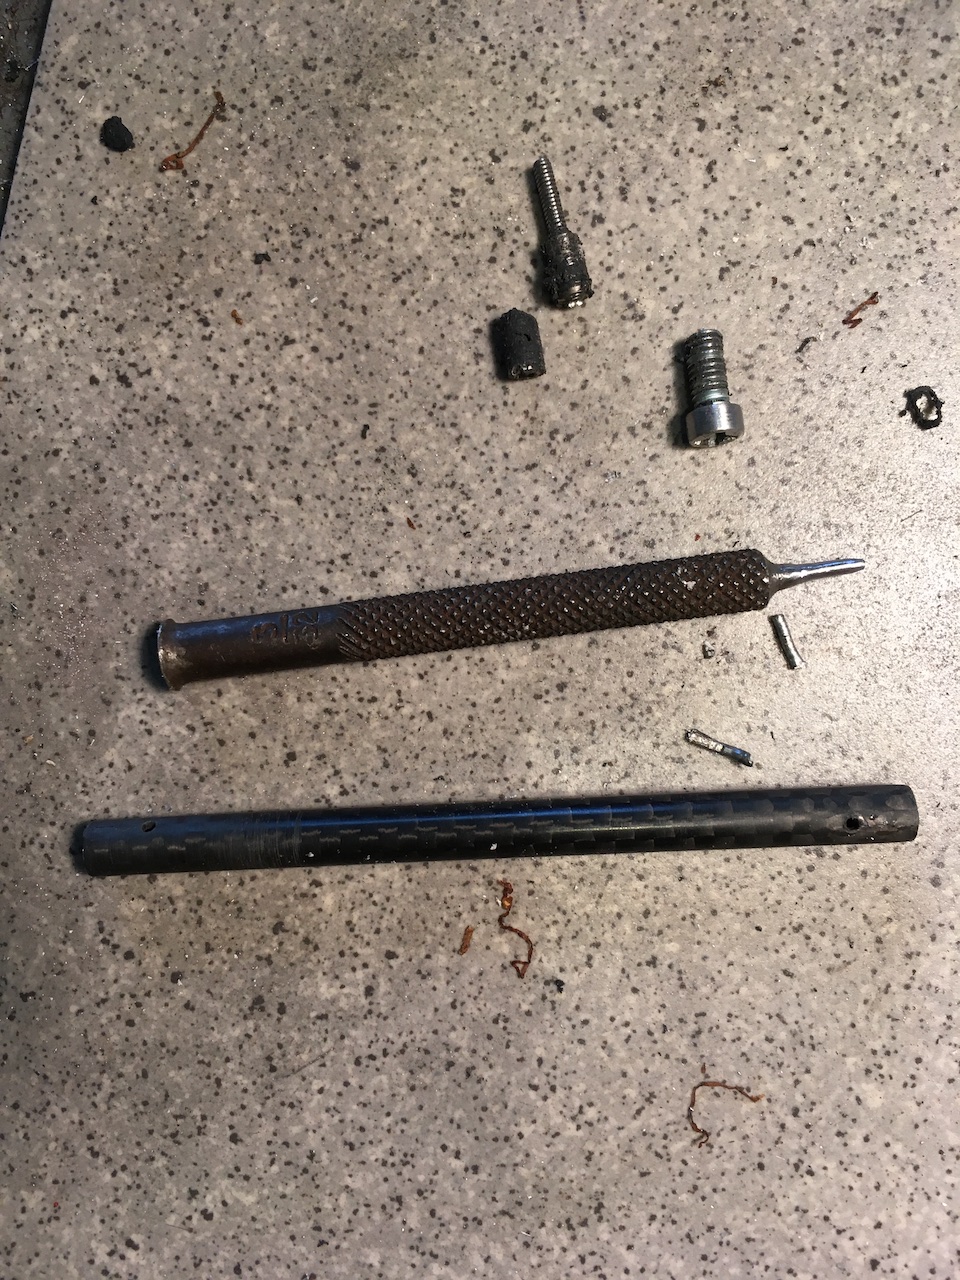
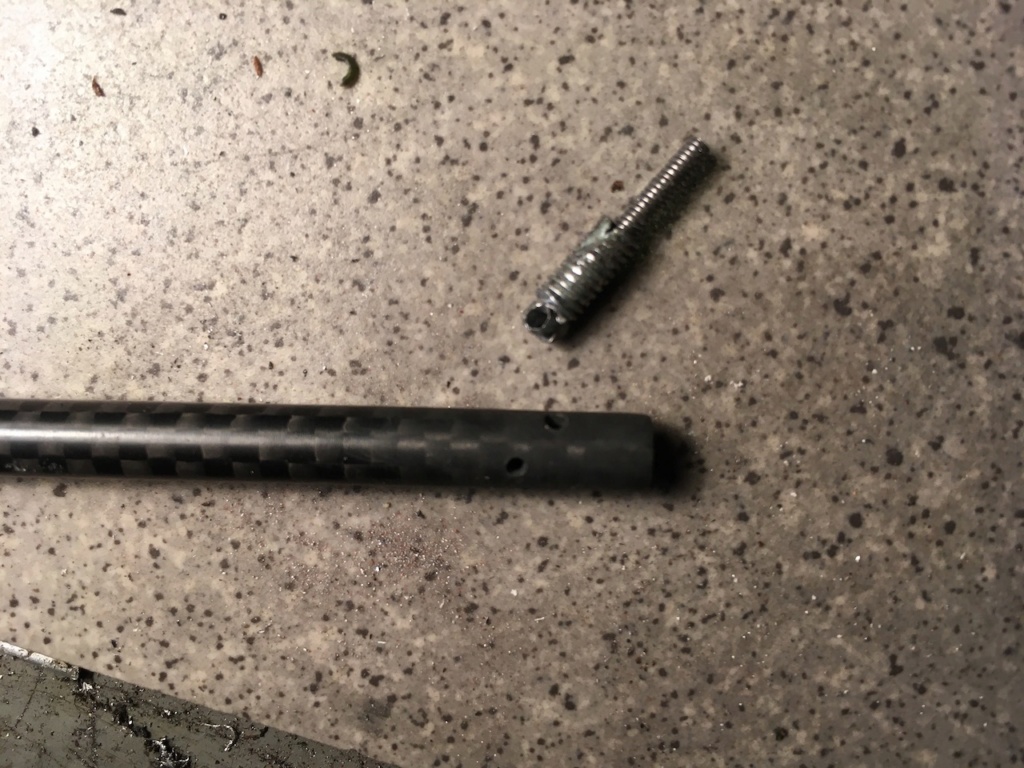
For the replacement I used a piece of M4 screw and drilled and tapped it M2.5 as the UNC screw turns in loosely but holds.
I predrilled the head this time and drilled just one side of the tube.
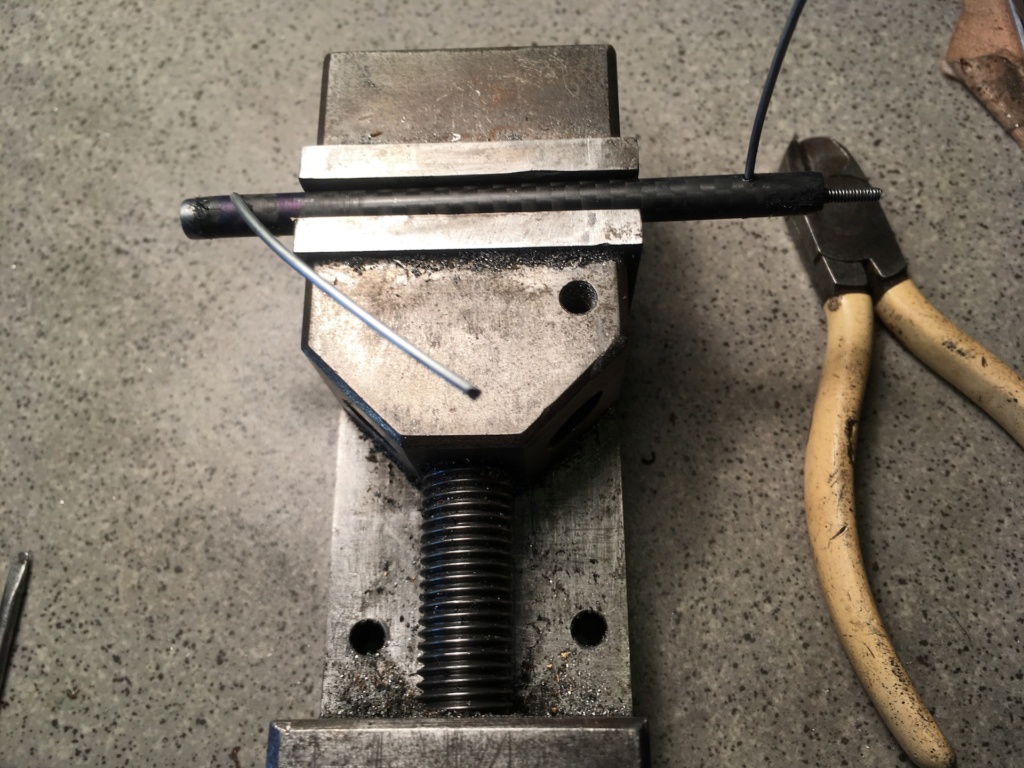
The shaft was assembled with new adhesive and aligned with wire 'till it sets.
I shall drill right through and peen some new pins.
As I was tightening the assembly, the prop shaft spun in the engine crank threads.
I had used an old screw which it turns out had corroded threads and was thus undersize.
I had to strip the shaft assembly.
I made a punch and removed the pins.
Because the adhesive is of a 'rubber' type I was able to remove the inserts by heating it.
Turns out that it may not have been such a bad thing to happen, as I had missed the screw head and drilled through the shank!
It came out in two parts!

For the replacement I used a piece of M4 screw and drilled and tapped it M2.5 as the UNC screw turns in loosely but holds.
I predrilled the head this time and drilled just one side of the tube.

The shaft was assembled with new adhesive and aligned with wire 'till it sets.
I shall drill right through and peen some new pins.


Daligh- Gold Member

- Posts : 101
Join date : 2020-06-28
Age : 75
Location : Sligo - Ireland
 Re: RC build of a Guillows Porter PC-6 for .020 Pee Wee
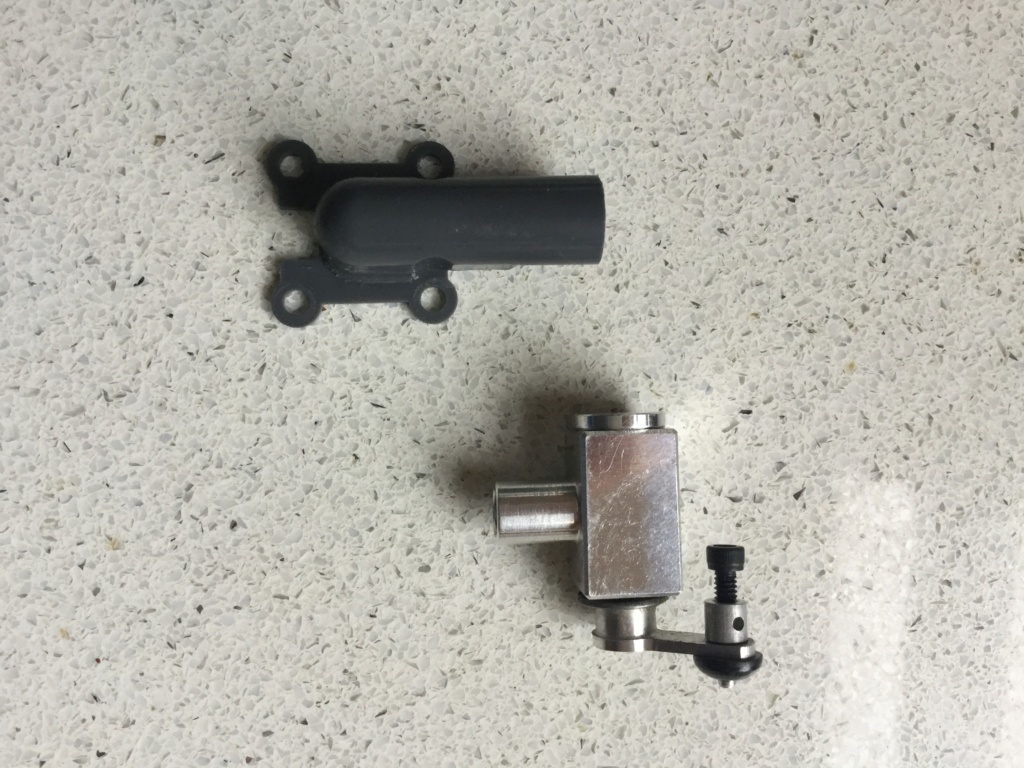
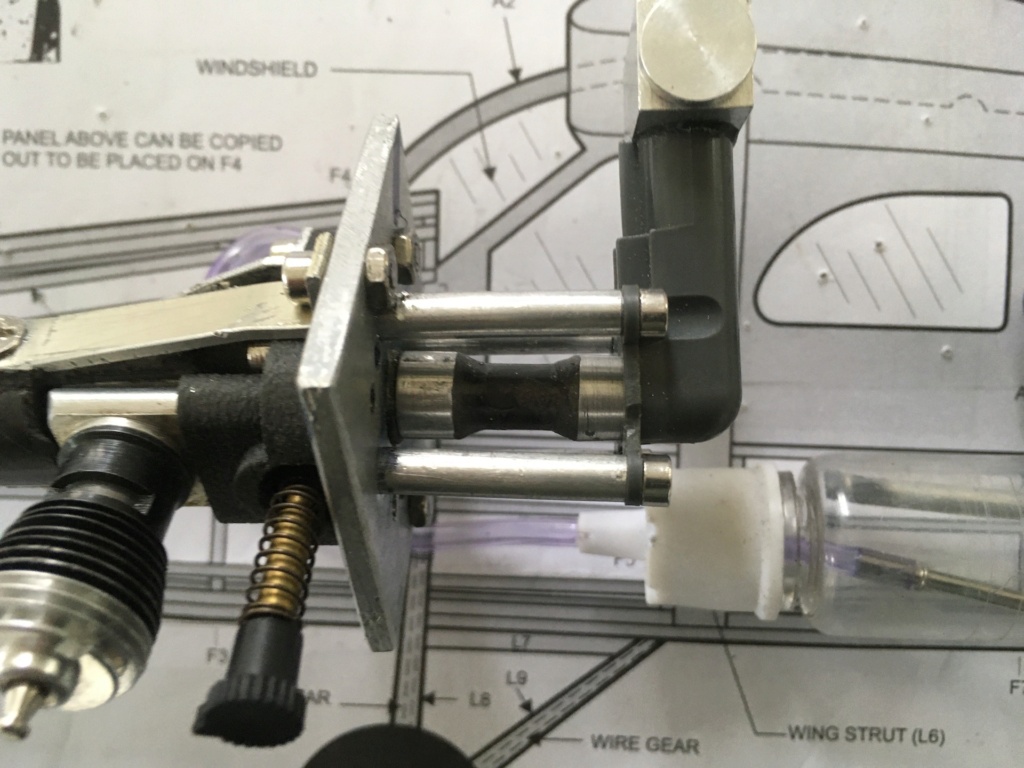
It does not appear feasible to reduce the height of the throttle tube from the pre-assembled unit.
I shall have to see if Bernie can supply the parts loose!?
So, I decided to make a 20mm stand-off tube and bolt spacers to locate the throttle into the cabin.
I also drilled and tapped extra mounting holes to allow the throttle to be mounted at 45 deg.
The spacers are from two alloy tubes pushed together.
The stand-off is a piece of 6mm carbon tube with alloy end pieces epoxied on.
The throttle end is reduced to fit and overhangs to locate an o-ring.
The engine plate end is flat.
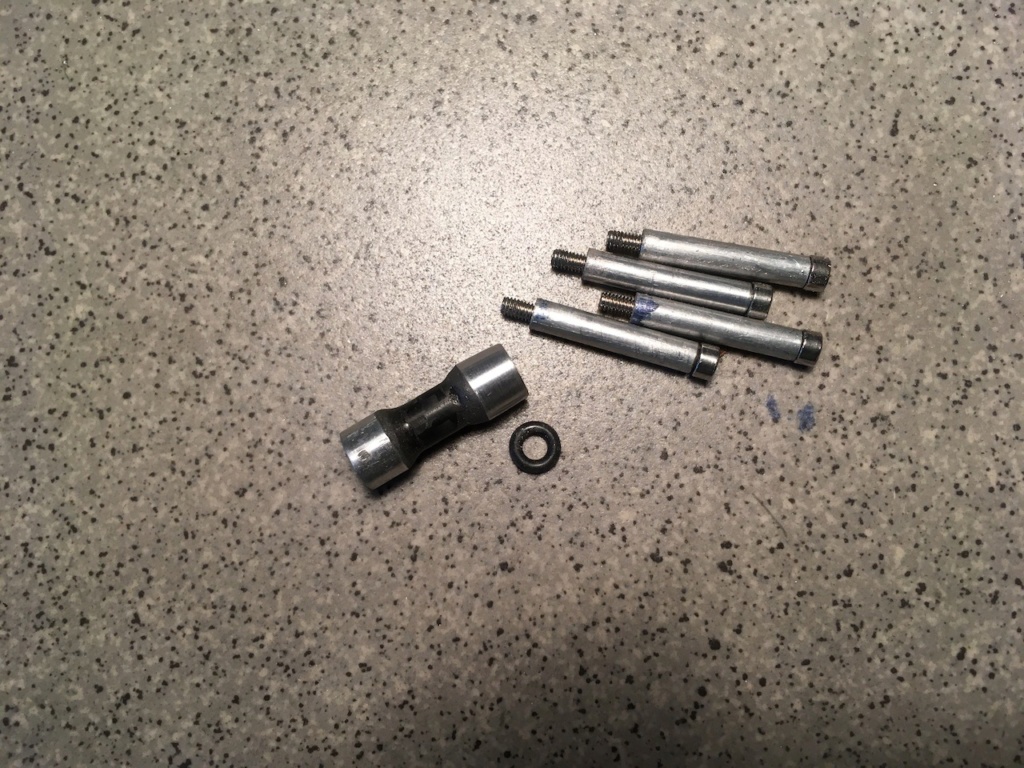
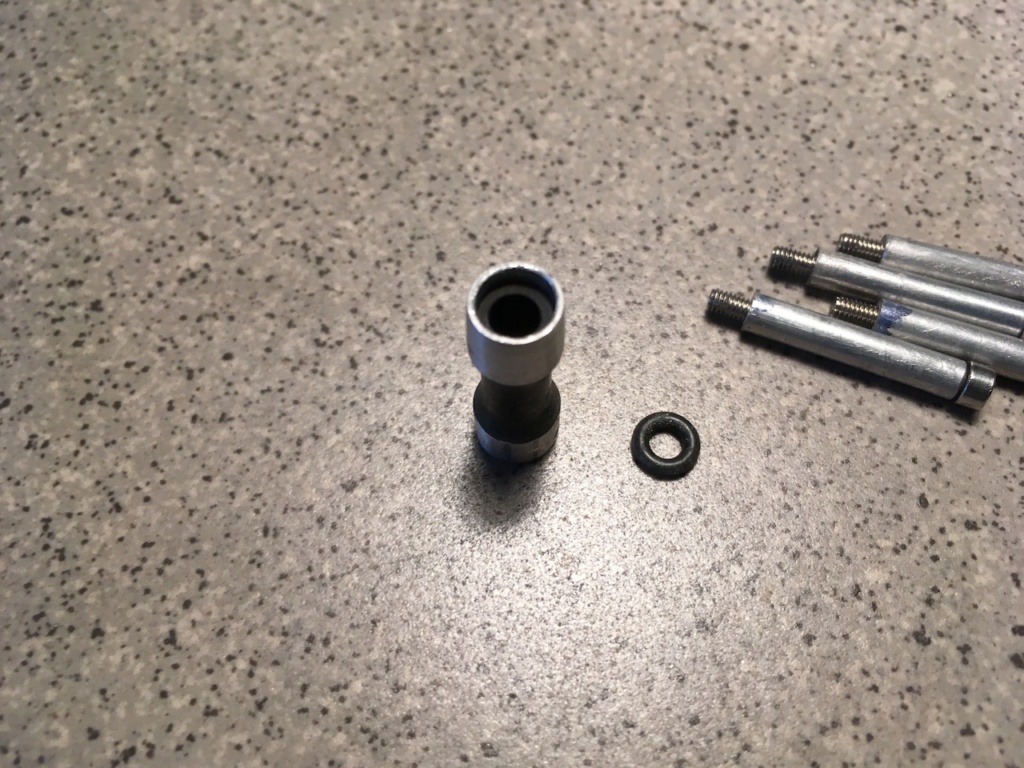
This is sort of what I intend to do.
The alloy engine plate will be reduced considerably before installation.
Still not a lot of head room for the throttle!
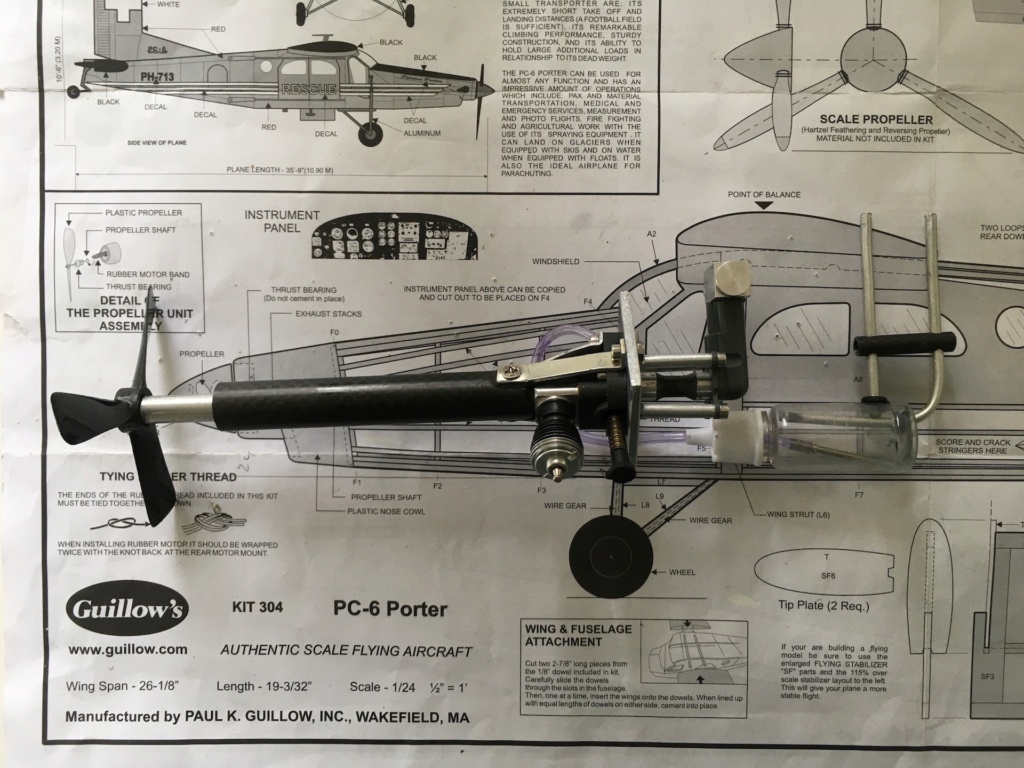
Flipping heck!!!!!!!!
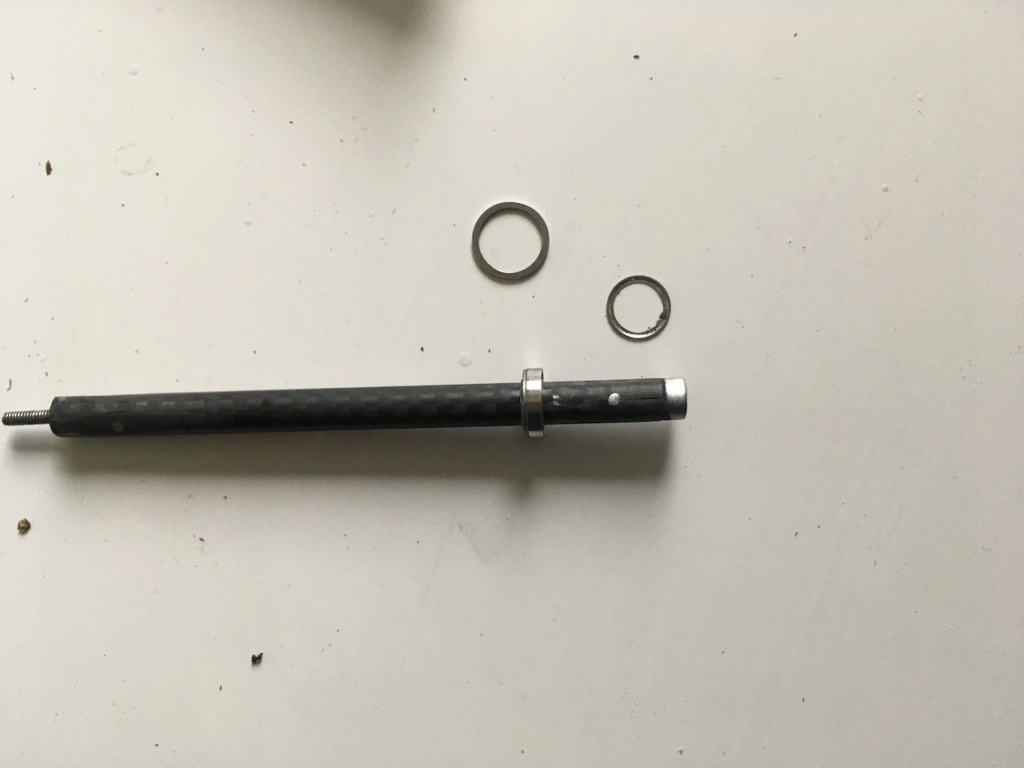
I managed to destroy one of the bearings when disassembling!
It went on as a light push fit but wouldn't slide off. I stupidly use a 12mm tube of the flange to force it off. The flange and shield came off OK.
It will take a week or so for new bearings to arrived.
I shall have to see if Bernie can supply the parts loose!?
So, I decided to make a 20mm stand-off tube and bolt spacers to locate the throttle into the cabin.
I also drilled and tapped extra mounting holes to allow the throttle to be mounted at 45 deg.
The spacers are from two alloy tubes pushed together.
The stand-off is a piece of 6mm carbon tube with alloy end pieces epoxied on.
The throttle end is reduced to fit and overhangs to locate an o-ring.
The engine plate end is flat.


This is sort of what I intend to do.
The alloy engine plate will be reduced considerably before installation.
Still not a lot of head room for the throttle!


Flipping heck!!!!!!!!
I managed to destroy one of the bearings when disassembling!
It went on as a light push fit but wouldn't slide off. I stupidly use a 12mm tube of the flange to force it off. The flange and shield came off OK.
It will take a week or so for new bearings to arrived.


Daligh- Gold Member

- Posts : 101
Join date : 2020-06-28
Age : 75
Location : Sligo - Ireland

Ada99- Moderate Poster

- Posts : 28
Join date : 2018-07-18

Daligh- Gold Member

- Posts : 101
Join date : 2020-06-28
Age : 75
Location : Sligo - Ireland
 Re: RC build of a Guillows Porter PC-6 for .020 Pee Wee
Shame about the bearing / but the rest is coming together nicely  Will there bee enough air in the fuse to run the engine good ?


getback- Top Poster


Posts : 10441
Join date : 2013-01-18
Age : 67
Location : julian , NC
 Re: RC build of a Guillows Porter PC-6 for .020 Pee Wee
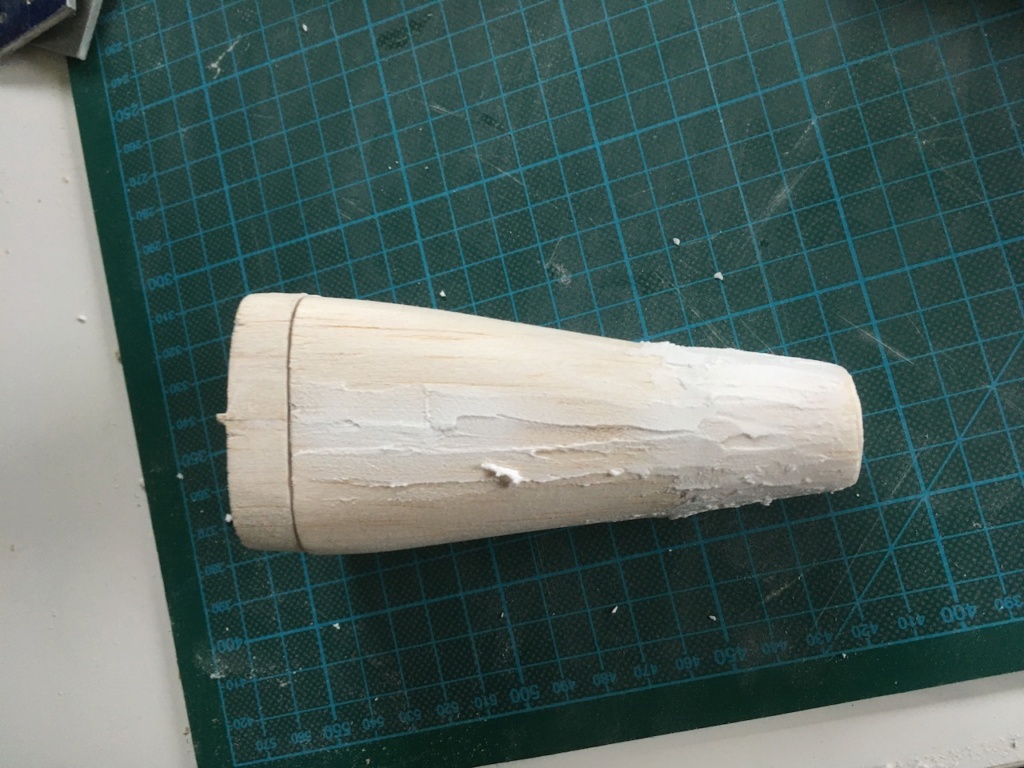
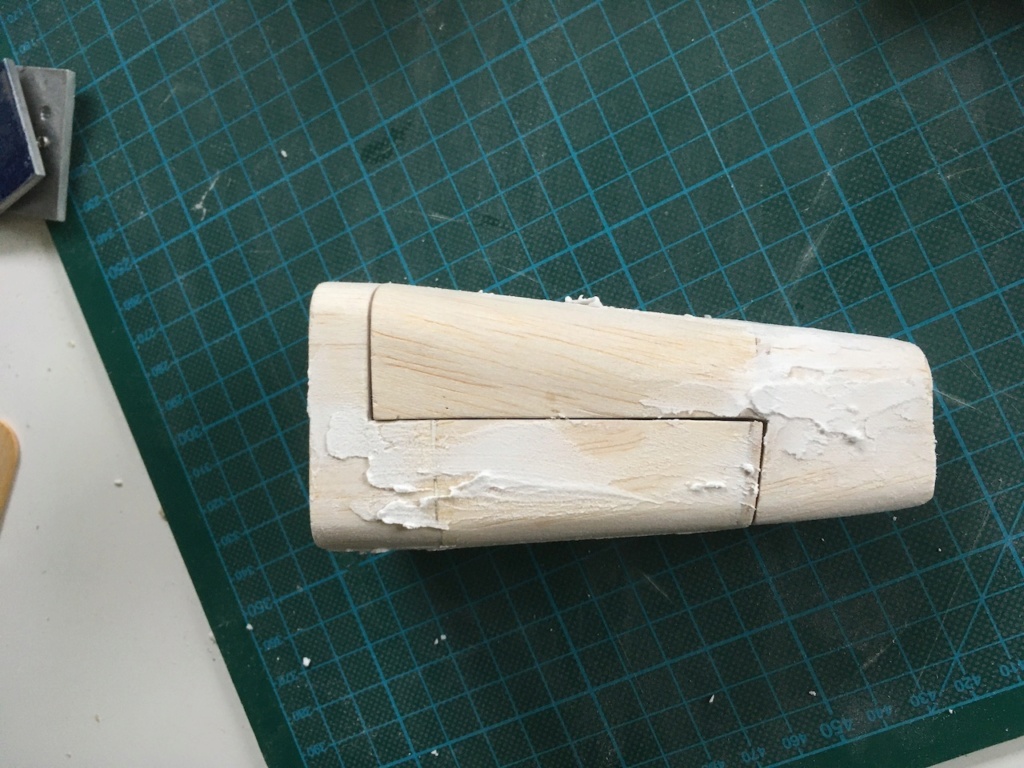
I have been working on the engine compartment of the PC-6, which is actually going to be a Fairchild AU-23.
I have had to modify the nose to the AU shape and followed the cowling lines of the full size aircraft, as best I can, to create the split line.
I used the original PC nose moulding and laminated 1/32 balsa around it to get the shape.
I used 1/16 plywood at the cabin bulkhead and the split lines.
NOW!
I need all the advise you kind folks can offer with regards the the following:
#1 - What should I use to proof the bulkhead and interior of the engine compartment?
#2 - How should I finish the exterior? I want to use USAAF shades of grey for the finish!


Daligh- Gold Member

- Posts : 101
Join date : 2020-06-28
Age : 75
Location : Sligo - Ireland

Levent Suberk- Diamond Member

- Posts : 2265
Join date : 2017-12-24
Location : Türkiye
 Fuel proofing.......
Daligh wrote:I have been working on the engine compartment of the PC-6, which is actually going to be a Fairchild AU-23.
I have had to modify the nose to the AU shape and followed the cowling lines of the full size aircraft, as best I can, to create the split line.
I used the original PC nose moulding and laminated 1/32 balsa around it to get the shape.
I used 1/16 plywood at the cabin bulkhead and the split lines.
NOW!
I need all the advise you kind folks can offer with regards the the following:
#1 - What should I use to proof the bulkhead and interior of the engine compartment?
#2 - How should I finish the exterior? I want to use USAAF shades of grey for the finish!
Daligh: fuel proofing, then more fuel proofing, then more fuel proofing.
Balsa is very absorbing. You may try thinned coats at first to lighten the weight, but fill the balsa pores, or maybe white glue thinned. The thinned white glue worked well on the poster board to cover the pores before painting with any type of paint and it didn’t seem to affect the poster board plastic at all.
Try whatever you think you want to use on a test piece to see the results before trying on your final product. That way you can see if you guessed right, or maybe you have to try something else because it is too heavy.
Happydad

happydad- Rest In Peace

- Posts : 1592
Join date : 2012-05-28
Age : 79
Location : Escondido, CA
 Re: RC build of a Guillows Porter PC-6 for .020 Pee Wee
Hi Happydad
I do love the setup and the universal joint idea. I ask how is the balance? I have some boats with this setup and I struggled to get decent balance I did achieve it eventually but it affected top end power and rpm. With the .020 might be better or worse? My .020 are a bit on the low end of brute force anyway. I have a TeeDee .020 that is pretty competent though. Maybe a TD would work good here?
Curious.
Thanks
Ice

Iceberg- Gold Member

- Posts : 382
Join date : 2018-11-03
Location : Suva Fiji Islands
 Maybe...
Iceberg wrote:Hi Happydad
I do love the setup and the universal joint idea. I ask how is the balance? I have some boats with this setup and I struggled to get decent balance I did achieve it eventually but it affected top end power and rpm. With the .020 might be better or worse? My .020 are a bit on the low end of brute force anyway. I have a TeeDee .020 that is pretty competent though. Maybe a TD would work good here?
Curious.
Thanks
Ice
Iceberg: I think you may be right. Lavender may have to use a TD .020 when he weighs his finished aircraft. The Pee Wee may not have enough power.
Daligh: what is your prediction for the AUW, final weight?
Happydad


happydad- Rest In Peace

- Posts : 1592
Join date : 2012-05-28
Age : 79
Location : Escondido, CA
 Re: RC build of a Guillows Porter PC-6 for .020 Pee Wee
Hi Adrian.
I soaked it in some 1987 vintage Model Technics 80/20 Castor Straight Glow Fuel for 6 days and it still will not disassemble!
Perhaps I need a NM mix?
Bernie will supply the throttle unassembled and I might have to go for that.
Dave.

Daligh- Gold Member

- Posts : 101
Join date : 2020-06-28
Age : 75
Location : Sligo - Ireland
 Re: RC build of a Guillows Porter PC-6 for .020 Pee Wee
happydad wrote:
Try whatever you think you want to use on a test piece to see the results before trying on your final product. That way you can see if you guessed right, or maybe you have to try something else because it is too heavy.
Happydad
Thanks.
I will experiment with various coatings. I have lots of different paints etc. to try.

Daligh- Gold Member

- Posts : 101
Join date : 2020-06-28
Age : 75
Location : Sligo - Ireland
 Re: RC build of a Guillows Porter PC-6 for .020 Pee Wee
Iceberg wrote:Hi Happydad
I do love the setup and the universal joint idea. I ask how is the balance? I have some boats with this setup and I struggled to get decent balance I did achieve it eventually but it affected top end power and rpm. With the .020 might be better or worse? My .020 are a bit on the low end of brute force anyway. I have a TeeDee .020 that is pretty competent though. Maybe a TD would work good here?
Curious.
Thanks
Ice
I had great difficulty in drilling accurately and the screw in the engine half of the coupling is a little off-centre.
It's only a 1/4mm or so off, but it looks wrong and worries me regarding balance hence the decision to go without a coupling.

Daligh- Gold Member

- Posts : 101
Join date : 2020-06-28
Age : 75
Location : Sligo - Ireland
 Re: RC build of a Guillows Porter PC-6 for .020 Pee Wee
happydad wrote:
Daligh: what is your prediction for the AUW, final weight?
Happydad
AUW looks like it will be around 180 gm.
The wing area is 80 x 600 so so wing loading will be .004 gm/mm.sq.
I believe that power is in the order of 25 Watts!? So power to weight ratio will be around .14 Watts/gm.
I don't have the foggiest idea what wing loading od power to weight ratio will fly!!!
But, if it does fly, I would like it to be uber slow!!!!!
Weighed Parts:
Assembled Engine and Fuel Tank = 80 gm.
Nose/Engine Assembly = 22 gm.
Tailplane/Elevator and Fin/Rudder = 8 gm.
Remaining Balsa Parts, Wire and Hardwood from Box (not stripped from the sheets) = 40 gm.
Estimated Weights:
Receiver = 15 gm.
Servos = 20 gm
Battery = 8 gm.

Daligh- Gold Member

- Posts : 101
Join date : 2020-06-28
Age : 75
Location : Sligo - Ireland
 Re: RC build of a Guillows Porter PC-6 for .020 Pee Wee
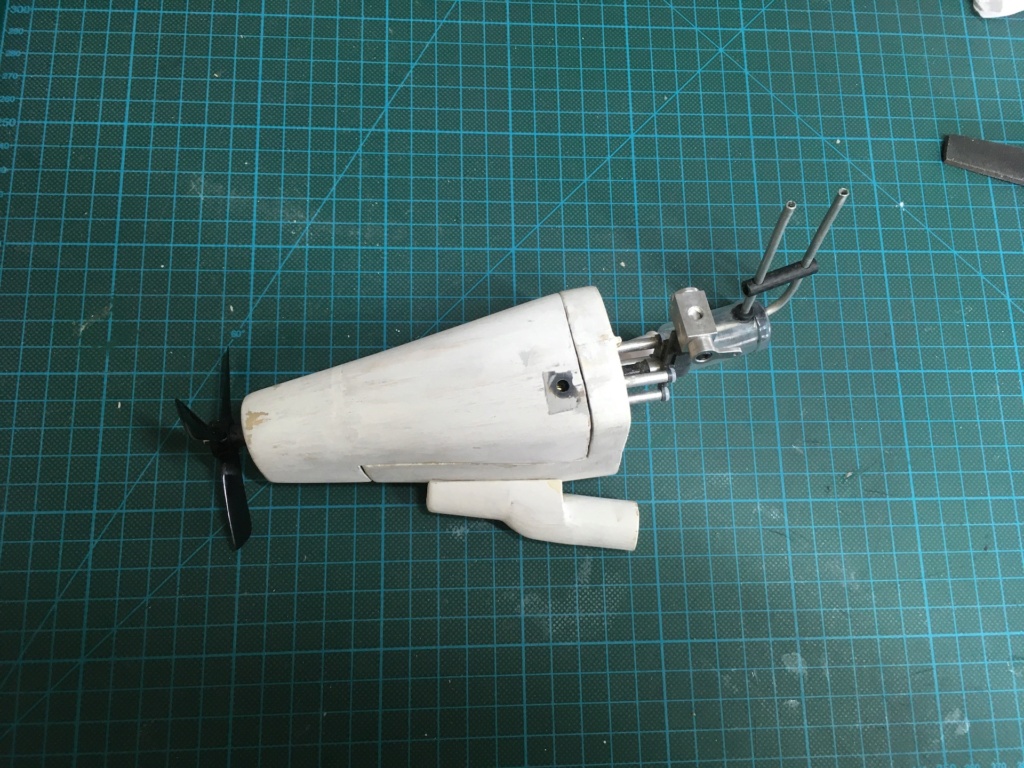
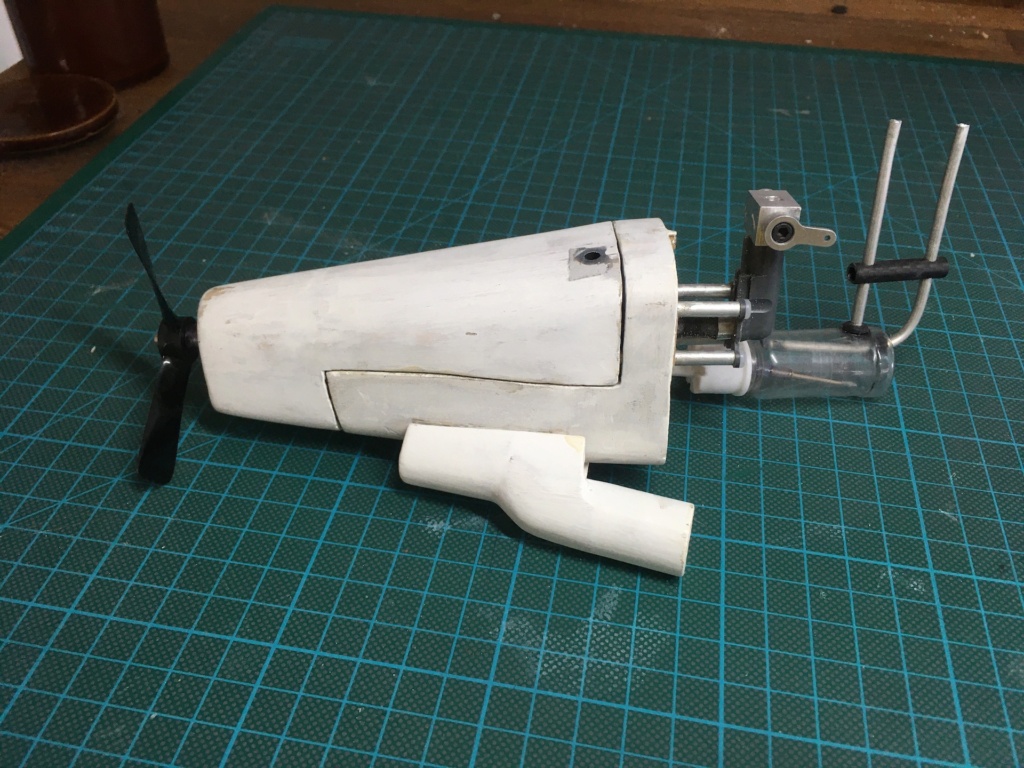
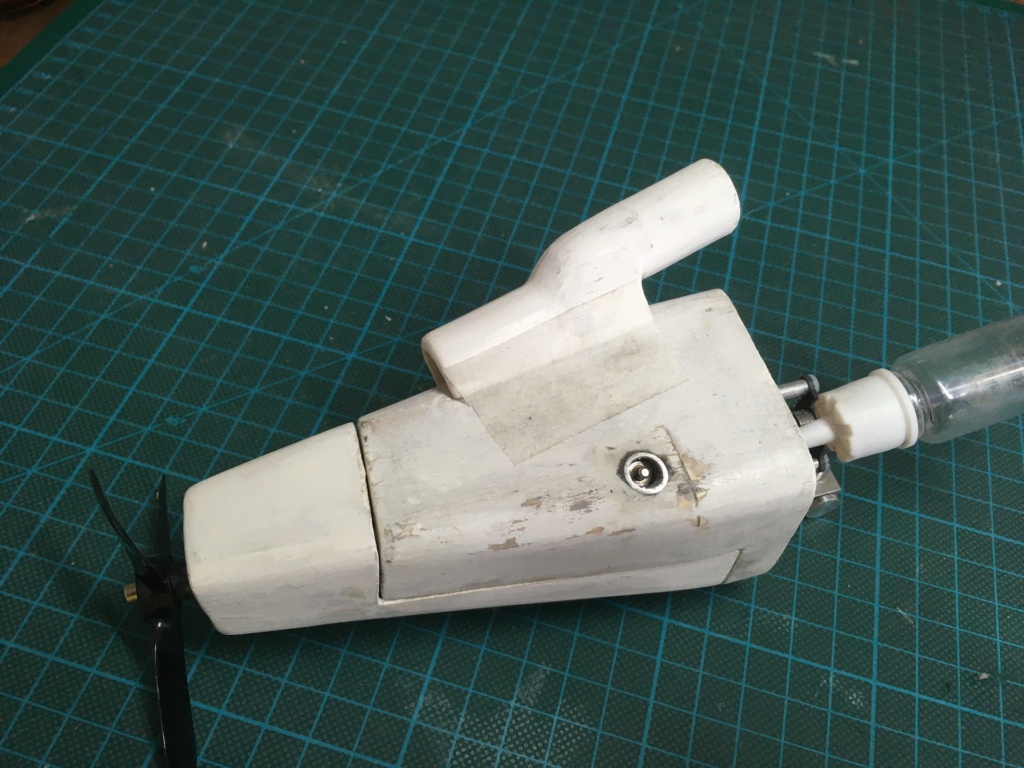
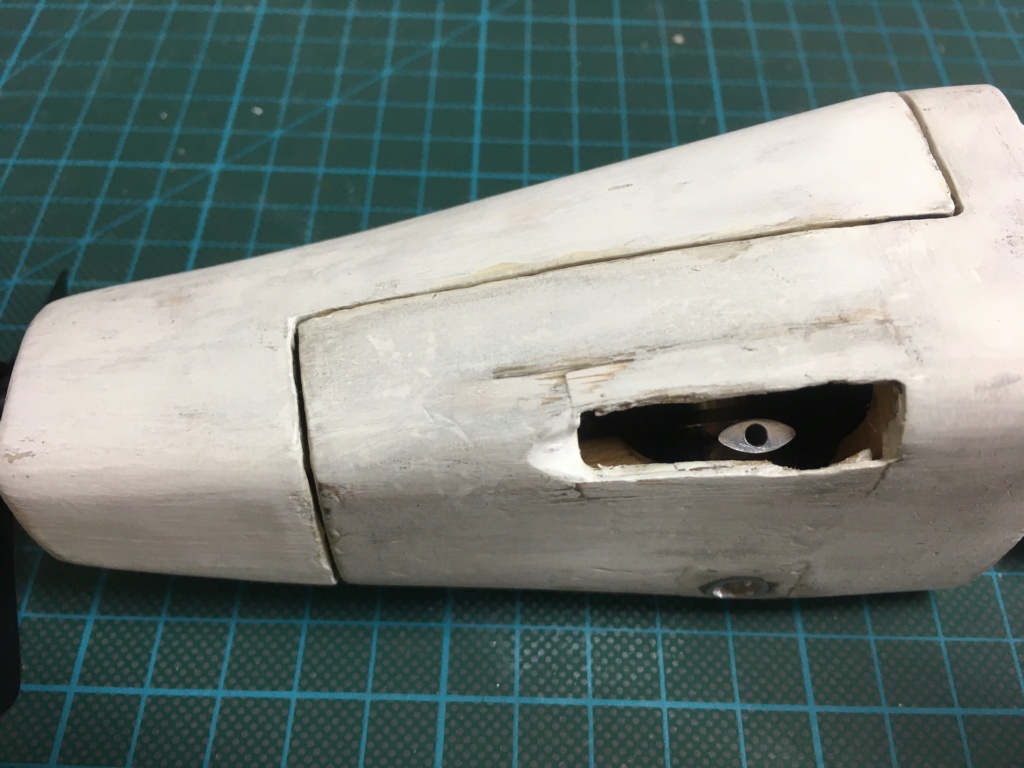
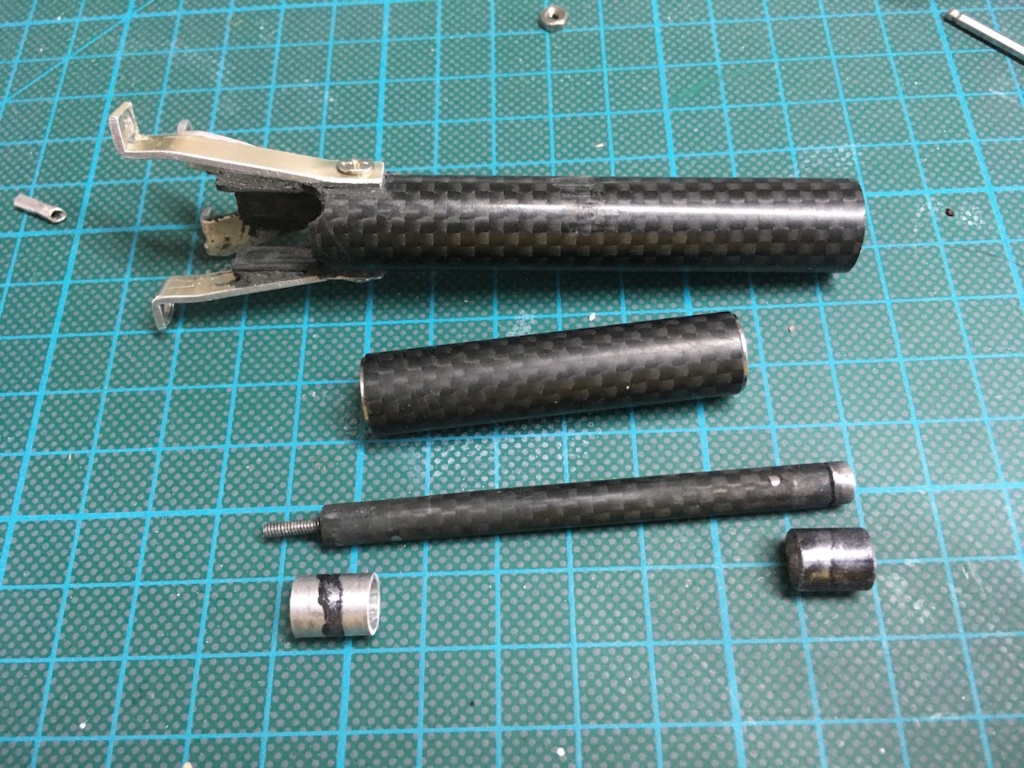
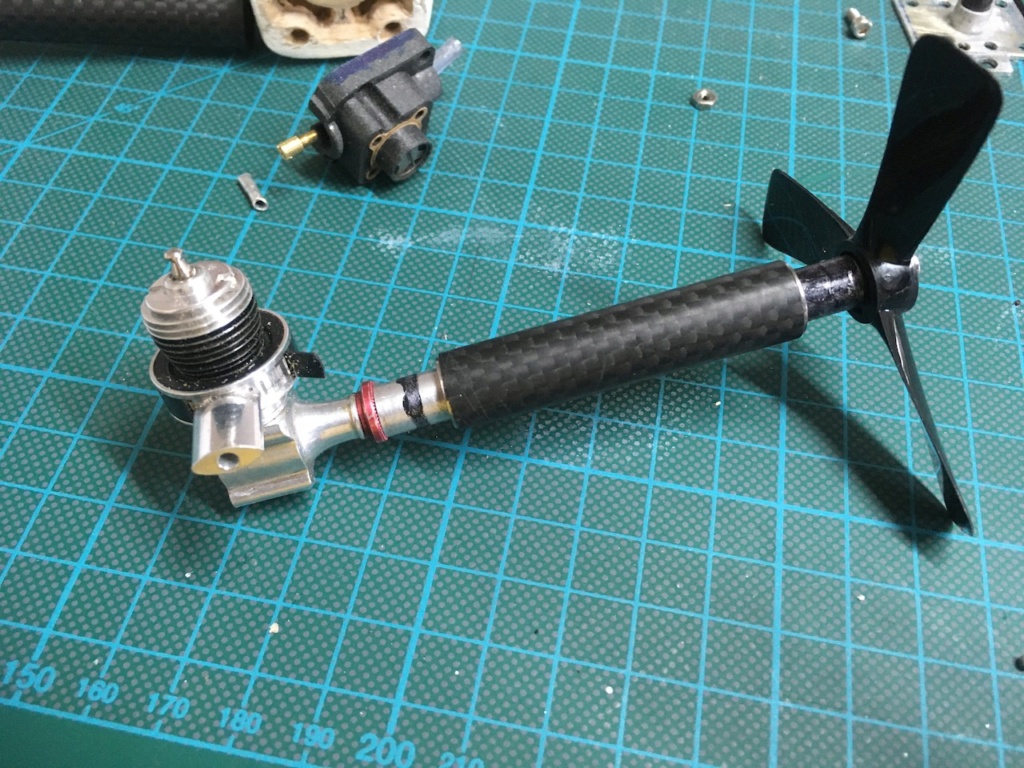
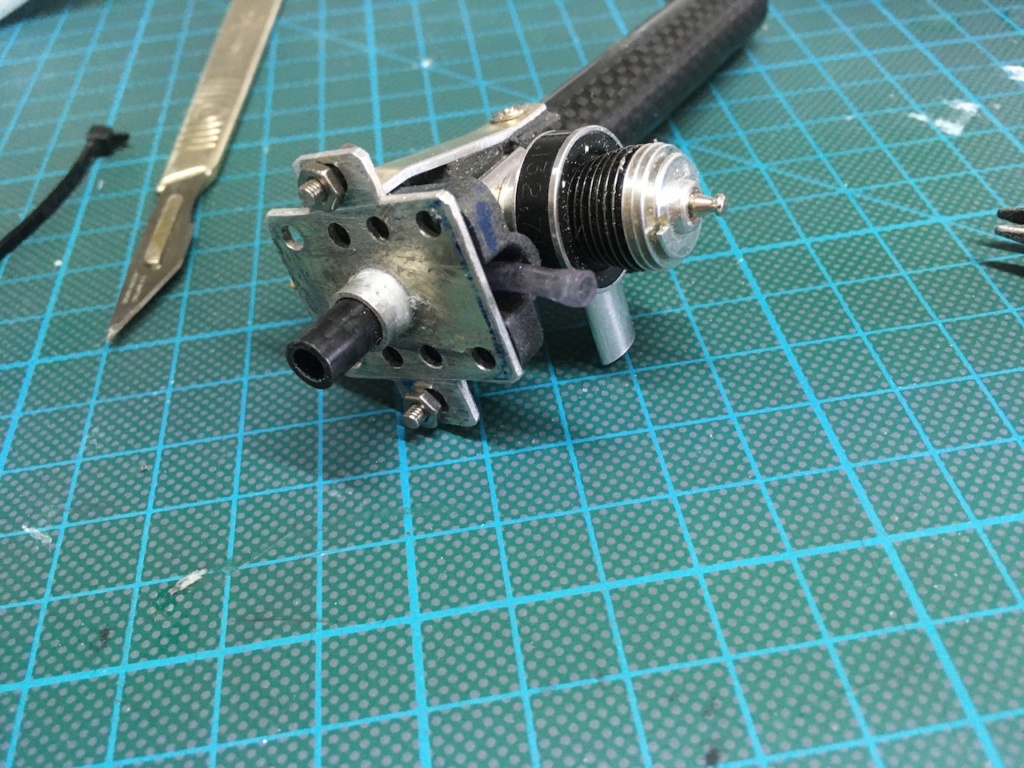
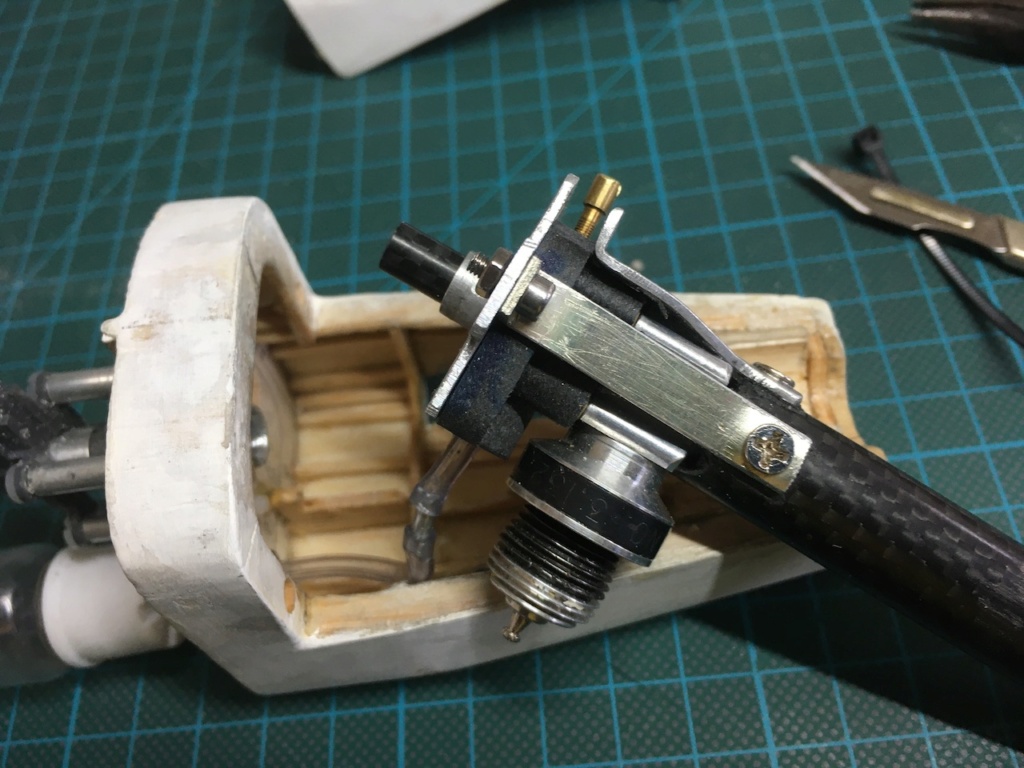
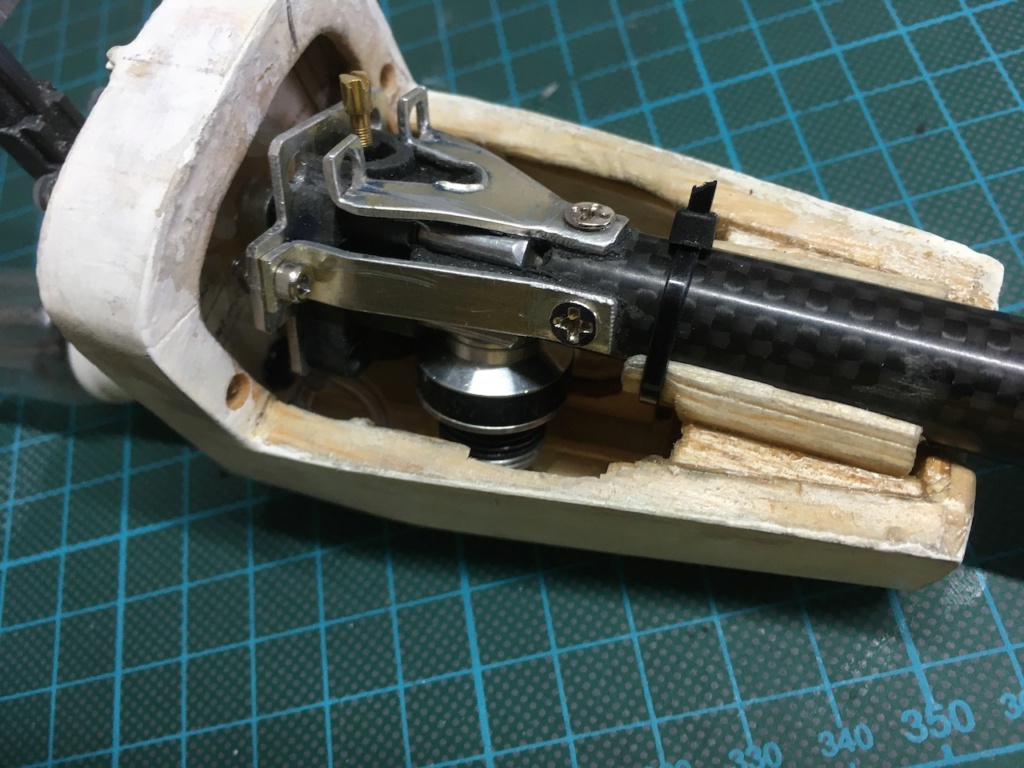
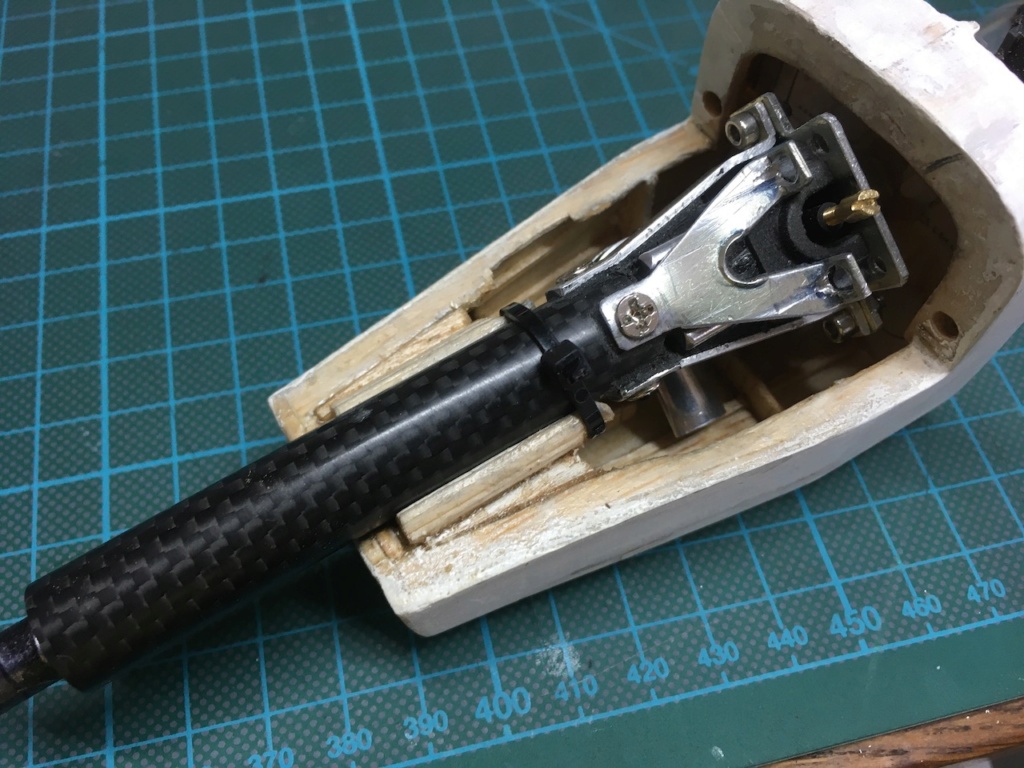
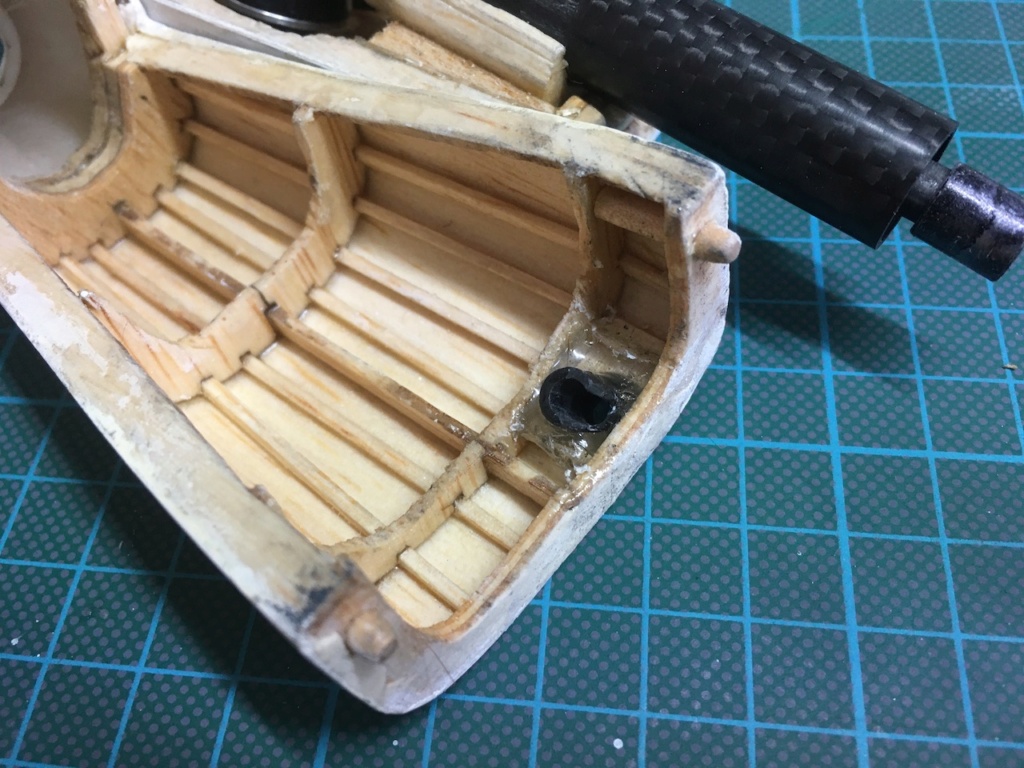
During the past few weeks some modifications and development works has been undertaken.
RC Throttle moved to Cabin Bulkhead.
Fuel supply connecting pipes. Which I am not entirely happy with!
New lighter engine backplate design with inlet to bulkhead.
Aluminium insert in engine compartment base. This acts as: Engine Location - Torque Reaction Point - Earth Connection for Glow Plug Power Supply (I meed to make a plug connector for this)
Carbon Tube insert to top of engine compartment to permit access to fuel needle valve which is cut down and slotted.
Angled mount for main Carbon Tube with cable tie fixing.
All Carbon fittings adjusted for length. The 12mm bearing tube is free to float in the 14mm tube and is located with spacers on the drive tube.
All the internals fuel proofed with proprietary proofer.
So now I need to make an electrical connector plug for the glow head and fire it up!
But I have a couple of problems:
FUEL - I only have some fuel from 1987 and I am not sure if it is still OK at 33 years of age!? I can't find 20% Castor Straight in Ireland and most fuels are in 4 litre bottles. I really don't know which fuel wouldest suit the Pee Wee!?
PROPELLER -The prop I have is I can only find one 3 blade 4 x 4 prop and that is for drones. It has a 5mm bore which is a problem. I believe that the 3.125 x 2.5 I have is a little on the small side!?


Daligh- Gold Member

- Posts : 101
Join date : 2020-06-28
Age : 75
Location : Sligo - Ireland
 Re: RC build of a Guillows Porter PC-6 for .020 Pee Wee
Wouldn't worry about the fuel, Im running Cox fuel from the 60's ....still runs fine!

OhBee- Platinum Member

- Posts : 698
Join date : 2016-03-23
Age : 73
Location : Minnesota
 Re: RC build of a Guillows Porter PC-6 for .020 Pee Wee
Seems you have got quite a bit done considering you haven to put engineering techniques to work here  Look forward to hearing about the engine run .
 Look forward to hearing about the engine run .

getback- Top Poster


Posts : 10441
Join date : 2013-01-18
Age : 67
Location : julian , NC
Page 2 of 2 •  1, 2
1, 2
 Similar topics
» Guillows Cessna 150 build circa 1970 (Build Log)
» Guillows ME 109 C/L Build
» Anybody want any guillows kits?
» Guillows Cessna build advice needed
» Porter-Cable sale at Lowes
» Guillows ME 109 C/L Build
» Anybody want any guillows kits?
» Guillows Cessna build advice needed
» Porter-Cable sale at Lowes
Page 2 of 2
Permissions in this forum:
You cannot reply to topics in this forum

 Rules
Rules


