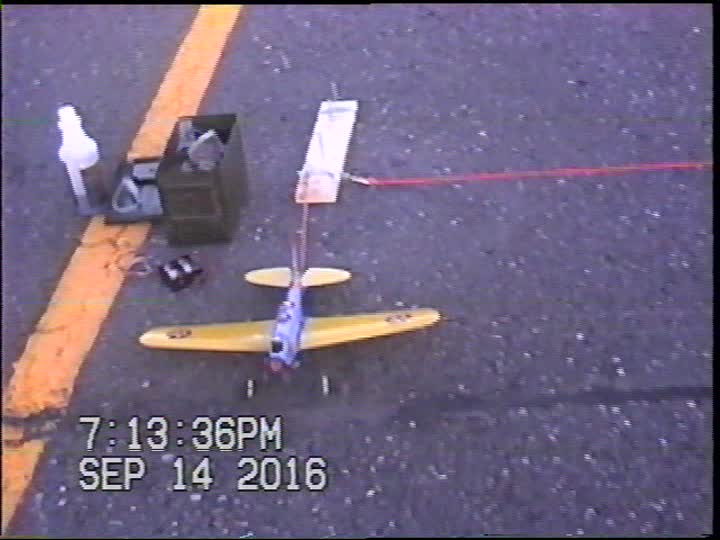
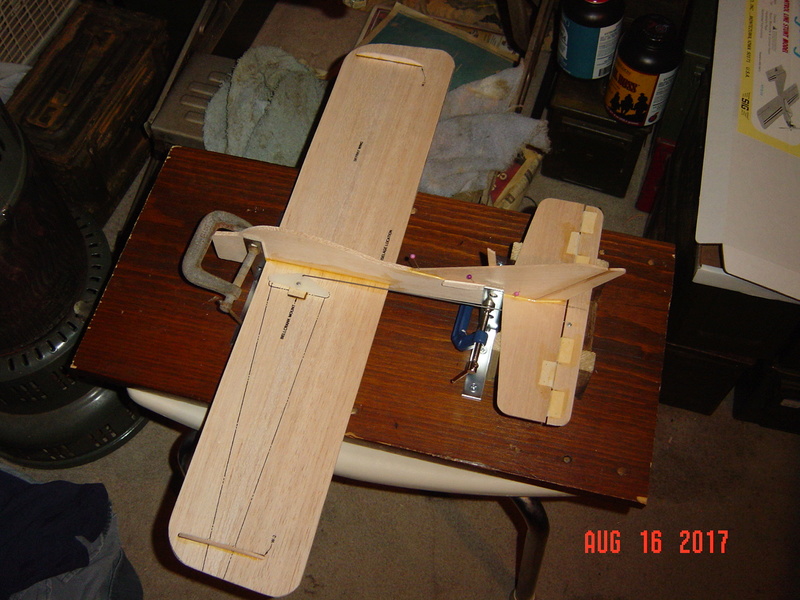
Log in
Search
Latest topics
» TEE DEE Having issuesby balogh Today at 7:42 am
» Retail price mark-up.. how much is enough?
by rsv1cox Today at 7:36 am
» Cox films/videos...
by Coxfledgling Today at 4:46 am
» Purchased the last of any bult engines from Ken Enya
by Coxfledgling Today at 4:18 am
» My N-1R build log
by roddie Today at 12:32 am
» Happy 77th birthday Andrew!
by akjgardner Today at 12:27 am
» Landing-gear tips
by roddie Yesterday at 6:17 pm
» Roger Harris revisited
by TD ABUSER Yesterday at 2:13 pm
» Tee Dee .020 combat model
by Ken Cook Yesterday at 1:41 pm
» My latest doodle...
by roddie Yesterday at 10:43 am
» Chocolate chip cookie dough.........
by roddie Fri Nov 22, 2024 1:13 pm
» Free Flight Radio Assist
by rdw777 Fri Nov 22, 2024 9:24 am
Cox Engine of The Month
Ordered a 1/2A Skyray kit
Page 1 of 6
Page 1 of 6 • 1, 2, 3, 4, 5, 6 
 Ordered a 1/2A Skyray kit
Just placed the order with SIG. I have a few questions as I've never built a balsa model.
What engine is appropriate? I'm thinking this .049, but am open to suggestions.

I'm looking a this 3/8 oz. tank. Any problems with using it?

The Skyray doesn't come with landing gear. Any reason why this set won't work?
https://coxengines.ca/cox-landing-gear-kit-v-profile-fuselage.html

Whats the recommended adhesive for assembling the model?
I'm sure I'll have more questions, but any responses to these will be much appreciated.
Thanks
What engine is appropriate? I'm thinking this .049, but am open to suggestions.

I'm looking a this 3/8 oz. tank. Any problems with using it?

The Skyray doesn't come with landing gear. Any reason why this set won't work?
https://coxengines.ca/cox-landing-gear-kit-v-profile-fuselage.html

Whats the recommended adhesive for assembling the model?
I'm sure I'll have more questions, but any responses to these will be much appreciated.
Thanks

TLAnderson- Gold Member

- Posts : 243
Join date : 2016-07-21
Location : Northern Wisconsin
 Re: Ordered a 1/2A Skyray kit
Hey! You have ordered a great kit for your first plane. This is the Cox Engine Forum, so we would tend to lean toward recommending the Cox 049 as the proper engine to power your aircraft !! a tanked Baby Bee would be just fine as a first plane motor. IiRC the instructions state to install the prop backwards and run the engine rich for a easy to fly first flight. You can work your way up to the medallion or TD along with that 3/8 Oz fuel tank for longer flights. Take your time and review the Engine of the Month winners you'll find a wide variety of engines to choose from. ( yah, I've got a testers/McCoy 049 on one of my models) 3/8oz tank Don't fill it full until you've gotten a few flights under your belt or you may be turning circles longer than you can stand!
Landing gear is really helpful if you have a hard surface to fly off of. It makes for more realistic take offs and landings, including the noseovers. Also, works well with a "stooge" for flying with out a "pitman" ......don't confuse the two or you'll be flying alone.
If you ordered your kit from SIG, you could also have ordered the adhesive of your choice from them also. I as a youngster started out with White glue, Elmers for balsa models like Giuillows, started using SiGment or Ambroid as it dried a little quicker and was (I think) "hot fuel proof" for the engine powered models. Lots of builders use the fast setting "CA" type of adhesive, it's quick and available in thin, medium and thick for different applications. For a slab wing profile model like the SkyRay I would use the white glue like TiteBond, relatively inexpensive and readily available. Keep us posted of your progress with some pictures and we'll help answer any other questions that might come up.

Marleysky- Top Poster


Posts : 3618
Join date : 2014-09-28
Age : 72
Location : Grand Rapids, MI
 Re: Ordered a 1/2A Skyray kit
Hi TL, The engine in your photo would work.. but there are four balsa "cheek-blocks" that back-up to the model's firewall, which would be in the way of using that wedge-tank. For simplicity purposes, I would recommend a Cox .049 Babe Bee with the older "metal" backplate. The fuel tank is integral to the engine. Later-on you can switch to a Cox Golden Bee or Black Widow.. and have the ability to fly inverted/aerobatics. They have tank-vents similar to the wedge-tank in your photo.. and the same mounting-arrangement as the Babe Bee does.
The inverted-V wire-gear will work. I personally would lay the wire in position against the UNASSEMBLED firewall initially.. and make "four" templates from card-stock. One in the full-shape of the firewall, another marking the lower-space between the "V" and two for the spaces above it. Obtain some 1/16" plywood and use the templates as a pattern for cutting the wood. The idea is to "trap" the wire with the plywood pieces "around it" and have those three pieces form the shape of the firewall. The full-perimeter template is used to cut a "cap" which will sandwich the wire inside.
Read and then re-read Sig's instructions before proceeding. The below method that I suggest, may need to be one of the "final-steps" in the build. The landing-gear installation "might" better-off be the last-step prior to fuel-proofing/painting.
Once your fuse's firewall/cheek-blocks are built.. brace the fuse/model vertically "nose-high" and "tack" the wire in-place with CA/super-glue. Then glue-in the three plywood filler-pieces to the firewall using epoxy.. (all pieces should be level) After that "cures".. coat the wire, filler-pieces and the "cap-piece" with epoxy.. and then install the cap-piece. You now have a nice flat "extension" of the firewall to which you can mount your engine. Note: when marking the four holes for mounting the engine, be mindful of where the wire runs through behind the plate.. so your screws clear it.
When it's time to paint the model, you can mask the wire-struts using a couple of plastic drinking-straws cut to length and split-open lengthwise with a #11 hobby-blade.
Some final thoughts; Landing-gear will hinder flight-performance a bit.. but can also help correct a tail-heavy condition due to excess paint. This model has a short nose.. and can get tail-heavy REAL quick. If those wheels end-up being too heavy, you can always get some lighter ones. Later-on.. if you don't like the way the model flies with the gear.. you can always slice-off the struts at the firewall with a dremel-tool/cut-off wheel.. and have a pitman hand-launch for you.
Best of luck TL! I also have this kit and have been wanting to build it.
The inverted-V wire-gear will work. I personally would lay the wire in position against the UNASSEMBLED firewall initially.. and make "four" templates from card-stock. One in the full-shape of the firewall, another marking the lower-space between the "V" and two for the spaces above it. Obtain some 1/16" plywood and use the templates as a pattern for cutting the wood. The idea is to "trap" the wire with the plywood pieces "around it" and have those three pieces form the shape of the firewall. The full-perimeter template is used to cut a "cap" which will sandwich the wire inside.
Read and then re-read Sig's instructions before proceeding. The below method that I suggest, may need to be one of the "final-steps" in the build. The landing-gear installation "might" better-off be the last-step prior to fuel-proofing/painting.
Once your fuse's firewall/cheek-blocks are built.. brace the fuse/model vertically "nose-high" and "tack" the wire in-place with CA/super-glue. Then glue-in the three plywood filler-pieces to the firewall using epoxy.. (all pieces should be level) After that "cures".. coat the wire, filler-pieces and the "cap-piece" with epoxy.. and then install the cap-piece. You now have a nice flat "extension" of the firewall to which you can mount your engine. Note: when marking the four holes for mounting the engine, be mindful of where the wire runs through behind the plate.. so your screws clear it.
When it's time to paint the model, you can mask the wire-struts using a couple of plastic drinking-straws cut to length and split-open lengthwise with a #11 hobby-blade.
Some final thoughts; Landing-gear will hinder flight-performance a bit.. but can also help correct a tail-heavy condition due to excess paint. This model has a short nose.. and can get tail-heavy REAL quick. If those wheels end-up being too heavy, you can always get some lighter ones. Later-on.. if you don't like the way the model flies with the gear.. you can always slice-off the struts at the firewall with a dremel-tool/cut-off wheel.. and have a pitman hand-launch for you.
Best of luck TL!
 I also have this kit and have been wanting to build it.
 Re: Ordered a 1/2A Skyray kit
Has anyone used an engine from EX Model Engines? I'm still looking at engine options. Their Silver Stunter looks like a possibility.
http://www.ebay.com/itm/Silver-Stunter-Customized-Cox-049-Model-Airplane-Engine-049-/281897553181?epid=907541658&hash=item41a2674d1d:g:OvUAAOSw1S9WhC6o

http://www.ebay.com/itm/Silver-Stunter-Customized-Cox-049-Model-Airplane-Engine-049-/281897553181?epid=907541658&hash=item41a2674d1d:g:OvUAAOSw1S9WhC6o


TLAnderson- Gold Member

- Posts : 243
Join date : 2016-07-21
Location : Northern Wisconsin
 Re: Ordered a 1/2A Skyray kit
TLAnderson wrote:Has anyone used an engine from EX Model Engines? I'm still looking at engine options. Their Silver Stunter looks like a possibility.
http://www.ebay.com/itm/Silver-Stunter-Customized-Cox-049-Model-Airplane-Engine-049-/281897553181?epid=907541658&hash=item41a2674d1d:g:OvUAAOSw1S9WhC6o
That would be an ideal engine TL. It comes with a plastic "backplate" which I'm not fond of though.. because the mounting-lugs can break-off in the event of a hard nose-dive crash. If you decide to buy that engine.. it may be wise to buy an extra backplate for it.. just in case you have a mishap.
The Skyray artwork from Sig shows a Cox "Golden Bee" engine mounted.. which is basically the same configuration as that "Silver Stunter".
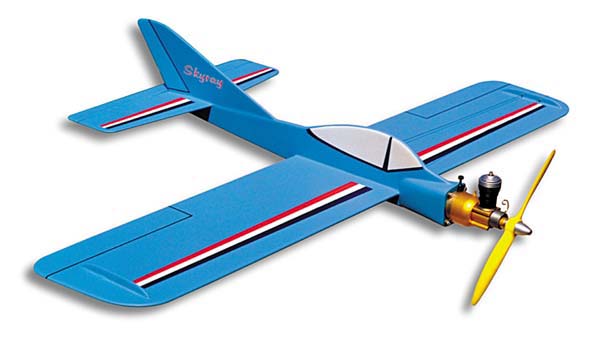
I'm curious to know how your model will fly with landing-gear. Here's some photos of Skyrays that have gear..
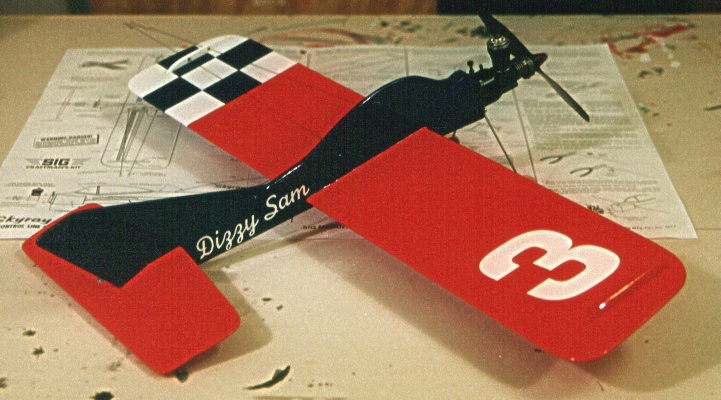

This kit was given to me by a fella who belonged to the N.E.S.T C/L aerobatics club around 1993 when I lived in Massachusetts.
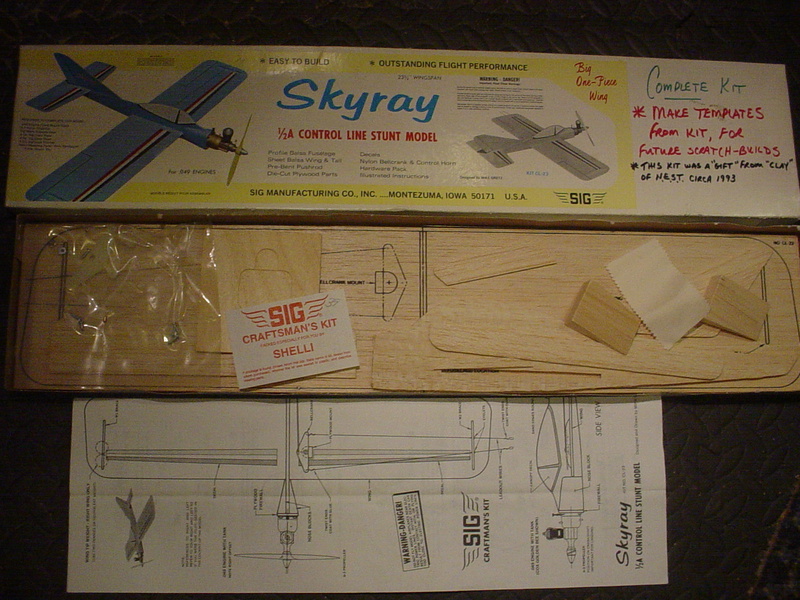
I plan on making templates of all the sheet-parts prior to assembly, in case I want to build another one. A quick-easy task with a piece of poster-board.
 Re: Ordered a 1/2A Skyray kit
A couple questions before I weigh in.
Have you flown before or is this the first? Do you plan on flying off of grass or concrete?
Have you flown before or is this the first? Do you plan on flying off of grass or concrete?

Cribbs74- Moderator


Posts : 11907
Join date : 2011-10-24
Age : 50
Location : Tuttle, OK
 Re: Ordered a 1/2A Skyray kit
Ron is on the right track with the intended use, skill, area....etc
There are so many good option to be successful returning to CL or just starting out in CL flight
BUT to directly answer the question;
Yes! Matt's products at EX Model Engines
As well as Bernie's, at Cox International are good sources of new Cox engines and a whole lot of other must have stuff
MY SkyRay with Black Widow and a 5x3 prop will screw me into the ground on 35" lines but too light on longer lines
I would also suggest getting a bunch of balsa ( craft store stuff is OK) and copy the sky ray to build two or more of them
Build one as a beater with very very minimal fuel proofing not caring a bit about looks.... this is the crash n learn plane
My first one is rustoleum paint and NO smoothing, or filler, or any other attempt to hide balsa grain
Find Rusty's post on his STOOGE ...copy the real easy bath mat design-----and forget the landing gear for the beater plane...IMO
IF total newbe fly over grass... roll on ground launch for 1/2a almost always requires a run way....asphalt, concrete or a "you lay it on grass" plywood, roll out mat, or cardboard flat take off zone...
Helper hand launch...or Stooge is just too easy comparatively

fredvon4- Top Poster


Posts : 4012
Join date : 2011-08-26
Age : 69
Location : Lampasas Texas
 Re: Ordered a 1/2A Skyray kit
Cribbs74 wrote:A couple questions before I weigh in.
Have you flown before or is this the first? Do you plan on flying off of grass or concrete?
Had a PT-19 back in the early '70s. I just got another one last year. I've been flying it whenever possible. See this thread.
https://www.coxengineforum.com/t9958-just-got-a-pt-19

TLAnderson- Gold Member

- Posts : 243
Join date : 2016-07-21
Location : Northern Wisconsin
 Re: Ordered a 1/2A Skyray kit
fredvon4 wrote:Ron is on the right track with the intended use, skill, area....etc
There are so many good option to be successful returning to CL or just starting out in CL flight
BUT to directly answer the question;
Yes! Matt's products at EX Model Engines
As well as Bernie's, at Cox International are good sources of new Cox engines and a whole lot of other must have stuff
Thanks. That's what I needed to know.
fredvon4 wrote:I would also suggest getting a bunch of balsa ( craft store stuff is OK) and copy the sky ray to build two or more of them
Build one as a beater with very very minimal fuel proofing not caring a bit about looks.... this is the crash n learn plane
My first one is rustoleum paint and NO smoothing, or filler, or any other attempt to hide balsa grain
That's what I was thinking also. I'll probably rekit the thing the first time I try a loop.
fredvon4 wrote:Find Rusty's post on his STOOGE ...copy the real easy bath mat design-----and forget the landing gear for the beater plane...IMO
IF total newbe fly over grass... roll on ground launch for 1/2a almost always requires a run way....asphalt, concrete or a "you lay it on grass" plywood, roll out mat, or cardboard flat take off zone...
Helper hand launch...or Stooge is just too easy comparatively
I've been flying the PT-19 over grass, with some carpet runners for a runway. Seems to work pretty well.
I made a stooge that works pretty well, too.
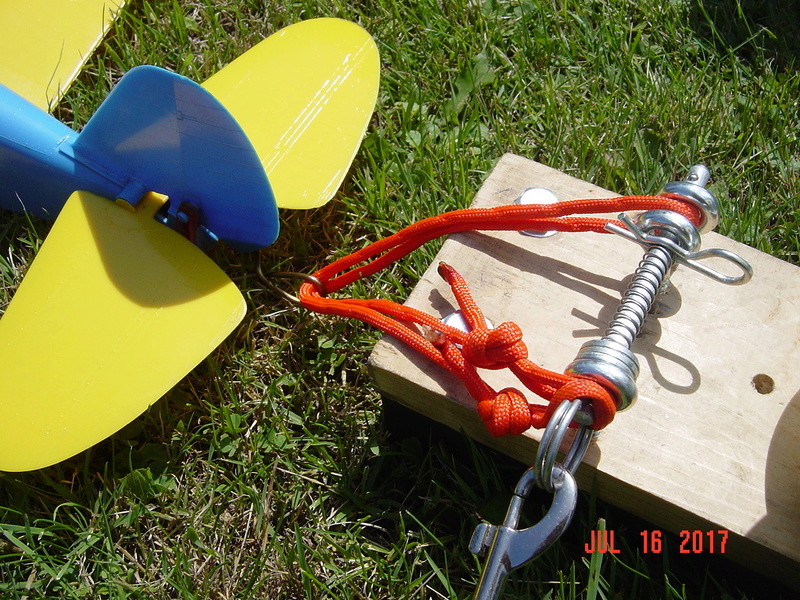
Thanks for the tips.

TLAnderson- Gold Member

- Posts : 243
Join date : 2016-07-21
Location : Northern Wisconsin
 Re: Ordered a 1/2A Skyray kit
fredvon4 wrote:Find Rusty's post on his STOOGE ...copy the real easy bath mat design-----and forget the landing gear for the beater plane...IMO
Here's the stooge link. I accidentally posted it in the wrong thread:
https://www.coxengineforum.com/t11079-roddie-s-1-2a-control-lines#140145
_________________
Don't Panic!
...and never Ever think about how good you are at something...
while you're doing it!
My Hot Rock & Blues Playlist
...and never Ever think about how good you are at something...
while you're doing it!
My Hot Rock & Blues Playlist

RknRusty- Rest In Peace

- Posts : 10869
Join date : 2011-08-10
Age : 68
Location : South Carolina, USA

TLAnderson- Gold Member

- Posts : 243
Join date : 2016-07-21
Location : Northern Wisconsin

TLAnderson- Gold Member

- Posts : 243
Join date : 2016-07-21
Location : Northern Wisconsin
 Re: Ordered a 1/2A Skyray kit
Looking good!

JPvelo- Diamond Member

- Posts : 1972
Join date : 2011-12-02
Age : 57
Location : Colorado
 Re: Ordered a 1/2A Skyray kit
Here's where it's at right now. I decided to use a product engine for a couple of reasons. 1. If I destroy the Skyray, I'll have a spare engine for my PT-19. 2. I think those external tanks look cool.
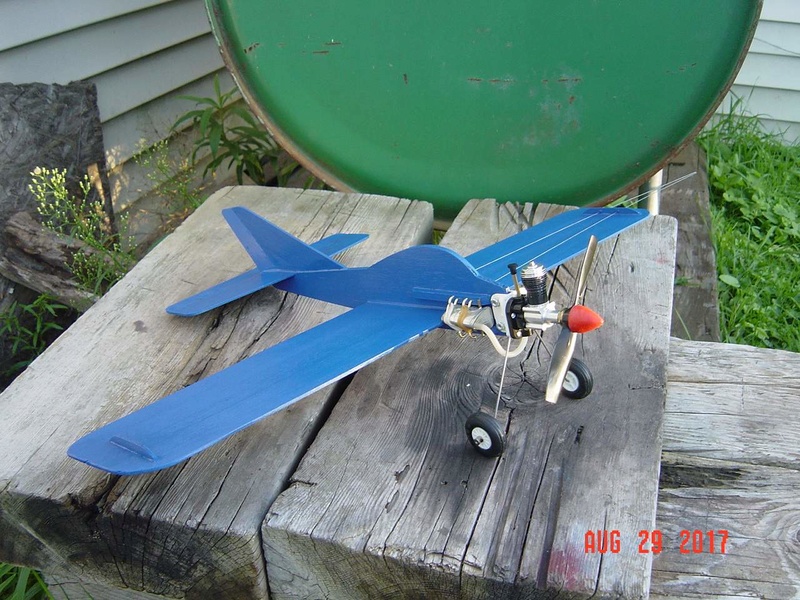


Since I didn't use the cheek blocks, I coated the nose with CA. I'm hoping the 1/4" square hardwood strips above and below the tank will stiffen up the nose also.
The plastic engine mount is made for a .250" thick fuselage. The skyray fuse is about .200" thick. I wrapped some .025" thick brass shim stock around the nose under the engine mount to take up the space, and to hopefully prevent the 4-40 x 3/4 bolts from crushing the balsa, or ripping out.
Not sure how well that tank is going to work. Is the bottom vent supposed to be plugged after the tank is filled?
The plane weighs 7 oz. according to a cheap kitchen spring scale. Balance point is at the leading edge of the wing. Still need to put some tip weight on it, and some kind of tail skid, then fly it and see what happens.


TLAnderson- Gold Member

- Posts : 243
Join date : 2016-07-21
Location : Northern Wisconsin
 Re: Ordered a 1/2A Skyray kit
TLAnderson wrote:The plastic engine mount is made for a .250" thick fuselage. The skyray fuse is about .200 thick. I wrapped some .025" thick brass shim stock around the nose under the engine mount to take up the space, and to hopefully prevent the 4-40 x 3/4 bolts from crushing the balsa, or ripping out.
I'm speculating that it is probably 3/16" (0.1875"). What you have is similar to the Sterling Beginner series aircraft. They simply used a similar engine mount to the 1/4" thick profile fuselage, nothing more. They flew fine. I would have probably glued 1/16" sheet balsa shims on both sides the same footprint as the engine mount to take up the slack. If you really wanted to toughen up the engine mount holes, then 1/32" or 1/16" plywood would really stiffen it up. Sterling used same bolting system, put a drop of glue or CA onto the ends of the nuts so they don't vibrate loose and you should be okay.
Not sure how well that tank is going to work. Is the bottom vent supposed to be plugged after the tank is filled?
The brass tubes extend through the tank with a little daylight before they hit the other side of the tank inside. You don't need to plug it, it works just fine as is, fuel won't pour or seep out.
The plane weighs 7 oz. according to a cheap kitchen spring scale. Balance point is at the leading edge of the wing. Still need to put some tip weight on it, and some kind of tail skid, then fly it and see what happens.

Balance point at wing leading edge sounds about right. Doesn't take much for a tail skid, can even use a paper clip, clip it off with a wire cutter, stick both ends into the balsa embedding at least a 1/4" with the loop on the bottom sticking out sufficiently so tail end doesn't get road rash. Then CA to secure in place.

GallopingGhostler- Top Poster


Posts : 5724
Join date : 2013-07-13
Age : 70
Location : Clovis NM or NFL KC Chiefs
 Re: Ordered a 1/2A Skyray kit
Normally, the bottom vent is plugged on standard vent tanks, prevents siphoning and helps fuel draw some.
The tank looks a little low, it should be slightly above the centerline of the engine. Won't really affect anything until you start going inverted though. If possible shorten the fuel line, it helps the engine draw fuel if you have a straighter shot at the spraybar.
The tank looks a little low, it should be slightly above the centerline of the engine. Won't really affect anything until you start going inverted though. If possible shorten the fuel line, it helps the engine draw fuel if you have a straighter shot at the spraybar.

Cribbs74- Moderator


Posts : 11907
Join date : 2011-10-24
Age : 50
Location : Tuttle, OK
 Re: Ordered a 1/2A Skyray kit
Cribbs74 wrote:Normally, the bottom vent is plugged on standard vent tanks, prevents siphoning and helps fuel draw some.
Siphoning is impossible with these type tanks. By capping the bottom tube will inhibit fuel flow. The standard Perfect wedge tanks, the top tube extends straight down to about 1/16" from the bottom. The bottom tube extends up vertically to about 1/16" from the top. If you cap off the bottom tube, it will have to draw air through the submerged top tube that you used to fill the tank. Basically you have increased resistance to fuel flow by the weight of the fuel at the bottom. Draw on these reed valve engines is weak. Keeping that bottom vent open is essential until in flight, when centrifugal force will open up both vents by causing fuel to hold to the outer fuel tank tube to the engine.
The tank looks a little low, it should be slightly above the centerline of the engine. Won't really affect anything until you start going inverted though. If possible shorten the fuel line, it helps the engine draw fuel if you have a straighter shot at the spraybar.
If it were a front rotary valve engine where the spraybar is mounted higher than engine crankshaft, then one would want to mount fuel tank in line with the spraybar. In this case the spraybar is over the crankshaft, so what he has looks right. Regarding the length of fuel line, there isn't much shortening available. Spraybar assembly barb is located at the bottom. About the only way to mitigate would be mount the engine pancake, with needle valve point toward the flier.
The old Carl Goldberg engine mount for the old postage stamp engines naturally oriented the needle valve to the inside of the circle, giving a straighter shot putting the spraybar nipple near the tank pickup by aligning the spraybar horizontally.

GallopingGhostler- Top Poster


Posts : 5724
Join date : 2013-07-13
Age : 70
Location : Clovis NM or NFL KC Chiefs
 Re: Ordered a 1/2A Skyray kit
Capping one of the vents doesn't affect fuel draw in a negative way. It improves it. I do it on EVERY model I own that uses standard venting. I cap the top when pitted so fuel doesn't siphon out prior to starting. You don't even need a bottom vent. You only need two pipes on a standard vented tank, the pickup tube and a tube to fill it. When filling, it gets filled through the pickup tube and overflow comes out the vent.

Ken Cook- Top Poster

- Posts : 5641
Join date : 2012-03-27
Location : pennsylvania
 Re: Ordered a 1/2A Skyray kit
Looks good. I like rubber spinners, partly because I was hit on the knee by one once.

David Ingham- Silver Member

- Posts : 86
Join date : 2017-03-30
Age : 82
Location : Mountsin View, California, USA
 Re: Ordered a 1/2A Skyray kit
I did not see mention of the control movement. The plans recommend minimal movement for your first flights to prevent over-control. As you get more proficient you can increase control movement simply by moving the pushrod wire.
This works for the Skyray built per plans. I would guess that it would work for one with landing gear.
George
This works for the Skyray built per plans. I would guess that it would work for one with landing gear.
George

gcb- Platinum Member

- Posts : 908
Join date : 2011-08-11
Location : Port Ewen, NY
 Re: Ordered a 1/2A Skyray kit
gcb wrote:I did not see mention of the control movement. The plans recommend minimal movement for your first flights to prevent over-control. As you get more proficient you can increase control movement simply by moving the pushrod wire.
This works for the Skyray built per plans. I would guess that it would work for one with landing gear.
George
I have the pushrod in the inner hole on the bellcrank, and the middle hole on the horn. Getting about 25 degrees of elevator movement each way from neutral. Haven't flown it yet, but it's ready, whenever the wind goes down.

TLAnderson- Gold Member

- Posts : 243
Join date : 2016-07-21
Location : Northern Wisconsin
 Re: Ordered a 1/2A Skyray kit
Cool that you opted for the product backplate for the engine. I like them.. and have used them extensively. I build all of my radial-mount firewalls with that backplate-mount in mind.. because I like having the option for running an external fuel delivery.
I see that you have a "long" needle installed in that backplate. If you experience any "richening" of the needle-setting while in flight.. it may be because vibration is causing that unsupported needle to "turn-open". A "short" needle is less prone to this. Short-needles are available.. or you could opt to cut this one shorter with a razor-saw. Another alternative would be to devise a "clip".. or friction-collar to hold the needle-setting. You might not experience any problems early-on.. but it's something to think about if your engine-runs begin to vary.
I like the engine-mount that affords an easy landing-gear installation! Others will object to that for this model.. but everyone has an opinion..
Stooge-links have been mentioned for the tail. Your PT19 sports one. For this model; I'd just drill a small hole through the bottom of the fuse's tail.. and thread some heavy-string through it.. and tie/make a loop for the stooge-pin. As lightweight as you can make it;. it's one detail that can get you in the air.. and in control quickly. Some thin CA-glue applied to the drilled-hole will strengthen-it. A tailskid or tail-wheel would be nice.. but will add weight. A "skid-plate" can be made from a thin strip of "anything" harder than the balsa.. that can be adhered to it. It's one of those details that you build-in for "longevity".. in the hopes that the model will be long-lived. We all hope for that!
 Re: Ordered a 1/2A Skyray kit
I have never heard of anyone else having my problem with long needles, but I had two of them on identical Blackhawk 1/2A Kom Bats with ~high perf~ Bee engines, and the brass threads vibrated off the needles, rendering them useless.
_________________
Don't Panic!
...and never Ever think about how good you are at something...
while you're doing it!
My Hot Rock & Blues Playlist
...and never Ever think about how good you are at something...
while you're doing it!
My Hot Rock & Blues Playlist

RknRusty- Rest In Peace

- Posts : 10869
Join date : 2011-08-10
Age : 68
Location : South Carolina, USA
 Re: Ordered a 1/2A Skyray kit
As I mentioned; you might not experience any problems TL. Be careful when hooking-up the glow-plug wires, so that the wires don't pull/snag on the needle which could bend it. Your PT19's cowling offers a little more protection against this happening.
If you haven't flown it yet.. consider fueling the tank only 1/2 way for the 1st flight.. just in case you have any trimming-issues. One minute can seem like an eternity if the model is hard to control.
If you haven't flown it yet.. consider fueling the tank only 1/2 way for the 1st flight.. just in case you have any trimming-issues. One minute can seem like an eternity if the model is hard to control.
Page 1 of 6 • 1, 2, 3, 4, 5, 6 
 Similar topics
» Great video on building and flying the 1/2A Skyray and Skyray 35
» RARE COX THIMBLE DROME PROTOTYPE "PT-19 COROPLAST BUILD" GAS MODEL AIRPLANE
» I ordered a Baby Flight Streak for a TeeDee!
» RC Japan. Anyone ordered?
» Cox fuel tank
» RARE COX THIMBLE DROME PROTOTYPE "PT-19 COROPLAST BUILD" GAS MODEL AIRPLANE
» I ordered a Baby Flight Streak for a TeeDee!
» RC Japan. Anyone ordered?
» Cox fuel tank
Page 1 of 6
Permissions in this forum:
You cannot reply to topics in this forum

 Rules
Rules


