Log in
Search
Latest topics
» Tee Dee .020 combat modelby rdw777 Today at 5:07 pm
» Free Flight Radio Assist
by rdw777 Today at 4:51 pm
» My N-1R build log
by akjgardner Today at 12:39 pm
» Purchased the last of any bult engines from Ken Enya
by getback Today at 12:05 pm
» Funny what you find when you go looking
by rsv1cox Yesterday at 3:21 pm
» Landing-gear tips
by 1975 control line guy Yesterday at 8:17 am
» Cox NaBOO - Just in time for Halloween
by rsv1cox Tue Nov 19, 2024 6:35 pm
» Canada Post strike - We are still shipping :)
by Cox International Tue Nov 19, 2024 12:01 pm
» Duende V model from RC Model magazine 1983.
by getback Tue Nov 19, 2024 6:08 am
» My current avatar photo
by roddie Mon Nov 18, 2024 9:05 pm
» My latest doodle...
by TD ABUSER Mon Nov 18, 2024 11:30 am
» Brushless motors?
by rsv1cox Sun Nov 17, 2024 6:40 pm
Cox Engine of The Month
Just got a PT 19
Page 2 of 3
Page 2 of 3 •  1, 2, 3
 Re: Just got a PT 19
Thanks for all the great info. I do have a couple of 6 x 3.5 RH props. I put one of those on this morning, glued the crack in the nose, and went flying. I got one flight in, but the wind was too high. The lines were going slack on me on the windward side. Didn't crash it though. 
The issue with the firewall moving around is hopefully going to get fixed. I have a new one incoming from ebay. I just realized today that the flanges on the firewall that hold the top of the engine backplate in, are broken off. The only thing holding the engine to the firewall are the two screws.
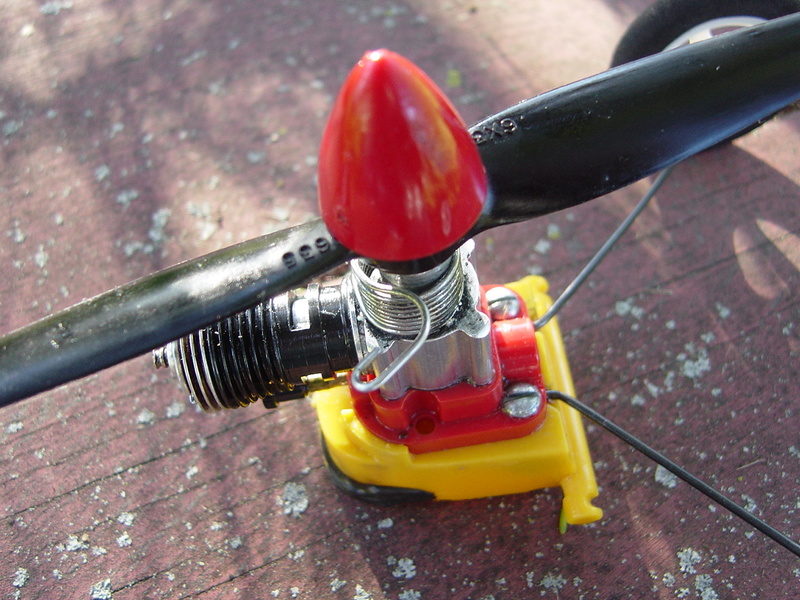
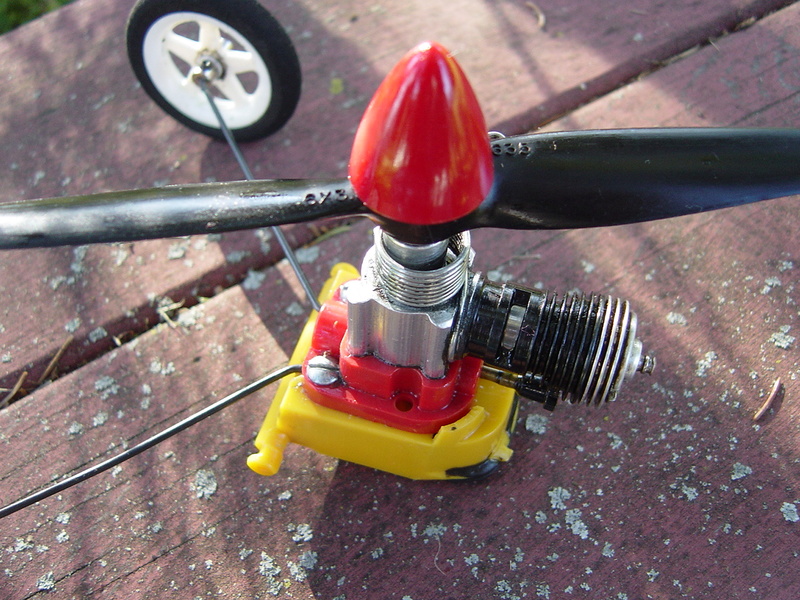
I'm hoping the new firewall will fit the grooves in the fuse tighter, and not move around so easy.
I think I'm going to try one of those 3 bladed LH props from Cox International. The five inch prop will give even more ground clearance for one thing.
I just flipped the RH prop with my finger today. I won't be taking the LH spring starter off.
I'll probably be making one of those stooges also, just in case the wife gets tired of getting sprayed with castor oil.
I'm thinking of making some kind of launch dolly for my Testors planes, as neither one has landing gear. If anyone has pics of launch dollys that they have made, I'd be interested in seeing them.
The issue with the firewall moving around is hopefully going to get fixed. I have a new one incoming from ebay. I just realized today that the flanges on the firewall that hold the top of the engine backplate in, are broken off. The only thing holding the engine to the firewall are the two screws.


I'm hoping the new firewall will fit the grooves in the fuse tighter, and not move around so easy.
I think I'm going to try one of those 3 bladed LH props from Cox International. The five inch prop will give even more ground clearance for one thing.
I just flipped the RH prop with my finger today. I won't be taking the LH spring starter off.
I'll probably be making one of those stooges also, just in case the wife gets tired of getting sprayed with castor oil.
I'm thinking of making some kind of launch dolly for my Testors planes, as neither one has landing gear. If anyone has pics of launch dollys that they have made, I'd be interested in seeing them.
Last edited by TLAnderson on Mon Jul 10, 2017 9:49 pm; edited 1 time in total

TLAnderson- Gold Member

- Posts : 243
Join date : 2016-07-21
Location : Northern Wisconsin
 Re: Just got a PT 19
Oldenginerod wrote:Pretty certain the 6X2 LH prop is standard original fitment on some model PT-19s.
With the known practice of COX to swap engine and kit components, it may well be so. Anyway, in these original COX documents you see the PT 19 with RH props only.
https://www.coxengineforum.com/h24-instruction-sheets

balogh- Top Poster


Posts : 4958
Join date : 2011-11-06
Age : 66
Location : Budapest Hungary
 Re: Just got a PT 19
from the search box https://www.coxengineforum.com/t1189-control-line-stooge?highlight=stooge 


getback- Top Poster


Posts : 10439
Join date : 2013-01-18
Age : 67
Location : julian , NC
 Re: Just got a PT 19
FWIW.. take-off dollies are generally used with powerful "speed" models. It's tough to build a dolly that's lightweight enough for a sport-model to get rolling fast enough to gain lift. After a few feet.. the dolly also wants to track straight.. which will pull on the lines. This will slow a sport-model down and it might even tip and fall off the dolly.
I'm not implying that it can't be done.. but there's definitely a bit of engineering that goes into making one work. Also.. they tend to be custom-built to fit a particular model..
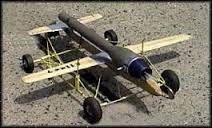
Here's a photo of a "dynajet-powered" speed-model and it's dolly..
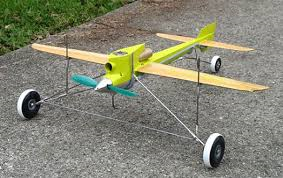
And another type that looks less complicated.. and lighter in weight.
If you know how to braze; a wire clothes-hanger could be bent/formed into a tail-dragger type cradle. Make a single "tail-wheel" that can have it's strut adjusted so as to track close to the radius of your flight-circle.
A note of caution though.. Your Testors models may only have enough power for a hard/smooth pavement roll-out using a dolly. Large diameter foam wheels on the dolly might work on a short grass field. It all depends on getting enough speed up to generate lift.
I'm not implying that it can't be done.. but there's definitely a bit of engineering that goes into making one work. Also.. they tend to be custom-built to fit a particular model..
Here's a photo of a "dynajet-powered" speed-model and it's dolly..

And another type that looks less complicated.. and lighter in weight.

If you know how to braze; a wire clothes-hanger could be bent/formed into a tail-dragger type cradle. Make a single "tail-wheel" that can have it's strut adjusted so as to track close to the radius of your flight-circle.
A note of caution though.. Your Testors models may only have enough power for a hard/smooth pavement roll-out using a dolly. Large diameter foam wheels on the dolly might work on a short grass field. It all depends on getting enough speed up to generate lift.
 Re: Just got a PT 19
Got the new firewall last week. It seems to be as loose fitting as the old one, so I guess it's the grooves in the fuselage that are worn. If I put enough rubber bands on it, it will stay in place well enough to fly. Got the three blade LH props from Cox International on Saturday. Put one on and went flying today.
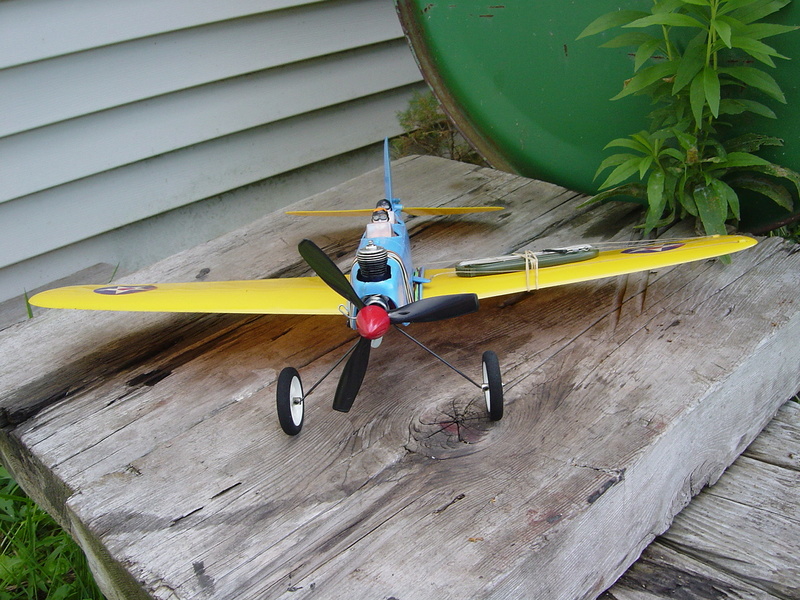
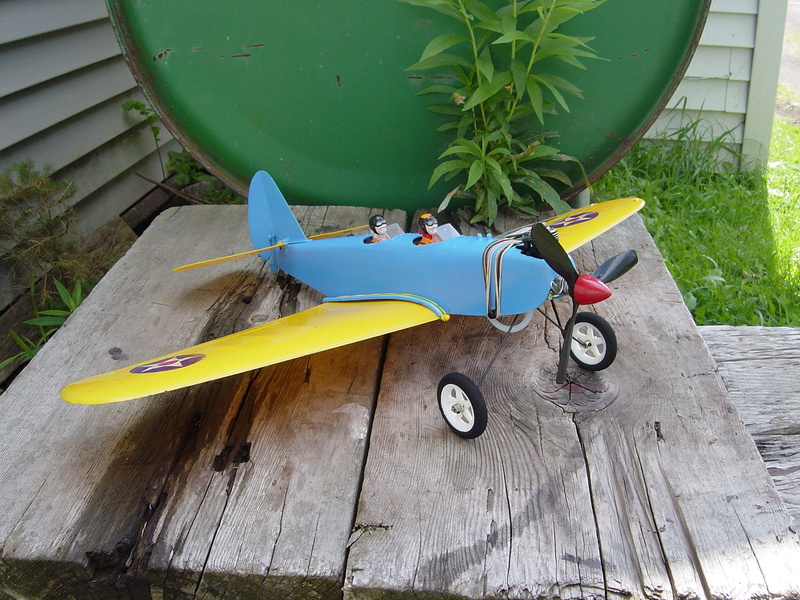
It really wants to lift the outboard wing in the wind. I'm going to try a little tip weight for the next flight.


It really wants to lift the outboard wing in the wind. I'm going to try a little tip weight for the next flight.

TLAnderson- Gold Member

- Posts : 243
Join date : 2016-07-21
Location : Northern Wisconsin
 Re: Just got a PT 19
Cool TL looks like your having some fun there with the PT on the lines  Its cooling off a bit here and I cant wait to get out and do some circles , got some planes to maiden too want to get my son into balsa planes he's starting to et an interest and I want to keep him going . Glue you a nickel on the under side of out board wing tip . Thanks for sharing keep us updated . Eric
 Its cooling off a bit here and I cant wait to get out and do some circles , got some planes to maiden too want to get my son into balsa planes he's starting to et an interest and I want to keep him going . Glue you a nickel on the under side of out board wing tip . Thanks for sharing keep us updated . Eric

getback- Top Poster


Posts : 10439
Join date : 2013-01-18
Age : 67
Location : julian , NC
 Re: Just got a PT 19
Yea.. you must have had a fairly strong breeze come-up.. to feel the model wanting to "come-in" towards you. Don't hesitate to take a step or two back.. while keeping a stiff-wrist when that happens. Watch what the model does. I realize that it happens in short order... but the best move is to recover to level-flight.. regain composure for a lap.. and re-assess if it's too windy to fly any fancy stuff. If so; it's better to fly-out the tank "level" the best you can .. and land.
The L/H props that you're using are a great training tool. When you switch to R/H props.. you'll feel the difference in how the model fly's.. and how you need to trim it.. to keep it tight on the lines. One method is to move the line-guides rearward on the inboard wing. This points the "nose" out-board a bit. That's a good place to start.. because most designs already have the engine-thrust and rudder-offset figured-in.
It's a lot of fun figuring it out with small 1/2A C/L models... (especially the cheap to build profile designs) because they can be built and finished usually in a weekend!!
 Re: Just got a PT 19
I would investigate the wing. Look at the wings from the rear. Stand behind the plane nose pointing into the floor. Sight the wings from trailing edge to high point of wing. It sounds like your outboard wing is down or your inboard wing is twisted up. It could also be a combination of both. Sight the wings from the left side ad the right side holding the plane out in front of you level, sight down the leading edge and then the trailing edge. Check to see if they're even straight which I would be very surprised if they were. A heat gun twisting the opposite direction can fix your problems. You can also melt the wing so use subtle heat and keep holding the opposing direction until cooled.
If the plane is flying outboard tip high, the end result is what your experiencing. Tip weight isn't going to resolve this problem. It will aid but it can cause other issues. Having a trained eye outside of the circle certainly helps. If you don't have that resource, pay careful attention to the outboard wing during level flight. You shouldn't be able to see it . Ken
If the plane is flying outboard tip high, the end result is what your experiencing. Tip weight isn't going to resolve this problem. It will aid but it can cause other issues. Having a trained eye outside of the circle certainly helps. If you don't have that resource, pay careful attention to the outboard wing during level flight. You shouldn't be able to see it . Ken

Ken Cook- Top Poster

- Posts : 5636
Join date : 2012-03-27
Location : pennsylvania
 Re: Just got a PT 19
Thanks for the helpful info from Roddie and Ken Cook. I'll check the wing out for warps.
One thing I've noticed when flying the plane is that it seems too fast. I feel like I can't enjoy flying it because all I'm doing is trying to hold it down on the upwind side, and keep it from diving into the ground on the downwind side. I'd like to slow it down, make it less twitchy. and enjoy the flight. I have it on 30 foot lines. Maybe longer lines would help, but it's already going slack on the crosswind side. I'm going to try running the engine a little richer, put the prop on backwards, and see what that does.
Maybe this is a dumb idea, but I was thinking of making some flaps out of some type of plastic, that I could attach to the trailing edge of the wing. My thinking is that this would increase the drag, thereby slowing the plane down, and also increase the lift at lower speeds, to keep the plane from stalling. Anyone tried this?

TLAnderson- Gold Member

- Posts : 243
Join date : 2016-07-21
Location : Northern Wisconsin
 Re: Just got a PT 19
TLAnderson wrote:Thanks for the helpful info from Roddie and Ken Cook. I'll check the wing out for warps.
One thing I've noticed when flying the plane is that it seems too fast. I feel like I can't enjoy flying it because all I'm doing is trying to hold it down on the upwind side, and keep it from diving into the ground on the downwind side. I'd like to slow it down, make it less twitchy. and enjoy the flight. I have it on 30 foot lines. Maybe longer lines would help, but it's already going slack on the crosswind side. I'm going to try running the engine a little richer, put the prop on backwards, and see what that does.
Maybe this is a dumb idea, but I was thinking of making some flaps out of some type of plastic, that I could attach to the trailing edge of the wing. My thinking is that this would increase the drag, thereby slowing the plane down, and also increase the lift at lower speeds, to keep the plane from stalling. Anyone tried this?
If you're flying in breezy weather.. then it's always going to be a challenge with a small airplane. It's tempting to fly a model that's "good to go".. the engine starts easily.. and you're psyched to fly. Shorter lines will give you more control.. but the lap-time (speed) increases. I personally would shorten the lines by 3-5 feet.. and keep the prop as-is. Keep the engine running in it's power-curve. Better to have the available power there.. and get used to a faster lap-time. The PT19 is a relatively heavy model that needs it's engine running strong. You'll feel more in control.. even though the model is flying faster. It will respond faster to your control inputs. Try setting the engine-mount in the trainer position. I know that you mentioned that there's some issues with that on your model. If that setting is "wavering" between flights.. it will fly differently. Strange that the new mount exhibits the same behavior..
 One thing you could try.. is removing the mount.. clean the contact areas with alcohol and put a strip of tape over the top of the mount; where it contacts the ridges in the underside of the fuse. Use tight-fitting rubber-bands when you re-install it. This should "shim" the fit and hold the setting. The "expert" setting of the mount is fine.. as long as you're used to it. I feel that the model flies better on the expert setting. It really needs to fly fast.. to fly well.
 Also.. keep the line-spacing at your handle as close as possible to the spacing on the model's bellcrank.. a 1:1 ratio is what you want. Check the location of the pushrod on the elevator horn too. There are two positions on my PT19. The "outer" position (furthest from the hinge-point) is the least sensitive.. but you may want faster control-input than that. Hopefully your wing is straight. Check it.. as Ken mentioned. A wing-warp will cause you trouble.. and no amount of skill can overcome that.
The old standard material for 1/2A size lines was "Dacron". If that's what you're using; consider switching to 15# "braided" fishing-line. "Spectra" or "Spider-Wire". A 110 yard reel will supply you with dozens of line-sets for your 1/2A flying models over the years. There's a special knot (Palomar/5-turn) that you'll need to learn how to tie, for safe/secure terminations.. but it's less "stretchy" than Dacron.. which translates to more positive control. It will surely make a difference in your flying!
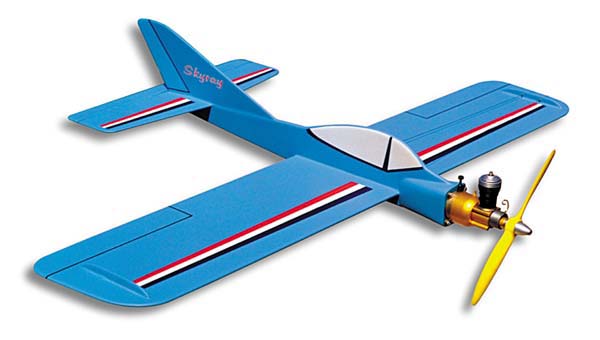
Balsawood 1/2A models are SUPERIOR to the plastic "ready to fly" ones. They may not look as nice.. but you'll feel the difference in performance immediately! Consider building a Sig Manufacturing Products "Skyray".. It's currently available.. and can use the same engine as in your PT-19.. with the addition of a little tin wedge-tank. It will be capable of performing stunts.. such as inverted-flight.. loops.. and more. Something to aspire to!
Below.. the Sig Skyray! (I have this kit; yet to be built) Sig has excellent quality fuel for your Cox engine. Their "Champion 25" is available in pints, quarts and gallons. It's a 25% nitro fuel with a combination of castor and synthetic oils that's proven to protect your Cox engine.. while providing excellent performance. The kit ($16.00) and a quart of fuel ($8.39) wouldn't set you back much.. probably a little over $30 with shipping from Iowa to Wisconsin. Of course you'd need a few extra items like a fuel tank, glue and paint.. but those things are easy to obtain and cheap. The Skyray has no landing-gear.. so it requires a "pitman" to toss it into the air. Alternately.. you can add gear and launch with the aid of a "stooge" for when you don't have a helper. Easy to make one.. we'll provide info. if you're interested. You can use it to launch your PT19 too.
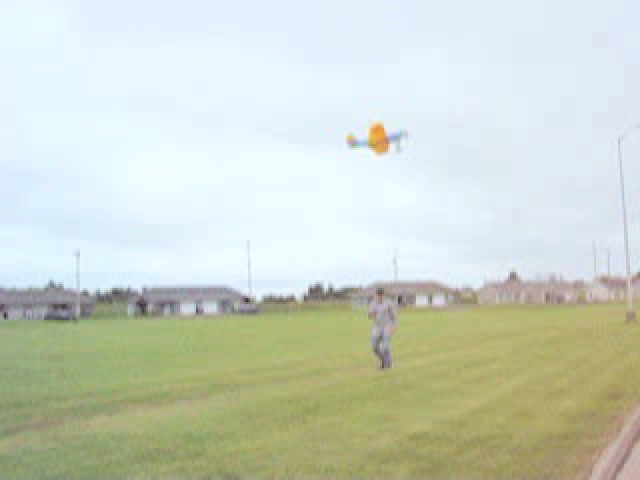
I was psyched to see the photo of you "out there" flying your PT19! Be patient.. and experiment. It's all good.. and it gets better; the more that you fly!
 Re: Just got a PT 19
Another interesting and informative post, Roddie. Thanks. I'm thinking that a Skyray or Brodak Basic Trainer would be a nice first build project.
Too windy to fly the last few days. I threw together a rough and quick stooge today. Have to wait for the wind to calm down to try it out.


Too windy to fly the last few days. I threw together a rough and quick stooge today. Have to wait for the wind to calm down to try it out.


TLAnderson- Gold Member

- Posts : 243
Join date : 2016-07-21
Location : Northern Wisconsin
 Re: Just got a PT 19
That's a great looking stooge, your rough one is better than mine...
Hope you don't expect that PT to take off in that grass!
Ron
Hope you don't expect that PT to take off in that grass!
Ron

Cribbs74- Moderator


Posts : 11907
Join date : 2011-10-24
Age : 50
Location : Tuttle, OK
 Re: Just got a PT 19
Got some more air time the other day. I Gorilla taped a nickel to the outboard wing for some tip weight, and it made an amazing difference in the way the plane flew. No more slack lines.

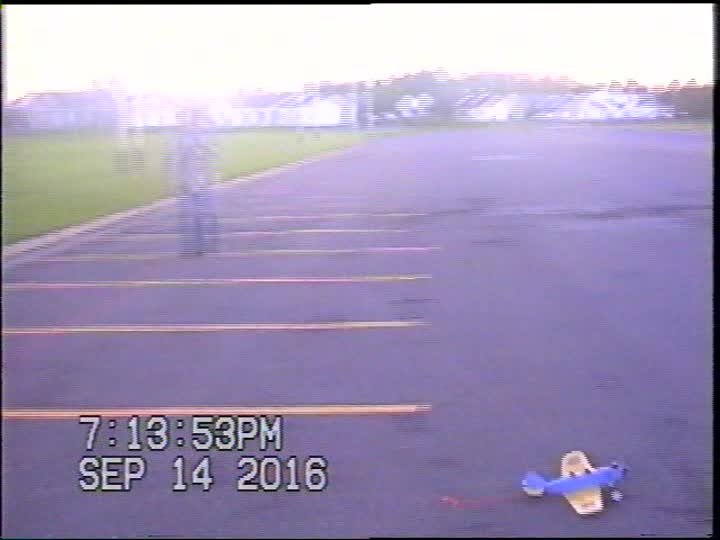
The stooge worked well. Here's a shot of the plane running, ready to be released from the stooge.

Released from stooge, starting takeoff roll. Takes about 1/4 of the circle to get off the ground.
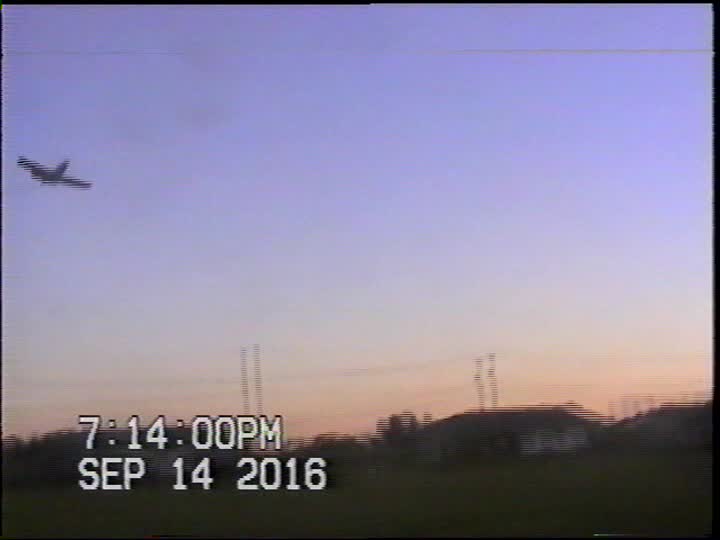
In the air. Got 4 flights in before it got dark. The moon was up, and it was a beautiful evening for flying.
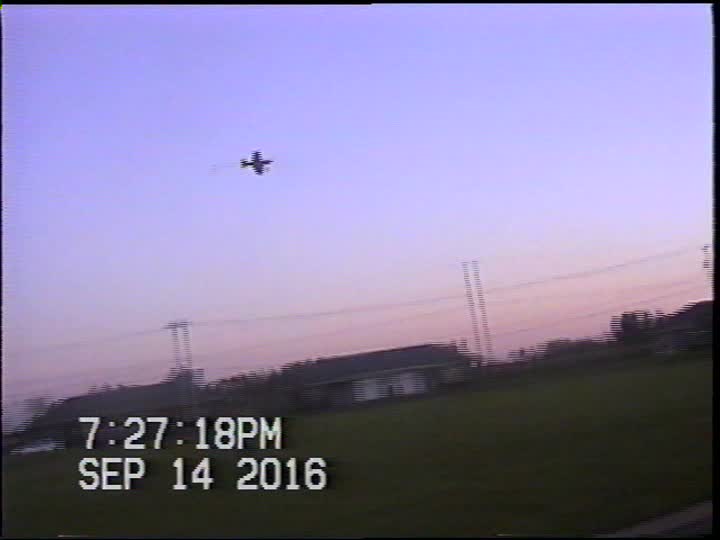
Not sure what effect that 12" of paracord has on the flight characteristics, but it didn't seem to hurt anything.
Sorry about the lo res photos. They are captures from a video taken with a VHS video camera. Had to copy the videotape to a DVD, then convert segments of the video to mpg files, then capture stills. Seems to have lost some quality in the process.

The stooge worked well. Here's a shot of the plane running, ready to be released from the stooge.

Released from stooge, starting takeoff roll. Takes about 1/4 of the circle to get off the ground.

In the air. Got 4 flights in before it got dark. The moon was up, and it was a beautiful evening for flying.


Not sure what effect that 12" of paracord has on the flight characteristics, but it didn't seem to hurt anything.
Sorry about the lo res photos. They are captures from a video taken with a VHS video camera. Had to copy the videotape to a DVD, then convert segments of the video to mpg files, then capture stills. Seems to have lost some quality in the process.

TLAnderson- Gold Member

- Posts : 243
Join date : 2016-07-21
Location : Northern Wisconsin
 Re: Just got a PT 19
Thanks for taking the time to make the pics. for us >> Good to see your getting some air time in on that ole pt-19 and that the wing weight made the plane stop coming in on you , that can bee a scary thing for sure . Yep you'll bee ready for some balsa fling by next spring . 


getback- Top Poster


Posts : 10439
Join date : 2013-01-18
Age : 67
Location : julian , NC
 Re: Just got a PT 19
Haven't had a chance to fly the PT 19 much lately. Weather's been windy and unsettled. Tried it last night, but the @#$% thing wouldn't run right. Lost the daylight trying to get it to run. Brought it home, pulled the fuel line, and found a piece of lint or something blocking the fuel inlet. Cleaned that out, and it ran fine. Course it was dark by then.
Last edited by TLAnderson on Thu Jul 06, 2017 11:13 pm; edited 1 time in total

TLAnderson- Gold Member

- Posts : 243
Join date : 2016-07-21
Location : Northern Wisconsin
 Re: Just got a PT 19
Good flight  Love the stooge-launch too.
That sucks about the fuel-line obstruction.. but at least you found the problem.. and it was a simple thing. You mentioned it flying much better after attaching a tip-weight when running a R/H prop. That's great! Unless anyone had the original 6 x2 L/H prop.. they'd likely install a R/H prop to fly the model.. and struggle (run backwards.. ) if it got breezy! I've done that "dance-step" more than once..
 Love the stooge-launch too.
 That sucks about the fuel-line obstruction.. but at least you found the problem.. and it was a simple thing. You mentioned it flying much better after attaching a tip-weight when running a R/H prop. That's great! Unless anyone had the original 6 x2 L/H prop.. they'd likely install a R/H prop to fly the model.. and struggle (run backwards..
 Re: Just got a PT 19
Thought I'd do an update. Haven't posted in a while. Got a chance to fly the PT 19 last Saturday. Wasn't expecting the weather to be so good this time of year up here. I had several failed takeoffs due to running out of runway before the plane became airborne. I changed the prop from the 5x3 left handed 3 blade, to a right handed 2 blade 6x3.5, and it woke right up. Only required about a 10 foot roll to get airborne. After I got it to fly, another problem showed up.
I had broken the tail skid off in a hard landing previously, and had jerry rigged a tail wheel onto it.
Apparently the tail wheel setup was a little too heavy, and had made the plane tail heavy. I had to hold down elevator just to keep the plane level. A gust of wind came up and I couldn't hold it down. The plane went straight up, the lines went slack, and she corkscrewed right into the ground.
Fortunately, It just popped apart without any serious damage. The firewall poked a hole in the fuel tank, but I was able to put the plane back together, and fly it a few more times. It didn't run too long with the leaky tank, but I could get about a minute and a half out of it.
I epoxied the tank later, and she's ready to fly again. Every flight is a learning experience. Hopefully I'll get a few more flying days before winter blows in.

TLAnderson- Gold Member

- Posts : 243
Join date : 2016-07-21
Location : Northern Wisconsin
 Re: Just got a PT 19
Greenie for you man good to hear your getting out to the field before the gray sky comes , thats one thing with the plastic fly apart planes when ya hit the ground they just come apart and you rubber band them together again , go fly  Balsa not so
 Balsa not so
getback- Top Poster


Posts : 10439
Join date : 2013-01-18
Age : 67
Location : julian , NC
 Re: Just got a PT 19
Well, those flights I got in on November 8th were the last ones before winter arrived. Now, the sun is back, we've got some daylight in the afternoon, and I'm waiting for it to warm up enough to get out and fly the PT 19 again. I did a couple of mods to the plane and the stooge to try to get ready if we get a warm windless day.
I put some wire leadouts on it, as the dacron ones made me nervous, and I couldn't easily remove them from the bellcrank if I wanted to take the wing off.
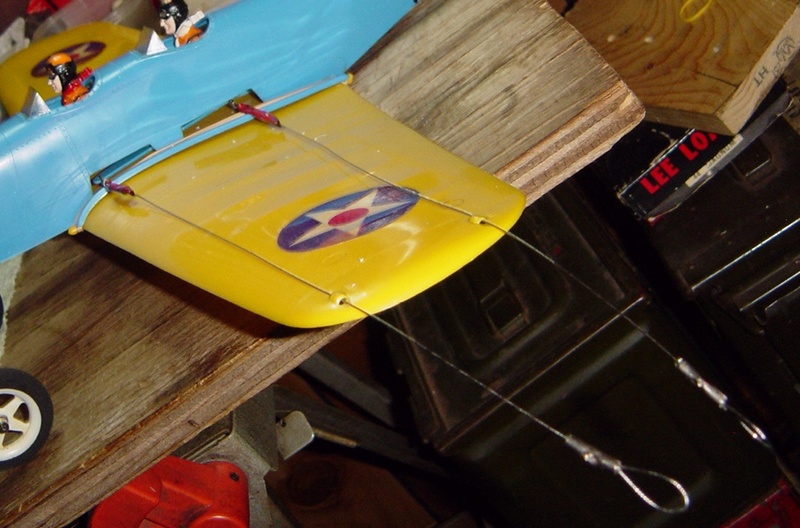

We'll see how long they hold up.
I also twisted up a piece of wire to hook the plane up to the stooge. Had to drill a couple of 1/8" holes in the fuselage to attach the wire to the plane. Hopefully, it's not too heavy.
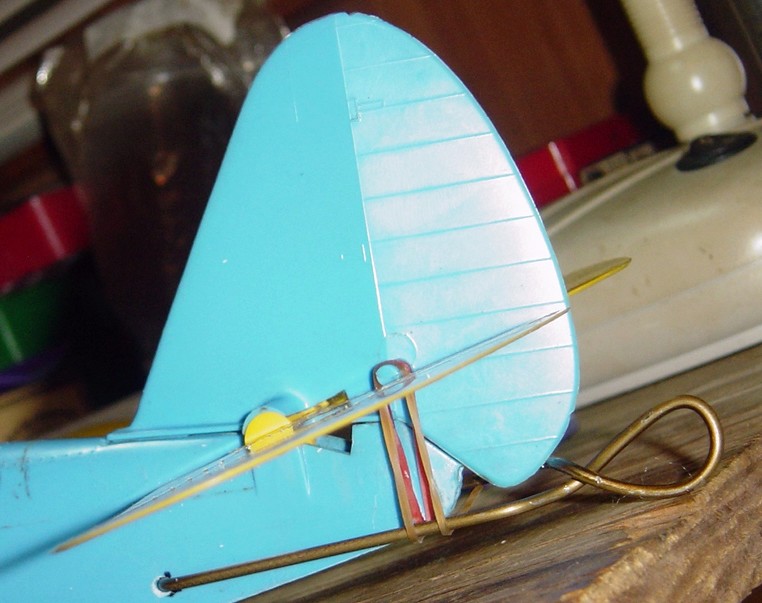

You can also see in the last pic, the mod I did to the stooge. I wanted to make it heavier, so it wouldn't slide around when I pulled the release line. I got a piece of steel from work, drilled and tapped four 5/16-18 holes in it, and bolted the stooge to it. Don't think it'll slide now, it probably weighs 10 pounds.
Hopefully these mods won't cause more problems than they solve. Just have to wait for a good day now and find out.
I put some wire leadouts on it, as the dacron ones made me nervous, and I couldn't easily remove them from the bellcrank if I wanted to take the wing off.


We'll see how long they hold up.
I also twisted up a piece of wire to hook the plane up to the stooge. Had to drill a couple of 1/8" holes in the fuselage to attach the wire to the plane. Hopefully, it's not too heavy.


You can also see in the last pic, the mod I did to the stooge. I wanted to make it heavier, so it wouldn't slide around when I pulled the release line. I got a piece of steel from work, drilled and tapped four 5/16-18 holes in it, and bolted the stooge to it. Don't think it'll slide now, it probably weighs 10 pounds.
Hopefully these mods won't cause more problems than they solve. Just have to wait for a good day now and find out.

TLAnderson- Gold Member

- Posts : 243
Join date : 2016-07-21
Location : Northern Wisconsin
 Re: Just got a PT 19
Great job on the weighted stooge! The wire loop looks good too, flight testing will tell if it's to heavy or not. 


Marleysky- Top Poster


Posts : 3618
Join date : 2014-09-28
Age : 72
Location : Grand Rapids, MI
 Re: Just got a PT 19
I cringed a little when I saw the hole drilled in the fuselage. Don't think I'd do that to a PT-19 if I could get hold of one.
To attach to a stooge, you should be able to tie a cord to a fixed point on the stooge, run it over the stabilizer one side, pass it under the fuselage and back to the stooge over the other side stabilizer, where it connects to the release pin. Of course you'd need to make sure you avoided any potential traps where the cord would jam, but it would do away with the need for an attachment on the plane and adds no flight weight. Pull the pin and the cord just unwraps from around the plane as it moves off, leaving the cord attachecd to the stooge. You'd probably need to experiment with different types of cord/string.
Rod.

Oldenginerod- Top Poster

- Posts : 4018
Join date : 2012-06-15
Age : 62
Location : Drouin, Victoria
 Re: Just got a PT 19
I see a couple of things that you might want to watch out for. The newly attached wire for the stooge-link looks pretty heavy to me.. possibly as heavy as the tail-wheel that you'd made-up. I'd go back to using the para-cord tied through an alternate hole drilled just above where the tail-skid was. It shouldn't interfere with the stabilator in that location.
Issue #2; You have 1" less clearance between the prop and the ground now that you're running a 6" prop. With a taller stooge; the tail will "pitch-up" once you start the engine.. and the prop could strike the ground. Even if there "is" enough prop-clearance, the model will release "tail-high". Having small wheels; if the runway is rough, you could experience nose-overs which are very frustrating. Ask me how I know...
Your stooge design/build is really nice.. and I feel that you'd have no problem building another type that's a little different.. and requires no links whatsoever to the airplane.
Here's a few pics..
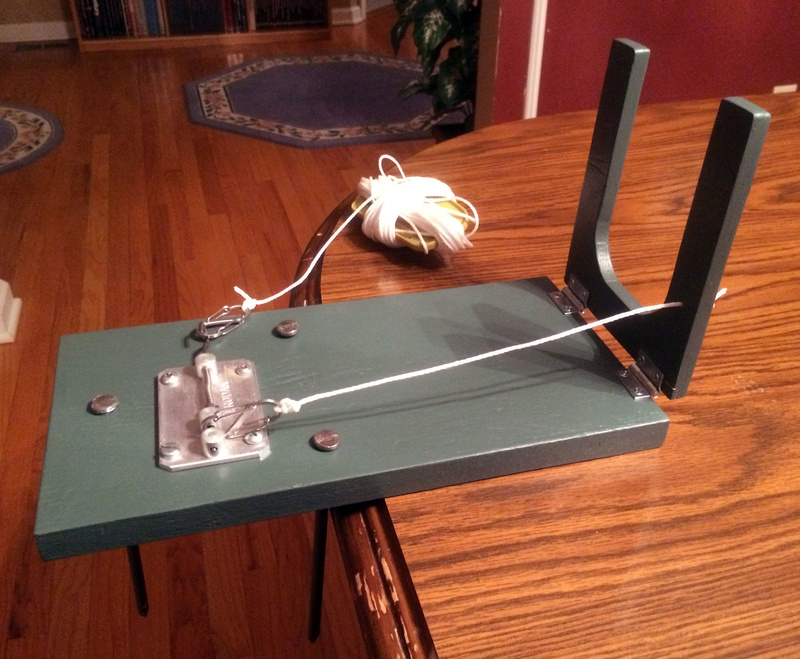
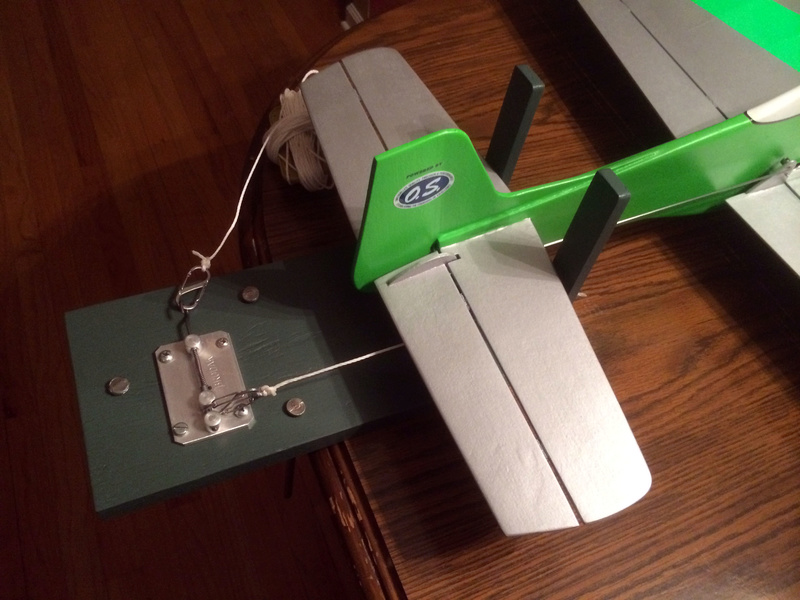
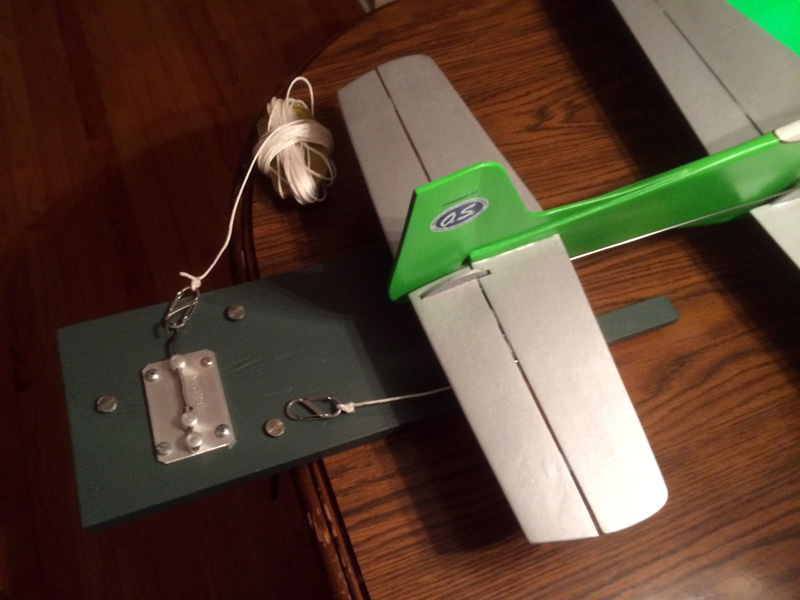
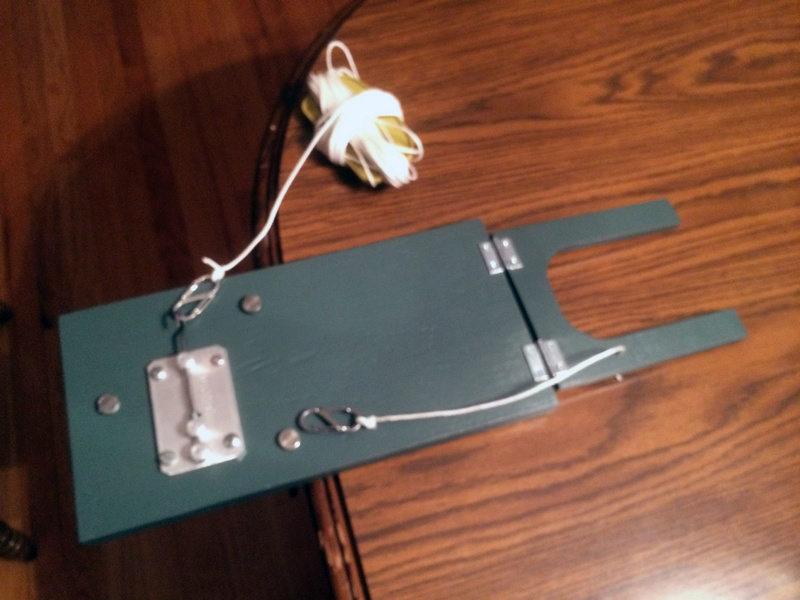
Either way; if you need to "weight" a stooge for placing it on hard pavement, find an iron dumbbell/barbell plate to anchor the stooge using a rear-extension with a "pin" through the weight. In conjunction with the weight; you can also drive a few wall-board screws through your stooge's base, so that they protrude through the bottom (1/8" to 1/4") enough so that they "dig-in".. to prevent the base from moving when you pull the cord. Make the extension for the barbell-weight long enough to accommodate heavier plates for launching more powerful/larger models. Once the model is airborne, you can take a few steps back for landing-clearance. You don't want to "grease a landing"....... only to smash into your stooge..


Issue #2; You have 1" less clearance between the prop and the ground now that you're running a 6" prop. With a taller stooge; the tail will "pitch-up" once you start the engine.. and the prop could strike the ground. Even if there "is" enough prop-clearance, the model will release "tail-high". Having small wheels; if the runway is rough, you could experience nose-overs which are very frustrating. Ask me how I know...

Your stooge design/build is really nice.. and I feel that you'd have no problem building another type that's a little different.. and requires no links whatsoever to the airplane.
Here's a few pics..


Either way; if you need to "weight" a stooge for placing it on hard pavement, find an iron dumbbell/barbell plate to anchor the stooge using a rear-extension with a "pin" through the weight. In conjunction with the weight; you can also drive a few wall-board screws through your stooge's base, so that they protrude through the bottom (1/8" to 1/4") enough so that they "dig-in".. to prevent the base from moving when you pull the cord. Make the extension for the barbell-weight long enough to accommodate heavier plates for launching more powerful/larger models. Once the model is airborne, you can take a few steps back for landing-clearance. You don't want to "grease a landing"....... only to smash into your stooge..
 Re: Just got a PT 19
Oldenginerod wrote:I cringed a little when I saw the hole drilled in the fuselage. Don't think I'd do that to a PT-19 if I could get hold of one.
To attach to a stooge, you should be able to tie a cord to a fixed point on the stooge, run it over the stabilizer one side, pass it under the fuselage and back to the stooge over the other side stabilizer, where it connects to the release pin. Of course you'd need to make sure you avoided any potential traps where the cord would jam, but it would do away with the need for an attachment on the plane and adds no flight weight. Pull the pin and the cord just unwraps from around the plane as it moves off, leaving the cord attachecd to the stooge. You'd probably need to experiment with different types of cord/string.
Rod.
I did have to talk myself into drilling those holes, however, I bought this plane to fly, not as a collectors item. I'm putting the plane at risk of destruction every time I fly it, so I finally decided that a couple of holes were acceptable.
I did try the cord around the fuselage method, but the stabilizer seemed to catch the cord every time. I couldn't see a way to avoid it.

TLAnderson- Gold Member

- Posts : 243
Join date : 2016-07-21
Location : Northern Wisconsin
 Re: Just got a PT 19
roddie wrote:I see a couple of things that you might want to watch out for. The newly attached wire for the stooge-link looks pretty heavy to me.. possibly as heavy as the tail-wheel that you'd made-up. I'd go back to using the para-cord tied through an alternate hole drilled just above where the tail-skid was. It shouldn't interfere with the stabilator in that location.
Issue #2; You have 1" less clearance between the prop and the ground now that you're running a 6" prop. With a taller stooge; the tail will "pitch-up" once you start the engine.. and the prop could strike the ground. Even if there "is" enough prop-clearance, the model will release "tail-high". Having small wheels; if the runway is rough, you could experience nose-overs which are very frustrating. Ask me how I know...
Your stooge design/build is really nice.. and I feel that you'd have no problem building another type that's a little different.. and requires no links whatsoever to the airplane.
Either way; if you need to "weight" a stooge for placing it on hard pavement, find an iron dumbbell/barbell plate to anchor the stooge using a rear-extension with a "pin" through the weight. In conjunction with the weight; you can also drive a few wall-board screws through your stooge's base, so that they protrude through the bottom (1/8" to 1/4") enough so that they "dig-in".. to prevent the base from moving when you pull the cord. Make the extension for the barbell-weight long enough to accommodate heavier plates for launching more powerful/larger models. Once the model is airborne, you can take a few steps back for landing-clearance. You don't want to "grease a landing"....... only to smash into your stooge..


All good points Roddie. I'm hoping for some good weather soon, so I can find out if any of these mods were worth doing. I like that stooge design that you showed. I'll probably have to make something like that. I'm going to try holding full up elevator when I release the plane from the stooge, and hopefully, it will not nose over. I guess I could flip the stooge over on the steel block so that the wood is on the bottom. Just have to redrill a couple of holes to reposition the stooge on the block.
If the wire turns out to be too heavy, I'll try running some small diameter cord through the holes, and hook that to the stooge. I mainly wanted to get away from having 12'' of paracord flipping around behind the plane while it was in flight.
Thanks for the responses. I've picked up some good information from this site. Lots of expertise here.

TLAnderson- Gold Member

- Posts : 243
Join date : 2016-07-21
Location : Northern Wisconsin
 Re: Just got a PT 19
 You're looking pretty good But : as was said .. Me i would remove the copper wire .. now you have two holes .. put your cord (Twine) through it and lead back to a loop knot that won't slip attach it to your Very Nice Made Stoge !! And go fly !!
  I made one of the Stoges that Roddie is talking of but have not got to try it
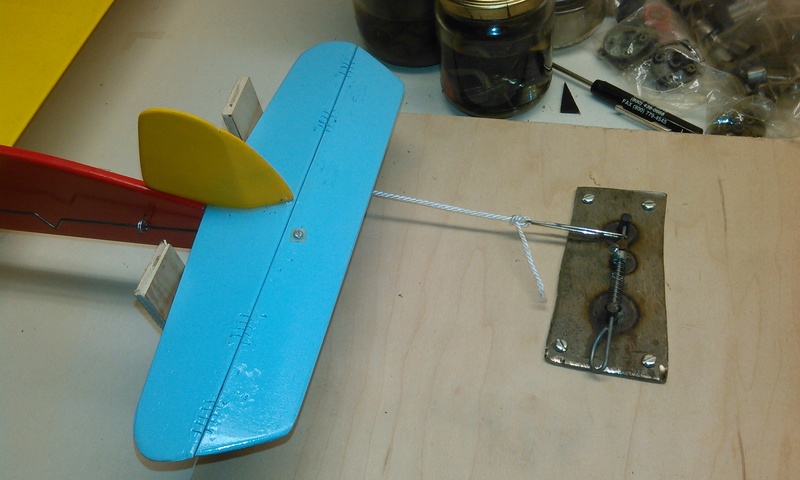
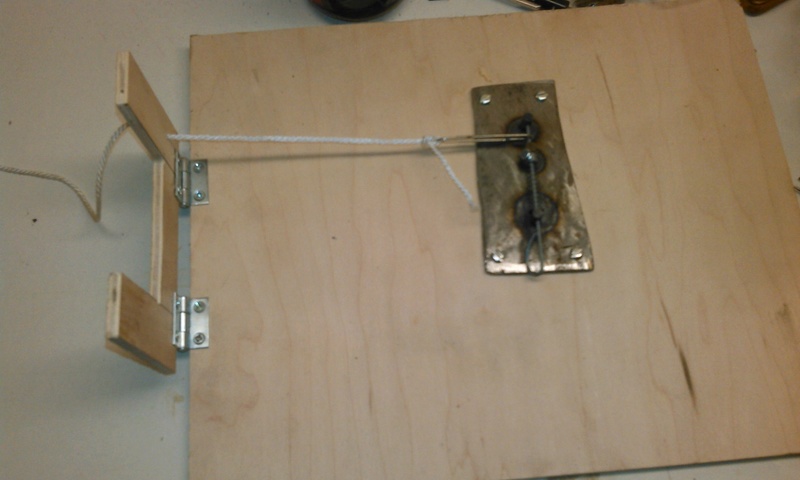 See how the cord is hooked ? I also hang them in my room from the wall so each plane has it's own cord (line chalk stripping string from say Lowes is fairly cheap and a lot of it )( colors too!)
 Last edited by getback on Mon Feb 20, 2017 8:01 pm; edited 1 time in total (Reason for editing : talk)

getback- Top Poster


Posts : 10439
Join date : 2013-01-18
Age : 67
Location : julian , NC
Page 2 of 3 •  1, 2, 3
Page 2 of 3
Permissions in this forum:
You cannot reply to topics in this forum

 Rules
Rules


