Log in
Search
Latest topics
» Tee Dee .020 combat modelby Ken Cook Today at 7:42 pm
» Free Flight Radio Assist
by GallopingGhostler Today at 3:54 pm
» My N-1R build log
by akjgardner Today at 3:39 pm
» Purchased the last of any bult engines from Ken Enya
by getback Today at 3:05 pm
» Funny what you find when you go looking
by rsv1cox Yesterday at 6:21 pm
» Landing-gear tips
by 1975 control line guy Yesterday at 11:17 am
» Cox NaBOO - Just in time for Halloween
by rsv1cox Tue Nov 19, 2024 9:35 pm
» Canada Post strike - We are still shipping :)
by Cox International Tue Nov 19, 2024 3:01 pm
» Duende V model from RC Model magazine 1983.
by getback Tue Nov 19, 2024 9:08 am
» My current avatar photo
by roddie Tue Nov 19, 2024 12:05 am
» My latest doodle...
by TD ABUSER Mon Nov 18, 2024 2:30 pm
» Brushless motors?
by rsv1cox Sun Nov 17, 2024 9:40 pm
Cox Engine of The Month
Cox Corvette
Page 1 of 1
 Cox Corvette
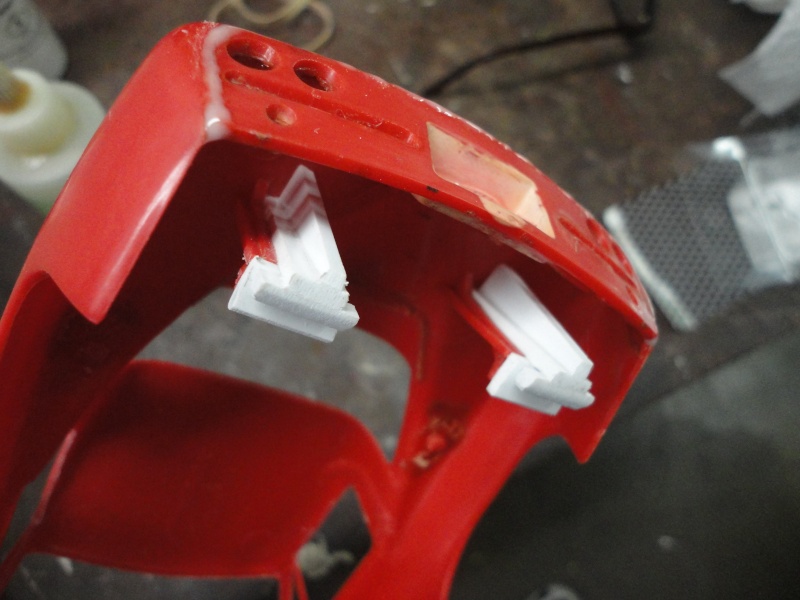
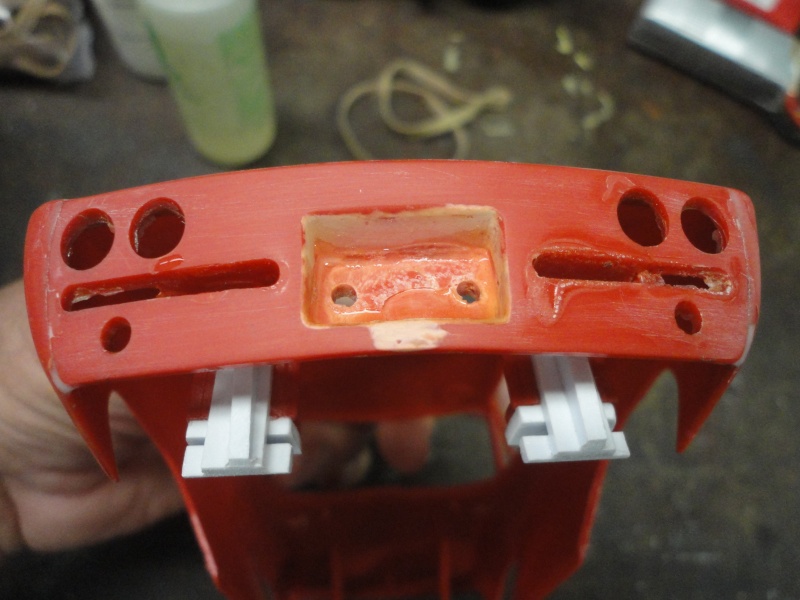
I started work on the Corvette about a week ago. I went ahead and built new rear body-to-chassis retainers before gluing and gap filling the rear valance. Until I buy a Maisto Corvette to take off parts from I'm on hold till then. If the front end is close, I plan to make a mold of the front valance after taking off all the chrome and make an epoxy glass copy to graft onto the Cox model.


bottomgun- Gold Member

- Posts : 138
Join date : 2012-12-27
Age : 67
Location : Southern California
 Long absence but working on it
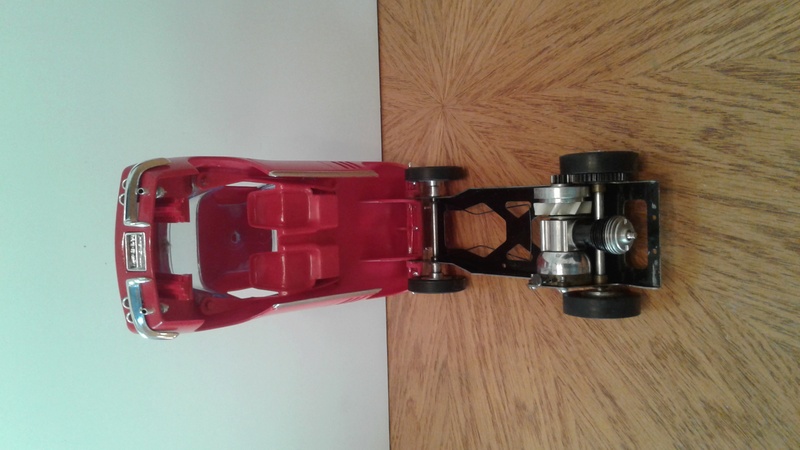
Been a long time since posting but I'm trying to get my PC fixed so I can transfer photos. I have an android that my son gave me but still learning to operate it. I can take photos with ease with that thing but I don't know how to transfer them to the post. I have worked extensively on the Corvette and am nearly completed. Had to do a lot of parts salvaging from different models but I got it done. Will get up pics when I can of what was done so far and a more detailed explanation of what was done.

bottomgun- Gold Member

- Posts : 138
Join date : 2012-12-27
Age : 67
Location : Southern California
 Re: Cox Corvette
Looking forward to your pictures.
The forum should be able to pull your photos right off your phone. I have an Iphone and it has no problrm pulling picures from it.
Ron
The forum should be able to pull your photos right off your phone. I have an Iphone and it has no problrm pulling picures from it.
Ron

Cribbs74- Moderator


Posts : 11907
Join date : 2011-10-24
Age : 50
Location : Tuttle, OK
 Re: Cox Corvette
I was just wondering about your restoration work a few days ago, your work is top notch!! Glad your back!!

crankbndr- Top Poster

- Posts : 3109
Join date : 2011-12-10
Location : Homestead FL

bottomgun- Gold Member

- Posts : 138
Join date : 2012-12-27
Age : 67
Location : Southern California

bottomgun- Gold Member

- Posts : 138
Join date : 2012-12-27
Age : 67
Location : Southern California
 Re: Cox Corvette
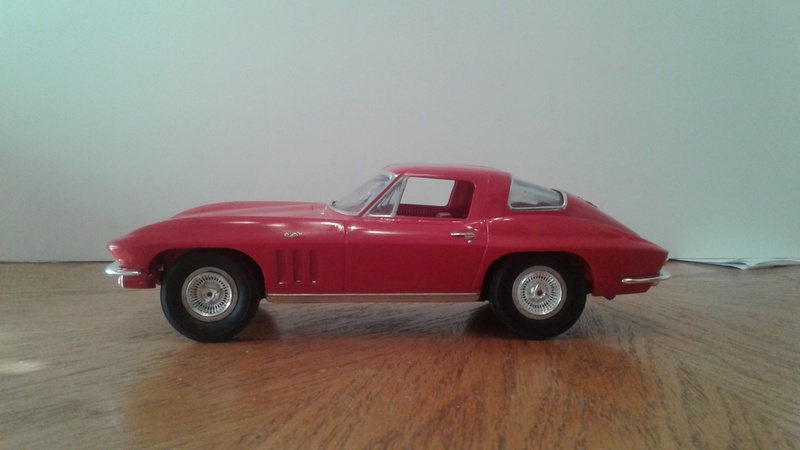
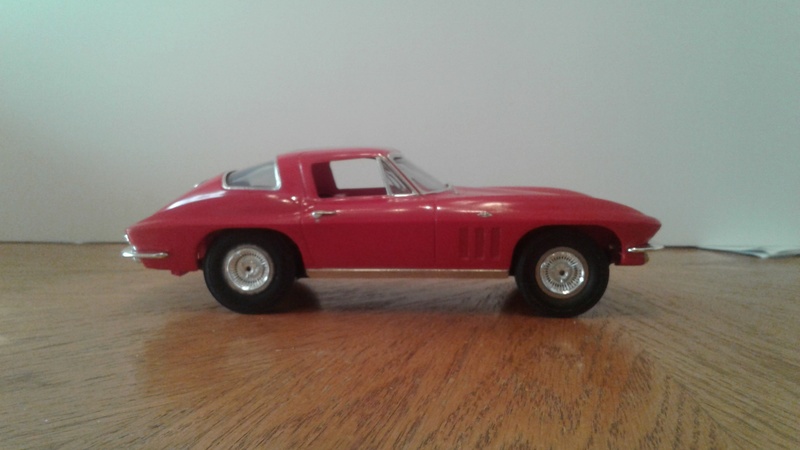
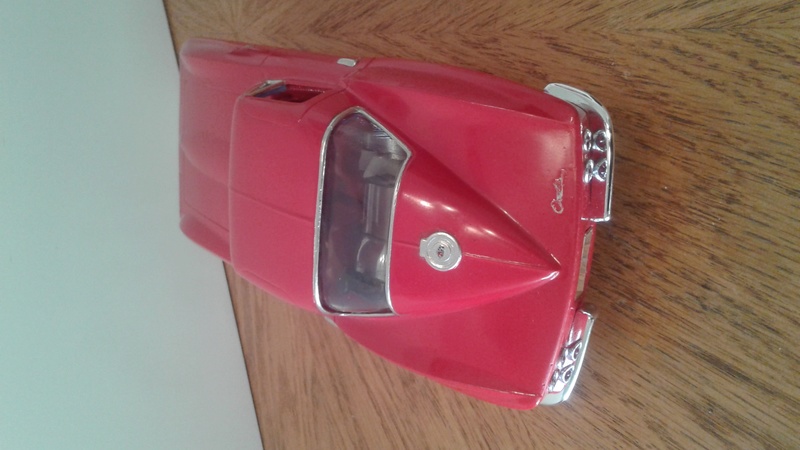
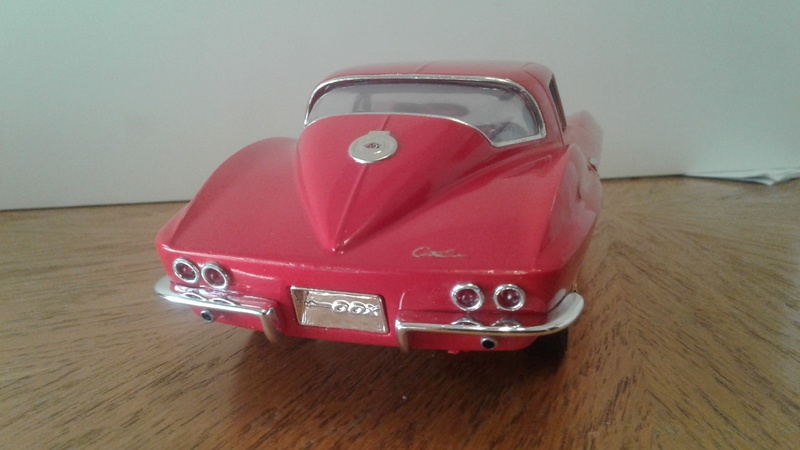
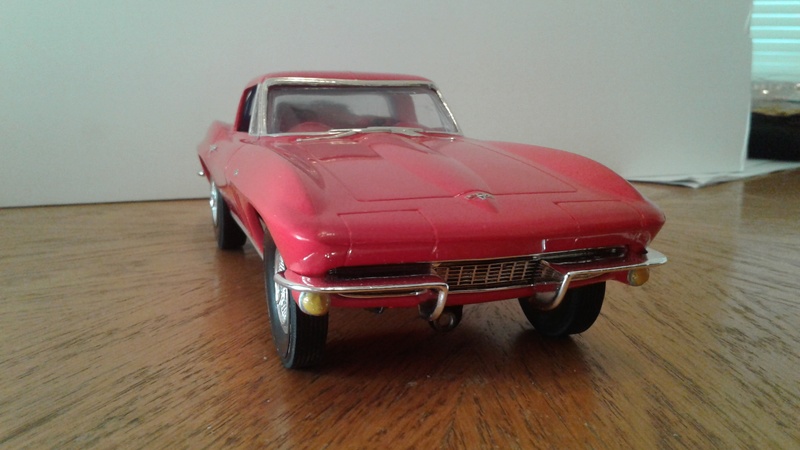
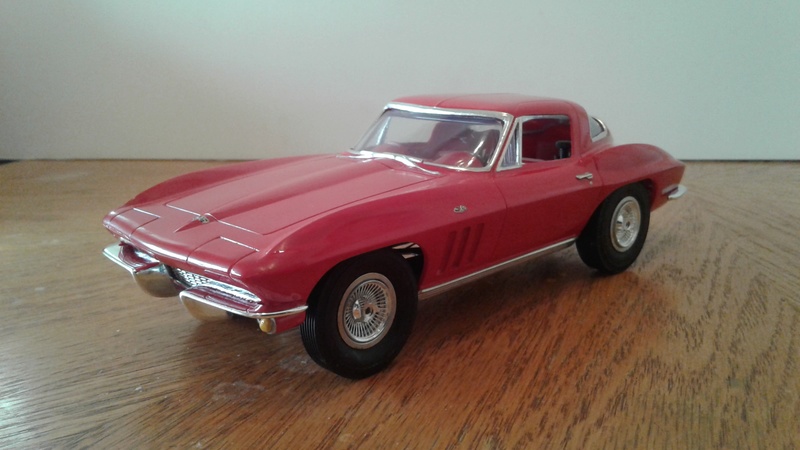
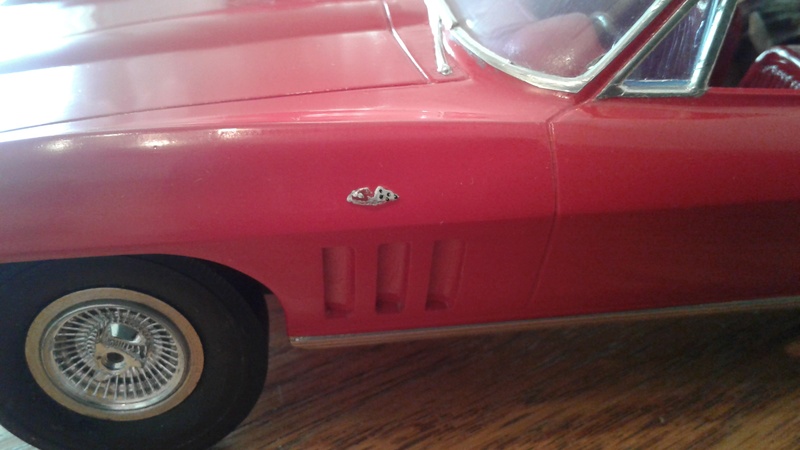
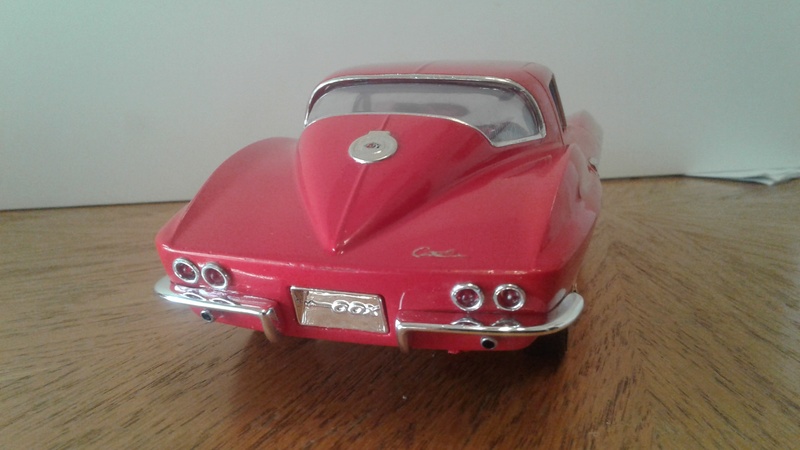
Whoa, Whoa, Whoa!! Now that's a frame off restoration of "Concurs" quality! Maxed-out on the details, turn signals, correct colors on the emblem and badges, Chrome trim around Windows and vents, wiper blades, gas cap and door handles!! WOW. 110%
Ya even did the dash board, with gauges and glove box ....ok 120% I am impressed and jealous all at the same time!! Nice job, Darn nice Job, SUPER nice job.
I can't stop looking....ya got the Teak Steering wheel and Seat Belts!! This isn't your first rodeo, is it cowboy??
Ya even did the dash board, with gauges and glove box ....ok 120% I am impressed and jealous all at the same time!! Nice job, Darn nice Job, SUPER nice job.
I can't stop looking....ya got the Teak Steering wheel and Seat Belts!! This isn't your first rodeo, is it cowboy??

Last edited by Marleysky on Wed Apr 05, 2017 6:41 pm; edited 1 time in total (Reason for editing : More cool stuff)

Marleysky- Top Poster


Posts : 3618
Join date : 2014-09-28
Age : 72
Location : Grand Rapids, MI
 Re: Cox Corvette
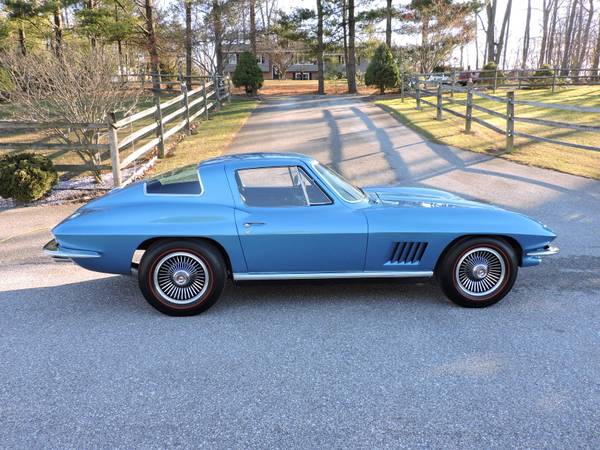
THAT IS FREAKING SMOKING !! Very nice job !! i scrolled up from Rene's post and i thought it was a real car (well you know) I see it took awhile and looks like time well spent , Fun Fun Fun !! 


getback- Top Poster


Posts : 10439
Join date : 2013-01-18
Age : 67
Location : julian , NC
 Re: Cox Corvette
Thanks guys for the comments!! Took quite a bit of time and patience. A breakdown of what I had to do:
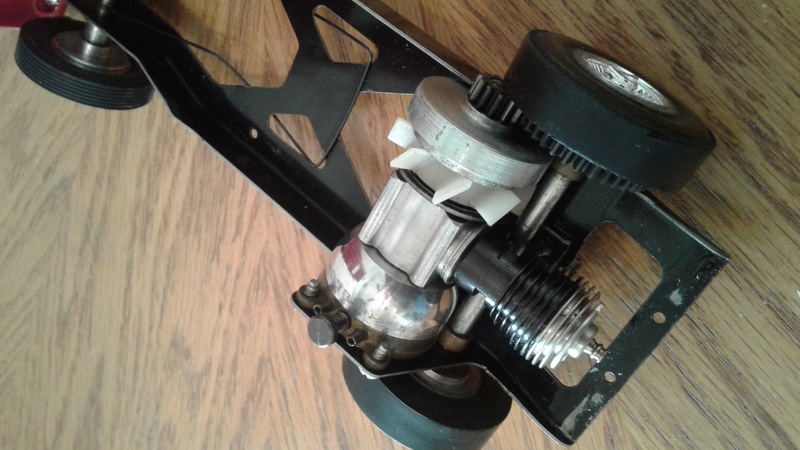
Wet sanded the body to get the numerous scratches and such out of the plastic. I then airbrushed on three light coats of enamel red because the plastic had discoloration in it and with a clear coat only it would have been uneven. I let it sit for two weeks and color sanded the paint to get any imperfections out and to prep it for the clearcoat. At this time the only chrome I had was the license plate bucket that goes into the rear valance. I was extremely fortunate to find the missing front valance and bumper assembly for auction separately on Ebay for a cheap price. I sent the bumper assembly to Chrome Tech in Wisconsin. Because it's nearly impossible to find the other missing pieces by themselves as I did the front end, I used the rear bumpers, exhaust tips, and rear tail light lenses and housings from a 1/18th scale Maisto Corvette that I picked up at a flea market for cheap. I had to modify the bumpers to look more scale in size before shipping them and the license plate bucket also to the same chroming vendor. The wheel covers came off a 1/24th scale diecast '65 Corvette that I again had to modify to fit the aluminum Cox wheels. As I said before, very hard to find the original items separately. Both front and rear valances were epoxied in with a mixture of two part 5 minute epoxy and baby powder so that when I wet sanded, it would provide a seamless joint where they were attached to the body. After my two week wait of letting the paint set and wet sanding, I airbrushed on three coats of two part epoxy clearcoat for a final shine and fuel proofing. I restore my projects with the capability to be run either in the air or on the track if wanting to do so.
I let the clearcoat sit for a full three weeks before doing a final wet sanding and hand rub polish. I wanted to make doubly sure that the epoxy fully hardened. It took about a month and a half to get my chrome back but it was well worth it. The chroming was perfect as usual coming from Chrome Tech. I should mention that before the clearcoat was sprayed, all detail paint for the trim and interior was painted on using a detail brush and a fixed magnifying glass to see what I was doing. After clearcoating and polish, the other trim such as rocker mouldings, wipers and stainless trim were done using Bare Metal foil available at any local hobby shop. The wheels covers were sanded from behind to reduce width until they would sit solidly into the aluminum hubs and were epoxied in so as not to fall out during a run on a tether line. Pretty long-winded description but that's what it took to get it right. I actually did a video of the car running on a short tether line under my garage overhang in the driveway before I restored it and after I went through the motor. Super fun and I'll see if I can upload it.

bottomgun- Gold Member

- Posts : 138
Join date : 2012-12-27
Age : 67
Location : Southern California
 Re: Cox Corvette
Wonderful job, great efforts win great rewards. The C2's, my favorites.
Bob
Bob

rsv1cox- Top Poster


Posts : 11245
Join date : 2014-08-18
Location : West Virginia
 Re: Cox Corvette
Would love to see the Video bottomgun . 


getback- Top Poster


Posts : 10439
Join date : 2013-01-18
Age : 67
Location : julian , NC
 Re: Cox Corvette
rsv1cox wrote:Wonderful job, great efforts win great rewards. The C2's, my favorites.
Bob
yep, me too!
congrats sir, well done!!!!!!
 Re: Cox Corvette
Excellent job! Very good, congratulations on the result!

MauricioB- Top Poster

- Posts : 3712
Join date : 2016-02-17
Age : 53
Location : ARG
 Re: Cox Corvette
Cribbs74 wrote:Looking forward to your pictures.
The forum should be able to pull your photos right off your phone. I have an Iphone and it has no problrm pulling picures from it.
Ron
Ok show me how!

706jim- Gold Member

- Posts : 472
Join date : 2013-11-30
 Re: Cox Corvette
Last edited by bottomgun on Sat Apr 08, 2017 11:15 pm; edited 1 time in total (Reason for editing : Added video)

bottomgun- Gold Member

- Posts : 138
Join date : 2012-12-27
Age : 67
Location : Southern California
 Similar topics
» Cox Corvette
» cox corvette riv etc
» '65 Corvette
» Non cox corvette, but could be!!
» The not so Cox Corvette
» cox corvette riv etc
» '65 Corvette
» Non cox corvette, but could be!!
» The not so Cox Corvette
Page 1 of 1
Permissions in this forum:
You cannot reply to topics in this forum

 Rules
Rules


