Log in
Search
Latest topics
» TEE DEE Having issuesby balogh Today at 7:42 am
» Retail price mark-up.. how much is enough?
by rsv1cox Today at 7:36 am
» Cox films/videos...
by Coxfledgling Today at 4:46 am
» Purchased the last of any bult engines from Ken Enya
by Coxfledgling Today at 4:18 am
» My N-1R build log
by roddie Today at 12:32 am
» Happy 77th birthday Andrew!
by akjgardner Today at 12:27 am
» Landing-gear tips
by roddie Yesterday at 6:17 pm
» Roger Harris revisited
by TD ABUSER Yesterday at 2:13 pm
» Tee Dee .020 combat model
by Ken Cook Yesterday at 1:41 pm
» My latest doodle...
by roddie Yesterday at 10:43 am
» Chocolate chip cookie dough.........
by roddie Fri Nov 22, 2024 1:13 pm
» Free Flight Radio Assist
by rdw777 Fri Nov 22, 2024 9:24 am
Cox Engine of The Month
Another proposed design by Roddie
Page 3 of 7
Page 3 of 7 •  1, 2, 3, 4, 5, 6, 7
 Re: Another proposed design by Roddie
Some of you may remember this technique that I discovered a few years ago, for feathering the edges of hinged control-surfaces and around the perimeter of a thin sheet-wing/stab. etc.
Before I get too far into it.. I made another useful tool this afternoon. I mentioned the Dubro "Kwik-Hinge Slotter" tool in my last post. It comes with a drill-centering guide (attachment) with holes for three common drill sizes. I thought to myself; If I had a "pen" that would fit into one of those holes.. I could mark the center of the edges on my parts.. for a reference when sanding/feathering them out. Stay with me here.. because this is kinda' cool if you're a freak like me...
A while back... I bought a "Pilot" .38mm (extra-fine) G2 gel-ink pen for inking my plans. The cartridges' "point" has a fairly long/straight shaft measuring .098" diameter.. long enough to fit through the drill-guide. The center-hole in the guide is for the common 3/32" (.093") drill.. so I sourced a .098" diameter (#40) drill from my index and enlarged that hole. The G2 gel-pen "cartridge" now fit's snugly into that hole.
Here's a photo..
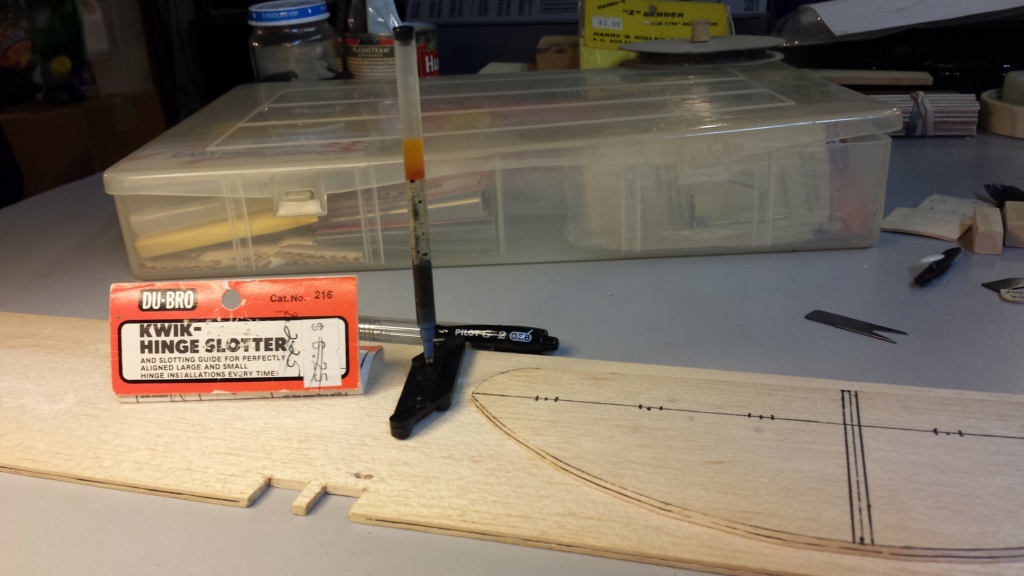
The Dubro kits' "scissor-fixture" accepts the drill-guide attachment.. (snaps onto two pins/posts) and will accommodate a maximum edge-thickness of .500". You can see the centered-marks on the edges of my parts.
OK.. moving right along.. (where's that smoking emoticon that Eric used..
  ) I use a "Smiths" knife-sharpener" (carbide-blade side) locked in my bench-vise, for feathering the edges of my parts that need their edges feathered.
It makes short-work of a laborious task that many choose to omit.. but can dramatically improve the performance of a small model airplane.
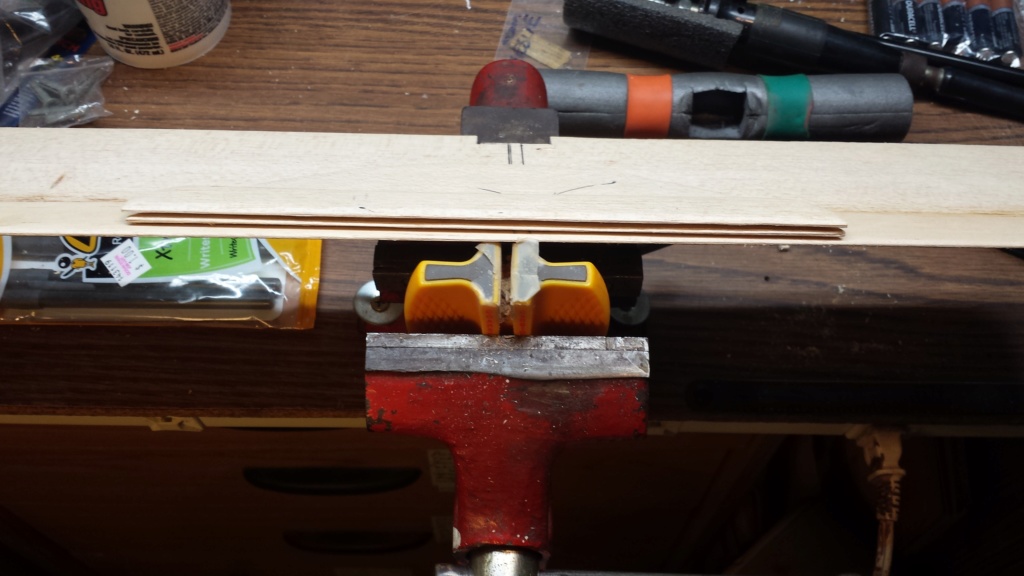

The tapered edges are a little rough.. so I go over them with a 220 grit sanding-block which smooth's them out quick and easy.
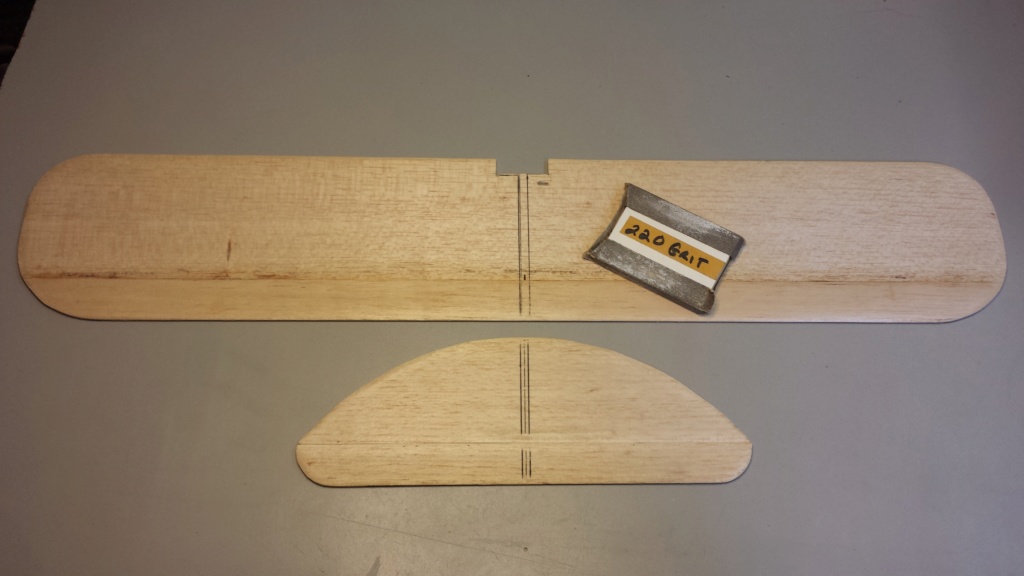
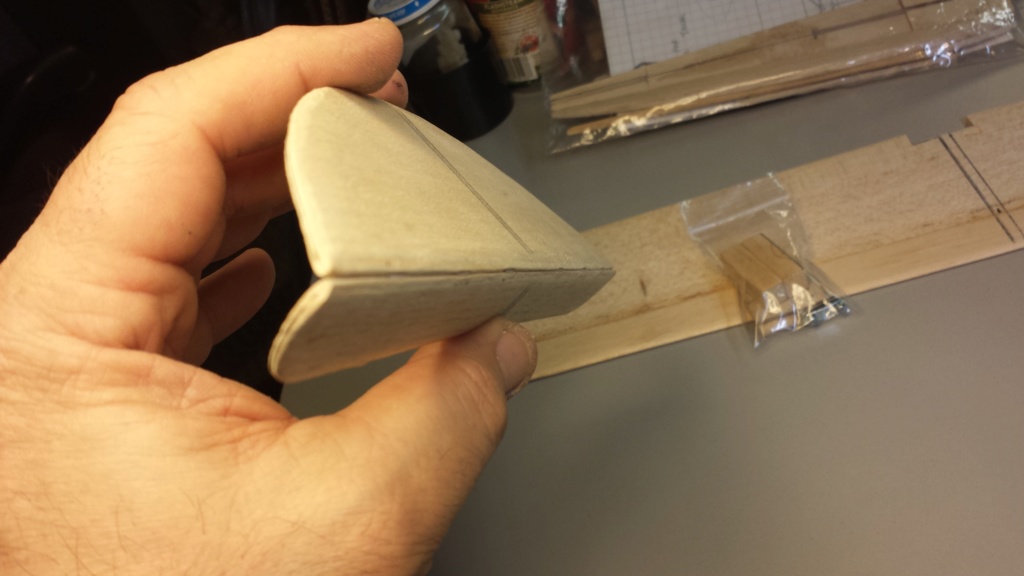
The assembled stab./elevator with hinges in their slots gives full 90 degree deflection with no gap in-between.
Before I get too far into it.. I made another useful tool this afternoon. I mentioned the Dubro "Kwik-Hinge Slotter" tool in my last post. It comes with a drill-centering guide (attachment) with holes for three common drill sizes. I thought to myself; If I had a "pen" that would fit into one of those holes.. I could mark the center of the edges on my parts.. for a reference when sanding/feathering them out.
A while back... I bought a "Pilot" .38mm (extra-fine) G2 gel-ink pen for inking my plans. The cartridges' "point" has a fairly long/straight shaft measuring .098" diameter.. long enough to fit through the drill-guide. The center-hole in the guide is for the common 3/32" (.093") drill.. so I sourced a .098" diameter (#40) drill from my index and enlarged that hole. The G2 gel-pen "cartridge" now fit's snugly into that hole.
Here's a photo..

The Dubro kits' "scissor-fixture" accepts the drill-guide attachment.. (snaps onto two pins/posts) and will accommodate a maximum edge-thickness of .500". You can see the centered-marks on the edges of my parts.
OK.. moving right along..
 (where's that smoking emoticon that Eric used..
 It makes short-work of a laborious task that many choose to omit.. but can dramatically improve the performance of a small model airplane.


The tapered edges are a little rough.. so I go over them with a 220 grit sanding-block which smooth's them out quick and easy.

The assembled stab./elevator with hinges in their slots gives full 90 degree deflection with no gap in-between.

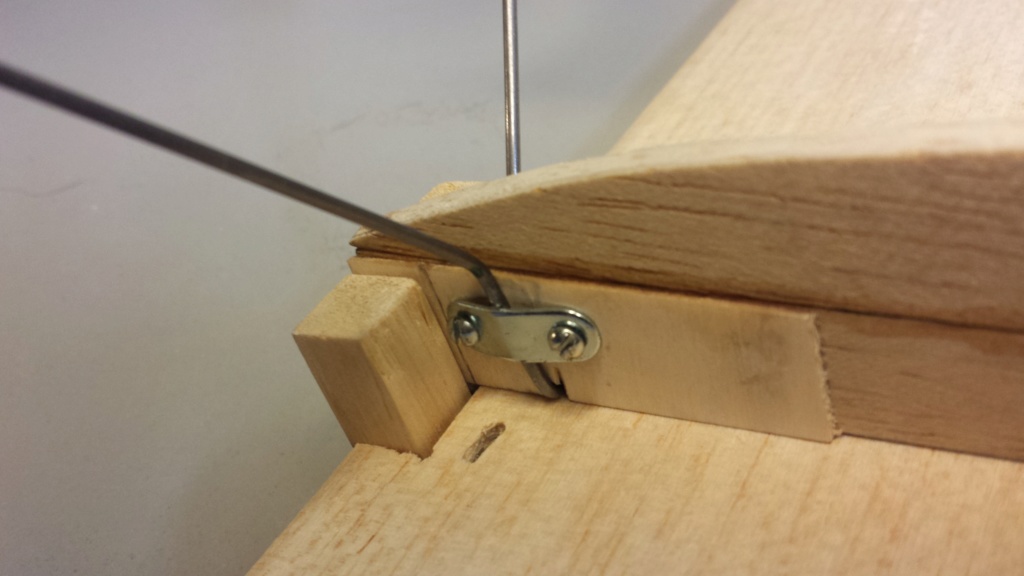
 a re-do on the L/G struts
The first inverted-"V" gear that I bent-up for this model sucked.. right from the start. It wasn't wide-enough, where it slips-over the fuse-doublers (in the slot under the wing) It just wasn't a good fit.. and you can't "re-bend" music-wire.. 
The "re-do" wasn't without issue.. I measured best I could... but the fit was still too tight. I needed an inverted "U" shape with 90-degree bends... and .300" clearance between its' two legs (the thickness of the fuse w/doublers).
I managed to adjust the music-wire for a good fit.
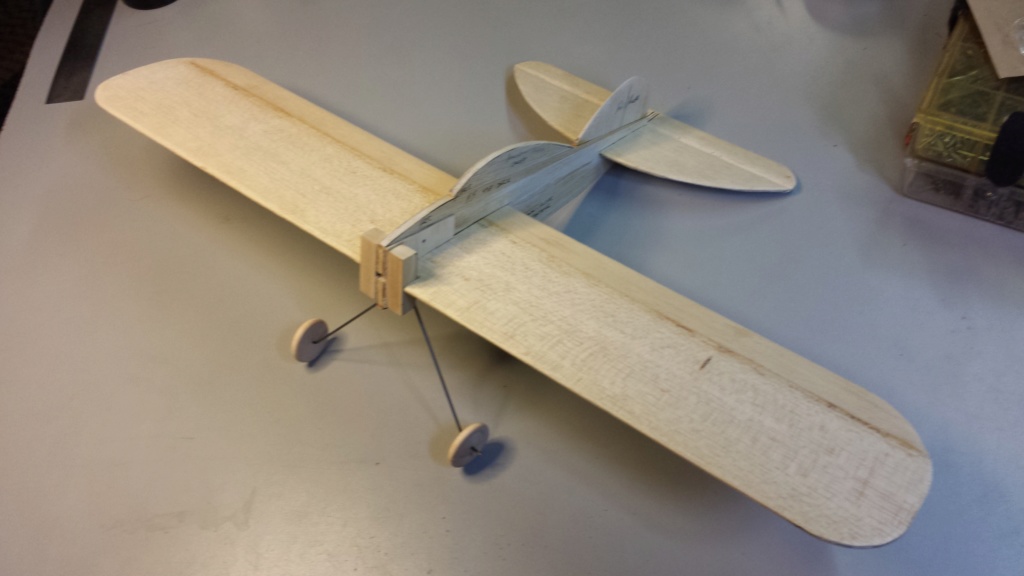
All of the fuse-pieces that Eric loves.. have been glued-together to form the final fuse-contour..
The main wing-slot is at 90 degrees to the fuse.. but the slot for the horizontal stabilizer needs to be "tweaked" a little more. Taking photos can help with alignment.
The left-side of the stab. is slightly "low".. which can be seen in the below-photos..

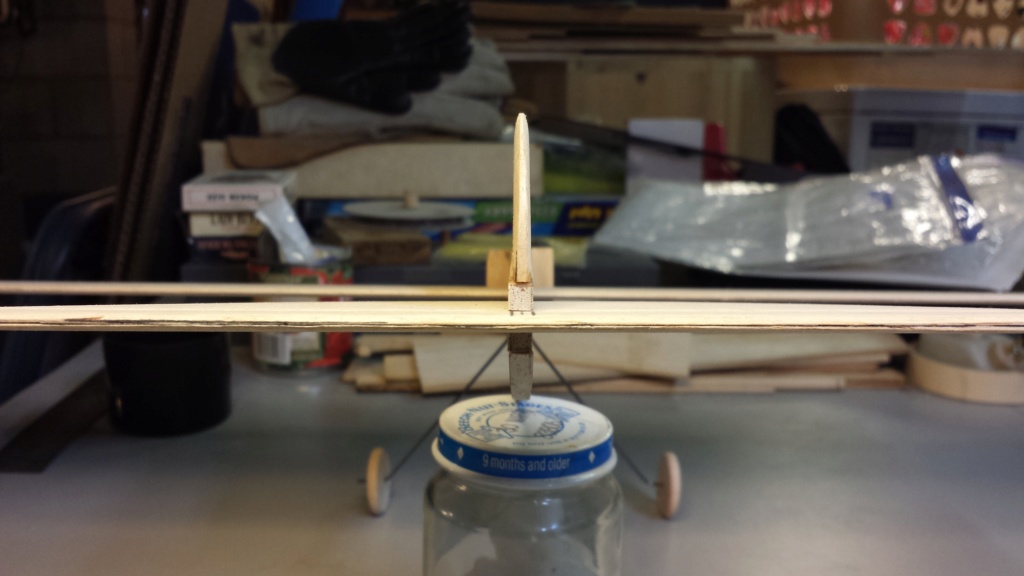
The wing/stab. slots in the fuse are for 1/8" sheet-balsa.. so I use a small piece of .100" thickness rigid-material and some medium-grit sandpaper to "tweak" the slot.. until both surfaces are level.
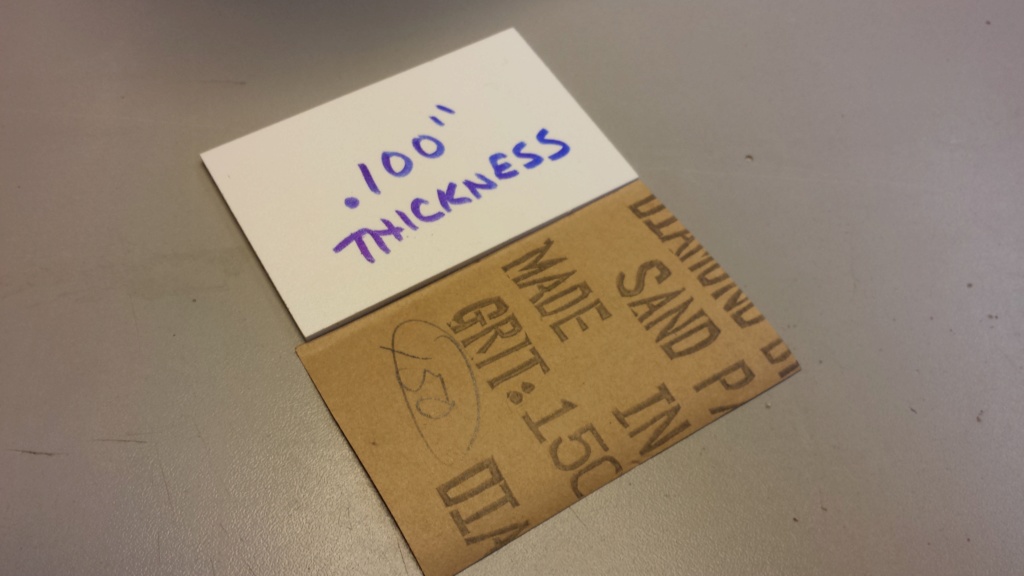
It doesn't take much. A stroke or two might correct the condition.

The "re-do" wasn't without issue.. I measured best I could... but the fit was still too tight. I needed an inverted "U" shape with 90-degree bends... and .300" clearance between its' two legs (the thickness of the fuse w/doublers).
I managed to adjust the music-wire for a good fit.

All of the fuse-pieces that Eric loves.. have been glued-together to form the final fuse-contour..

The main wing-slot is at 90 degrees to the fuse.. but the slot for the horizontal stabilizer needs to be "tweaked" a little more. Taking photos can help with alignment.
The left-side of the stab. is slightly "low".. which can be seen in the below-photos..


The wing/stab. slots in the fuse are for 1/8" sheet-balsa.. so I use a small piece of .100" thickness rigid-material and some medium-grit sandpaper to "tweak" the slot.. until both surfaces are level.

It doesn't take much. A stroke or two might correct the condition.

getback- Top Poster


Posts : 10442
Join date : 2013-01-18
Age : 67
Location : julian , NC
 Re: Another proposed design by Roddie
 and I love "you" brother! No rudder-offset will be applied. You may remember; I sourced some DAL-brand 5" x 4" L/H propellers. I plan on running one on this airplane. I will apply some outboard-wing tip-weight.. but less than would be required if running a R/H propeller. I'm thinking; x1 thin "slice" of the weights used for the "Pine-Wood Derby" cars.
The CA hinge material is very strong.. even if you cut it into narrow strips. My strips are 1/4" width.. but you could cut them to "half" that width.. as long as there are "enough" to support the span of the control-surface. I will probably experiment with narrower-width CA hinges in the future.
 gluing the CA hinges
The CA hinges that I used on this model, require anchoring with "thin" Cyanoacrylate adhesive. Since I'd completed fitting the hinges.. and feathering-out the hinge-line of the stabilizer/elevator.. I could now continue with "anchoring" (gluing-in) the hinges.
I slightly separate the stab. and elev. to expose the hinge-points.. and use a common/sewing-"pin" to pierce the wood (top and bottom..) in several places where the hinges will be.. to allow the thin CA glue to penetrate.
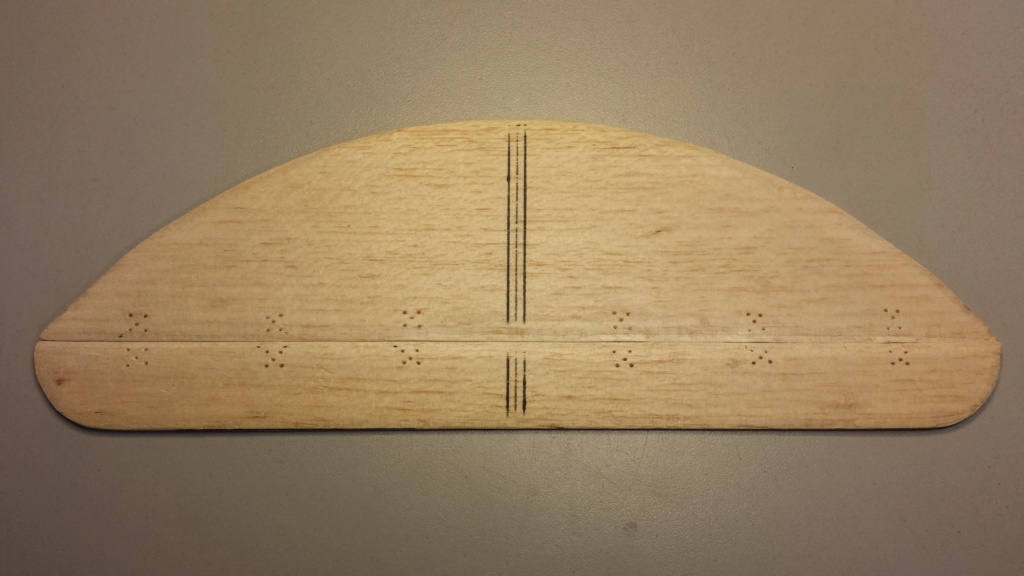
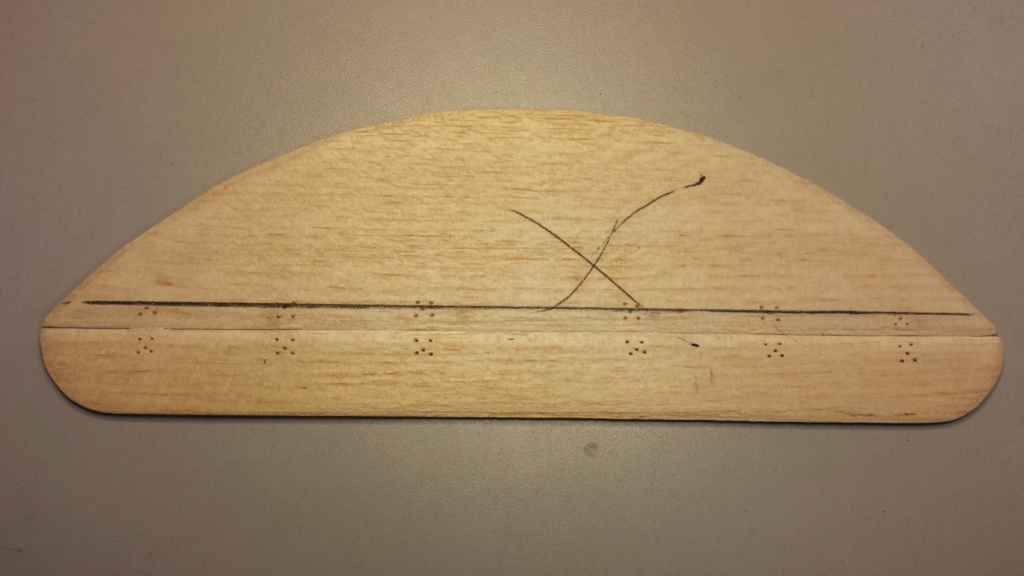
Once the pin-holes are all made; I reposition the two parts back-together to form a tight hinge-line.. and apply thin CA glue over the pin-holes.. and "wipe-over" the areas with a small piece of wax-paper to spread/force the glue into the pin-holes.
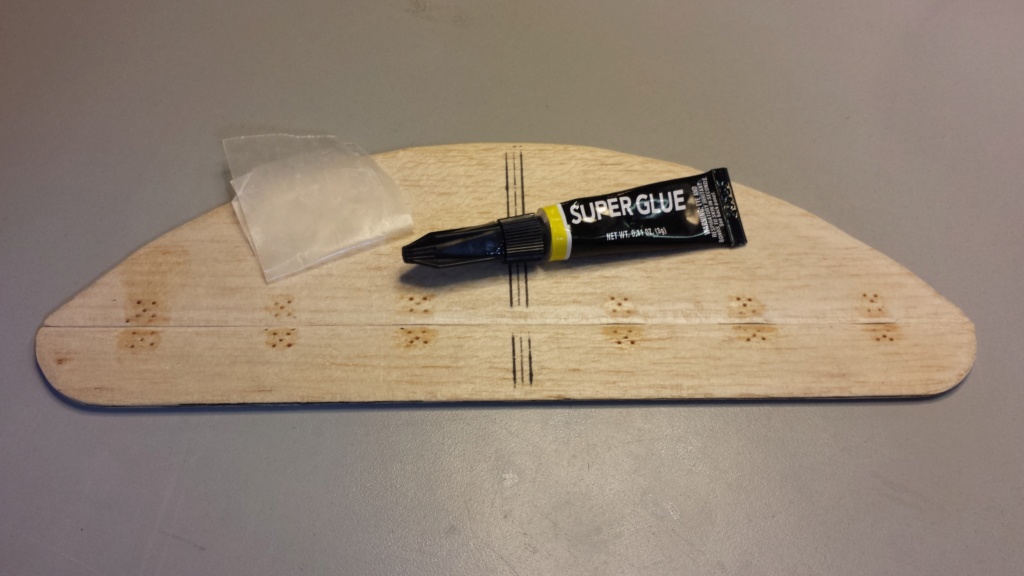
It's a different gluing-technique than is recommended by "Sig".. but it keeps glue away-from/off-of the hinge-line. These hinges are not going to pull-out of their slots.. I guarantee it.
I slightly separate the stab. and elev. to expose the hinge-points.. and use a common/sewing-"pin" to pierce the wood (top and bottom..) in several places where the hinges will be.. to allow the thin CA glue to penetrate.


Once the pin-holes are all made; I reposition the two parts back-together to form a tight hinge-line.. and apply thin CA glue over the pin-holes.. and "wipe-over" the areas with a small piece of wax-paper to spread/force the glue into the pin-holes.

It's a different gluing-technique than is recommended by "Sig".. but it keeps glue away-from/off-of the hinge-line. These hinges are not going to pull-out of their slots.. I guarantee it.
 Re: Another proposed design by Roddie
I love it when a good plane comes together! 

NEW222- Top Poster

- Posts : 3896
Join date : 2011-08-13
Age : 46
Location : oakbank, mb
 Re: Another proposed design by Roddie
NEW222 wrote:I love it when a good plane comes together!
Hey Chancey!
 applying wood-filler to the fuse-contours
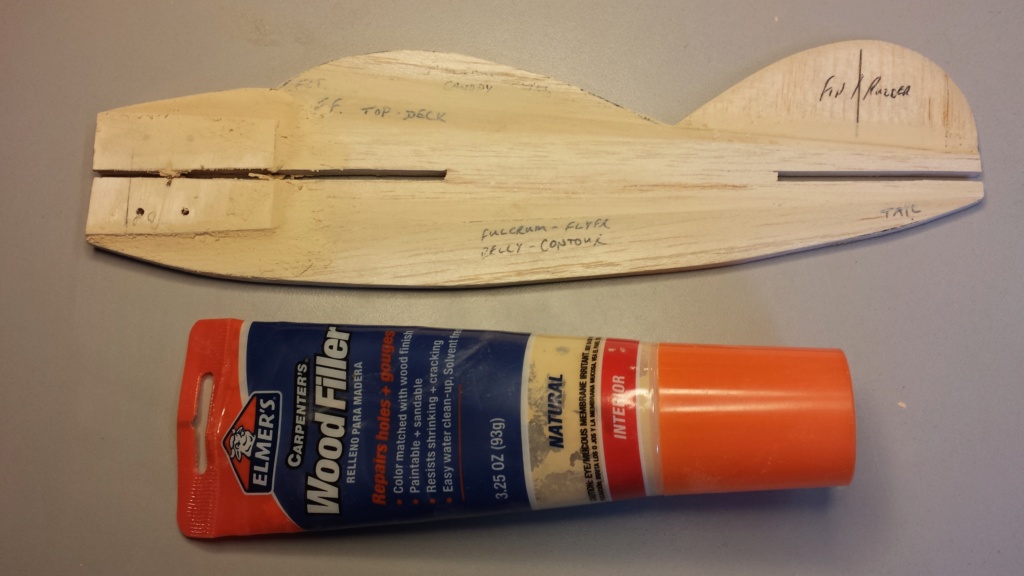
I have used this pictured version of Elmer's "Carpenter's Wood Filler" on my last couple of models.. and I really like it. It sands like balsa.. need I say more.
I needed to fill the joints between the fuses' contour-pieces.. and around the ply-doublers and the fin/rudder joint.
I'll sand with fine-paper tomorrow!
I needed to fill the joints between the fuses' contour-pieces.. and around the ply-doublers and the fin/rudder joint.

I'll sand with fine-paper tomorrow!
 Re: Another proposed design by Roddie
And for the record, don't dope over latex fillers because it blisters

Ken Cook- Top Poster

- Posts : 5641
Join date : 2012-03-27
Location : pennsylvania
 Re: Another proposed design by Roddie
Ken Cook wrote: And for the record, don't dope over latex fillers because it blisters
Thanks Ken. Good to know.
 I won't be using any dope on this model. The base-color is "white".. so I'm planning on using "KILZ-2".. and then applying the trim-color(s)/graphics over that base-coat.. followed by gloss or semi-gloss clear-polyurethane to seal.
  Re: Another proposed design by Roddie
Hmmm. Kilz hey. That is the stuff we use on the bottom of the plywood floor we replace in the busses as we rebuild them. It appears to be some good stuff. I had never thought of it on an airplane. I will be watching this step very, very carefully..... 

NEW222- Top Poster

- Posts : 3896
Join date : 2011-08-13
Age : 46
Location : oakbank, mb
 Re: Another proposed design by Roddie
NEW222 wrote:Hmmm. Kilz hey. That is the stuff we use on the bottom of the plywood floor we replace in the busses as we rebuild them. It appears to be some good stuff. I had never thought of it on an airplane. I will be watching this step very, very carefully.....
The KILZ "2" is the latex version of KILZ white-pigmented shellac. Zinsser-brand makes a similar product called "Bin-Seal". Their latex variant is labelled "Bulls-eye 1-2-3". Both manufacturers claim that these products can be top-coated with any latex or oil-based paint.
The fact that it's a "white-pigmented" coating, makes it a perfect choice for a model with a white base-color. It's like a primer/sealer/base-color all in a single application. The latex has less noxious fumes than the oil-based variant. That's important at my house.
I'll probably be "brushing it on".. we'll see. It has a dull/flat-finish. That's fine... because after the trim-colors are applied, I plan to seal the finish by spraying with polyurethane.
 Re: Another proposed design by Roddie
Rod, I finally got around to reading your whole thread in one sitting. I've been very slack about keeping up with my fellow forum members' project threads, and I regret that because some of my thoughts would have been more appropriate in the proper context of the timeline.
In any case, I like it a lot. My only constructive criticism is regarding the stab chord. And it matters only if you plan on ever flying this plane, and then only if your flight plan involves flying a loop or turning 180° to inverted. I would consider trimming the stab chord to about 25° of the wing chord. I think you'd find it to be much more responsive and needing considerably less room to execute such a turn. Whether or not to reduce the actual chord of the elevator alone, I can't say, but with that change, testing different fore-aft C/G positions will be necessary.
The only other question I have is, why not give this bird some airfoil? A 1/4" sheet of Sig airfoil would make some beneficial lift... or even a pair of those sheets laminated together for a stunt type symmetrical foil. I understand the latter might be more weight than you have accounted for.
Anyway, nice bird. You've put an admirable lot of thought into it. Good luck,
Rusty
_________________
Don't Panic!
...and never Ever think about how good you are at something...
while you're doing it!
My Hot Rock & Blues Playlist
...and never Ever think about how good you are at something...
while you're doing it!
My Hot Rock & Blues Playlist

RknRusty- Rest In Peace

- Posts : 10869
Join date : 2011-08-10
Age : 68
Location : South Carolina, USA
 Re: Another proposed design by Roddie
Excellent job on those hinges roddie, I never thought they would offer that much deflection. They are on my to-do list for my next build.
I hope Kilz two smells better than Kilz one. The smell of kilz one kilz me.......
I hope Kilz two smells better than Kilz one. The smell of kilz one kilz me.......

rsv1cox- Top Poster


Posts : 11251
Join date : 2014-08-18
Location : West Virginia
 Re: Another proposed design by Roddie
Gonna sound mean when I do not intend to...
Take a 4" x 6 by thin piece of scrap balsa weigh it
make another
Weigh it and trim one to be exact weight of your Two test strips
Spray one with Crylon or Rustoleum White
brush on your Kilz 2 white
report back
my bet...kilz will be THREE times heavier
The WHY: The Kilz formulas are designed as a Vapor barrier, a mold barrier, and a one coat stain or smoke barrier...the product has a LOT of the white solids...a LOT!!

fredvon4- Top Poster


Posts : 4012
Join date : 2011-08-26
Age : 69
Location : Lampasas Texas
 Re: Another proposed design by Roddie
RknRusty wrote:Rod, I finally got around to reading your whole thread in one sitting. I've been very slack about keeping up with my fellow forum members' project threads, and I regret that because some of my thoughts would have been more appropriate in the proper context of the timeline.
In any case, I like it a lot. My only constructive criticism is regarding the stab chord. And it matters only if you plan on ever flying this plane, and then only if your flight plan involves flying a loop or turning 180° to inverted. I would consider trimming the stab chord to about 25° of the wing chord. I think you'd find it to be much more responsive and needing considerably less room to execute such a turn. Whether or not to reduce the actual chord of the elevator alone, I can't say, but with that change, testing different fore-aft C/G positions will be necessary.
The only other question I have is, why not give this bird some airfoil? A 1/4" sheet of Sig airfoil would make some beneficial lift... or even a pair of those sheets laminated together for a stunt type symmetrical foil. I understand the latter might be more weight than you have accounted for.
Anyway, nice bird. You've put an admirable lot of thought into it. Good luck,
Rusty
Man Rusty.. It's SoOoOo great to hear from you. We've missed you here dude!
My stabs' root-chord is 2.25" but has a swept 11.25" leading-edge radius applied over the stabs' 8.75" span. The elevator has a constant-chord of .75".. with 1.5" radius trailing-tips.
I have definitely NOT followed any hard-fast design criteria when designing my airplanes for performing precision aerobatics. That's evident by my sheet-wing designs. They're "roundy-round" U-control models.. capable of wing-overs and inverted-flight.. which is (was..
I know that I need to graduate from sheet-wing.. and move-on to air-foiled wing-construction. My aim has been to set up my shop for that. Maybe this year. You may remember the RCM jigs that I made..
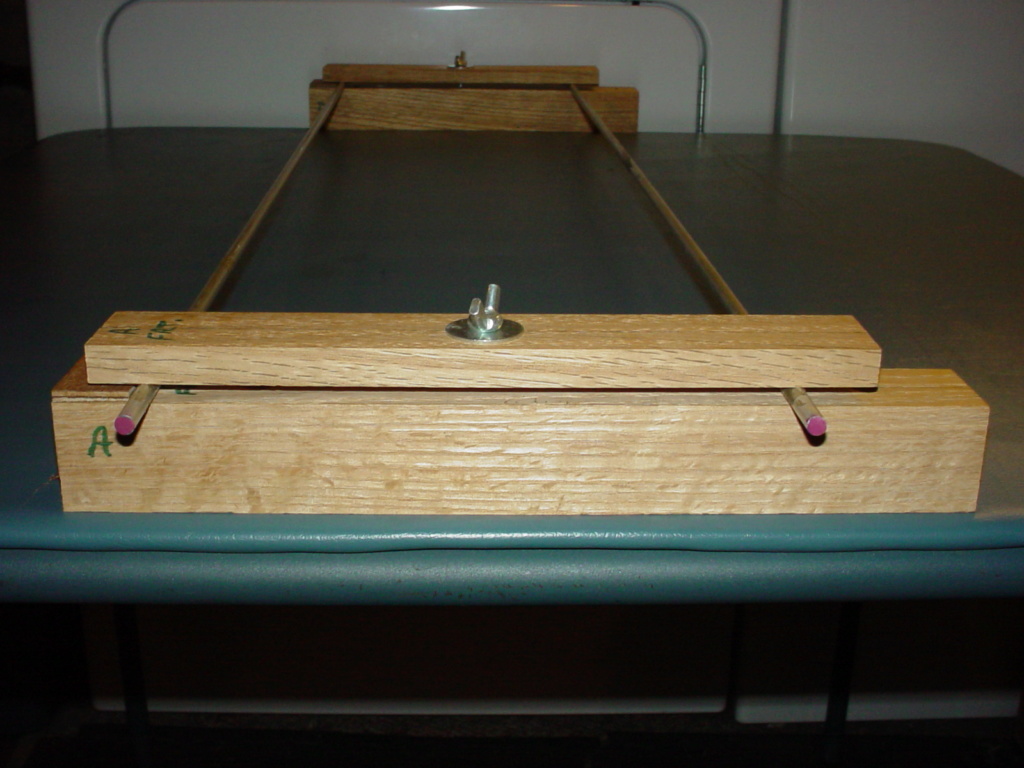
I've wanted to build a 50% smaller version with 1/8" diameter rods.. for 1/2A class wings.
 Re: Another proposed design by Roddie
rsv1cox wrote:Excellent job on those hinges roddie, I never thought they would offer that much deflection. They are on my to-do list for my next build.
I hope Kilz two smells better than Kilz one. The smell of kilz one kilz me.......
Thank You Robert. The method that I've developed for installing them, lends itself well to small airplanes.. (thin control-surfaces) It can often try your patience, when working with small parts. I try to develop methods to make it easier to assemble a small flying model.
 Re: Another proposed design by Roddie
fredvon4 wrote:Gonna sound mean when I do not intend to...
Take a 4" x 6 by thin piece of scrap balsa weigh it
make another
Weigh it and trim one to be exact weight of your Two test strips
Spray one with Crylon or Rustoleum White
brush on your Kilz 2 white
report back
my bet...kilz will be THREE times heavier
The WHY: The Kilz formulas are designed as a Vapor barrier, a mold barrier, and a one coat stain or smoke barrier...the product has a LOT of the white solids...a LOT!!
Hi Phred, Yes.. you're correct. The reason that I'm using the "KILZ" product is exactly because of it's composition.. and the fact that this models' base-color is "white". I intend to apply (directly to bare-wood) a single coat.. whereas I'd alternately need to seal/prime and possibly apply multiple base-coats of a garden-variety white spray-paint for my base-color. The "KILZ" may be heavy.. but it's also a barrier for sealing the wood against fuel/oil ingress. The trim-color(s) will be applied over that single-coat.. followed by a misting of polyurethane.
 Re: Another proposed design by Roddie
Your Airplane Looks Good Roddie. Iv'e had good luck with Krylon Paints. They seem to be pretty fuel proof .

akjgardner- Diamond Member


Posts : 1602
Join date : 2014-12-28
Age : 65
Location : Greensberg Indiana
 Re: Another proposed design by Roddie
Ok, so someone has to educate me why everybody doesn't use Minwax Sanding Sealer.
When Aero gloss sanding sealer became unavailable I searched for a suitable substitute finding nothing until I found this product.
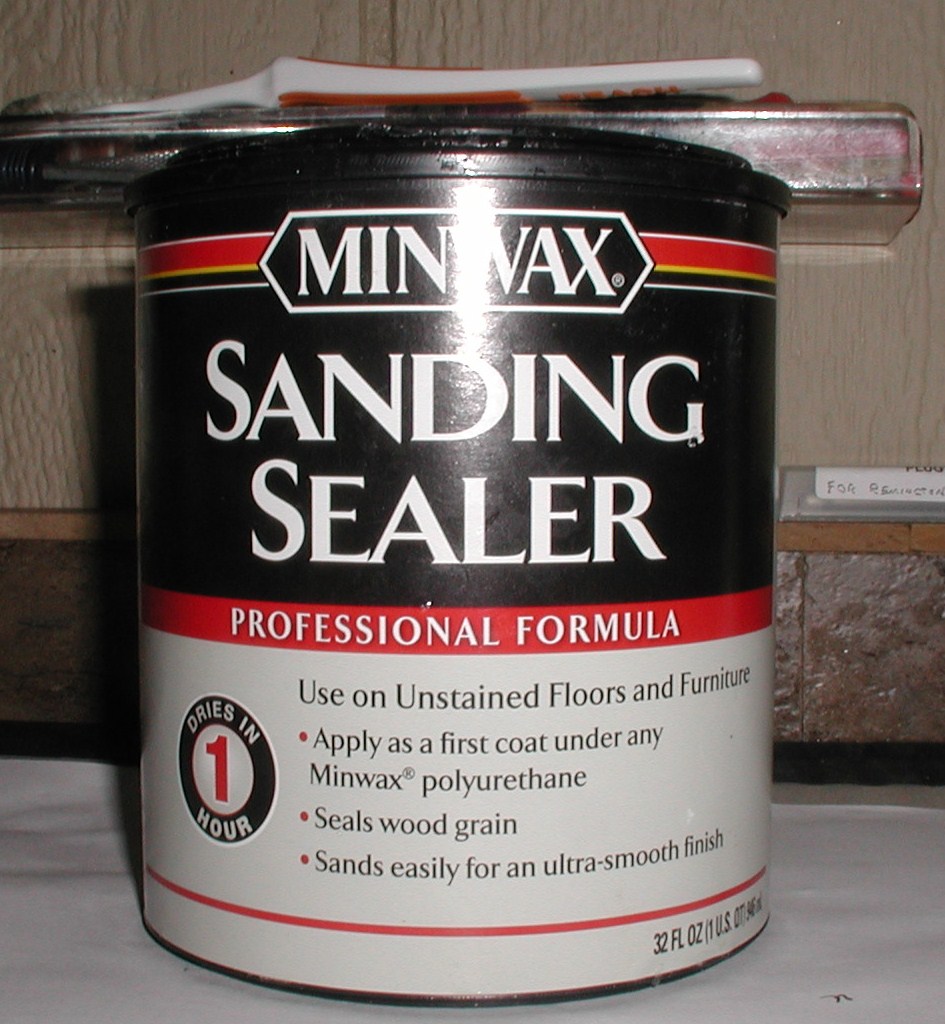
Cheap, available and it works as a base coat sealer. My last three builds feature it, whether finished in colors or white.
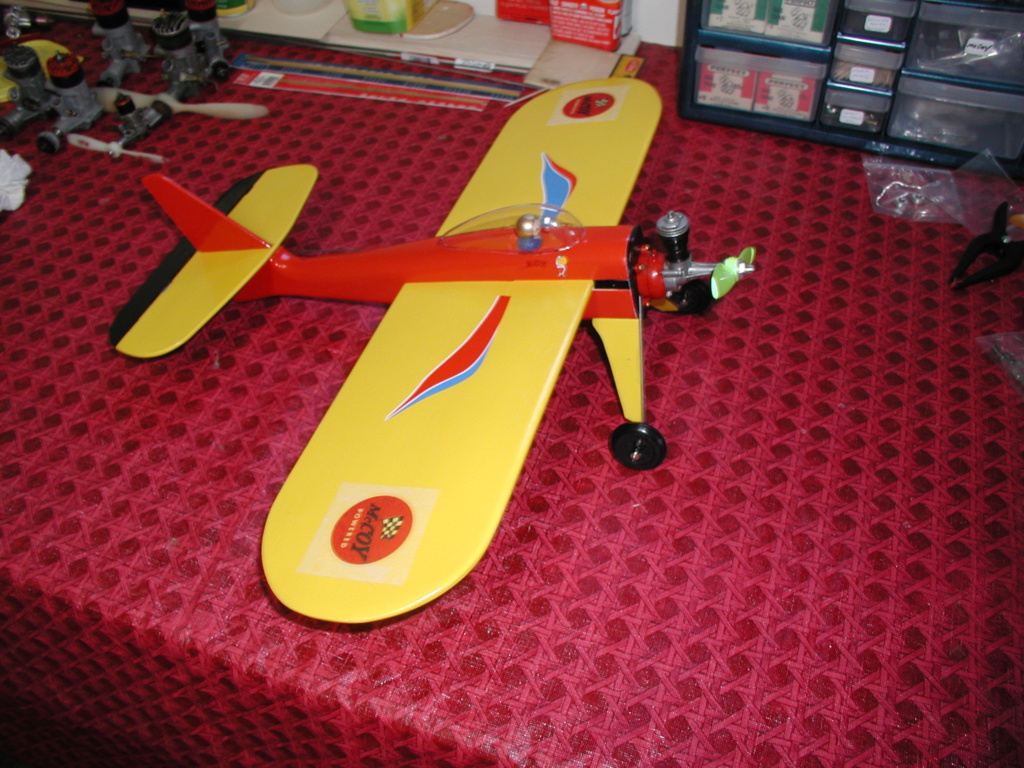
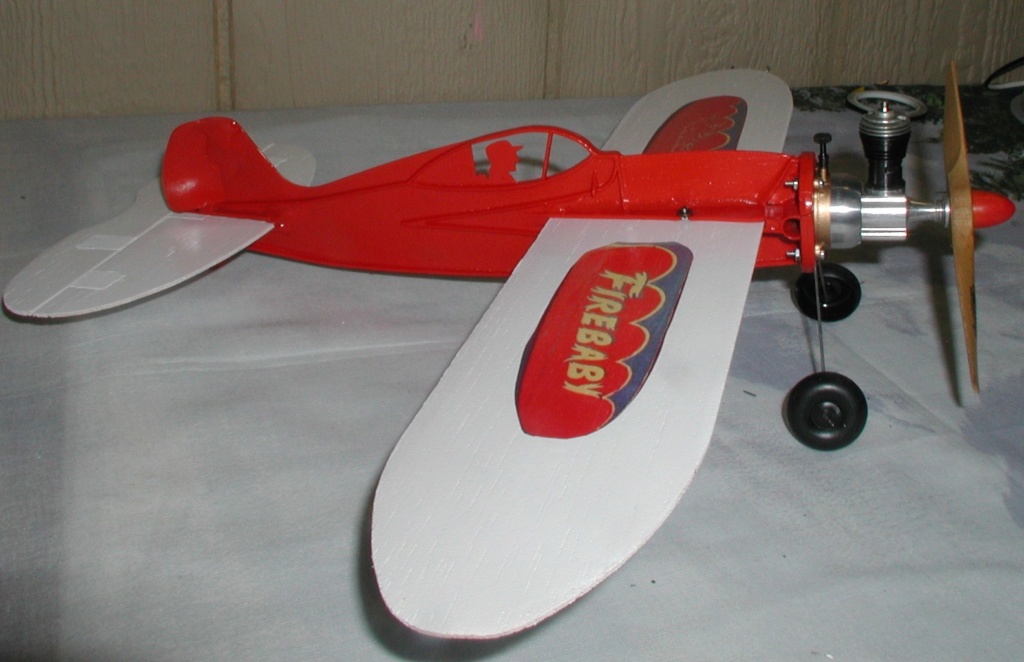
On wings, I use a broad brush liberally applied, let it sit a few seconds and wipe it off well pushing hard into the surface. Water based you must do both sides or it will warp. Applied this way it dries in minutes depending upon temperature/humidity. When dry I apply a second coat in the same manner. When dry, sand smooth and paint. I use Top Flights Lustrekote either primer then paint, or just paint. I would think that off the shelf rattle cans would work as well......as soon as I run out of Lustrekote.
Bob
When Aero gloss sanding sealer became unavailable I searched for a suitable substitute finding nothing until I found this product.

Cheap, available and it works as a base coat sealer. My last three builds feature it, whether finished in colors or white.


On wings, I use a broad brush liberally applied, let it sit a few seconds and wipe it off well pushing hard into the surface. Water based you must do both sides or it will warp. Applied this way it dries in minutes depending upon temperature/humidity. When dry I apply a second coat in the same manner. When dry, sand smooth and paint. I use Top Flights Lustrekote either primer then paint, or just paint. I would think that off the shelf rattle cans would work as well......as soon as I run out of Lustrekote.
Bob

rsv1cox- Top Poster


Posts : 11251
Join date : 2014-08-18
Location : West Virginia
 Re: Another proposed design by Roddie
I think Roddie mentioned some time ago that his wife can’t stand the smell of solvents, so he prefers water-based stuff.
I remember because I have the same issue, no shop outside the house (working on it though) and SWMBO dislikes the smell of epoxy and solvents.
I remember because I have the same issue, no shop outside the house (working on it though) and SWMBO dislikes the smell of epoxy and solvents.

KariFS- Diamond Member

- Posts : 2044
Join date : 2014-10-10
Age : 53
 Re: Another proposed design by Roddie
KariFS wrote:I think Roddie mentioned some time ago that his wife can’t stand the smell of solvents, so he prefers water-based stuff.
I remember because I have the same issue, no shop outside the house (working on it though) and SWMBO dislikes the smell of epoxy and solvents.
"Water based you must do both sides or it will warp."

rsv1cox- Top Poster


Posts : 11251
Join date : 2014-08-18
Location : West Virginia
 Re: Another proposed design by Roddie
rsv1cox wrote:KariFS wrote:I think Roddie mentioned some time ago that his wife can’t stand the smell of solvents, so he prefers water-based stuff.
I remember because I have the same issue, no shop outside the house (working on it though) and SWMBO dislikes the smell of epoxy and solvents.
"Water based you must do both sides or it will warp."
I will heed your warning Robert. I'm glad that you guys are commenting. It's giving me a lot to consider/re-consider. I'll "have" to eventually use some products that have an odor. Maybe I should put-off those steps until the weather is mild-enough to work outside. OTOH... I may be able to seal/paint the model at my employers' shop.
 Re: Another proposed design by Roddie
I wonder with it being a high solids primer/paint, and the fact I do know how it works, I wonder if one puts on a coat, then sands the majority off to remove excess weight. Not much different than using primer and sanding off a guide coat. You could eliminate a lot of weight that way. And to even save a bit more, one could use a WBPU coat first to seal teh wood pores from absorbing more, this way you would only be filling the grain left that the WBPU did not fill. Just another random Saturday morning thought from a brain that just started to operate!

NEW222- Top Poster

- Posts : 3896
Join date : 2011-08-13
Age : 46
Location : oakbank, mb
 Re: Another proposed design by Roddie
NEW222 wrote:I wonder with it being a high solids primer/paint, and the fact I do know how it works, I wonder if one puts on a coat, then sands the majority off to remove excess weight. Not much different than using primer and sanding off a guide coat. You could eliminate a lot of weight that way. And to even save a bit more, one could use a WBPU coat first to seal teh wood pores from absorbing more, this way you would only be filling the grain left that the WBPU did not fill. Just another random Saturday morning thought from a brain that just started to operate!
Hey Chancey, You have some very interesting random Saturday morning thoughts my friend! This is how we find solutions!
I went on some errands today.. and one included some shopping at "Lowes" (a "big-box" home improvement outlet). While there; I visited the paint department. I was curious about the Minwax sanding-sealer that Robert had mentioned. Lowes has it.. priced at approx. $17/qt.
I chose to buy some Krylon rattle-can automotive sandable-primer (white) and also their automotive acrylic enamel (gloss white).
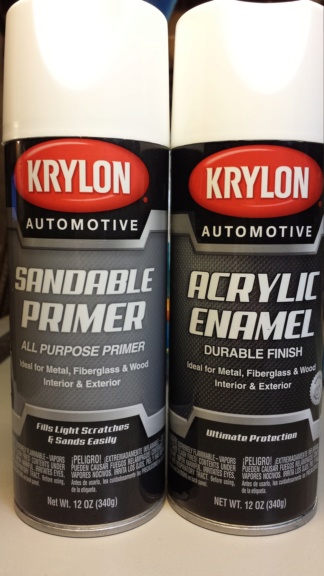
Lowes also stocks Krylon "Epoxy Enamel" in gloss white.. which was very tempting. Epoxy enamels are said to be the most resistant to any type of fuel.. but I will be applying trim-colors over a white-base. I think I'll try the Krylon white sandable-primer.. and see if it will pass for a white-base. My trim-colors should adhere well to that. The final sealing will be a clear polyurethane, of which I have a choice of satin, semi-gloss or gloss.
Page 3 of 7 •  1, 2, 3, 4, 5, 6, 7
 Similar topics
» Roddie's CEF 2019 "RWYB" proposed entry(ies)..
» New P-38 profile scratch build log
» Roddie-Rigger.. a 2005 original design
» Cox Engines - Proposed Users
» CEF speed contest Design Discussions
» New P-38 profile scratch build log
» Roddie-Rigger.. a 2005 original design
» Cox Engines - Proposed Users
» CEF speed contest Design Discussions
Page 3 of 7
Permissions in this forum:
You cannot reply to topics in this forum

 Rules
Rules


