Log in
Search
Latest topics
» Cox films/videos...by Coxfledgling Today at 4:46 am
» Purchased the last of any bult engines from Ken Enya
by Coxfledgling Today at 4:18 am
» My N-1R build log
by roddie Today at 12:32 am
» Happy 77th birthday Andrew!
by akjgardner Today at 12:27 am
» TEE DEE Having issues
by TD ABUSER Yesterday at 9:43 pm
» Landing-gear tips
by roddie Yesterday at 6:17 pm
» Roger Harris revisited
by TD ABUSER Yesterday at 2:13 pm
» Tee Dee .020 combat model
by Ken Cook Yesterday at 1:41 pm
» Retail price mark-up.. how much is enough?
by Ken Cook Yesterday at 1:37 pm
» My latest doodle...
by roddie Yesterday at 10:43 am
» Chocolate chip cookie dough.........
by roddie Fri Nov 22, 2024 1:13 pm
» Free Flight Radio Assist
by rdw777 Fri Nov 22, 2024 9:24 am
Cox Engine of The Month
Another proposed design by Roddie
Page 5 of 7
Page 5 of 7 •  1, 2, 3, 4, 5, 6, 7
 sanding.........
I did some sanding this morning. The "DAP" brand wood-filler is very similar to the "Elmer's" that I had been using. I used 220 grit "garnet" paper to knock-down the high-spots.. and then 600 grit to smooth-out.
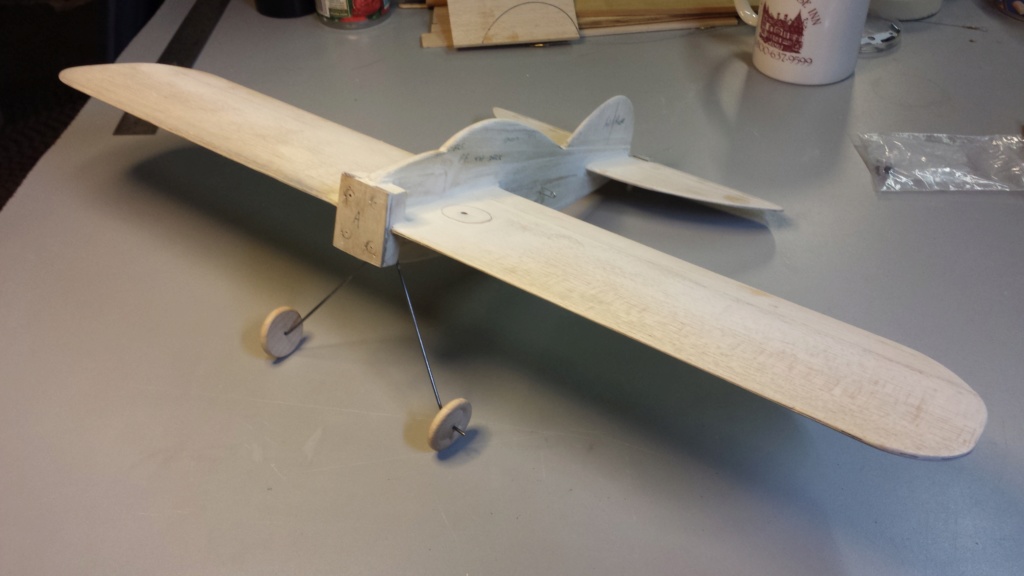
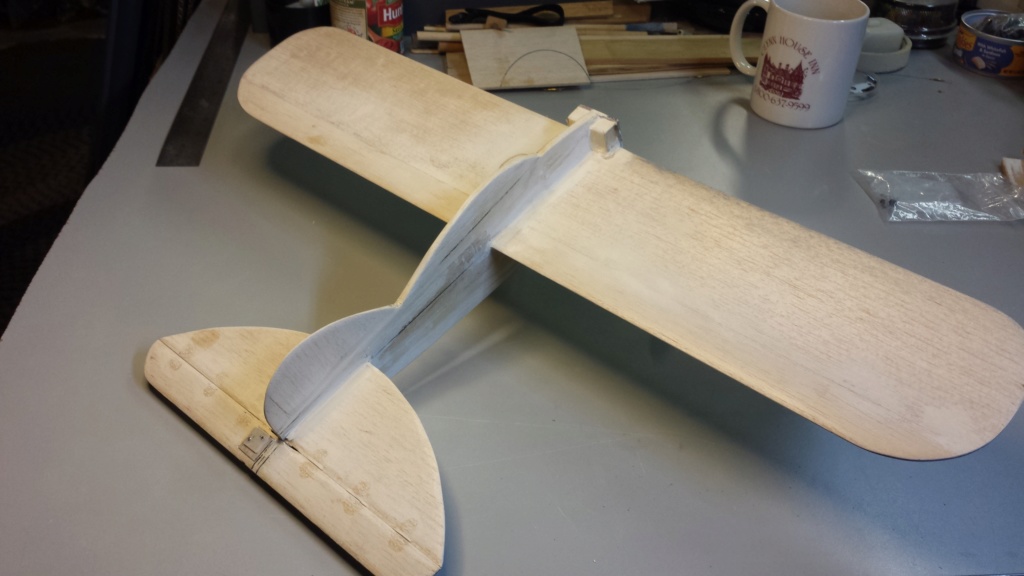
I still need to work-out a couple of hardware issues though.. A hard-tank mount and lead-out guides..


I still need to work-out a couple of hardware issues though.. A hard-tank mount and lead-out guides..

 configuring an engine..
This afternoon, I decided to put together an engine using a "product" (horseshoe) backplate for use with an external fuel delivery. I had sourced some Cox reed-valve engines last year on "consignment" at a hobby shop (Hog Heaven Hobbies) in Fiskdale, MA. It was time to put one of them to use.

A 190/290 postage-stamp product-engine with a #1 (dual-bypass ported) cylinder was chosen. I removed the backplate and put it into storage. Its' fine-thread NVA will be used, down the road at some point. I had ordered some complete "Sure-Start" horseshoe backplate assemblies from EXModel engines. This is the backplate/carb that will be used on this engine.

A 190/290 postage-stamp product-engine with a #1 (dual-bypass ported) cylinder was chosen. I removed the backplate and put it into storage. Its' fine-thread NVA will be used, down the road at some point. I had ordered some complete "Sure-Start" horseshoe backplate assemblies from EXModel engines. This is the backplate/carb that will be used on this engine.
 engine-work
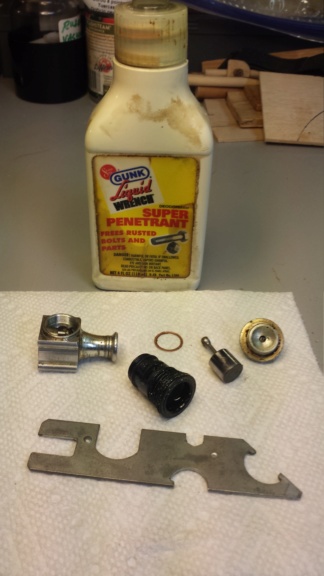
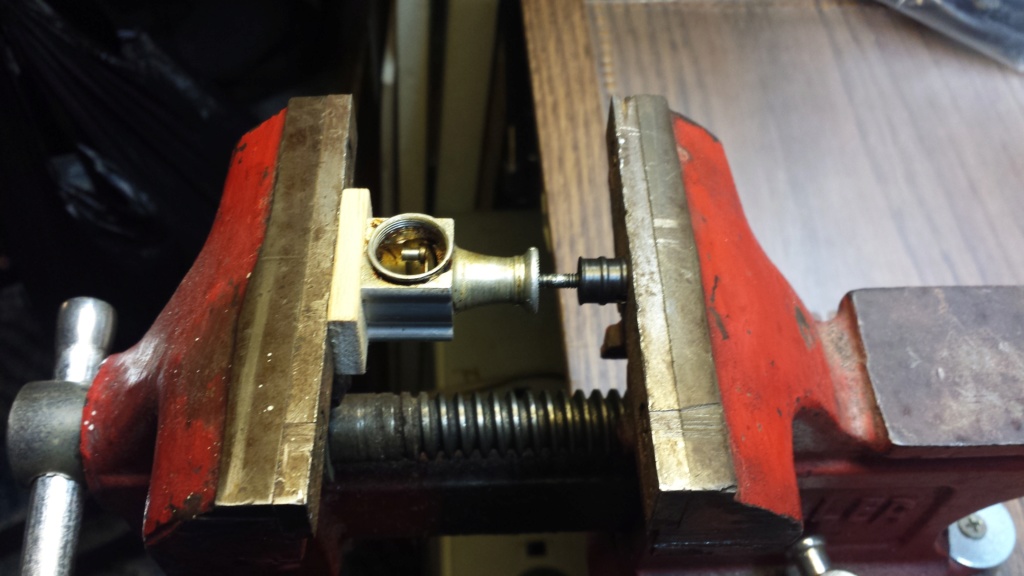
Removing the crankshaft from the case; I've only recently learned how to do it, but I'm much more "at-ease" now after doing a few engines. I've been using a 5-40 stub-shaft screwed-into the crank with a spinner-nut installed. This provides a "flat-face" to bear on. With all other engine parts previously removed, I place a small thin wood-block against the back of the crankcase and use a bench-vise to press the crank backward and out of the drive-plate.
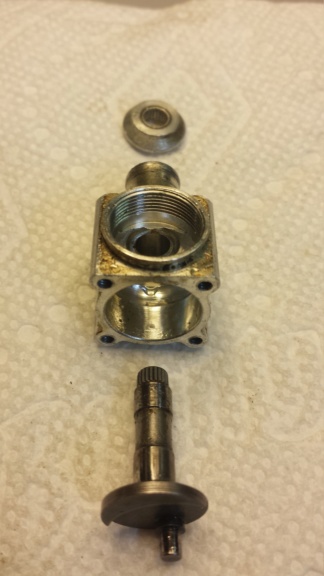
The crank-journal/oil-slot was fairly clean.. so I ran a small round brush through a few times, lubed and reassembled.
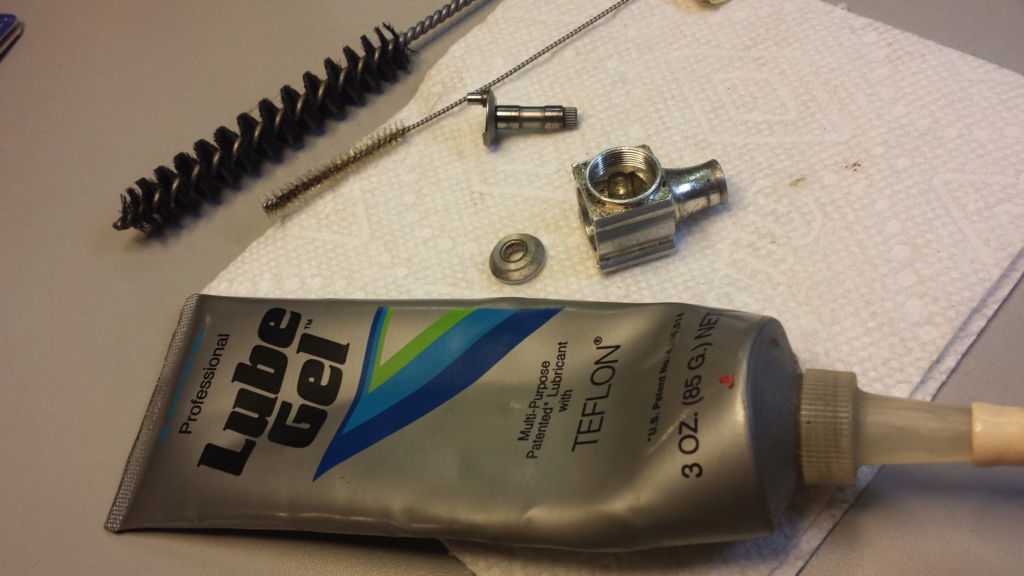
I made a tool for reinstalling the drive-washer back onto the spline on the crankshaft. It's just a scrap piece of 5/16" hardwood drilled-through for a prop-screw. I sourced some 5-40 x 1" long cap-screws which take a 3/32" hex-key. They're "black-oxide" and much better than the softer/slotted 5-40 screws. A 1" long screw seemed to work well with a Tee Dee style aluminum spinner and the wood-block.. for pressing the drive-washer back on.
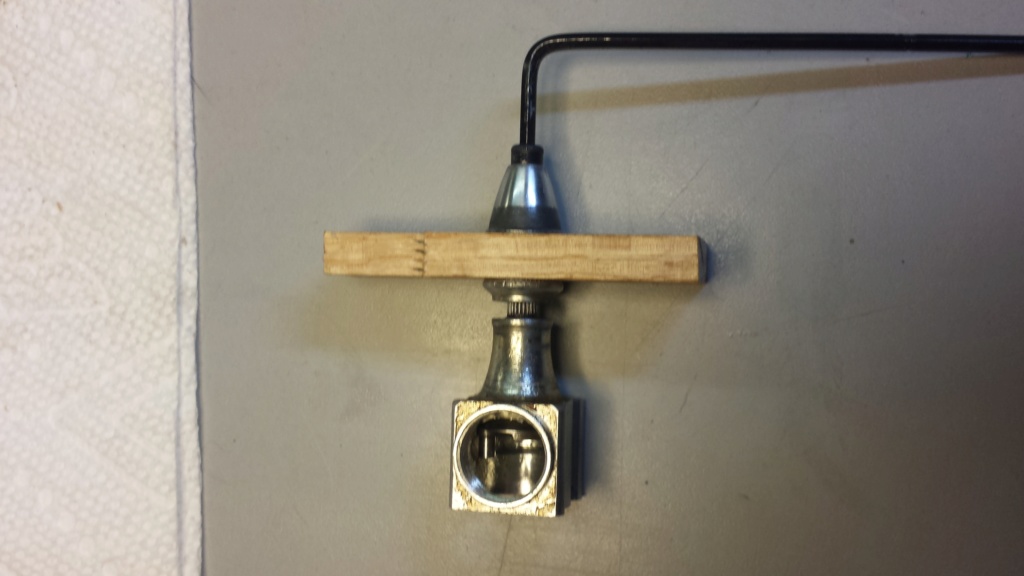
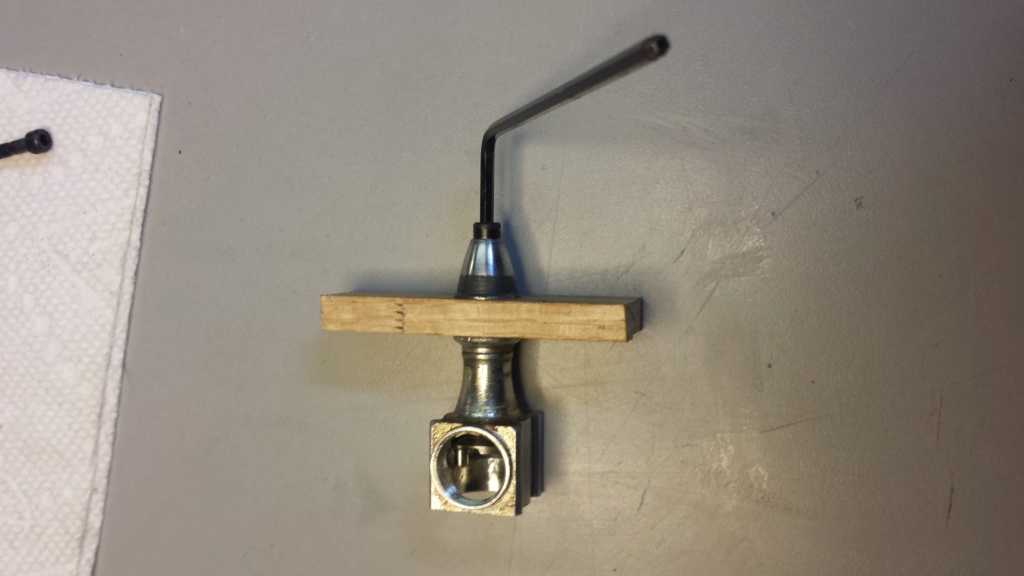
There was considerable "play" (slop) in the piston/rods' ball-socket joint.. so I got my reset-tool out and reset the fit. (Note; shown in the photo below is a small hammer with rubber/plastic heads. I ended up needing a heavier standard "nail-hammer" to do the job.) Light but firm "taps" with the hammer is all it takes.. checking the fit between each tap. A vises' anvil provides a good/solid "base" to perform this operation.

Before installing the new "Sure-Start" style horseshoe backplate assy., I made four plastic washers for under the case-screw heads because I won't be using the "choke-tube" that came with the carb.. and wanted to be sure that the case-screws wouldn't "bottom-out".
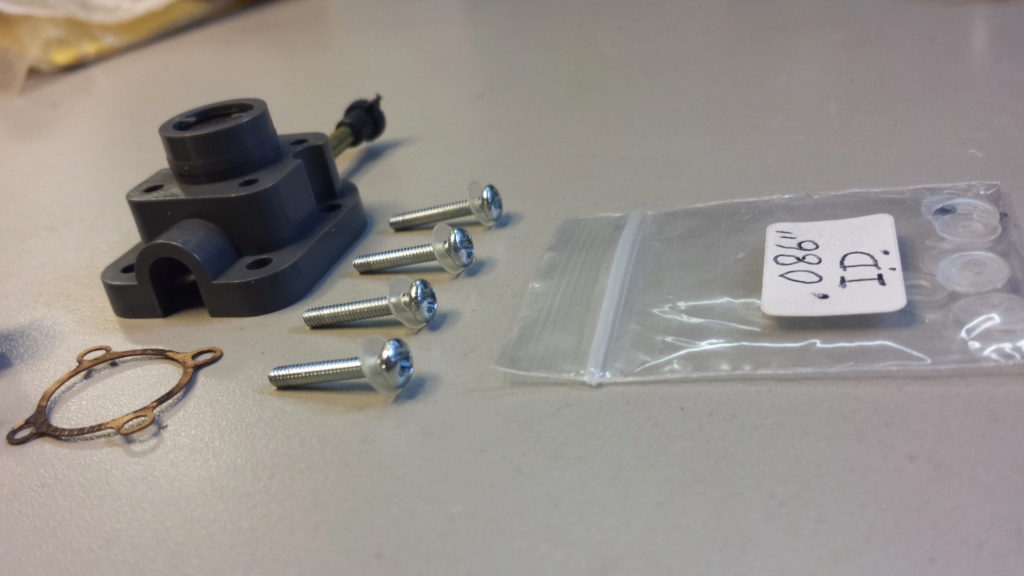
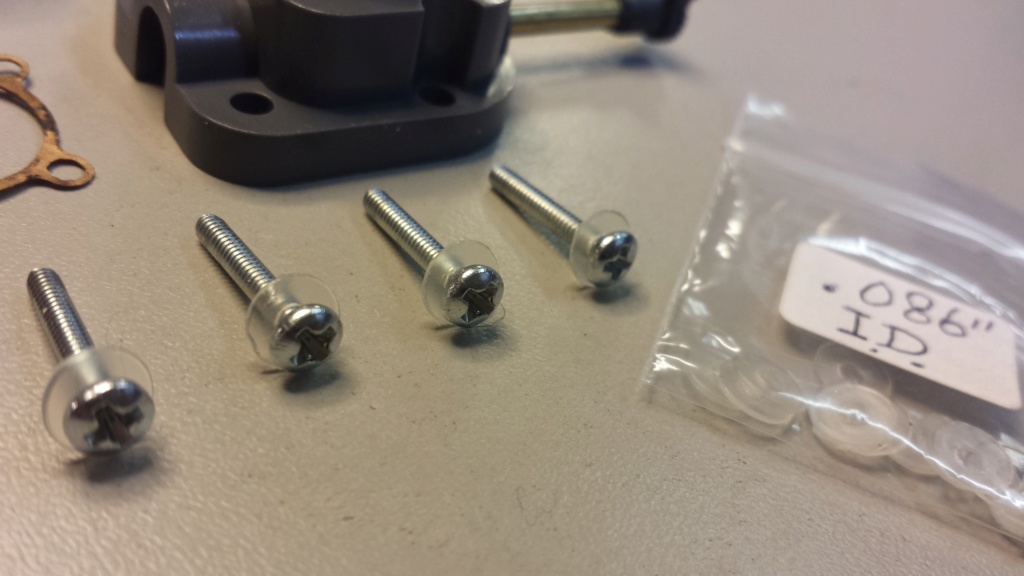
The screws seemed to tighten-up fine.. although the plastic-washers I made are from .020" thick stock. The flange on the choke-tube is .050" thick.. and the case-screws may be of a length to compensate for that. I have a tap to thread the four 2-56 case-holes deeper if need be.
I had also ordered/received "left-hand" starter-springs from ExModel engines, in the two different configurations x4 ea. This engine will use the early (zero-drag) style. The test-propeller will be a "DAL" 5040R two blade. This is a 5 X 4 reverse-pitch (left-hand) drone-propeller. Alternate propellers are Cox 6 x 2 L/H two-blade and 5 x 3 L/H three-blade.
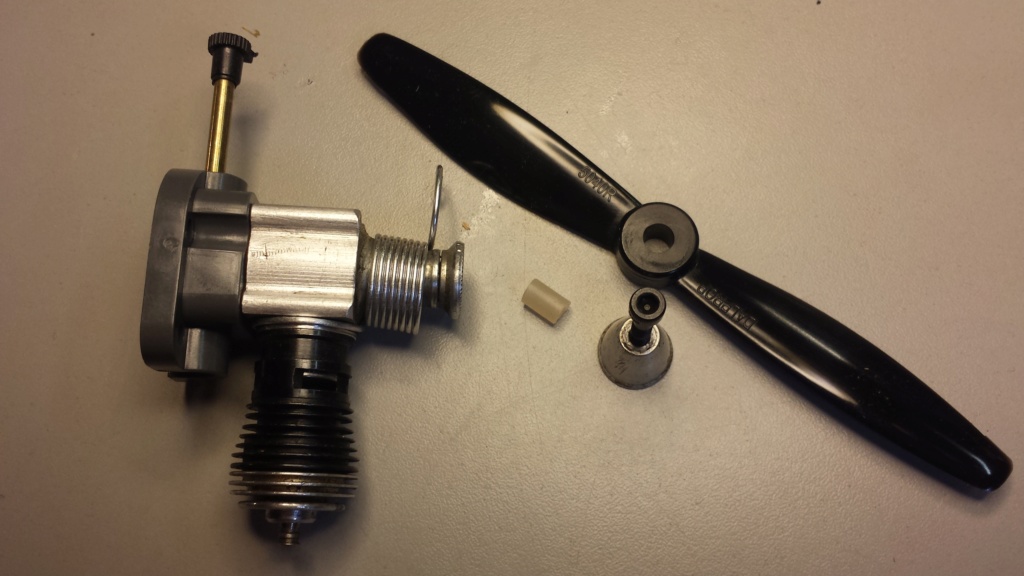
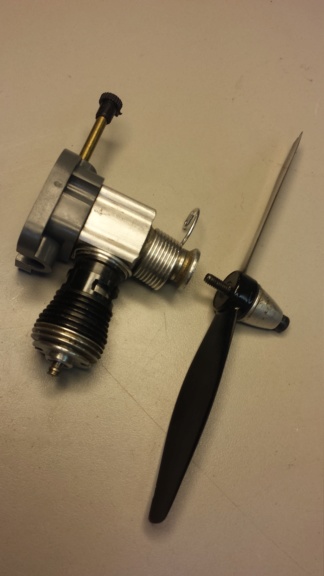

I don't want to use the longer-style needle that's furnished with the Cox Sure-Start carb assy. It's ok for use with the choke-tube because it's somewhat supported near the top, just below the knob.. but I'm not using the choke-tube. The extra length of the longer unsupported-needle lends-itself to vibration and possible wandering of the mixture-setting. I'll probably trim its' length approx. 3/8" shorter.
 Re: Another proposed design by Roddie
Nice job roddie, I like your attention to detail.
Bob
Bob

rsv1cox- Top Poster


Posts : 11250
Join date : 2014-08-18
Location : West Virginia
 Re: Another proposed design by Roddie
rsv1cox wrote:Nice job roddie, I like your attention to detail.
Bob
Thank You Robert. I enjoy the building part very much.
 lead-out guides and outboard tip-weight
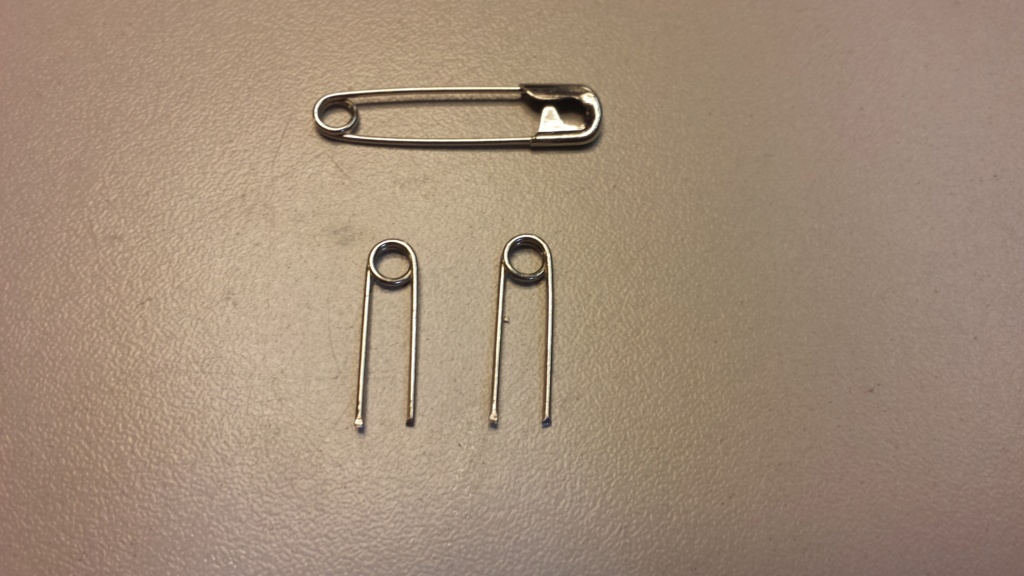
I made-up a pair of lead-out guides using safety-pins.. exactly the same way that I made the pushrod-guide.
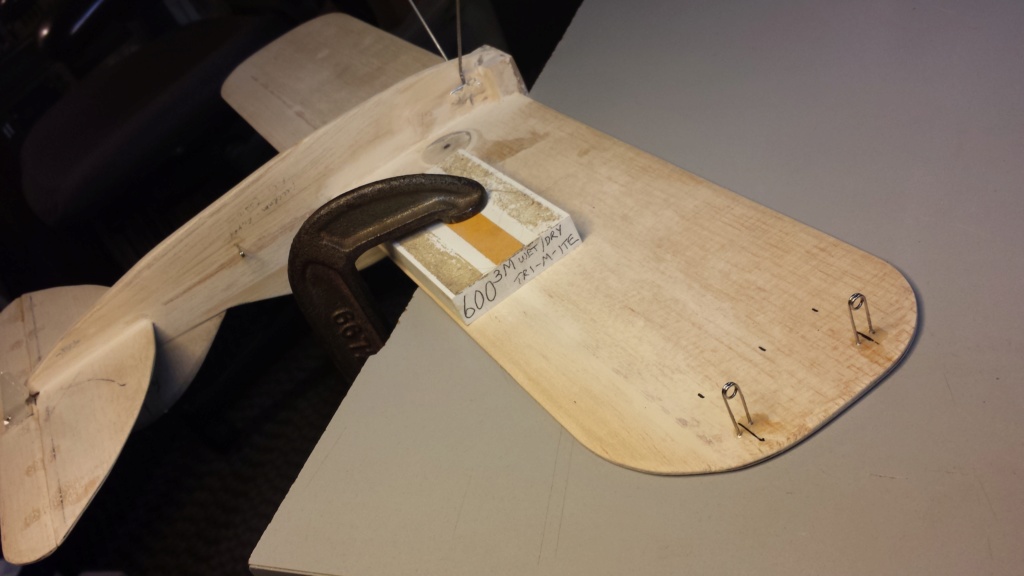
Regarding their "placement"; I carried my bellcranks' 1.625" line-spacing straight-out to the wingtip and then rearward by 1/8". It's a "S.W.A.G." method.. but I'm going with it. I'm applying that same SWAG method to the outboard wingtip weight.
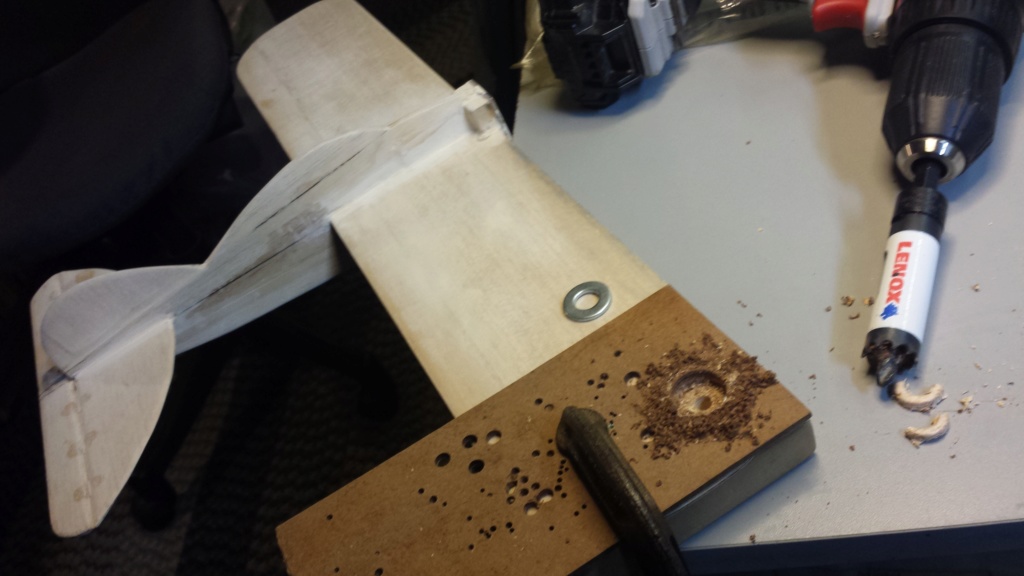
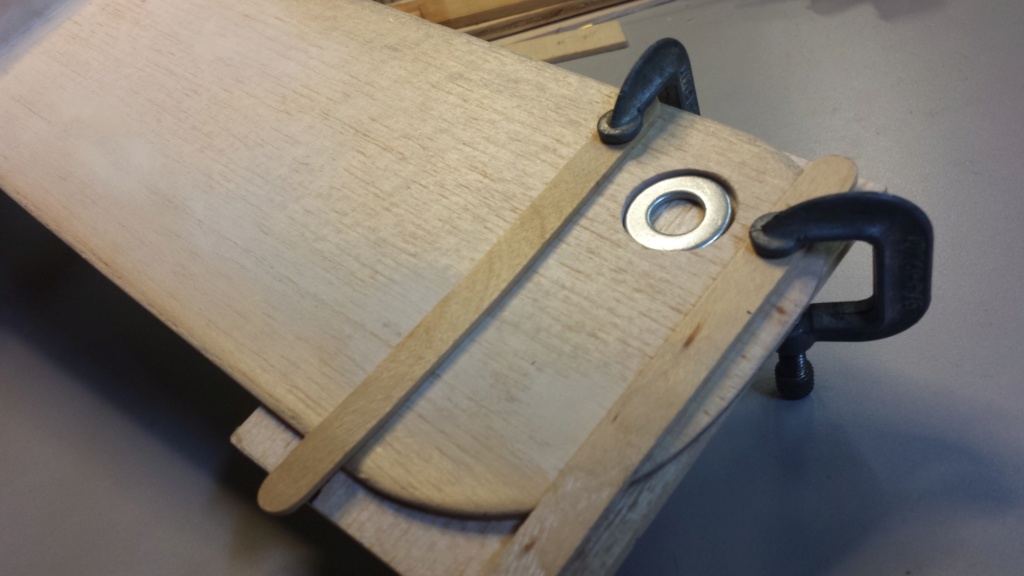
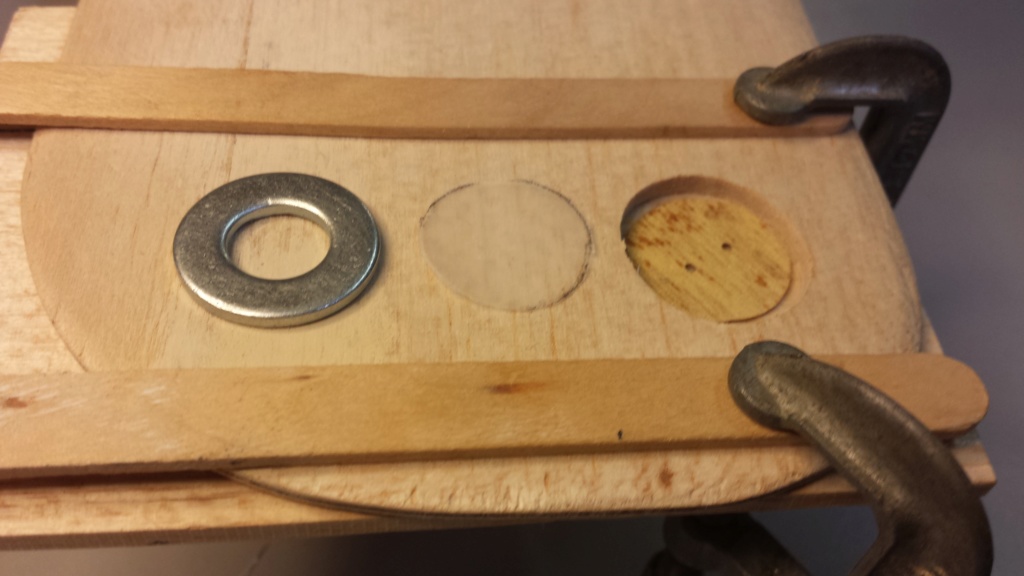
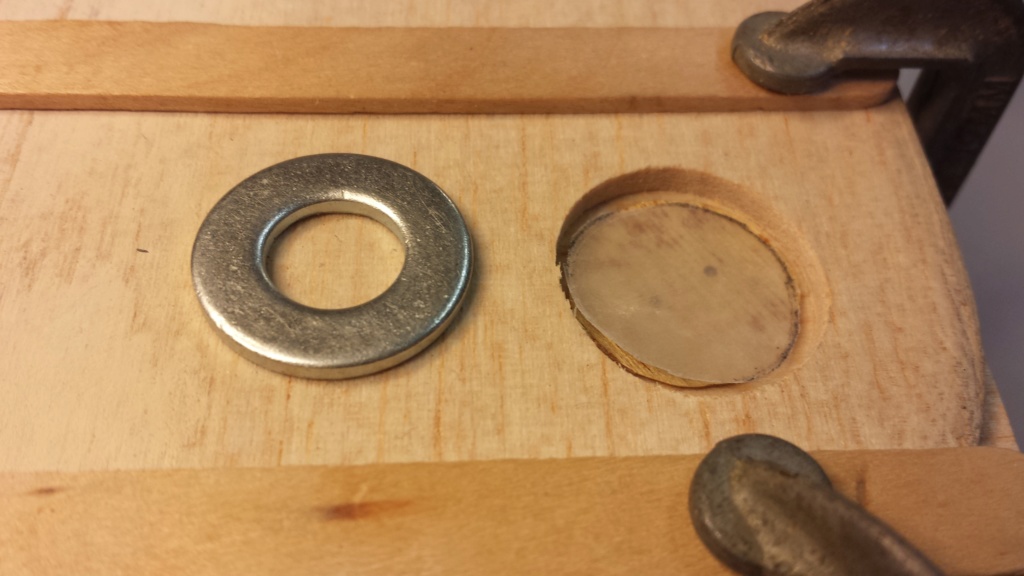
The steel flat-washer shown weighs 2-3gr. I'm not sure how I will anchor it inside the wing.. but probably similar to the way I did it for the P-38.
I wasn't sure whether I wanted/needed any tip-weight. Although this airplane is set-up to run a left-hand propeller, I still felt that there should be some tip-weight to counter the line-weight off-power/engine-out.. if that makes sense. I didn't want to add any unnecessary weight.. which is why I picked a spot closer to the wings' leading-edge. There is little-to-no rudder-offset. I can and may apply some thrust-offset for the shake-down flight.
I'm getting the last few hardware details buttoned-up so I can start to seal the wood for painting.. but there's a few more things I need to figure out. An external fuel-tank mount is one of them..


Regarding their "placement"; I carried my bellcranks' 1.625" line-spacing straight-out to the wingtip and then rearward by 1/8". It's a "S.W.A.G." method..
 but I'm going with it. I'm applying that same SWAG method to the outboard wingtip weight.

The steel flat-washer shown weighs 2-3gr. I'm not sure how I will anchor it inside the wing.. but probably similar to the way I did it for the P-38.
I wasn't sure whether I wanted/needed any tip-weight. Although this airplane is set-up to run a left-hand propeller, I still felt that there should be some tip-weight to counter the line-weight off-power/engine-out.. if that makes sense. I didn't want to add any unnecessary weight.. which is why I picked a spot closer to the wings' leading-edge. There is little-to-no rudder-offset. I can and may apply some thrust-offset for the shake-down flight.
I'm getting the last few hardware details buttoned-up so I can start to seal the wood for painting.. but there's a few more things I need to figure out. An external fuel-tank mount is one of them..
 fuel system
I have a few options for hard (wedge) tanks.. which I have the most experience with. Dan McEntee sold me a bunch of N.O.S. 1/2A size Perfect-brand tanks a few years ago.. and I've installed many of them in models that are waiting to fly; either "again".. or for the first time. I haven't managed to get a model in the air since becoming a member here.. but it will happen.
For this airplane I chose a #18 short/standard wedge of 1/3 oz. capacity.. which equates to 9.85cc's.
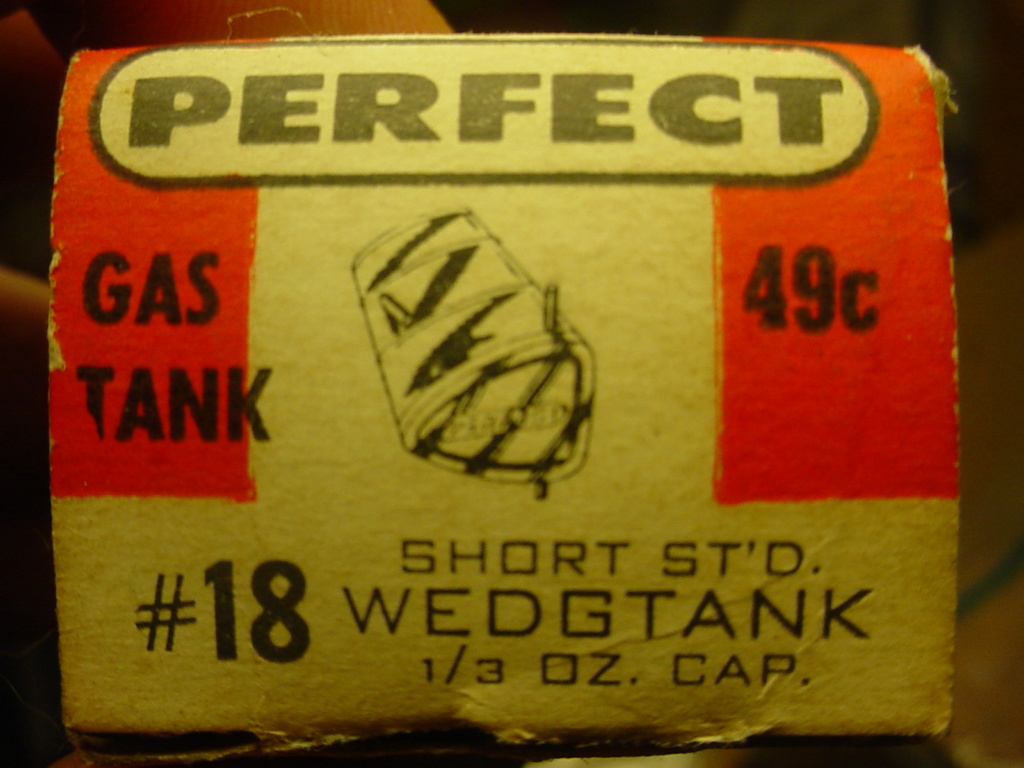
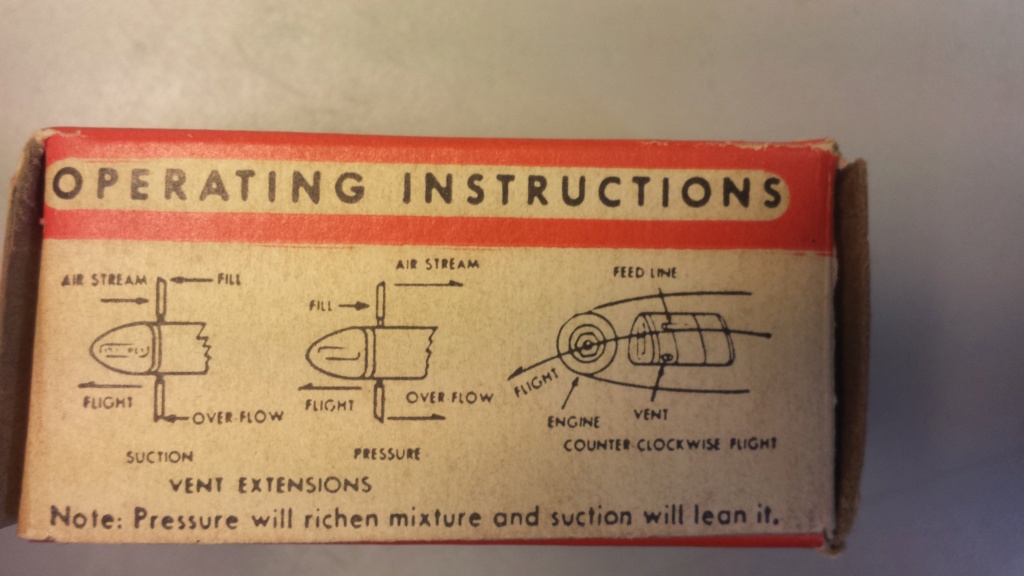
 .. I like N.O.S. model-airplane stuff. It got us to where we are now.
Any-who... I elected for the short-standard configuration to concentrate the fuel-payload nearer the leading-edge of the wing. I have a feeling that this airplane.. equipped with an external fuel-delivery will balance on the "ragged-edge" of the CG once finished.
I'm still grappling with a method of attachment for the tank. I want it to be removable.. in case it doesn't work-out. I'm hoping that the #18 tank works-out. The 9.8cc's should offer plenty of run-time; almost two more cc's than a Golden Bee or Black Widow.
The tank sits atop the sheet-wing.. so I sleeved an overflow/vent-hole with a piece of brass tubing.
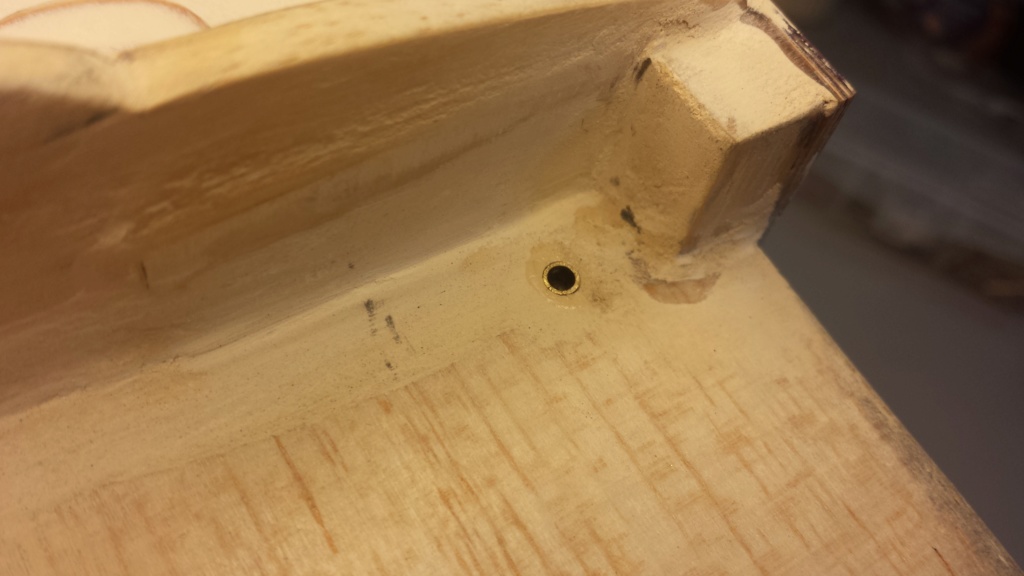
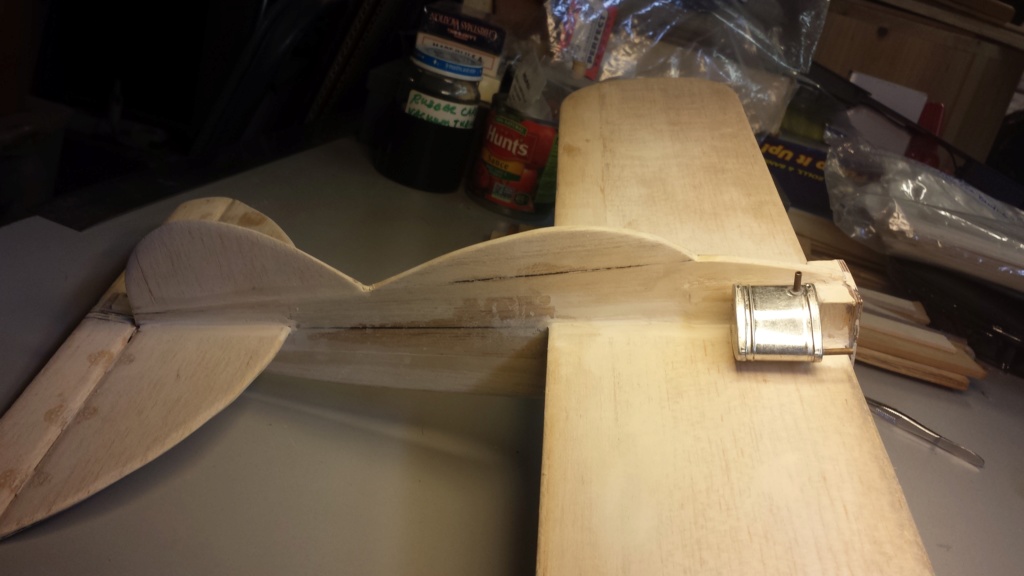
For this airplane I chose a #18 short/standard wedge of 1/3 oz. capacity.. which equates to 9.85cc's.


Any-who... I elected for the short-standard configuration to concentrate the fuel-payload nearer the leading-edge of the wing. I have a feeling that this airplane.. equipped with an external fuel-delivery will balance on the "ragged-edge" of the CG once finished.
I'm still grappling with a method of attachment for the tank. I want it to be removable.. in case it doesn't work-out. I'm hoping that the #18 tank works-out. The 9.8cc's should offer plenty of run-time; almost two more cc's than a Golden Bee or Black Widow.
The tank sits atop the sheet-wing.. so I sleeved an overflow/vent-hole with a piece of brass tubing.


Last edited by roddie on Mon Mar 11, 2019 6:26 pm; edited 1 time in total
 Re: Another proposed design by Roddie
Thinking alike roddie. While there are a few wedge skeptics here I also like the wedgies.
I just laid this one this morning on a bed of epoxy knowing how I dislike rubber bands holding these things. Will it hold.. we will see but I'm betting that it will.

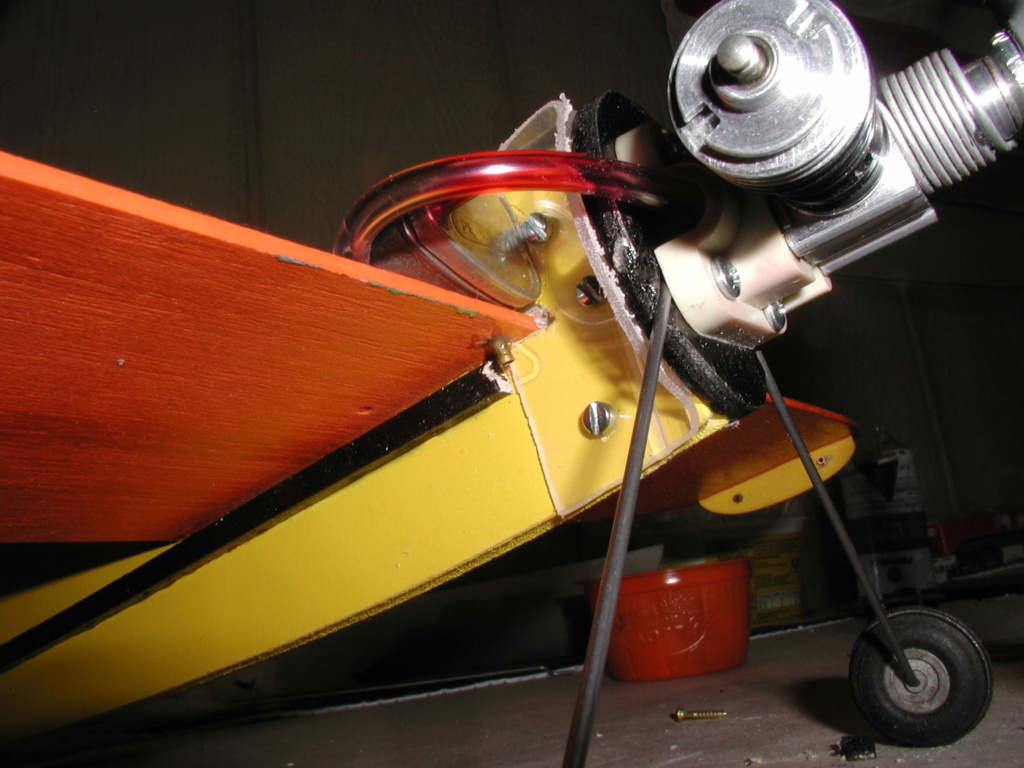
Meant to be easily and quickly built, cheap, and expendable. I see Mark and I flying combat in the Spring.
I just laid this one this morning on a bed of epoxy knowing how I dislike rubber bands holding these things. Will it hold.. we will see but I'm betting that it will.


Meant to be easily and quickly built, cheap, and expendable. I see Mark and I flying combat in the Spring.

rsv1cox- Top Poster


Posts : 11250
Join date : 2014-08-18
Location : West Virginia
 Re: Another proposed design by Roddie
Coming right along Roddie i am still hanging in here to see what ur up to. I have also struggled with the tank mount thing! 

getback- Top Poster


Posts : 10442
Join date : 2013-01-18
Age : 67
Location : julian , NC
 Re: Another proposed design by Roddie
rsv1cox wrote:Thinking alike roddie. While there are a few wedge skeptics here I also like the wedgies.
I just laid this one this morning on a bed of epoxy knowing how I dislike rubber bands holding these things. Will it hold.. we will see but I'm betting that it will.
Meant to be easily and quickly built, cheap, and expendable. I see Mark and I flying combat in the Spring.
Hi Robert! I thought about using epoxy to secure my wedge tank.. but I've almost always provided some type of vibration-damping material to help avoid fuel-foaming. The latest material I've found is a product for lining kitchen shelves. It's a perforated "spongy" rubber/foam type of material. I've also used polyurethane filter-material made for air-conditioners. Both of these products are thin-sheet goods that can be easily cut with scissors.
I do advocate the rubber-band method of securing.. but to each his own.
If I were to use epoxy to secure a Tin-tank, I would probably "rough-up" the Tin-panel and corresponding mounting-surface with 60-80 grit paper for better adhesion. I'm guessing that you probably did that. Even if you didn't.. the bond should still hold.
I'll keep my eye out for the "VCA" reports.. (Vining Combat Adventures) coming this Spring!!


 Re: Another proposed design by Roddie
getback wrote:Coming right along Roddie i am still hanging in here to see what ur up to. I have also struggled with the tank mount thing!
Hey Bro! Yea.. I'm getting some time in on this model.. and I appreciate the support! I had an idea tonight.. but I'm not sure how or "if" I can apply it..

That's a zip-tie mount that I trimmed smaller. It has two holes for "screw-attachment" and also has a "self-stick" foam-tape backing.
These mounts were with my zip-tie "stock".. and I didn't plan on using one.. but we'll see. The zip-tie(s) "alone"... were just something that I thought I could make work somehow.

 Re: Another proposed design by Roddie
She's coming right along there. I myself, am personally on the fence with wedge tanks. This is only because I have only ever used one on a Platter and it just seemed to siphon out all of the fuel from teh tank, regardless of what I did. However, with that said, I have a few here that I have made and have not yet tried out or installed in a plane. I personally like a balloon tank. But that may change when I start to try using my own tanks. Keep up the good work.

NEW222- Top Poster

- Posts : 3896
Join date : 2011-08-13
Age : 46
Location : oakbank, mb
 Re: Another proposed design by Roddie
If you cap the top after filling, it can't siphon out. Leave the cap on during flight as it's not going to hamper inverted flight or maneuvering. The shape of the tank isn't responsible for siphoning.

Ken Cook- Top Poster

- Posts : 5640
Join date : 2012-03-27
Location : pennsylvania
 Re: Another proposed design by Roddie
Thanks Ken, I will give it a try. I thought I had done that as I had tried something before, but am unsure of what. I am just assuming a piece of fuel line plugged on the top/fill line, correct?

NEW222- Top Poster

- Posts : 3896
Join date : 2011-08-13
Age : 46
Location : oakbank, mb
 Re: Another proposed design by Roddie
I'm sure that you have seen this model before roddie, but it is my preferred way to mount a tank in a profile fuselage. I would have done it in the throw-away clone Firebaby but I wasn't sure if the foam core would handle it.
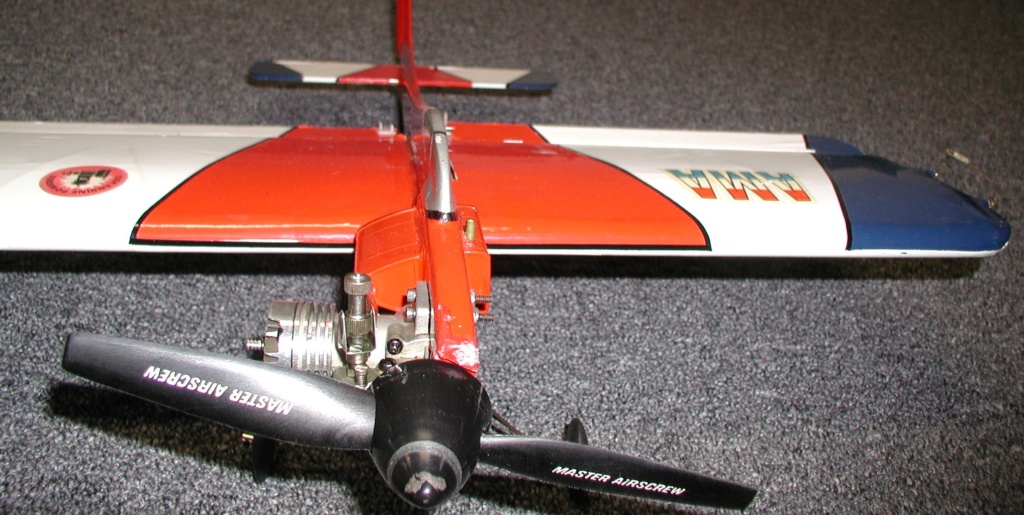
It is secure in it's mount with no padding and over many years of flying, fuel foaming was never an issue if that is measured by engine performance. Mark flew it last fall.
But yes, I agree, a little foam padding can't hurt. In fact I used it in my profile tanked yet to be flown Mosquito build.
Yup, combat time this spring with the FB's.
Bob

rsv1cox- Top Poster


Posts : 11250
Join date : 2014-08-18
Location : West Virginia
 Re: Another proposed design by Roddie
That's what i am thinking with my son may not bee all combat models But have some Fun See if i can show him what the ole mans still got or not LOLYup, combat time this spring with the FB's. Smile wrote:

getback- Top Poster


Posts : 10442
Join date : 2013-01-18
Age : 67
Location : julian , NC
 Re: Another proposed design by Roddie
Hey Bob. Do you not find or feel that mounting the tank in the fuselage hat way to weaken the overall structure? Just to note, not from fuel soaked wood, as I am positive you would have taken very good care of that detail, but rather just the big old hole in the fuse.

NEW222- Top Poster

- Posts : 3896
Join date : 2011-08-13
Age : 46
Location : oakbank, mb
 Re: Another proposed design by Roddie
Just mounted my # 18 wedge tank on my new 1/2 plane . Made some L-shaped brackets and soldered them to the tank . Just drilled and screwed them on to the plane . Will probably put a thin piece of foam rubber under the tank just for a bit of vibration dampening . I hope to post a picture of the complete plane sooner or later . It has a Medallion .049 on it for power . Hope the tank is big enough for a couple minutes of flying .
Mike1484
Mike1484

Mike1484- Gold Member

- Posts : 303
Join date : 2011-10-28
Age : 76
Location : Northern Ohio
 Re: Another proposed design by Roddie
NEW222 wrote:Hey Bob. Do you not find or feel that mounting the tank in the fuselage hat way to weaken the overall structure? Just to note, not from fuel soaked wood, as I am positive you would have taken very good care of that detail, but rather just the big old hole in the fuse.
That was a concern expressed in a thread here long ago that maybe the fuselage would lose some structural integrity or fuel intrusion would be a problem. Fuel intrusion just can't happen as the tank is epoxied in then painted over with two part Hobby Poxie. Maybe some time in the next forty years but so far even after several hard landings (ask Mark) it's still as new.
Bob

rsv1cox- Top Poster


Posts : 11250
Join date : 2014-08-18
Location : West Virginia

NEW222- Top Poster

- Posts : 3896
Join date : 2011-08-13
Age : 46
Location : oakbank, mb
 Re: Another proposed design by Roddie
That’s a clean-looking tank installation Bob. I suppose the tank works as a reinforcement for the fuselage since it is epoxied in. And there probably are some plywood doublers on both sides so the 1/4” balsa does not have to carry all the stress.
A similar construction is used in Dale Kirn’s ”290 Special”, and in the instructions it was emphasized that the tank must be glued in to provide support for the nose area.
A similar construction is used in Dale Kirn’s ”290 Special”, and in the instructions it was emphasized that the tank must be glued in to provide support for the nose area.

KariFS- Diamond Member

- Posts : 2044
Join date : 2014-10-10
Age : 53
 Re: Another proposed design by Roddie
I could fasten/anchor the #18 wedge-tank a few different ways.. but I don't really like any of the methods that I've come up with.. so I won't be using that tank.
I should have known that an external fuel tank could present a challenge; whereas I took design cues from the Goldberg Swordsman 18 and Stuntman 23 models which were "both" designed to use integrally-tanked Cox 1/2A reed-valve engines. There's virtually no "nose-moment" to either model. Their firewalls for the radially-mounted engines are on the wings' leading edge.
Maybe I should forego the product-engine configuration.. and work on getting an integrally-tanked "Golden Bee" configured for this model.. I was hoping for more than 8cc's of fuel payload though..
I've done some research.. and built a few prototype "balloon-tanks".., and this model just might make a good platform for testing one.
I'll concentrate on "both" aspects.. because this model is a new design.. and the "CG" has yet to be established. We shall see how the methods weigh-out..
I should have known that an external fuel tank could present a challenge; whereas I took design cues from the Goldberg Swordsman 18 and Stuntman 23 models which were "both" designed to use integrally-tanked Cox 1/2A reed-valve engines. There's virtually no "nose-moment" to either model. Their firewalls for the radially-mounted engines are on the wings' leading edge.
Maybe I should forego the product-engine configuration.. and work on getting an integrally-tanked "Golden Bee" configured for this model..
 I was hoping for more than 8cc's of fuel payload though..
 I've done some research.. and built a few prototype "balloon-tanks".., and this model just might make a good platform for testing one.
I'll concentrate on "both" aspects.. because this model is a new design.. and the "CG" has yet to be established. We shall see how the methods weigh-out..
 outboard tip-weight (cont.)
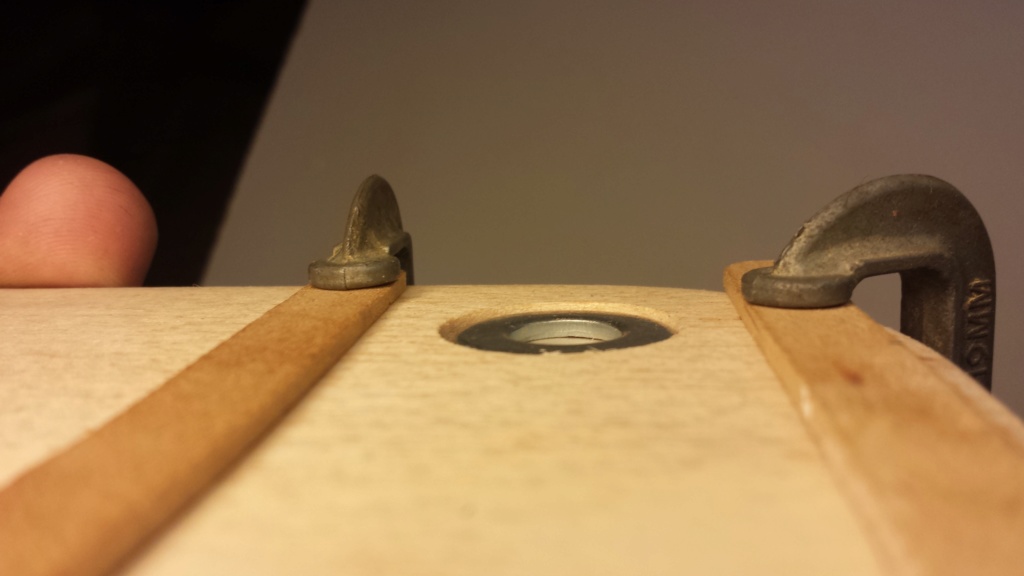
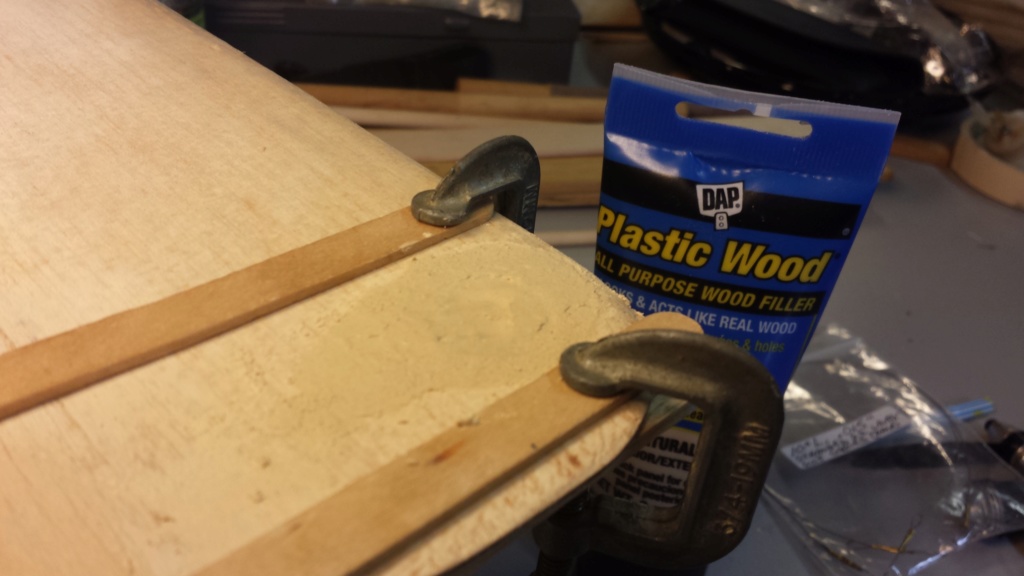
A little more work was done tonight on the outboard wing-tip weight. The previous work on filling the "topside" of the 1/8" balsa sheet-wing was satisfactory.

The underside was filled tonight.. and will be sanded tomorrow.
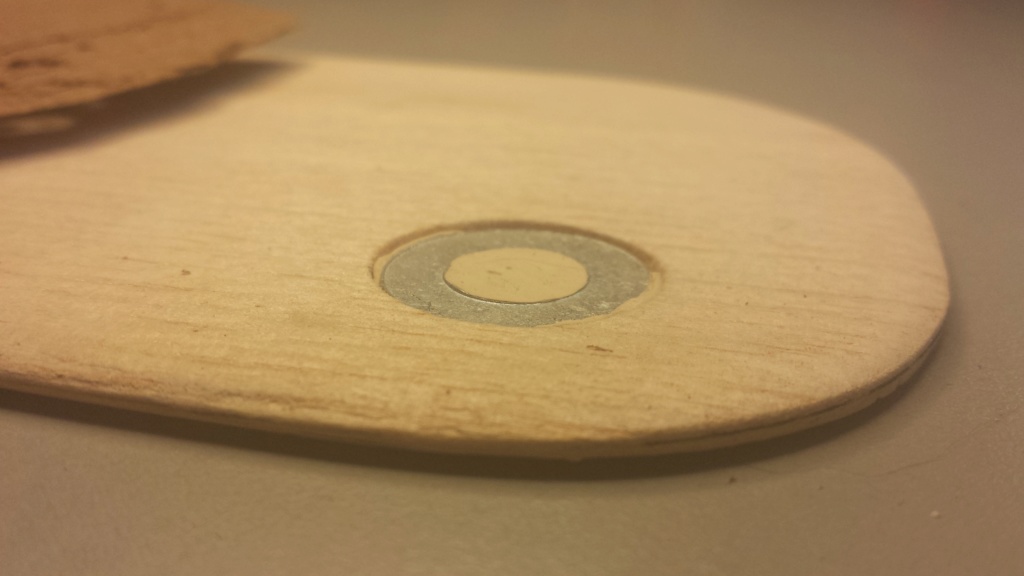
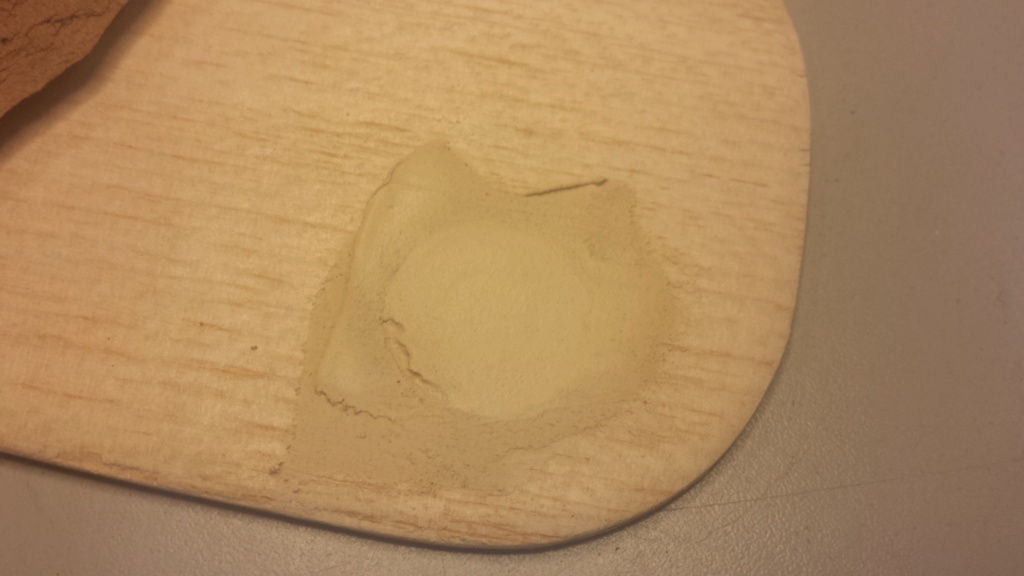
Both top and bottom areas will require a finish-filler application.. but that will be a minor detail.

The underside was filled tonight.. and will be sanded tomorrow.


Both top and bottom areas will require a finish-filler application.. but that will be a minor detail.
 Re: Another proposed design by Roddie
I like that idead of putting the weight in teh wing. I do similar, but instead use 5 minute epoxy. I didn't think that filler would be strng enough and did not want it to fall out. Now after seeing yours, I am now going to change my ways.....

NEW222- Top Poster

- Posts : 3896
Join date : 2011-08-13
Age : 46
Location : oakbank, mb
Page 5 of 7 •  1, 2, 3, 4, 5, 6, 7
 Similar topics
» Roddie's CEF 2019 "RWYB" proposed entry(ies)..
» New P-38 profile scratch build log
» Roddie-Rigger.. a 2005 original design
» Cox Engines - Proposed Users
» CEF speed contest Design Discussions
» New P-38 profile scratch build log
» Roddie-Rigger.. a 2005 original design
» Cox Engines - Proposed Users
» CEF speed contest Design Discussions
Page 5 of 7
Permissions in this forum:
You cannot reply to topics in this forum

 Rules
Rules


