Log in
Search
Latest topics
» Retail price mark-up.. how much is enough?by rsv1cox Today at 12:23 pm
» Tee Dee .020 combat model
by 1/2A Nut Today at 10:34 am
» Happy 77th birthday Andrew!
by rdw777 Today at 10:04 am
» Purchased the last of any bult engines from Ken Enya
by sosam117 Today at 8:15 am
» TEE DEE Having issues
by balogh Today at 7:42 am
» Cox films/videos...
by Coxfledgling Today at 4:46 am
» My N-1R build log
by roddie Today at 12:32 am
» Landing-gear tips
by roddie Yesterday at 6:17 pm
» Roger Harris revisited
by TD ABUSER Yesterday at 2:13 pm
» My latest doodle...
by roddie Yesterday at 10:43 am
» Chocolate chip cookie dough.........
by roddie Fri Nov 22, 2024 1:13 pm
» Free Flight Radio Assist
by rdw777 Fri Nov 22, 2024 9:24 am
Cox Engine of The Month
P-38 Lightning-Roddie style..
Page 3 of 9
Page 3 of 9 •  1, 2, 3, 4, 5, 6, 7, 8, 9
 P-38
P-38
Its looking real good, You've done a great job!!
What brand of paint are you going to use for the finish?
RK Flyer
What brand of paint are you going to use for the finish?
RK Flyer


RK Flyer- Gold Member

- Posts : 274
Join date : 2013-07-16
Location : Somerset, Kentucky
 Re: P-38 Lightning-Roddie style..
Marleysky wrote:She’s lookin good! Allways like it when the pieces put together, start to look like a airplane! I do like your balance station.
Thank You Rene! Yes.. it's good when pieces can finally be glued together.. rather than propped-up or pinned. I made that balance station recently.. and checked quite a few of my airplanes with it.
 Re: P-38 Lightning-Roddie style..
RK Flyer wrote:Its looking real good, You've done a great job!!
What brand of paint are you going to use for the finish?
RK Flyer
Thank you very much Richard! I looked at some samples of Rust-Oleum aerosol a few days ago at Walmart. There was a "satin" Navy blue that I liked. I just don't know how fuel-resistant satin Rust-Oleum is. Whatever I end up using; I will allow it to cure for several weeks before exposing it to glow-fuel exhaust wastes.
There's still a LOT of work to be done before painting. The fuel-tanks need mounts, the bellcrank mount needs beefing-up, wing-tip lead-out guides.. fillets.. etc.
 Re: P-38 Lightning-Roddie style..
Hey Roddie, Nice Job on the P38, I have found Rustolium Camo Paints not to be very fuelproof. They do seem to get a little better after a few weeks of Curing, But not much, However I have found the Krylon Paints that I have used pretty good
Last edited by akjgardner on Wed Jan 24, 2018 6:18 am; edited 1 time in total

akjgardner- Diamond Member


Posts : 1602
Join date : 2014-12-28
Age : 65
Location : Greensberg Indiana
 Paint for the P-38???
akjgardner wrote:Hey Roddie, Nice Job on the P38, I have found Rustolium Camo Pasints not to be very fuelproof. They do seem to get a little better after a few weeks of Curing, But not much, However I have found the Krylon Paints that I have used pretty good
Thanks Joe. Yea.. choosing paint nowadays gives me fits. I haven't flown anything in so long; the balsa models that I "did fly" back in the day were all finished in either Pactra "Aero-Gloss" dope, "Formula-U" aerosol.. or Top-Flite "Mono-Kote".
I'll probably open-up a "can-o-worms" with this statement.. but most aero-modelers of decades past weren't using high-nitro glow-fuels in general. The finishing-products that were commonly-available... provided adequate protection for glow-fuel containing 10% nitro. The racing and combat modelers were likely experimenting with finishes that would hold-up to higher-nitro glow-fuels... just like those of us who currently run our Cox engines for maximum-performance using 25%+ nitro in the fuel-mix. It's tough when you consider the need to "seal" the wood.. apply the color-coat(s).. then seal them in the desired sheen.. (matte, semi-gloss, or gloss).. while trying to keep the weight to a minimum. If there was an easier way to provide a fuel-proof finish to a glow-engine powered-model.. we'd all be standing in line to buy it.
I for one; don't own any spray-painting equipment. I don't have a compressor or a spray-gun. If I did.. then it would make more sense to invest in some of the newer proven products that are available.
It's basically like having to choose the highest-rated (output) engine for a given-design; in order to assure proper performance, once the finish is applied.
 P-38 .049 Cox reed-valve engines..
The engines that are "dangling" from my model.. are merely dangling...  in-place as "teasers".. and for the purpose of retrieving preliminary balance-data. They are currently being held in-place by one screw.
They will however be configured as "product-engines" with stock horseshoe-style backplates. The airplane with engines weighs-in at just under 8oz. in its current state of build. I plan to configure the engines with #1 dual-bypass/SPI cylinders.. and stock Cox #325 glow-heads. Reed-valves will likely be .005" thick oval-shaped Mylar.
The props (planned) are the "DAL" 5 x 4's that I sourced recently. They came as lefts and rights.. which was an attractive aspect for a Cox .049/twin-application.
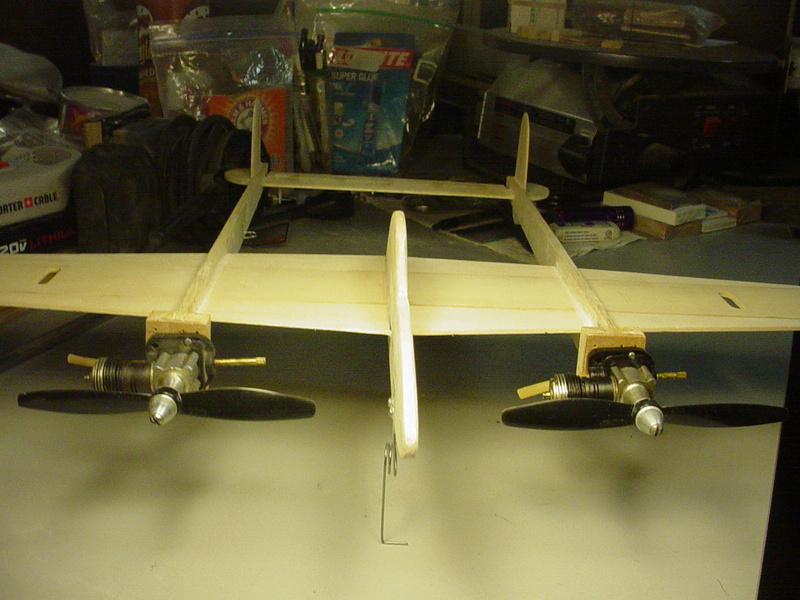
Planned control-lines are Dyneema/Spectra synthetic-braid 15# x 35 feet.
They will however be configured as "product-engines" with stock horseshoe-style backplates. The airplane with engines weighs-in at just under 8oz. in its current state of build. I plan to configure the engines with #1 dual-bypass/SPI cylinders.. and stock Cox #325 glow-heads. Reed-valves will likely be .005" thick oval-shaped Mylar.
The props (planned) are the "DAL" 5 x 4's that I sourced recently. They came as lefts and rights.. which was an attractive aspect for a Cox .049/twin-application.

Planned control-lines are Dyneema/Spectra synthetic-braid 15# x 35 feet.
 Re: P-38 Lightning-Roddie style..
Hi Roddie , The plane is coming along nicely !! I really like the landing gear you configured on there Good Fun Man . I am sure you know bee sure to fill those extra holes in the firewall good with a fuel proofer / speaking of paint the Krylon paints i have used were good to 25% Nitro after that it ran the color away  You know you can buy paint sprayers that work off air cans / or check the pawn shops...


getback- Top Poster


Posts : 10442
Join date : 2013-01-18
Age : 67
Location : julian , NC
 Re: P-38 Lightning-Roddie style..
getback wrote:Hi Roddie , The plane is coming along nicely !! I really like the landing gear you configured on there Good Fun Man . I am sure you know bee sure to fill those extra holes in the firewall good with a fuel proofer / speaking of paint the Krylon paints i have used were good to 25% Nitro after that it ran the color awayYou know you can buy paint sprayers that work off air cans / or check the pawn shops...

Thanks Eric! Good of you to mention that about the extra engine-mount-holes. Have you used satin/flat Krylon? I'm wondering if the gloss paints do a better job at repelling the fuel mist?
My brother gave me an old Badger air-brush system a few years ago. I've never used it. I think it needs a new can of propellant.

 Re: P-38 Lightning-Roddie style..
Regarding that old Badger, I had a Humbrol in High School. That air brush got a steady diet of air from an old, big truck tire.
While air was cheaper that way, I got the benefit of aerobic excersize filling the tire with a bicycle tire pump. During longer spraying periods I would haul it to the school's auto shop to fill it for free.
While air was cheaper that way, I got the benefit of aerobic excersize filling the tire with a bicycle tire pump. During longer spraying periods I would haul it to the school's auto shop to fill it for free.
944_Jim- Diamond Member


Posts : 2022
Join date : 2017-02-08
Age : 59
Location : NE MS
 Re: P-38 Lightning-Roddie style..
good trick Jim, greenie for that one

akjgardner- Diamond Member


Posts : 1602
Join date : 2014-12-28
Age : 65
Location : Greensberg Indiana
 Re: P-38 Lightning-Roddie style..
I will give a greenie for that too Jim , pumping an full size tire up with the ole manual tire pump was a JOB , done that before  Use that thing Roddie ( a least give it a try to see if you like it ((( I like mine can spray parts , plane in a jiffy )) The only thing is getting the mixture right if you run out on the first spray 's ? I have used Gloss and regular but not the Satin Roddie .


getback- Top Poster


Posts : 10442
Join date : 2013-01-18
Age : 67
Location : julian , NC
 Re: P-38 Lightning-Roddie style..
Here's one for your longer spray sessions (and a spare in the middle if you happen to run out of air in a critical point).


KariFS- Diamond Member

- Posts : 2044
Join date : 2014-10-10
Age : 53
 Re: P-38 Lightning-Roddie style..
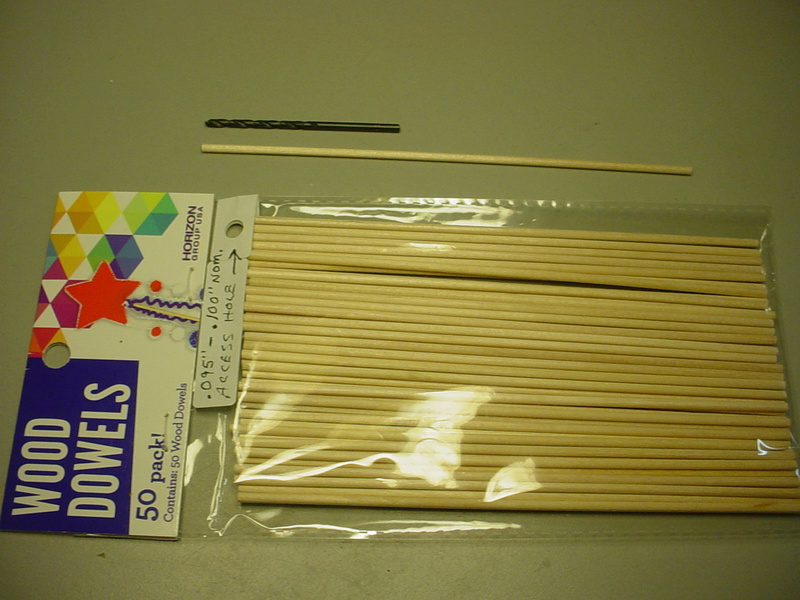
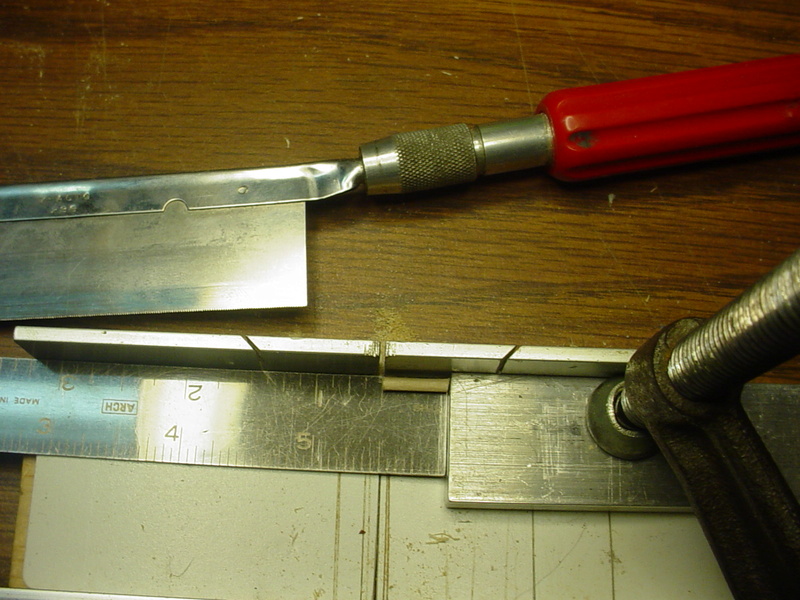
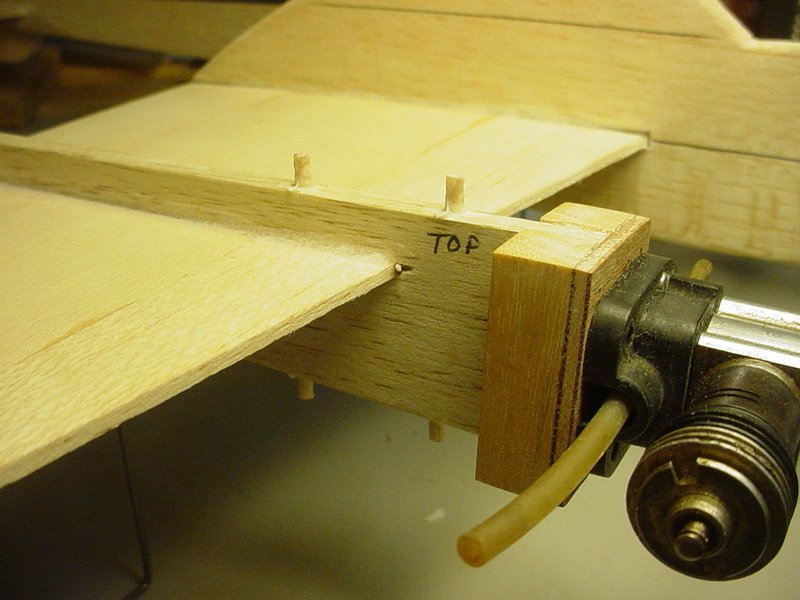
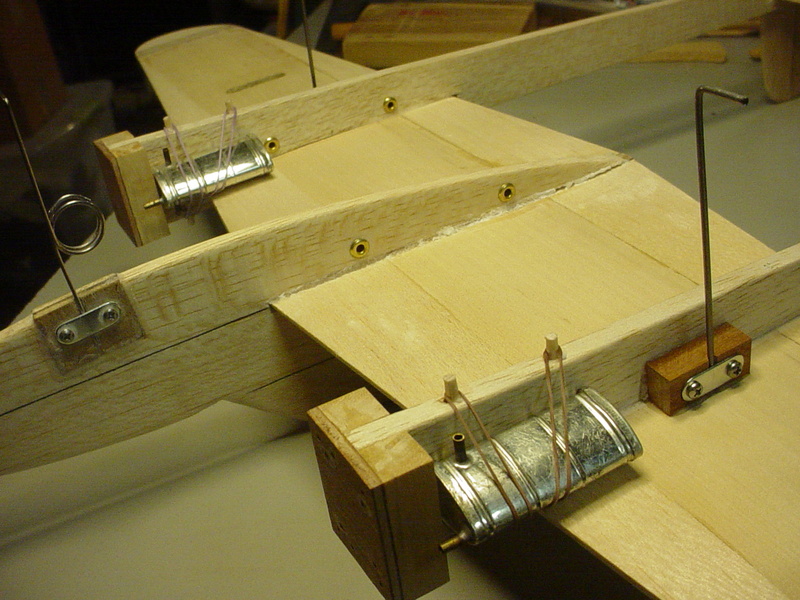
I hope to get some work done on this model later in the afternoon today. The wedge-tanks need mounts. I'll likely imbed pairs of small hardwood dowels (pegs) top and bottom into the 1/4" balsa. Rubber-bands hook over the pegs to hold the tank in place against the side-wall. The wing's leading-edge is posing an issue with the rear-set of rubber-band pegs.. but I think I have a solution for that.
These are Perfect-brand #17 tanks which are .25oz. (7.4cc) capacity.
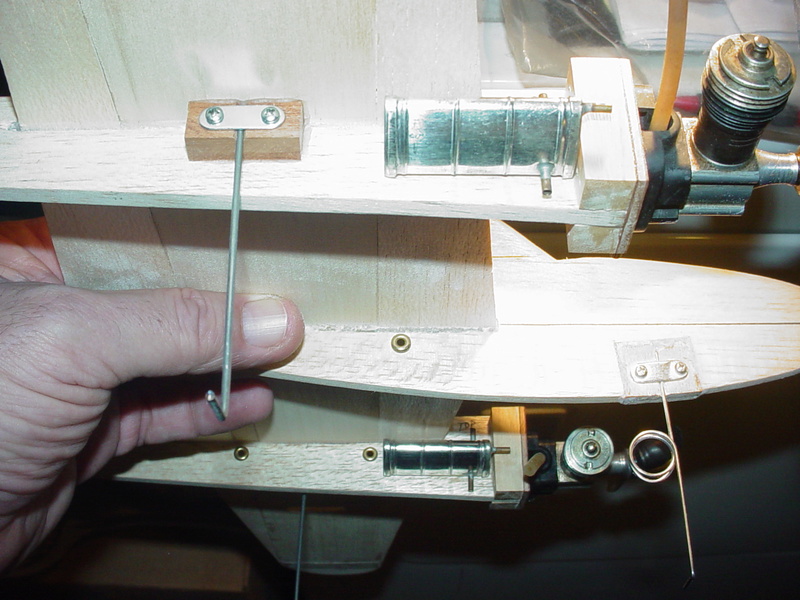
These are Perfect-brand #17 tanks which are .25oz. (7.4cc) capacity.

 P-38 Lightening
Roddie....You are making great progress on the P-38! Are those tanks 3/4 oz?
Keep up the good work.
I still have a couple of planes on the bench so it wont be long before they are complete!
RK Flyer
Keep up the good work.
I still have a couple of planes on the bench so it wont be long before they are complete!
RK Flyer


RK Flyer- Gold Member

- Posts : 274
Join date : 2013-07-16
Location : Somerset, Kentucky
 Re: P-38 Lightning-Roddie style..
RK Flyer wrote:Roddie....You are making great progress on the P-38! Are those tanks 3/4 oz?
Keep up the good work.
I still have a couple of planes on the bench so it wont be long before they are complete!
RK Flyer
Hi Richard. Thank You so much! The tanks are 1/4oz. (Perfect #17) which equals 7.4cc's. This will yield a run-time just slightly less than that of a Cox Golden Bee .049 which has an 8cc tank. I figure that should be plenty to have some fun with.
 Re: P-38 Lightning-Roddie style..
WooHoo! Getting closer, and looking better every day!

NEW222- Top Poster

- Posts : 3896
Join date : 2011-08-13
Age : 46
Location : oakbank, mb
 Re: P-38 Lightning-Roddie style..
NEW222 wrote:WooHoo! Getting closer, and looking better every day!
Thanks Chancey! I need to do some fillet-work at the wing/fuse joints. There's twelve points to fillet on this model. I'm going to try using some spackle-paste and apply a thin bead using a syringe.
I went a bit "heavy" with the thin CA/baking-soda accelerator on the center (cockpit/wing) joint.
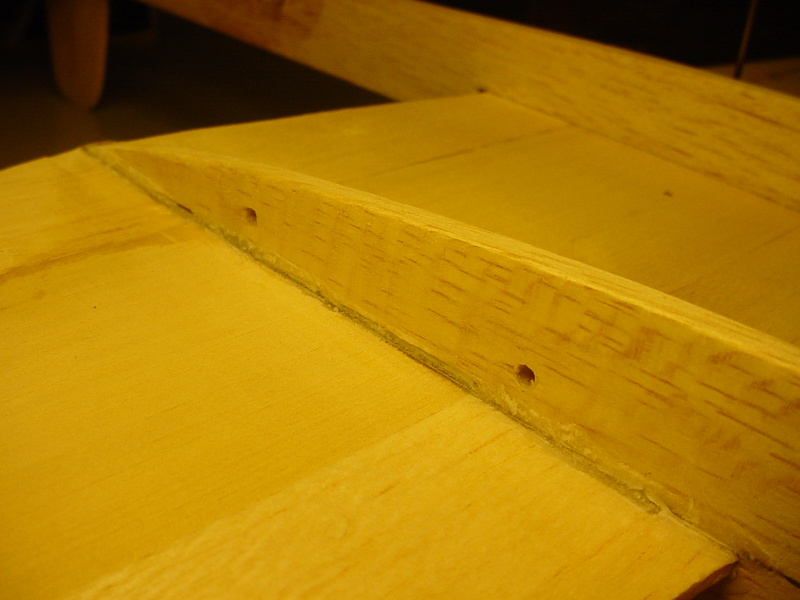
I had cut the wing-slot too wide.. then to make matters worse..
It's one of those things that I didn't plan-on. A mistake that cost the build; in "time".. figuring-out a viable solution, utilizing extra materials that I had on-hand.. and their application; to assure a strong-lightweight solution.
I actually do "pride myself" in having a myriad of materials in my shop. The downside is.. my shop is small; so as I add items.. efficient organization is a continual work in progress.
I'd like to improve my "finishing-skills" as a modeler. I can't hold a candle to some of the folks here on CEF who show their Masterful skills in the build-photos that they post. Aesthetics have always been secondary to reliable mechanical-function for me.
 fillets
Today I decided to try making some fillets. The "plan" was to load some spackling-paste into a syringe.. and inject a bead along the wing/fuse joints.


As I mentioned.. there are 12 wing-joints on this model. I had a standard 10-12cc "oral-syringe" that came from a pharmacy.. and loaded the spackle into the barrel using a small flat tool having a radius on the end.. (a craft/popsicle-stick would work fine for this..)
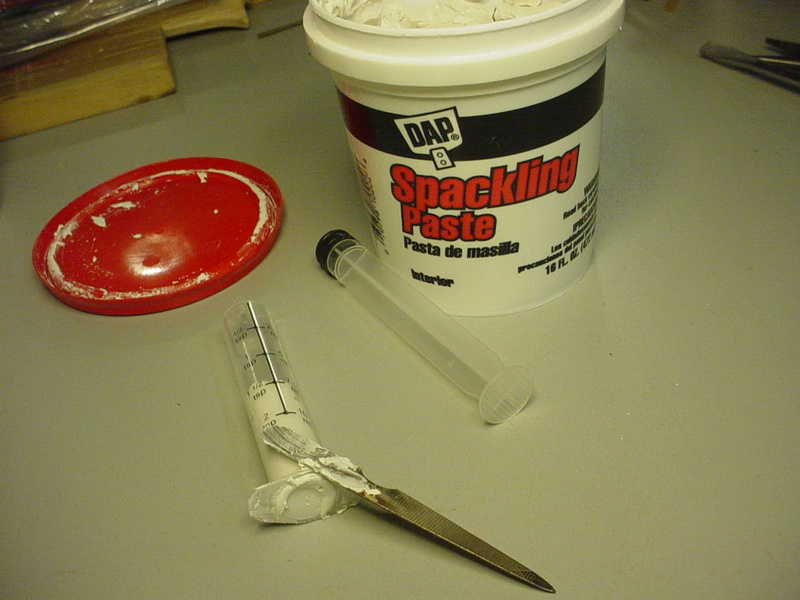
My syringe had an opening of just over 1/16" diameter. (.067"/1.7mm) The ideal "bead-size" was approximately 3/32" (2.4mm) diameter.. for forming a fillet using a 1/4" (6mm) dowel-rod.. or tube.
Keeping a square paper-towel "pad" soaked with water in your work-area, helps to keep your tools/fingers/area clean. Dragging the "dowel-rod/tube" through the bead of spackle to form the fillet, causes the dowel/tool to accumulate spackle. "Twirling" the tool on the wet towel removes the excess-spackle.. and also leaves a wet-surface on the tool for smoothing-over the fillet. As with many finishing tasks.. it takes a little practice to develop a technique that you're happy with.
While I had the spackling-paste out.. I decided to fill some spots on the "T33-Dee".. and "Flying-Blind" CEF 2018 Speed-Models..

The above (T33-Dee) model; I had carelessly removed/reinstalled the wing, causing the retrofitted main-gear wire to "groove" the bottom-side of the soft-balsa wing-panel.. ... It was "one of those nights" where I should have been more careful.. and wasn't. On the "up-side".. I got a LOT of other things done.. where I usually procrastinate.
The "Flying-Blind" model received four fillets to the main-wing joint.

It may take a second-application of spackle to achieve the desired results.. but that's "OK"... I can't paint until the weather cooperates. So far.... it's been a fairly mild February here in Rhode Island. I'd like to see 50-60F temps consistent into March.. and maybe I can do some painting.


As I mentioned.. there are 12 wing-joints on this model. I had a standard 10-12cc "oral-syringe" that came from a pharmacy.. and loaded the spackle into the barrel using a small flat tool having a radius on the end.. (a craft/popsicle-stick would work fine for this..)

My syringe had an opening of just over 1/16" diameter. (.067"/1.7mm) The ideal "bead-size" was approximately 3/32" (2.4mm) diameter.. for forming a fillet using a 1/4" (6mm) dowel-rod.. or tube.
Keeping a square paper-towel "pad" soaked with water in your work-area, helps to keep your tools/fingers/area clean. Dragging the "dowel-rod/tube" through the bead of spackle to form the fillet, causes the dowel/tool to accumulate spackle. "Twirling" the tool on the wet towel removes the excess-spackle.. and also leaves a wet-surface on the tool for smoothing-over the fillet. As with many finishing tasks.. it takes a little practice to develop a technique that you're happy with.
While I had the spackling-paste out.. I decided to fill some spots on the "T33-Dee".. and "Flying-Blind" CEF 2018 Speed-Models..

The above (T33-Dee) model; I had carelessly removed/reinstalled the wing, causing the retrofitted main-gear wire to "groove" the bottom-side of the soft-balsa wing-panel..
 ... It was "one of those nights" where I should have been more careful.. and wasn't. On the "up-side".. I got a LOT of other things done.. where I usually procrastinate.
 The "Flying-Blind" model received four fillets to the main-wing joint.

It may take a second-application of spackle to achieve the desired results.. but that's "OK"... I can't paint until the weather cooperates. So far.... it's been a fairly mild February here in Rhode Island. I'd like to see 50-60F temps consistent into March.. and maybe I can do some painting.
 Re: P-38 Lightning-Roddie style..
Hey! You are making progress. That fillet job was very interesting. I didn’t see any real “gaps “ in your construction that really required a filler. I’m gonna guess you just want a smooth beveled transition from fuse to wing, not to fill gaps in figment? I’m not sure from the amount you used there would be a huge difference in weight between the spackle you’ve used versus the light weight spackle that is used to fill small holes in drywall or as a filler, leveling material on balsa. The stuff I have used is like a fluffy frosting and weighs practically nothing, and sands off real smooth.
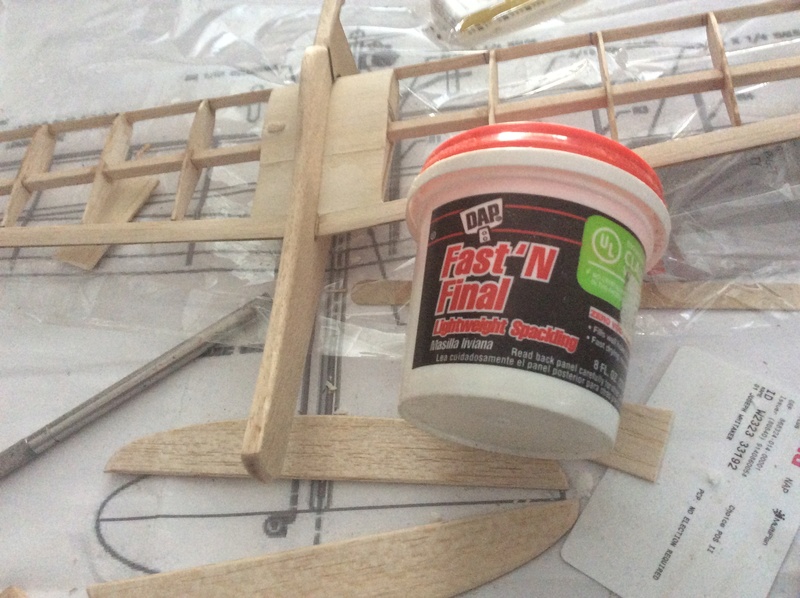
Here you can barely see the filler on the TE portion of the wing sheeting.

Here you can barely see the filler on the TE portion of the wing sheeting.

Marleysky- Top Poster


Posts : 3618
Join date : 2014-09-28
Age : 72
Location : Grand Rapids, MI
 Re: P-38 Lightning-Roddie style..
You had better luck with that lightweight spackling than I did Rene. I could not get it to apply correctly whether I wet the wood or not using that exact same brand. I finally resorted to my old standby, the stuff that roddie is using. But my preferred method has always been with epoxy smoothed out with either my finger or with a glove. Done right it does not need sanding and has always accepted paint well.
I'm eager to use this for fillets where strength is not a prime concern. Self mixing and applies as a bead. Problem is it's a one timer, so it must be used up on a model that is ready for it.


I'm eager to use this for fillets where strength is not a prime concern. Self mixing and applies as a bead. Problem is it's a one timer, so it must be used up on a model that is ready for it.


rsv1cox- Top Poster


Posts : 11252
Join date : 2014-08-18
Location : West Virginia
 Re: P-38 Lightning-Roddie style..
You better be quick on the draw with that 1 minute epoxy. It comes out hot out of the mixing tube and is gelled up in short order. No time for do overs with that stuff. I learned the hard way gluing a 3D printed SR-71 together. The seams are not quite even. I went back to the 5 minute stuff after that.

Jason_WI- Top Poster


Posts : 3123
Join date : 2011-10-09
Age : 49
Location : Neenah, WI
 Re: P-38 Lightning-Roddie style..
Thanks VERY MUCH for the replies Bob and Rene.. I don't have a lot of experience with making fillets. I "do" have a lot of experience with sanding... 


I don't really mind sanding... as long as it's not laborious. There's no need for that when we're building a small "sport-model". I try to "draw the line" there. It really depends on how I feel about the project. If it's a "one-of-a-kind" thing.. it would deserve some extra-attention... but I've never built "that type" of model.
Machines that "work".. or.. models of them.... don't stay "pretty-looking" for long after their operation. It's up to us to clean them up afterwards... and make them ready for their next mission......
 Re: P-38 Lightning-Roddie style..
You sure have put a lot of time, thought, and effort into that model roddie. It's going to turn out wonderful. I can't wait to see your paint scheme. As I have mentioned before and you alluded to, everything from solid to quite involved.
Bob
Bob

rsv1cox- Top Poster


Posts : 11252
Join date : 2014-08-18
Location : West Virginia
 Re: P-38 Lightning-Roddie style..
Marleysky wrote:Hey! You are making progress. That fillet job was very interesting. I didn’t see any real “gaps “ in your construction that really required a filler. I’m gonna guess you just want a smooth beveled transition from fuse to wing, not to fill gaps in figment?
There were some gaps in the cockpit-module joint.. but all of the wing-slot joints were glued-up using thin-CA, then sprinkled with baking-soda. This formed small fillets which had a crystalline texture and were not uniform. Left untreated; these glue-fillets would have looked crappy.
I've never used the "lightweight" spackle. I should give it a try.. but I didn't use very much of the regular/heavier stuff on this model. As I mentioned; the bead-size was approx. 3/32" and was filleted using a 1/4" diameter wood dowel. This combination was just enough to form a small/neat radius.. with a minimum ridge needing sanding. The syringe worked really well.. and was easy to clean-up afterward, using warm water.
Page 3 of 9 •  1, 2, 3, 4, 5, 6, 7, 8, 9
 Similar topics
» Wen Mac P-38's
» Red Wen Mac P-38 Lightning
» 1:64 scale Diecast (Hot Wheels)
» The P-38 Lightning Wow factor
» Baby Lightning Streak
» Red Wen Mac P-38 Lightning
» 1:64 scale Diecast (Hot Wheels)
» The P-38 Lightning Wow factor
» Baby Lightning Streak
Page 3 of 9
Permissions in this forum:
You cannot reply to topics in this forum

 Rules
Rules


