Log in
Search
Latest topics
» Retail price mark-up.. how much is enough?by rsv1cox Today at 12:23 pm
» Tee Dee .020 combat model
by 1/2A Nut Today at 10:34 am
» Happy 77th birthday Andrew!
by rdw777 Today at 10:04 am
» Purchased the last of any bult engines from Ken Enya
by sosam117 Today at 8:15 am
» TEE DEE Having issues
by balogh Today at 7:42 am
» Cox films/videos...
by Coxfledgling Today at 4:46 am
» My N-1R build log
by roddie Today at 12:32 am
» Landing-gear tips
by roddie Yesterday at 6:17 pm
» Roger Harris revisited
by TD ABUSER Yesterday at 2:13 pm
» My latest doodle...
by roddie Yesterday at 10:43 am
» Chocolate chip cookie dough.........
by roddie Fri Nov 22, 2024 1:13 pm
» Free Flight Radio Assist
by rdw777 Fri Nov 22, 2024 9:24 am
Cox Engine of The Month
P-38 Lightning-Roddie style..
Page 7 of 9
Page 7 of 9 •  1, 2, 3, 4, 5, 6, 7, 8, 9
 Re: P-38 Lightning-Roddie style..
Don't rush it Roddie just because of the membership thing. Fly when you're prepared, not just because of a certain date. If you feel you really need to fly, do so with a plane you don't love so much. Sounds like you have a few options. You've put a lot of effort into the Lightning. Don't hurry & spoil things.

Oldenginerod- Top Poster

- Posts : 4018
Join date : 2012-06-15
Age : 62
Location : Drouin, Victoria
 Re: P-38 Lightning-Roddie style..
Remove the rubber engine mounts. Engines need to be mounted solid or they will vibrate like crazy and cause really crappy runs.
Looks like you are almost there. Is this going to result in some actual air time?
Looks like you are almost there. Is this going to result in some actual air time?

Cribbs74- Moderator


Posts : 11907
Join date : 2011-10-24
Age : 50
Location : Tuttle, OK
 Re: P-38 Lightning-Roddie style..
Looking very good there with the progress. Somehow I have missed this thread for a bit. However just a note for next time. I just cleaned up a product engine with horseshoe backplate last week. I already knew not to put plastic parts in the crock pot, so instead, I opted to put all my plastic bits into a baby food jar with some nitro fuel. I left them overnight and used a toothbrush on them in the morning, and everything came off very easily with no effort. Just throwing out another option.

NEW222- Top Poster

- Posts : 3896
Join date : 2011-08-13
Age : 46
Location : oakbank, mb
 Re: P-38 Lightning-Roddie style..
I was wondering about that same thing ,, Roddie just glass the holes over with some CA will work fine . As was said get something in the air before trying to fly the twin will give you some handle time you haven't had in a LOOONG time . The bird is looking good !Cribbs74 wrote:Remove the rubber engine mounts. Engines need to be mounted solid or they will vibrate like crazy and cause really crappy runs.
Looks like you are almost there. Is this going to result in some actual air time?


getback- Top Poster


Posts : 10442
Join date : 2013-01-18
Age : 67
Location : julian , NC
 Re: P-38 Lightning-Roddie style..
Ken Cook wrote:Your really overthinking this. Add more tip weight. 3/4 oz. to start and retract as needed.
Yes.. unfortunately it's my nature. I wasn't planning to apply any outboard tip-weight.. because of the control-system hardware being located on the "outboard" wing-panel.. and the elevator-pushrod running down the inside of the outboard tail-boom. I suppose I should "play it safe".. and add some tip-weight.
A while back, I bought a package of "Pine-car" weights. Four individual segments weighs .25oz. (approx. 8gr.) which would seem more than enough for a model of this size; given the weight-offset of the pushrod.

Post-paint weight currently is just under 5oz.

This means I sprayed almost .8oz. of paint (primer/base-color) on the model thus far. Below is the pre-paint weight..

This would put the model currently at around 10oz. "LESS" trim-accents and clear-coat/fuel-proofing.
 Re: P-38 Lightning-Roddie style..
Oldenginerod wrote:Don't rush it Roddie just because of the membership thing. Fly when you're prepared, not just because of a certain date. If you feel you really need to fly, do so with a plane you don't love so much. Sounds like you have a few options. You've put a lot of effort into the Lightning. Don't hurry & spoil things.
That's good advice Rod. I didn't plan on flying this model until I have some airtime on something that I know will fly.. without being a handful.
 Re: P-38 Lightning-Roddie style..
Cribbs74 wrote:Remove the rubber engine mounts. Engines need to be mounted solid or they will vibrate like crazy and cause really crappy runs.
Looks like you are almost there. Is this going to result in some actual air time?
Hi Ron, I'll heed your advice regarding the sheet-rubber covering the firewalls. It was done in "haste" one night. I hope to fly this airplane soon.. but not until I've flown something more familiar. It's been a while...
 Re: P-38 Lightning-Roddie style..
I removed the rubber pads from the firewalls per Ron Cribbs' advice.. and filled the unused mount-pattern holes to avoid oil-seepage per Eric's advice.
The finish had some rough-spots.. which I sanded-out with 400 paper. I plan on spraying another coat today. The weather is nice enough.

Here's a close-up of how my tank(s) will mount. The fuel-lines are a short/straight-shot to the carb.
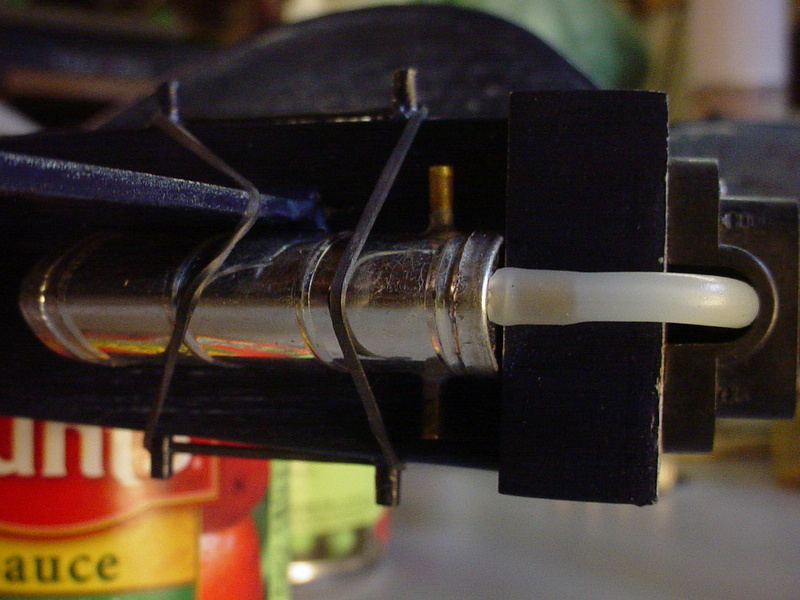
I'll be doing some mods to the gear-struts. They need small (#2) steel flat-washers soldered onto the axles because of the thin wheels that I plan on using.
The finish had some rough-spots.. which I sanded-out with 400 paper. I plan on spraying another coat today. The weather is nice enough.

Here's a close-up of how my tank(s) will mount. The fuel-lines are a short/straight-shot to the carb.

I'll be doing some mods to the gear-struts. They need small (#2) steel flat-washers soldered onto the axles because of the thin wheels that I plan on using.
 Re: P-38 Lightning-Roddie style..
roddie wrote:
The finish had some rough-spots.. which I sanded-out with 400 paper. I plan on spraying another coat today. The weather is nice enough.
I'll be doing some mods to the gear-struts. They need small (#2) steel flat-washers soldered onto the axles because of the thin wheels that I plan on using.
Really nice weather here in New England/Northern Rhode Island today. I shot another (2nd) coat of "base-color" on the model outdoors.

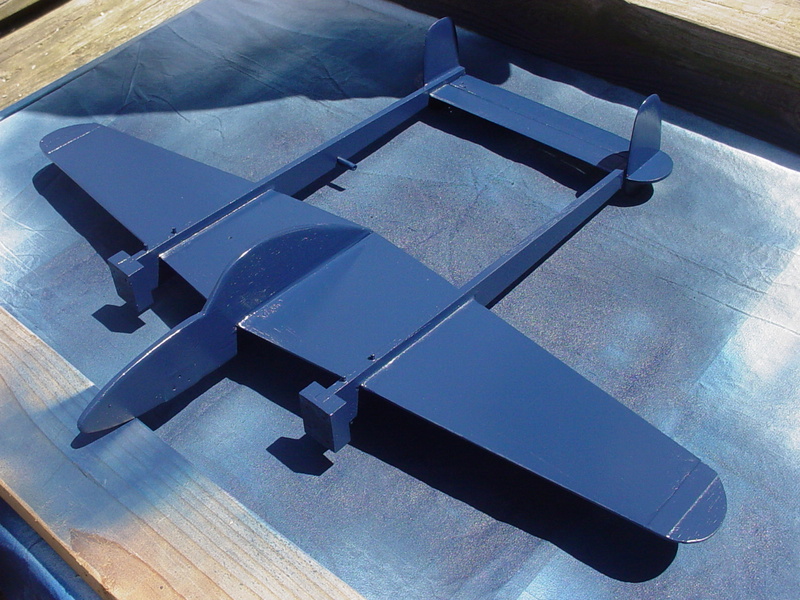
That will be the last application of base-color. The only other pigmented paint to be applied, will be some sort of canopy detail (framework) along with a reflective color of the sky. I've never applied that technique.. but several of "you guys" have.. and I really like how it looks. I've thought about a "red-orange" to depict a sunset-flight.
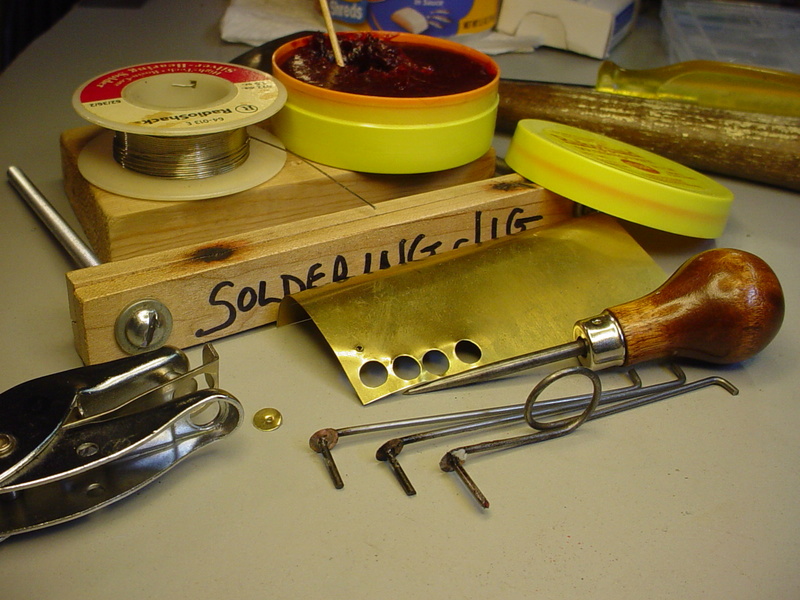
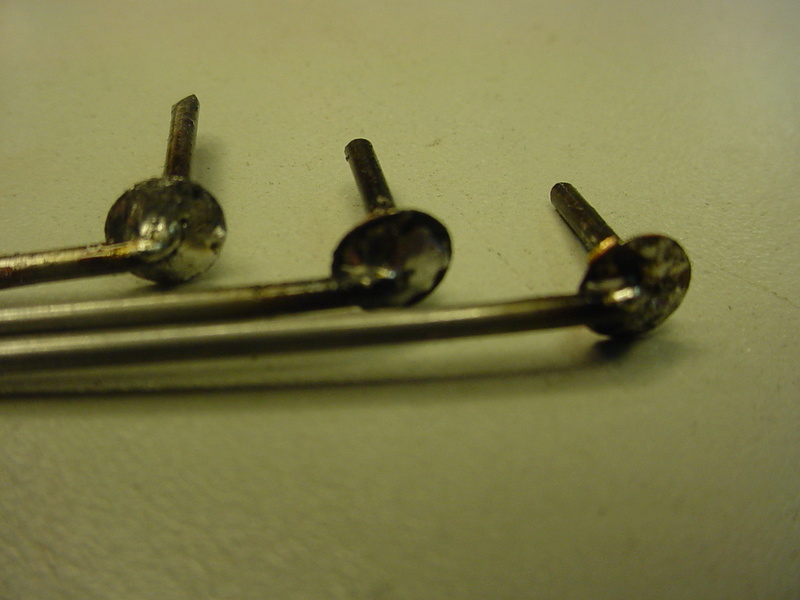
As for the gear-struts.. I struggled with soldering steel flat-washers onto the .062" music-wire. It sucked actually..
so... I decided to use my awesome brain-power to devise a different method..
I had some .005" sheet-brass that could be made-into flat-washers using a paper-punch.. (the paper-punch is your friend..) I first "pierced" the brass-sheet with a small awl.. (a thumb-tack would also work) and lined-up the eye of the punch to cut the pieces out. I have a "strong-grip".. but it's not very difficult to punch .005" sheet-brass using a hole-punch. Then........ I placed my 1/16" music-wire axle-shaft over the piercing.. and hammered it through.. over a block of wood. This forms a snug-fit of the axle; through the brass-washer, which is desirable for soldering. The application of flux is imperative for cleaning the two metals for flowing the solder to bond them together.
 Re: P-38 Lightning-Roddie style..
Good job!
I also use silver-bearing solder for this purpose.
I used .005 tin plate from Hobby Lobby for my axle washers. It is the same stuff for my fuel tank-making.
What brand are you using?
I'm searching for something a little less aggressive than plumber's flux. My latest brand is NoKorode.
Thanks in advance
944_Jim- Diamond Member


Posts : 2022
Join date : 2017-02-08
Age : 59
Location : NE MS
 Re: P-38 Lightning-Roddie style..
944_Jim wrote:Good job!
I also use silver-bearing solder for this purpose.
I used .005 tin plate from Hobby Lobby for my axle washers. It is the same stuff for my fuel tank-making.
What brand are you using?
I'm searching for something a little less aggressive than plumber's flux. My latest brand is NoKorode.
Thanks in advance
Hi Jim, "Thanks"! This .005" brass is "K & S" brand.

I use .008" "Hillman" brand tin-plate for my fuel-tanks.
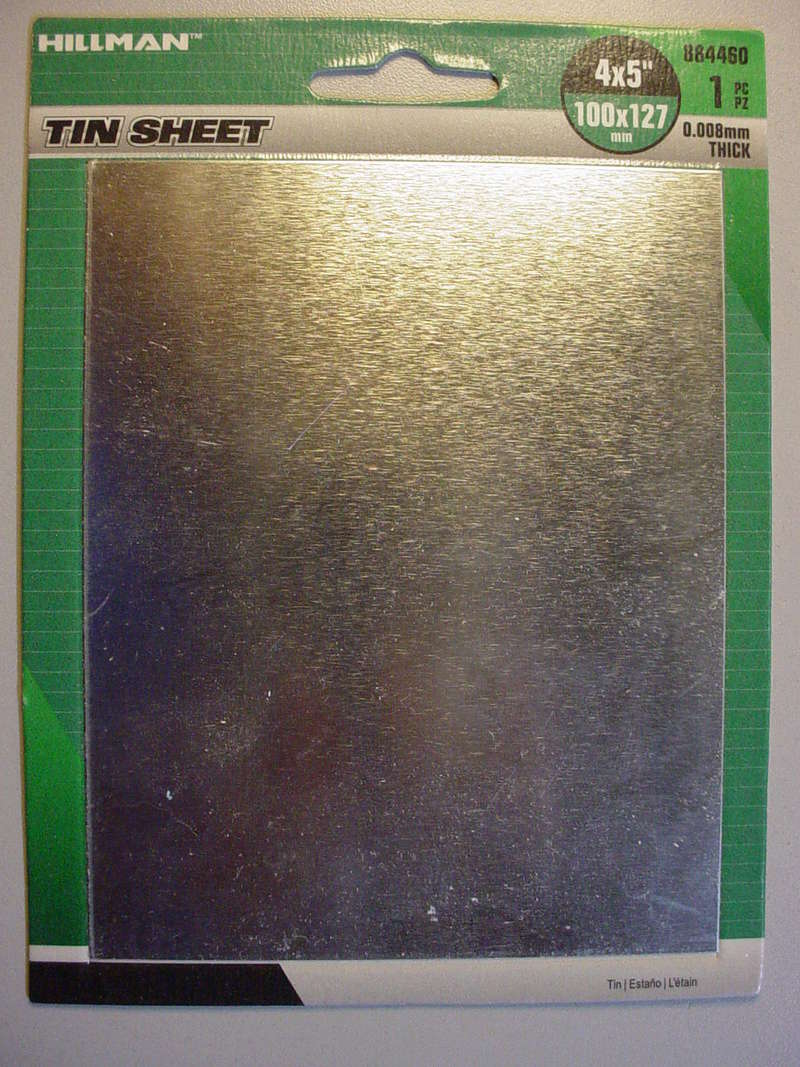
The tanks are plumbed with 1/8" annealed-copper tubing; the type sold at automotive stores for gages.

The flux I use is "Rubyfluid".. made by Superior.


 Re: P-38 Lightning-Roddie style..
Looks good Roddie. I would give serious consideration to using starter springs on the engines. It would be very easy not to to notice an engine running backwards in the excitement of starting a multi engine model.
Jim
Jim

JPvelo- Diamond Member

- Posts : 1972
Join date : 2011-12-02
Age : 57
Location : Colorado
 Re: P-38 Lightning-Roddie style..
JPvelo wrote:Looks good Roddie. I would give serious consideration to using starter springs on the engines. It would be very easy not to to notice an engine running backwards in the excitement of starting a multi engine model.
Jim
Jim, Thanks so much for the compliment! I know you have the experience with Cox-engine powered multi's.. I wanted to run "zero-drag" springs on both engines.. but didn't have any L/H springs of that type. I manage pretty-well with my electric-starter. My experimental reed-valve test thread shows how I utilize the 12V. "fuel-pump" circuit/connection with its polarity-switch to alternate between right and left-hand rotations.
The "DAL"-brand props that I've been testing are SHARP. I've been bitten more than once.. so I'd rather use the electric-starter.
 Re: P-38 Lightning-Roddie style..
I see, should be no problem with the starter.

JPvelo- Diamond Member

- Posts : 1972
Join date : 2011-12-02
Age : 57
Location : Colorado
 Re: P-38 Lightning-Roddie style..
Roddie, I'm not criticizing your design so don't take it that way. It's creating drag and it looks bulky. One of those weights can be smacked with a hammer and made paper thin. Bury it into the wood by either using hinge tools and insert it into the wingtip end or pare it into the wing itself. You need only about 5 grams of tip weight if you even need that. I would use 5 to start with.

Ken Cook- Top Poster

- Posts : 5642
Join date : 2012-03-27
Location : pennsylvania
 Re: P-38 Lightning-Roddie style..
Ken Cook wrote: Roddie, I'm not criticizing your design so don't take it that way. It's creating drag and it looks bulky. One of those weights can be smacked with a hammer and made paper thin. Bury it into the wood by either using hinge tools and insert it into the wingtip end or pare it into the wing itself. You need only about 5 grams of tip weight if you even need that. I would use 5 to start with.
Hi Ken, I wasn't originally going to add any tip-weight. My 1/16" music-wire pushrod and bellcrank assembly will be mounted "just inside" of the outboard boom/nacelle.. which is a point; 3+ inches outboard of the model's centerline. That assembly weighs 8 grams.. but it's spread between the bellcrank and elevator-horn.. rather than concentrated out at the wingtip.
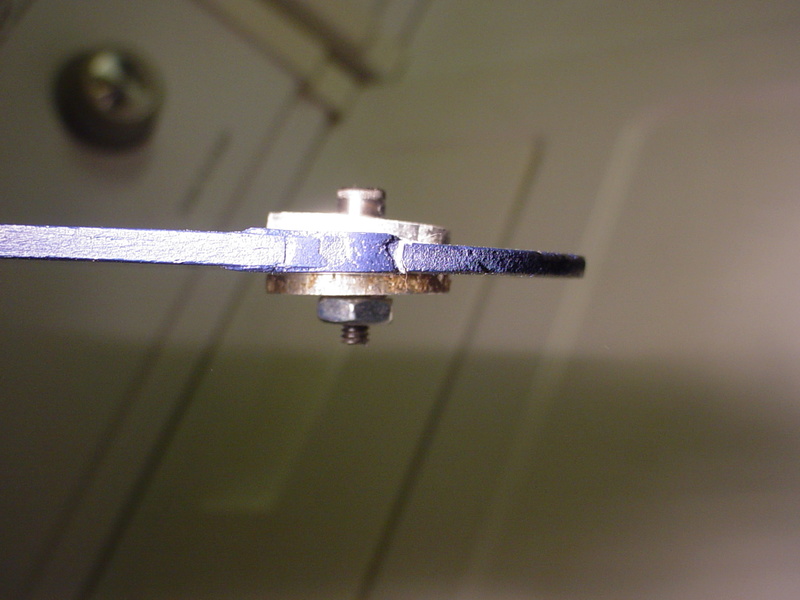
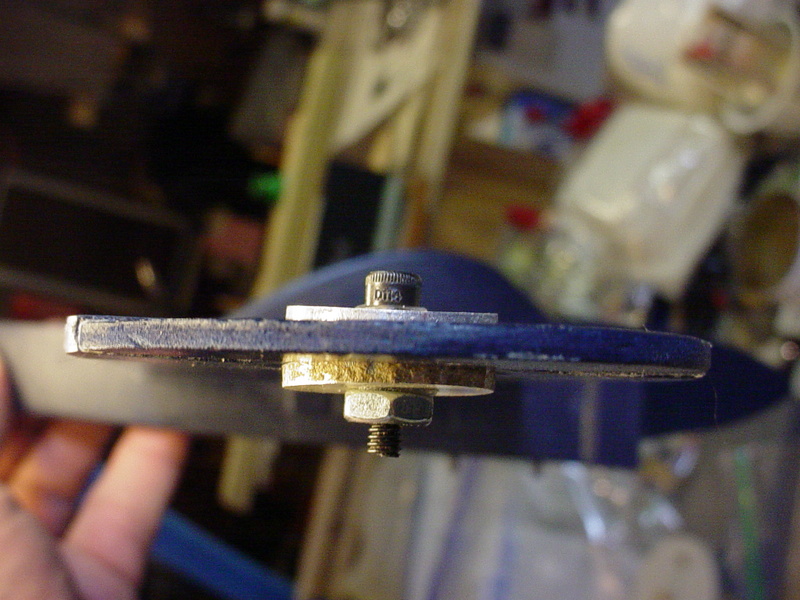
The aluminum discs are 3mm (.118") thick which is what my wing is.. and .750" diameter. Imbedding one into the wing wouldn't be difficult.
 Re: P-38 Lightning-Roddie style..
Ken Cook wrote: Roddie, I'm not criticizing your design so don't take it that way. It's creating drag and it looks bulky. One of those weights can be smacked with a hammer and made paper thin. Bury it into the wood by either using hinge tools and insert it into the wingtip end or pare it into the wing itself. You need only about 5 grams of tip weight if you even need that. I would use 5 to start with.
I thought the same as Ken Roddie. It just looks awkward. A steel washer or coin glued on would be a whole lot neater and far more streamlined.
Rod.

Oldenginerod- Top Poster

- Posts : 4018
Join date : 2012-06-15
Age : 62
Location : Drouin, Victoria
 Re: P-38 Lightning-Roddie style..
Oldenginerod wrote:Ken Cook wrote: Roddie, I'm not criticizing your design so don't take it that way. It's creating drag and it looks bulky. One of those weights can be smacked with a hammer and made paper thin. Bury it into the wood by either using hinge tools and insert it into the wingtip end or pare it into the wing itself. You need only about 5 grams of tip weight if you even need that. I would use 5 to start with.
I thought the same as Ken Roddie. It just looks awkward. A steel washer or coin glued on would be a whole lot neater and far more streamlined.
Rod.
That's cool dudes... no offense taken. I have been busy with "work".. which is "really good". Model-work has been on the back-burner.. Tonight I bored a .750" hole through my model's outboard wing.. near the tip, for inserting a "single" aluminum disc for wingtip weight.


I'll figure-out how to finish around the voids..
 Re: P-38 Lightning-Roddie style..
Are you using the disc as tip weight? Or are you attaching weight to the disc?
Edit: I should have read closer. How much does that disc weigh?
Edit: I should have read closer. How much does that disc weigh?

Cribbs74- Moderator


Posts : 11907
Join date : 2011-10-24
Age : 50
Location : Tuttle, OK
 Re: P-38 Lightning-Roddie style..
Cribbs74 wrote: How much does that disc weigh?
A single aluminum disc weighs 1gr. I might be better off using two pennies. A single penny weighs 2grams. Pennies are also the same .750" diameter as the aluminum disc. The aluminum is .080" thickness and a penny is thinner @.055". My sheet-wing is .120" thickness.. so two pennies will fit in the slot.. with .010" to spare.
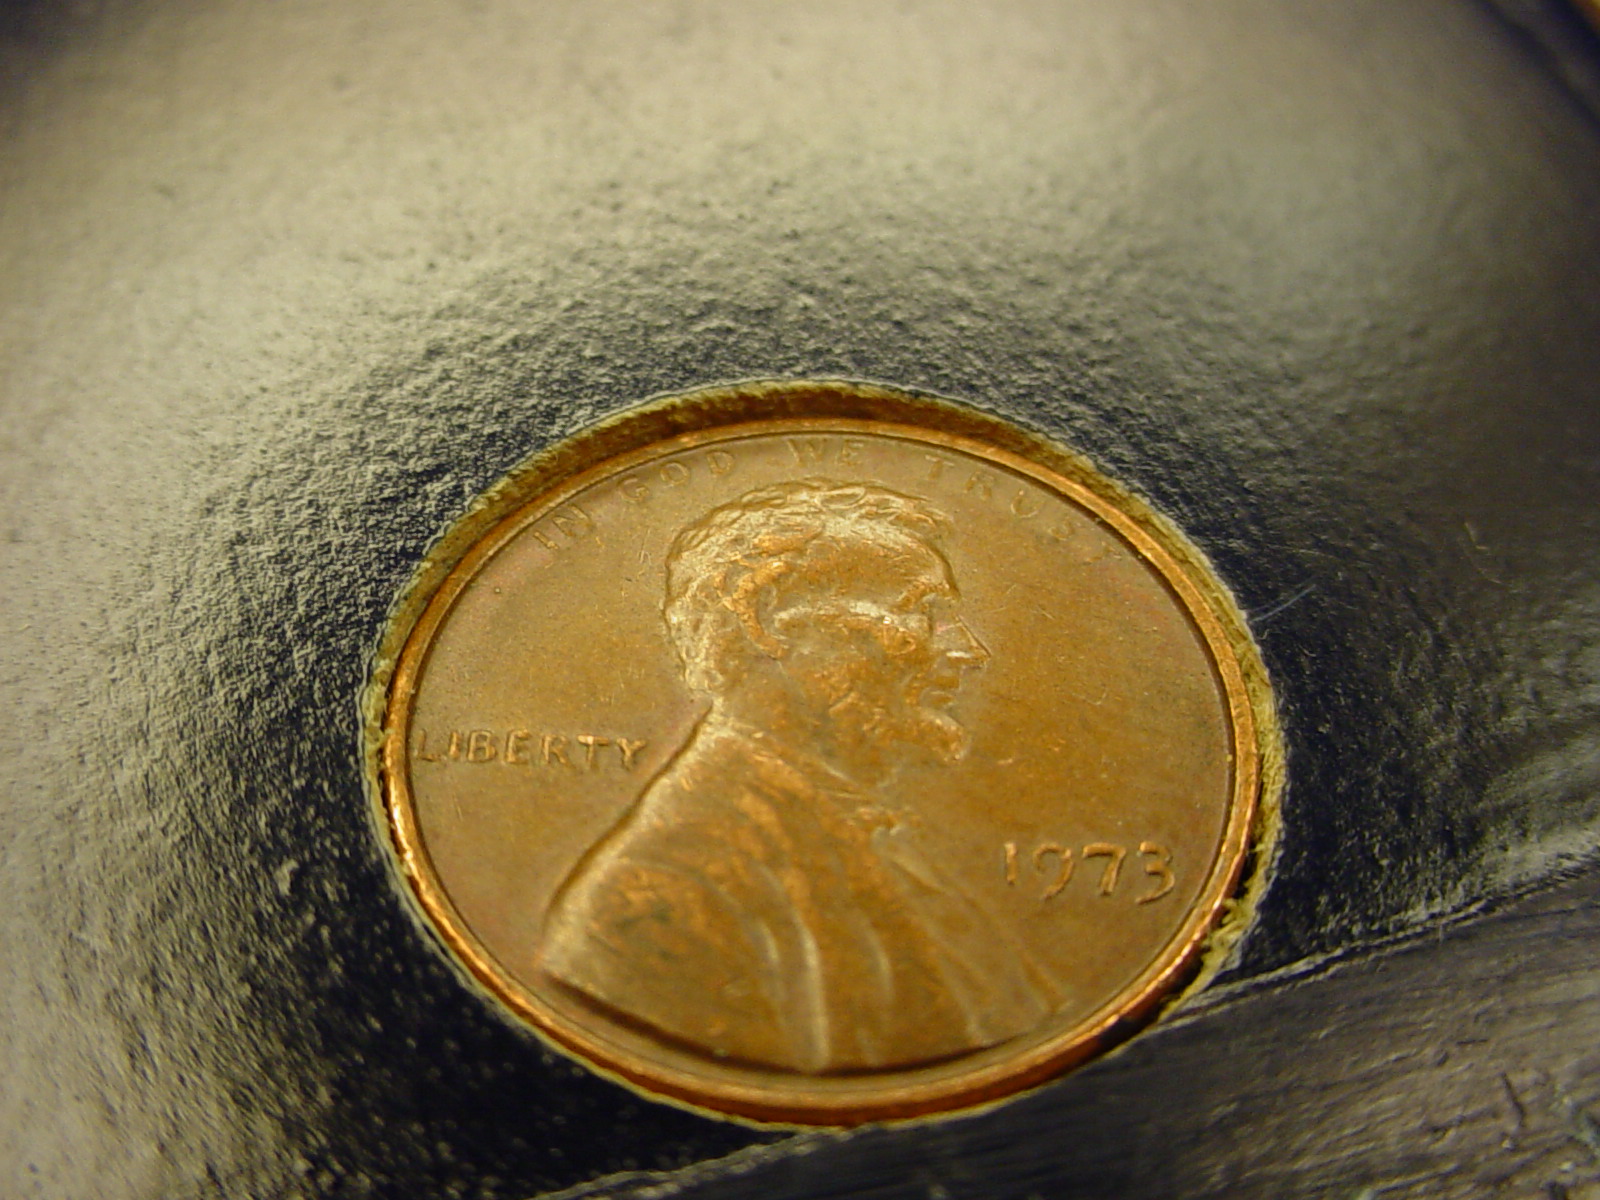
 my 2 cents..
 literally..
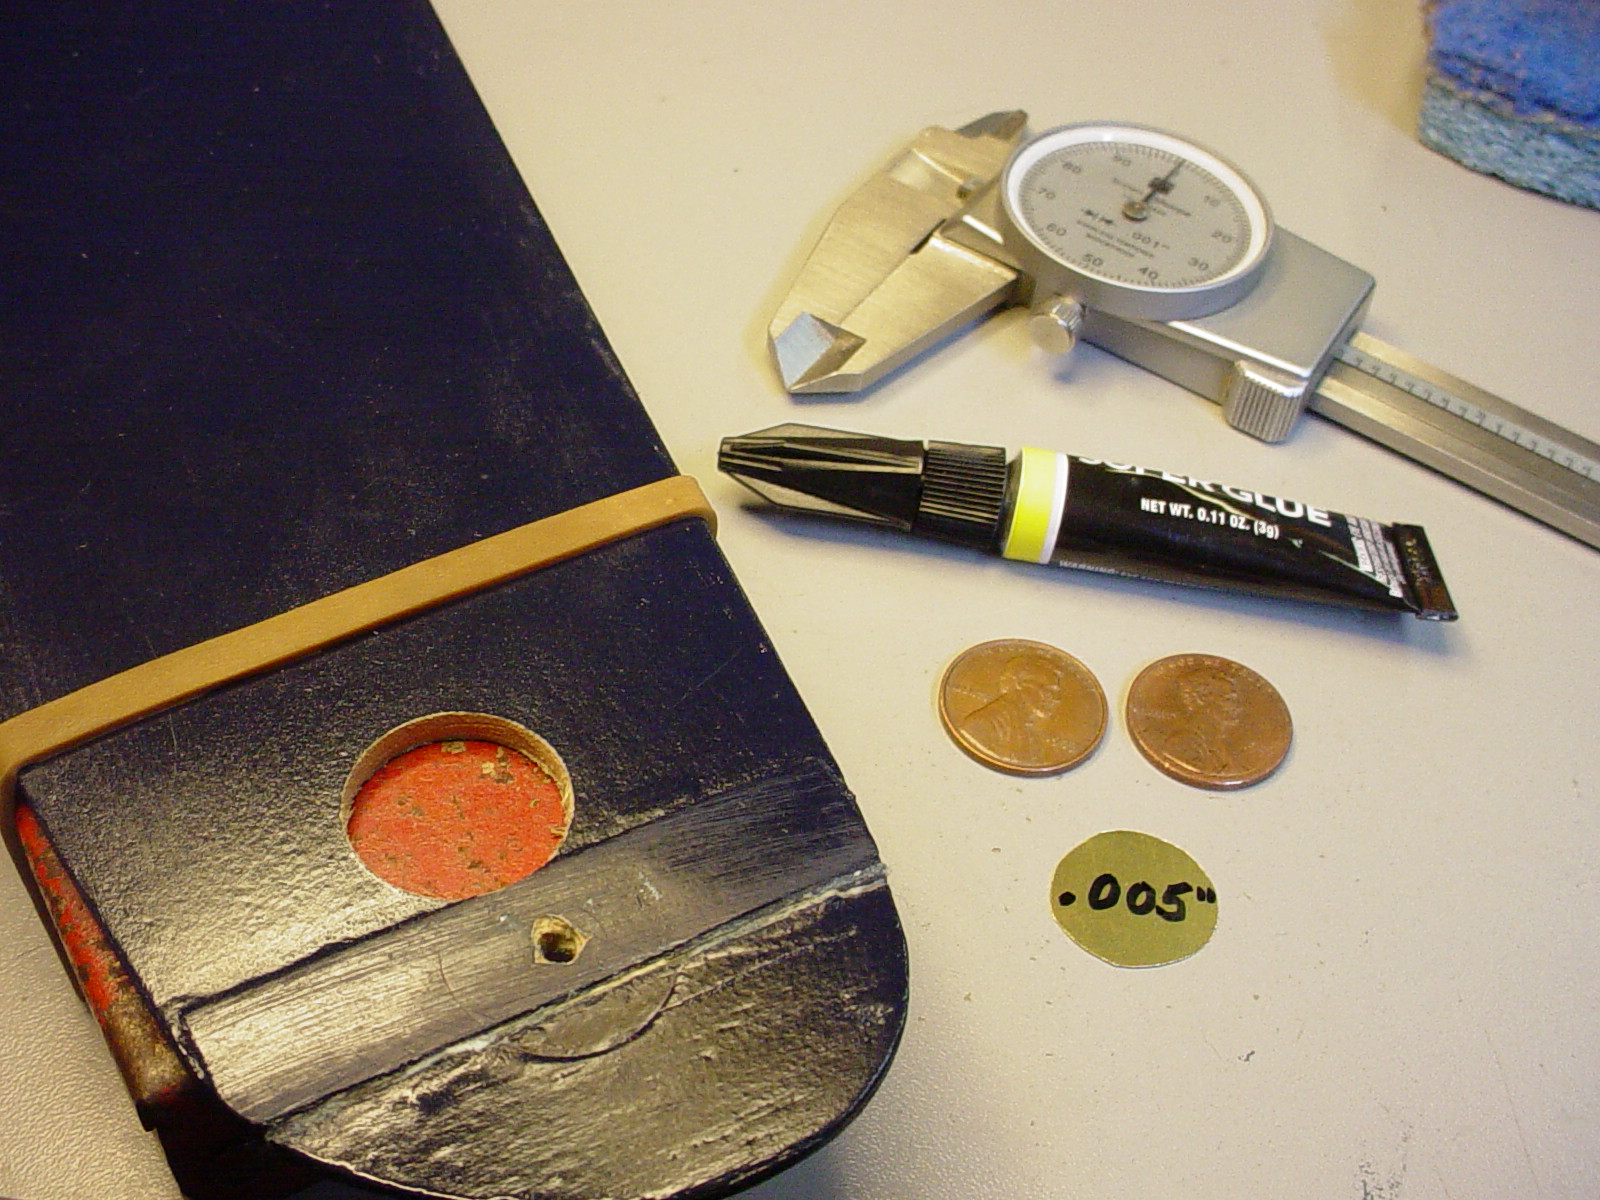


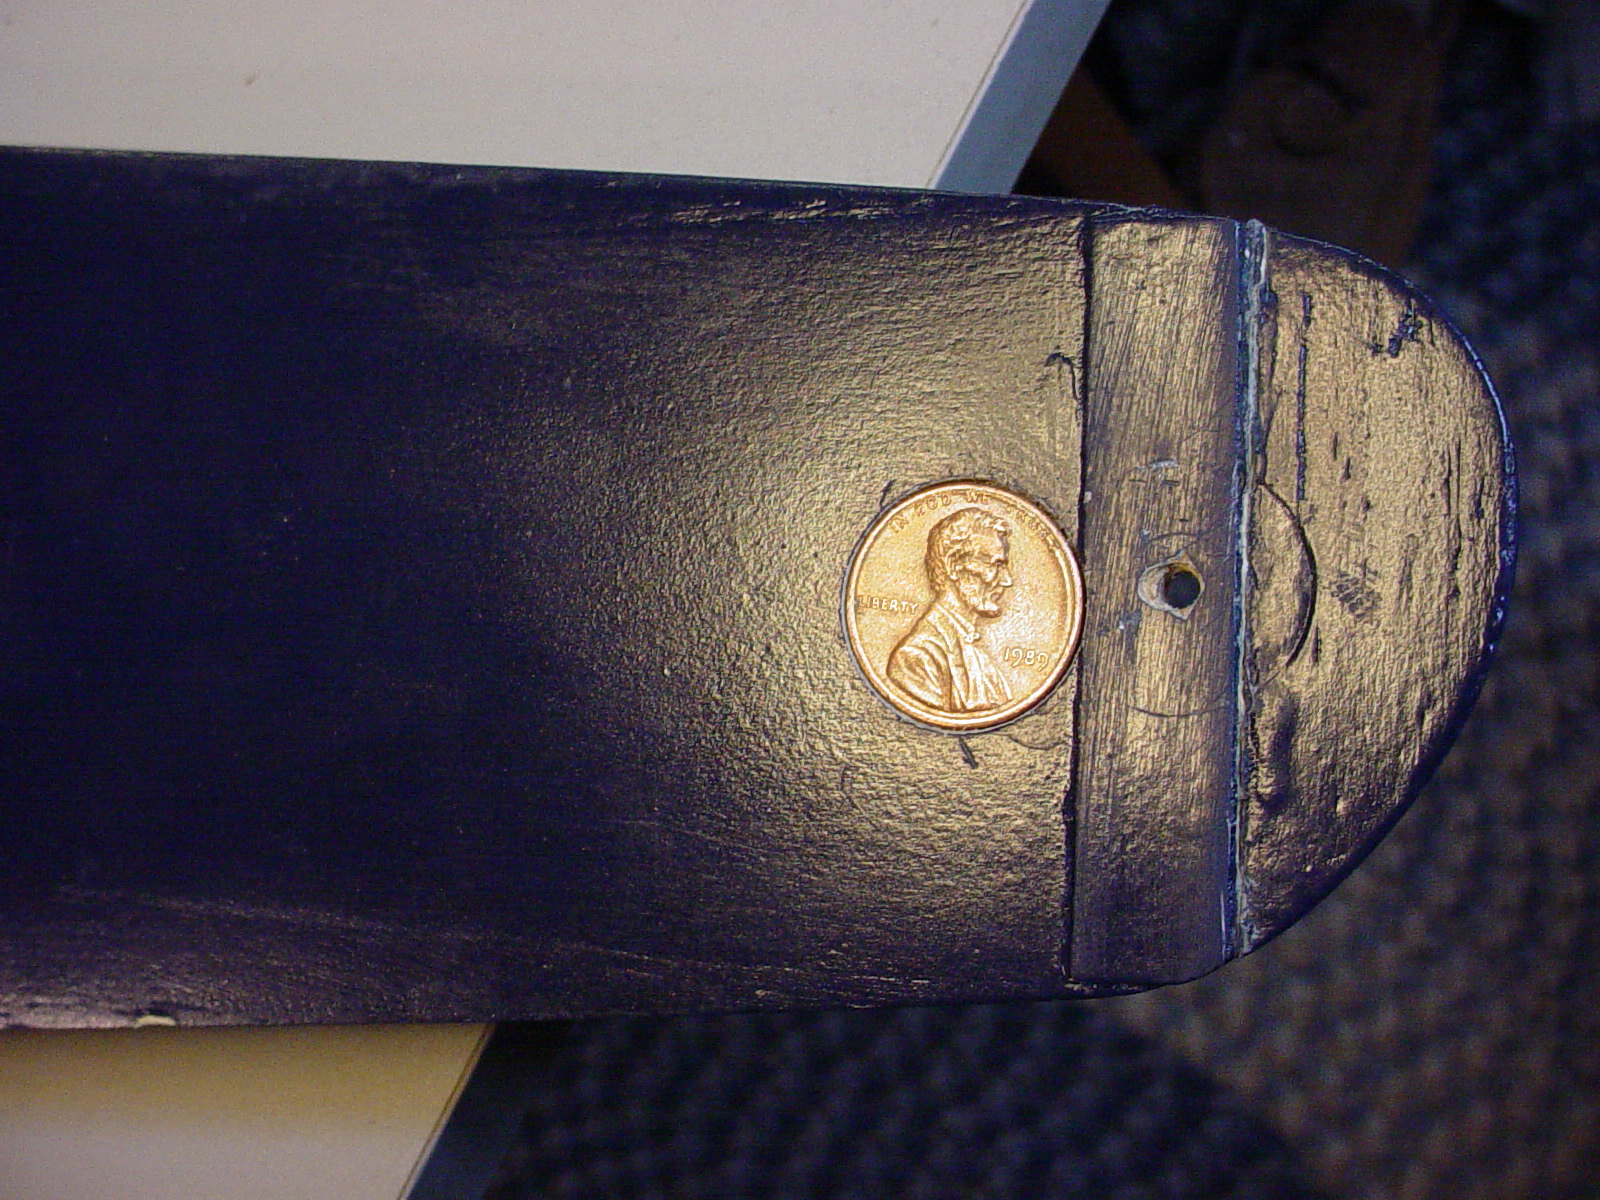
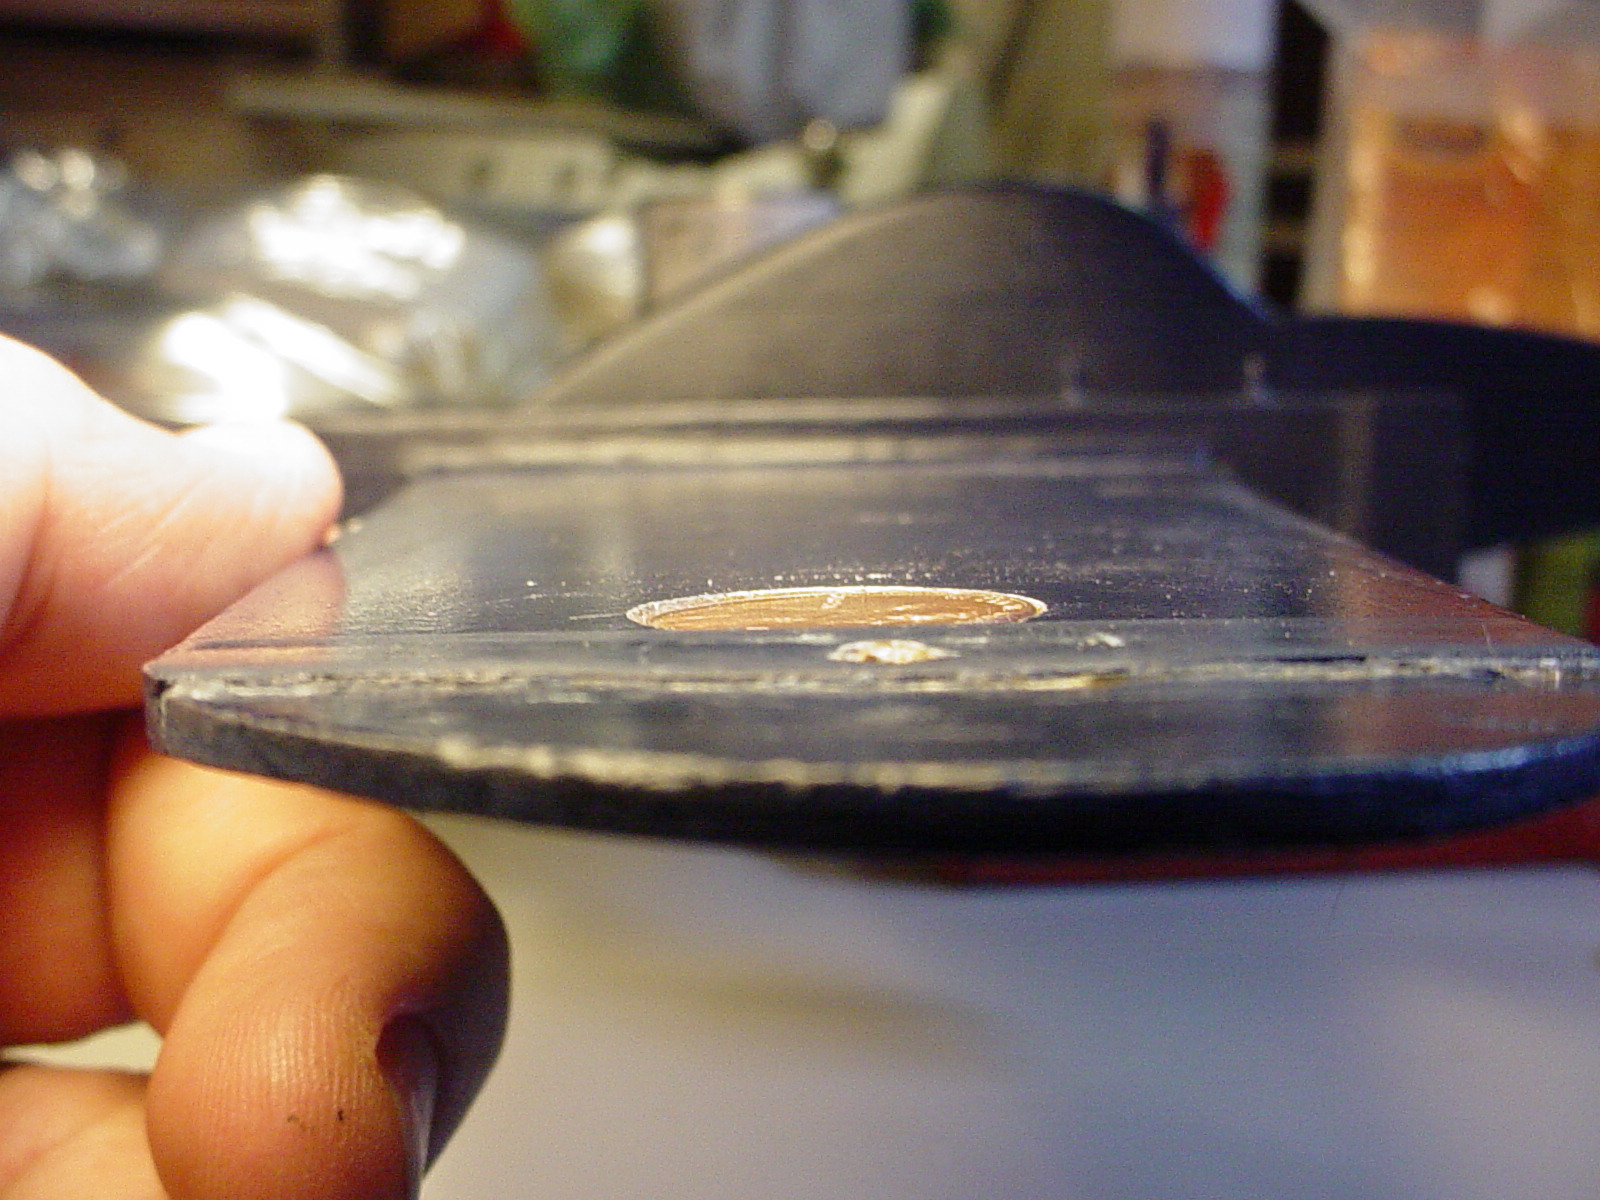
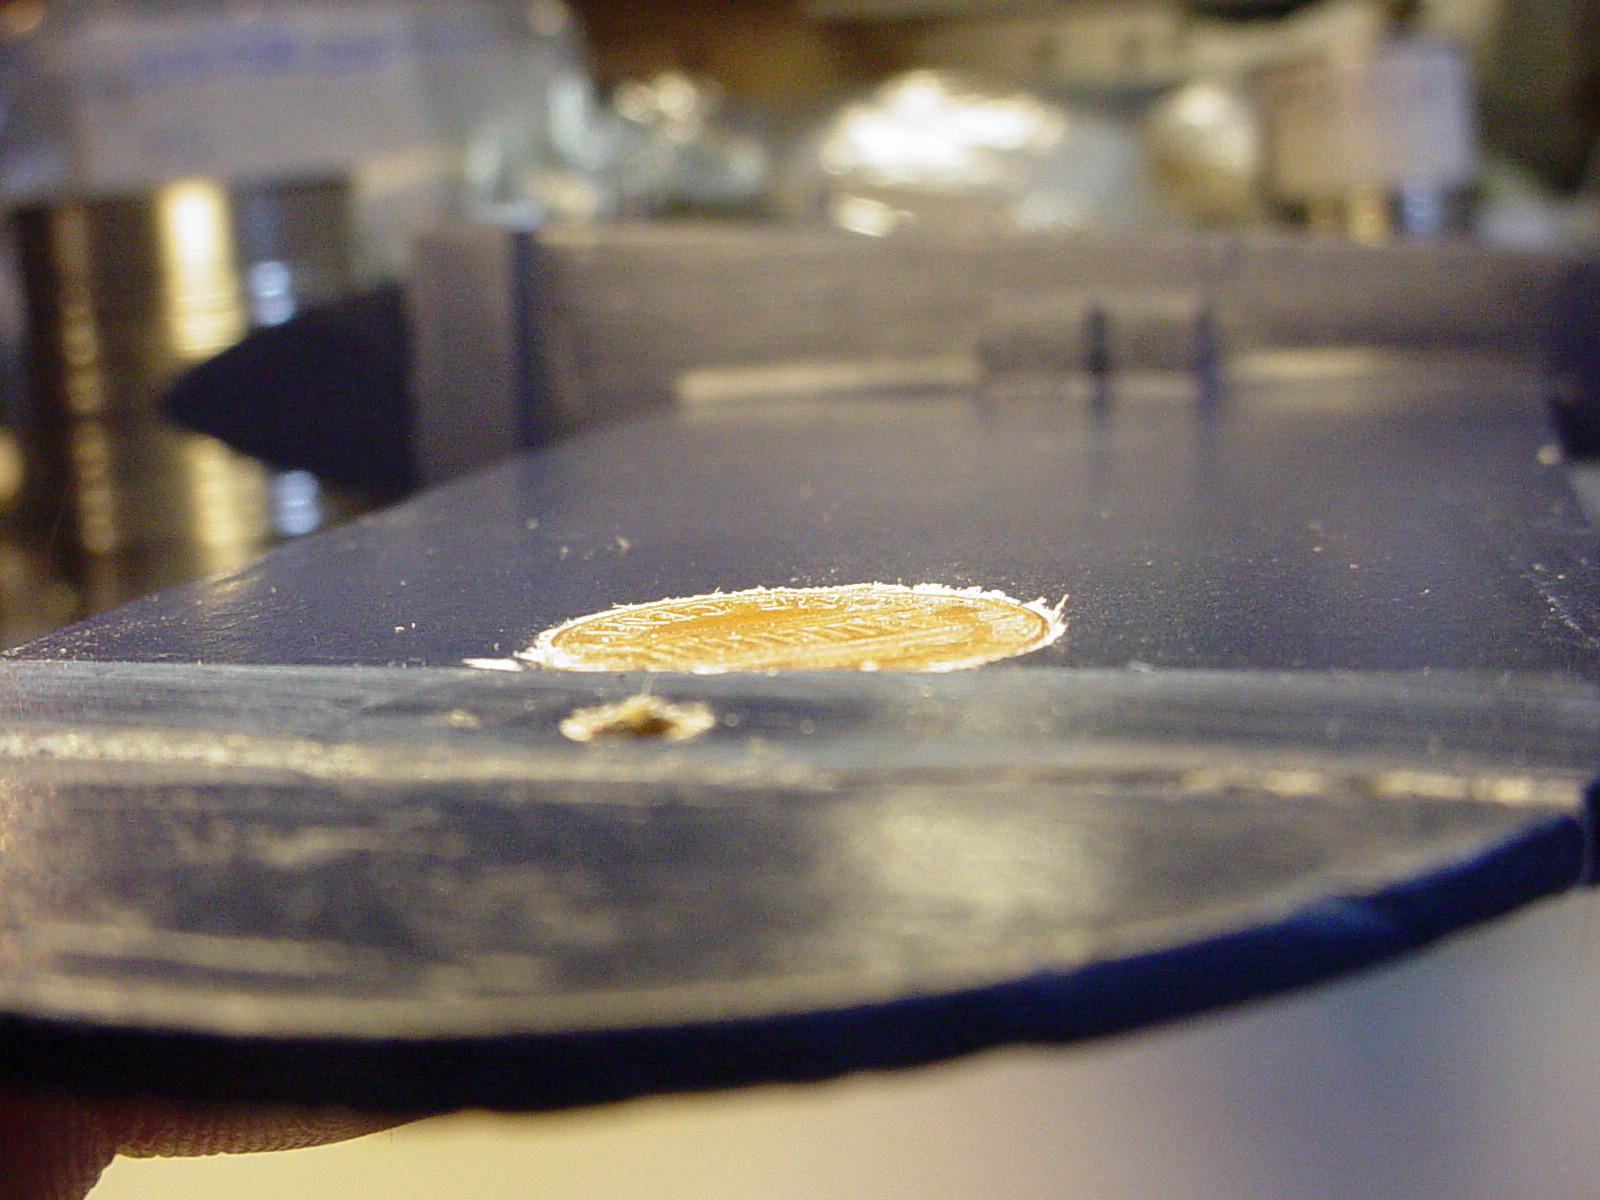
Despite the 1/64" ply tip-braces top/bottom.. I've managed to snap-off the outboard balsa wingtip twice so far.
The braces were needed because of the balsa wingtip to basswood wing-core joint. The wing's "2-piece" leading and trailing edges are also balsa. The wing "core" is 3mm sheet basswood; 2.375" x 24.0". The 1.0" balsa tips make the total wingspan 26.0".
 a little more work..
It won't be long before this model will be ready to fly.. but I started a new job 3 weeks ago, running a BIG CNC router. That's taken a bit of my time and concentration.
The P-38 had been put on the back-burner.. but I have managed to "chip-away" at some of the lingering details over the last few days.
The O/B wingtip-weight was reworked a few days ago.. so now I've been focusing on my landing-gear/wheel design. It's a very lightweight/streamlined set-up that I'd been wanting to "complete" and install.. to see if it seems "rugged-enough" to sustain the snags of grass-landings. R.O.G. launches will need to be from a relatively smooth surface.
I "dipped" my wheels in the oil-based Rust-Oleum flat-black paint.. and made a fixture for them to dry.

After 24hrs. drying-time.. I needed to fit alloy tube hub-bushings to reduce-down from a 1/8" hub-hole; for a 1/16" music-wire axle.
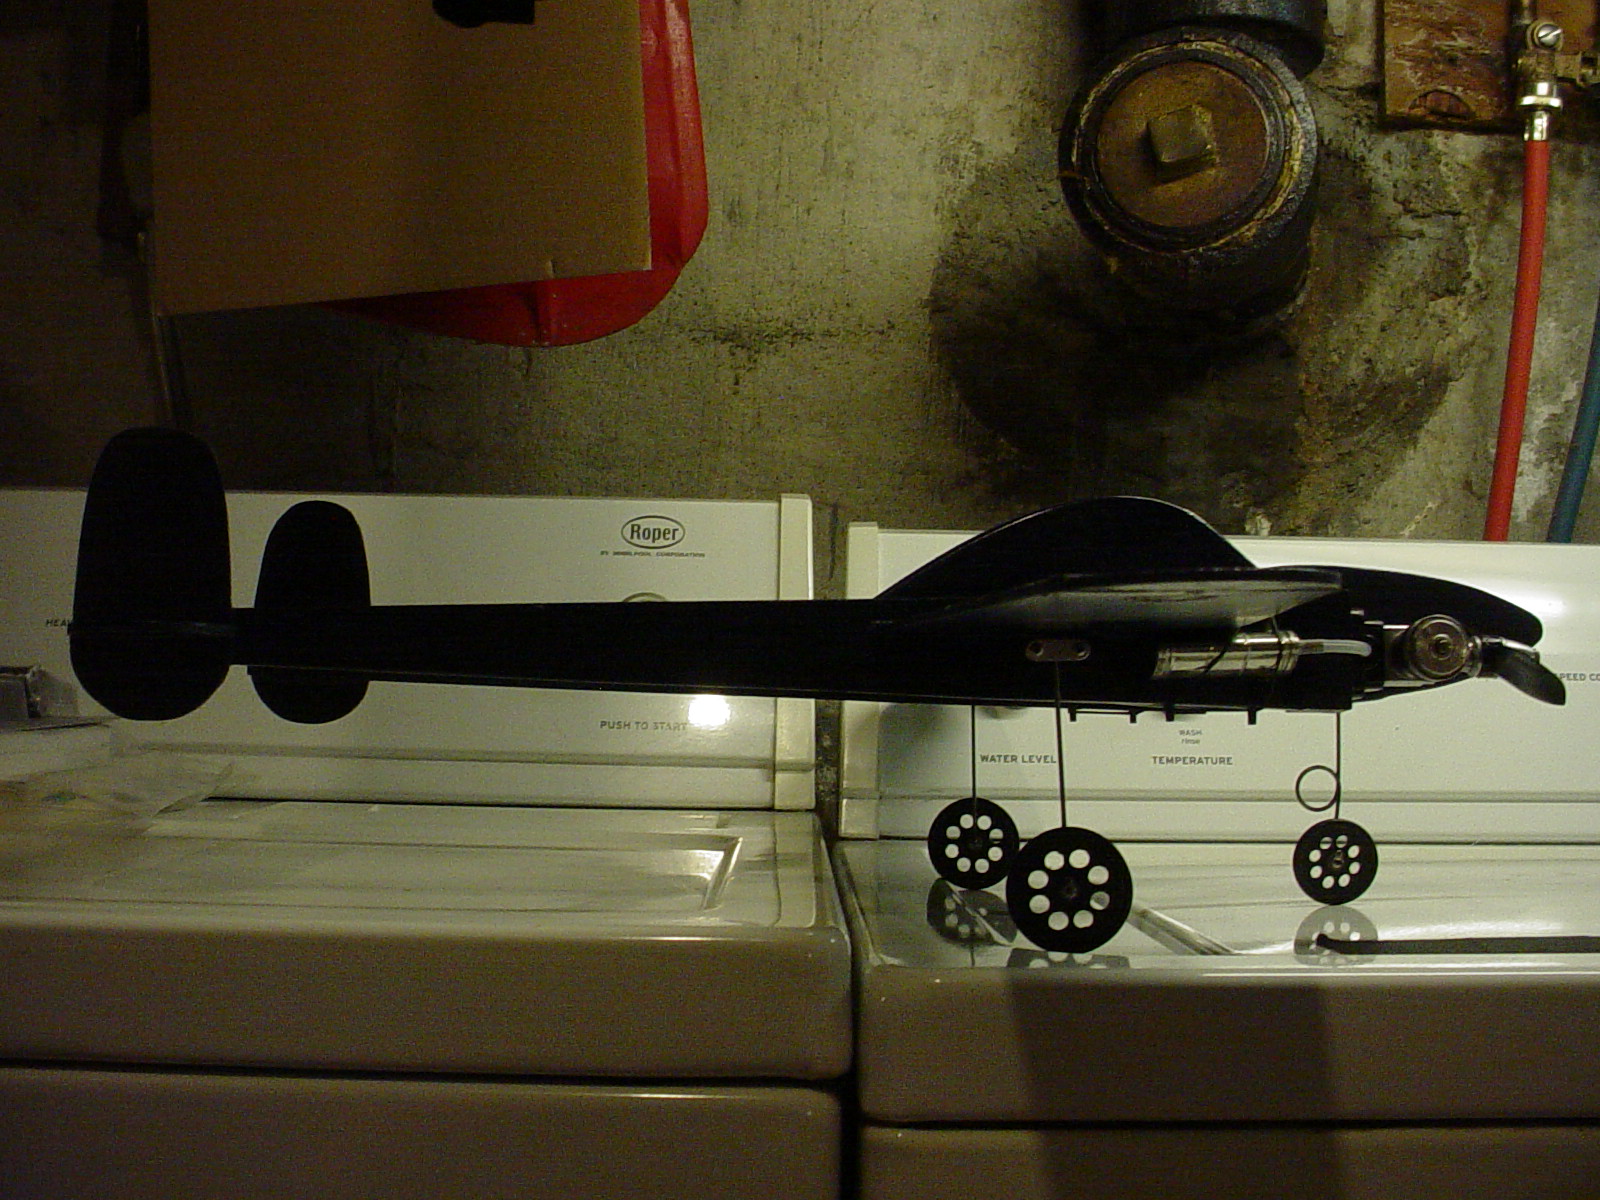
The photo below, shows the wheels (with rubber O-ring tires installed) with their hubs bushed.. and fitted to the pre-made 1/16" music-wire struts/axles. All use the "Goldberg-style" spring-retainers for lightweight, reliability.. and simplicity.

Mounting the struts to the models' gear-blocks is quick and easy. I'd made previsions for this early-on in the construction. I use the Dubro #158 "steel" landing-gear straps exclusively on my profile 1/2A C/L models.
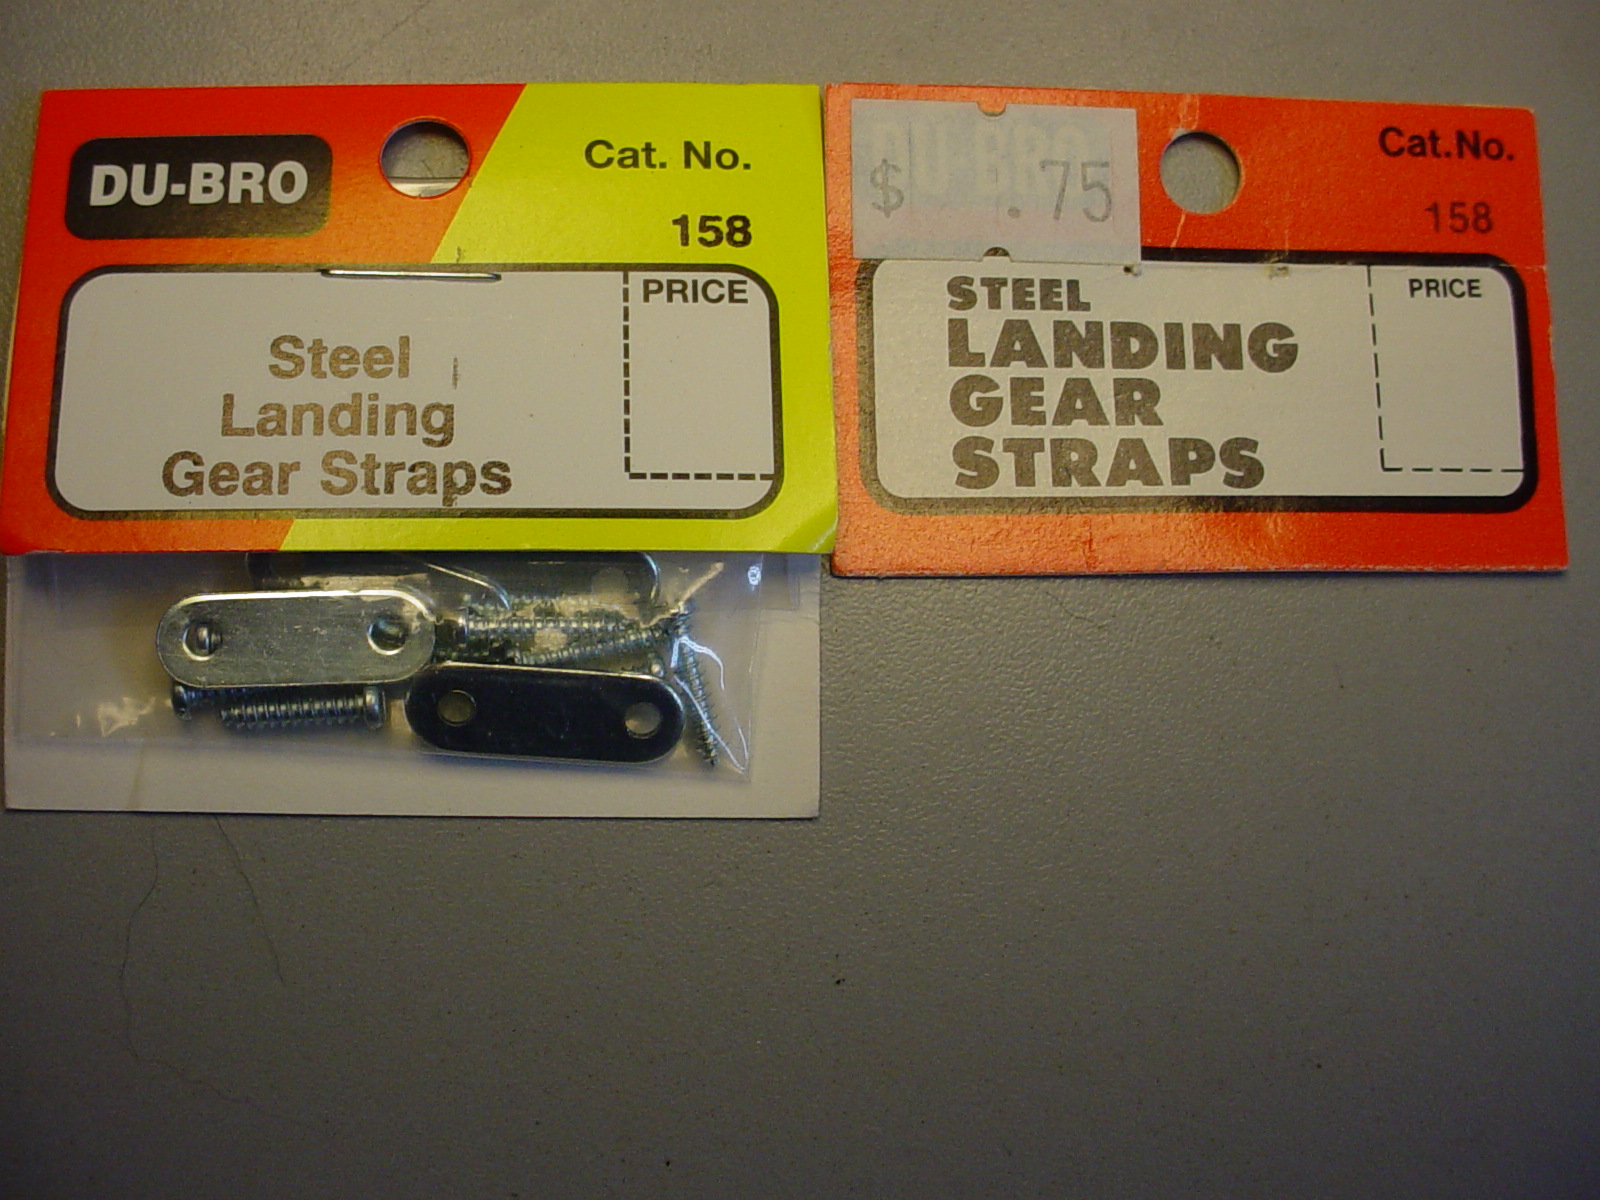
and I also exclusively use Dubro #107 1/2A control-horns on my profile 1/2A C/L models.

I've found these items to be staples for building my 1/2A C/L airplanes over the last 30 years. I can't say that about too many other hardware items.
Anyway (blah blah blah..) I decided to install the landing-gear, engines and fuel tanks.. to see how the model "balanced" and its weight.
Here's some photos..
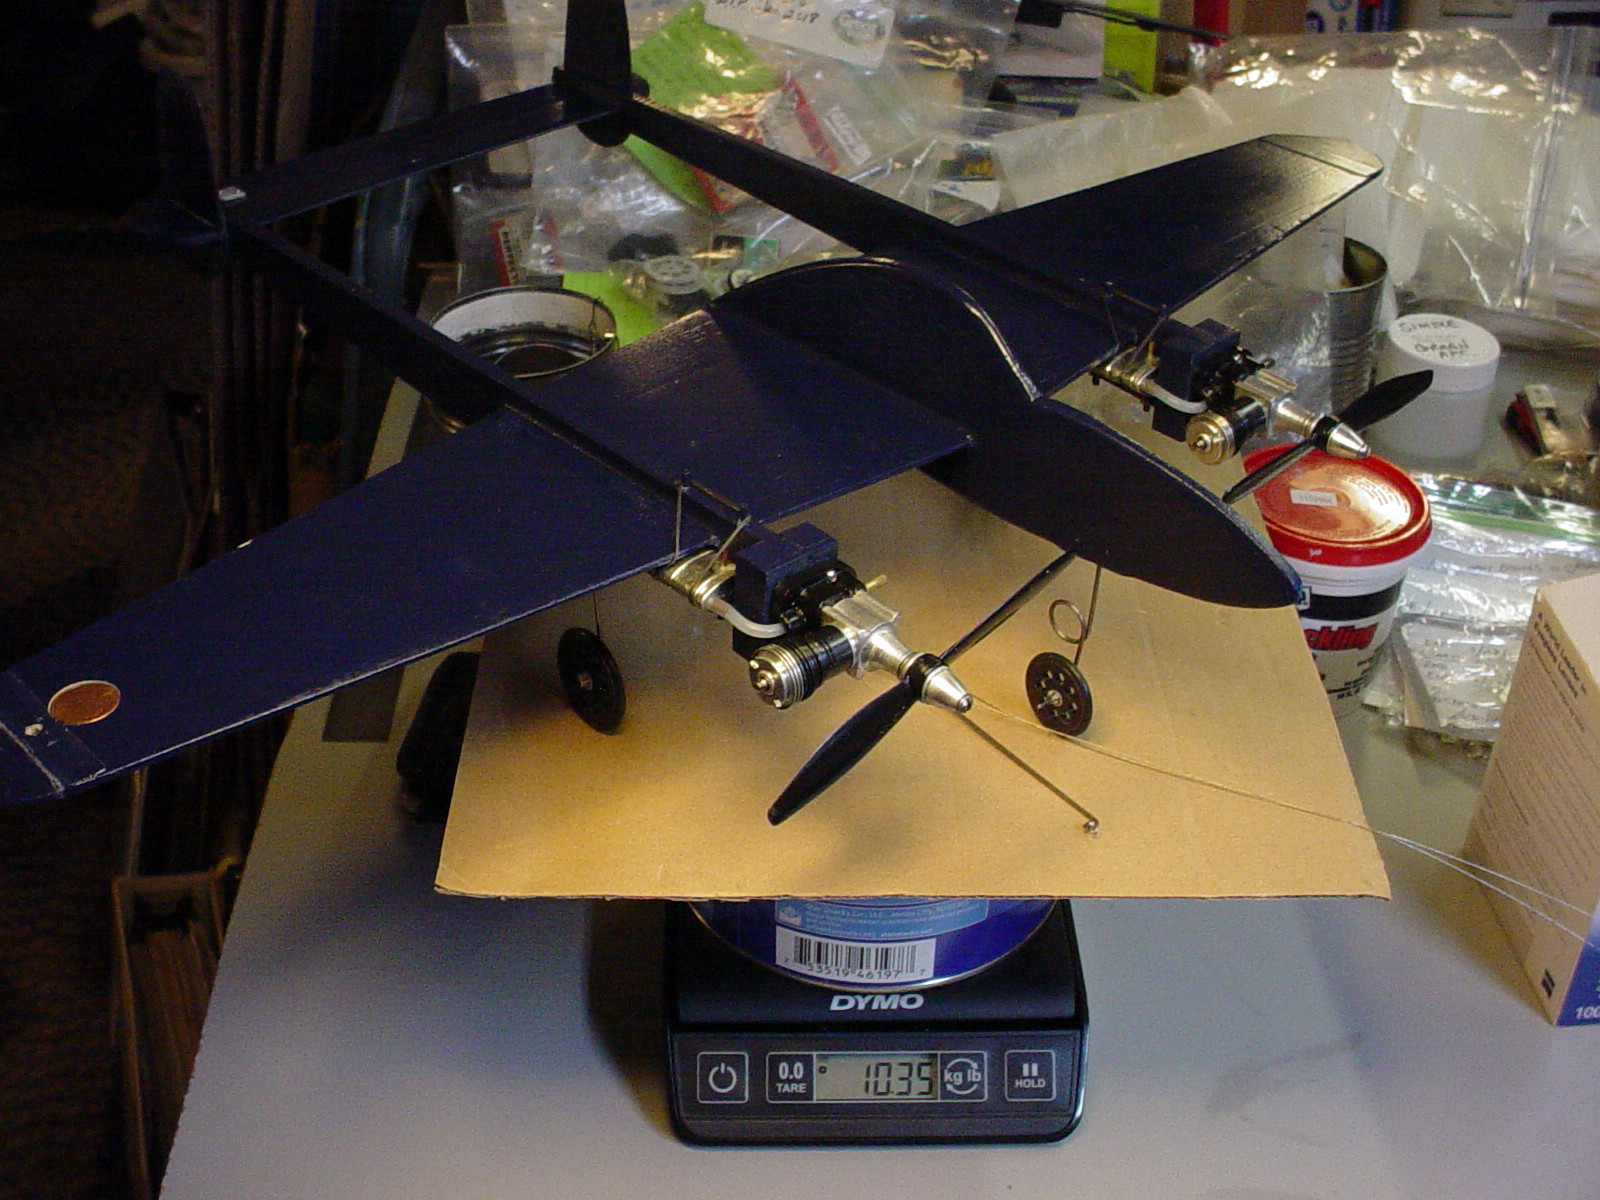
Ten and a half ounces.. not too bad. The 1/16" M/W pushrod is not installed.. but can be seen on the scale.. underneath the O/B engine.

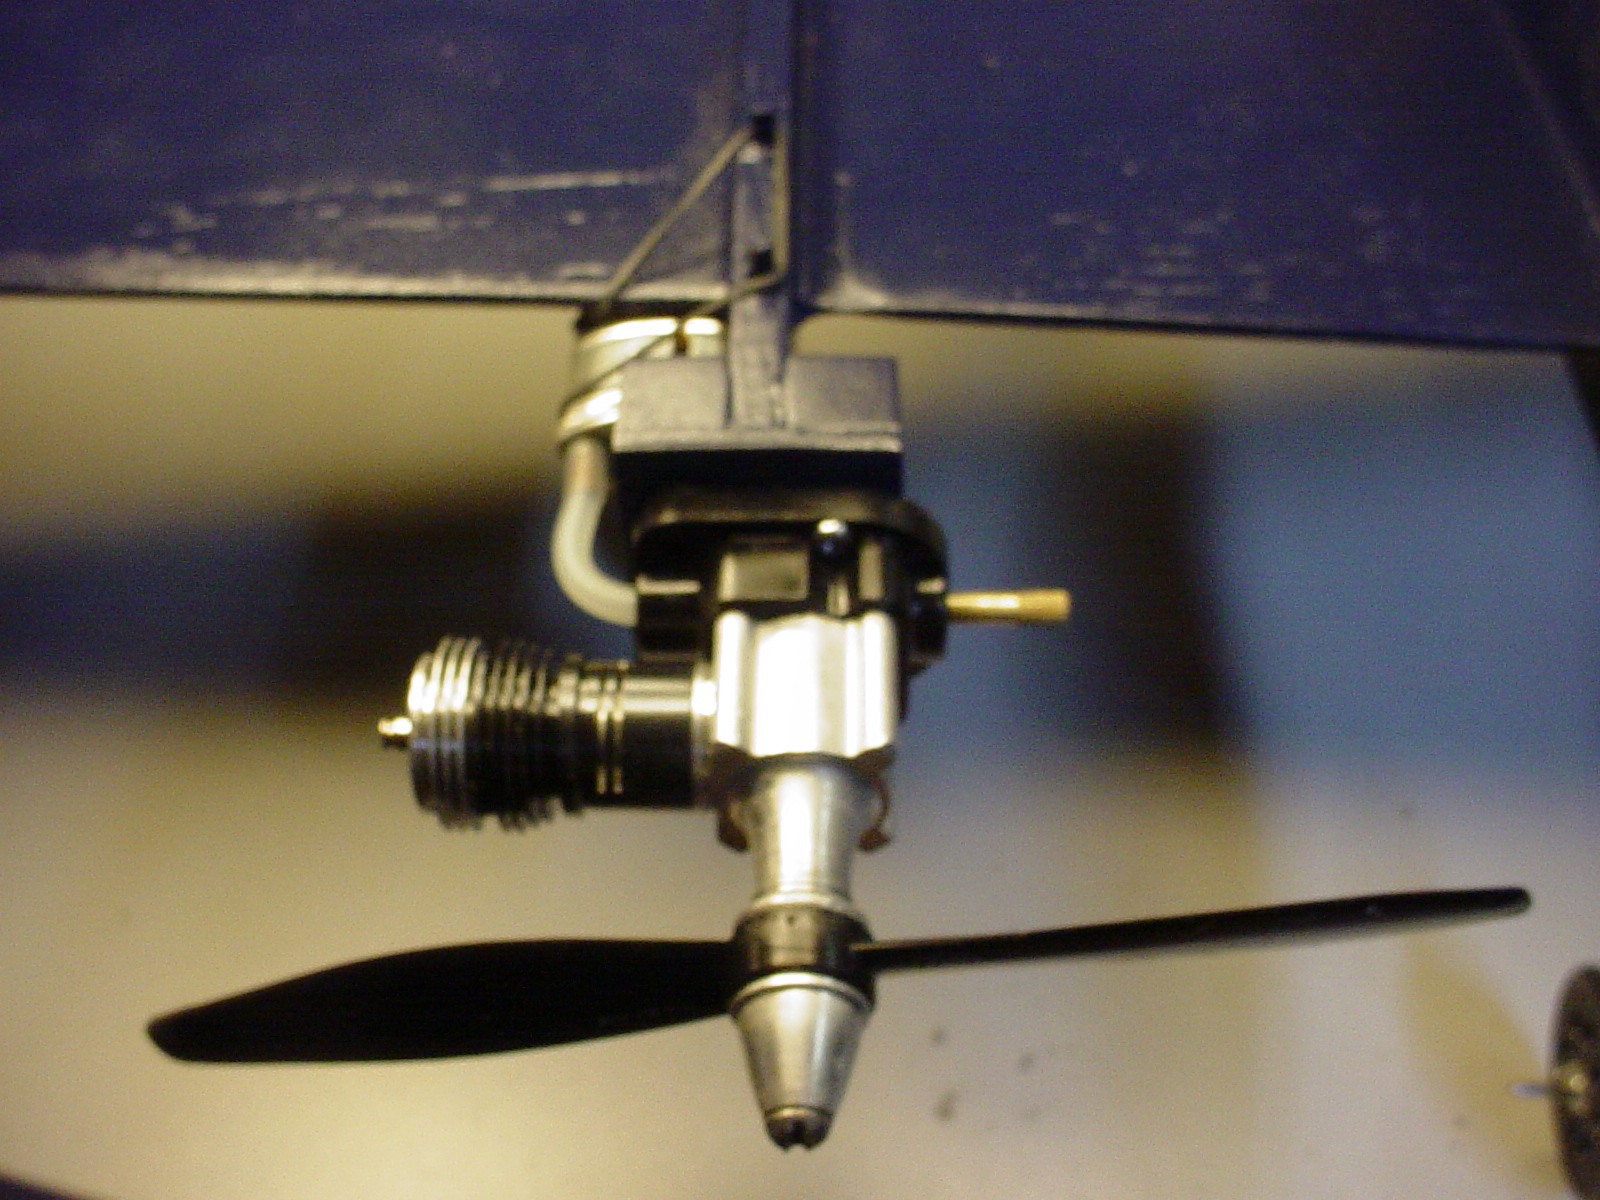
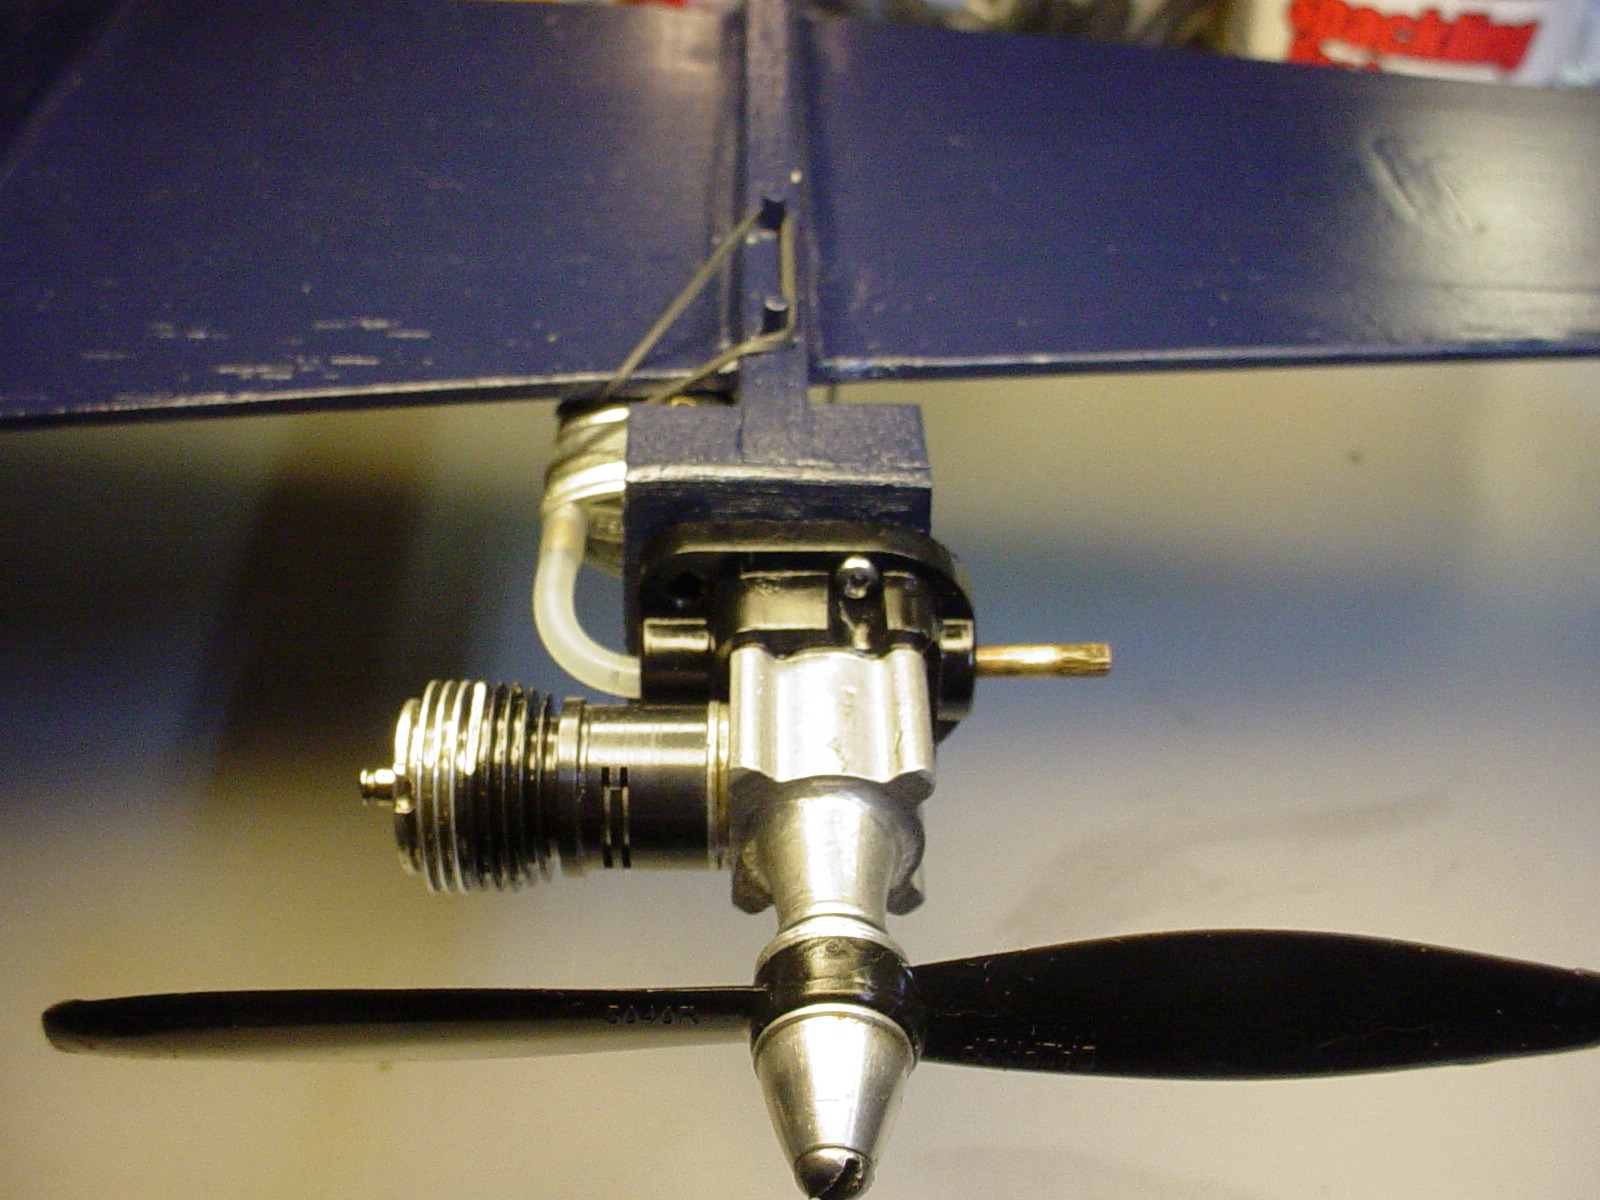
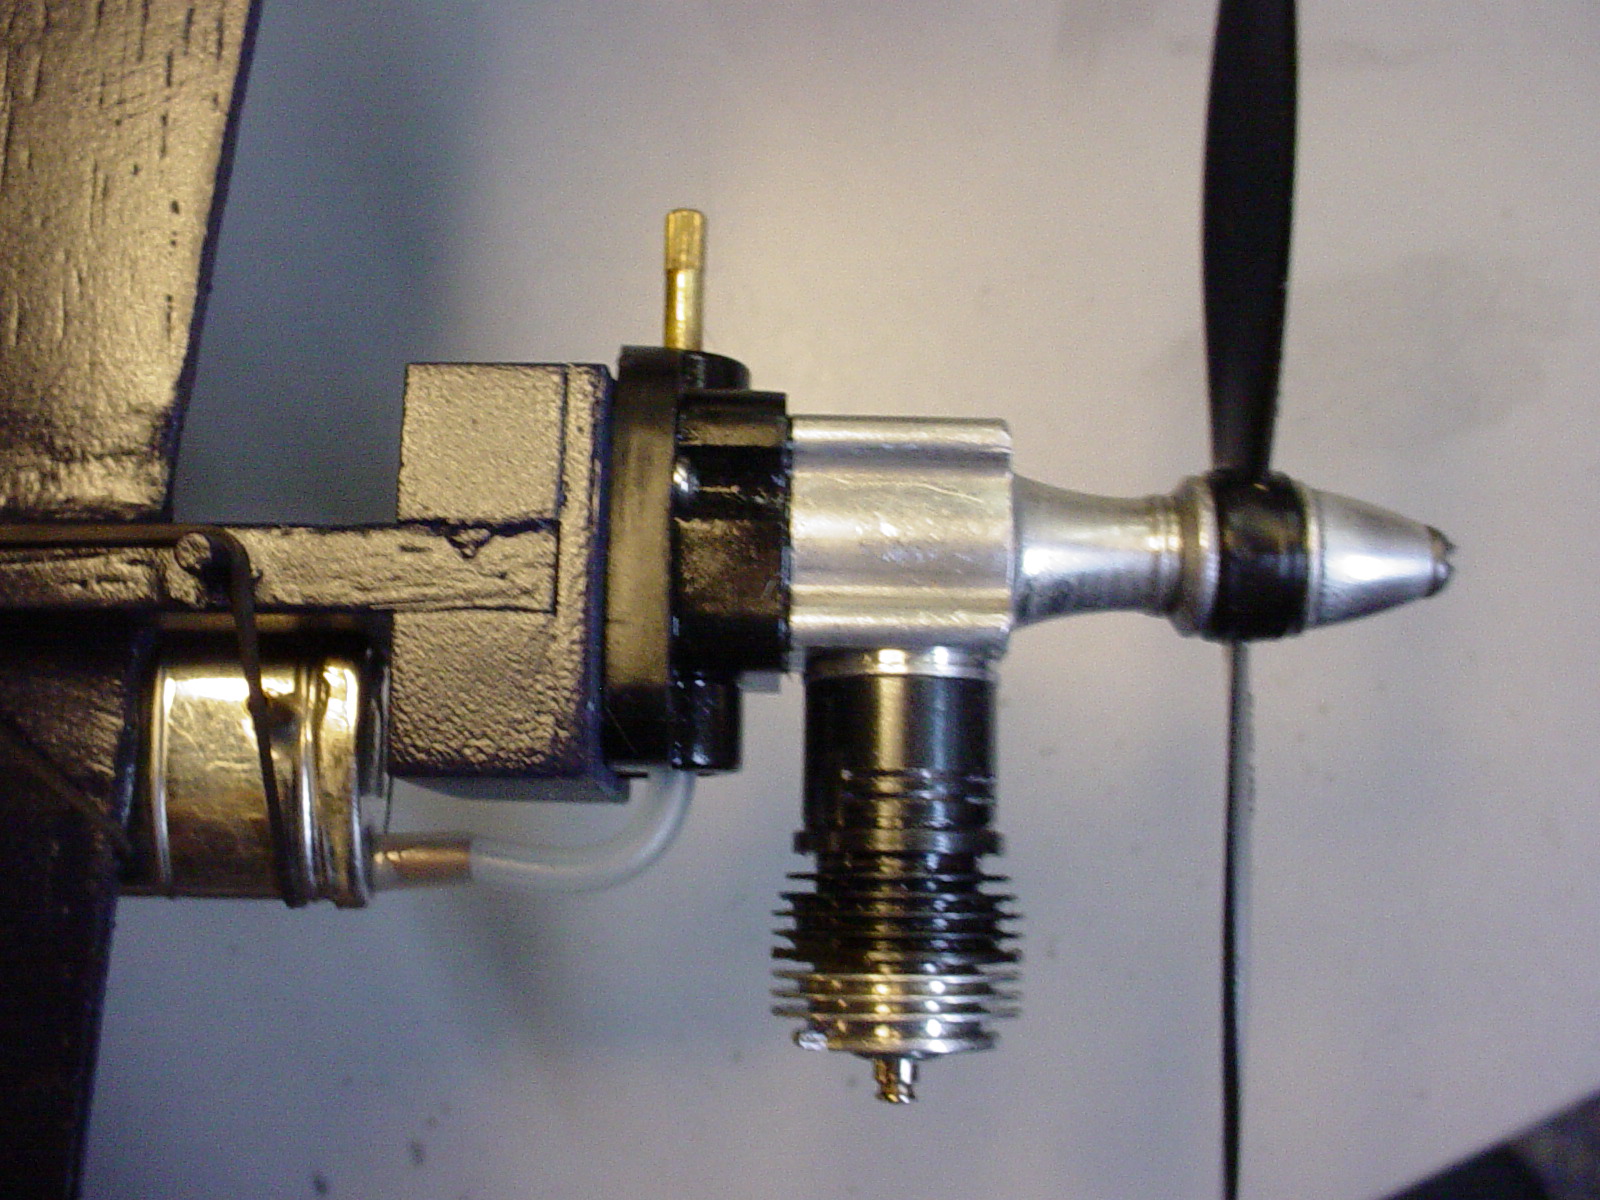
Lead-out guides are next on the agenda..
The P-38 had been put on the back-burner.. but I have managed to "chip-away" at some of the lingering details over the last few days.
The O/B wingtip-weight was reworked a few days ago.. so now I've been focusing on my landing-gear/wheel design. It's a very lightweight/streamlined set-up that I'd been wanting to "complete" and install.. to see if it seems "rugged-enough" to sustain the snags of grass-landings. R.O.G. launches will need to be from a relatively smooth surface.
I "dipped" my wheels in the oil-based Rust-Oleum flat-black paint.. and made a fixture for them to dry.

After 24hrs. drying-time.. I needed to fit alloy tube hub-bushings to reduce-down from a 1/8" hub-hole; for a 1/16" music-wire axle.
The photo below, shows the wheels (with rubber O-ring tires installed) with their hubs bushed.. and fitted to the pre-made 1/16" music-wire struts/axles. All use the "Goldberg-style" spring-retainers for lightweight, reliability.. and simplicity.

Mounting the struts to the models' gear-blocks is quick and easy. I'd made previsions for this early-on in the construction. I use the Dubro #158 "steel" landing-gear straps exclusively on my profile 1/2A C/L models.

and I also exclusively use Dubro #107 1/2A control-horns on my profile 1/2A C/L models.

I've found these items to be staples for building my 1/2A C/L airplanes over the last 30 years. I can't say that about too many other hardware items.
Anyway (blah blah blah..) I decided to install the landing-gear, engines and fuel tanks.. to see how the model "balanced" and its weight.
Here's some photos..

Ten and a half ounces.. not too bad. The 1/16" M/W pushrod is not installed.. but can be seen on the scale.. underneath the O/B engine.


Lead-out guides are next on the agenda..
 Re: P-38 Lightning-Roddie style..
She looks sweet, as well, it looks like it will 'fly right off the board'!

NEW222- Top Poster

- Posts : 3896
Join date : 2011-08-13
Age : 46
Location : oakbank, mb
Page 7 of 9 •  1, 2, 3, 4, 5, 6, 7, 8, 9
 Similar topics
» Wen Mac P-38's
» Red Wen Mac P-38 Lightning
» 1:64 scale Diecast (Hot Wheels)
» The P-38 Lightning Wow factor
» Baby Lightning Streak
» Red Wen Mac P-38 Lightning
» 1:64 scale Diecast (Hot Wheels)
» The P-38 Lightning Wow factor
» Baby Lightning Streak
Page 7 of 9
Permissions in this forum:
You cannot reply to topics in this forum

 Rules
Rules


