Log in
Search
Latest topics
» Tee Dee .020 combat modelby roddie Today at 1:34 pm
» Chocolate chip cookie dough.........
by roddie Today at 1:13 pm
» Purchased the last of any bult engines from Ken Enya
by sosam117 Today at 11:32 am
» Free Flight Radio Assist
by rdw777 Today at 9:24 am
» My latest doodle...
by batjac Yesterday at 9:47 pm
» My N-1R build log
by roddie Yesterday at 8:50 pm
» Funny what you find when you go looking
by rsv1cox Wed Nov 20, 2024 3:21 pm
» Landing-gear tips
by 1975 control line guy Wed Nov 20, 2024 8:17 am
» Cox NaBOO - Just in time for Halloween
by rsv1cox Tue Nov 19, 2024 6:35 pm
» Canada Post strike - We are still shipping :)
by Cox International Tue Nov 19, 2024 12:01 pm
» Duende V model from RC Model magazine 1983.
by getback Tue Nov 19, 2024 6:08 am
» My current avatar photo
by roddie Mon Nov 18, 2024 9:05 pm
Cox Engine of The Month
Prod. engine bench-mount plan
Page 1 of 1
 Prod. engine bench-mount plan
I drew this up earlier this afternoon.. The idea is to mimic Cox's retention system of the horseshoe backplate into a quick-mount design for bench running. The base could either be held in a vise.. and/or holes could be drilled for mounting to a post.
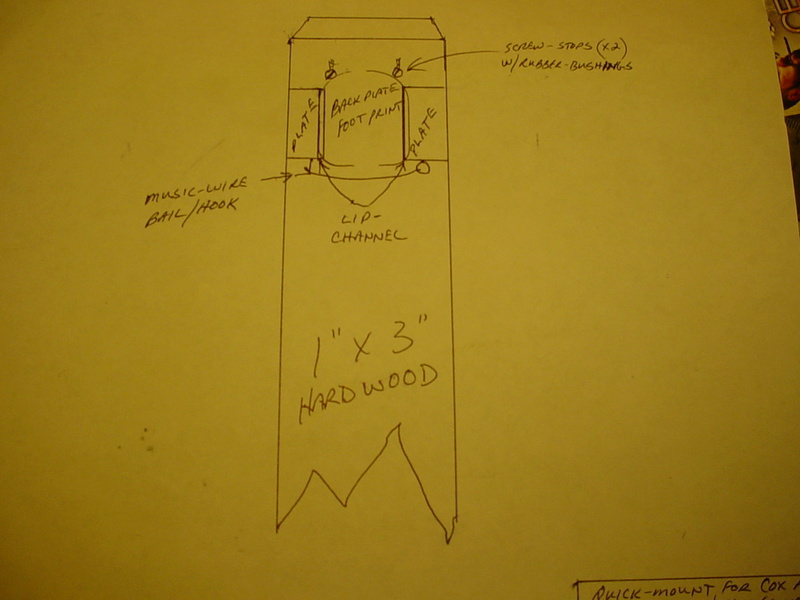
It was difficult to draw/emphasize the two vertical guide-channels.. but that mentioned; you should be able to visualize the backplate sliding up into the fixture from the bottom. The top of the mount uses two padded stand-offs, which straddle the NVA and establish a stop. The bottom of the mount incorporates a padded bail-strap made from .062" music-wire/sm. silicone tubing. This bail secures the engine with spring-pressure by bearing across the bottom of the backplate/case. One side of the bail has a loop for attaching to the base with a stand-off/screw.. and the other end is latched up over a hook on the other side. When unlatched, the bail swings down out of the way.
The guide-channels need to be made and secured using a backplate as a template. 3/16" thickness is required of the guides.. to allow the guide-plates to fit over the backplate-flange, which is approx. .180" thick.
I'd thought about something like this for when Ron was running the tach-race.. but there wasn't much time.. and I hadn't even drawn anything out. It would still need to be proven.. but would be a lot more convenient than messing with 4 tiny screws.
 Re: Prod. engine bench-mount plan
I like the idea. The big thing would be that the engine back plate slide SNUGGLY into the retaining plates so that vibration is not an issue. You need a friend with a machine shop to machine a nice mount out of aluminum or acetal. Properly executed, I think this is a great idea.

rainyday101- Bronze Member

- Posts : 35
Join date : 2017-04-30
Location : Peshtigo, Wisconsin
 Re: Prod. engine bench-mount plan
rainyday101 wrote:I like the idea. The big thing would be that the engine back plate slide SNUGGLY into the retaining plates so that vibration is not an issue. You need a friend with a machine shop to machine a nice mount out of aluminum or acetal. Properly executed, I think this is a great idea.
Thanks! I already found the correct combination-thickness of material to make snug-fitting guides for a prototype. I might try putting something together tomorrow.
 Re: Prod. engine bench-mount plan
Post pics if you do. I am thinking about building some Killer Bees and that mount would work great for these.

rainyday101- Bronze Member

- Posts : 35
Join date : 2017-04-30
Location : Peshtigo, Wisconsin
 Re: Prod. engine bench-mount plan
rainyday101 wrote:Post pics if you do. I am thinking about building some Killer Bees and that mount would work great for these.
Yes it should.. It was tough falling asleep last night because I was thinking about the construction.. The latch-wire will bear across the bottom/rear of the case. The fuel-connection prevents latching any further back. I'm still planning/counting-on the latch to work.. and have done a lot of thinking there. That element will make or break this prototype. It has to be safe/secure, functional, easy to use and unobtrusive.
Last edited by roddie on Thu May 25, 2017 10:00 pm; edited 1 time in total (Reason for editing : grammar typo)
 Re: Prod. engine bench-mount plan
I gathered some things.. The base is overkill red-oak.. 3/4" x 3" x 12".. so I will need to drill pilot-holes for any wood screws/screw-hooks used.
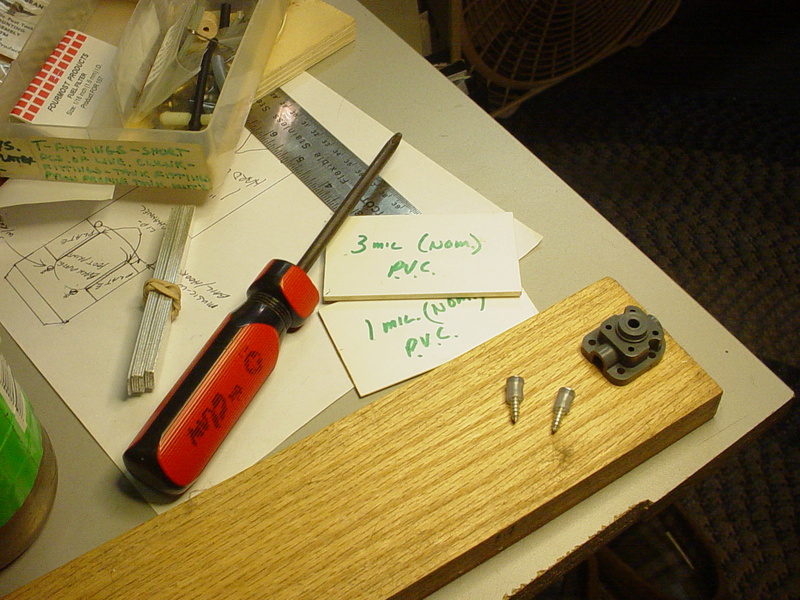
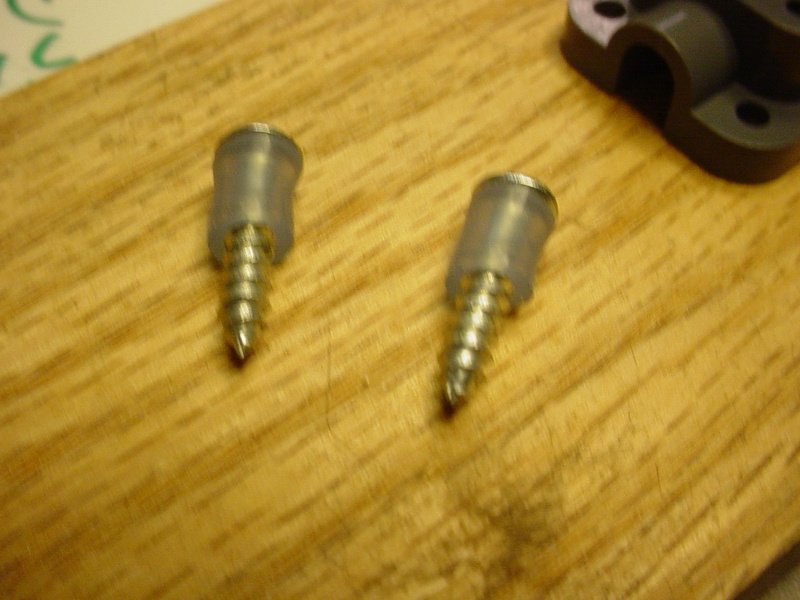
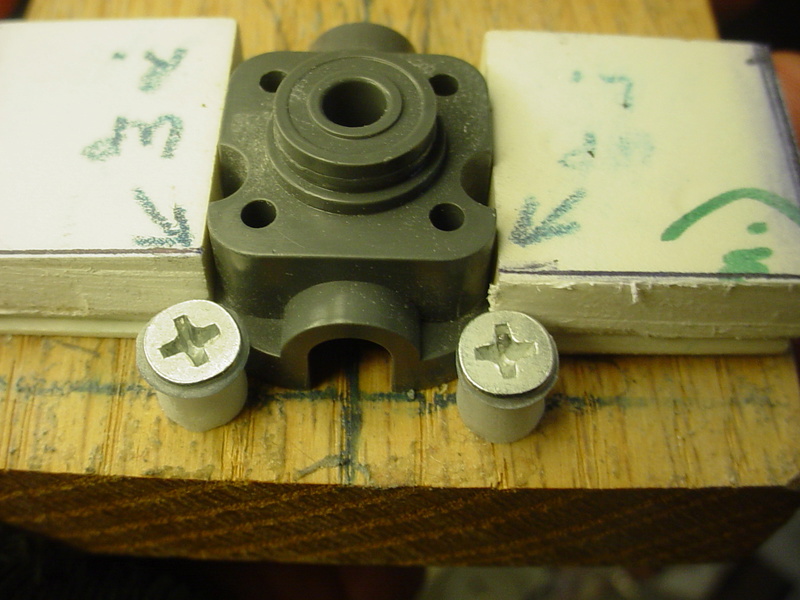
The two wood-screws with the silicone-tubing over them, are stop-bumpers for the top radius of the backplate.. and spaced approx. 5/8" apart and on-center. They will also be the uppermost part of the mount.. so they'll be located approx. 1/4" below the top of the base.. to assure easy access with the short-style needle.
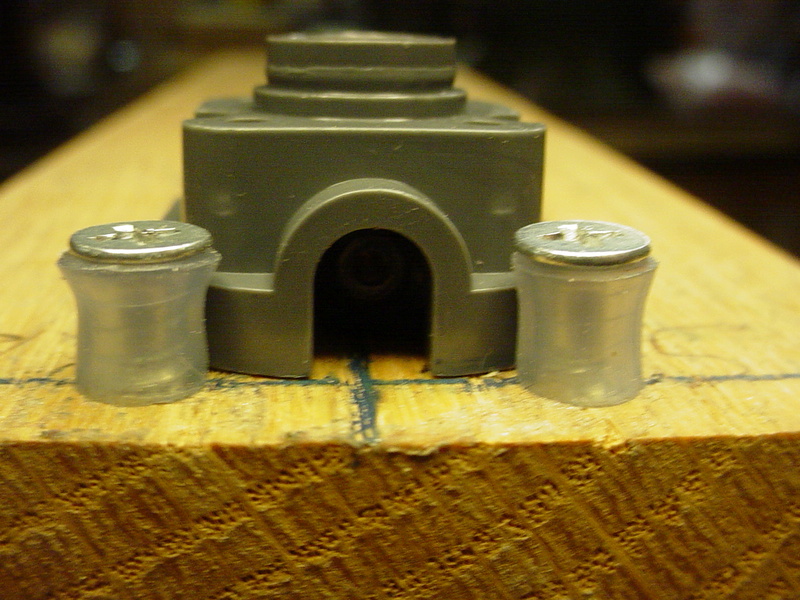
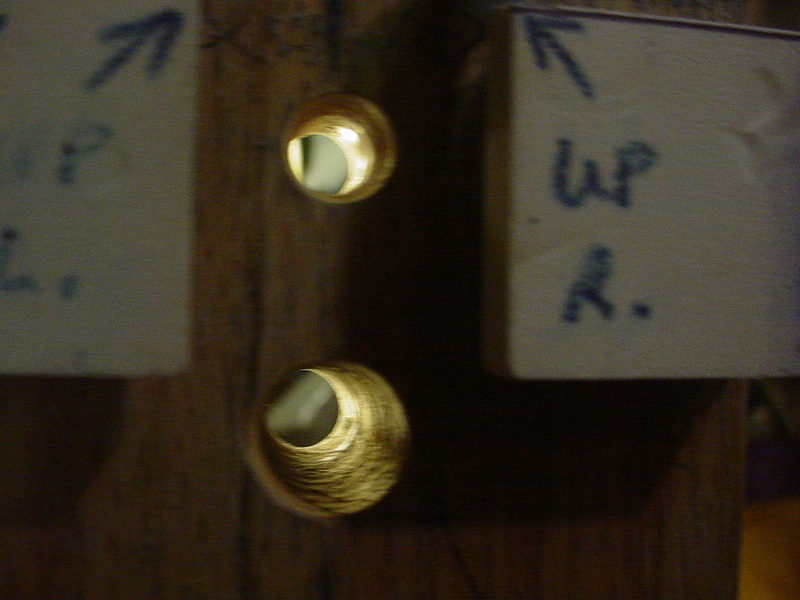
Other TIP (thoughts in-process.. ) are the drilling of two 3/8" holes on-center through the base. One directly behind the air-intake.. and the other at a point below the backplate for a fuel-line to pass-through. Maybe mount a small shelf to the back of the base via a corner-brace for mounting a tank.

The two wood-screws with the silicone-tubing over them, are stop-bumpers for the top radius of the backplate.. and spaced approx. 5/8" apart and on-center. They will also be the uppermost part of the mount.. so they'll be located approx. 1/4" below the top of the base.. to assure easy access with the short-style needle.

Other TIP (thoughts in-process..
 Re: Prod. engine bench-mount plan
Coming along pretty well so far.


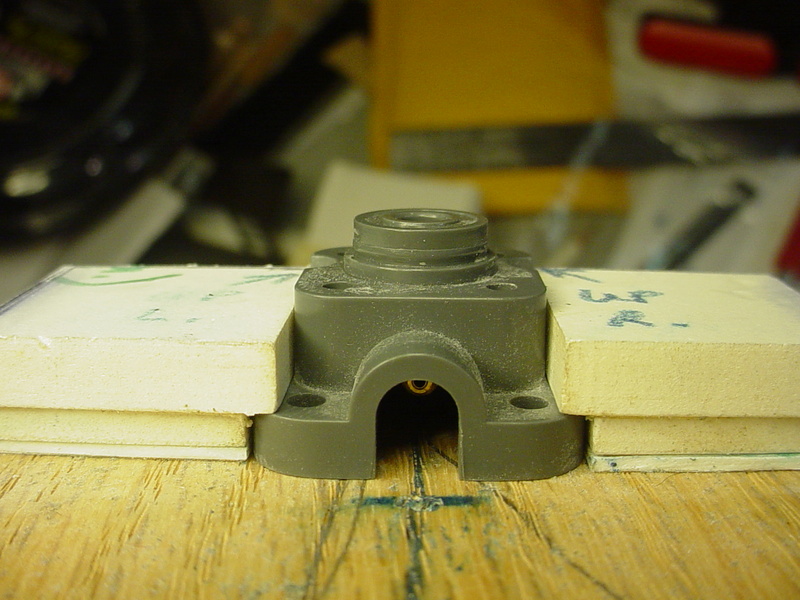
Two-sided film-tape was used for preliminary tacking the guide/plate pieces (PVC) to the base, using an actual backplate for alignment.
Here are the holes in the base for air-intake and fuel-line management.
I need to secure the PVC guide pieces with sheet-metal screws/flat-washers. Once they're solid I can proceed with the latch. The latch will be tough.. because the bail pretty much needs to sit flush across the guide-plates.. I have some ideas.. including forming the bail with a right-angle "handle" to aid in tensioning-it up and over a hook on the left-side. A loop in the music-wire with a screw-post will permanently-hinge the right-side.
Stay tuned..


Two-sided film-tape was used for preliminary tacking the guide/plate pieces (PVC) to the base, using an actual backplate for alignment.


Here are the holes in the base for air-intake and fuel-line management.

I need to secure the PVC guide pieces with sheet-metal screws/flat-washers. Once they're solid I can proceed with the latch. The latch will be tough.. because the bail pretty much needs to sit flush across the guide-plates.. I have some ideas.. including forming the bail with a right-angle "handle" to aid in tensioning-it up and over a hook on the left-side. A loop in the music-wire with a screw-post will permanently-hinge the right-side.
Stay tuned..
Last edited by roddie on Thu May 25, 2017 10:06 pm; edited 1 time in total (Reason for editing : changed screw-type)
 Done
Done
Done.. a little rough.. but I'm pretty satisfied with the prototype. All of scrap materials I had on-hand.
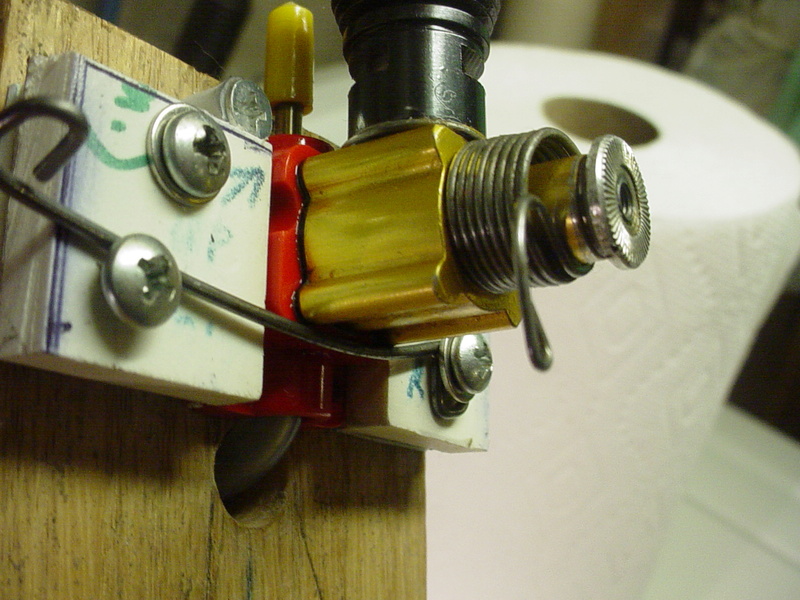
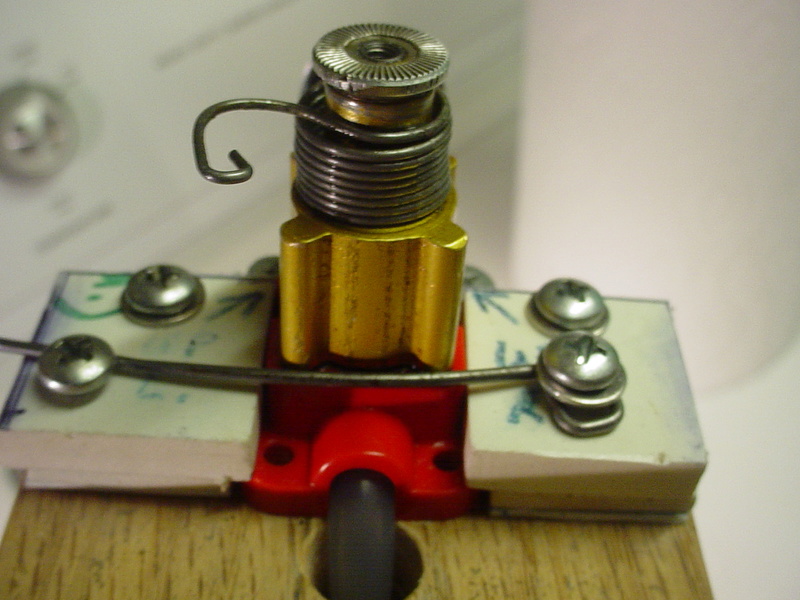
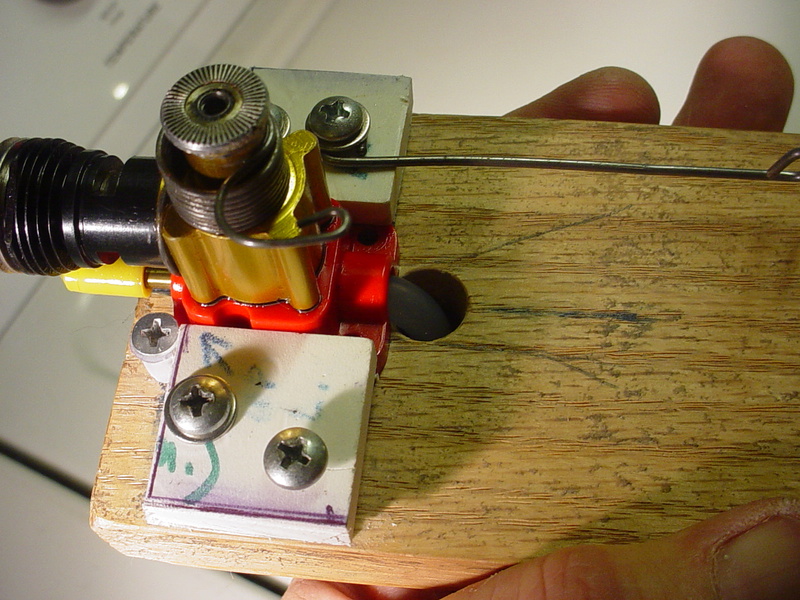


I forgot to put a silicone tubing cushion over the bail-wire.. but it already had short L-bends on both ends.. and was a good length without having to cut it. I used Harry's Z-bender and locking-pliers to make the loops. It really should have the cushion/padding to prevent marking/marring the case.
Next will be a tank-shelf/mount on the back.
 Re: Prod. engine bench-mount plan
It took literally 10 seconds to swap these two engines..

But there is an issue with running a horizontally opposed cylinder..

That's not acceptable to me. The cylinder clears the retaining-plates but the latch-screw is too high. The fix would be in using thinner 1/8"retaining-plates in the guide-assy.'s and using metal to make them.. rather than PVC plastic. I used 6mm (.236") thickness PVC for its rigidity.. but cylinder-heat and a direct-facing exhaust-port would melt plastic. The bail and latching-screw might still work as designed.. because all of the screw-heads will sit lower with thinner retaining-plates.

But there is an issue with running a horizontally opposed cylinder..

That's not acceptable to me. The cylinder clears the retaining-plates but the latch-screw is too high. The fix would be in using thinner 1/8"retaining-plates in the guide-assy.'s and using metal to make them.. rather than PVC plastic. I used 6mm (.236") thickness PVC for its rigidity.. but cylinder-heat and a direct-facing exhaust-port would melt plastic. The bail and latching-screw might still work as designed.. because all of the screw-heads will sit lower with thinner retaining-plates.
 Re: Prod. engine bench-mount plan
I like the idea very much. The prototype looks great.

NEW222- Top Poster

- Posts : 3896
Join date : 2011-08-13
Age : 46
Location : oakbank, mb
 Re: Prod. engine bench-mount plan
NEW222 wrote:I like the idea very much. The prototype looks great.
Thank You Chancey! I'm thinking now about having some one-piece aluminum guide-sets machined from 1/4" x 1" bar-stock. A 12"L bar with a single endmill cut to form the .180" x .110" channel. It's a 5 minute operation on a Bridgeport machine.. unless I have holes drilled and countersunk. The bar would be flipped-over 180 degrees for those added operations. Someone who's proficient with a "Proto-Trac" controller can program the cuts in minutes.
The guides should be a bit longer, to each accommodate two countersunk mounting screws.. and the raised-screw for the latch mechanism. I figure 1.5" guide-length makes room for top and bottom countersunk mounting-holes.. with a non-countersunk bore in between for the raised (round-head) latch-screw.
The oak base I would definitely keep, because of having to install the top "bumper"screws so close to the edge. Softer woods run the risk of splitting. Drilling pilot-holes for the wood-screws is no big deal.. but has to be done.
I will make at least one more of these.. because it irks me that I rushed it.. and didn't put the soft-tube sleeve on the bail.
 Re: Prod. engine bench-mount plan
Since using PVC plastic, could you not countersink the screws and use flathead screws. Just a thought and idea that came to mind.

NEW222- Top Poster

- Posts : 3896
Join date : 2011-08-13
Age : 46
Location : oakbank, mb
 Re: Prod. engine bench-mount plan
NEW222 wrote:Since using PVC plastic, could you not countersink the screws and use flathead screws. Just a thought and idea that came to mind.
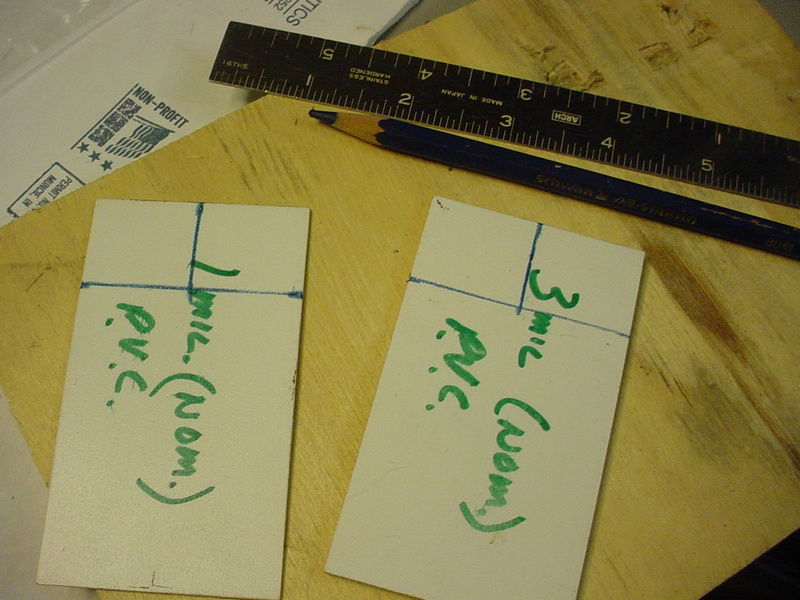
Yes I could do that Chancey, but the top-plates need to be made from a thinner material. It's the part that actually covers the backplate on each side. I chose the 6mm stock for strength. The 3mm stock is .118" and I didn't think it was strong enough. It's not a real rigid plastic like polycarbonate.. but there's only a .110" (2.8mm) retention-lip involved.. (the distance between the side-edge of the backplate and the reed-housing). There's not much bearing-area to cause flexing.. so the 3mm stock might be fine.
It would also be easier to cut. The pieces are small.. and I'm cautious with using powered saws to cut smalls. The thinner material cuts easily with a knife.. not that it's safer, but I feel like I have more control. A few scoring-strokes with a steel straight-edge as a guide works well. The 6mm I held in a vise cut with a razor-saw.. and it was tough to get a clean straight/square cut. I was also being hasty.. on a "high" to get it built and somewhat proven. There still remains the engine-run test to check for vibration.
I also used double-sided film-tape to stick (tack) the layers together and on the bottom plate to stick-it to the oak base-board. This helped to get a snug fit against the sides of the backplate.. and the top-plate snug against the reed-housing. Then I was able to drill the screw-holes and install the screws without any of the layers shifting. The tape does account for .003"/layer. I used 3 layers in the assembly of the 3 plates which added approx. .010" (.25mm) to the overall thickness.. or "height" when measured off the baseboard surface.
I like to write about the stuff I build. Maybe it's my OCD nature. I'm not too worried about it right now though. If I ever decide to build a Cox engine-powered generator.. it could be a problem..
 Re: Prod. engine bench-mount plan
Roddie.... your last about OCD was what I first thought when you initially posted your neat idea......grin
BTW you still owe me ( and others) a re-run of the Cox type field box kits....
relax brother jest busting your chops a bit
BTW you still owe me ( and others) a re-run of the Cox type field box kits....
relax brother jest busting your chops a bit

fredvon4- Top Poster


Posts : 4012
Join date : 2011-08-26
Age : 69
Location : Lampasas Texas
 Re: Prod. engine bench-mount plan
fredvon4 wrote:Roddie.... your last about OCD was what I first thought when you initially posted your neat idea......grin
BTW you still owe me ( and others) a re-run of the Cox type field box kits....
relax brother jest busting your chops a bit
 my bad.. did I do a thread on Cox type field box kits?
  No.. I don't think I did. I love you guys! Would you like me to do a thread on Cox type field box kits?
  Re: Prod. engine bench-mount plan
Roddie I think there already is one and I think several of us wanted one...but at the time your life got complicated
and seriously brother that is totally understandable...
BTW I still have and fly the snot out of my Roddie RM bi-plane
and seriously brother that is totally understandable...
BTW I still have and fly the snot out of my Roddie RM bi-plane

fredvon4- Top Poster


Posts : 4012
Join date : 2011-08-26
Age : 69
Location : Lampasas Texas
 Re: Prod. engine bench-mount plan
did I do a thread on Cox type field box kits?  Hey.. I'm on vacation this week and taking advantage of it. It's being partially fueled by Sam Adams Summer Ale.. a lemon-wheat ale.. 5.3% alcohol and states it's brewed with lemon-peel and grains of paradise.
 Re: Prod. engine bench-mount plan
fredvon4 wrote:Roddie I think there already is one and I think several of us wanted one...but at the time your life got complicated
and seriously brother that is totally understandable...
BTW I still have and fly the snot out of my Roddie RM bi-plane
Phred.... your messing with me..
 Re: Prod. engine bench-mount plan
OK wake the hell up Fred
Yes sir, I had a senior moment
In my defense both of you Rogers are very experimental and prolific with posting your different projects
OK sorry brother
Back to your excellent thread on this latest project
Yes sir, I had a senior moment
In my defense both of you Rogers are very experimental and prolific with posting your different projects
OK sorry brother
Back to your excellent thread on this latest project

fredvon4- Top Poster


Posts : 4012
Join date : 2011-08-26
Age : 69
Location : Lampasas Texas
 Re: Prod. engine bench-mount plan
It's ok Phred. I see myself having those moments more and more these days. It concerns me some.. but I've been thinking way outside the box, most of my life. This last post even gives me an idea for a model airplane having an exceptionally long tail.. and name it..
wait for it.......
"Senior Moment"
Thanks also Phred, for the excellent thread comment. I often wonder what people think, about the stuff I come up with. This particular item I saw an immediate use for. I recently purchased 6 Cox horseshoe backplate assemblies.. needles, reeds, screws.. with the intention of rebuilding 6 engines to test. My ARF airplanes mostly use that backplate. These are the new-to-me Sure-Start type. I hope that their quality is consistent. I'd wanted more of the horseshoe backplates for a while. My old original Cox-black ones with circlip retainer were diminishing. I'd bought a few of those direct from Cox in the early 90's and disassembled some Babe Bee's to reconfigure with external wedge tanks. I have that same option now.. except I've learned a lot more about cylinder ID and porting differences, than I knew then. Thanks to CEF for that!
I'll enjoy this project in many ways. There isn't always a means to an end with my approach to modeling. With this mount, I can slide an engine in.. and lock the bail-strap in two seconds. No tiny #3 screws/nuts to fuss with, drop/lose or strip-out.. The engine fits tightly. I doubt that vibration will be an issue. The two rubber-insulated bumper-posts at the top, consist of flat-head screws, installed with their heads slightly higher than the flange on the backplate. Locking the bail-wire compresses the rubber and the under-head-angle of the screws pushes the backplate inward against the base. The bail-wire applies upward and inward pressure when locked. There's about 3/8" of travel between the point where the bail-wire starts to flex.. to where it locks on its screw-post. The function-length of the .062" bail-wire is 2" being that its mount and latch screws are this distance apart. I located them either side and on-center with the bottom of the engine case. This provided for low-effort.. yet good clamping force.
wait for it.......
"Senior Moment"

Thanks also Phred, for the excellent thread comment. I often wonder what people think, about the stuff I come up with. This particular item I saw an immediate use for. I recently purchased 6 Cox horseshoe backplate assemblies.. needles, reeds, screws.. with the intention of rebuilding 6 engines to test. My ARF airplanes mostly use that backplate. These are the new-to-me Sure-Start type. I hope that their quality is consistent. I'd wanted more of the horseshoe backplates for a while. My old original Cox-black ones with circlip retainer were diminishing. I'd bought a few of those direct from Cox in the early 90's and disassembled some Babe Bee's to reconfigure with external wedge tanks. I have that same option now.. except I've learned a lot more about cylinder ID and porting differences, than I knew then. Thanks to CEF for that!
I'll enjoy this project in many ways. There isn't always a means to an end with my approach to modeling. With this mount, I can slide an engine in.. and lock the bail-strap in two seconds. No tiny #3 screws/nuts to fuss with, drop/lose or strip-out..
 Re: Prod. engine bench-mount plan
Hey Phred, I messaged Roger Harris on Facebook.. I hope he replies. His laser-cut ringmaster-bipe kits that he supplied a few of us with were the "nads".
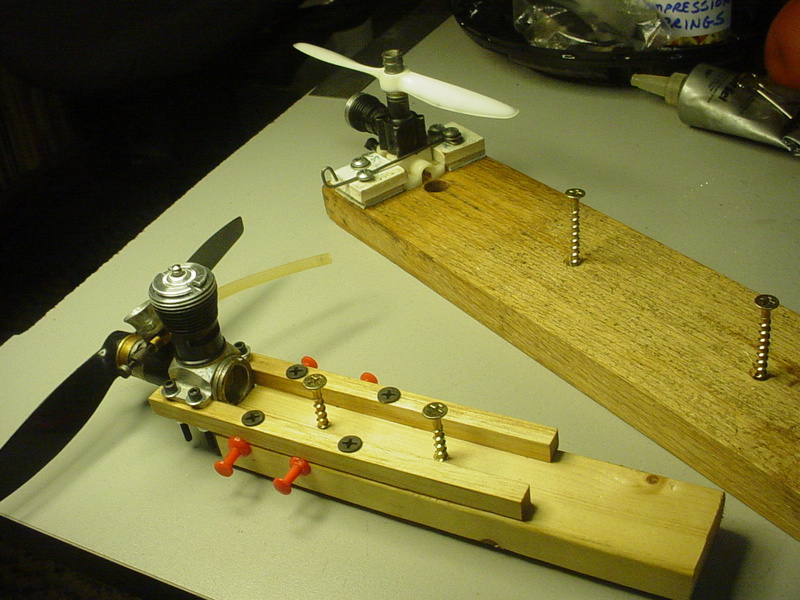
Regarding this topic.. I have one of Bob's (rsv1cox) reed-valve .049's equipped with a horseshoe-backplate locked and loaded for a bench-run tomorrow.. along with my Tee Dee .09. I enjoy building bench-mounts almost as much as I do airplanes!
Regarding this topic.. I have one of Bob's (rsv1cox) reed-valve .049's equipped with a horseshoe-backplate locked and loaded for a bench-run tomorrow.. along with my Tee Dee .09. I enjoy building bench-mounts almost as much as I do airplanes!

 Re: Prod. engine bench-mount plan
I have been having a lot of success with those older product backplate engines. These would be the stepped wall cylinder versions. I have tried to get our club members to do a 1/2A stunt day by flying the pattern. I managed to do it recently with very distinguished shapes and smoothness. Over the years these things tend to accumulate and they needed a home, Brodak offers a mount with this hole pattern and also for integral style Bee's. Swapping the engine out was a simple task but getting the tank on some of these wasn't so easy. Some required a new fuse which wasn't all that difficult just not something I really wanted to do. The Brodak mount is offered in 2 styles of plastic, one is beige and the other is more like a translucent white. I prefer the white because it's much more flexible. I did what you did by trying several different engines and selected what was the best runner in terms of ease of starting and rpm's.

Ken Cook- Top Poster

- Posts : 5637
Join date : 2012-03-27
Location : pennsylvania
 Re: Prod. engine bench-mount plan
Ken Cook wrote: I have been having a lot of success with those older product backplate engines. These would be the stepped wall cylinder versions. I have tried to get our club members to do a 1/2A stunt day by flying the pattern. I managed to do it recently with very distinguished shapes and smoothness. Over the years these things tend to accumulate and they needed a home, Brodak offers a mount with this hole pattern and also for integral style Bee's. Swapping the engine out was a simple task but getting the tank on some of these wasn't so easy. Some required a new fuse which wasn't all that difficult just not something I really wanted to do. The Brodak mount is offered in 2 styles of plastic, one is beige and the other is more like a translucent white. I prefer the white because it's much more flexible. I did what you did by trying several different engines and selected what was the best runner in terms of ease of starting and rpm's.
Hi Ken, It's good to know that you're having success with the reed-valve engines. Will you give us some details on the model you flew the pattern with, its weight.. and any other details that you care to add?
I took a look at Brodak's site and saw a mount like the one you mentioned. It didn't show the screw-hole orientations for the engine.. but I assume that the hole-pattern for running the horseshoe (product) backplate orients the needle facing "up".
My C/L models' firewalls are all drilled for orienting the product backplate with needle facing inner-circle for a short/horizontal run of the fuel line from the tank to the spray-bar nipple on the models' outboard-side. Naturally I'm talking "profile-style" construction.
 Re: Prod. engine bench-mount plan
I have 3 models, one being the Brodak Baby Clown. It has a decent wing on it. These have now changed and they're offered in a beam mount configuration. Mine is pretty old. The other is the Dumas Lil Tomahawk. I cut out a rib bay to install the tank. The other is one a Top Flite Mustang. This is a very neat model. They're not very common. I just completed a model called the Lil Monster. This is a late 50's design with a wing darn near identical to the Clown. The Baby Clown is also a old design in or around that era which was kitted by PDQ. I may still have the part number for the Brodak mount, I probably purchased them about 10 years ago. The needle valve is orientated up. I don't have an issue with that. The Mustang though is using a Sure Start which by the way runs off the hook. I have one more model which is the Brodak Baby Lightning Streak ( Essentially a Flite Streak ) which flies extremely well. I would highly recommend that kit to any 1/2A enthusiast. Reason being is it's still built with old school framework. Solid leading and trailing edge and dado slots for the ribs. A no brainer and very easy to assemble. My tank is too small on the Lightning Streak and real estate is tight. I was going to graft a smaller tank onto the side and make a chicken hopper out of it. I can do the pattern but no laps in between maneuvers which is not correct.

Ken Cook- Top Poster

- Posts : 5637
Join date : 2012-03-27
Location : pennsylvania
 Re: Prod. engine bench-mount plan
Ken Cook wrote: I have 3 models, one being the Brodak Baby Clown. It has a decent wing on it. These have now changed and they're offered in a beam mount configuration. Mine is pretty old. The other is the Dumas Lil Tomahawk. I cut out a rib bay to install the tank. The other is one a Top Flite Mustang. This is a very neat model. They're not very common. I just completed a model called the Lil Monster. This is a late 50's design with a wing darn near identical to the Clown. The Baby Clown is also a old design in or around that era which was kitted by PDQ. I may still have the part number for the Brodak mount, I probably purchased them about 10 years ago. The needle valve is orientated up. I don't have an issue with that. The Mustang though is using a Sure Start which by the way runs off the hook. I have one more model which is the Brodak Baby Lightning Streak ( Essentially a Flite Streak ) which flies extremely well. I would highly recommend that kit to any 1/2A enthusiast. Reason being is it's still built with old school framework. Solid leading and trailing edge and dado slots for the ribs. A no brainer and very easy to assemble. My tank is too small on the Lightning Streak and real estate is tight. I was going to graft a smaller tank onto the side and make a chicken hopper out of it. I can do the pattern but no laps in between maneuvers which is not correct.
I've yet to fly a model having a built-up wing. I started building that foamie (1/2-scale Voo Doo) just so I could find out how it feels to fly one. I will finish that model.
 Similar topics
» Queen Bee on diesel
» Fuel-line attach to Cox prod. backplate
» Best way to lower the ports on an .049 cylinder.
» Bad Boy ! "The Plan"
» SIG Akromaster CL20 instruction book
» Fuel-line attach to Cox prod. backplate
» Best way to lower the ports on an .049 cylinder.
» Bad Boy ! "The Plan"
» SIG Akromaster CL20 instruction book
Page 1 of 1
Permissions in this forum:
You cannot reply to topics in this forum

 Rules
Rules


