Log in
Search
Latest topics
» Tee Dee .020 combat modelby 1/2A Nut Today at 2:43 pm
» Chocolate chip cookie dough.........
by roddie Today at 1:13 pm
» Purchased the last of any bult engines from Ken Enya
by sosam117 Today at 11:32 am
» Free Flight Radio Assist
by rdw777 Today at 9:24 am
» My latest doodle...
by batjac Yesterday at 9:47 pm
» My N-1R build log
by roddie Yesterday at 8:50 pm
» Funny what you find when you go looking
by rsv1cox Wed Nov 20, 2024 3:21 pm
» Landing-gear tips
by 1975 control line guy Wed Nov 20, 2024 8:17 am
» Cox NaBOO - Just in time for Halloween
by rsv1cox Tue Nov 19, 2024 6:35 pm
» Canada Post strike - We are still shipping :)
by Cox International Tue Nov 19, 2024 12:01 pm
» Duende V model from RC Model magazine 1983.
by getback Tue Nov 19, 2024 6:08 am
» My current avatar photo
by roddie Mon Nov 18, 2024 9:05 pm
Cox Engine of The Month
Test stand fuel tank experiment
Page 1 of 1
 Test stand fuel tank experiment
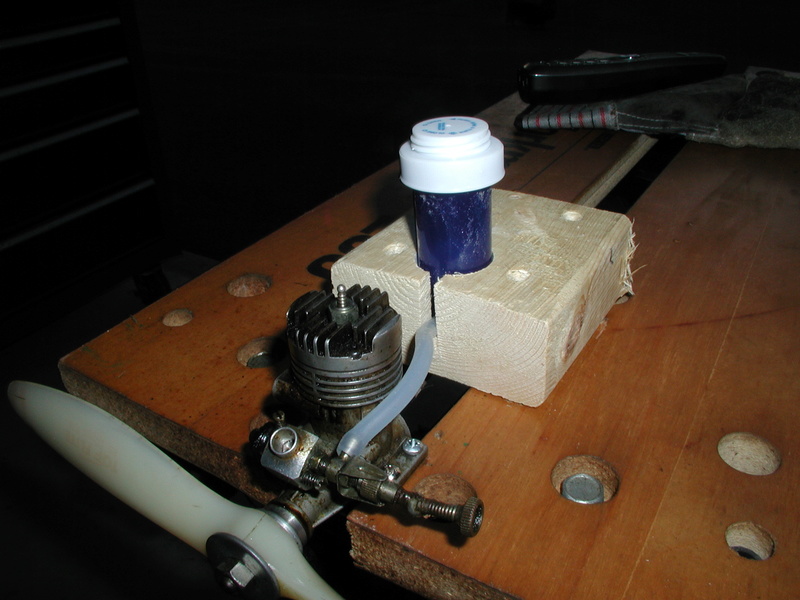
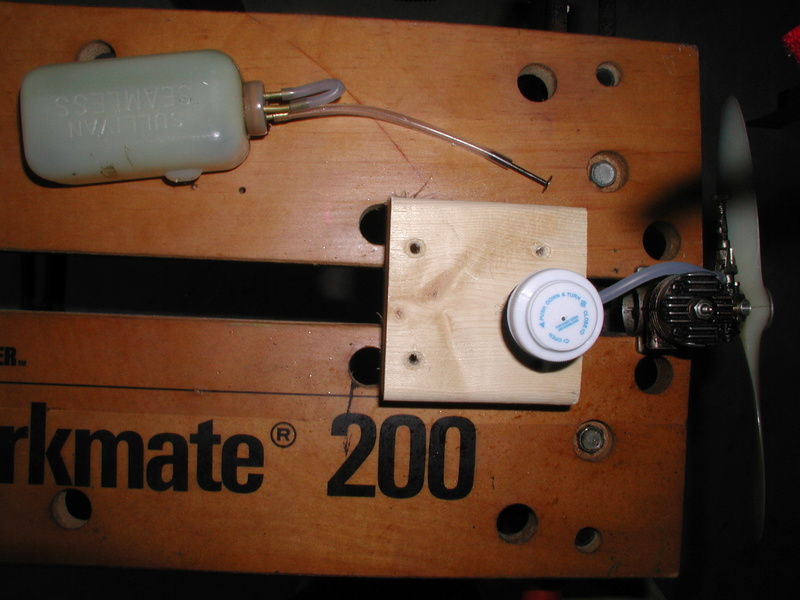
Tired of fighting the existing fuel tank on my test stand I came up with this:

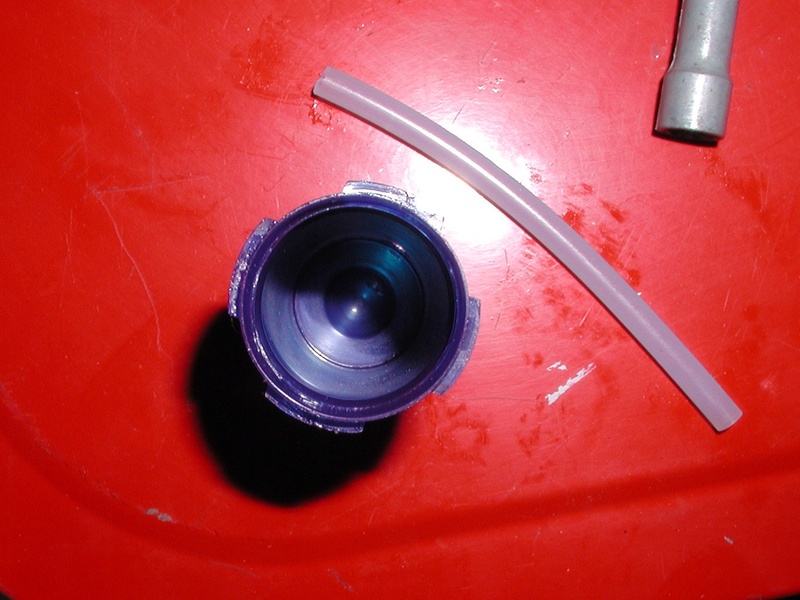
One continuous fuel line from tank to engine. Drilled a hole at the bottom of the tank slightly smaller than the silicone tubing resulting in a tight friction fit. Holds one ounce, easily refillable during run if necessary and removable for cleaning.
I just got tired of all the fuss mounting that original tank, then pulling the plug to clean the remaining goo out of it. Spike donated one of his old pill bottles. I could wrap it in thin foam to help with any foaming problems.


rsv1cox- Top Poster


Posts : 11247
Join date : 2014-08-18
Location : West Virginia
 Re: Test stand fuel tank experiment
 I like it and know what your talking about with the tank flopping{ in my case }around You got the WORK HORSE 200 in drive

getback- Top Poster


Posts : 10441
Join date : 2013-01-18
Age : 67
Location : julian , NC
 Re: Test stand fuel tank experiment
I like that Work-Mate approach.. in that it's adjustable to different width cases. Ever thought of cutting two planks to match.. and bolting them to (over) the Work-Mate's pads? You could flip them around, as well as flip them over.. to provide four different beam-mount patterns. It appears that there's holes there already, to use as a guide for drilling/mounting the auxiliary-pads. Just a thought. You could run most all of your beam-mount engines having different fore/aft spacing. Maybe the Enya's are all the same.. in which case.. never mind. 
Good luck with the new tank set-up! It looks like you can adjust the height if needed. The thin foam you mentioned might help to hold the height-setting in the block too.
Good luck with the new tank set-up! It looks like you can adjust the height if needed. The thin foam you mentioned might help to hold the height-setting in the block too.
 Re: Test stand fuel tank experiment
My new best friend

Just fill it right from the bottle. No syringes or bulbs or associated contamination. Remove from holder when finished, remove cover and wipe clean, a little compressed air through the tube doesn't hurt.


Nasty Enya .15 as received. Preheated slightly with a heat gun, 20/20 Traxx? car fuel cut with castor wouldn't run. Lot's of brown stuff coming out of the exhaust. NV from full in to full out and everything in between, throttle set at half. Pumped near a whole tank through it which probably cleaned it out a bit. That fuel has always worked in my other engines.

Added 25% Cox fuel uncut to an almost empty tank and she took right off running great through the TV range. No RPM conclusions can be made however. I will run it again after a crock pot boil. Tach shown taken at about 1/2 throttle.

You read my mind roddie. I had cut new table tops before I destroy the originals leaving out the peg holes.

Ready for the pot. I have loosened the case and head machine screws (warm engine). I like replacing the same screws where they came from head and case. Sometimes I get so picky I ensure the same screws go back in their original holes especially if they are unmolested engines.

Bob

Just fill it right from the bottle. No syringes or bulbs or associated contamination. Remove from holder when finished, remove cover and wipe clean, a little compressed air through the tube doesn't hurt.


Nasty Enya .15 as received. Preheated slightly with a heat gun, 20/20 Traxx? car fuel cut with castor wouldn't run. Lot's of brown stuff coming out of the exhaust. NV from full in to full out and everything in between, throttle set at half. Pumped near a whole tank through it which probably cleaned it out a bit. That fuel has always worked in my other engines.

Added 25% Cox fuel uncut to an almost empty tank and she took right off running great through the TV range. No RPM conclusions can be made however. I will run it again after a crock pot boil. Tach shown taken at about 1/2 throttle.

You read my mind roddie. I had cut new table tops before I destroy the originals leaving out the peg holes.

Ready for the pot. I have loosened the case and head machine screws (warm engine). I like replacing the same screws where they came from head and case. Sometimes I get so picky I ensure the same screws go back in their original holes especially if they are unmolested engines.

Bob

rsv1cox- Top Poster


Posts : 11247
Join date : 2014-08-18
Location : West Virginia
 Re: Test stand fuel tank experiment
It's nice when things work.. and are easy to clean too!  I notice you're using what look like sheet-metal screws to hold the engine down. Try to find four hex-head cap-screws, washers and lock-nuts.. and drill your new table-pads through to accept them. Make sure they're long enough to tighten with the engine in-place. A "ball-end" hex-key can be angled-away from the case to prevent scratching it.. and the hex-key won't slip-off the head either. Hold the lock-nut on the bottom with a small socket-wrench while tightening. It's a much easier and faster way to mount/remove an engine.
The new tabletops for the WorkMate look like MDO/plywood. Are they? If so.. that should hold up better than the existing particle-board ones.. especially if you drill them for machine-screws. The particle-board I can see is swelling from fuel exposure. I wouldn't count on sheet-metal screws to hold down another engine. You can seal the new tabletops and end-grain with poly, to help prevent fuel-soaking.
 I notice you're using what look like sheet-metal screws to hold the engine down. Try to find four hex-head cap-screws, washers and lock-nuts.. and drill your new table-pads through to accept them. Make sure they're long enough to tighten with the engine in-place. A "ball-end" hex-key can be angled-away from the case to prevent scratching it.. and the hex-key won't slip-off the head either. Hold the lock-nut on the bottom with a small socket-wrench while tightening. It's a much easier and faster way to mount/remove an engine.
 The new tabletops for the WorkMate look like MDO/plywood. Are they? If so.. that should hold up better than the existing particle-board ones.. especially if you drill them for machine-screws. The particle-board I can see is swelling from fuel exposure. I wouldn't count on sheet-metal screws to hold down another engine. You can seal the new tabletops and end-grain with poly, to help prevent fuel-soaking.

 Re: Test stand fuel tank experiment
Thank you. That is one great idea, and I too will be stealing your idea and implementing it to my workbench the same as yours.

NEW222- Top Poster

- Posts : 3896
Join date : 2011-08-13
Age : 46
Location : oakbank, mb
 Re: Test stand fuel tank experiment
Me too, maybe a universal clamp mount with a pair of 1/4" or 3/8" thick aluminum clamp bars, just clamping over the crankcase wings with 1/8" bearers under the wings.
With a long clamp bar, you could clamp the smallest to the largest engine in it. Screw it to the workmate with a pair of 6-32 or 8-32 brass inserts epoxied into the workmate.I can't tell you the number of engines I omitted test running because it's a pain. This would solve that lazy problem.
Rusty
With a long clamp bar, you could clamp the smallest to the largest engine in it. Screw it to the workmate with a pair of 6-32 or 8-32 brass inserts epoxied into the workmate.I can't tell you the number of engines I omitted test running because it's a pain. This would solve that lazy problem.
Rusty
_________________
Don't Panic!
...and never Ever think about how good you are at something...
while you're doing it!
My Hot Rock & Blues Playlist
...and never Ever think about how good you are at something...
while you're doing it!
My Hot Rock & Blues Playlist

RknRusty- Rest In Peace

- Posts : 10869
Join date : 2011-08-10
Age : 68
Location : South Carolina, USA
 Re: Test stand fuel tank experiment
Thanks for the comments guys. There is lot's of room for improvement here in both the fuel tank holder and clamp down systems. I just got tired of floppy tanks held down with fuel saturated gooey rubber bands that were difficult to empty and clean after a run. This is just so simple.
Yes, I have to devise a whole new platform system. I'm thinking 1X4's custom cut to house my various engines. Most Enya's have mounting holes different from one another as you might think. Then attaching each to the Work Mate in the same mounting pattern using the first one as a guide. I like using that WM bench as it's portable and I can bring it outside and let the engines rip. Or is that RIP...
Or as Rusty says, I could make an adjustable clamp style universal mount, one size fit's all. On ebay there is a metal stand that I have admired, but I have always thought that I could build a better one.
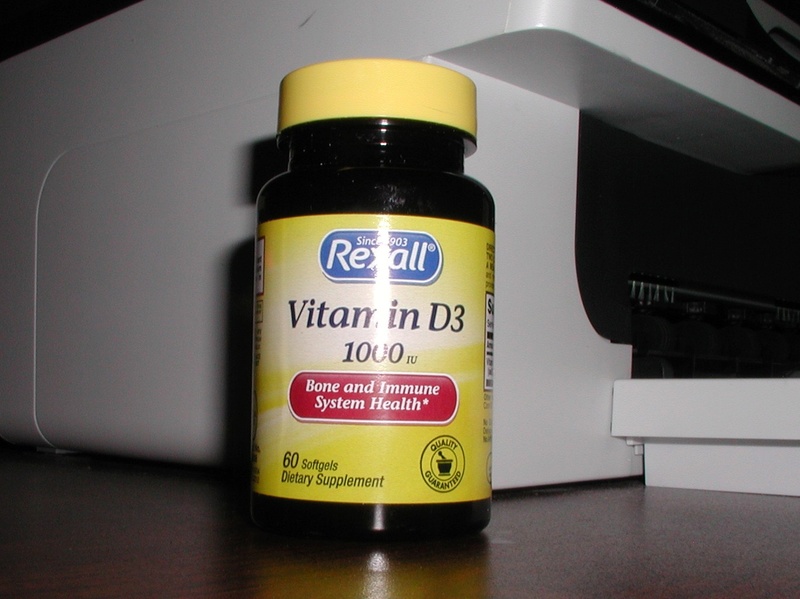
I'm keeping that fuel supply though, easiest system I have ever encountered. I am looking to make another fuel supply module for bigger engines, something that would hold about 2 ounces. Just testing here, not for endurance runs. Maybe this old vitamin bottle would work. It just has to be removable and easy to clean.

I think my spade bit set go's out to I think 2", ought to do it.
I do have ball end hex wrenches by Hobbico both SAE and metric that I have had for years and they do work great on hard to get at places. But I have few hex machine screws in # 2 & 4 sizes. Most of my mounting screws are slots salvaged from other peoples engines.
I'm cooking that .15 Enya even as we speak. Eager to see how/if it runs after a boil. Got all the new parts assembled too. Gasket, prop washer and nut, TV control arm, and a new needle. But will use the old needle to check it first.
Bob
Yes, I have to devise a whole new platform system. I'm thinking 1X4's custom cut to house my various engines. Most Enya's have mounting holes different from one another as you might think. Then attaching each to the Work Mate in the same mounting pattern using the first one as a guide. I like using that WM bench as it's portable and I can bring it outside and let the engines rip. Or is that RIP...
Or as Rusty says, I could make an adjustable clamp style universal mount, one size fit's all. On ebay there is a metal stand that I have admired, but I have always thought that I could build a better one.
I'm keeping that fuel supply though, easiest system I have ever encountered. I am looking to make another fuel supply module for bigger engines, something that would hold about 2 ounces. Just testing here, not for endurance runs. Maybe this old vitamin bottle would work. It just has to be removable and easy to clean.

I think my spade bit set go's out to I think 2", ought to do it.
I do have ball end hex wrenches by Hobbico both SAE and metric that I have had for years and they do work great on hard to get at places. But I have few hex machine screws in # 2 & 4 sizes. Most of my mounting screws are slots salvaged from other peoples engines.
I'm cooking that .15 Enya even as we speak. Eager to see how/if it runs after a boil. Got all the new parts assembled too. Gasket, prop washer and nut, TV control arm, and a new needle. But will use the old needle to check it first.
Bob

rsv1cox- Top Poster


Posts : 11247
Join date : 2014-08-18
Location : West Virginia
 Similar topics
» glow fuel Experiment with water contaminated nitro fuel
» Wen Mac MK-III on the Test Stand
» My new test stand
» June, 2012 Engine of the Month submissions
» Ran the first engine of the year!
» Wen Mac MK-III on the Test Stand
» My new test stand
» June, 2012 Engine of the Month submissions
» Ran the first engine of the year!
Page 1 of 1
Permissions in this forum:
You cannot reply to topics in this forum

 Rules
Rules


