Log in
Search
Latest topics
» My N-1R build logby roddie Today at 12:32 am
» Happy 77th birthday Andrew!
by akjgardner Today at 12:27 am
» TEE DEE Having issues
by TD ABUSER Yesterday at 9:43 pm
» Landing-gear tips
by roddie Yesterday at 6:17 pm
» Roger Harris revisited
by TD ABUSER Yesterday at 2:13 pm
» Tee Dee .020 combat model
by Ken Cook Yesterday at 1:41 pm
» Retail price mark-up.. how much is enough?
by Ken Cook Yesterday at 1:37 pm
» My latest doodle...
by roddie Yesterday at 10:43 am
» Chocolate chip cookie dough.........
by roddie Fri Nov 22, 2024 1:13 pm
» Purchased the last of any bult engines from Ken Enya
by sosam117 Fri Nov 22, 2024 11:32 am
» Free Flight Radio Assist
by rdw777 Fri Nov 22, 2024 9:24 am
» Funny what you find when you go looking
by rsv1cox Wed Nov 20, 2024 3:21 pm
Cox Engine of The Month
Tha' Bandit builds a bean thread
Page 1 of 2
Page 1 of 2 • 1, 2 
 Tha' Bandit builds a bean thread
Yup with all the Beans being built lately I just couldn't help it so heres my addition to the growing bean population beginning of it anyway hehe.
First off, we have to have a wing so heres the start of just that "The Wing" ((Note)) please excuse me i'm kinda in a goofy mood right now due to some head ache meds so please bear with me so where was I, YUP that's it, I've got to figure out how to build this here wing so here goes nuthin'
First we've got to have plans so go on and get that out and lay it on the building board and stick it down with anything you can think of and lay down some wax paper over the wing part of that plan *important if you want to keep said set of plans* I was gonna use my wing jig but decided against it, Why? dunno, just did *Shrugs* before I begin I find all the parts and lay em out in front of me to make sure all those important parts are accounted for.
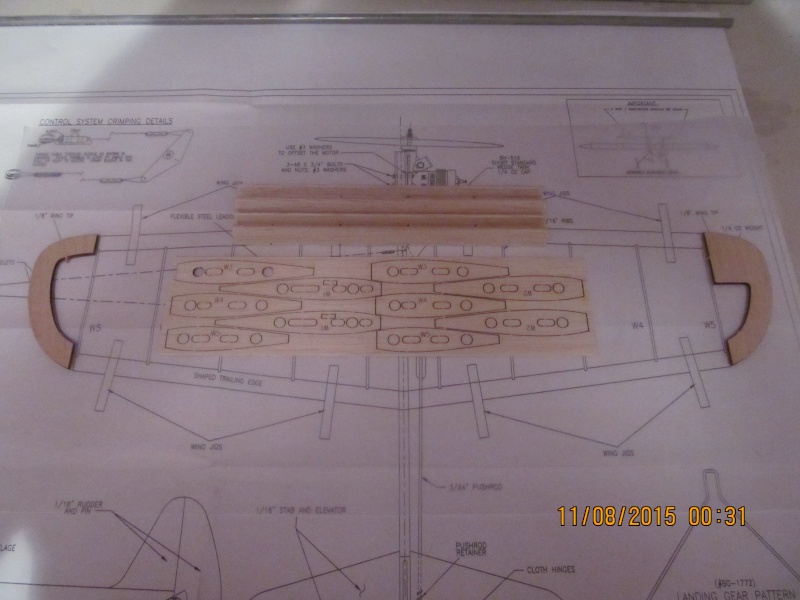
The all mighty manual states that the first step is to separate the LE and TE apart and trim the flashing, I used a sanding block to beat down all that flashing in quick order then it's time to lay out those all important jig blocks and begin construction!
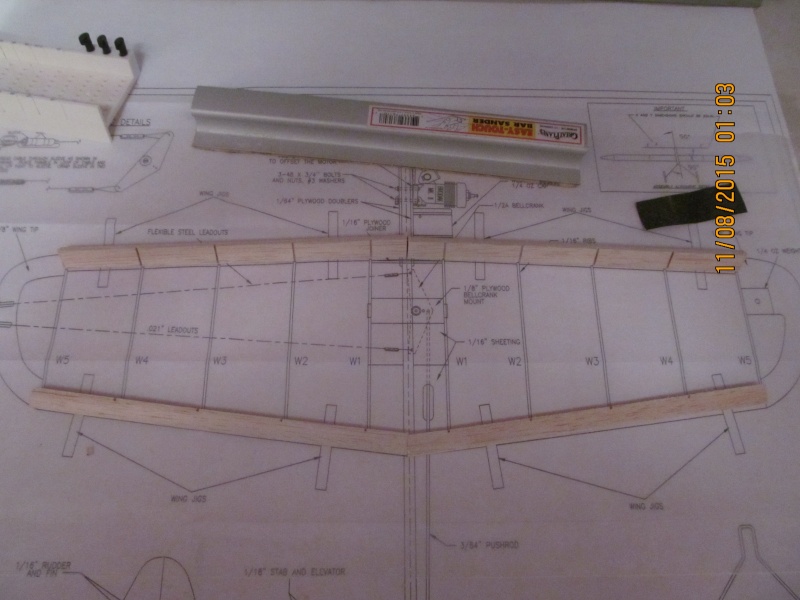
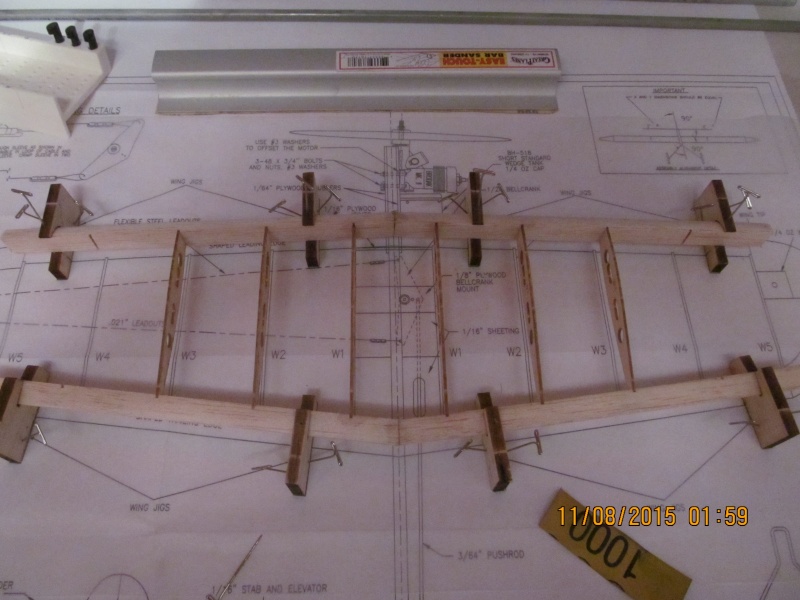
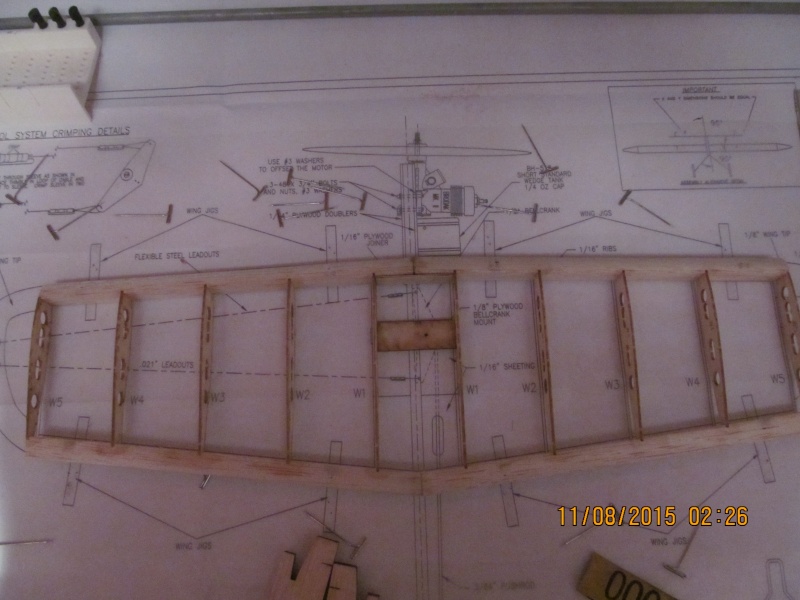
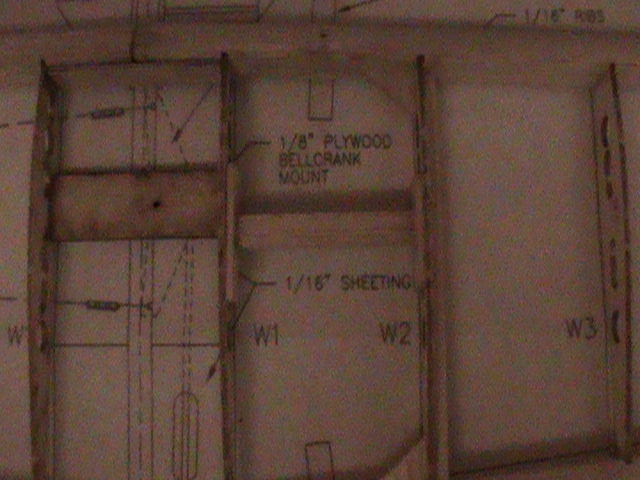
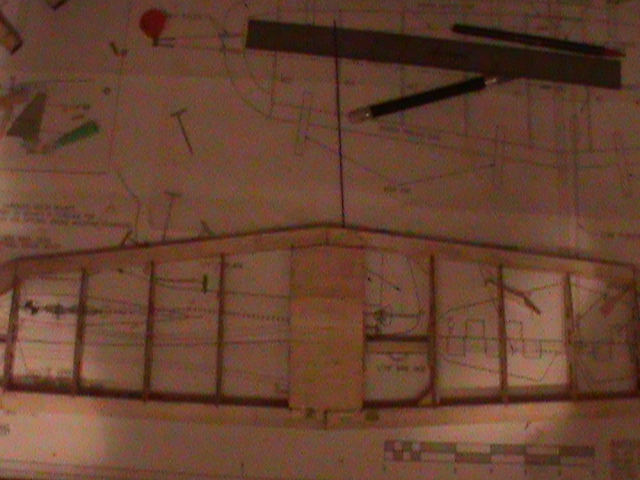
Once those blocks are in place on the plans, I again took the sanding block to the LE and TE and sanded em to fit on the plans and set em in place in the jig blocks and pinned em in place making sure the butt joints are centered with the center line on the plans and then I joined em together with medium CA. Next I too those ribs *Not the eating kind!* W1 if I remember correctly, and taking a piece of 1/16 scrap balsa positioned the ribs in place making sure the peice of scrap balsa was flat with the top of that rib for the sheeting and glues em in place, repeat for the other rib W1. Once I was done with that, I Then CA'ed the remaining ribs W2-W5 in place. Once the CA set and my eyes quit running, I removed the wing from the jig blocks and then layed it on the plans. I then too that piece of 1/8 ply called a bellcrank mount and glued it in place *Yup more watering eyes again Hmm might help if i turned on the dang fan GOOD IDEA DUFAS!*
Here are a few pics!
OK next on the list is to...Er...Why is the camera growing legs? OK...I think it's time to hit the hay, my goofiness is a little disturbing now Take care folks Will get more pics tomorrow and I promise I'll be back to normal O_o
Night all. (The bandit goes to find that bottle of head ache meds to read it)
First off, we have to have a wing so heres the start of just that "The Wing" ((Note)) please excuse me i'm kinda in a goofy mood right now due to some head ache meds so please bear with me so where was I, YUP that's it, I've got to figure out how to build this here wing so here goes nuthin'
First we've got to have plans so go on and get that out and lay it on the building board and stick it down with anything you can think of and lay down some wax paper over the wing part of that plan *important if you want to keep said set of plans* I was gonna use my wing jig but decided against it, Why? dunno, just did *Shrugs* before I begin I find all the parts and lay em out in front of me to make sure all those important parts are accounted for.

The all mighty manual states that the first step is to separate the LE and TE apart and trim the flashing, I used a sanding block to beat down all that flashing in quick order then it's time to lay out those all important jig blocks and begin construction!
Once those blocks are in place on the plans, I again took the sanding block to the LE and TE and sanded em to fit on the plans and set em in place in the jig blocks and pinned em in place making sure the butt joints are centered with the center line on the plans and then I joined em together with medium CA. Next I too those ribs *Not the eating kind!* W1 if I remember correctly, and taking a piece of 1/16 scrap balsa positioned the ribs in place making sure the peice of scrap balsa was flat with the top of that rib for the sheeting and glues em in place, repeat for the other rib W1. Once I was done with that, I Then CA'ed the remaining ribs W2-W5 in place. Once the CA set and my eyes quit running, I removed the wing from the jig blocks and then layed it on the plans. I then too that piece of 1/8 ply called a bellcrank mount and glued it in place *Yup more watering eyes again Hmm might help if i turned on the dang fan GOOD IDEA DUFAS!*
Here are a few pics!


OK next on the list is to...Er...Why is the camera growing legs? OK...I think it's time to hit the hay, my goofiness is a little disturbing now Take care folks Will get more pics tomorrow and I promise I'll be back to normal O_o
Night all. (The bandit goes to find that bottle of head ache meds to read it)

TDbandit- Platinum Member

- Posts : 897
Join date : 2014-12-01
Age : 53
Location : Riverdale Georgia
 Re: Tha' Bandit builds a bean thread
Looking Good Bandit , Hope your head feels better today , Been thinking about one those Beans myself but just cant get done with what I need to do now !! Picking up a good used clothes dryer off craigslist today then fire wood time (again) If you can think of it this build you were going to show me the easy way you do the lead outs . Thanks Eric 


getback- Top Poster


Posts : 10442
Join date : 2013-01-18
Age : 67
Location : julian , NC
 Re: Tha' Bandit builds a bean thread
Yup that's right (Face Palms "DOH!!) Ok i'll do that today since I'm at that step thanks for reminding me. (Bandit)getback wrote:Looking Good Bandit , Hope your head feels better today , Been thinking about one those Beans myself but just cant get done with what I need to do now !! Picking up a good used clothes dryer off craigslist today then fire wood time (again) If you can think of it this build you were going to show me the easy way you do the lead outs . Thanks Eric

TDbandit- Platinum Member

- Posts : 897
Join date : 2014-12-01
Age : 53
Location : Riverdale Georgia
 Re: Tha' Bandit builds a bean thread
Dang, Bandit, you were in bed an hour later than me, I hit it at 2:00. After our 2 hour phone chat, all I could think about was airplanes and forum surfed for 4 hours. As we mentioned, that bellcrank mount is the main weak point in the plane, so all you Bean builders account for that.
See how it busted loose, in the middle of a loop. The lines went slack and my attempt at catching it yanked the crank through a couple of ribs. I was unskilled at building and didn't appreciate how the B/C is the kingpin of the whole model.
Thumbnails so as not to hog Bandit's space

Here is the repair as I transformed the plane into the Refried Bean. A hard rib and a bamboo brace. I wouldn't do it that way today either, but it worked until the other wing folded in flight.

Note how old rib stumps make great supports for replacing with new ribs.
Look at the OB wing. You can see where the Radial mounted BW swung over one day and chopped the LE in two.
Rusty
See how it busted loose, in the middle of a loop. The lines went slack and my attempt at catching it yanked the crank through a couple of ribs. I was unskilled at building and didn't appreciate how the B/C is the kingpin of the whole model.
Thumbnails so as not to hog Bandit's space

Here is the repair as I transformed the plane into the Refried Bean. A hard rib and a bamboo brace. I wouldn't do it that way today either, but it worked until the other wing folded in flight.

Note how old rib stumps make great supports for replacing with new ribs.
Look at the OB wing. You can see where the Radial mounted BW swung over one day and chopped the LE in two.
Rusty
_________________
Don't Panic!
...and never Ever think about how good you are at something...
while you're doing it!
My Hot Rock & Blues Playlist
...and never Ever think about how good you are at something...
while you're doing it!
My Hot Rock & Blues Playlist

RknRusty- Rest In Peace

- Posts : 10869
Join date : 2011-08-10
Age : 68
Location : South Carolina, USA
 Re: Tha' Bandit builds a bean thread
Rusty did you also double up on the support under the org. bell crank mount ? I see the bamboo stick / support shaft!!

getback- Top Poster


Posts : 10442
Join date : 2013-01-18
Age : 67
Location : julian , NC
 Re: Tha' Bandit builds a bean thread
That is what I am doing right now but I'm doing it slightly different though.RknRusty wrote:Dang, Bandit, you were in bed an hour later than me, I hit it at 2:00. After our 2 hour phone chat, all I could think about was airplanes and forum surfed for 4 hours. As we mentioned, that bellcrank mount is the main weak point in the plane, so all you Bean builders account for that.
See how it busted loose, in the middle of a loop. The lines went slack and my attempt at catching it yanked the crank through a couple of ribs. I was unskilled at building and didn't appreciate how the B/C is the kingpin of the whole model.
Thumbnails so as not to hog Bandit's space
Here is the repair as I transformed the plane into the Refried Bean. A hard rib and a bamboo brace. I wouldn't do it that way today either, but it worked until the other wing folded in flight.
Note how old rib stumps make great supports for replacing with new ribs.
Look at the OB wing. You can see where the Radial mounted BW swung over one day and chopped the LE in two.
Rusty
@Getback
I'm in the process of getting your pics now on leadout making.

TDbandit- Platinum Member

- Posts : 897
Join date : 2014-12-01
Age : 53
Location : Riverdale Georgia
 Bean Build
Bandit....
I just caught up with your post & I am getting ready for the winter building season, so I hope you don't mind a few questions!
First off who makes the kit you're working on, and where did you find the jig set for the wing? The bean looks like the perfect plane for my next project!
RK Flyer
I just caught up with your post & I am getting ready for the winter building season, so I hope you don't mind a few questions!
First off who makes the kit you're working on, and where did you find the jig set for the wing? The bean looks like the perfect plane for my next project!
RK Flyer


RK Flyer- Gold Member

- Posts : 274
Join date : 2013-07-16
Location : Somerset, Kentucky
 Re: Tha' Bandit builds a bean thread
Eric, since it gutted itself, I just replaced the original #1 and #2 ribs and mounted the crank between them in the first bay. I don't recall if I made a new plate for it. Today, I would have boxed it in, top and bottom, and added some sort of additional support for the line pull, but not the bamboo stick and pad like in the picture. Using my wing stooge, it doesn't take much pull to release it, but that was a consideration. The most important point when using a wing stooge is to prevent the plane from rotating, thus the bungee and brick to pinch behind the TE.getback wrote:Rusty did you also double up on the support under the org. bell crank mount ? I see the bamboo stick / support shaft!!
RK, here's the one Bandit is building, same as mine:
http://brodak.com/control-line-kits/brodak/1-2-a-series/1-2a-lil-jumpin-bean-kit.html
Rusty
_________________
Don't Panic!
...and never Ever think about how good you are at something...
while you're doing it!
My Hot Rock & Blues Playlist
...and never Ever think about how good you are at something...
while you're doing it!
My Hot Rock & Blues Playlist

RknRusty- Rest In Peace

- Posts : 10869
Join date : 2011-08-10
Age : 68
Location : South Carolina, USA
 Re: Tha' Bandit builds a bean thread
Rusty is correct it's the Brodak version of Carl Goldberg's LiL jumpin' bean and the jig blocks come with the kit btw.
(Bandit)
(Bandit)

TDbandit- Platinum Member

- Posts : 897
Join date : 2014-12-01
Age : 53
Location : Riverdale Georgia
 Build a Bean
Thanks for the fast reply's! The order went in & I will join in on the FUNN!!
RK Flyer

RK Flyer


RK Flyer- Gold Member

- Posts : 274
Join date : 2013-07-16
Location : Somerset, Kentucky
 Re: Tha' Bandit builds a bean thread
No problem! BTW I've got to go to the hobby shop and pick up some more leadout wire, there wasn't enough in the kit so it's on hold untill i get some  (Bandit)
Oh yeah @ Getback I did a video for doing leadout's just got to edit it and it will be up.
Oh yeah @ Getback I did a video for doing leadout's just got to edit it and it will be up.

TDbandit- Platinum Member

- Posts : 897
Join date : 2014-12-01
Age : 53
Location : Riverdale Georgia
 Re: Tha' Bandit builds a bean thread
Thanks Bandit I will be looking forward to it . getback 


getback- Top Poster


Posts : 10442
Join date : 2013-01-18
Age : 67
Location : julian , NC
 Re: Tha' Bandit builds a bean thread
Save those simple jig blocks for future use, especially the TE ones, which fit many 35 size plane trail edges. They are so simple and work great without inducing any forced stress like a rod jig will.
Saw square blocks off a balsa log which has a straight height gauge line across the length of it for pinning the LE off the table. The prop tabs do that job for the kit they're made for. But on future builds with different size ribs and LE, you can use the square blocks to pick a comfortable height to pin the LE all the way across, and then shim the height of the TE jigs so there is no incidence as it sits on the table. Draw an incidence line on two temporary tip ribs for final jig fixing. I'm not an expert, but this method has given me perfect results every time.
Rusty
_________________
Don't Panic!
...and never Ever think about how good you are at something...
while you're doing it!
My Hot Rock & Blues Playlist
...and never Ever think about how good you are at something...
while you're doing it!
My Hot Rock & Blues Playlist

RknRusty- Rest In Peace

- Posts : 10869
Join date : 2011-08-10
Age : 68
Location : South Carolina, USA
 Re: Tha' Bandit builds a bean thread
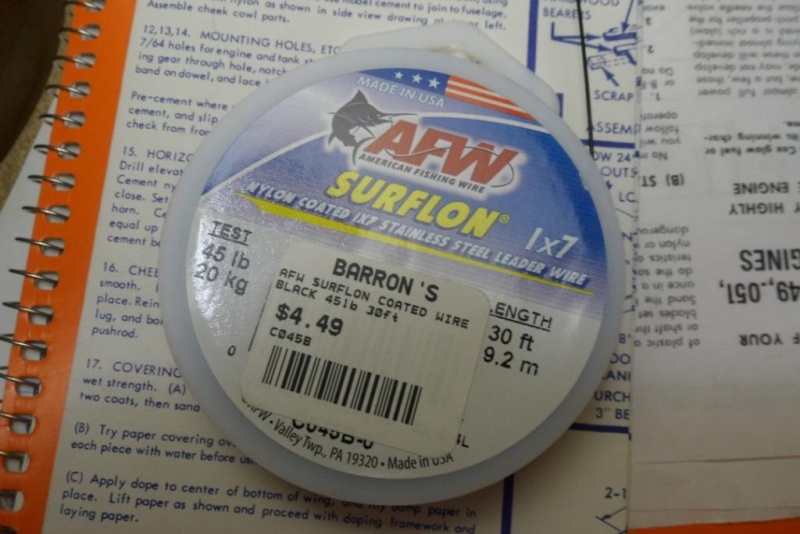
I love this wire for leadouts. Pictured is heavy 1x7 for the 32 ounce Shoestring, but 25# test is what I've used on small planes. You can get lighter roo. I buy the black nickel crimp tubes and make sure the wire will make 2 passes through it. It will last forever. It's un-twisted stainless 7-strand steel coated with black teflon coated nylon sheath. Very limber. Looks nice too. Jim Thomerson used it for decades, and if it's good enough for my old 1/2A mentor, it's good enough for me. RIP, Jim T.

_________________
Don't Panic!
...and never Ever think about how good you are at something...
while you're doing it!
My Hot Rock & Blues Playlist
...and never Ever think about how good you are at something...
while you're doing it!
My Hot Rock & Blues Playlist

RknRusty- Rest In Peace

- Posts : 10869
Join date : 2011-08-10
Age : 68
Location : South Carolina, USA
 Re: Tha' Bandit builds a bean thread
Sup guys, Got another update or somewhat related one anyway.
This one is a video I threw together about how i do crimp leadouts, its primary for Getback but it's there for anyone else who will like to see one done.I'm no expert on it but I've never had one fail. hope you all enjoy!
(Bandit)
For those who have problems with the video heres a direct link.
https://www.youtube.com/watch?v=8FIVAHveitA&feature=em-upload_owner

TDbandit- Platinum Member

- Posts : 897
Join date : 2014-12-01
Age : 53
Location : Riverdale Georgia
 Re: Tha' Bandit builds a bean thread
Lot's of Beans around here!
I never did anything special to the bellcrank, just built it per plans and used 30 min epoxy. I have crashed my bean more times than I can count and the wing and crank is still sound. I do reccommend glassing the split TE though.
What powerplant are you going with?
Ron
I never did anything special to the bellcrank, just built it per plans and used 30 min epoxy. I have crashed my bean more times than I can count and the wing and crank is still sound. I do reccommend glassing the split TE though.
What powerplant are you going with?
Ron

Cribbs74- Moderator


Posts : 11907
Join date : 2011-10-24
Age : 50
Location : Tuttle, OK
 Re: Tha' Bandit builds a bean thread
I'm gonna power it with a Brodak .049MKII Haven't messed with one of those engines yet so just wanted to try something different and try and get it to work.Cribbs74 wrote:Lot's of Beans around here!
I never did anything special to the bellcrank, just built it per plans and used 30 min epoxy. I have crashed my bean more times than I can count and the wing and crank is still sound. I do reccommend glassing the split TE though.
What powerplant are you going with?
Ron
and about the trailing edge, I put a joiner at the leading edge to strengthen it.
(Bandit)

TDbandit- Platinum Member

- Posts : 897
Join date : 2014-12-01
Age : 53
Location : Riverdale Georgia
 Re: Tha' Bandit builds a bean thread
Hang on Brother!!!
Mine was a handful with a TD, probably won't be too bad on 42's
It's the TE that likes to split on impact. Can't wait to see a beam mount bean, I'll be watching!

Mine was a handful with a TD, probably won't be too bad on 42's
It's the TE that likes to split on impact. Can't wait to see a beam mount bean, I'll be watching!


Cribbs74- Moderator


Posts : 11907
Join date : 2011-10-24
Age : 50
Location : Tuttle, OK
 Re: Tha' Bandit builds a bean thread
Ok, as promised here's another segment of the bean build and don't worry this time I'm normal lol
Also another note, my main camera took a dump on me and quit working so I have had to revert to my old Handycam to take pics and it does not do it too well so the pics are not the greatest so bear with me.
Last installment, I finished adding and gluing up the ribs then added and glued up the bellcrank mount.
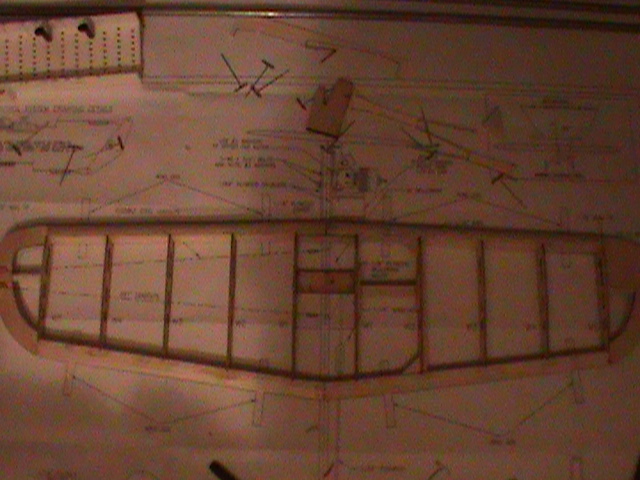
my next action kinda required me to deviate from the manual since I decided to beef up the bellcrank area by adding a 1/4" balsa truss on the outpoard side securing it to rib W3 along with gussets and a 1/8x1/8 balsa stringer on the opposite side of W3 to give it strength as seen in the pic below:
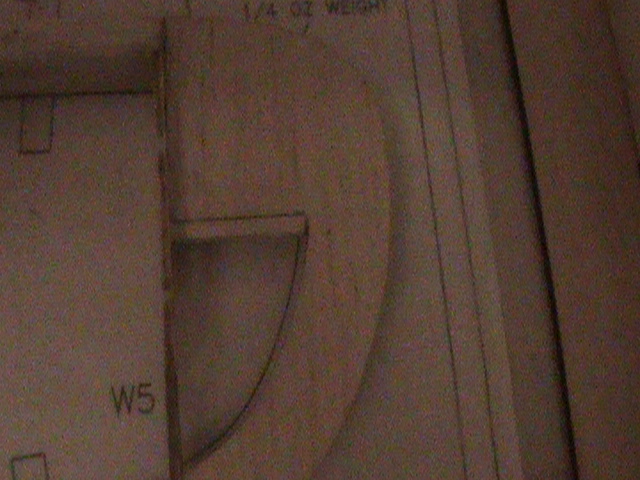
Once I accomplished that, it was time to add the leadouts to the inboard wing tip and glue up the wing tips. Now here is another major weak spot in this wing, the wing tips are one peice 1/8" soft balsa that is more than flimsy, the original CG kit had a built up tip that was stronger than this setup. While eaiser, it is not stronger so I beifed it up using 1/8" hard balsa stringer connecting the tip to the tip rib W5 while minor it really did add to its streinth. I did this for both tips.
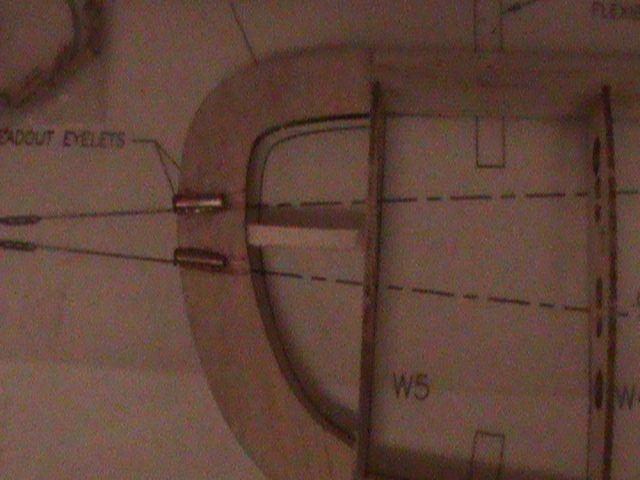
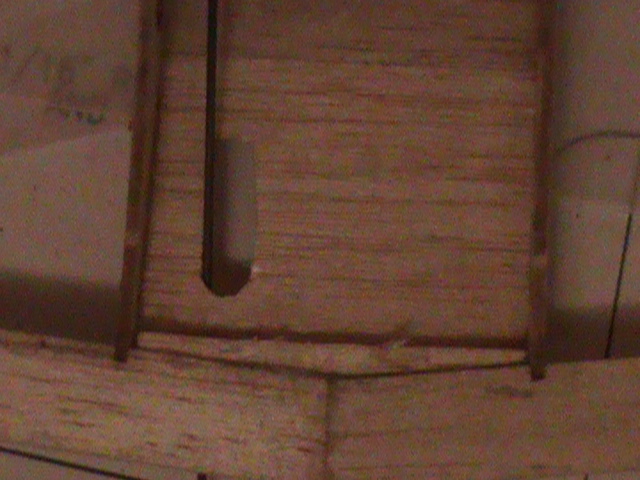
Next up is installing the bellcrank, first as the manual states, I added the leadouts to the bellcrank and test fitted the unit in place and had to add clearence to the rips to allow free movement then it permanently installed the bellcrank (Note) in the manual it calls for installing the bellcrank with a small 2-56 sized wood screw (Nope not when I'm around) I replaced it with a 4-40 screw installed from the bottom and secured it with a washer and locknut then trimmed off the excess. I would avoid the wood screw while it probably will be fine, all it takes is it to loose line tension requiring you to step back possibly resulting in a jerk which could/will compromise the screw. this is cheap insurance!
After that, I beefed up the TE with a joiner and then I cut out, sanded to fit and glued the center sheeting in place. If you want to see how i did the sheeting look in my Ringmaster build thread. I did it the same way:)
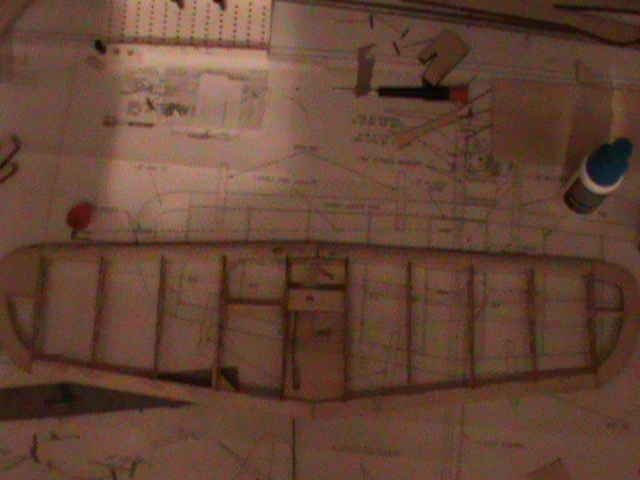

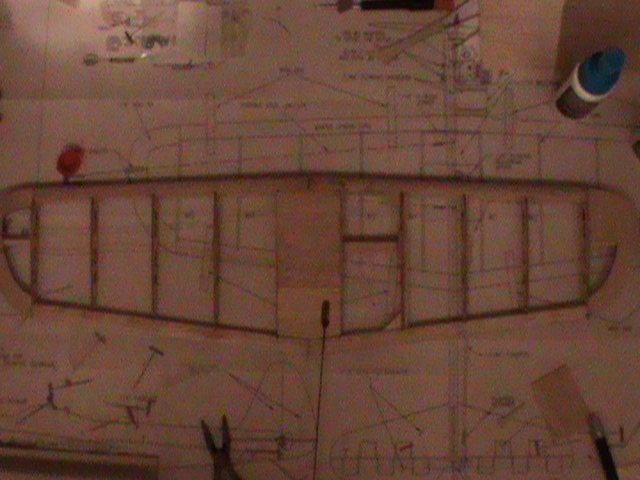
Ok finally got the current pics uploaded took only all dang night *sighs* Anyway next up is the fuselage which I will be beginning tomarrow till then take care and night!! (The bandit turns and passes out)
Also another note, my main camera took a dump on me and quit working so I have had to revert to my old Handycam to take pics and it does not do it too well so the pics are not the greatest so bear with me.
Last installment, I finished adding and gluing up the ribs then added and glued up the bellcrank mount.
my next action kinda required me to deviate from the manual since I decided to beef up the bellcrank area by adding a 1/4" balsa truss on the outpoard side securing it to rib W3 along with gussets and a 1/8x1/8 balsa stringer on the opposite side of W3 to give it strength as seen in the pic below:

Once I accomplished that, it was time to add the leadouts to the inboard wing tip and glue up the wing tips. Now here is another major weak spot in this wing, the wing tips are one peice 1/8" soft balsa that is more than flimsy, the original CG kit had a built up tip that was stronger than this setup. While eaiser, it is not stronger so I beifed it up using 1/8" hard balsa stringer connecting the tip to the tip rib W5 while minor it really did add to its streinth. I did this for both tips.


Next up is installing the bellcrank, first as the manual states, I added the leadouts to the bellcrank and test fitted the unit in place and had to add clearence to the rips to allow free movement then it permanently installed the bellcrank (Note) in the manual it calls for installing the bellcrank with a small 2-56 sized wood screw (Nope not when I'm around) I replaced it with a 4-40 screw installed from the bottom and secured it with a washer and locknut then trimmed off the excess. I would avoid the wood screw while it probably will be fine, all it takes is it to loose line tension requiring you to step back possibly resulting in a jerk which could/will compromise the screw. this is cheap insurance!
After that, I beefed up the TE with a joiner and then I cut out, sanded to fit and glued the center sheeting in place. If you want to see how i did the sheeting look in my Ringmaster build thread. I did it the same way:)


Ok finally got the current pics uploaded took only all dang night *sighs* Anyway next up is the fuselage which I will be beginning tomarrow till then take care and night!! (The bandit turns and passes out)
Last edited by TDbandit on Tue Nov 10, 2015 11:09 pm; edited 2 times in total (Reason for editing : Added pics)

TDbandit- Platinum Member

- Posts : 897
Join date : 2014-12-01
Age : 53
Location : Riverdale Georgia
 Re: Tha' Bandit builds a bean thread
OOPS meant to say TE sorry, yup looks like it is a week spot I did add a joiner to it i'm addng pics now to the build thead btw provided that my net cooperates lolCribbs74 wrote:Hang on Brother!!!
Mine was a handful with a TD, probably won't be too bad on 42's
It's the TE that likes to split on impact. Can't wait to see a beam mount bean, I'll be watching!

BTW I was told that the Brodak has the power of a BW or Medallion so we will see.

TDbandit- Platinum Member

- Posts : 897
Join date : 2014-12-01
Age : 53
Location : Riverdale Georgia
 Re: Tha' Bandit builds a bean thread
Here is a post from Ken that contains info about his Brodak MKII. His was putting out good numbers.
https://www.coxengineforum.com/t3854-brodak-mk-ii
The Bean is really light and was designed around a Babe Bee. Original instructions show how to mount a Fox .09 if you can believe it!
https://www.coxengineforum.com/t3854-brodak-mk-ii
The Bean is really light and was designed around a Babe Bee. Original instructions show how to mount a Fox .09 if you can believe it!

Cribbs74- Moderator


Posts : 11907
Join date : 2011-10-24
Age : 50
Location : Tuttle, OK
 Re: Tha' Bandit builds a bean thread
Thanks for the link man and btw Brodak has made some changes to the MkII redesigned drive washer, head, NVA and looks like the crank may be cleaner we will see! I'll get a pic up soon of it. Yup I have an original CG kit with the blue inked plans which basically only shows the wing lolCribbs74 wrote:Here is a post from Ken that contains info about his Brodak MKII. His was putting out good numbers.
https://www.coxengineforum.com/t3854-brodak-mk-ii
The Bean is really light and was designed around a Babe Bee. Original instructions show how to mount a Fox .09 if you can believe it!
That fox almost weighs as much as the model! (Bandit)

TDbandit- Platinum Member

- Posts : 897
Join date : 2014-12-01
Age : 53
Location : Riverdale Georgia
 Re: Tha' Bandit builds a bean thread
THANK YOU TDBANDIT !! Very good I seen a few things that I didn't know and will help me in future builds , soory it took me so long to get back to this as LIFE got in the way again lol . Thanks again for taking the time to do that video for me and the others that may not no the way to do them correctly . getback 


getback- Top Poster


Posts : 10442
Join date : 2013-01-18
Age : 67
Location : julian , NC
 Re: Tha' Bandit builds a bean thread
No problem man, glad I could help! I'm not that great at making videos but I try lol. Sorry bout the noise though, was raining something hard that night. (Bandit)getback wrote:THANK YOU TDBANDIT !! Very good I seen a few things that I didn't know and will help me in future builds , soory it took me so long to get back to this as LIFE got in the way again lol . Thanks again for taking the time to do that video for me and the others that may not no the way to do them correctly . getback


TDbandit- Platinum Member

- Posts : 897
Join date : 2014-12-01
Age : 53
Location : Riverdale Georgia
 Re: Tha' Bandit builds a bean thread
TDbandit wrote:Sorry bout the noise though, was raining something hard that night. (Bandit)
You could have said it was a large bag of popcorn in the microwave ... would have believed you. LOL!!

larrys4227- Gold Member

- Posts : 338
Join date : 2015-07-23
Location : Lakeland, FL
Page 1 of 2 • 1, 2 
 Similar topics
» I promised someone I'd post the CG of a Jumpin Bean. Don't remember who or what thread
» Goldberg Li'l Jumpin Bean build thread (Finished!)
» Cox .010 appreciation thread
» novelty builds?
» Smokey and the Bandit is on...
» Goldberg Li'l Jumpin Bean build thread (Finished!)
» Cox .010 appreciation thread
» novelty builds?
» Smokey and the Bandit is on...
Page 1 of 2
Permissions in this forum:
You cannot reply to topics in this forum

 Rules
Rules


