Log in
Search
Latest topics
» Roger Harris revisitedby rsv1cox Today at 3:38 pm
» My N-1R build log
by GallopingGhostler Today at 3:04 pm
» Tee Dee .020 combat model
by 1/2A Nut Today at 2:43 pm
» Chocolate chip cookie dough.........
by roddie Today at 1:13 pm
» Purchased the last of any bult engines from Ken Enya
by sosam117 Today at 11:32 am
» Free Flight Radio Assist
by rdw777 Today at 9:24 am
» My latest doodle...
by batjac Yesterday at 9:47 pm
» Funny what you find when you go looking
by rsv1cox Wed Nov 20, 2024 3:21 pm
» Landing-gear tips
by 1975 control line guy Wed Nov 20, 2024 8:17 am
» Cox NaBOO - Just in time for Halloween
by rsv1cox Tue Nov 19, 2024 6:35 pm
» Canada Post strike - We are still shipping :)
by Cox International Tue Nov 19, 2024 12:01 pm
» Duende V model from RC Model magazine 1983.
by getback Tue Nov 19, 2024 6:08 am
Cox Engine of The Month
OS 40 LA cleanup
Page 1 of 1
 OS 40 LA cleanup
This is not one of my restorations or "Shelf Queen" cleans - they take a long time.
It is the same process but "perfection" takes over and it always involves fully dismantling the engine (do not do this unless absolutely necessary!) for a "Shelf Queen". When I say a long time - I mean weeks of "on and off", returning to and inspecting followed by rejecting a less than perfect finish.
However, this job was three and a half hours from start to finish. I would say that it approaches 80% of what I would describe as perfect but ........ the next 20% - full scratch removal, blending out any corrosion, removing any ugly casting marks and a full polish .... you would be looking at, probably, five times this - perhaps 20 hours.
So here is the quick and dirty.
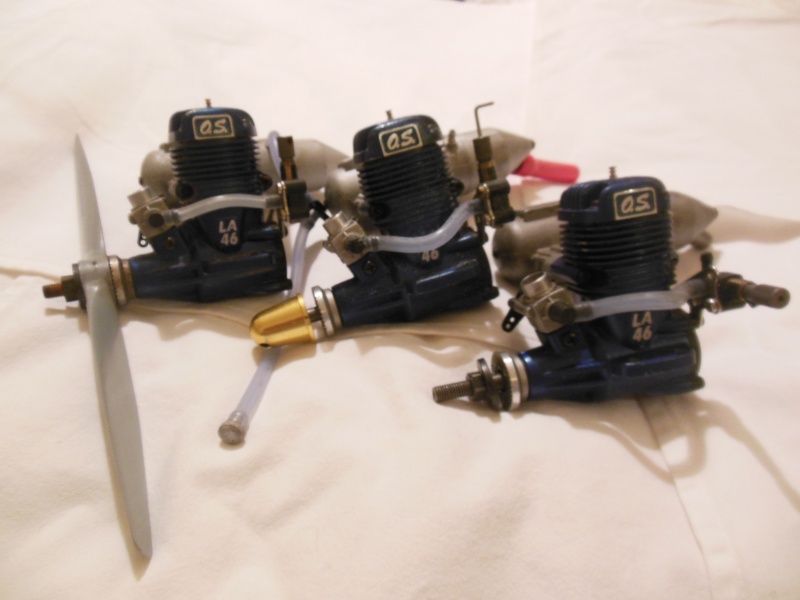
The engine came to me - OS 40 LA - as the result of a prang. I knew the history of it but as I now have quite a collection of LAs (and word has got around!), it was given to me along with the front end of the plane.
The plane ( an RC Fun Flyer) was built 18 months ago. The engine had been carefully run in and operated with 10% castor and 10% synthetic oil. However, the flyer/builder was not too particular about fuel proofing and that led to the demise of the plane.
He was very unhappy as it was his pride and joy - rescued his gear and left the front end in his garage for 10 months - built another Fun Flyer but this time fuel proofed it and installed a 46 LA.
So he gave me the 40.
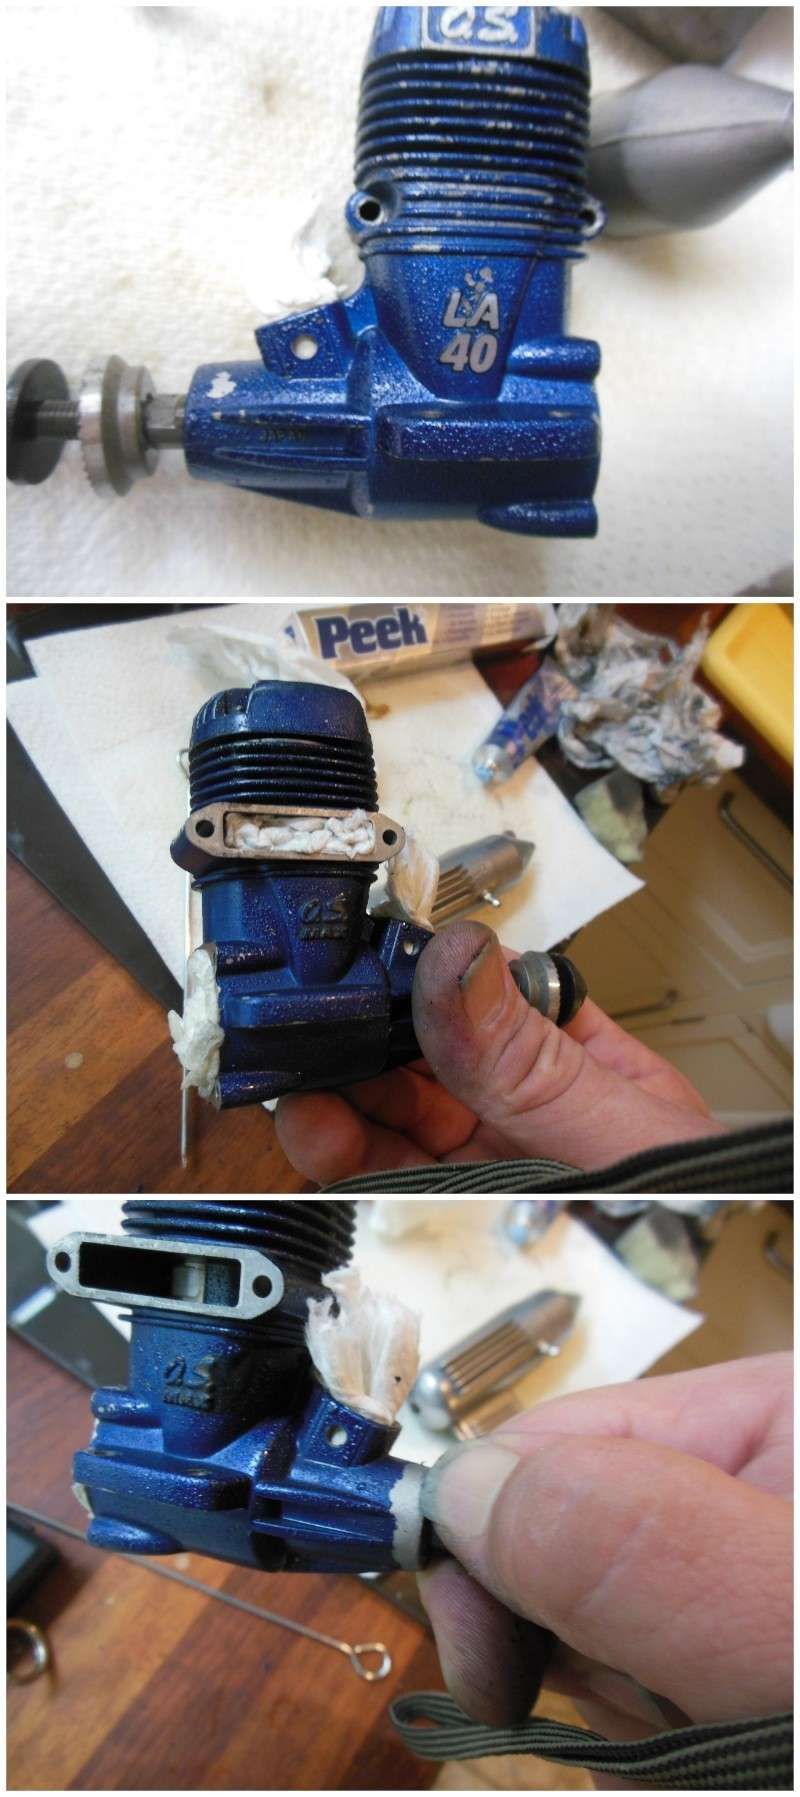
It was scratched, the castor had gummed it up, bits of the blue paint had come adrift and corrosion had set in beneath the paint in places. Some castor had congealed on the outside of the engine and was rock hard. At first I thought it was epoxy!
Apart from that it looked fine and so I dunked it in my Hoppes/turpentine mixture as I couldn't stand the sight of it and then I promptly forgot about it until I needed to do a quick engine clean today. It has been soaking for around five weeks.
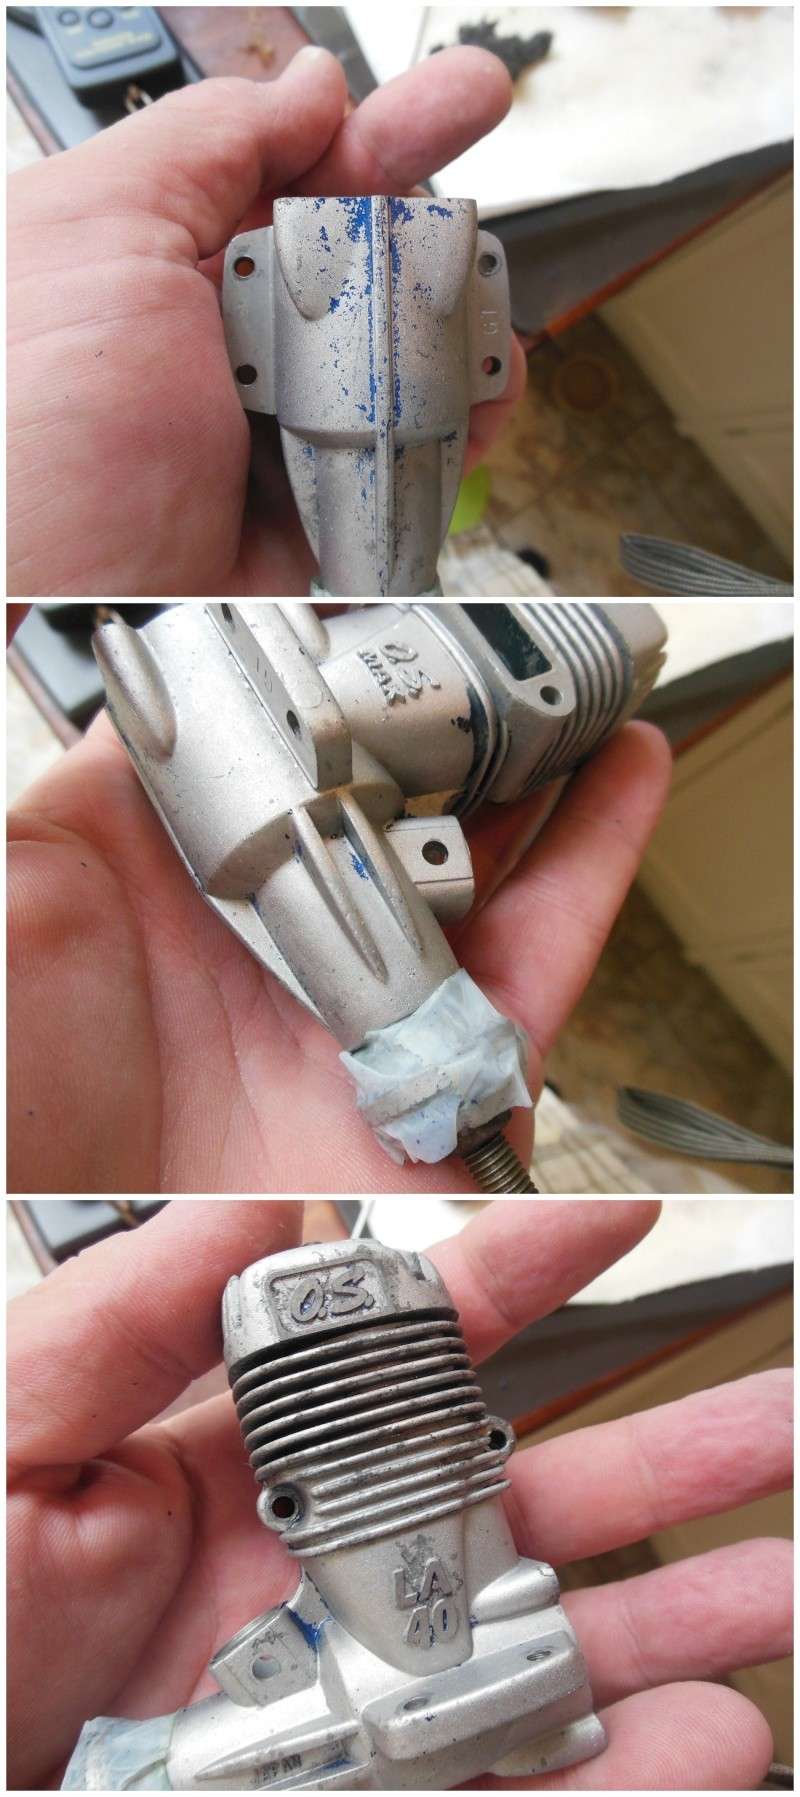
When I pulled it out the paint had bubbled and so that solved what I was going to do to tidy it up!

Then I started on the silencer. I normally use Solvol Autosol but I also use Peek (I know this can be found in the USA). Here I use 0000 wire wool and the Peek polish along with a toothbrush (I also trim the handle to fit crevises).

I often find very hard castor varnish that has to be scraped off. It seems like epoxy sometimes but it eventually dissolves in neat Hoppes.

Then for the paint removal. It starts easy. First I block up the exhaust, rear crankcase and the venturi inlet. Then start with my thumbnail. When that has worn down I revert to the toothbrush and wire wool.

Often there are stubborn bits and so I apply paint remover and rework with the brush and wire wool.


Then it is back to wire wool and Peek polish. I often resort to a brass wire brush.

It is important to keep wiping off the polish as it blackens. The polish is slightly abrasive and gets more abrasive as it picks up the surface of the engine.
Then we are finished!

It is the same process but "perfection" takes over and it always involves fully dismantling the engine (do not do this unless absolutely necessary!) for a "Shelf Queen". When I say a long time - I mean weeks of "on and off", returning to and inspecting followed by rejecting a less than perfect finish.
However, this job was three and a half hours from start to finish. I would say that it approaches 80% of what I would describe as perfect but ........ the next 20% - full scratch removal, blending out any corrosion, removing any ugly casting marks and a full polish .... you would be looking at, probably, five times this - perhaps 20 hours.
So here is the quick and dirty.
The engine came to me - OS 40 LA - as the result of a prang. I knew the history of it but as I now have quite a collection of LAs (and word has got around!), it was given to me along with the front end of the plane.
The plane ( an RC Fun Flyer) was built 18 months ago. The engine had been carefully run in and operated with 10% castor and 10% synthetic oil. However, the flyer/builder was not too particular about fuel proofing and that led to the demise of the plane.
He was very unhappy as it was his pride and joy - rescued his gear and left the front end in his garage for 10 months - built another Fun Flyer but this time fuel proofed it and installed a 46 LA.
So he gave me the 40.
It was scratched, the castor had gummed it up, bits of the blue paint had come adrift and corrosion had set in beneath the paint in places. Some castor had congealed on the outside of the engine and was rock hard. At first I thought it was epoxy!
Apart from that it looked fine and so I dunked it in my Hoppes/turpentine mixture as I couldn't stand the sight of it and then I promptly forgot about it until I needed to do a quick engine clean today. It has been soaking for around five weeks.
When I pulled it out the paint had bubbled and so that solved what I was going to do to tidy it up!

Then I started on the silencer. I normally use Solvol Autosol but I also use Peek (I know this can be found in the USA). Here I use 0000 wire wool and the Peek polish along with a toothbrush (I also trim the handle to fit crevises).

I often find very hard castor varnish that has to be scraped off. It seems like epoxy sometimes but it eventually dissolves in neat Hoppes.

Then for the paint removal. It starts easy. First I block up the exhaust, rear crankcase and the venturi inlet. Then start with my thumbnail. When that has worn down I revert to the toothbrush and wire wool.

Often there are stubborn bits and so I apply paint remover and rework with the brush and wire wool.


Then it is back to wire wool and Peek polish. I often resort to a brass wire brush.

It is important to keep wiping off the polish as it blackens. The polish is slightly abrasive and gets more abrasive as it picks up the surface of the engine.
Then we are finished!


ian1954- Diamond Member

- Posts : 2688
Join date : 2011-11-16
Age : 70
Location : England
 Re: OS 40 LA cleanup
Very nicely done!! That was quite a transformation you performed -- from ugly duckling to a swan. I never cared for the blue LA's and always tried to stay with the silver version.
 Re: OS 40 LA cleanup
Meh, it looks ok 
Great job Ian, I think you got a good thing going on there.
Great job Ian, I think you got a good thing going on there.

Cribbs74- Moderator


Posts : 11907
Join date : 2011-10-24
Age : 50
Location : Tuttle, OK
 Re: OS 40 LA cleanup
Looks better than new. Never understood why they painted the LA series. Paint holds heat.

Jason_WI- Top Poster


Posts : 3123
Join date : 2011-10-09
Age : 49
Location : Neenah, WI
 Re: OS 40 LA cleanup
I have a few more "blues" to do.

That should keep me busy on a rainy day and we have a lot of those here.

That should keep me busy on a rainy day and we have a lot of those here.

ian1954- Diamond Member

- Posts : 2688
Join date : 2011-11-16
Age : 70
Location : England
 Re: OS 40 LA cleanup
Just run them!
(the bare metal does look much better though)
Phil
(the bare metal does look much better though)
Phil

pkrankow- Top Poster

- Posts : 3025
Join date : 2012-10-02
Location : Ohio
 Similar topics
» nitro cleanup
» Silver Bee cleanup
» Restoring Trike sportster question
» Wen Mac boat engine clean-up
» Wow! Cleanup your old damaged Cox plastic bodies
» Silver Bee cleanup
» Restoring Trike sportster question
» Wen Mac boat engine clean-up
» Wow! Cleanup your old damaged Cox plastic bodies
Page 1 of 1
Permissions in this forum:
You cannot reply to topics in this forum

 Rules
Rules


