Log in
Search
Latest topics
» Roger Harris revisitedby rsv1cox Today at 3:38 pm
» My N-1R build log
by GallopingGhostler Today at 3:04 pm
» Tee Dee .020 combat model
by 1/2A Nut Today at 2:43 pm
» Chocolate chip cookie dough.........
by roddie Today at 1:13 pm
» Purchased the last of any bult engines from Ken Enya
by sosam117 Today at 11:32 am
» Free Flight Radio Assist
by rdw777 Today at 9:24 am
» My latest doodle...
by batjac Yesterday at 9:47 pm
» Funny what you find when you go looking
by rsv1cox Wed Nov 20, 2024 3:21 pm
» Landing-gear tips
by 1975 control line guy Wed Nov 20, 2024 8:17 am
» Cox NaBOO - Just in time for Halloween
by rsv1cox Tue Nov 19, 2024 6:35 pm
» Canada Post strike - We are still shipping :)
by Cox International Tue Nov 19, 2024 12:01 pm
» Duende V model from RC Model magazine 1983.
by getback Tue Nov 19, 2024 6:08 am
Cox Engine of The Month
Ian's Rocking Donkey
Page 1 of 2
Page 1 of 2 • 1, 2 
 Ian's Rocking Donkey
JPvelo wrote:From this point forward Ian's plane will be referred to as "The Rocking Donkey".ian1954 wrote:In my schooldays woodwork classes, we were taught two things:-
1. Measure twice, cut once
2. Don't tell anyone what you are making until it is finished
(That way - you can cover up your mistakes and change your mind. Start off making a rocking horse, end up with a rocking donkey!)
The build is now well under way.

After watching every one elses builds - how hard can it be?
First of all cut out a fuselage shape - easy peasy - make a plywood sandwich of it - to keep it straight and strong - slap some glue on it - clamp tight until dry.

Cut out the wing shapes and slots for any additional wing bits. Fasten flat and sand the airfoil.
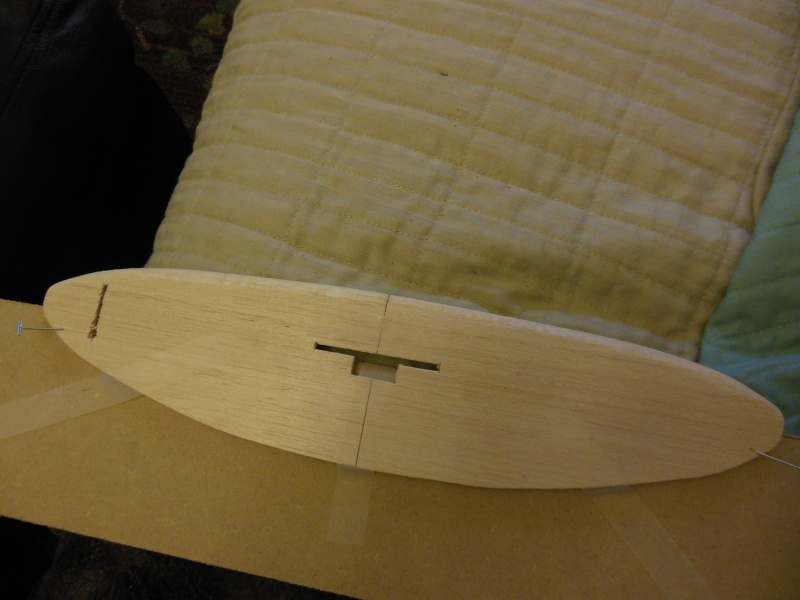
Now some prefer to sand the wing when assembled but this is a peculiar shape and also has dihedral.
Glue the two bits of wing together after sanding the dihedral. Tape the elevator a tailplane together for sanding and sand.

Quick preview to see the donkey taking shape.

Cut plywood former for dihedral. Done after sanding wing to make fitting and finishing wing easier.
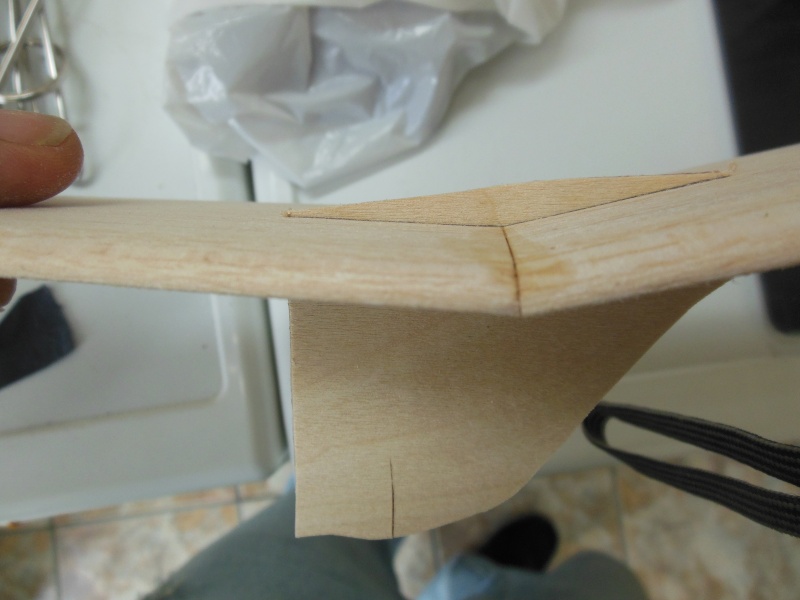

Cut a few more bits out and test fit engine.
Step back and admire how quick this is going

Then stick everything together, a bit more sanding and reinforcing blocks - then it is ready to slap some paint on.

We ought to have a "build an aeroplane race".

ian1954- Diamond Member

- Posts : 2688
Join date : 2011-11-16
Age : 70
Location : England
 Re: Ian's Rocking Donkey
Nice!
So the engine cage mates to the front of the cowling correct? Will you be cowling the engine in as well?
Jim
Edit: I just saw how the case mounts to the firewall, very cool.
So the engine cage mates to the front of the cowling correct? Will you be cowling the engine in as well?
Jim
Edit: I just saw how the case mounts to the firewall, very cool.

JPvelo- Diamond Member

- Posts : 1972
Join date : 2011-12-02
Age : 57
Location : Colorado
 Re: Ian's Rocking Donkey
Dude! That donkey is Rockin'! Can't wait to see how it turns out. But, with all that dihedral, how are you going to launch it?
The Bad Pun Mark
The Bad Pun Mark
batjac- Diamond Member


Posts : 2374
Join date : 2013-05-22
Age : 61
Location : Broken Arrow, OK, USA
 Re: Ian's Rocking Donkey
Dihedral... Never seen it in CL. Not sure what it will do. 
I am not being negative mind you just genuinely curious. Looks good though Ian!

I am not being negative mind you just genuinely curious. Looks good though Ian!

Cribbs74- Moderator


Posts : 11907
Join date : 2011-10-24
Age : 50
Location : Tuttle, OK
 Re: Ian's Rocking Donkey
Dihedral offers some problems with the lines pulling the inboard wing and causing the model to roll inward. Otoh, a polyhedral like the Jim's Corsair eliminates the problem by having level outer wings to receive the leadouts in a straight line.
_________________
Don't Panic!
...and never Ever think about how good you are at something...
while you're doing it!
My Hot Rock & Blues Playlist
...and never Ever think about how good you are at something...
while you're doing it!
My Hot Rock & Blues Playlist

RknRusty- Rest In Peace

- Posts : 10869
Join date : 2011-08-10
Age : 68
Location : South Carolina, USA
 Re: Ian's Rocking Donkey
Cribbs74 wrote:Dihedral... Never seen it in CL. Not sure what it will do.
I am not being negative mind you just genuinely curious. Looks good though Ian!
Well, my guess is that it's going to need a fair bit of down trim and right offset. Looking at the picture, I'm guessing about 15 degrees of dihedral? Since the wings are airfoil shaped, therefore giving some amount of lift, the combined lift will be vertical from the fuselage centerline. Since holes in the leadout guide appear relatively close to the wing's lower surface, approximately the same distance below the wing as the bellcrank, the inboard wing will be mostly horizontal. That'll place the fuselage vertical centerline and the wing's lift vector around seven degrees inwards towards the pilot? If it had been a flat sheet wing plane, the issue wouldn't be so bad in level flight, but it would still try to fly inside the circle when up elevator was applied.
Just as an observation, and if it were me building the plane, I'd make leadout guides that hang lower. I'd hold the fuselage level and measure from the wingtip down to a point that is horizontal with the center of the bellcrank. Then I'd bend some wire with two loops that are even with the bellcrank. Look on Outerzone for C/L plans of scale high wing planes to see how they do these wire leadout guides.
But then, I could be totally out to lunch.
The Hanging Mark
Last edited by batjac on Sat Jun 28, 2014 11:56 pm; edited 2 times in total

batjac- Diamond Member


Posts : 2374
Join date : 2013-05-22
Age : 61
Location : Broken Arrow, OK, USA
 Re: Ian's Rocking Donkey
Here's a crappy drawing, but it should explain what I'm talking about:

The Artiste Mark

The Artiste Mark

batjac- Diamond Member


Posts : 2374
Join date : 2013-05-22
Age : 61
Location : Broken Arrow, OK, USA
 Re: Ian's Rocking Donkey
The ever-popular SIG Deweybird has wing dihedral and leadouts which run parallel to the underside of the wing. (I know because I have a kit sitting in front of me). Instructions say the wing halves should be glued with a 3/4" block under one wing-tip. I'll let the mathematicians in the group figure out the angle. Obviously it works ok in this example. The design/kit has been around for a long time and all reports are that they fly pretty well. I'll get mine built one day! (One day!!)
Rod.
Rod.

Oldenginerod- Top Poster

- Posts : 4018
Join date : 2012-06-15
Age : 62
Location : Drouin, Victoria
 Re: Ian's Rocking Donkey
By the way, after all that speculation, the "Donkey" ain't no Spitfire by the look of things.

Oldenginerod- Top Poster

- Posts : 4018
Join date : 2012-06-15
Age : 62
Location : Drouin, Victoria
 Re: Ian's Rocking Donkey
The dihedral is 14 degrees, Mark was close but no cigar.
There is scale, semi-scale and practical but similar. A scale Spitfire is a difficult model to fly and not for the faint hearted.
A lot of British modellers have learned this the hard way - the elliptical wing while beautiful and emminently practical for a WWII warbird has the ability to stall and take the plane into a flat spin. Not just a tip stall - the whole wing!
The real thing

ian1954- Diamond Member

- Posts : 2688
Join date : 2011-11-16
Age : 70
Location : England
 Re: Ian's Rocking Donkey
After getting addicted to the "Windy" videos as promoted by Rusty - I decided to try som of Windy's techiniques for finishing a model. He makes it look easier than it is (well for me anyway!).
First of all, I manage to find the acrylic green putty that he uses. Marvellous stuff but his videos aren't "training" videos - so here are some of my mistakes.
1. The putty is marvellous but I put it on bare wood at first. Big mistake!!! It sets too quickly on bare balsa and then is difficult to sand without taking the surrounding balsa out. The dust also gets into the grain and won't come out easily.
2. A thin application (less than 1 mm) dries quickly - any thicker and the drying time incrases exponentially. !/16th inch wasn't dry overnight!
Applying it after sanding sealer (sanded of course!), indicated holes that you didn't know were there using a "wipe on, wipe off technique).
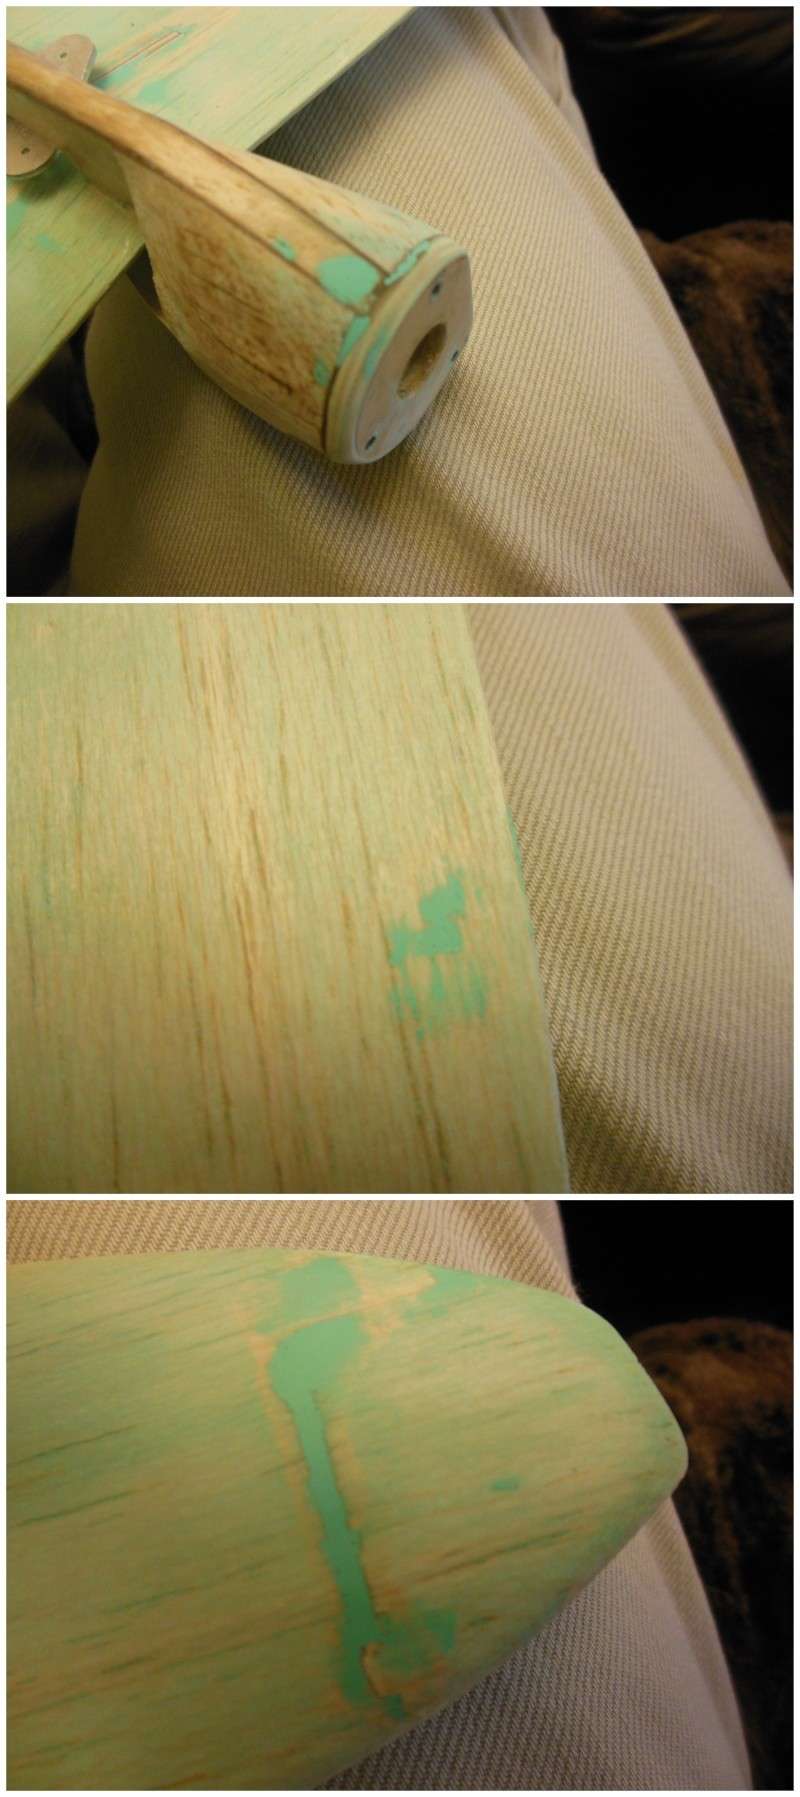
Then I tried the silver dope. Ken warned against this because it can affect the top colour but I am experimenting.
I had not mixed and sprayed for a while and my impatience got the better of me. I went too thick and too quickly between coats. A major sanding job ensued.
But as Windy pointed out - after sanding the siver dope - the shiny areas indicate low spots. (Also some dings I have made through careless handling.
Anyway - more filling, more sanding, more doping and a vicious circle until I get it right.

First of all, I manage to find the acrylic green putty that he uses. Marvellous stuff but his videos aren't "training" videos - so here are some of my mistakes.
1. The putty is marvellous but I put it on bare wood at first. Big mistake!!! It sets too quickly on bare balsa and then is difficult to sand without taking the surrounding balsa out. The dust also gets into the grain and won't come out easily.
2. A thin application (less than 1 mm) dries quickly - any thicker and the drying time incrases exponentially. !/16th inch wasn't dry overnight!
Applying it after sanding sealer (sanded of course!), indicated holes that you didn't know were there using a "wipe on, wipe off technique).

Then I tried the silver dope. Ken warned against this because it can affect the top colour but I am experimenting.
I had not mixed and sprayed for a while and my impatience got the better of me. I went too thick and too quickly between coats. A major sanding job ensued.
But as Windy pointed out - after sanding the siver dope - the shiny areas indicate low spots. (Also some dings I have made through careless handling.
Anyway - more filling, more sanding, more doping and a vicious circle until I get it right.


ian1954- Diamond Member

- Posts : 2688
Join date : 2011-11-16
Age : 70
Location : England
 Re: Ian's Rocking Donkey
It's looking really good Ian! That Donkey IS rockin'!
Unfortunately, you have arrived at the step that seems to be the bane of my existence! The "fill, sand, repeat until you wish sandpaper had never been invented" stage of finishing. I am primarily a stunt guy, so this is one of the necessary stages in most of my projects (I currently have two stunters stalled at this point), but it doesn't mean I have to like it! Fortunately, all of the (tedious) work you put in will be rewarded in the end!
Any particular paint scheme are you thinking of using?
 Re: Ian's Rocking Donkey
I like the cowling Ian. It hides the engine nicely.
The video was fantastic!
The video was fantastic!

Cribbs74- Moderator


Posts : 11907
Join date : 2011-10-24
Age : 50
Location : Tuttle, OK
 Re: Ian's Rocking Donkey
Good going Ian. I'm glad I introduced the Windy videos to the forums and you took an interest. Being a stunter that will never be seeking 20 appearance points at the Nats, I'll probably never take finishing this far but I really enjoy seeing it being done. Kind of like music, I can appreciate it while only dabbling in it myself. I'm looking forward to watching you slowly go mad looking for dings and scratches, and finally finishing the plane. I was working on the Skyray yesterday and talking(in my head) in Windy's voice.
Rusty
Also, I just re-read the first post and I shot Coffee out of my nose at Jim's quote about the Donkey.
Rusty
Also, I just re-read the first post and I shot Coffee out of my nose at Jim's quote about the Donkey.

_________________
Don't Panic!
...and never Ever think about how good you are at something...
while you're doing it!
My Hot Rock & Blues Playlist
...and never Ever think about how good you are at something...
while you're doing it!
My Hot Rock & Blues Playlist

RknRusty- Rest In Peace

- Posts : 10869
Join date : 2011-08-10
Age : 68
Location : South Carolina, USA
 Re: Ian's Rocking Donkey
I have been sanding and filling, filling and sanding this evening - it is tedious! I am determined to try for a nice finish. I don't know how the super stunt chaps cope - this is taking hours for such small bits of wood.
I am planning on a WWII RAF colour scheme. Not too detailed - I won't be doing panels and rivets - definitely not got the patience for that!
Need more practise spraying.
I am planning on a WWII RAF colour scheme. Not too detailed - I won't be doing panels and rivets - definitely not got the patience for that!
Need more practise spraying.

ian1954- Diamond Member

- Posts : 2688
Join date : 2011-11-16
Age : 70
Location : England
 Re: Ian's Rocking Donkey
I am doing a dope finish on mine Ian so I will be going down that road here soon. Keep at it I am sure it will turn out well!
Does anyone have any knowledge as to how one hand rubs a dope finish to a glossy shine?
Ron
Does anyone have any knowledge as to how one hand rubs a dope finish to a glossy shine?
Ron

Cribbs74- Moderator


Posts : 11907
Join date : 2011-10-24
Age : 50
Location : Tuttle, OK
 Re: Ian's Rocking Donkey
Cribbs74 wrote:I am doing a dope finish on mine Ian so I will be going down that road here soon. Keep at it I am sure it will turn out well!
Does anyone have any knowledge as to how one hand rubs a dope finish to a glossy shine?
Ron
Very fine sandpaper first (UK - coarser than 1200 grit, regular paper change, use "Windex" to wipe off and or tack cloth).
Following by car paint cutting compound/polish. Here in UK, 3M Perfect It , available in different grades but quite expensive. £25 for a bottle. Keep wiping off Windex until shine remains.
Microfibre cloths and regular changes of cloth (can be washed) a must.
Now this is prone to disaster - I am heavy handed when sanding and if you chose the wrong grade of cutting compound ......................
It is also long and laborious but can produce an almost mirror like shine. Make sure the dope has had plenty of time to cure and only use this on a clear top coat over any colouring.

ian1954- Diamond Member

- Posts : 2688
Join date : 2011-11-16
Age : 70
Location : England
 Re: Ian's Rocking Donkey
Only needs fuel proofing now and then it will be ready of engine and tank mounting followed by the rest of the stuff needed to help it fly in circles.


ian1954- Diamond Member

- Posts : 2688
Join date : 2011-11-16
Age : 70
Location : England
 Re: Ian's Rocking Donkey
That really turned out well Ian, I was concerned at first, but it looks great now. Love the scheme.
Ron
Ron

Cribbs74- Moderator


Posts : 11907
Join date : 2011-10-24
Age : 50
Location : Tuttle, OK
 Re: Ian's Rocking Donkey
Nice work Ian. Really sharp looking.
_________________
Don't Panic!
...and never Ever think about how good you are at something...
while you're doing it!
My Hot Rock & Blues Playlist
...and never Ever think about how good you are at something...
while you're doing it!
My Hot Rock & Blues Playlist

RknRusty- Rest In Peace

- Posts : 10869
Join date : 2011-08-10
Age : 68
Location : South Carolina, USA
 Re: Ian's Rocking Donkey
I definitely agree with Rusty. Very sharp looking!
KP
KP
kpriddle- Bronze Member

- Posts : 35
Join date : 2012-05-29
Location : Maine
 Re: Ian's Rocking Donkey
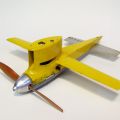
Not finished yet


ian1954- Diamond Member

- Posts : 2688
Join date : 2011-11-16
Age : 70
Location : England
 Re: Ian's Rocking Donkey
Nice choice on the prop allows you to use no tip weight.
Torquing the right wing down helps keep the extra weight being added to the overall engine load-should be a peppy flyer on that 4.5 x 4.
Torquing the right wing down helps keep the extra weight being added to the overall engine load-should be a peppy flyer on that 4.5 x 4.

1/2A Nut- Top Poster

- Posts : 3537
Join date : 2013-10-20
Age : 61
Location : Brad in Texas
Page 1 of 2 • 1, 2 
Page 1 of 2
Permissions in this forum:
You cannot reply to topics in this forum

 Rules
Rules


