Log in
Search
Latest topics
» Roger Harris revisitedby rsv1cox Today at 10:46 am
» Duende V model from RC Model magazine 1983.
by MauricioB Today at 10:29 am
» A Little 400 Mile Hop for Some Memory Lane Stuff, and to Hit a Swap Meet.
by getback Today at 7:48 am
» Free Flight Radio Assist
by getback Today at 6:39 am
» Happy 77th birthday Andrew!
by Kim Yesterday at 9:18 am
» Promote the forum with flyers!
by Admin Yesterday at 1:35 am
» Engine choice
by GallopingGhostler Mon Nov 25, 2024 4:03 pm
» My N-1R build log
by roddie Mon Nov 25, 2024 9:19 am
» Night flying at Walters RC park
by 1975 control line guy Sun Nov 24, 2024 7:29 pm
» Cox films/videos...
by GallopingGhostler Sun Nov 24, 2024 7:07 pm
» Cox 020 PeeWee rebuild questions
by LooseSpinner99 Sun Nov 24, 2024 6:13 pm
» Did you spot the Cox engine in this NASA research video?
by balogh Sun Nov 24, 2024 5:08 pm
Cox Engine of The Month
T-Bee-D1 (a Rod-de-sign)
Page 6 of 8
Page 6 of 8 •  1, 2, 3, 4, 5, 6, 7, 8
 Re: T-Bee-D1 (a Rod-de-sign)
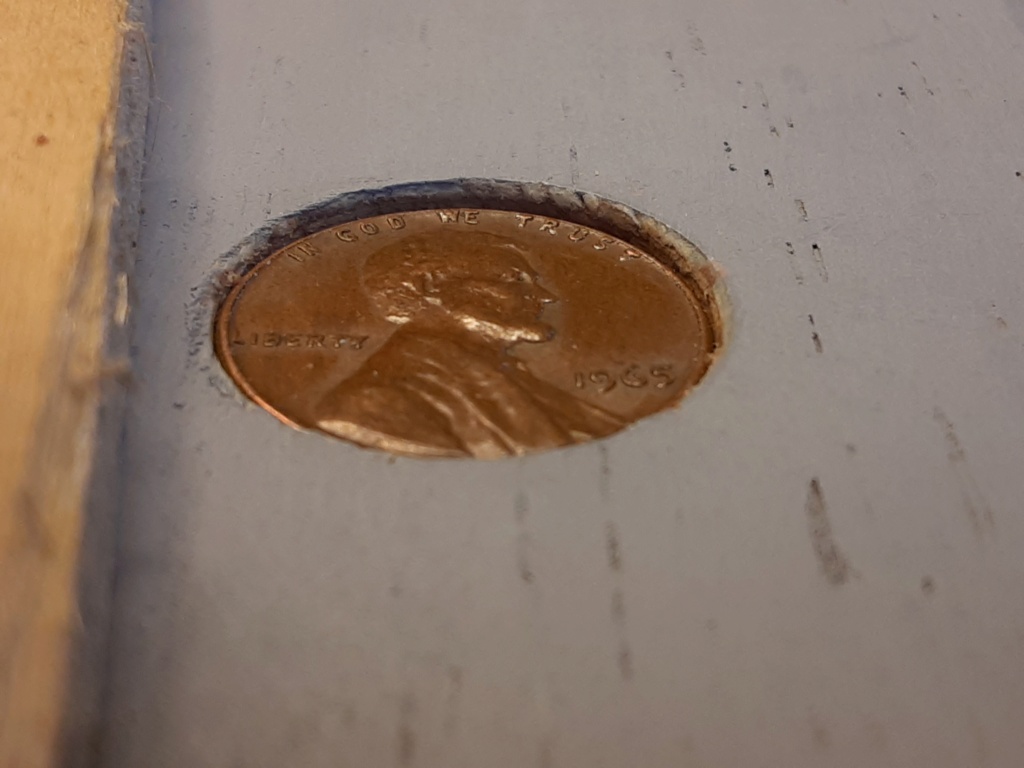
OK I had forgot you had sufficient reinforcement up front  Yeah you would be pressed to break the fuse there at reinforcement , Carry on, i like your hidden Pennie , rattle can day ahead sounds good .... Colors
 Yeah you would be pressed to break the fuse there at reinforcement , Carry on, i like your hidden Pennie , rattle can day ahead sounds good .... Colors

getback- Top Poster


Posts : 10448
Join date : 2013-01-18
Age : 67
Location : julian , NC

rsv1cox- Top Poster


Posts : 11260
Join date : 2014-08-18
Location : West Virginia
 Re: T-Bee-D1 (a Rod-de-sign)
balogh wrote:Hey Roddie that sacrificial wood plank placed over the balsa to prevent it from mangling when drilled is a great idea! Thanks for that!
Andras! Thank "You" for the acknowledgement! You can also apply that method to lighten-up any flat panel where there's enough area around the hole to utilize the sacrificial material.. but also; the means of clamping it effectively (near as possible to the core). Cover with film.. and you're good to go. Of course; it's imperative to be mindful of maintaining the structural integrity of the panel.
The sacrificial material that I used was plywood. The "top" or tool-entry side was .300" (7.6mm) thickness 5-ply.. but anything within 1mm thickness of that would be fine. I had several strips that were 55mm width.. and about 380mm long. Strips are easier to position.
The "bottom" material I used was thicker. It was thick enough to cut into.. but not through. I think it's better to "NOT" cut through. I found it easy to tell when I cut into the balsa.. and out of it. No need to go any deeper than that.
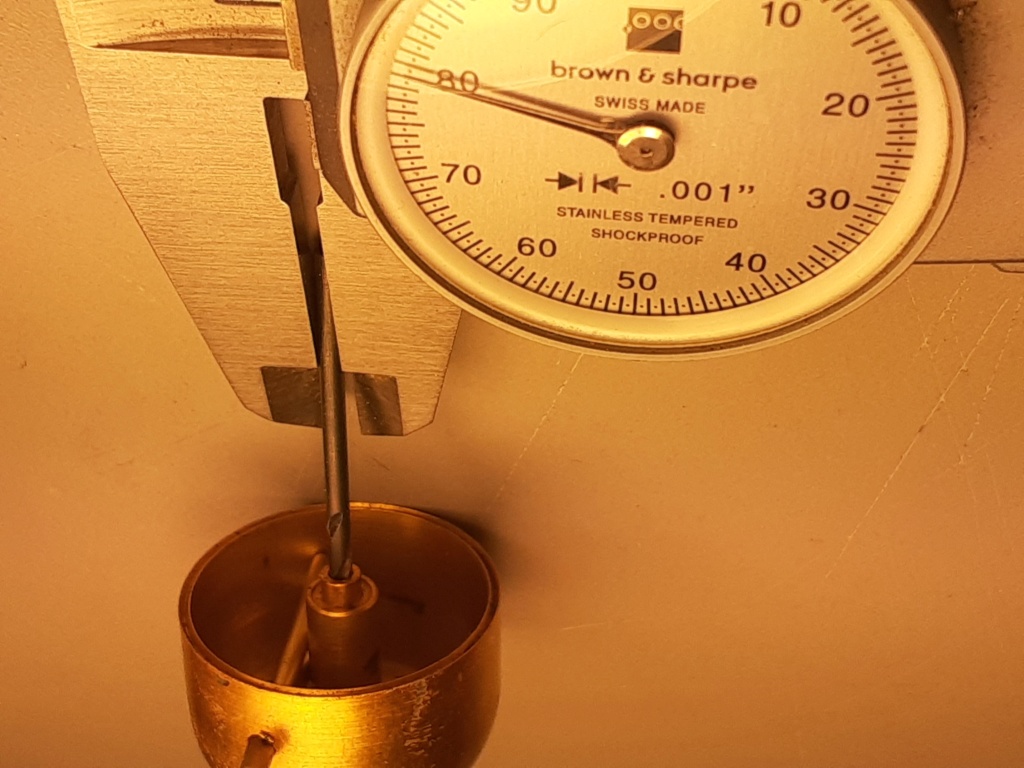
This is a piece of 15mm Baltic Birch plywood that I used for the sacrificial base (bottom)
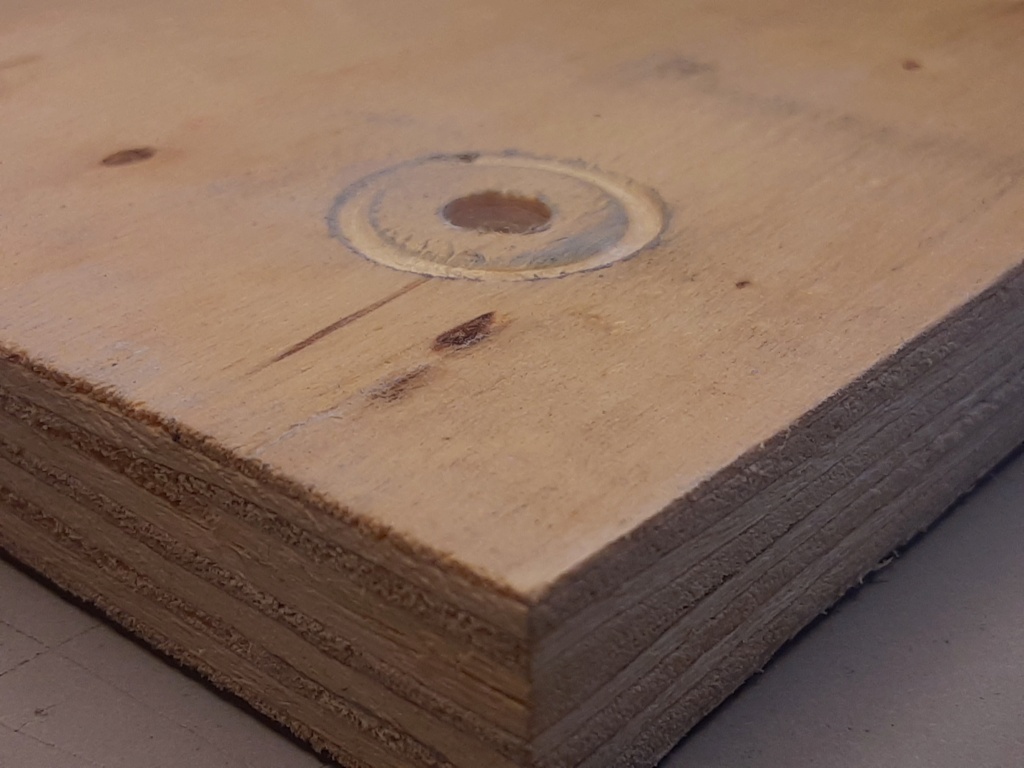
I used a single C-clamp which was fine for what I was doing. As you well know; balsa is fragile. Fixtures such as this help to keep pressure off the soft wood while fab'ing/handling.
 Re: T-Bee-D1 (a Rod-de-sign)
getback wrote:OK I had forgot you had sufficient reinforcement up frontYeah you would be pressed to break the fuse there at reinforcement , Carry on, i like your hidden Pennie , rattle can day ahead sounds good .... Colors

Yes Eric.. anyone would be "hard-pressed" to break off that motor mount.. even with a ball peen hammer!

I'm still filling/sanding brother..
topside...

underside...
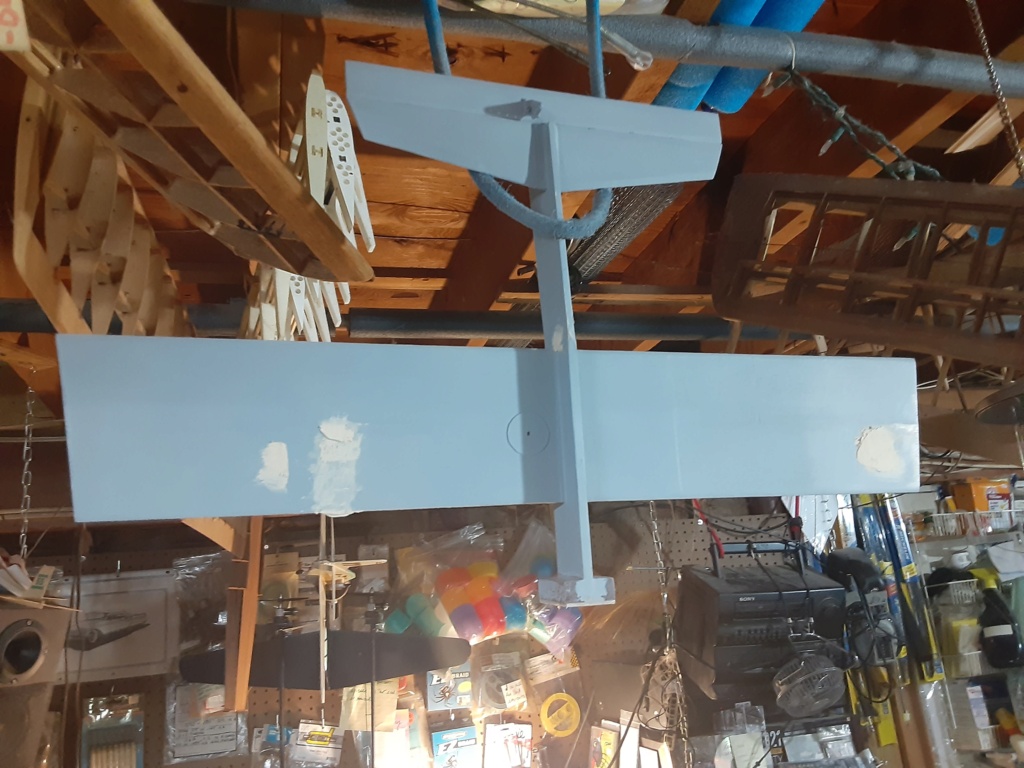
If it's not too breezy tomorrow.. I'll spray another light primer coat.. and then a base-coat if I can decide on the color by then. I'm leaning toward "yellow" though.

 fairlead/guides
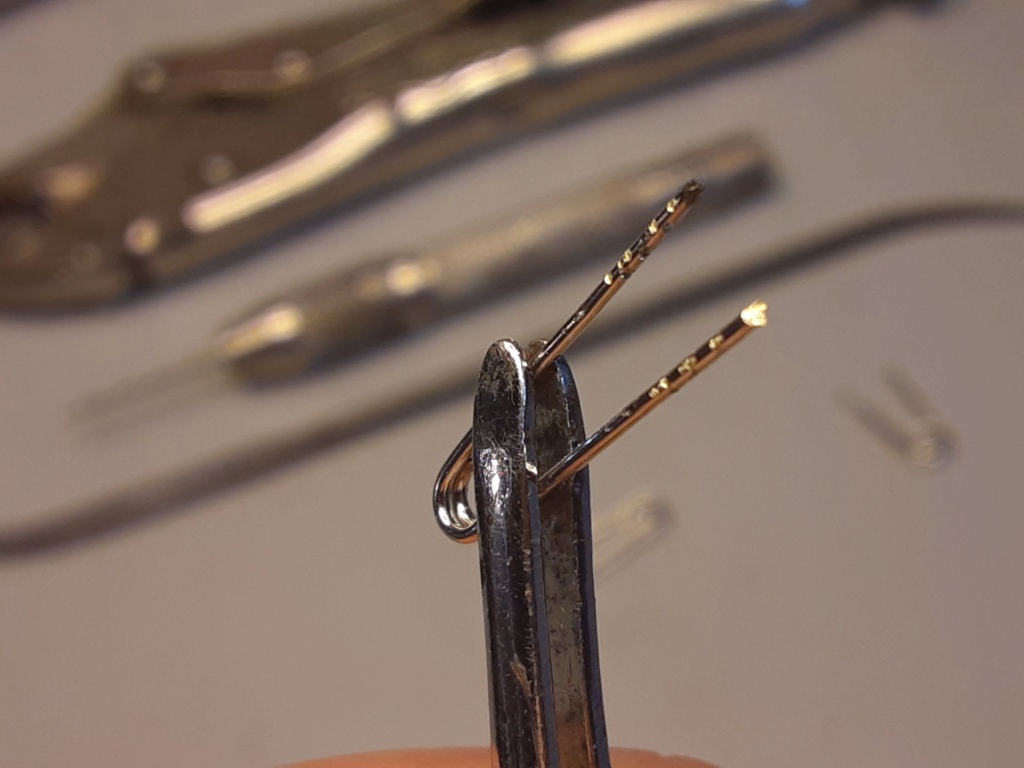
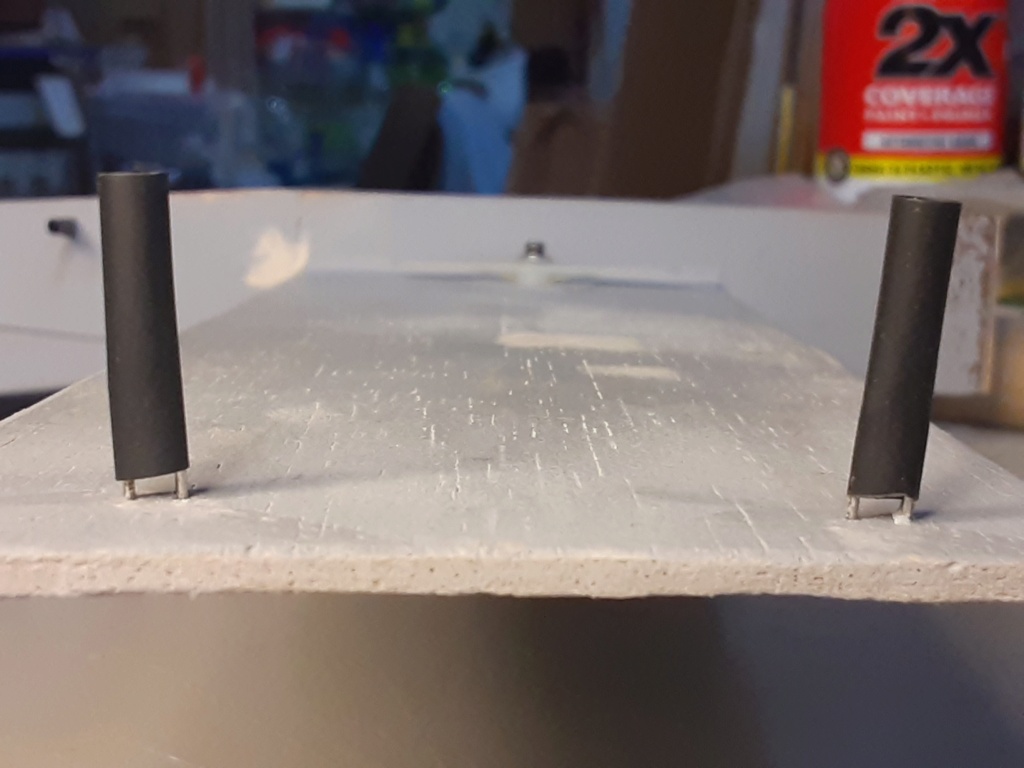
No painting today. I could have.. but got something tedious out of the way. This is the 3rd model that I'm using safety-pin eyes for fairleads (lead-out and push-rod guides) with the hasp-end cut off and discarded.
I measured.. and pre-drilled holes with a .040" (#60) drill, using my pin-vise.
The "legs" are trimmed to the needed length.. and I then file notches where they mount into the wood for glue-retention.

The push-rod guide requires a location preferably at the rod's halfway-point.. and also at an elevation as close as possible to the halfway-point of the horn's hole-pattern.. (I use DuBro Nylon horns with multiple throw-positions)
Note in the image below; A Sig 1/2A Nylon bellcrank (in the foreground), the push-rod "guide" (in focus) and the DuBro Nylon control-horn (in the background).
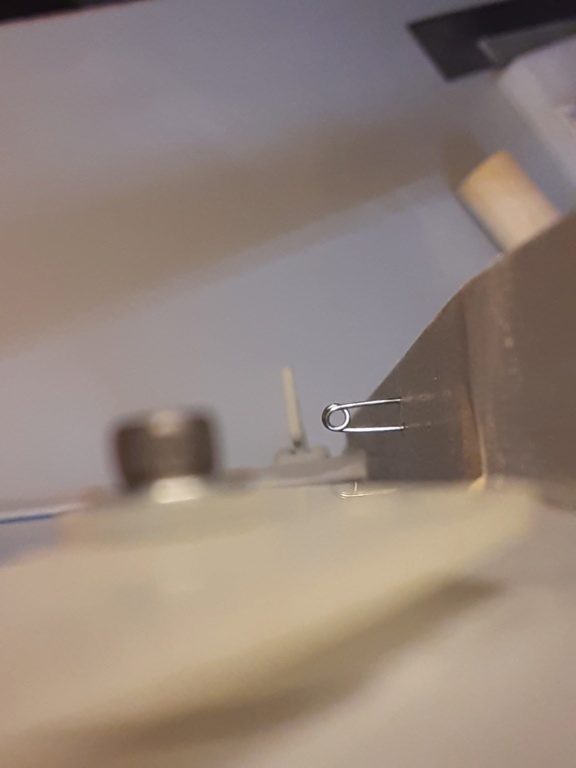
The Sig 1/2A bellcrank (SH-234) has a 2.125" line-spacing.. so I carried that measurement out near the inboard wingtip.. and raked slightly rearward.. to point the model's nose slightly away from center.
The wings' lead-out guides are the same construction. I use thick/gel CA glue to anchor them.

The model has no rudder or thrust offsets. Having designed it for Cox "Bee" (reed-valve) engines; I plan on running left-hand propellers.
These were good things to get done before paint. I used some heat-shrink tubing to "mask" these fairleads.. although some modelers might prefer to let them blend-into the surrounding finish.
I measured.. and pre-drilled holes with a .040" (#60) drill, using my pin-vise.
The "legs" are trimmed to the needed length.. and I then file notches where they mount into the wood for glue-retention.


The push-rod guide requires a location preferably at the rod's halfway-point.. and also at an elevation as close as possible to the halfway-point of the horn's hole-pattern.. (I use DuBro Nylon horns with multiple throw-positions)
Note in the image below; A Sig 1/2A Nylon bellcrank (in the foreground), the push-rod "guide" (in focus) and the DuBro Nylon control-horn (in the background).

The Sig 1/2A bellcrank (SH-234) has a 2.125" line-spacing.. so I carried that measurement out near the inboard wingtip.. and raked slightly rearward.. to point the model's nose slightly away from center.
The wings' lead-out guides are the same construction. I use thick/gel CA glue to anchor them.

The model has no rudder or thrust offsets. Having designed it for Cox "Bee" (reed-valve) engines; I plan on running left-hand propellers.
These were good things to get done before paint. I used some heat-shrink tubing to "mask" these fairleads.. although some modelers might prefer to let them blend-into the surrounding finish.

 Re: T-Bee-D1 (a Rod-de-sign)
Great idea

akjgardner- Diamond Member


Posts : 1603
Join date : 2014-12-28
Age : 65
Location : Greensberg Indiana
 Re: T-Bee-D1 (a Rod-de-sign)
akjgardner wrote:Great idea
Joe, Thanks much for your praise.
I used a couple of different tools. Both were plier-type tools. The smaller safety pin was cut 1st; using standard/light-duty wire-cutters. The wire seemed softer than the slightly larger pins that I used for the lead-outs which needed something tougher.
I have small locking-pliers that have cutters in their jaws, which require less "pressure" by being able to make multiple cuts. I make the first cut observing the jaws locking but failing to cut through. I then unlock the jaws without releasing the work-piece.. and proceed to tighten (slightly) the adjustment screw/knob until the jaws back-open a little. This provides a 2nd deeper bite which usually breaks-through. This works well for light-guage spring-steel wire.
I'll reiterate the importance of protecting your eyes... always.
 configuring an engine
I've still got lots of choices for configuring a Bee engine. My "engine project" box is a Chinese take-out container.. in which I had a Golden Bee case and back-end. No top-end.. but I robbed a piston from another project. I still needed a jug.. and I wanted a dual bypass (#1) at the least.
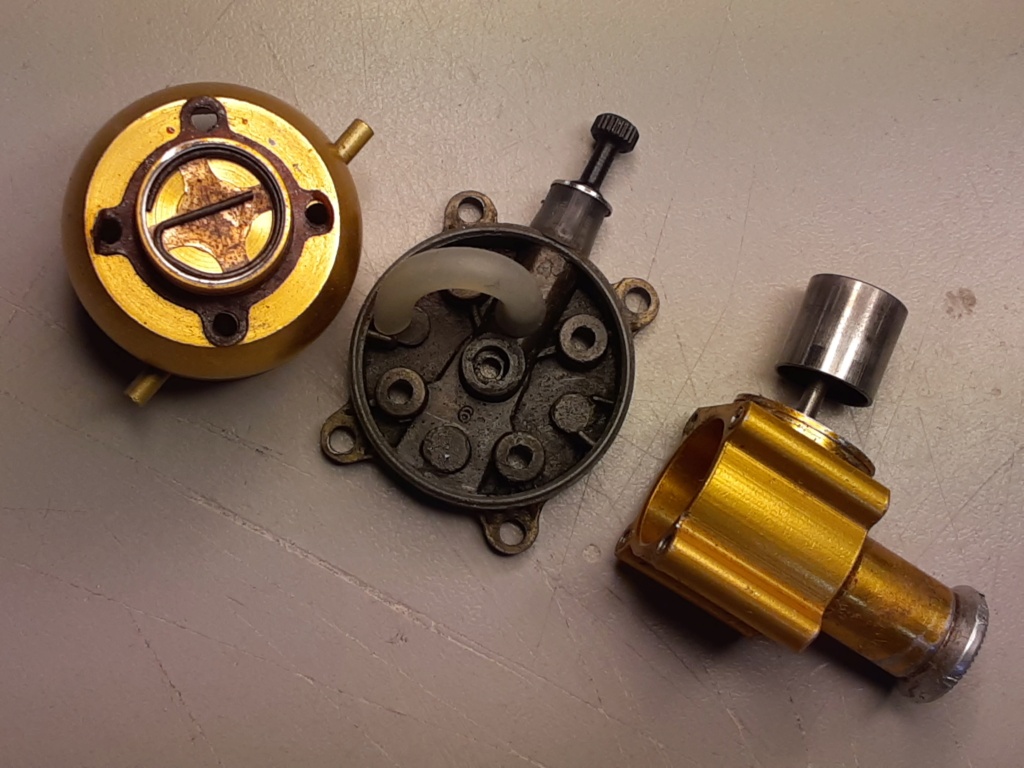
Then realized that this was my Golden Bee with the larger (.080") venturi.
Here's a #2 that could use a home. I got this "290" Cox product-engine in a consignment lot at a hobby shop in nearby Sturbridge, MA Dec. 2017.
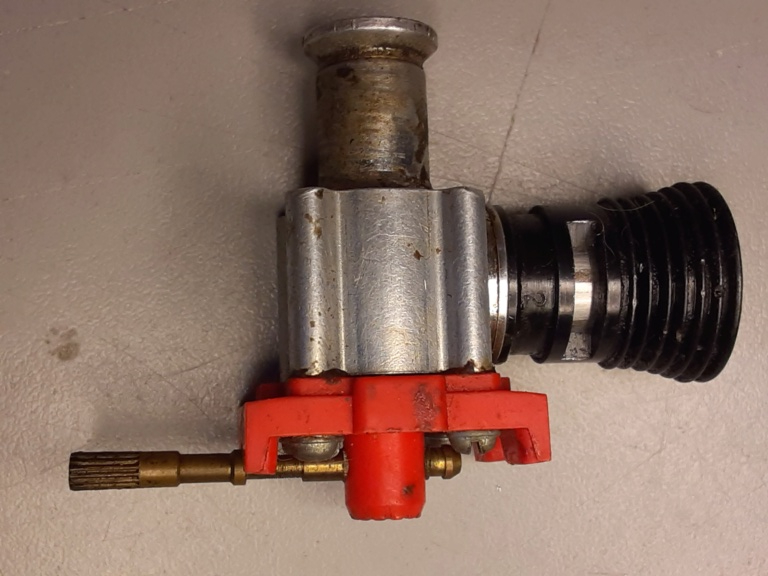
There was an additional postie backplate/NVA included. Those early product-engine's had better (finer-thread) needle valves well worth hanging onto. Save the reed and circlip as well. You'll often see/find these in on-line auction photos... on the cheap. The engines are usually in very good condition.. because they generally "outlived" the platform from which they came. The engines are superior.. hands-down. They come from an era when Cox was custom-fitting pistons to cylinders with higher precision than in later years..

Then realized that this was my Golden Bee with the larger (.080") venturi.


Here's a #2 that could use a home. I got this "290" Cox product-engine in a consignment lot at a hobby shop in nearby Sturbridge, MA Dec. 2017.

There was an additional postie backplate/NVA included. Those early product-engine's had better (finer-thread) needle valves well worth hanging onto. Save the reed and circlip as well. You'll often see/find these in on-line auction photos... on the cheap. The engines are usually in very good condition.. because they generally "outlived" the platform from which they came. The engines are superior.. hands-down. They come from an era when Cox was custom-fitting pistons to cylinders with higher precision than in later years..
Last edited by roddie on Sun Oct 22, 2023 10:37 am; edited 2 times in total (Reason for editing : cylinder # changed from #2 to #1)
 Re: T-Bee-D1 (a Rod-de-sign)
well........... I obviously don't know my Cox cylinders by #/configuration yet.. 
 I wanted a "dual-bypass" cylinder for the oversize venturi.. and thought that a Cox #2 would fill the order. No... Wrong Roddie... I took apart that "Postie" (early Cox #290 product engine) for its cylinder. Oh..........
  it's a single bypass cylinder.
  That's OK Roddie.. (I thought..) You're gonna' clean-up this poor ol' Toasted Postie... for spares...
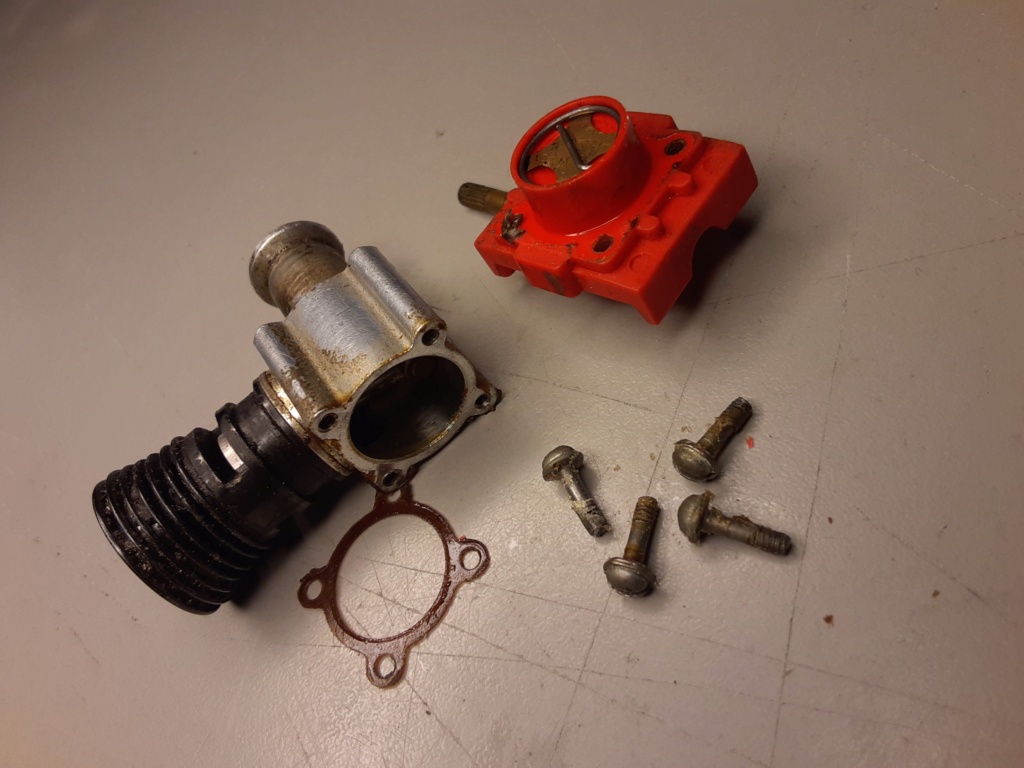
I needed to remove the cylinder to check its porting. No "flats" on top.. so I used the smaller .312" width fork-tool on the Cox wrench, to remove the cylinder from the case.
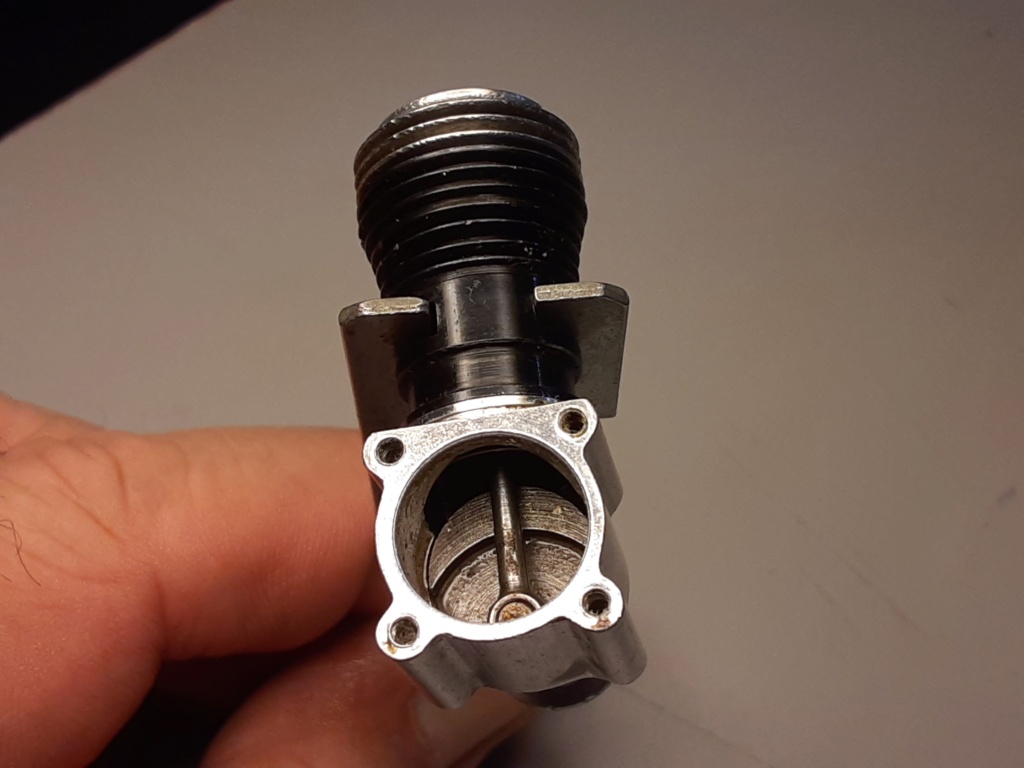
The cylinder loosened without a fight.. but to my surprise has a single bypass-port configuration..

So........... I got one of my old stiff-bristled tooth-brushes.. saved just for model-building purposes, a bottle of 91% isopropyl alcohol, cotton-swabs, wooden toothpicks.. facial-tissue and paper-towel blotters.. and started scrubbing, brushing... to find that the 91% alcohol was working to strip the parts clean without a whole lot of effort.
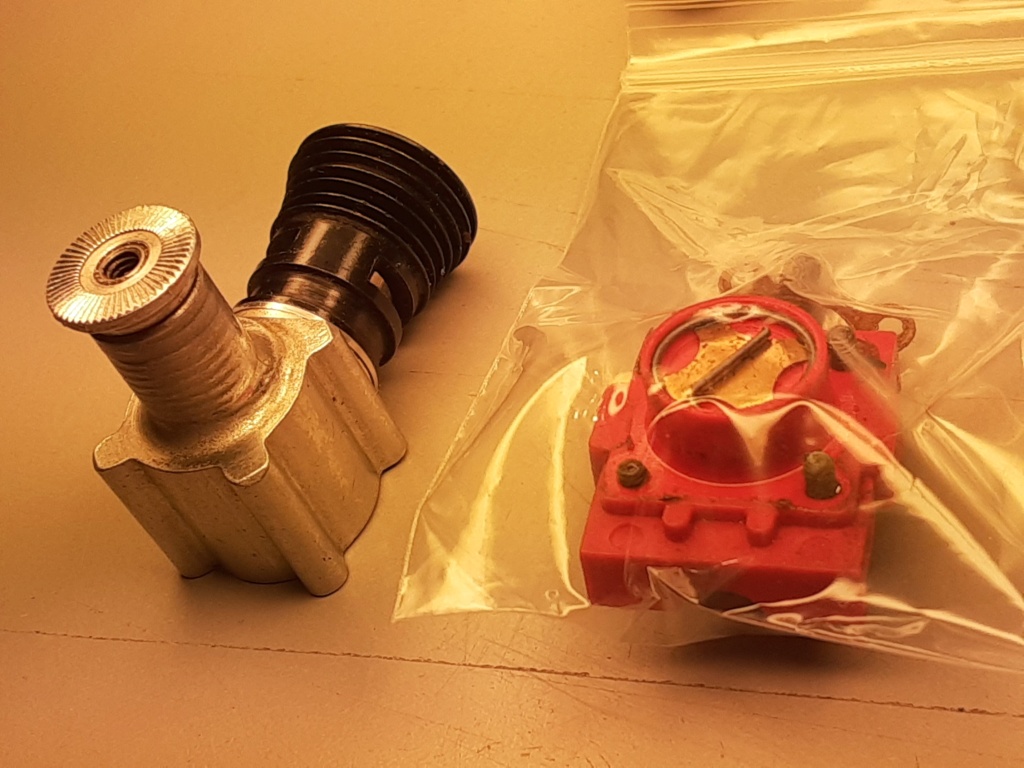
As I mentioned earlier;these engines are typically in great condition.. and this one was no exception. The piston rod/socket fit was snug (hardly any play) The piston's dry-fit got tighter in the bore.. when approaching TDC. After a light-oiling, installing a head gasket and glowhead; this engine yielded "like new" compression.

I needed to remove the cylinder to check its porting. No "flats" on top.. so I used the smaller .312" width fork-tool on the Cox wrench, to remove the cylinder from the case.

The cylinder loosened without a fight.. but to my surprise has a single bypass-port configuration..
So........... I got one of my old stiff-bristled tooth-brushes.. saved just for model-building purposes, a bottle of 91% isopropyl alcohol, cotton-swabs, wooden toothpicks.. facial-tissue and paper-towel blotters.. and started scrubbing, brushing... to find that the 91% alcohol was working to strip the parts clean without a whole lot of effort.

As I mentioned earlier;these engines are typically in great condition.. and this one was no exception. The piston rod/socket fit was snug (hardly any play) The piston's dry-fit got tighter in the bore.. when approaching TDC. After a light-oiling, installing a head gasket and glowhead; this engine yielded "like new" compression.
 Re: T-Bee-D1 (a Rod-de-sign)
I think I'm gonna' go with the single-bypass cylinder and an 8cc fuel-bowl for a proto/test-engine.. rather than the bigger venturi/intake option. It was good to get that little "290" engine cleaned-up.. (maybe my next airplane's engine) but I have two complete Golden Bees from that same consignment-lot which look to be "bone-stock" Golden Bees.
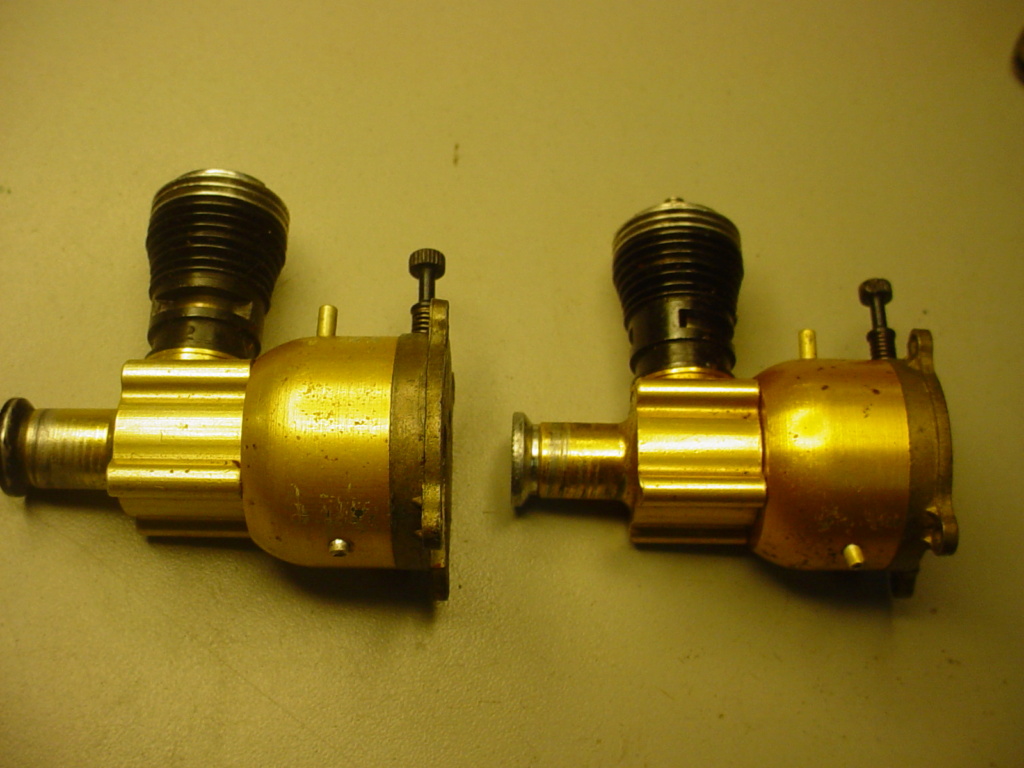
I posted about them back when I got them.. but here's a few more photos that I took..
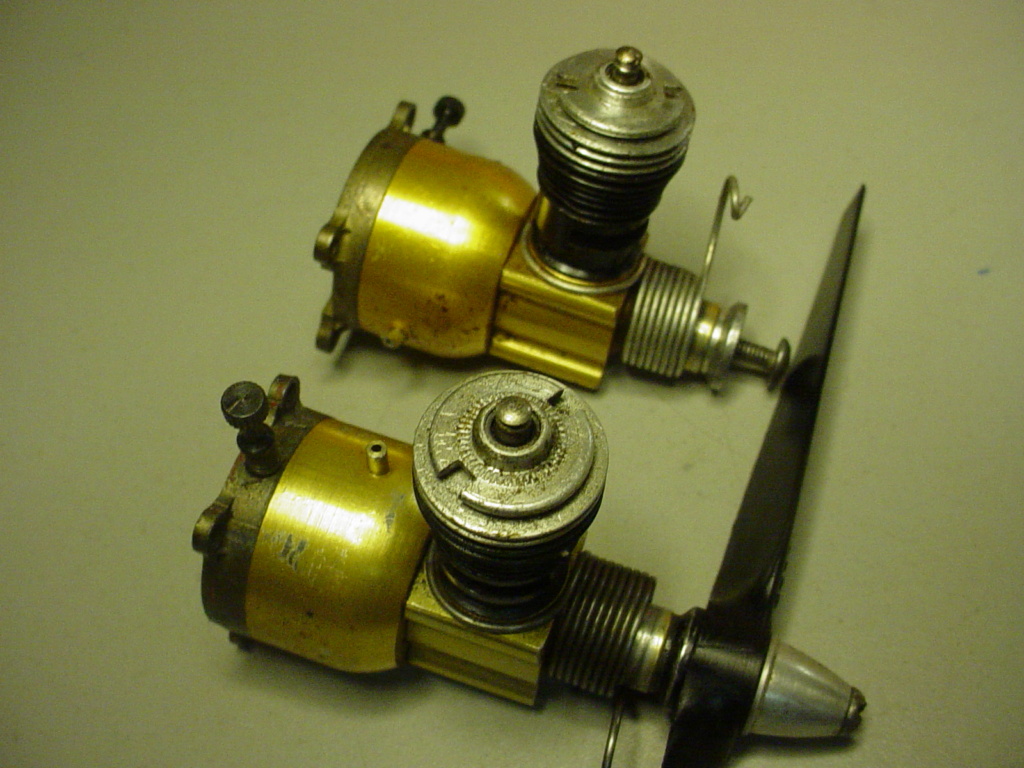
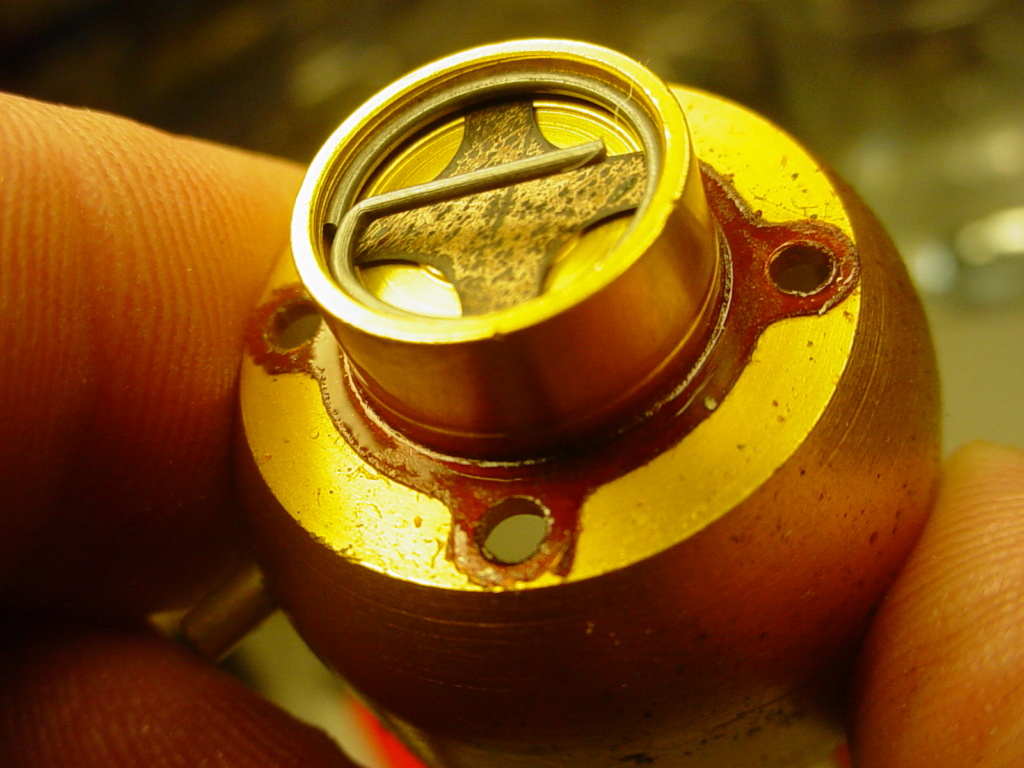
Both engines are equally clean.. and I'm going to use one of them. I'll save the "big venturi" 8cc back-end as a test module for later on.

I posted about them back when I got them.. but here's a few more photos that I took..


Both engines are equally clean.. and I'm going to use one of them. I'll save the "big venturi" 8cc back-end as a test module for later on.
 Re: T-Bee-D1 (a Rod-de-sign)
roddie wrote:.....I have two complete Golden Bees from that same consignment-lot which look to be "bone-stock" Golden Bees.
Apart from the High Compression head on one.

Oldenginerod- Top Poster

- Posts : 4019
Join date : 2012-06-15
Age : 62
Location : Drouin, Victoria
 Re: T-Bee-D1 (a Rod-de-sign)
Oldenginerod wrote:roddie wrote:.....I have two complete Golden Bees from that same consignment-lot which look to be "bone-stock" Golden Bees.
Apart from the High Compression head on one.
yea.. about that...
 Re: T-Bee-D1 (a Rod-de-sign)
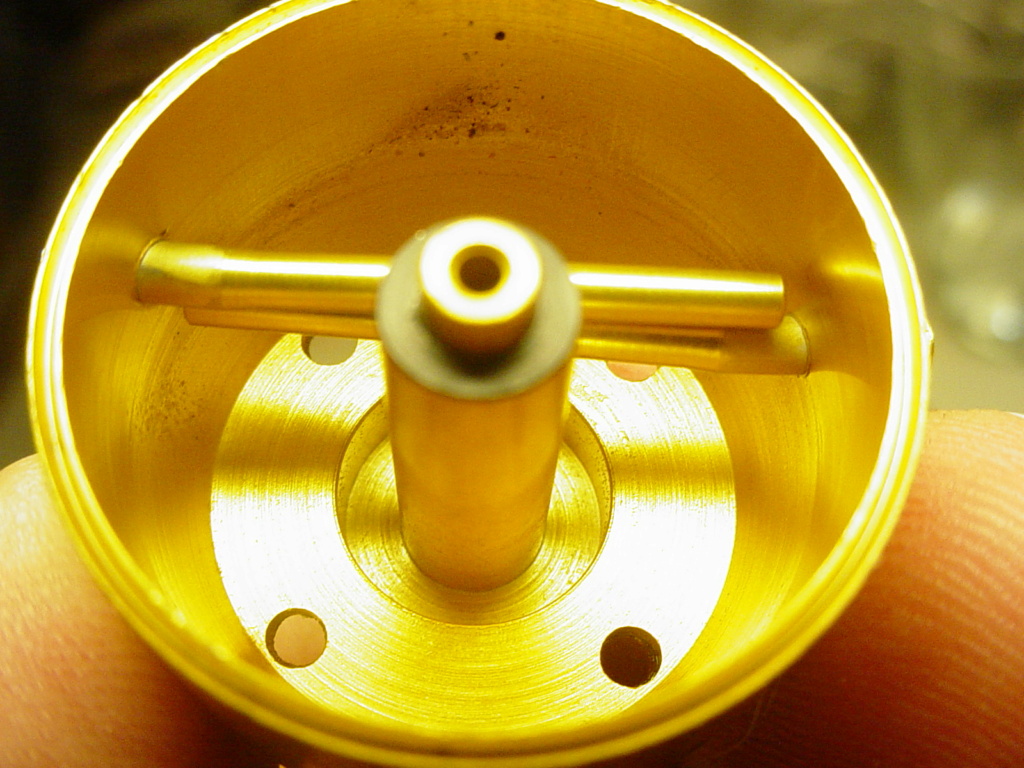
It looks like I'll be building a bone-stock "mongrel" 8cc integrally-tanked prototype engine for this airplane. I installed a pick-up tube in the 9 o-clock position and found some new venturi gaskets.
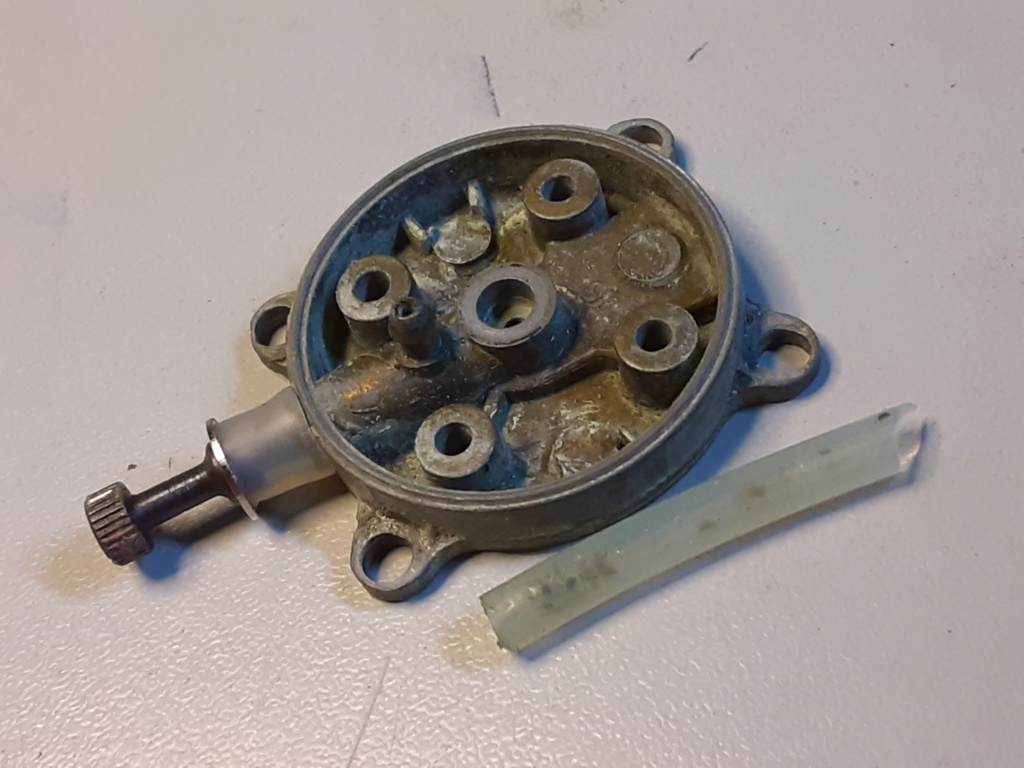
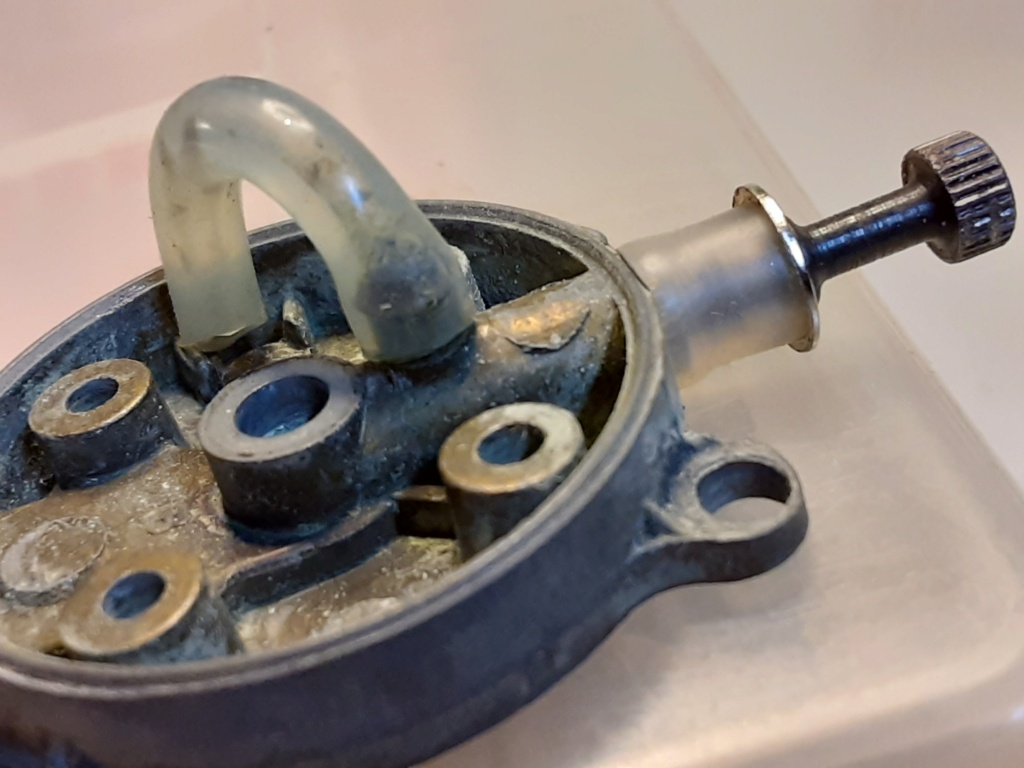

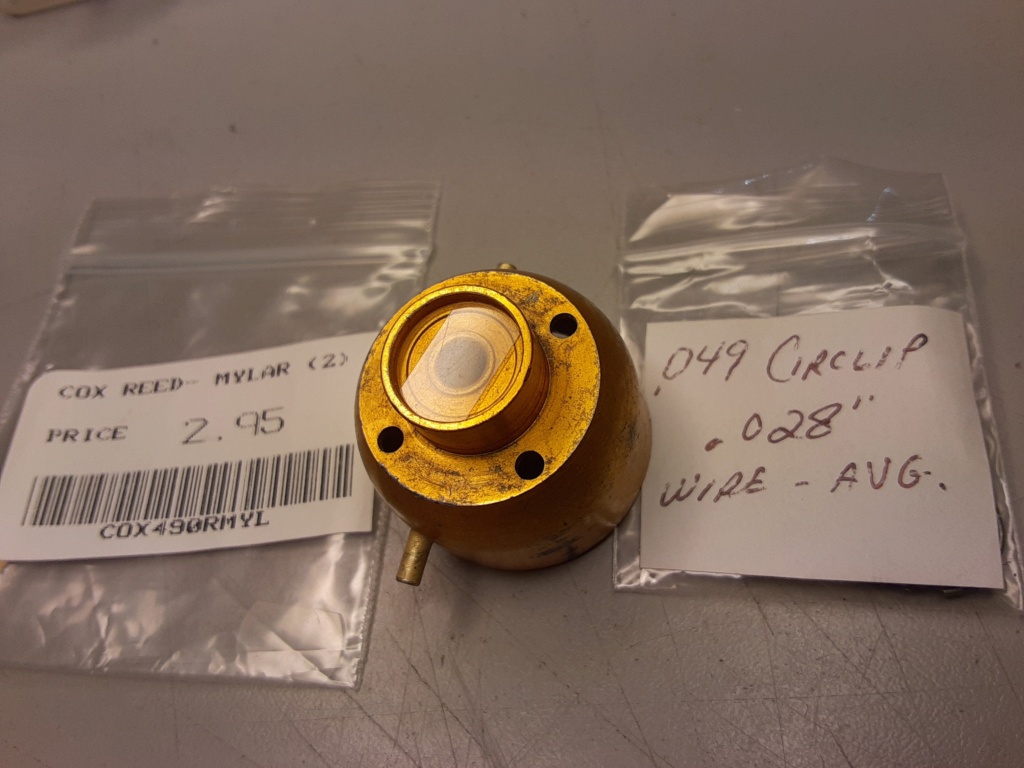
The needle got the tubing-seal treatment and flow-test-check ... and I installed a new Mylar reed with one of my "thinner-wire" (.028") circlips. Test (blow/suck) check..
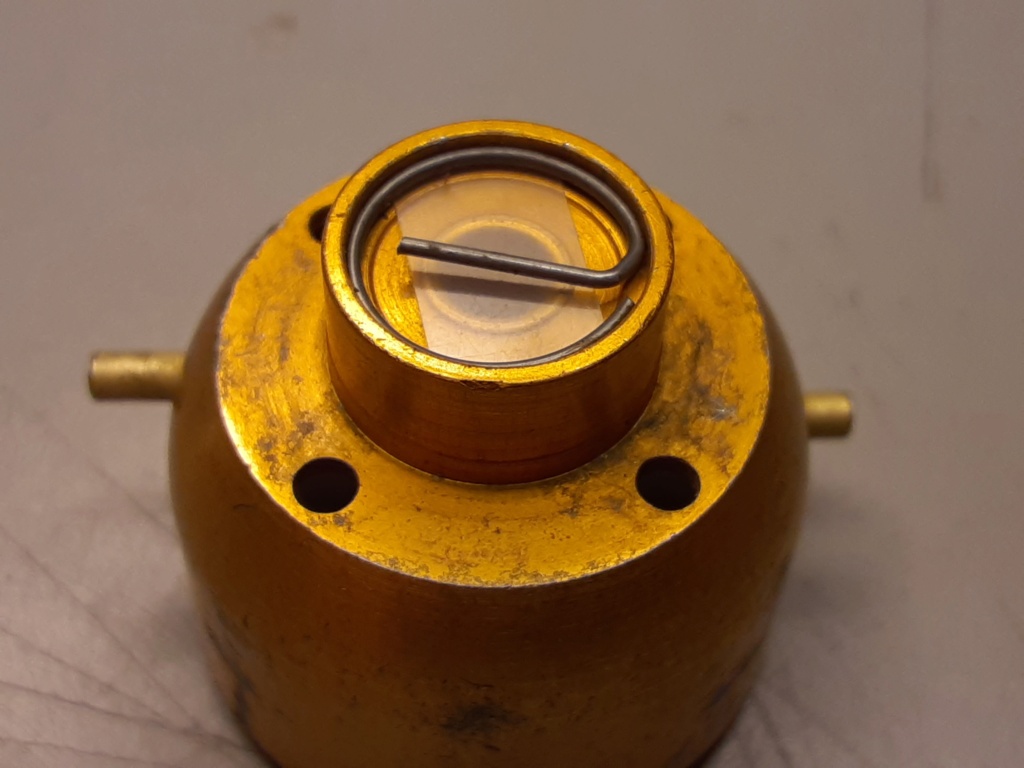
"Paint and chrome.. don't get ya' home".. but a starter-spring (L/H) will help to light the fire...
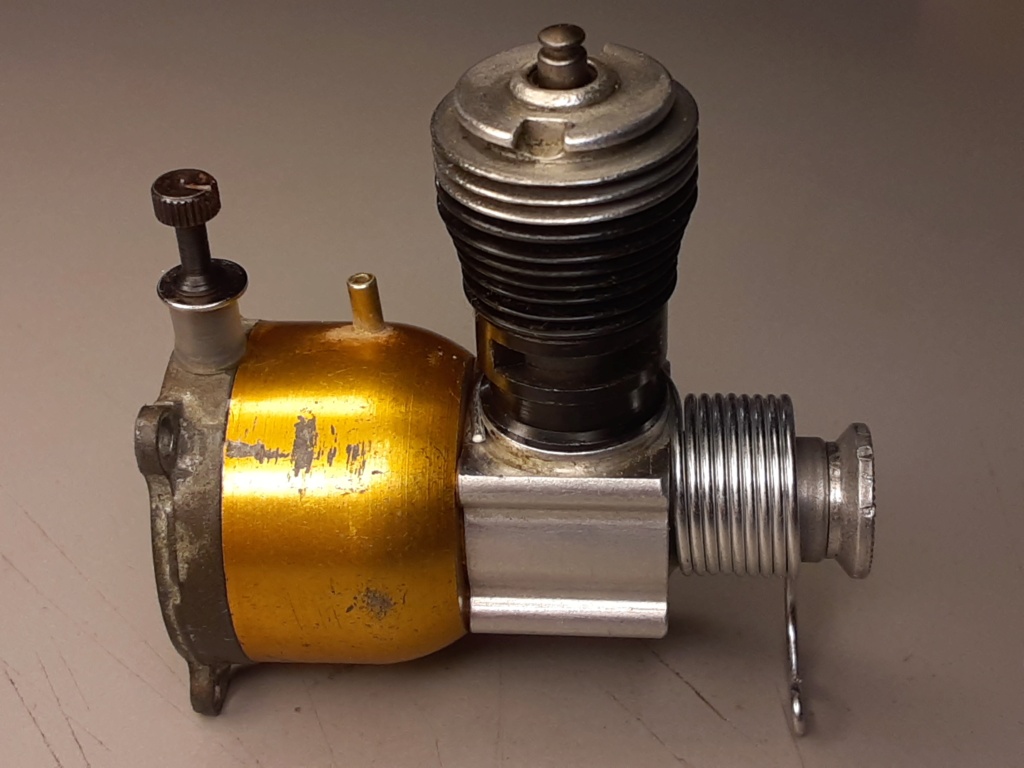
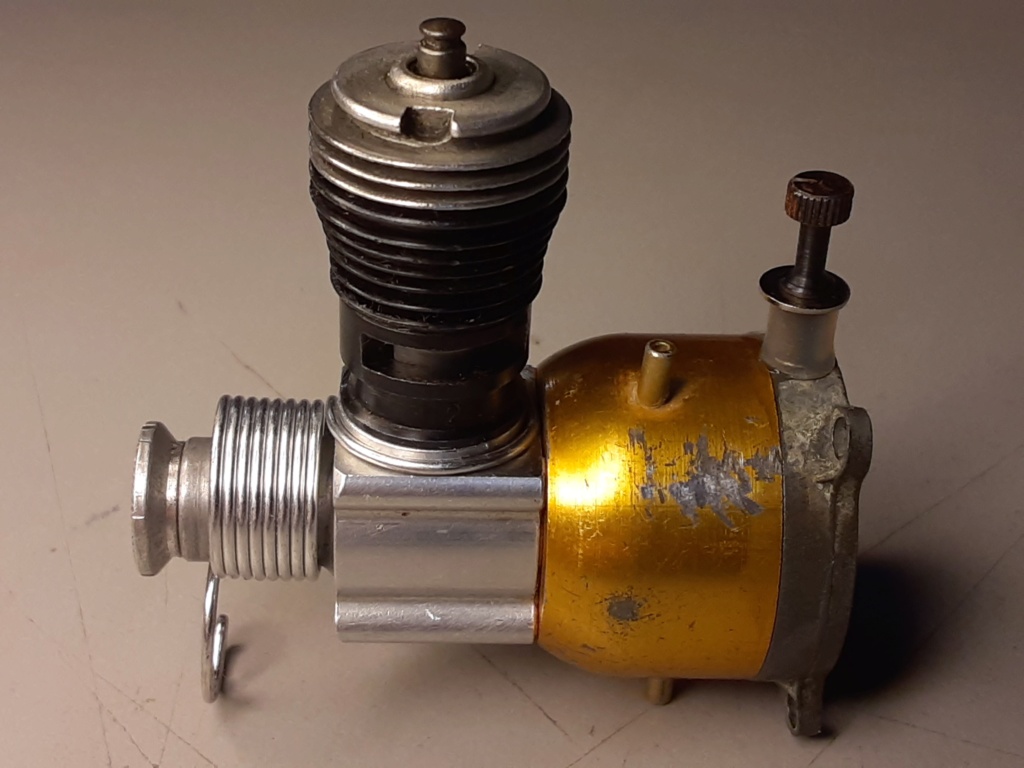
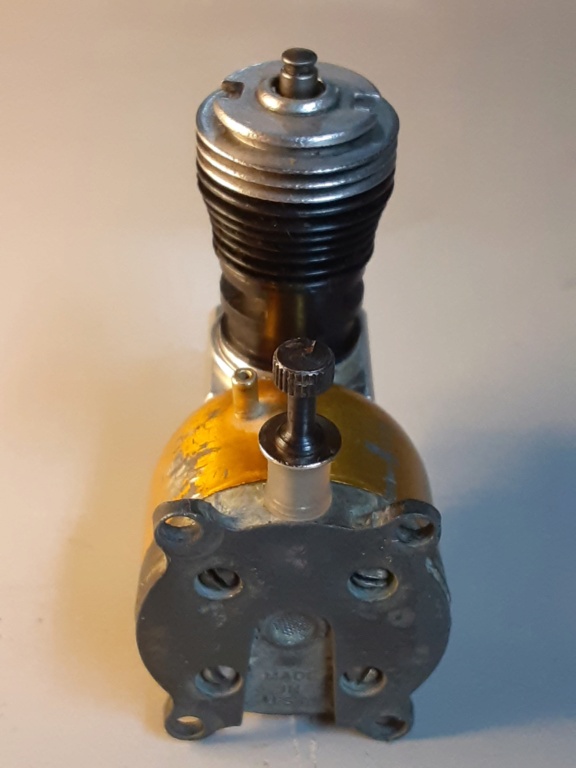
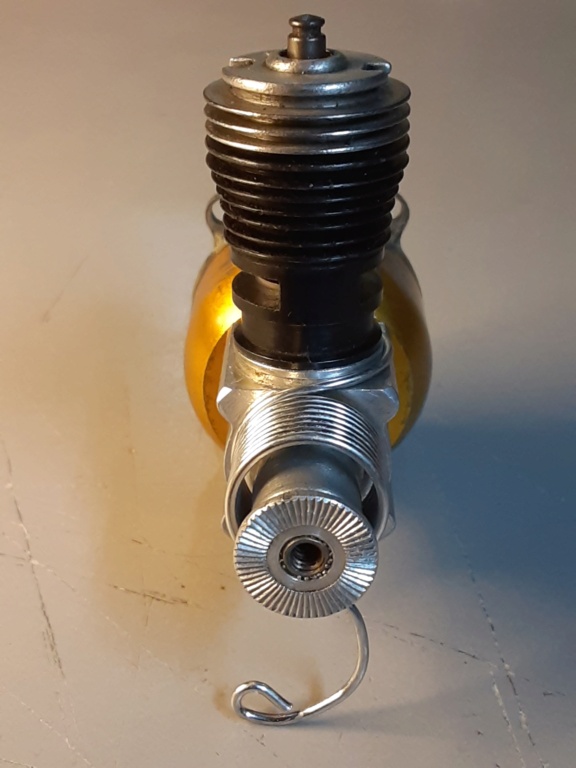


The needle got the tubing-seal treatment and flow-test-check
 ... and I installed a new Mylar reed with one of my "thinner-wire" (.028") circlips. Test (blow/suck) check..


"Paint and chrome.. don't get ya' home".. but a starter-spring (L/H) will help to light the fire...


 Re: T-Bee-D1 (a Rod-de-sign)
I love that engine roddie, typical of what I used to buy only with gobs of baked on castor inside the fins.

rsv1cox- Top Poster


Posts : 11260
Join date : 2014-08-18
Location : West Virginia
 Re: T-Bee-D1 (a Rod-de-sign)
That should get her up in the air with no problem , engine clean up went well to  tHe #2 cly. is the right one for the GB you may have been thinking the #1 is duel bypass / boosters

getback- Top Poster


Posts : 10448
Join date : 2013-01-18
Age : 67
Location : julian , NC
 Re: T-Bee-D1 (a Rod-de-sign)
rsv1cox wrote:I love that engine roddie, typical of what I used to buy only with gobs of baked on castor inside the fins.
Me too Robert! The front/top-end is of that little "postie" that I just cleaned-up. I don't think I mentioned that. The 8cc stunt bowl and backplate are GB engine parts from when I was a kid.. which will make this engine assembly that much more special to me.
The postie had considerable crap in-between the cooling-fins.. and had no glowhead when purchased in that consignment lot. It sat in the same bag since 2017. Six years.. scary. It just doesn't seem like it was that long ago that I scored that lot.
 Re: T-Bee-D1 (a Rod-de-sign)
roddie wrote:rsv1cox wrote:I love that engine roddie, typical of what I used to buy only with gobs of baked on castor inside the fins.
Me too Robert! The front/top-end is of that little "postie" that I just cleaned-up. I don't think I mentioned that. The 8cc stunt bowl and backplate are GB engine parts from when I was a kid.. which will make this engine assembly that much more special to me.
The postie had considerable crap in-between the cooling-fins.. and had no glowhead when purchased in that consignment lot. It sat in the same bag since 2017. Six years.. scary. It just doesn't seem like it was that long ago that I scored that lot.
That baked-on fin castor coke is about the one thing that Berrymans will not loosen. I have to dig it out with a jewelers screwdriver that fits nicely inside the fins. Mixing and matching parts is fun. Sometimes you can come up with a real hybred.

rsv1cox- Top Poster


Posts : 11260
Join date : 2014-08-18
Location : West Virginia
 Re: T-Bee-D1 (a Rod-de-sign)
getback wrote:That should get her up in the air with no problem , engine clean up went well totHe #2 cly. is the right one for the GB you may have been thinking the #1 is duel bypass / boosters

Yes.. I think you're right. It should be a healthy runner.. but not overkill. That's best for the first few flights. The ease of clean-up surprised me. Most of the grime was likely from being tossed around in dirty field/parts boxes over the years as is often the case with these orphaned product engines.. if they were even saved at all.
Regarding the cylinders; I'll have some options.. and I have that Golden Bee oversize (.080") venturi 8cc bowl/backplate combo that may breathe enough to run a Tee Dee ported cylinder and HC head. All with the same 8cc integral fuel bowl footprint. Then there's fuel blend.. and propeller options to mess around with in-between!

 Re: T-Bee-D1 (a Rod-de-sign)
rsv1cox wrote:
That baked-on fin castor coke is about the one thing that Berrymans will not loosen. I have to dig it out with a jewelers screwdriver that fits nicely inside the fins. Mixing and matching parts is fun. Sometimes you can come up with a real hybred.
I don't have Berryman's in my arsenal Robert.. but I've tried to pay attention to your methods.. and bought some "Hoppes" #9 gun-bore cleaner a few years ago. I had no knowledge of it; having never owned any firearms. I haven't used any yet. I'll need to ask you about specifics when the time comes.
I used the "backside" of a #11 blade in a small X-Acto handle to scrape the crud from between the fins of that postie's cylinder. Mostly dirt... and then with a toothbrush dampened with 91% isopropyl alcohol; I proceeded to scrub, which worked quite well. A have a stiffer black-plastic bristled brush for cleaning the case and glowhead size machined-threads. Cotton swabs and paper-towel blotters prep for a light oiling. I've been using a "Zoom-Spout" oiler with sewing-machine oil as an assembly-lube.
I've always enjoyed Mixing and Matching Cox .049 engine parts. It's kinda' like building a small-block Chevy engine. There's lots of options available.
 base-coat time...
We're expecting clear and mild weather for the next several days here in Southern New England. I'm psyched.. because I'm ready to spray some base-coats on this airplane.
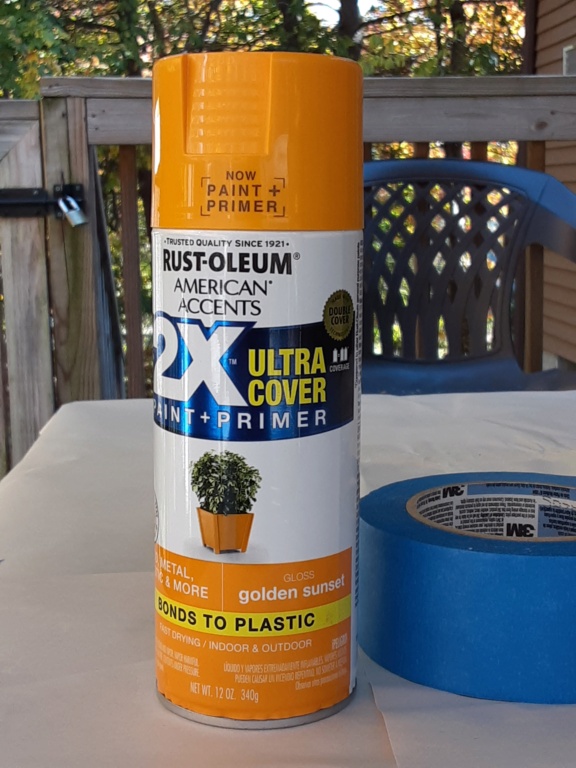
This is a yellow gloss.. the same color as I painted my Rodd-E-Liminator tether-car. It's yellow; believe me.. but looks absolutely "orange".. under certain lighting conditions. Rust-Oleum calls it "Golden Sunset". It's more of a Butterscotch Yellow.. than a Canary Yellow.
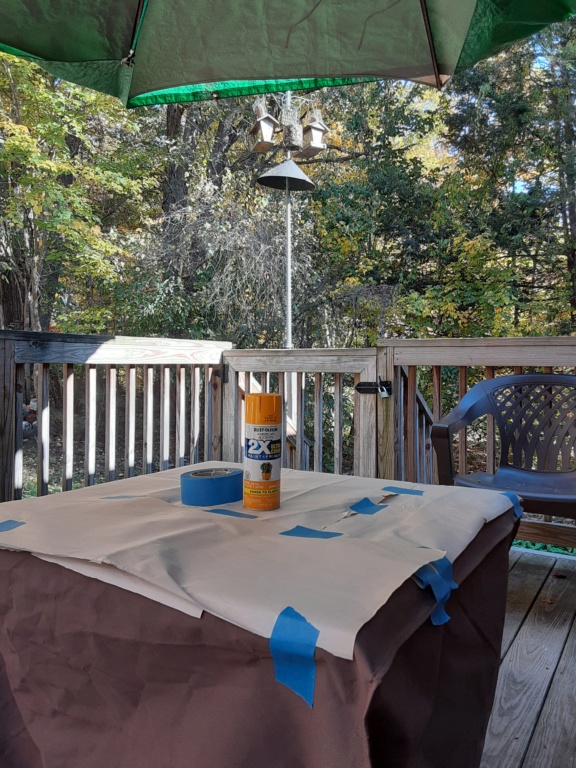
Our LP gas fire-pit/table will serve as a painting area. It's a gorgeous day.. with only an occasional light breeze.
I sprayed 6 coats (X3 bottom and X3 topside) about 10 minutes apart.
Note in the photo below; the wing resting on the outboard tip (hence weighted with the penny)

Enough base-coats for today.
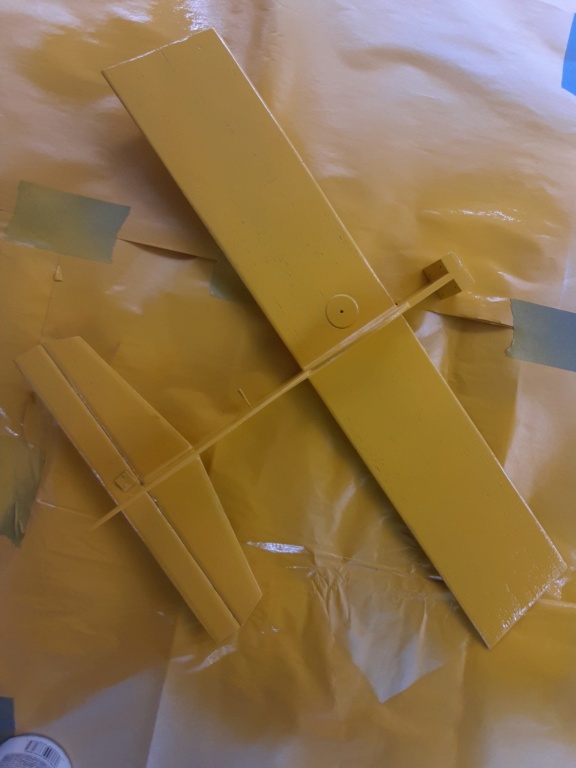
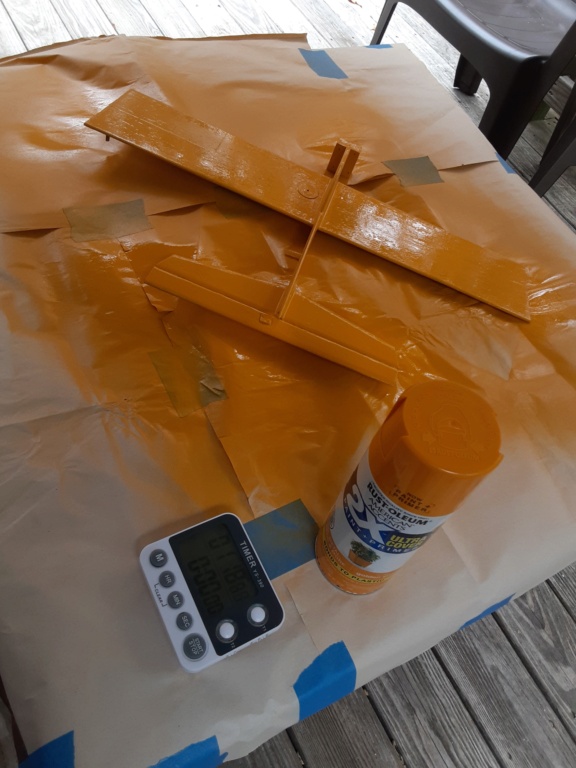
See what I mean about the tone?

This is a yellow gloss.. the same color as I painted my Rodd-E-Liminator tether-car. It's yellow; believe me.. but looks absolutely "orange".. under certain lighting conditions. Rust-Oleum calls it "Golden Sunset". It's more of a Butterscotch Yellow.. than a Canary Yellow.

Our LP gas fire-pit/table will serve as a painting area. It's a gorgeous day.. with only an occasional light breeze.

I sprayed 6 coats (X3 bottom and X3 topside) about 10 minutes apart.
Note in the photo below; the wing resting on the outboard tip (hence weighted with the penny)

Enough base-coats for today.


See what I mean about the tone?

rsv1cox- Top Poster


Posts : 11260
Join date : 2014-08-18
Location : West Virginia
 going with solids..
I decided to go with .015" solid-wire lead-outs.
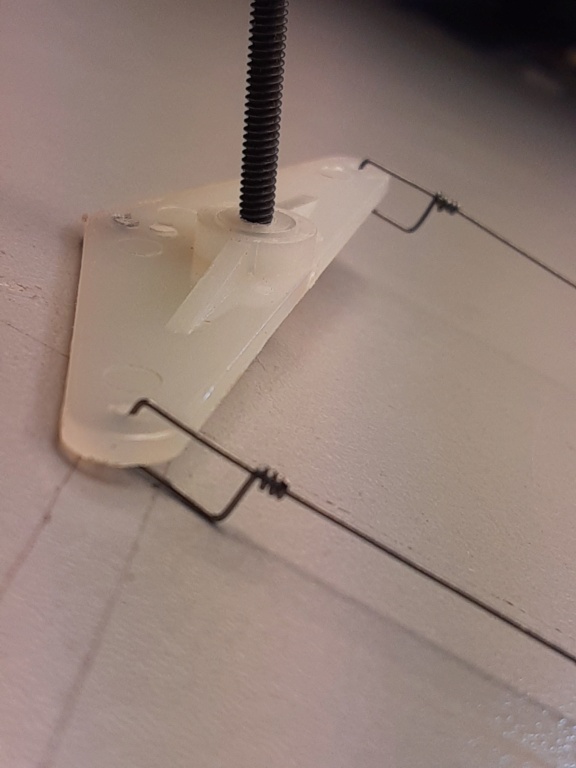
I wanted to make the terminations small enough to pass-through the eyes of the guides. This avoids trying to form the wire with an airplane attached.
These are practice-loops, to see if I could do it. Yes.. the solids are plenty long, so I'll cut them back and redo them later.
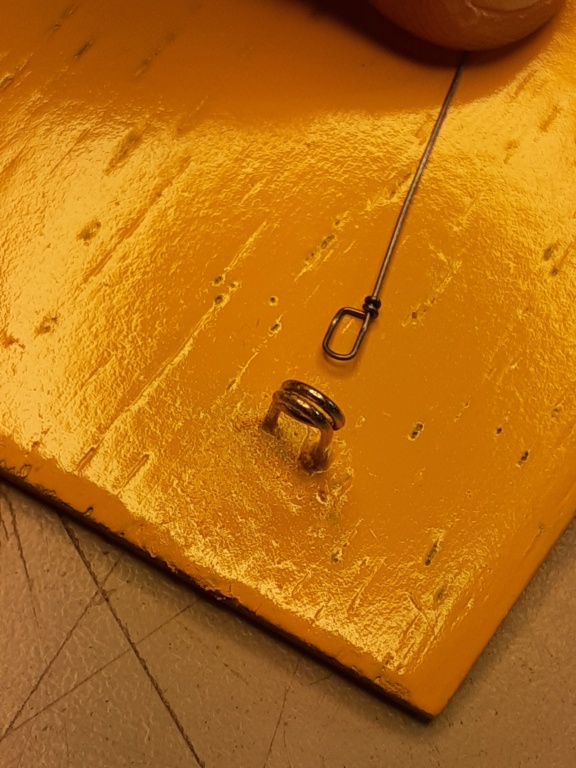
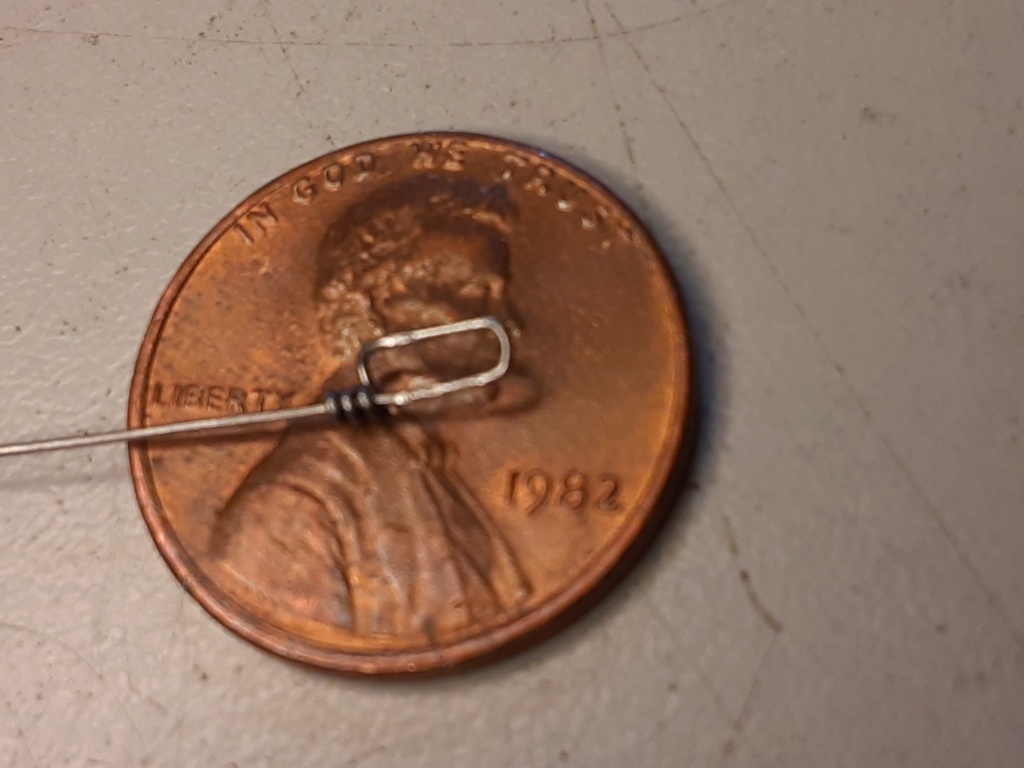
BTW.. this is what I use to set "elevator-neutral" when setting-up the controls.

It's been too chilly outdoors for me to spray another coat of base-color.. but it needs it. I've got something interesting planned for the trim.

I wanted to make the terminations small enough to pass-through the eyes of the guides. This avoids trying to form the wire with an airplane attached.
These are practice-loops, to see if I could do it. Yes.. the solids are plenty long, so I'll cut them back and redo them later.


BTW.. this is what I use to set "elevator-neutral" when setting-up the controls.

It's been too chilly outdoors for me to spray another coat of base-color.. but it needs it. I've got something interesting planned for the trim.
 Re: T-Bee-D1 (a Rod-de-sign)
I like your lead-out ends. Getting them squared off is difficult enough but coiling the wire like that takes calm hands and skill. Well done!
A vice and needle-nosed pliers I would think.
A vice and needle-nosed pliers I would think.

rsv1cox- Top Poster


Posts : 11260
Join date : 2014-08-18
Location : West Virginia
 Re: T-Bee-D1 (a Rod-de-sign)
rsv1cox wrote:I like your lead-out ends. Getting them squared off is difficult enough but coiling the wire like that takes calm hands and skill. Well done!
A vice and needle-nosed pliers I would think.
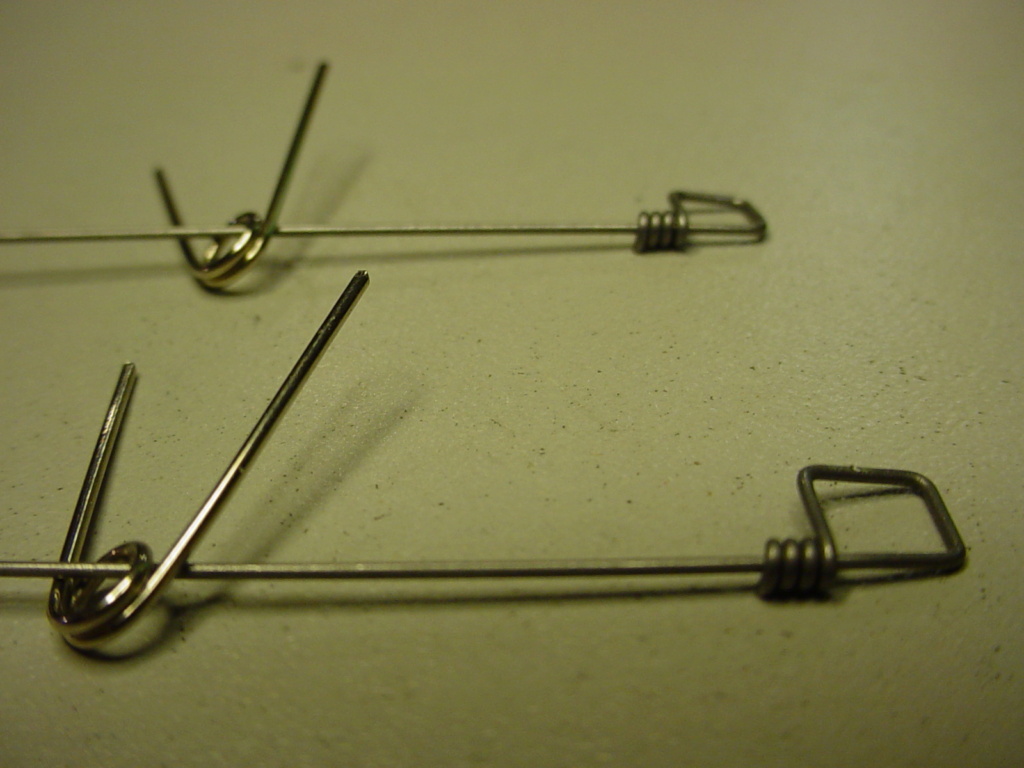
Hey Robert! Thanks!! I make the 3 bends (to form a box..) using my needle-nose pliers. I make them like my dad did. I leave myself an inch of wire and wrap it around; starting the coil gradually with my fingers. I wind until it starts to hurt..... then i use the jaws of the pliers to twist the tang (end) around the main leg until it gets too short. I then cut-off the blunt-end with a dremel-type tool. These are only .015" music-wire lead-outs. I made-up .025" wire on the Rare Bear. (below photo)
Page 6 of 8 •  1, 2, 3, 4, 5, 6, 7, 8
 Similar topics
» Stopped by the local sign shop today.
» Sign of the times
» ***The Traveling Engine TD .049*** SIGN UP!
» Brodak Stop Sign
» Can't sign up for Yahoo - But Comet RTF question
» Sign of the times
» ***The Traveling Engine TD .049*** SIGN UP!
» Brodak Stop Sign
» Can't sign up for Yahoo - But Comet RTF question
Page 6 of 8
Permissions in this forum:
You cannot reply to topics in this forum

 Rules
Rules


