Log in
Search
Latest topics
» Tee Dee .020 combat modelby 1/2A Nut Today at 10:34 am
» Happy 77th birthday Andrew!
by rdw777 Today at 10:04 am
» Purchased the last of any bult engines from Ken Enya
by sosam117 Today at 8:15 am
» TEE DEE Having issues
by balogh Today at 7:42 am
» Retail price mark-up.. how much is enough?
by rsv1cox Today at 7:36 am
» Cox films/videos...
by Coxfledgling Today at 4:46 am
» My N-1R build log
by roddie Today at 12:32 am
» Landing-gear tips
by roddie Yesterday at 6:17 pm
» Roger Harris revisited
by TD ABUSER Yesterday at 2:13 pm
» My latest doodle...
by roddie Yesterday at 10:43 am
» Chocolate chip cookie dough.........
by roddie Fri Nov 22, 2024 1:13 pm
» Free Flight Radio Assist
by rdw777 Fri Nov 22, 2024 9:24 am
Cox Engine of The Month
DPC Models P-38
Page 1 of 1
 DPC Models P-38
I finally got around to starting the P-38. Dave provides a terrific example of a moldie oldie. I took this out of the packaging last evening while digesting our fabulous dinner provided by my wife. First thing first, I bent up the gear wire. I changed things a bit as the original finished out by turning into the rib. Regardless, I sandwiched the gear wire after roughing it up and cleaning followed by epoxy. I let those sit over night. Dave provides square stock for leading and trailing edges. This stock is to be shaped so don't figure on a shaped leading edge. I left all stock square initially until assembly. I shaped the trailing edge and left the leading edge until it was assembled.
Looking at the plan, I arrived at about 5 degrees. When cutting trailing and leading edges, don't take off any more than needed to acquire the angles. Basically, I ganged all stock up and setting the miter saw to 5 deg, I cut all stock at the same time. Seeing you need lefts and rights, just flip the material over. Now, the most important step, mark all material inboard, outboard, top, bottom. Line up the trailing edge and leading edge over the print and tick off both sides of the rib locations. The rib dadoes are NOT SQUARE to the leading and trailing edge. I used a thin kerf blade in my table saw which is exactly a 1/16" kerf. Using the miter gauge, I set the blade height to 1/8" and cut the dadoes into the leading and trailing edges with the blade set a 5 deg angle. Seeing once again, we have a left and right panel, the dadoes are also handed. Just carefully climb cut in reverse to cut the opposing dadoes. Not exactly a correct practice in harder woods, balsa this is fine. Of course one could use a hacksaw blade and do this manually. I spent more time changing my blade then the actual cuts. Accuracy is at a premium here because with all the angles, this wing won't fit together properly.
I'm quite happy with the product, I would like to see the firewalls a bit wider as the Baby Bee backplate barely makes it onto the face of it. I'm up in the air in regards to replacing them. Fitment is terrific on the parts. I despise using CA. I use Titebond only so I like the challenge of making everything fit tight. I'm looking forward to finishing.

Inboard side , plane is on it's gear. Wheels are plywood. I glued them up last night and shaped them in the drill press this morning. Fuse isn't attached, just slipped onto wing for show purpose. The double rib which sandwiches the gear leg is where the fuse gets glued to. Sterling provided a crappy design here. Having the gear leg glued into the ribs means you now have to build the wing upside down. The original provided no sheeting in this area and this kit is no different. This is a must. Either fill in the entire bay or just fill in a 1/2" strip leading edge to trailing edge alongside of the
fuselage and tail booms topside and underside.
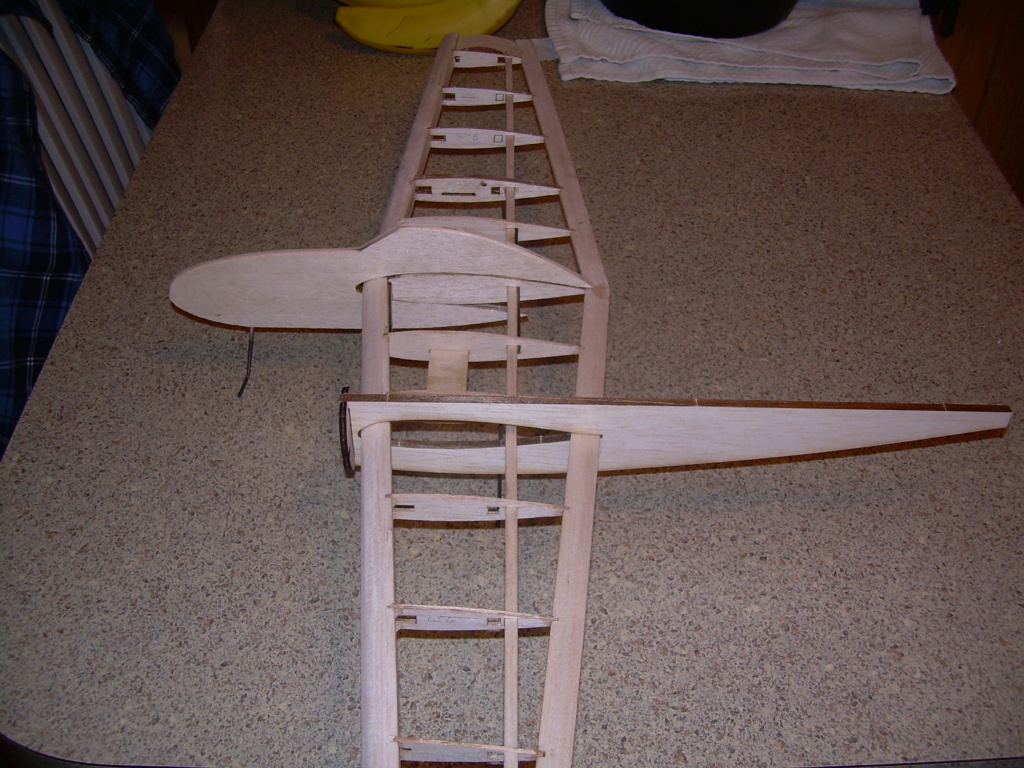 prior to assembly, I marked a centerline on the trailing edge stock. Without planing down the top side, I carefully used the razor plane to shape down the stock across it's face to my centerline. Assuming your dado depths are correct, the trailing edge finishes perfectly to the rib thickness.

Power will either be Golden Bee or Babe Bees
Looking at the plan, I arrived at about 5 degrees. When cutting trailing and leading edges, don't take off any more than needed to acquire the angles. Basically, I ganged all stock up and setting the miter saw to 5 deg, I cut all stock at the same time. Seeing you need lefts and rights, just flip the material over. Now, the most important step, mark all material inboard, outboard, top, bottom. Line up the trailing edge and leading edge over the print and tick off both sides of the rib locations. The rib dadoes are NOT SQUARE to the leading and trailing edge. I used a thin kerf blade in my table saw which is exactly a 1/16" kerf. Using the miter gauge, I set the blade height to 1/8" and cut the dadoes into the leading and trailing edges with the blade set a 5 deg angle. Seeing once again, we have a left and right panel, the dadoes are also handed. Just carefully climb cut in reverse to cut the opposing dadoes. Not exactly a correct practice in harder woods, balsa this is fine. Of course one could use a hacksaw blade and do this manually. I spent more time changing my blade then the actual cuts. Accuracy is at a premium here because with all the angles, this wing won't fit together properly.
I'm quite happy with the product, I would like to see the firewalls a bit wider as the Baby Bee backplate barely makes it onto the face of it. I'm up in the air in regards to replacing them. Fitment is terrific on the parts. I despise using CA. I use Titebond only so I like the challenge of making everything fit tight. I'm looking forward to finishing.

Inboard side , plane is on it's gear. Wheels are plywood. I glued them up last night and shaped them in the drill press this morning. Fuse isn't attached, just slipped onto wing for show purpose. The double rib which sandwiches the gear leg is where the fuse gets glued to. Sterling provided a crappy design here. Having the gear leg glued into the ribs means you now have to build the wing upside down. The original provided no sheeting in this area and this kit is no different. This is a must. Either fill in the entire bay or just fill in a 1/2" strip leading edge to trailing edge alongside of the
fuselage and tail booms topside and underside.
 prior to assembly, I marked a centerline on the trailing edge stock. Without planing down the top side, I carefully used the razor plane to shape down the stock across it's face to my centerline. Assuming your dado depths are correct, the trailing edge finishes perfectly to the rib thickness.
Power will either be Golden Bee or Babe Bees

Ken Cook- Top Poster

- Posts : 5641
Join date : 2012-03-27
Location : pennsylvania
 Re: DPC Models P-38
Nice Ken. Looks like you shaped the leading edge.
Have you seen this electric? Construction perhaps not as nice as yours.
https://www.youtube.com/watch?v=h3yhvtWsJf0
Have you seen this electric? Construction perhaps not as nice as yours.
https://www.youtube.com/watch?v=h3yhvtWsJf0

rsv1cox- Top Poster


Posts : 11251
Join date : 2014-08-18
Location : West Virginia
 Re: DPC Models P-38
rsv1cox wrote:Nice Ken. Looks like you shaped the leading edge.
Have you seen this electric? Construction perhaps not as nice as yours.
https://www.youtube.com/watch?v=h3yhvtWsJf0
EEEWWWWheee!
that electricnoise wanna make me barf!

Marleysky- Top Poster


Posts : 3618
Join date : 2014-09-28
Age : 72
Location : Grand Rapids, MI
 Re: DPC Models P-38
That's Airsoft Brenda from Texas. She introduced me to Dave Cowell. Dave cuts great kits. Ken, provide feedback to Dave regarding your concerns about the firewalls. He has adjusted/improved kits based on feedback.
I think the guy's name is Mike Halbrook over on Facebook...his is the silver job on the Sterling plans for this plane at OZ. Halbrook has a few really snazzy Guillows 400 series CL jobs.
I think the guy's name is Mike Halbrook over on Facebook...his is the silver job on the Sterling plans for this plane at OZ. Halbrook has a few really snazzy Guillows 400 series CL jobs.
_________________
Never enough time to build them all...always enough time to smash them all!
944_Jim- Diamond Member


Posts : 2022
Join date : 2017-02-08
Age : 59
Location : NE MS
 Re: DPC Models P-38
Didn't Brenda post on here some years ago? We need more women in this hobby. I taught my daughter how to fly but her interests shifted. I really want her to try it again. One afternoon I was flying in a small lot with my son and a woman drove in to watch. She told me her father taught her how to fly and she loved it. I said when was the last time you flew which she replied probably 30 years ago. I told her to grab the handle and she flew my plane which I could see a immediate smile. She finished, thanked me and drove away. I never saw her again but my son always laughs about it.

Ken Cook- Top Poster

- Posts : 5641
Join date : 2012-03-27
Location : pennsylvania
 Re: DPC Models P-38
@Brenda's last post was May 29, 2015.
https://www.coxengineforum.com/t5421p25-cox-electric-control-line-aeroplanes#105124
She expressed herself by posting this:
https://www.coxengineforum.com/t8199-what-other-hobbies#104126
https://www.coxengineforum.com/t5421p25-cox-electric-control-line-aeroplanes#105124
She expressed herself by posting this:
https://www.coxengineforum.com/t8199-what-other-hobbies#104126

GallopingGhostler- Top Poster


Posts : 5724
Join date : 2013-07-13
Age : 70
Location : Clovis NM or NFL KC Chiefs
 Re: DPC Models P-38
Callie? chessie? Chedde? Something like that. Sold gaskets for McCoys etc.

rsv1cox- Top Poster


Posts : 11251
Join date : 2014-08-18
Location : West Virginia
 Re: DPC Models P-38
Chellie Romo I believe. I've contacted her via You Tube in the past. I know she surfaced on another stunt forum which didn't seem to be very positive. At least that's the impression I received.

Ken Cook- Top Poster

- Posts : 5641
Join date : 2012-03-27
Location : pennsylvania
 Re: DPC Models P-38
@CHELLIE Romo goes by the E-Bay name: https://www.ebay.com/usr/verysassyblond/. She discontinued selling there may be 4 or 5 years ago. I purchased Testor McCoy Red Head .35 gaskets from her. They were of excellent quality, of finer modern gasket material. Her last post here was Jun 12, 2015.
Their disappearance from CEF at about the same time are strictly coincidental. She and Brenda are 2 different people.
Their disappearance from CEF at about the same time are strictly coincidental. She and Brenda are 2 different people.

GallopingGhostler- Top Poster


Posts : 5724
Join date : 2013-07-13
Age : 70
Location : Clovis NM or NFL KC Chiefs
 Re: DPC Models P-38
Ken,
I keep watching for news regarding the build. How is it coming along?
I keep watching for news regarding the build. How is it coming along?
_________________
Never enough time to build them all...always enough time to smash them all!

944_Jim- Diamond Member


Posts : 2022
Join date : 2017-02-08
Age : 59
Location : NE MS
 Re: DPC Models P-38
Essentially, this is a direct copy of the original. That being said, Sterling uses spars which in my opinion were never necessary, this one being no different. All it essentially does at this point is hold the ribs onto it somewhat like a building jig. What it does do is get in the way of the bellcrank. I had to use the small Perfect which I don't care for. Nonetheless, I'm just looking for fun here and nothing more. I had to use solid leadout wire which I also don't like to use. Only reason is that it gets kinked and causes binds when it does. And it rattles in the car on the drive to the field. Currently, at this stage, I need to dig out some more 1/32" balsa for additional sheeting on the wing around the nacelles. I managed to go flying Saturday and yesterday was dedicated to housework. This week should get some more activity.

Ken Cook- Top Poster

- Posts : 5641
Join date : 2012-03-27
Location : pennsylvania
 Re: DPC Models P-38
I've really been dragging on this one. I covered the wings with Polyspan which went terrific until I brushed on the filler coats of clear. Seeing that certain dopes are harder to obtain, I was using Randolph taughtening clear. To combat the strangulation of the model, I add plasticizer to the dope. I usually add the plasticizer to the dope when I'm ready to brush it. My son however, cut the dope 50/50 and added plasticizer. I thinned it a bit more and added even more plasticizer which did weird stuff to it when it would dry. It would go on beautiful and then it would crinkle. I would sand it down, clean it, brush it again. I couldn't figure out what was going on until my son saw me mixing the clear adding the plasticizer. He said he already added more than enough to it. This took much needed sanding to level it all out and essentially start over. One tends to lose interest real fast when your continuously sanding.
Yesterday, I got a quick blocker coat of white followed by a mist coat of silver. I hate laser cutting, it's virtually impossible to remove all of the charring and it bleeds terribly through a dope paint job. The white over top of the ribs and other areas immensely stops the bleed through. I don't use primer as I feel it's far too heavy and I've had it peel when using dope. I build up all coats with thinned clear. I don't use talc either for the same reason I don't use primer, it causes adhesion issues. The silver came out real nice.

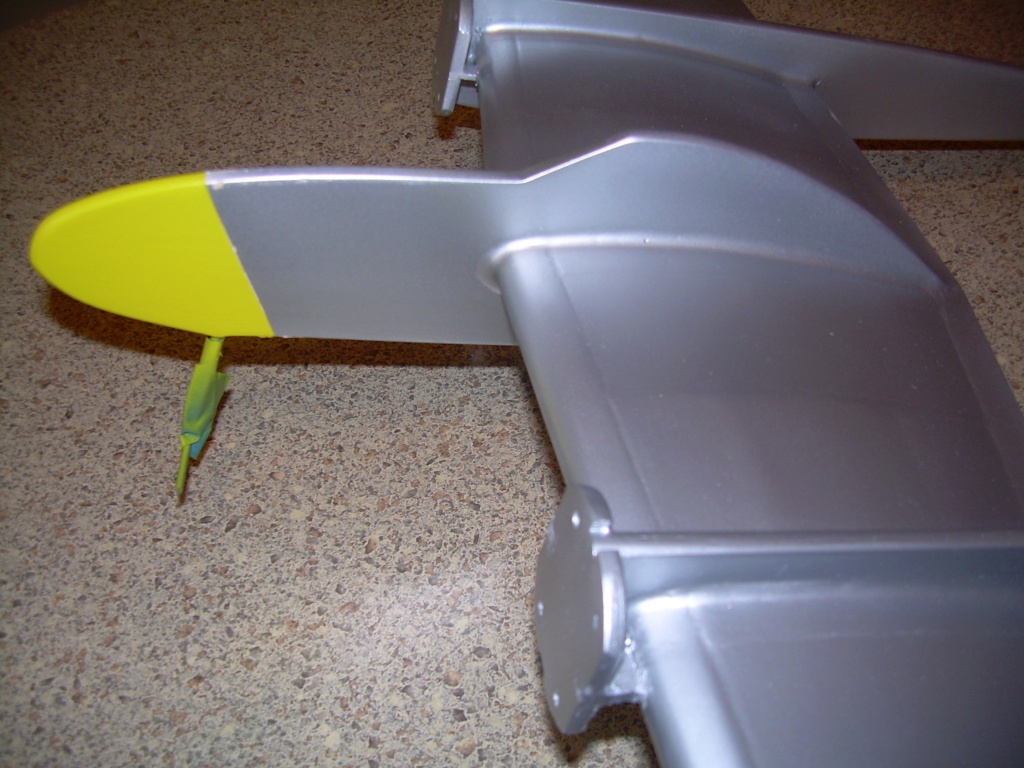
Now to add some more trim and get it in the air. Dave provided some sort of crazy decal sheet. I don't quite understand what it is and it looks pretty cheap so I will forego the kit decals. It say to glue them on with 3M spray adhesive but the backing is already sticky. In addition, it says dope will attack them so that's already a problem. In addition, the color is off but it says when cleared, the colors will darken and pop. Well, clear dope isn't compatible so we will skip the decals and hope for the best.
Yesterday, I got a quick blocker coat of white followed by a mist coat of silver. I hate laser cutting, it's virtually impossible to remove all of the charring and it bleeds terribly through a dope paint job. The white over top of the ribs and other areas immensely stops the bleed through. I don't use primer as I feel it's far too heavy and I've had it peel when using dope. I build up all coats with thinned clear. I don't use talc either for the same reason I don't use primer, it causes adhesion issues. The silver came out real nice.


Now to add some more trim and get it in the air. Dave provided some sort of crazy decal sheet. I don't quite understand what it is and it looks pretty cheap so I will forego the kit decals. It say to glue them on with 3M spray adhesive but the backing is already sticky. In addition, it says dope will attack them so that's already a problem. In addition, the color is off but it says when cleared, the colors will darken and pop. Well, clear dope isn't compatible so we will skip the decals and hope for the best.

Ken Cook- Top Poster

- Posts : 5641
Join date : 2012-03-27
Location : pennsylvania
 Re: DPC Models P-38
Four months in Ken, but despite your protests the polyspan wing looks excellent. Got a nice smooth glow to it. You and your son have to to communicate more. 
I imagine that your going to clear coat the decals? Have I missed the power plants? I love the sound of sync'd engines.
I imagine that your going to clear coat the decals? Have I missed the power plants? I love the sound of sync'd engines.

rsv1cox- Top Poster


Posts : 11251
Join date : 2014-08-18
Location : West Virginia
 Re: DPC Models P-38
Sig has always been my go to dope. Currently, there's essentially none as Sig apparently is moving and essentially has no stock. I hope this isn't a sign of the times but I feel it is. They tell me they will offer it when finally moved but I won't be holding my breath. I waited for almost 18 months just to get 2 qts of thinner. I combined whatever I had laying around . Sig Lite Coat is thicker than molasses. My son was essentially combining what ever small amounts we had into one large glass jar. Basically, one four ounce bottle of Lite Coat makes nearly 12 ounces of material.
Decals won't be present on this model as I stated, they're some weird ink jet decal on a vinyl backing. it says not to clear over them with dope and the decal has a white background. They look like something one would see on a cheap model. I will just paint on some additional trim colors like blue tips and some anti glaring for the canopy.
Power is going to be Babe Bees or Golden Bees. The ground clearance is limited so I purchased some Master Airscrew three blade props. I'm very uncertain with these props. They look cheap . They don't look like they're for nitro and the hole in the prop is quite large. The thickness is off so the prop screw bottoms out which is also concerning. I mean design something that works guys. Currently, tractor three bladers are hard to come by. I had about 20 Cox three blade props, all of them when flexed cracked.

Ken Cook- Top Poster

- Posts : 5641
Join date : 2012-03-27
Location : pennsylvania
 Re: DPC Models P-38
In my opinion the P-38 wears blue very well, as you mention on the insides of the naceiles and top of the fuselage. I have seen an air show P-38 painted that way.
I never had a problem with Cox three blades, 5/3's I think. Used them for years. Wish I knew that Master Airscrew made them in that range. I have several but in largers sizes. Sharp edges though.
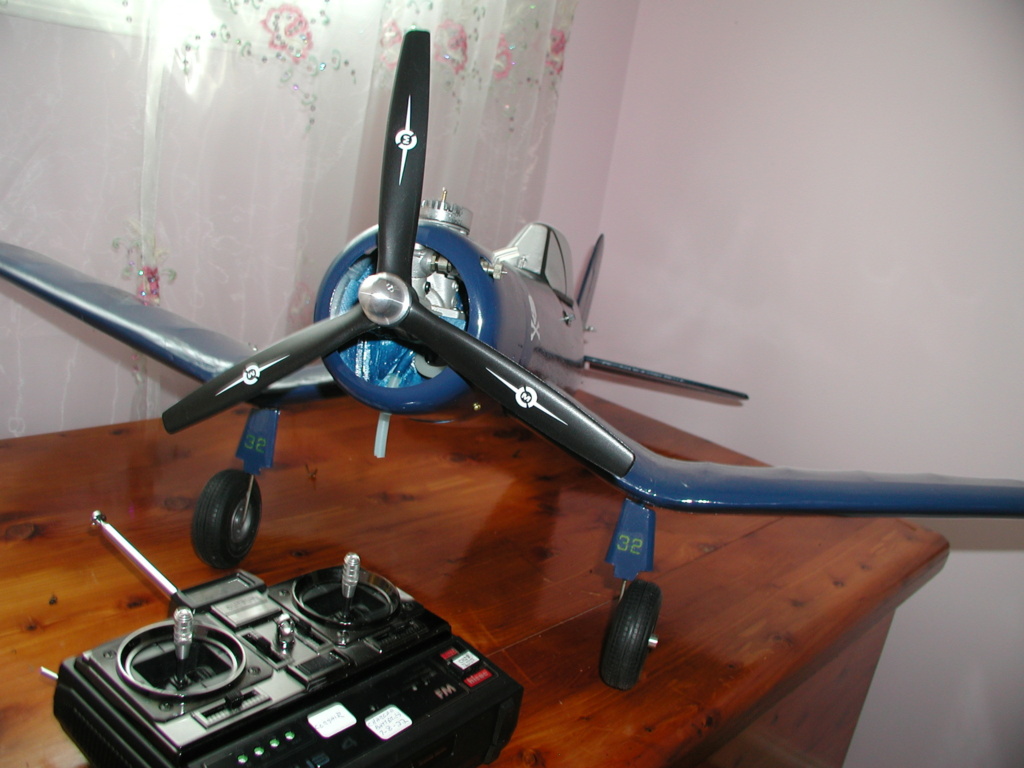
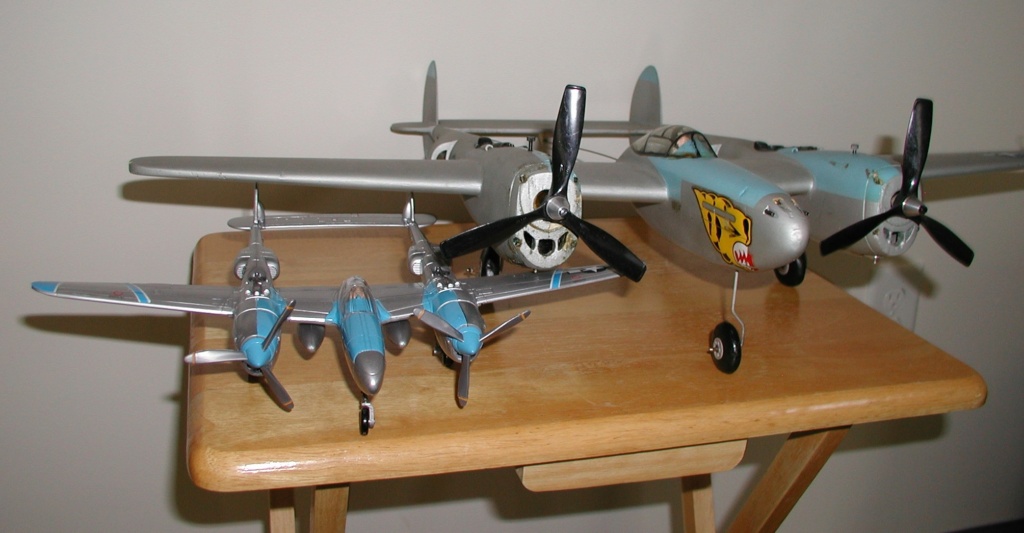
I never had a problem with Cox three blades, 5/3's I think. Used them for years. Wish I knew that Master Airscrew made them in that range. I have several but in largers sizes. Sharp edges though.


rsv1cox- Top Poster


Posts : 11251
Join date : 2014-08-18
Location : West Virginia
 Re: DPC Models P-38
I'm digging this build, Ken. Good for you! Sweet looking plane.
_________________
Never enough time to build them all...always enough time to smash them all!

944_Jim- Diamond Member


Posts : 2022
Join date : 2017-02-08
Age : 59
Location : NE MS
 Re: DPC Models P-38
Ken Cook wrote: Didn't Brenda post on here some years ago? We need more women in this hobby. I taught my daughter how to fly but her interests shifted. I really want her to try it again. One afternoon I was flying in a small lot with my son and a woman drove in to watch. She told me her father taught her how to fly and she loved it. I said when was the last time you flew which she replied probably 30 years ago. I told her to grab the handle and she flew my plane which I could see a immediate smile. She finished, thanked me and drove away. I never saw her again but my son always laughs about it.
I would have drove after her, until I found her Ken.
 Re: DPC Models P-38
Perhaps something we grew up with as kids, that may help explain the the way things are, and why we see the less thereof? 

- Old English Nursery Rhyme:
- What are little boys made of?
Frogs and snails,
And puppy-dogs' tails;
That's what little boys are made of.
What are little girls made of?
Sugar and spice,
And everything nice;
That's what little girls are made of.

GallopingGhostler- Top Poster


Posts : 5724
Join date : 2013-07-13
Age : 70
Location : Clovis NM or NFL KC Chiefs
 Re: DPC Models P-38
Well, here I am another month almost two out and still not done. Many things have taken place over the past two months. One very positive is my daughter graduated college and I can't be happier for her. She's a outstanding student and her grades were impeccable. I'm very proud of her she's a talented young lady.
I decided to put some rocket blue on the plane. This has really been a neat little project. It has consumed a lot of paint time. One may not think so, but there's a lot of sanding and clear on this model not too mention the masking and back masking. It becomes tiresome and I'm looking forward to seeing it fly now. The plane will get two more clear coats for a final to lock down the trim colors and she's ready for the air.

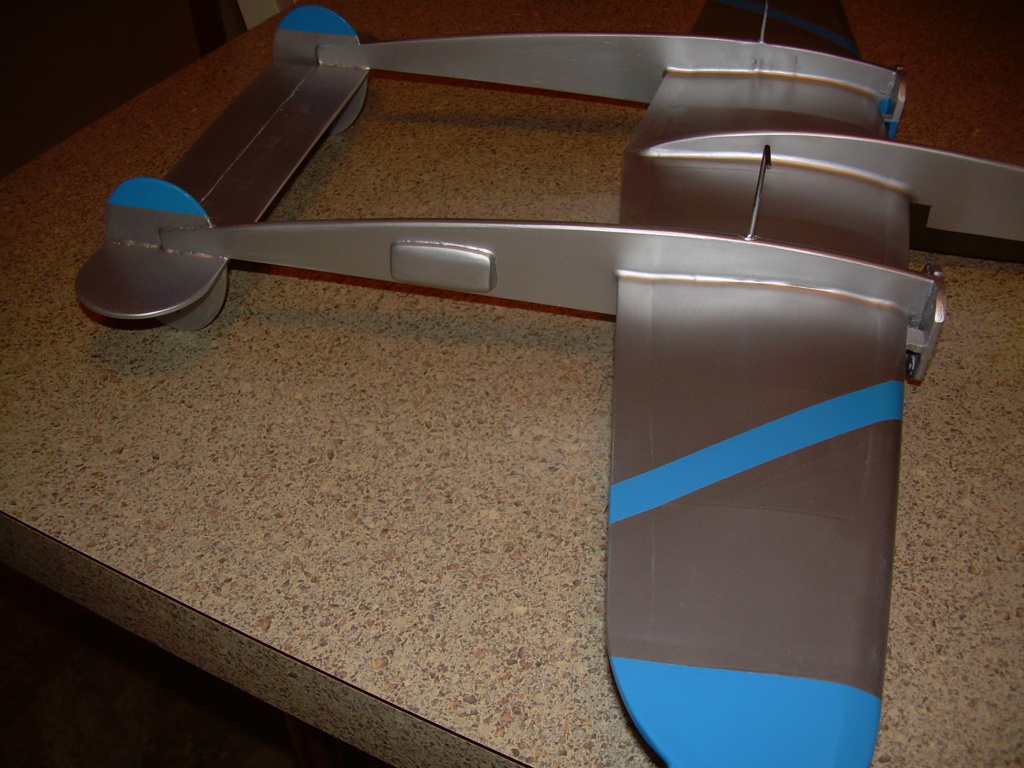
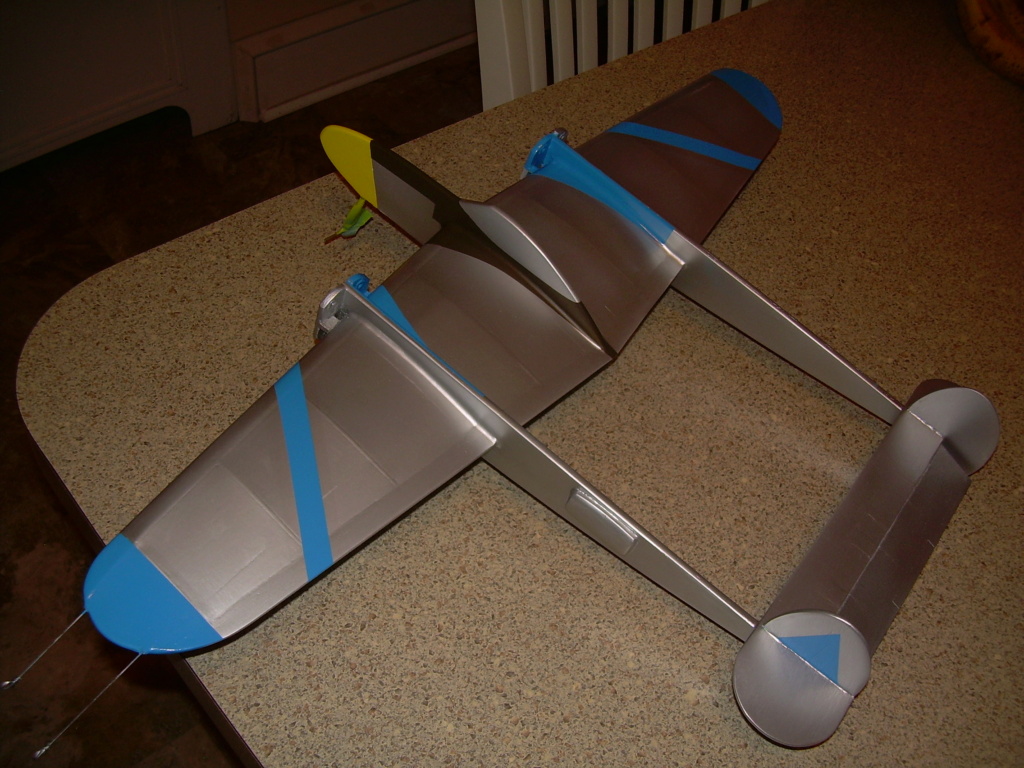
I decided to put some rocket blue on the plane. This has really been a neat little project. It has consumed a lot of paint time. One may not think so, but there's a lot of sanding and clear on this model not too mention the masking and back masking. It becomes tiresome and I'm looking forward to seeing it fly now. The plane will get two more clear coats for a final to lock down the trim colors and she's ready for the air.


Ken Cook- Top Poster

- Posts : 5641
Join date : 2012-03-27
Location : pennsylvania
 Re: DPC Models P-38
Ken, The smooth and sheen you were able to achieve on the silver is very convincing to aluminum…. Makes the blue really stand out!…. Painting with model aircraft finishes that are fuel proof and getting a good result is definitely an art…. I can lay tissue OK but painting, Not so much…. I’ve got a few ancient bottles of Aergloss colored dope I would like try some day though….

rdw777- Diamond Member


Posts : 1720
Join date : 2021-03-11
Location : West Texas
 Similar topics
» Engines for Models by Berkeley Models PDF
» What can you tell me about these models?
» ex models.com
» Suitable planes for Cox 049 power
» .049 RTF plastic airplanes
» What can you tell me about these models?
» ex models.com
» Suitable planes for Cox 049 power
» .049 RTF plastic airplanes
Page 1 of 1
Permissions in this forum:
You cannot reply to topics in this forum

 Rules
Rules


