Log in
Search
Latest topics
» Landing-gear tipsby roddie Today at 6:17 pm
» Roger Harris revisited
by TD ABUSER Today at 2:13 pm
» Tee Dee .020 combat model
by Ken Cook Today at 1:41 pm
» Retail price mark-up.. how much is enough?
by Ken Cook Today at 1:37 pm
» Happy 77th birthday Andrew!
by getback Today at 11:52 am
» My latest doodle...
by roddie Today at 10:43 am
» My N-1R build log
by GallopingGhostler Yesterday at 3:04 pm
» Chocolate chip cookie dough.........
by roddie Yesterday at 1:13 pm
» Purchased the last of any bult engines from Ken Enya
by sosam117 Yesterday at 11:32 am
» Free Flight Radio Assist
by rdw777 Yesterday at 9:24 am
» Funny what you find when you go looking
by rsv1cox Wed Nov 20, 2024 3:21 pm
» Cox NaBOO - Just in time for Halloween
by rsv1cox Tue Nov 19, 2024 6:35 pm
Cox Engine of The Month
Garbage in, garbage out........Cox Prop Rod arrives and displays its graceful curves
Page 1 of 1

rsv1cox- Top Poster


Posts : 11250
Join date : 2014-08-18
Location : West Virginia
 Re: Garbage in, garbage out........Cox Prop Rod arrives and displays its graceful curves
There's always a way.

bottomgun- Gold Member

- Posts : 138
Join date : 2012-12-27
Age : 67
Location : Southern California
 Re: Garbage in, garbage out........Cox Prop Rod arrives and displays its graceful curves
No lacking of character there however.... 

Kim- Top Poster


Posts : 8625
Join date : 2011-09-06
Location : South East Missouri
 Re: Garbage in, garbage out........Cox Prop Rod arrives and displays its graceful curves
Looks like a couple of more great restorations to watch for......

NEW222- Top Poster

- Posts : 3896
Join date : 2011-08-13
Age : 46
Location : oakbank, mb
 Re: Garbage in, garbage out........Cox Prop Rod arrives and displays its graceful curves
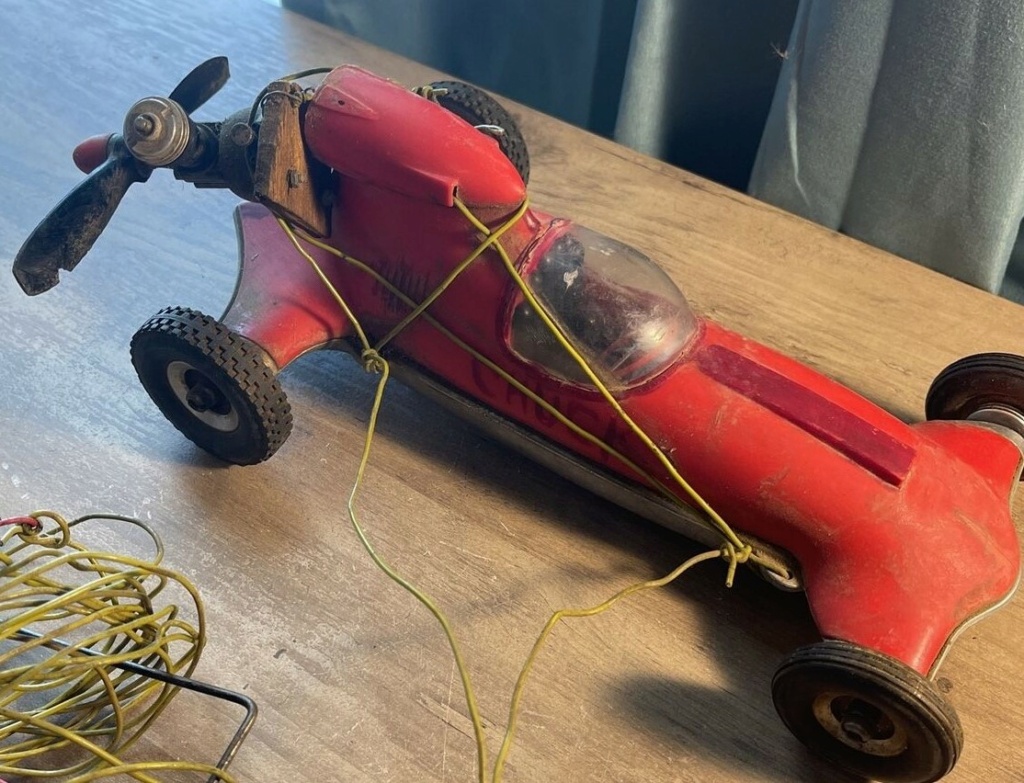
Took it apart, broken rear mounting posts. Poor repair.
The right rear wheel refused to come off. Castor locked. Tried Rene's soldering gun/iron applied to the axle at the bitter end to no joy even after three minutes. Resorted to the butane torch applied an inch aft of the brake drum. Still didn't come off. Resorted to more heat and - horrors pliers applied to the drum slow rotations and pulling finally did the job.
Fun ahead. I think I enjoy doing cars more than airplanes, less complicated.
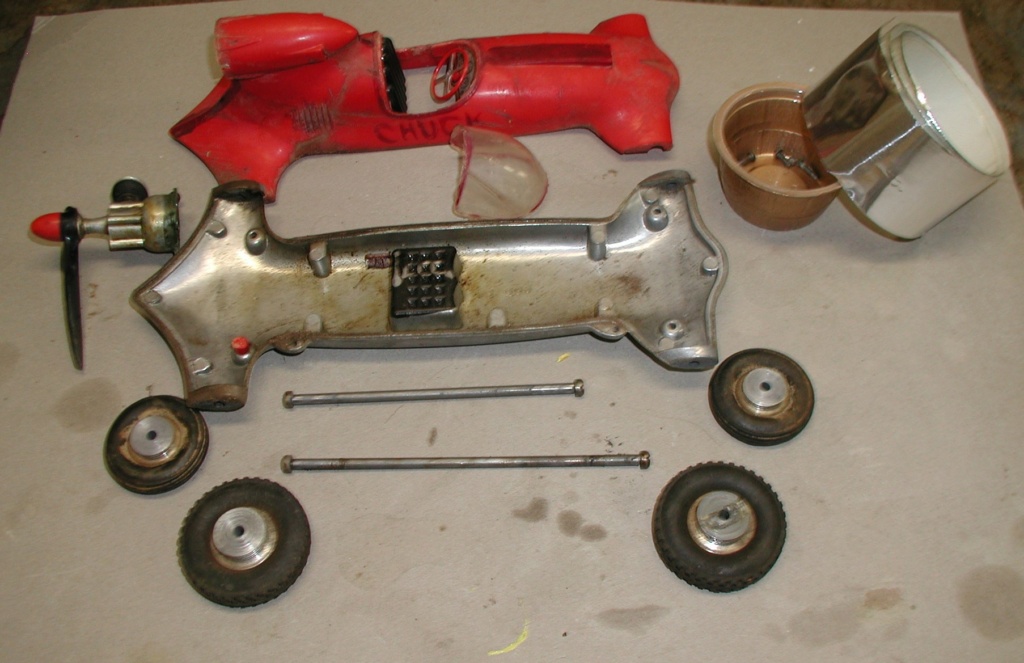

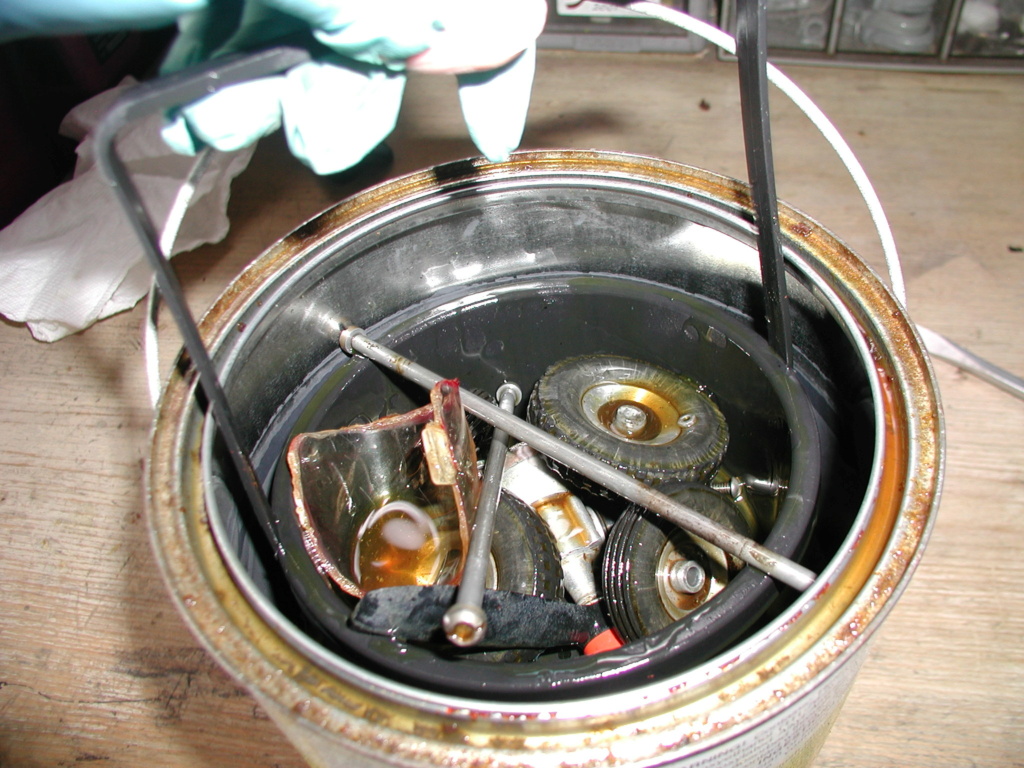
Chuck gets the Easy-Off, aluminum polish, Berryman's, Simple Green, and canopy cement treatment, plus maybe a few others. Anyone have a hint on how to remove the engines pod?
The right rear wheel refused to come off. Castor locked. Tried Rene's soldering gun/iron applied to the axle at the bitter end to no joy even after three minutes. Resorted to the butane torch applied an inch aft of the brake drum. Still didn't come off. Resorted to more heat and - horrors pliers applied to the drum slow rotations and pulling finally did the job.
Fun ahead. I think I enjoy doing cars more than airplanes, less complicated.


Chuck gets the Easy-Off, aluminum polish, Berryman's, Simple Green, and canopy cement treatment, plus maybe a few others. Anyone have a hint on how to remove the engines pod?

rsv1cox- Top Poster


Posts : 11250
Join date : 2014-08-18
Location : West Virginia
 Re: Garbage in, garbage out........Cox Prop Rod arrives and displays its graceful curves
rsv1cox wrote:Anyone have a hint on how to remove the engines pod?
Not having one, nor ever seeing one in person, are the pods not molded into the body as one unit?

NEW222- Top Poster

- Posts : 3896
Join date : 2011-08-13
Age : 46
Location : oakbank, mb
 Re: Garbage in, garbage out........Cox Prop Rod arrives and displays its graceful curves
I know that the later prop rods and shrikes have locking tabs on the nacelles that snap down into place. Then a separate plastic "wedge", for the sake of a better word, is pressed into the middle gap of the tabs from underneath to keep them pressed tight against the sides of the nacelle mount. When restoring my metal pan version, there is also a tab from underneath, but much thinner. I did not attempt to remove it because it wasn't really necessary and I didn't want to damage anything. I could be wrong, but I don't think the older version nacelles were ever glued into place. The older versions probably were more prone to coming loose after an accident, and may be the reason why the nacelle assemblies were redesigned when they went to the plastic chassis version.

bottomgun- Gold Member

- Posts : 138
Join date : 2012-12-27
Age : 67
Location : Southern California
 Re: Garbage in, garbage out........Cox Prop Rod arrives and displays its graceful curves
I also wanted to say that on redvenom repro's website, he states that when you order a new nacelle, you have to specify whether it's a metal pan car or a plastic one, because of the different design features.

bottomgun- Gold Member

- Posts : 138
Join date : 2012-12-27
Age : 67
Location : Southern California
 Re: Garbage in, garbage out........Cox Prop Rod arrives and displays its graceful curves
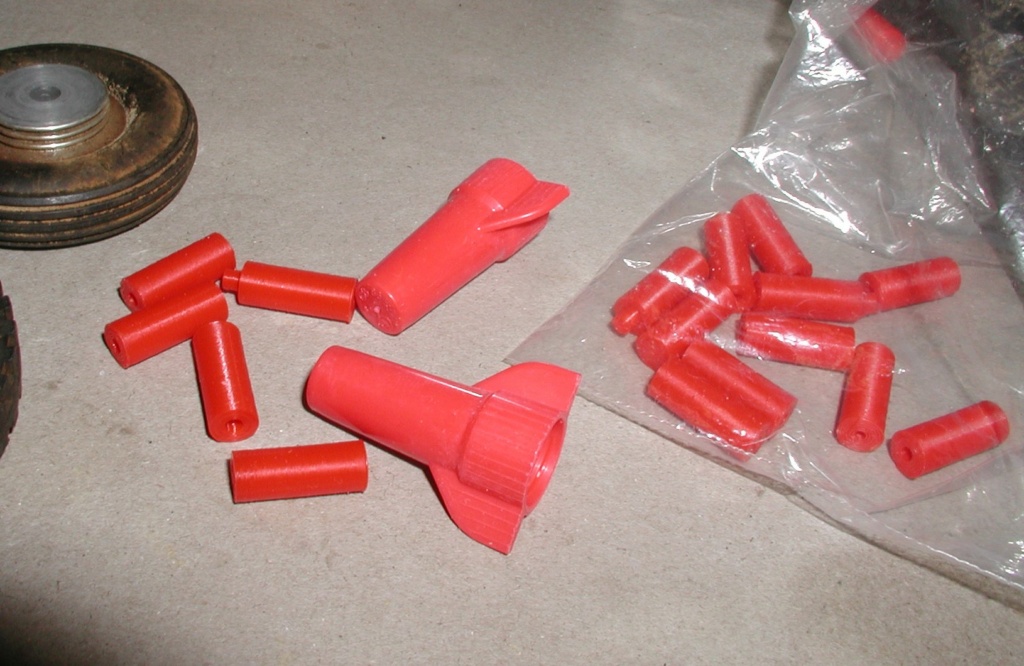
To me, the pod looks like a cylinder with a slot cut in the bottom that fits over a long tab molded into the main body then cemented. I don't think that Cox wanted these flying off the body under engine power so secure was the word. The "Tab A slot B" approach alone would not work. If anyone has removed the pod without damaging the body, I would like to know how they did it.
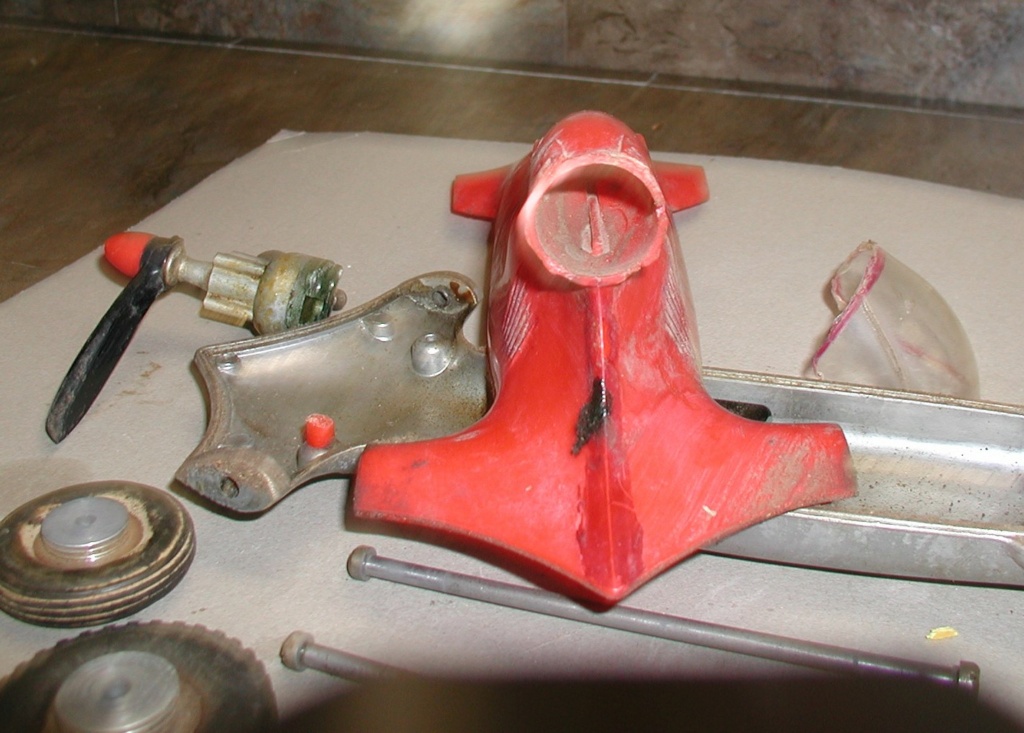
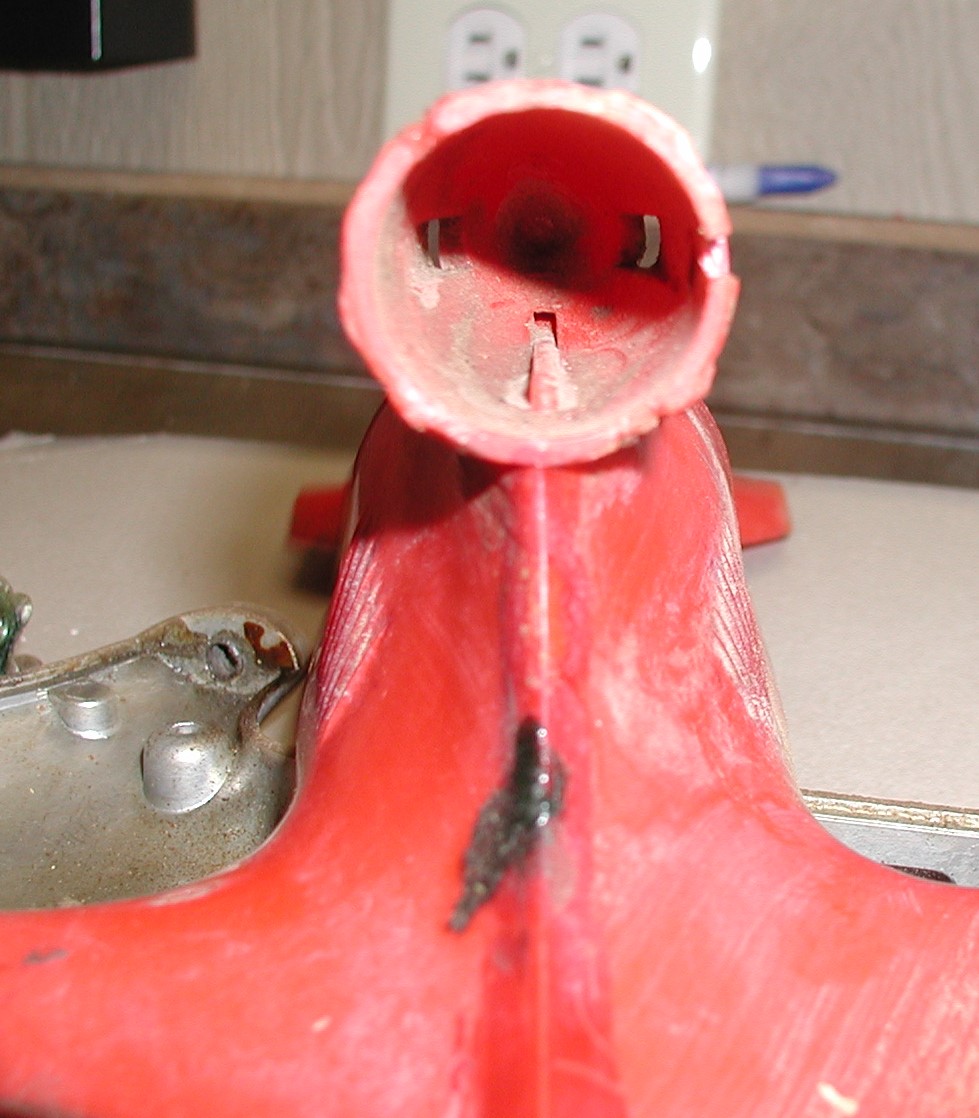
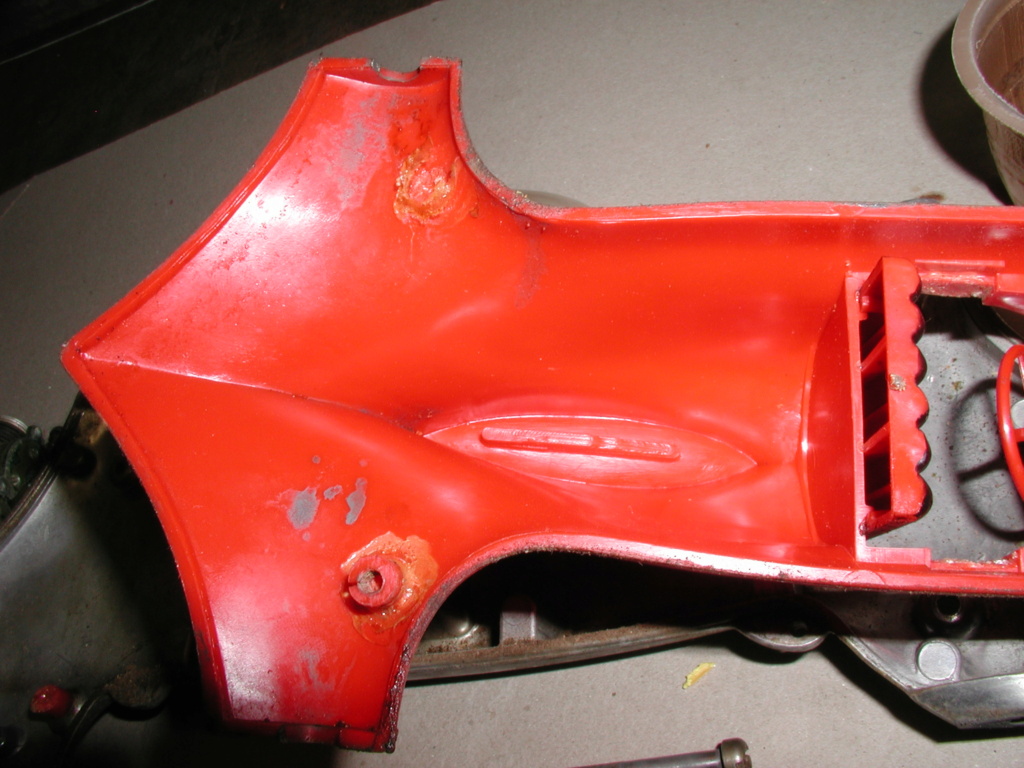
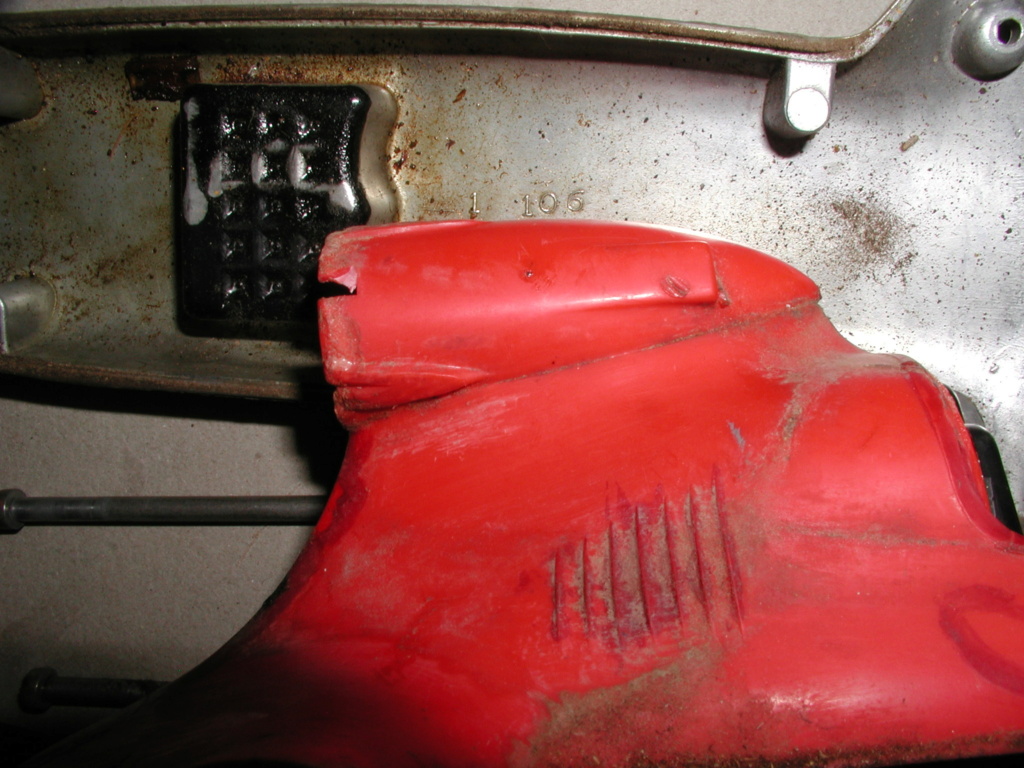
I could make those engine mounting tabs out of items I keep around for such purposes and glue them onto the body, but I wouldn't trust them to hold under engine power.
Chuck does have a very nice steering wheel though.
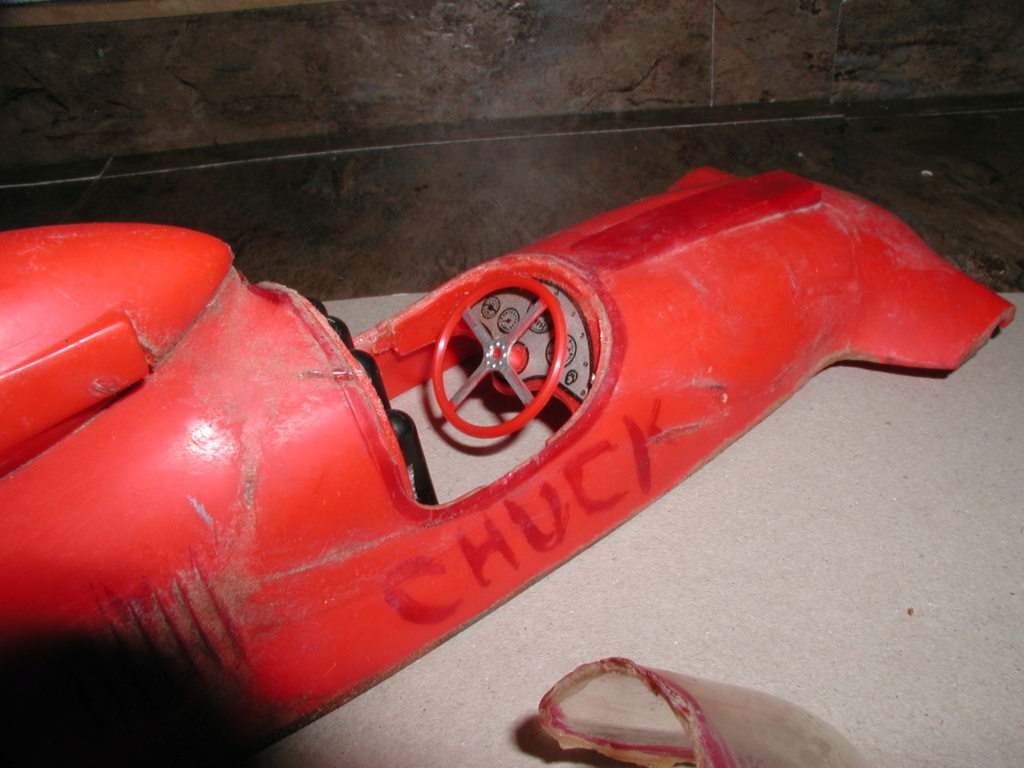


I could make those engine mounting tabs out of items I keep around for such purposes and glue them onto the body, but I wouldn't trust them to hold under engine power.

Chuck does have a very nice steering wheel though.


rsv1cox- Top Poster


Posts : 11250
Join date : 2014-08-18
Location : West Virginia
 Re: Garbage in, garbage out........Cox Prop Rod arrives and displays its graceful curves
Cool one Chuck is its name Or that of the previous owner ?  Can't wait to see the final result and the progress on this one


davidll1984- Diamond Member

- Posts : 2327
Join date : 2020-02-12
Age : 39
Location : shawinigan

rsv1cox- Top Poster


Posts : 11250
Join date : 2014-08-18
Location : West Virginia
 Re: Garbage in, garbage out........Cox Prop Rod arrives and displays its graceful curves
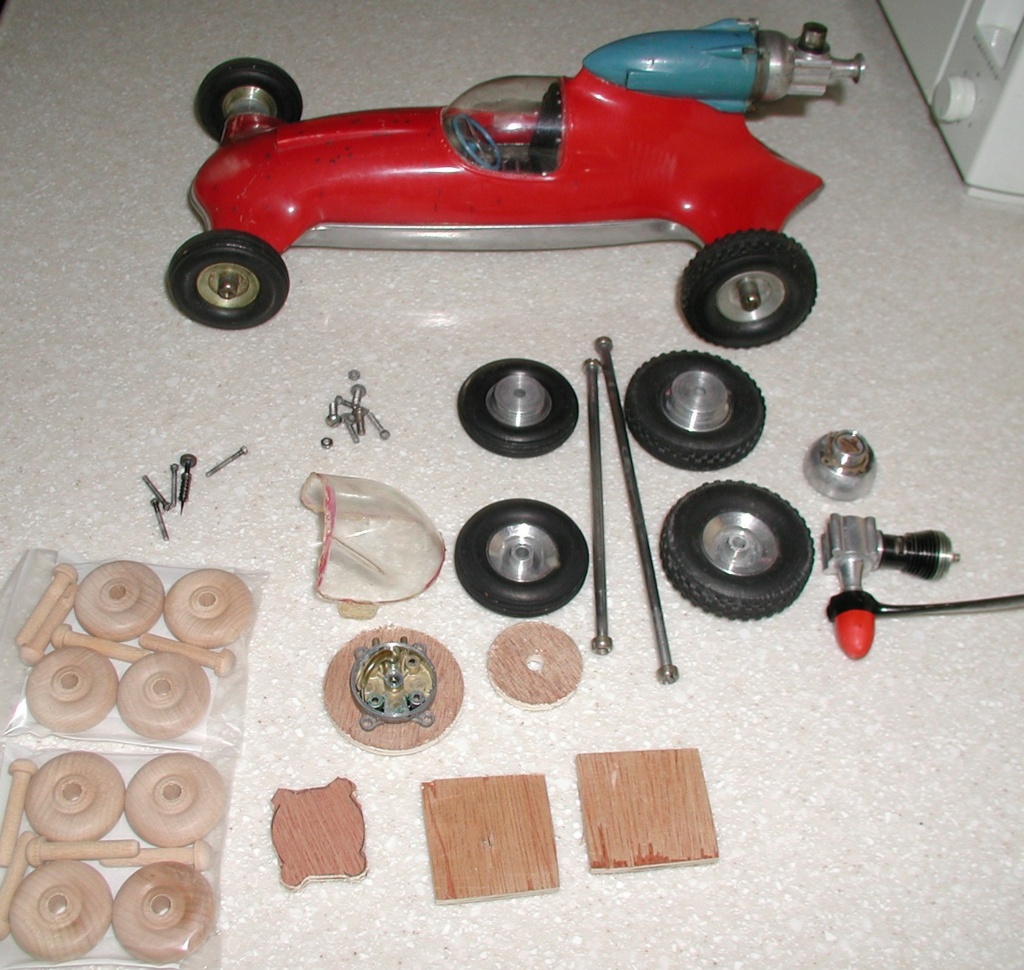
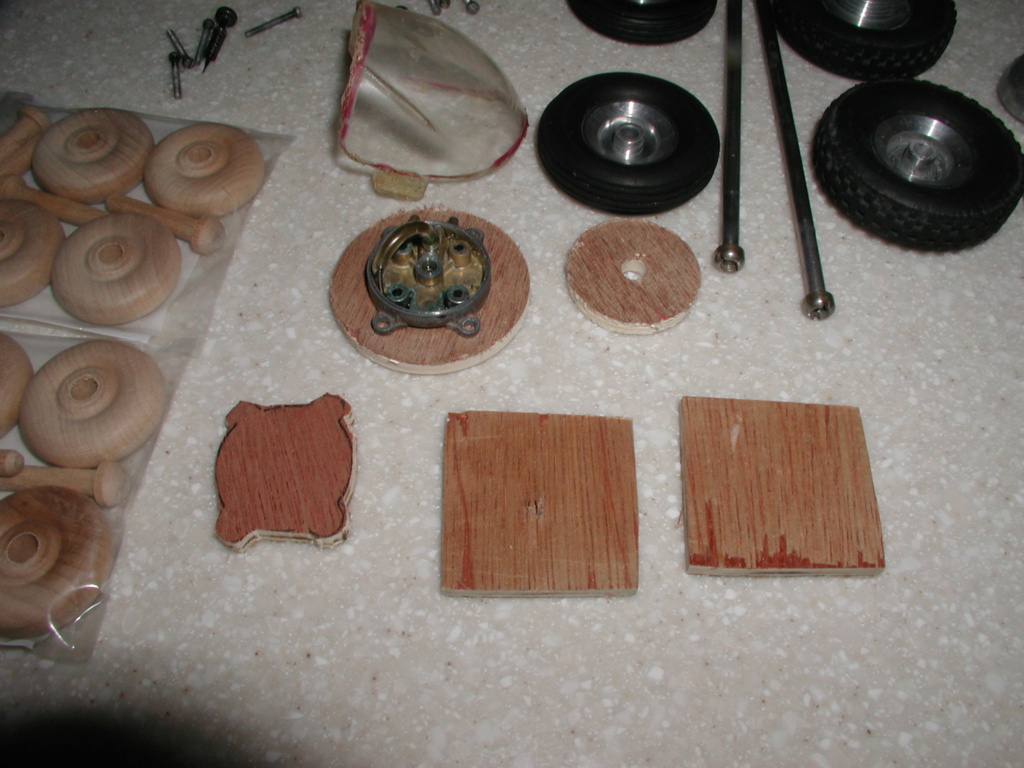
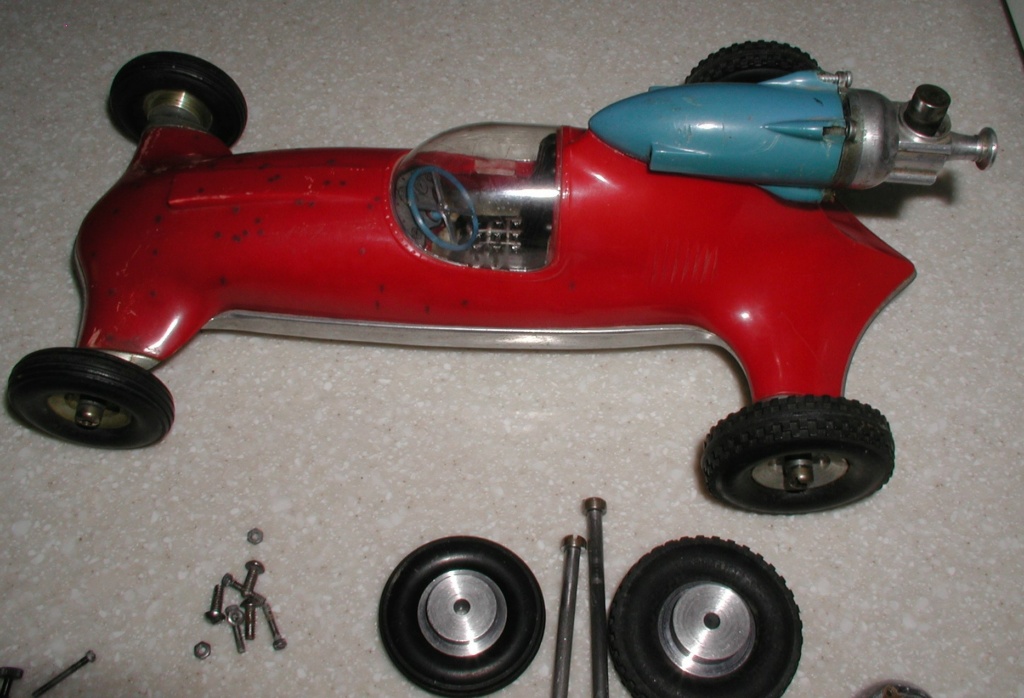
If you can't beat them, join them. No way I'm going to salvage that engine pod. Exploring options. Luan mount secured from the inside with four screws through the pod. Removable. Round mount or one cut to shape. Preferred.
Shave the existing ears, body filler. Paint, no other way. Deep scars on the body. Got lots of plastic friendly aerosols in different colors. Camo, the stealth Prop Rod, Corsair blue, Navy gray, or back to red.
Got the smooth pan today. Much better chance of maintaining originality.

rsv1cox- Top Poster


Posts : 11250
Join date : 2014-08-18
Location : West Virginia
 Re: Garbage in, garbage out........Cox Prop Rod arrives and displays its graceful curves
Botched engine pod certainly left you with option opportunities there, Bob. 

Pod is almost begging for an internal tank with plumbing to a non-tanked engine like a horseshoe backed one with tighter mount pattern and thicker firewall just fitting the inside diameter of the pod.
1st thoughts was that weird Enya powered natural finish wood block prop rod you posted a couple years ago. May be time to put that HB .15 engine to use?


GallopingGhostler- Top Poster


Posts : 5724
Join date : 2013-07-13
Age : 70
Location : Clovis NM or NFL KC Chiefs
 Re: Garbage in, garbage out........Cox Prop Rod arrives and displays its graceful curves
GallopingGhostler wrote:Botched engine pod certainly left you with option opportunities there, Bob.

Pod is almost begging for an internal tank with plumbing to a non-tanked engine like a horseshoe backed one with tighter mount pattern and thicker firewall just fitting the inside diameter of the pod.
1st thoughts was that weird Enya powered natural finish wood block prop rod you posted a couple years ago. May be time to put that HB .15 engine to use?
Your're challenging my ingenuity George, and it's not that good. But that is a great idea. Some sort of a plastic vial with vent/fuel tubes extending up out of the pod. But I'm sticking with the original thin wall BB.
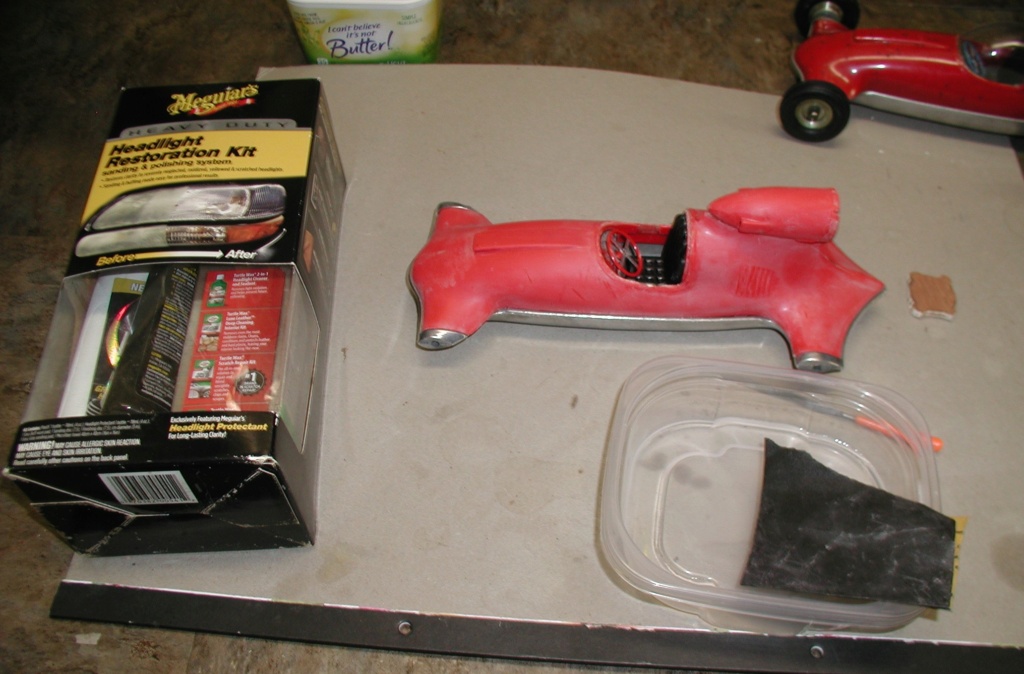
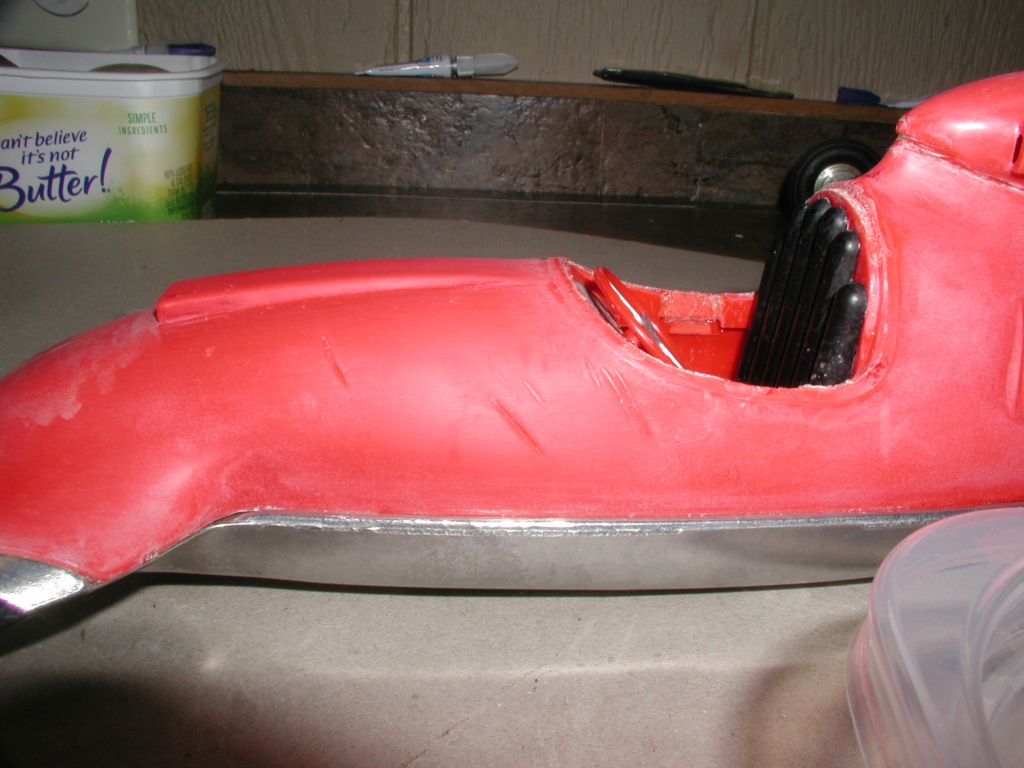
Weaking on paint. Paint hides detail and the best is not fuel friendly. Worked the body down last night with 500/800 W/D with water after leveling the scars with an equalizing jewelers file. Got out the headlight lens polishing kit with 1000/3000 grit pads and plastic polish. Body curves make it difficult but we shall see.

rsv1cox- Top Poster


Posts : 11250
Join date : 2014-08-18
Location : West Virginia
 Re: Garbage in, garbage out........Cox Prop Rod arrives and displays its graceful curves
Just thinking out loud with you for a possible repair on the blue pod…
File off what is damaged on the screw boss… Get or make a dowel or plug similar to missing shape…Glob modeling clay around the boss and plug (to form a female mould)…The plug needs some slickum for easy removal…. Remove the plug and fill with epoxy or JB…. Cure, remove clay, clean, shape up exterior, re-drill for screws..,
Tedious but could possibly work to preserve what you have

rdw777- Diamond Member


Posts : 1718
Join date : 2021-03-11
Location : West Texas
 Re: Garbage in, garbage out........Cox Prop Rod arrives and displays its graceful curves
rdw777 wrote:Just thinking out loud with you for a possible repair on the blue pod…
File off what is damaged on the screw boss… Get or make a dowel or plug similar to missing shape…Glob modeling clay around the boss and plug (to form a female mould)…The plug needs some slickum for easy removal…. Remove the plug and fill with epoxy or JB…. Cure, remove clay, clean, shape up exterior, re-drill for screws..,
Tedious but could possibly work to preserve what you have
Thanks, Gunsmiths use a release agent available at Brownells, think I have some laying around, used for bedding stocks. And I do have modeling clay. Good idea. I just recently used JB Weld to repair a plastic fuselage pylon. Stick a tooth pick down the half-broken hole, apply the JB wrap with masking tape and let it cure twisting the tooth pick occasionally. Self-tapping screws do the rest.

rsv1cox- Top Poster


Posts : 11250
Join date : 2014-08-18
Location : West Virginia
 Re: Garbage in, garbage out........Cox Prop Rod arrives and displays its graceful curves
I see a lot of imperfection knowing you I'm sure you'll make it 100 times better than before 
 It's just gonna take longer see the good side is that it keeps you busy modeling is fun
 It's just gonna take longer see the good side is that it keeps you busy modeling is fun
davidll1984- Diamond Member

- Posts : 2327
Join date : 2020-02-12
Age : 39
Location : shawinigan
 Re: Garbage in, garbage out........Cox Prop Rod arrives and displays its graceful curves
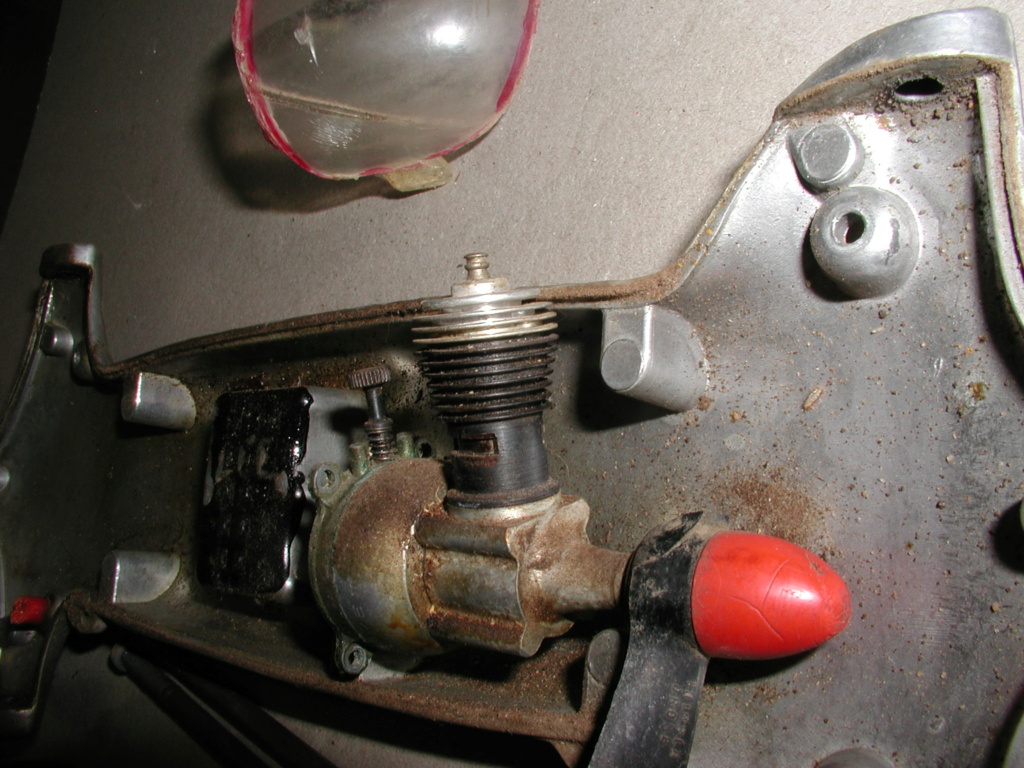
Spent most of the morning working on the engine, did just enough to earn a passable grade. That garbage in garbage out thing.
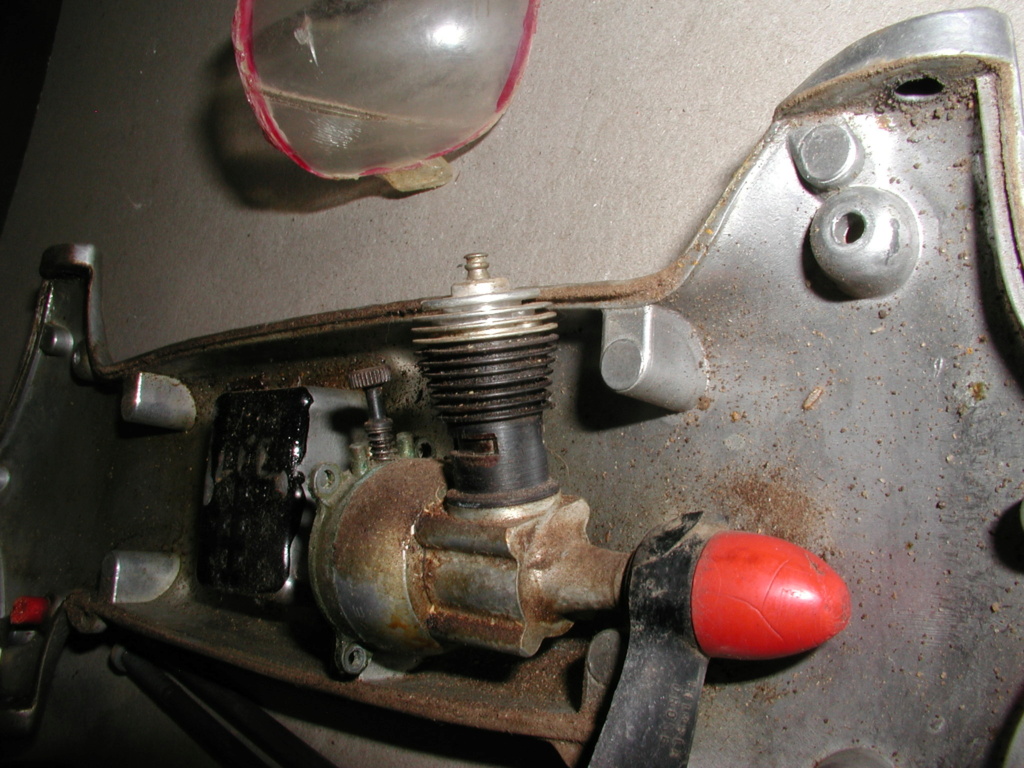
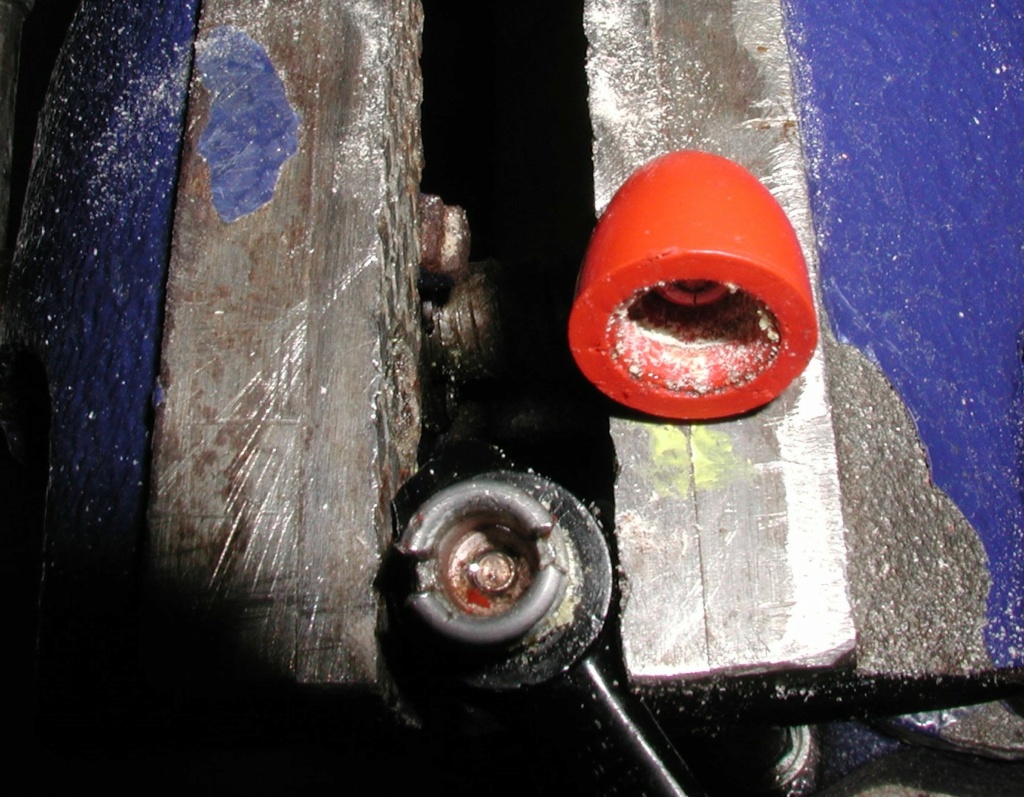
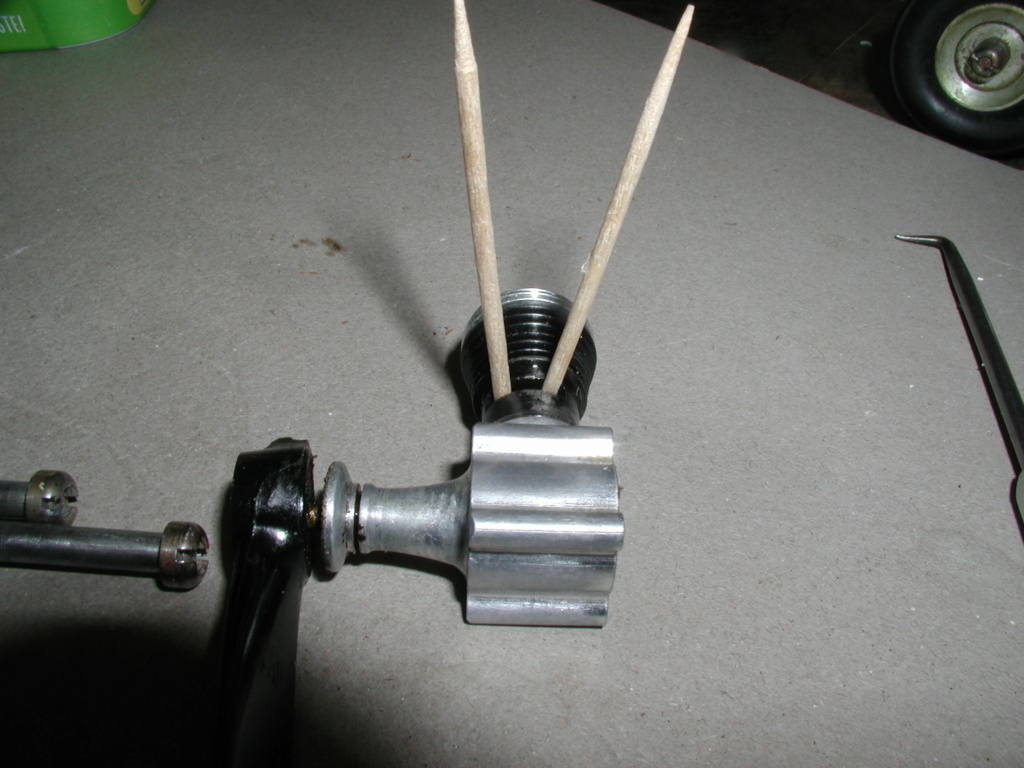
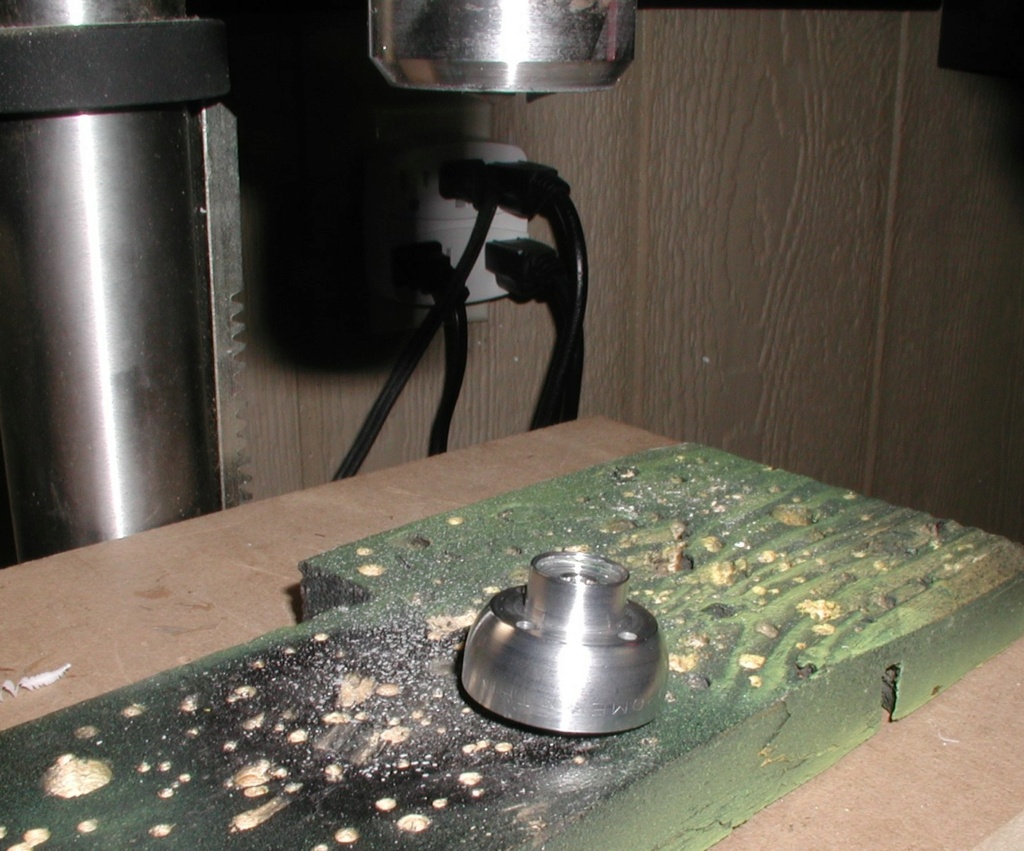
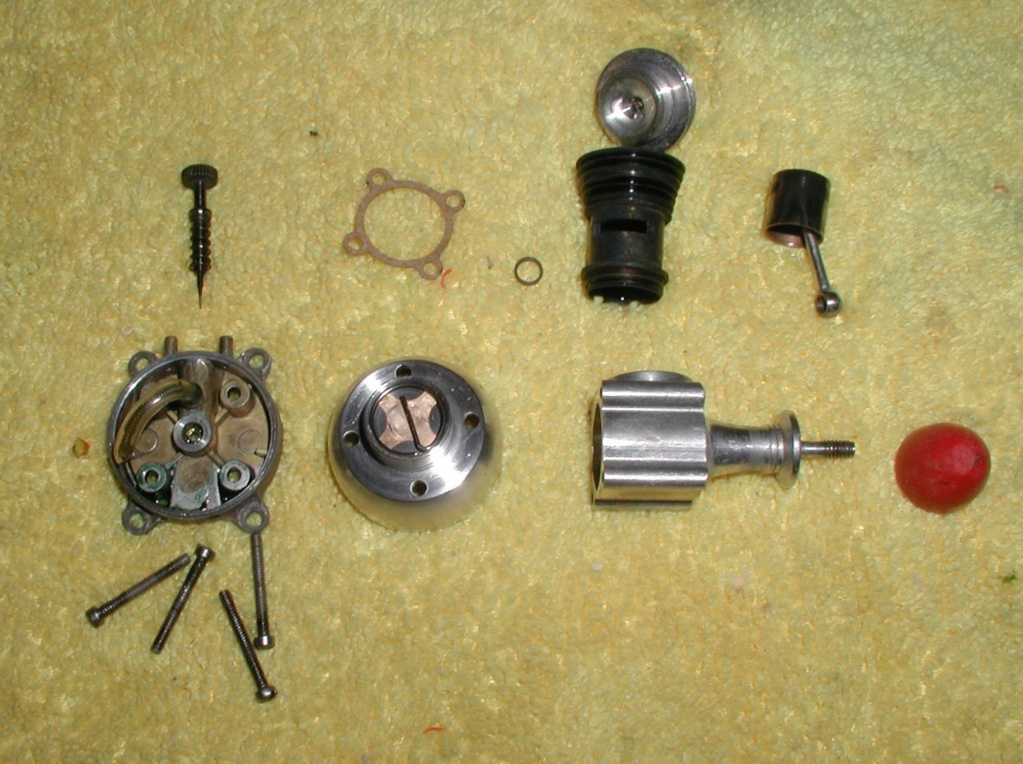
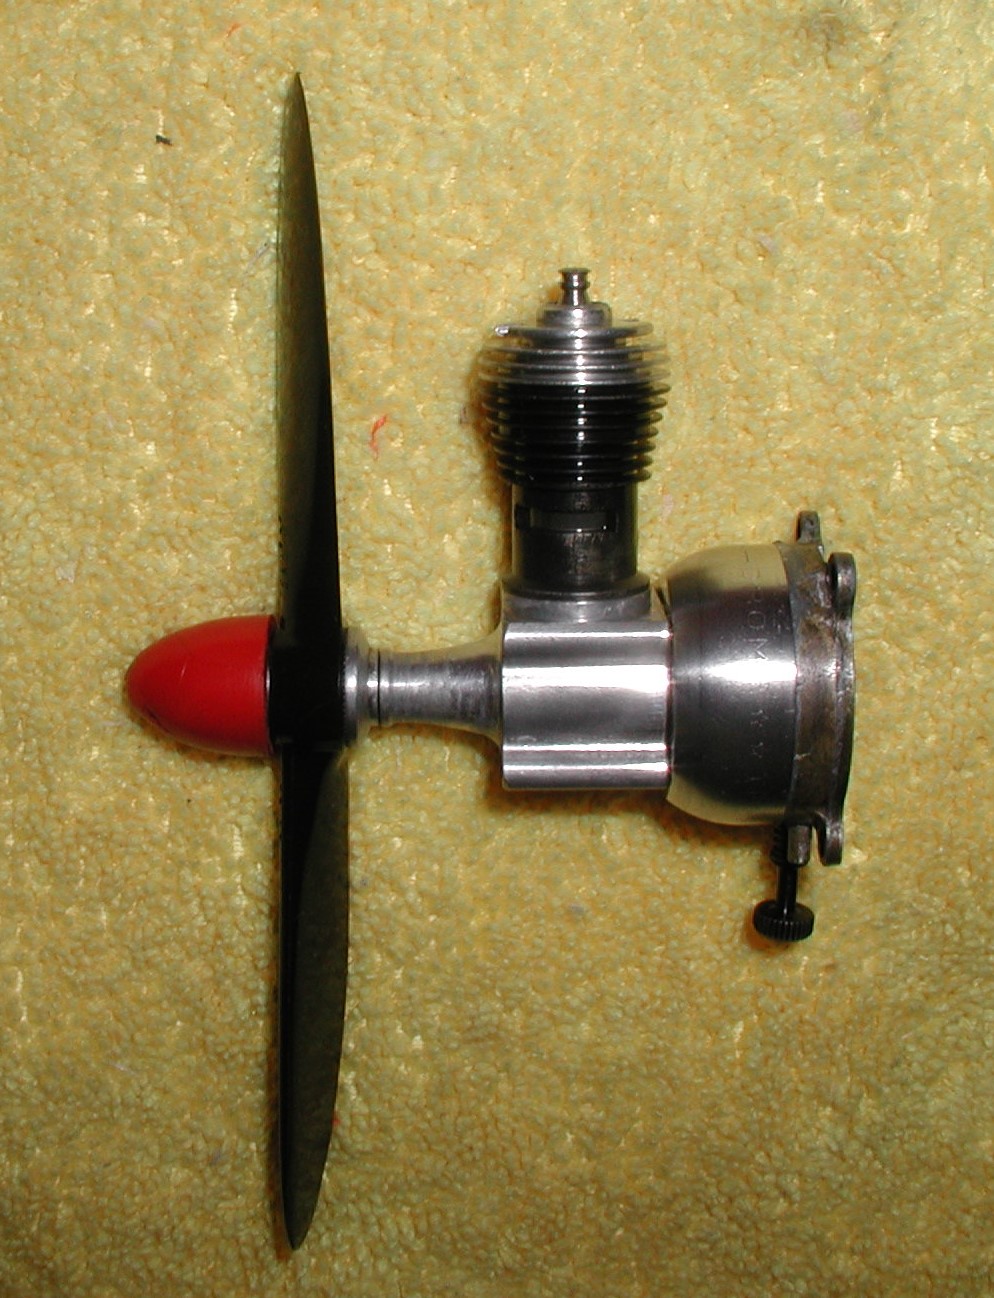
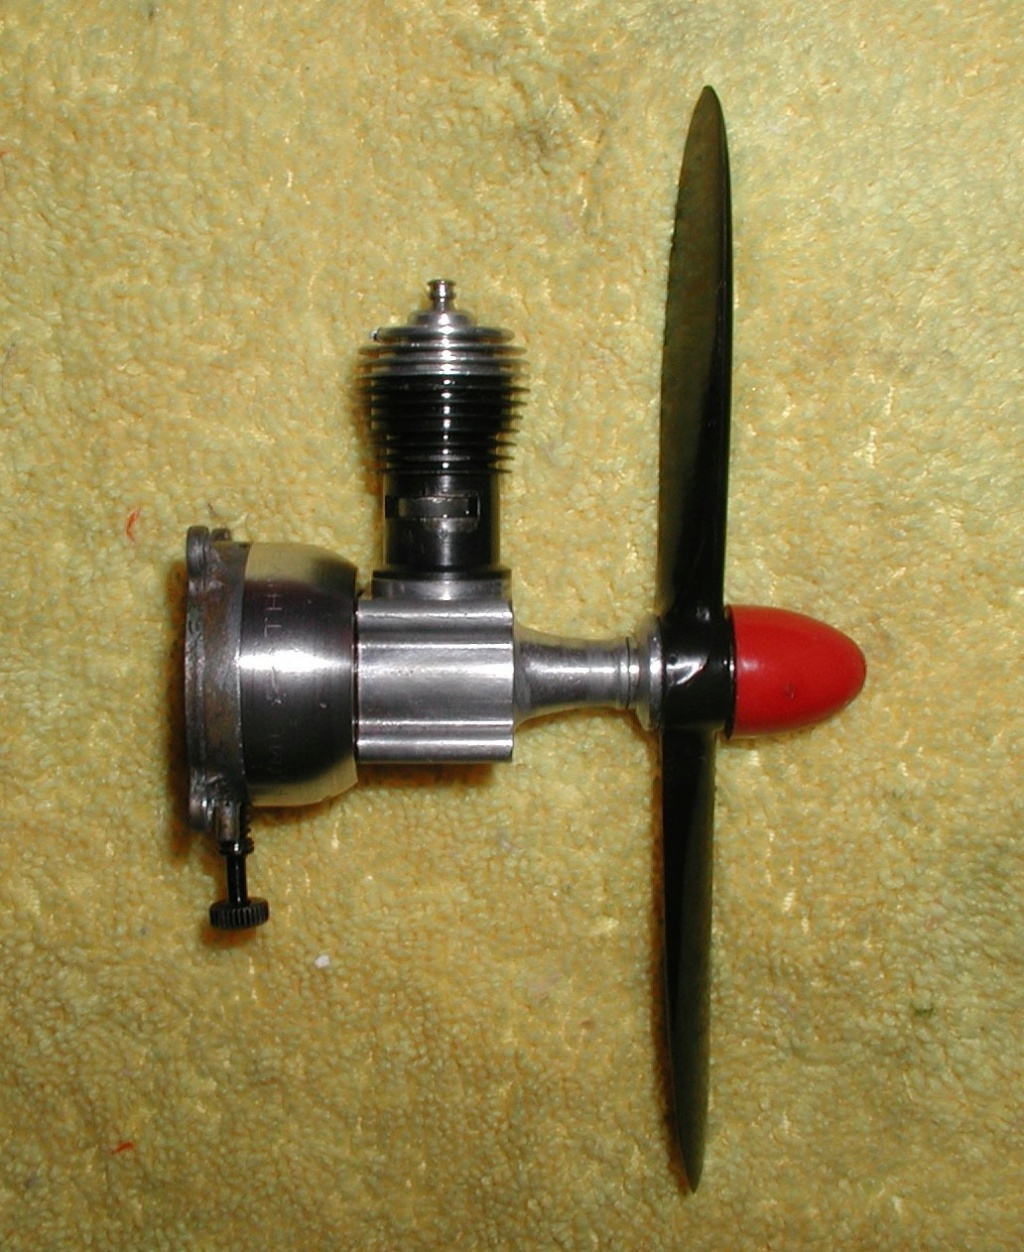
Corroded as bad as I have seen. Even the connecting rod. I did not remove the crankshaft, prop stud securely imbedded in the crankshaft and I did not want to use vice grips to remove it. Better to leave it in and let Simple Green do it's job. Nice movement and compression pop on this old thin-wall.


Corroded as bad as I have seen. Even the connecting rod. I did not remove the crankshaft, prop stud securely imbedded in the crankshaft and I did not want to use vice grips to remove it. Better to leave it in and let Simple Green do it's job. Nice movement and compression pop on this old thin-wall.

rsv1cox- Top Poster


Posts : 11250
Join date : 2014-08-18
Location : West Virginia
 Re: Garbage in, garbage out........Cox Prop Rod arrives and displays its graceful curves
Looks good. Are you going to do a test run on it?

bottomgun- Gold Member

- Posts : 138
Join date : 2012-12-27
Age : 67
Location : Southern California
 Re: Garbage in, garbage out........Cox Prop Rod arrives and displays its graceful curves
bottomgun wrote:Looks good. Are you going to do a test run on it?
Probably, once I get the engine configured the the prop selected. Cox recommended a 6/3 for these. Got the mount pretty much figured out.
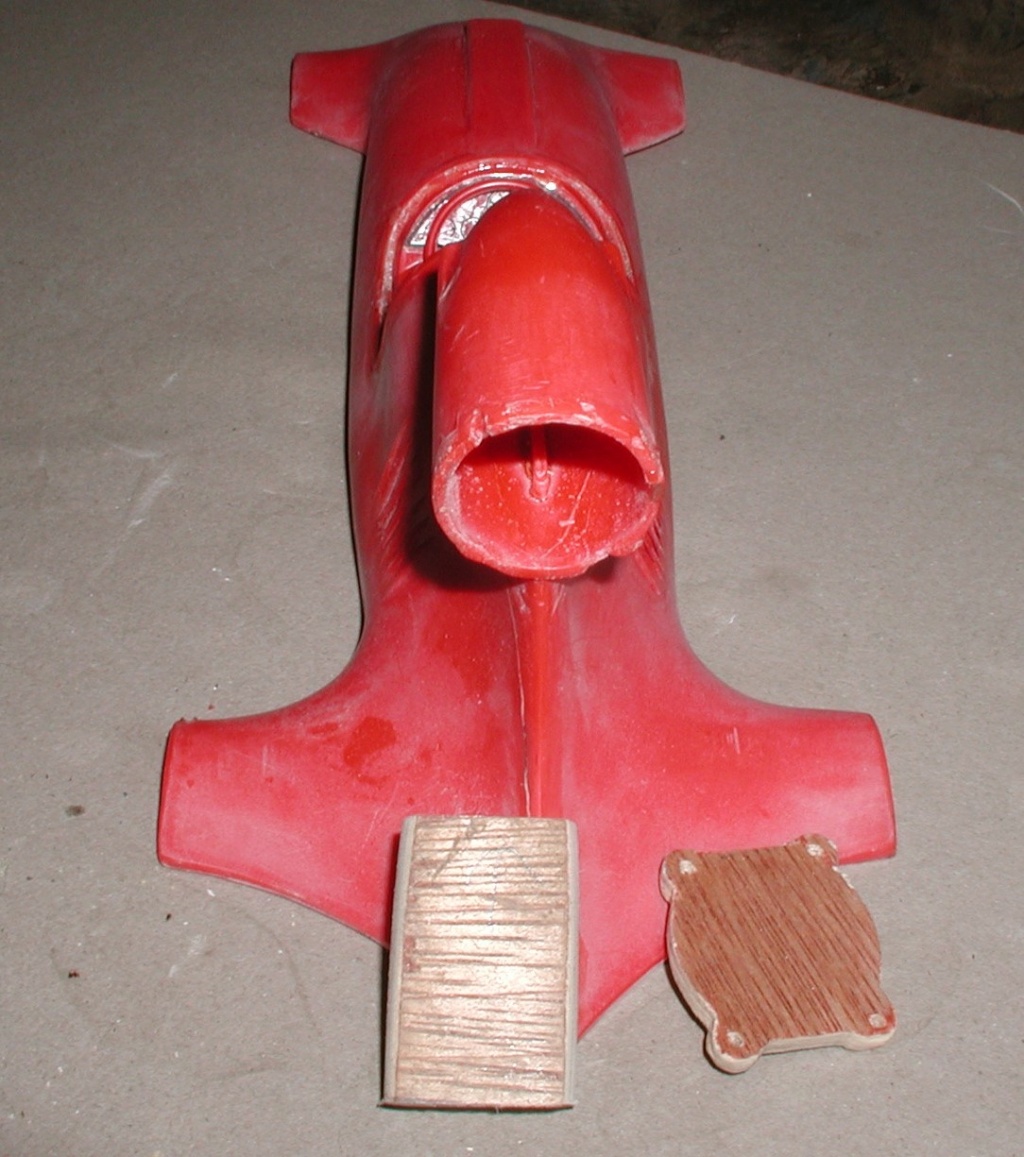
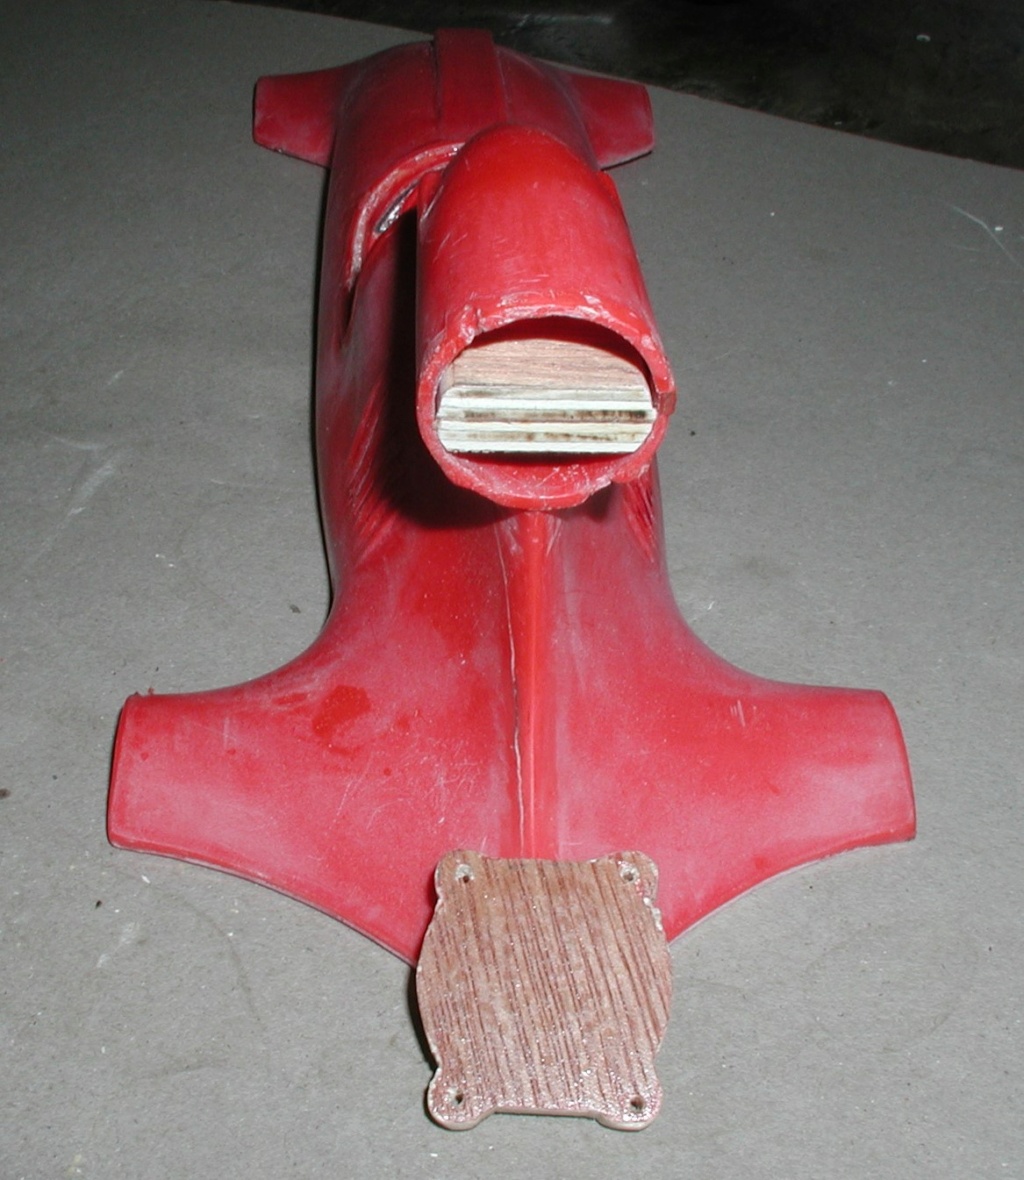
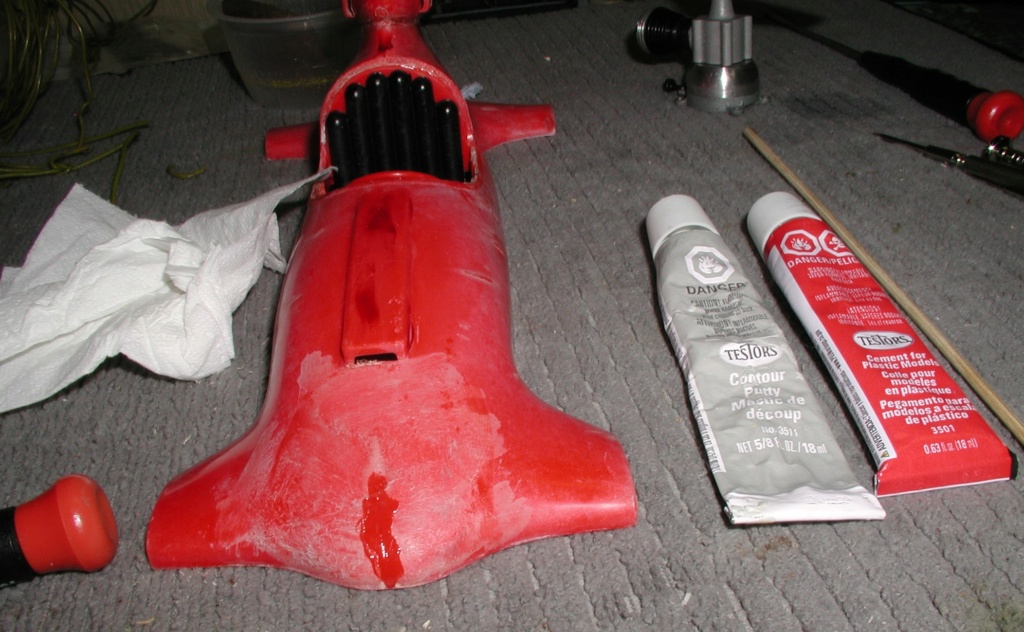
Went back and sanded the body some more. Finally got through the white substance on the nose and eliminated most of the deep scars, including the canopy.

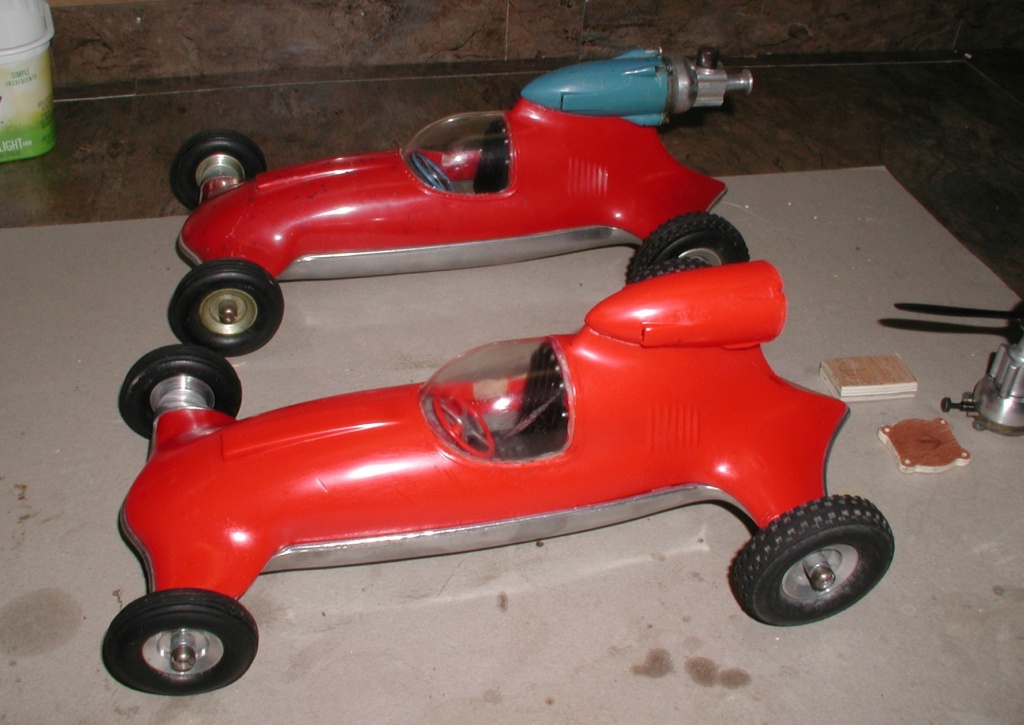
Tight fit, thinking about just canopy cement to hold it in. It would save me putting screws in from the outside. Thinking about it.
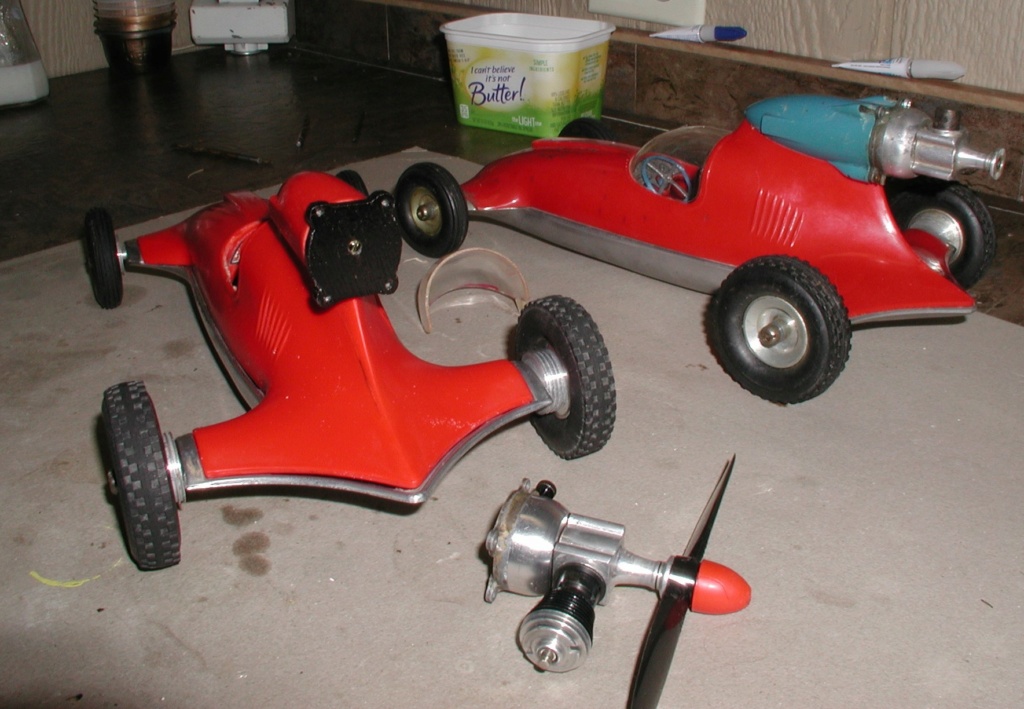
Ah, I'm just going to cement it in, if it comes loose (it won't, that canopy cement is pretty tough stuff) I could add screws later.
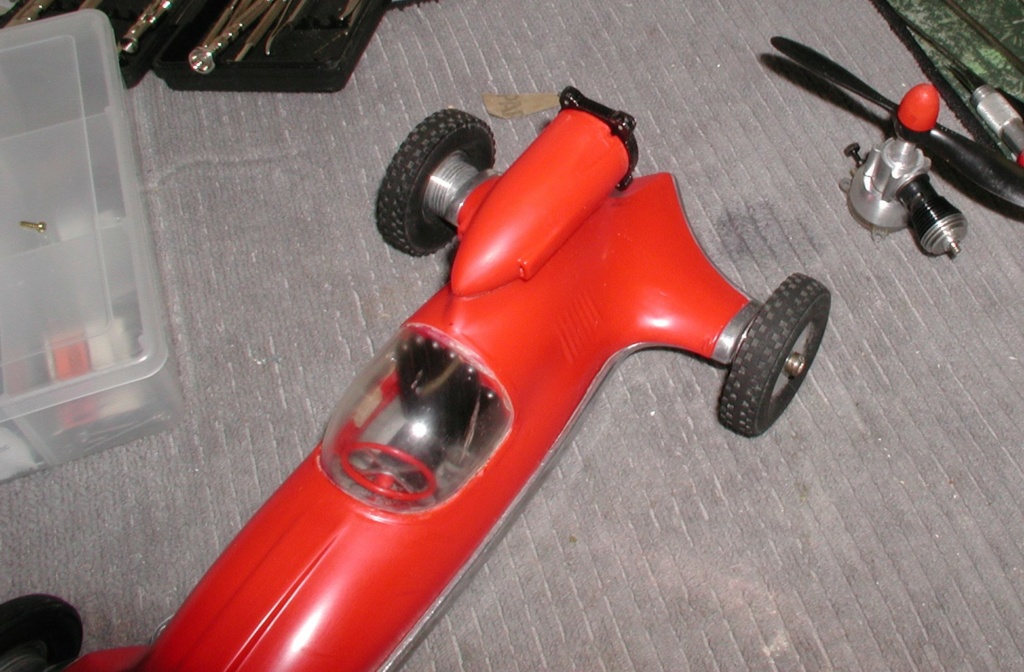
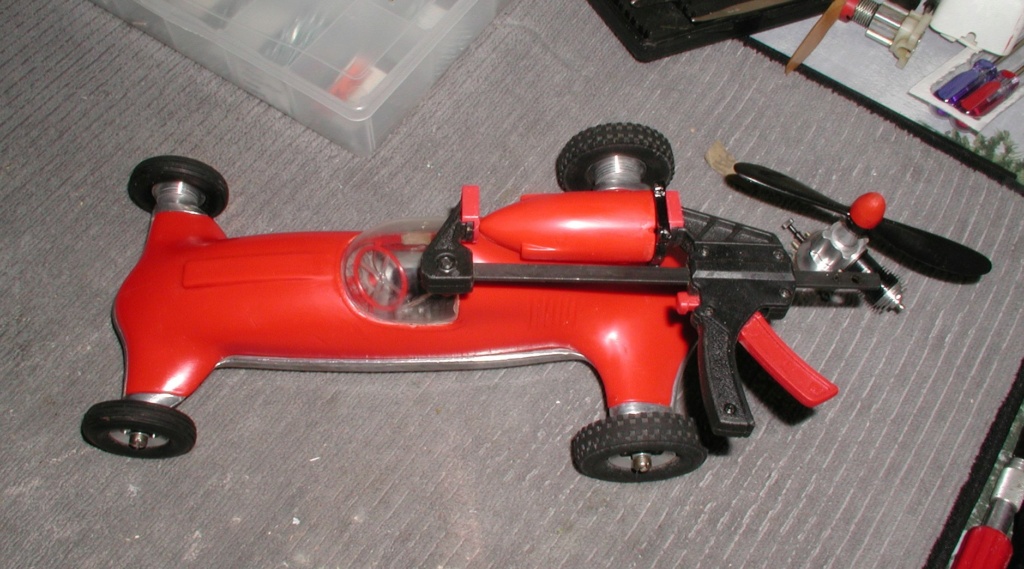
Some difference from this:

rsv1cox- Top Poster


Posts : 11250
Join date : 2014-08-18
Location : West Virginia
 Re: Garbage in, garbage out........Cox Prop Rod arrives and displays its graceful curves
On my plastic pan model, I had so many scratches that after doing a lot of sanding, I had difficulty polishing it out so I did some fine grit wet sanding and gave it an airbrush coating of two part gloss clear epoxy. Yours came out pretty decent. What did you use to polish it out?

bottomgun- Gold Member

- Posts : 138
Join date : 2012-12-27
Age : 67
Location : Southern California
 Re: Garbage in, garbage out........Cox Prop Rod arrives and displays its graceful curves
bottomgun wrote:On my plastic pan model, I had so many scratches that after doing a lot of sanding, I had difficulty polishing it out so I did some fine grit wet sanding and gave it an airbrush coating of two part gloss clear epoxy. Yours came out pretty decent. What did you use to polish it out?
I sprayed it with Easy-Off oven cleaner to get the paint and Chucks magic marker off, rinsed it off and started with 800 grit W/D paper used wet, then the headlight polish kit pictured above, starting with 1000 grit, then 3000 grit applicator pads. Then their polishing compound used with the 3000 grit pad, then just the polish with a micro-fiber towel. Same for the canopy.
One of the plastic posts used to attach the pan to the body is missing, one other broken. I still have to address those. Used canopy cement this morning to glue the made-up engine mount to the body. 24 hour cure.
Years ago, I used two part Hobby-Poxy (I think that's the name) air brushed on to do my scratch built P-38. Still some fifty years later it still looks great.
Bob

rsv1cox- Top Poster


Posts : 11250
Join date : 2014-08-18
Location : West Virginia
 Re: Garbage in, garbage out........Cox Prop Rod arrives and displays its graceful curves
Speaking of Garbage In, Garbage Out, how many remember these photos? 
CEF: Ah yes! The long lost Cox Skate Prototype
and
These are long lost classics to the rabbit hole of time!


CEF: Ah yes! The long lost Cox Skate Prototype
and
These are long lost classics to the rabbit hole of time!


GallopingGhostler- Top Poster


Posts : 5724
Join date : 2013-07-13
Age : 70
Location : Clovis NM or NFL KC Chiefs
 Re: Garbage in, garbage out........Cox Prop Rod arrives and displays its graceful curves
I wish I had your skill and patience!

Wiking44- Beginner Poster

- Posts : 7
Join date : 2022-04-30
 Similar topics
» Big box arrives and pretty sad Prop Rod
» The new W-196 arrives......finally
» [The Traveling Prop] Who wants to be the one to send the prop overseas?
» HB .15 arrives
» Big box arrives
» The new W-196 arrives......finally
» [The Traveling Prop] Who wants to be the one to send the prop overseas?
» HB .15 arrives
» Big box arrives
Page 1 of 1
Permissions in this forum:
You cannot reply to topics in this forum

 Rules
Rules


