Log in
Search
Latest topics
» Cox films/videos...by Coxfledgling Today at 4:46 am
» Purchased the last of any bult engines from Ken Enya
by Coxfledgling Today at 4:18 am
» My N-1R build log
by roddie Today at 12:32 am
» Happy 77th birthday Andrew!
by akjgardner Today at 12:27 am
» TEE DEE Having issues
by TD ABUSER Yesterday at 9:43 pm
» Landing-gear tips
by roddie Yesterday at 6:17 pm
» Roger Harris revisited
by TD ABUSER Yesterday at 2:13 pm
» Tee Dee .020 combat model
by Ken Cook Yesterday at 1:41 pm
» Retail price mark-up.. how much is enough?
by Ken Cook Yesterday at 1:37 pm
» My latest doodle...
by roddie Yesterday at 10:43 am
» Chocolate chip cookie dough.........
by roddie Fri Nov 22, 2024 1:13 pm
» Free Flight Radio Assist
by rdw777 Fri Nov 22, 2024 9:24 am
Cox Engine of The Month
New r / c model airplane project for Cox!
Page 1 of 4
Page 1 of 4 • 1, 2, 3, 4 
 New r / c model airplane project for Cox!
Well friends, once again we started another project for Cox!
This time it will be possible to use many Cox models between .049 and .051 given the flight characteristics of this model aircraft.
The chosen model aircraft is called SCAMP and I modify the original size of the plane, taking it to 86 cm wingspan = 33.8583 inches.
Also modify the incidence of the wing, since it was very positive and I gave it the angle of attack to my personal taste.
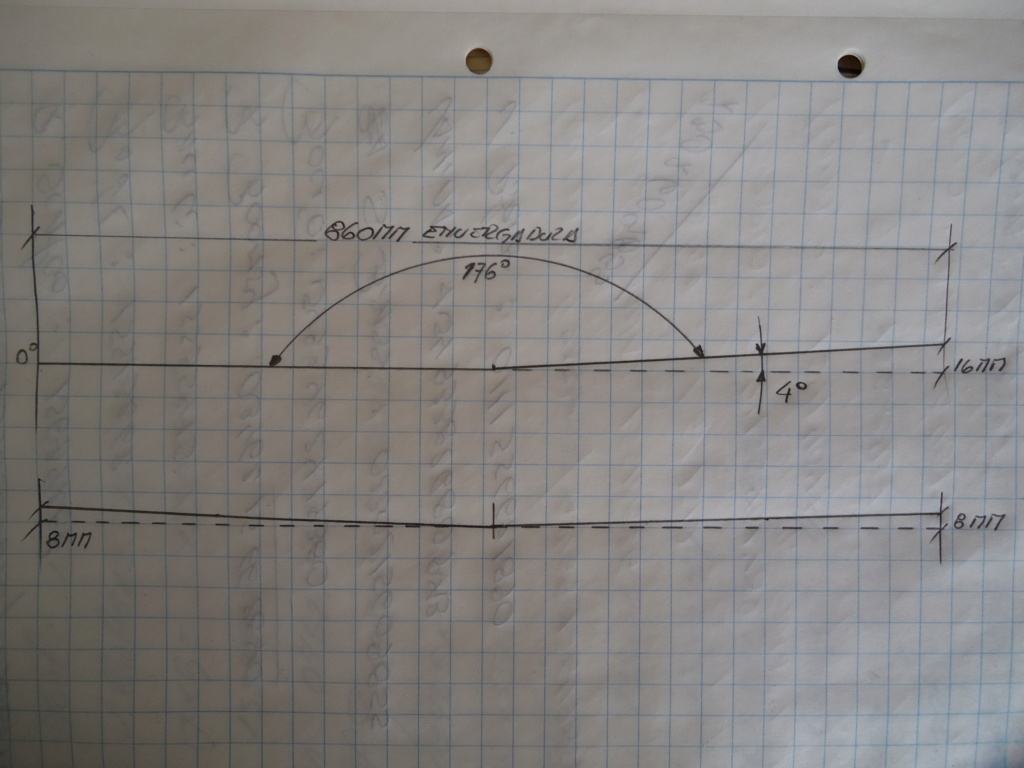
Another modification will be the original dihedral, since this model from the plane does not have ailerons.
As I mentioned before, measure the dihedral because I will incorporate ailerons.
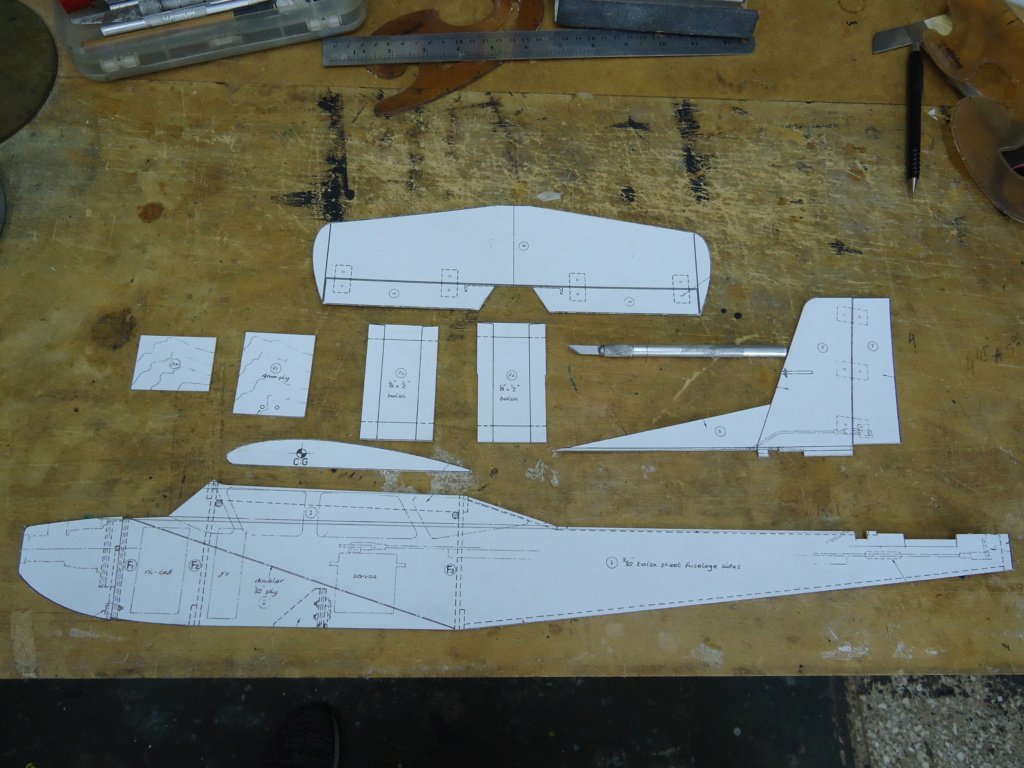
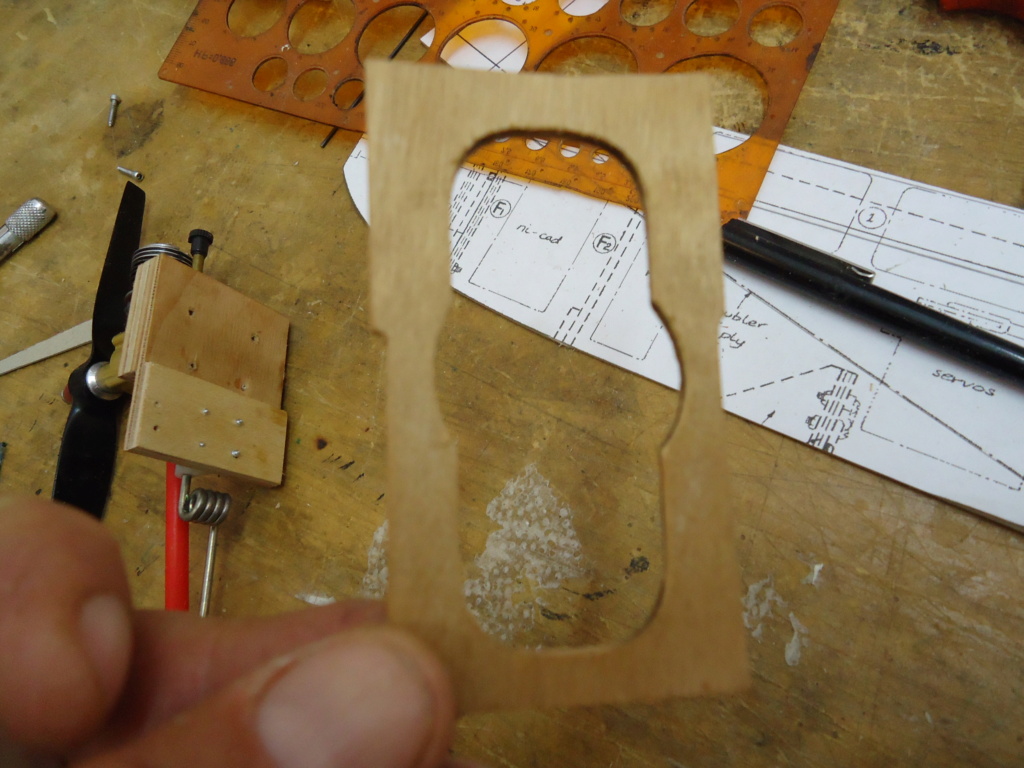
The structure will be modified as it sees fit, such is the case of the F1, which in the way it is manufactured, allows the nose gear to be positioned with its steering movement, without this mechanism interfering with the fuel supply line of the motor.
The original model aircraft has a fixed nose train and in my case, I will place its address.
Well, this is the beginning, here we go !!!, I hope you enjoy this new post!
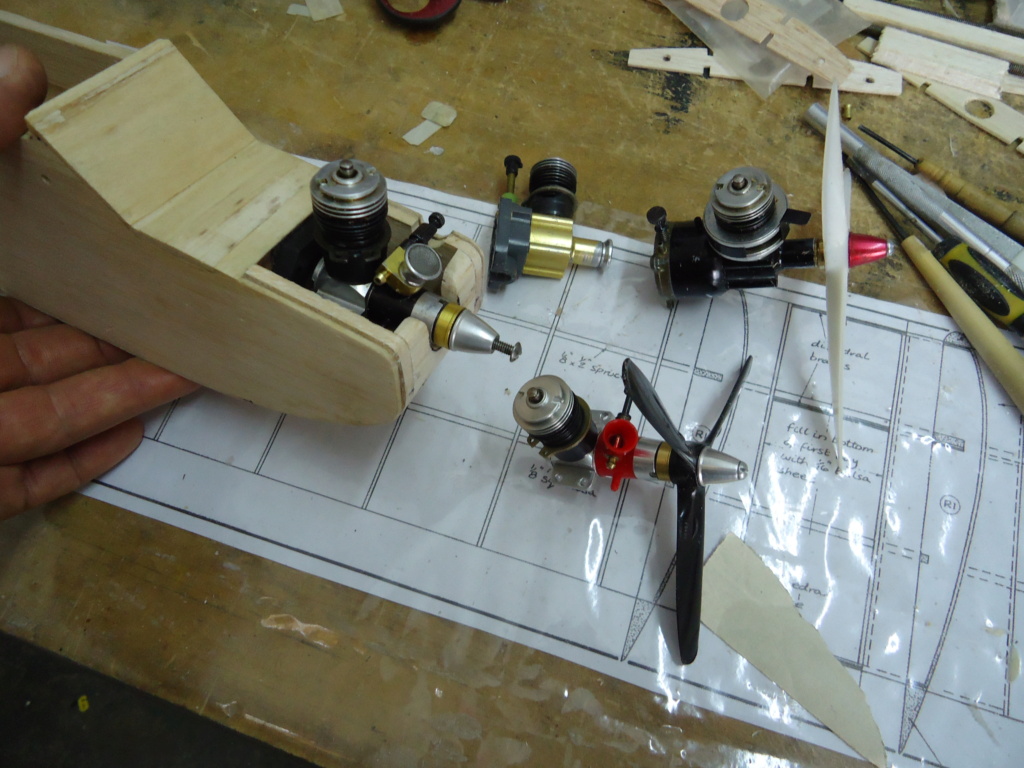
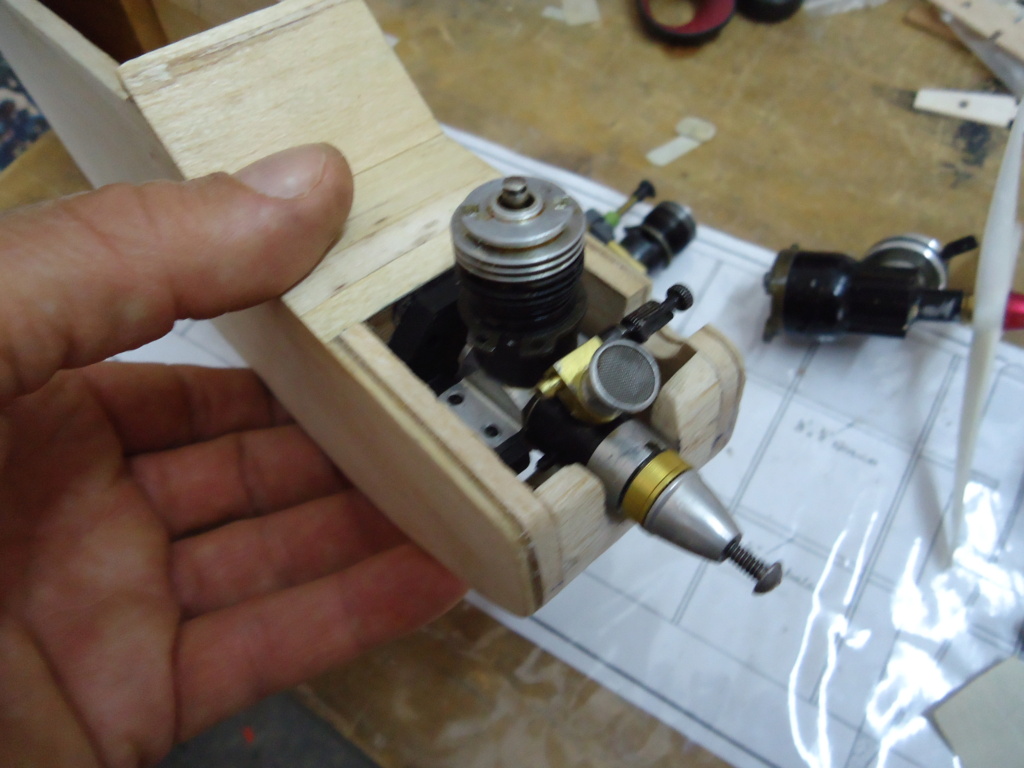
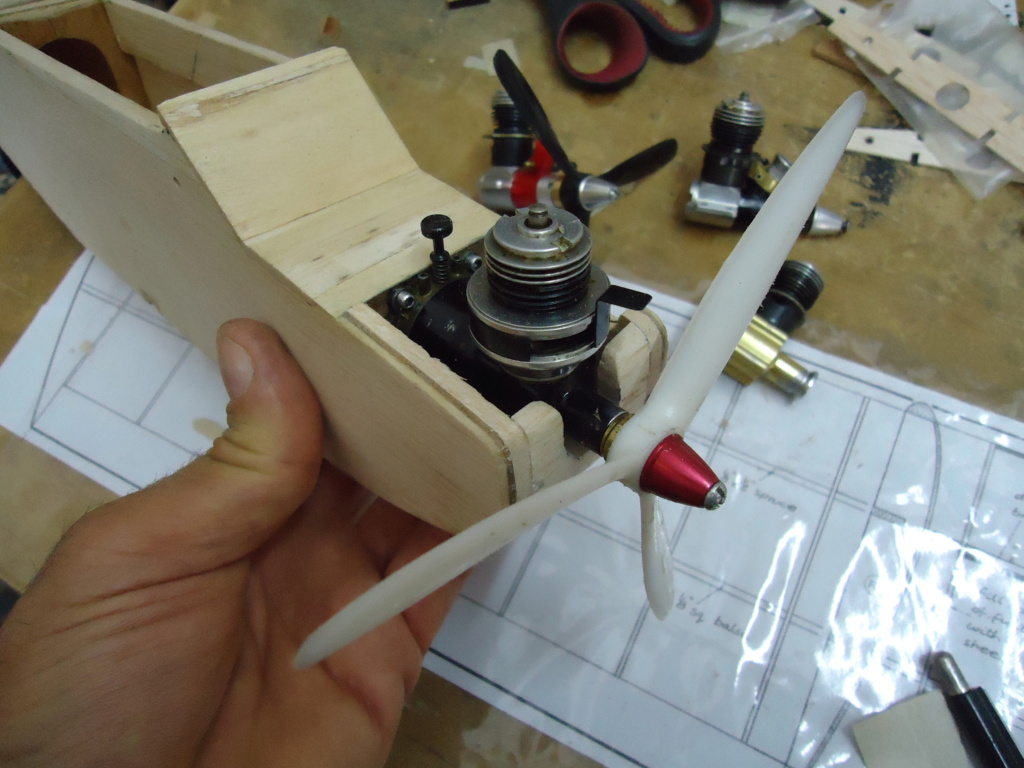
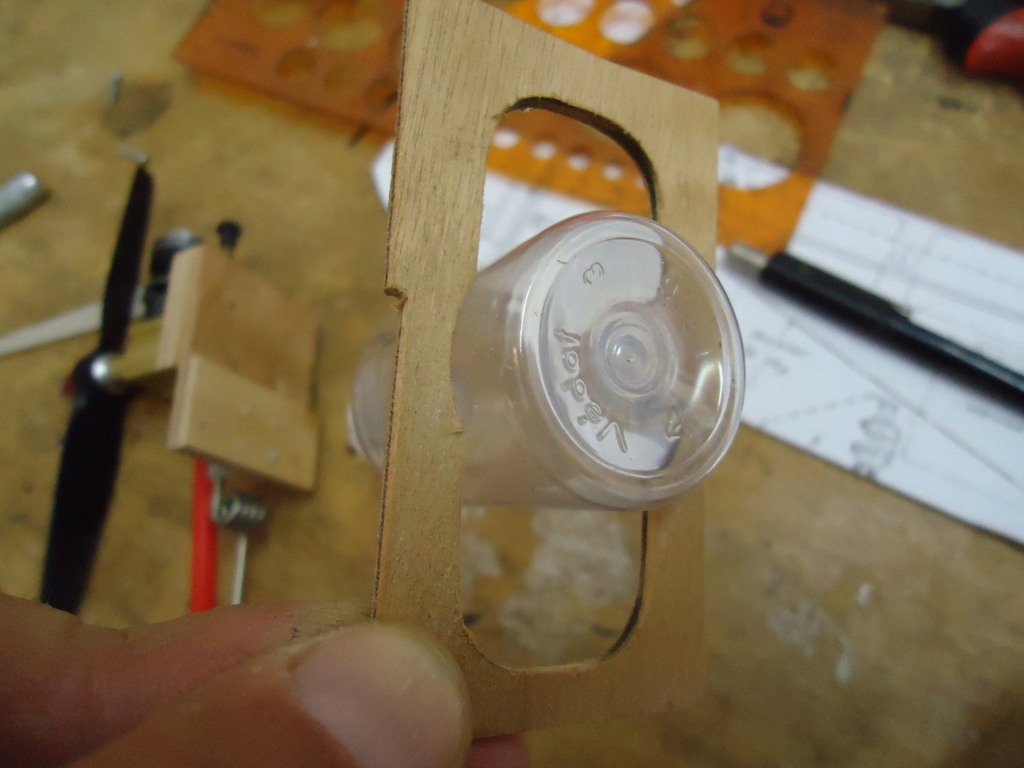
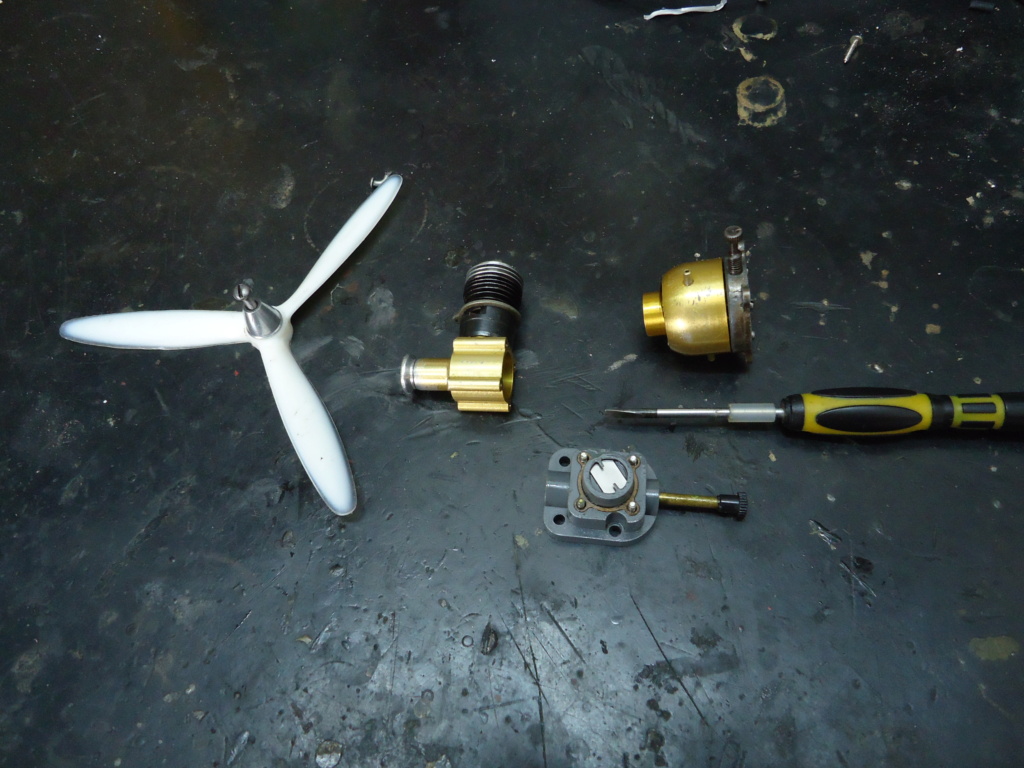
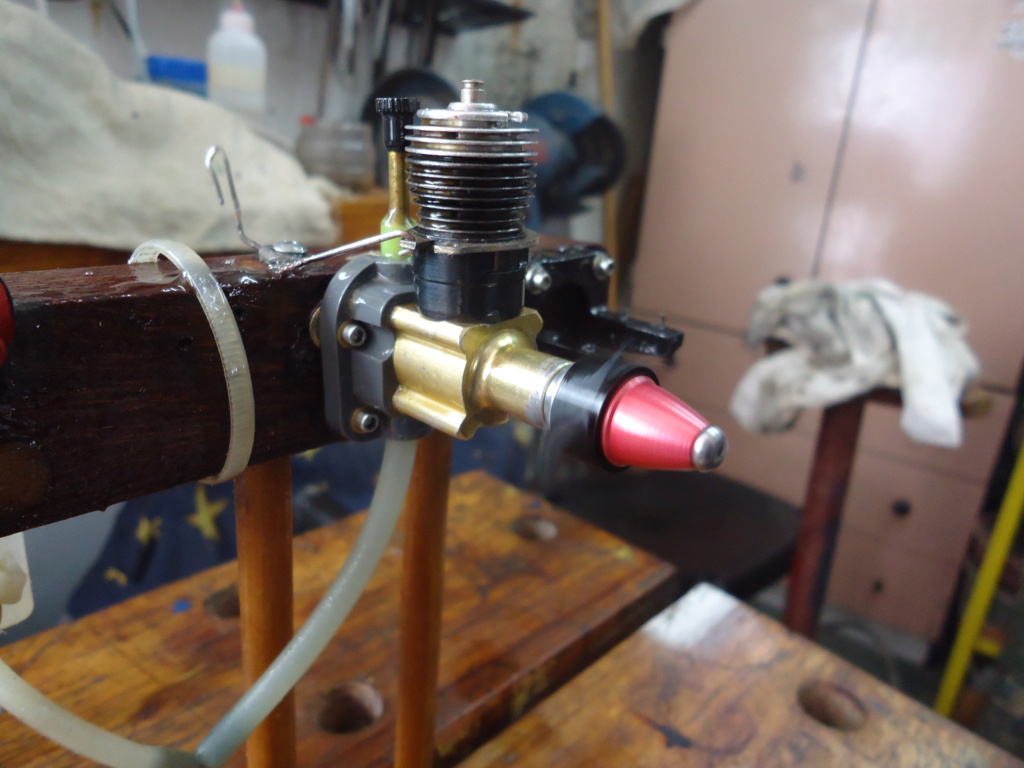
I have modified my Cox Golden Bee, putting a Surestar back plate on it, in order to fit a tank with more capacity, for longer flights.
Here you can see how the engine, fuel line and steering control unit looks!...


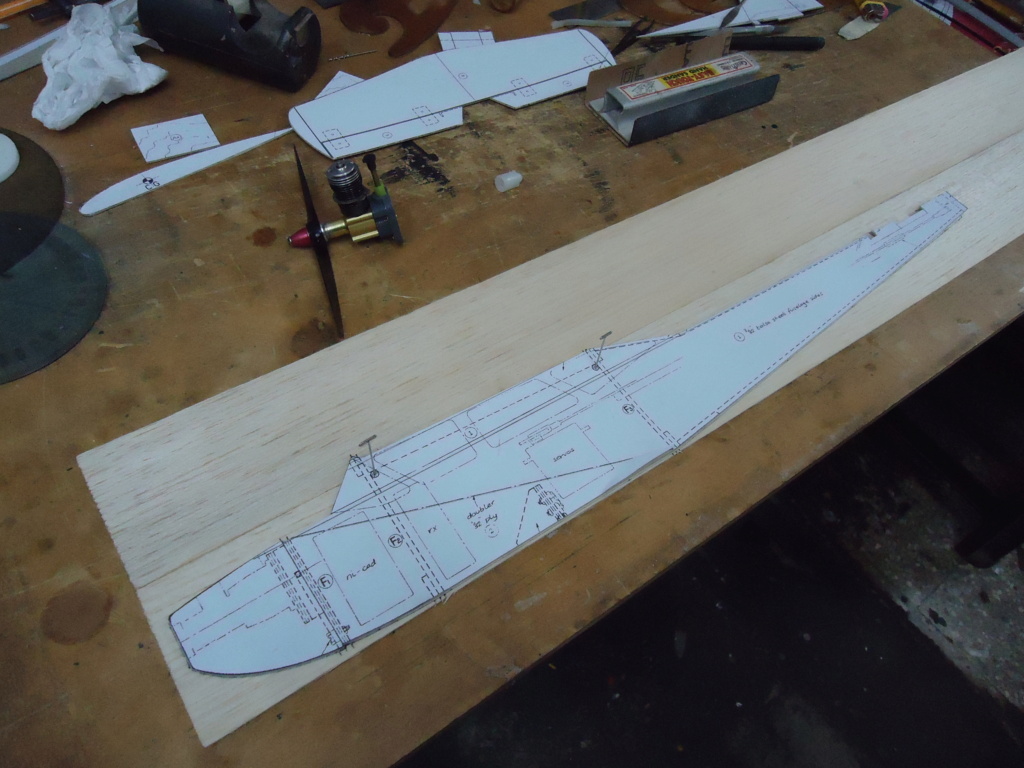
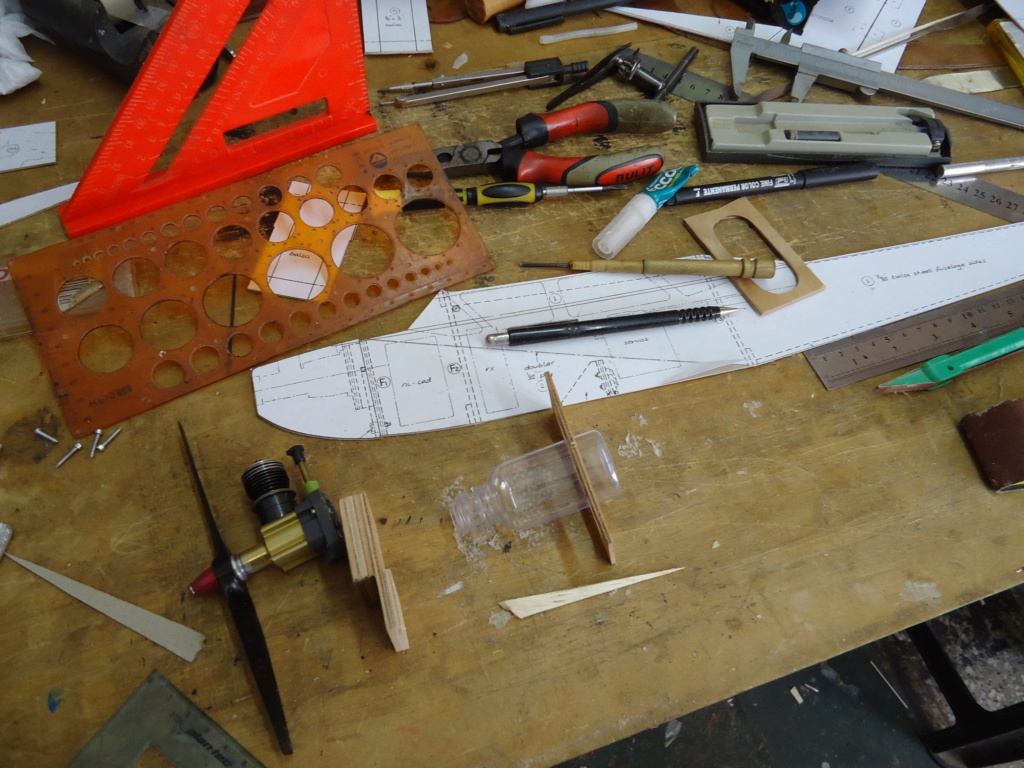
frame F2, adjusts to fit a fuel tank...
The Cox Golden Bee has already been tested with the Surestar board and it works wonders!...
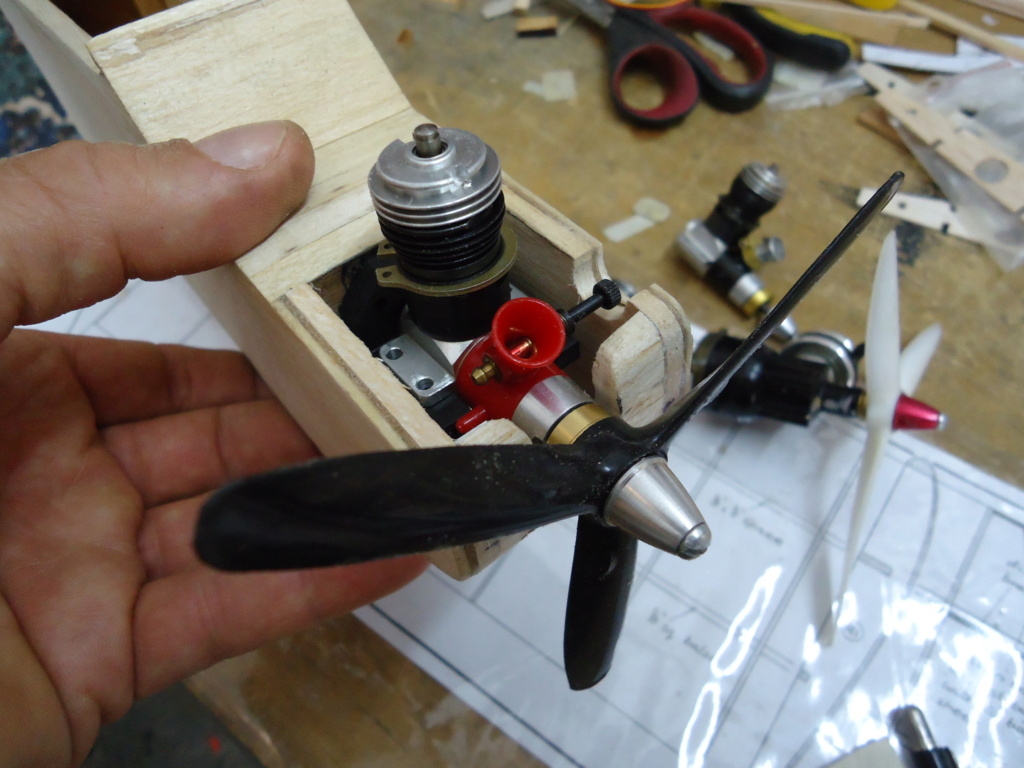
The three-bladed propeller that you see in the photo is a gift from my dear friend Roberto (who unfortunately lost his life due to COVID). It is a large propeller for the engine (6 x 4) clockwise rotation, but it works wonderfully, so I may also use it for some flights!

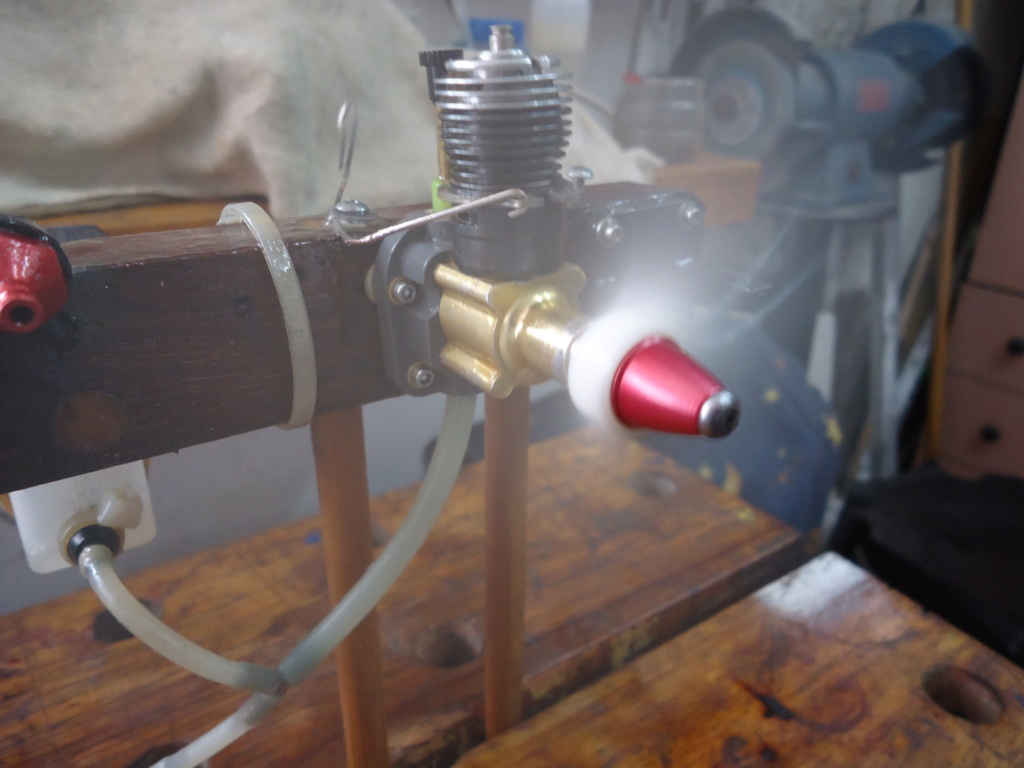
and here with an MA 6x3 two-bladed propeller...
to be continue!.....
This time it will be possible to use many Cox models between .049 and .051 given the flight characteristics of this model aircraft.
The chosen model aircraft is called SCAMP and I modify the original size of the plane, taking it to 86 cm wingspan = 33.8583 inches.
Also modify the incidence of the wing, since it was very positive and I gave it the angle of attack to my personal taste.
Another modification will be the original dihedral, since this model from the plane does not have ailerons.
As I mentioned before, measure the dihedral because I will incorporate ailerons.
The structure will be modified as it sees fit, such is the case of the F1, which in the way it is manufactured, allows the nose gear to be positioned with its steering movement, without this mechanism interfering with the fuel supply line of the motor.
The original model aircraft has a fixed nose train and in my case, I will place its address.
Well, this is the beginning, here we go !!!, I hope you enjoy this new post!


I have modified my Cox Golden Bee, putting a Surestar back plate on it, in order to fit a tank with more capacity, for longer flights.
Here you can see how the engine, fuel line and steering control unit looks!...


frame F2, adjusts to fit a fuel tank...


The Cox Golden Bee has already been tested with the Surestar board and it works wonders!...
The three-bladed propeller that you see in the photo is a gift from my dear friend Roberto (who unfortunately lost his life due to COVID). It is a large propeller for the engine (6 x 4) clockwise rotation, but it works wonderfully, so I may also use it for some flights!


and here with an MA 6x3 two-bladed propeller...

to be continue!.....


MauricioB- Top Poster

- Posts : 3712
Join date : 2016-02-16
Age : 53
Location : ARG
 Re: New r / c model airplane project for Cox!
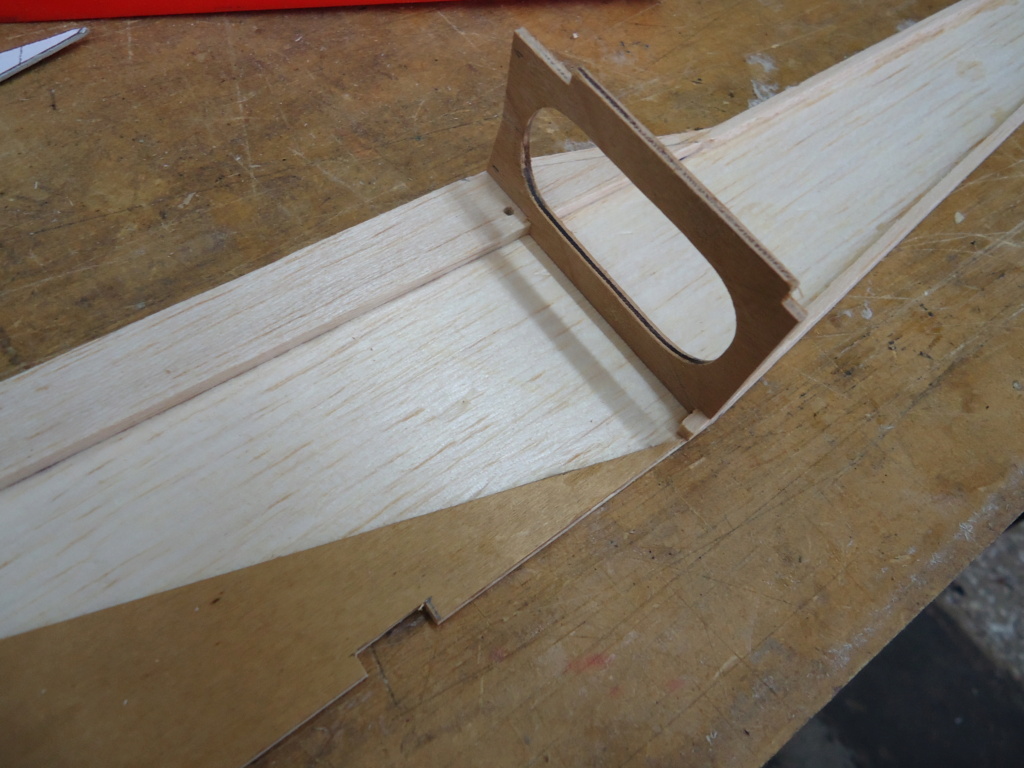
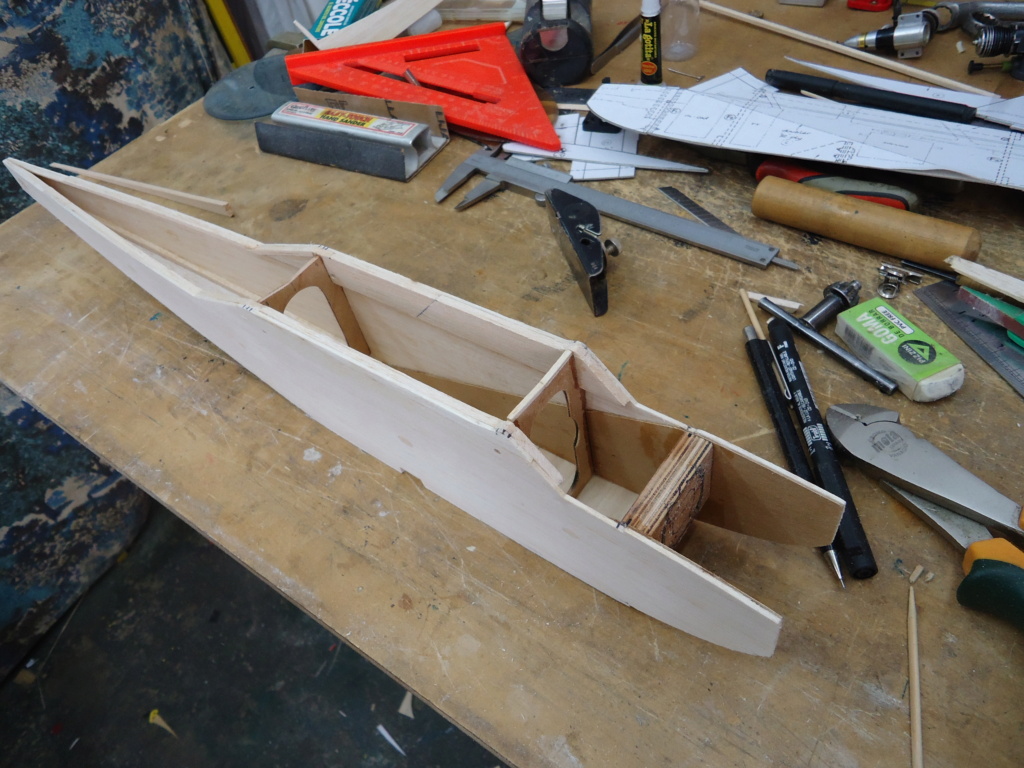
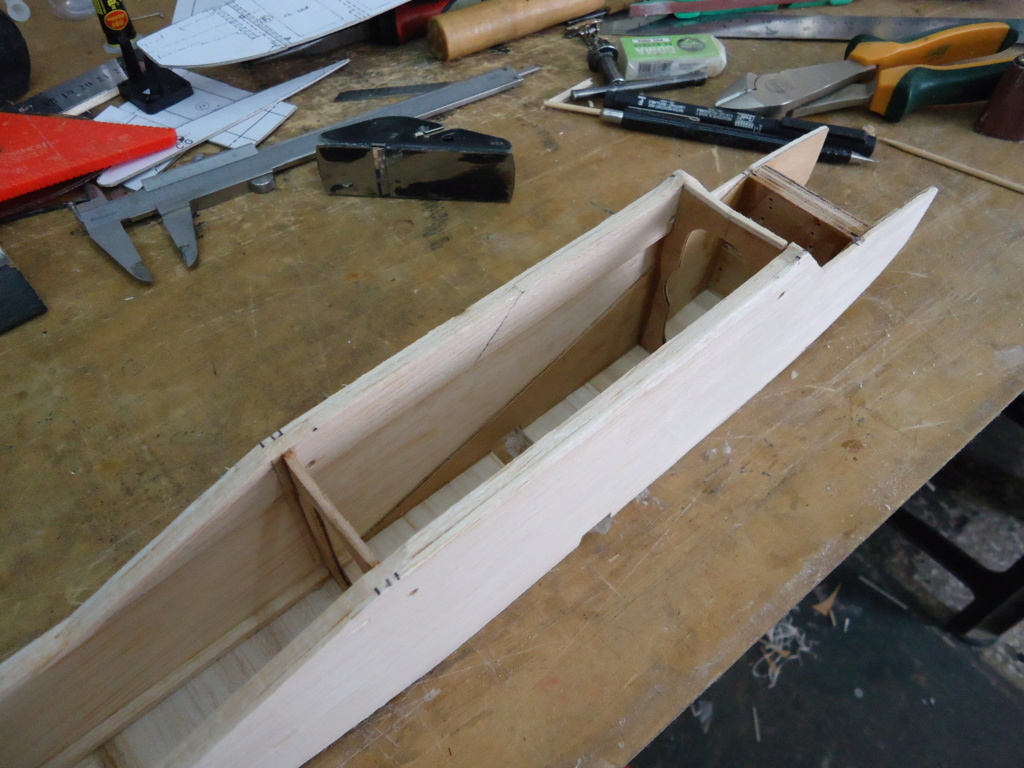
Today Sunday I stayed at home and made the most of the time to advance in this little outfit.
Here you can see the progress and assembly of the fuselage ...
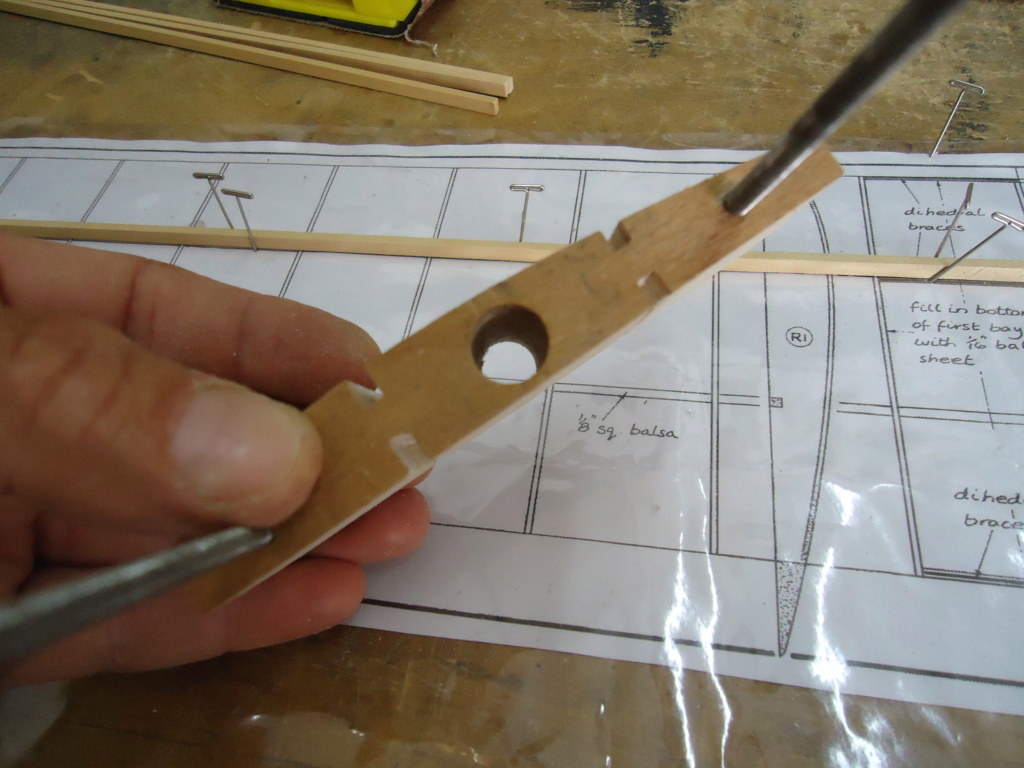
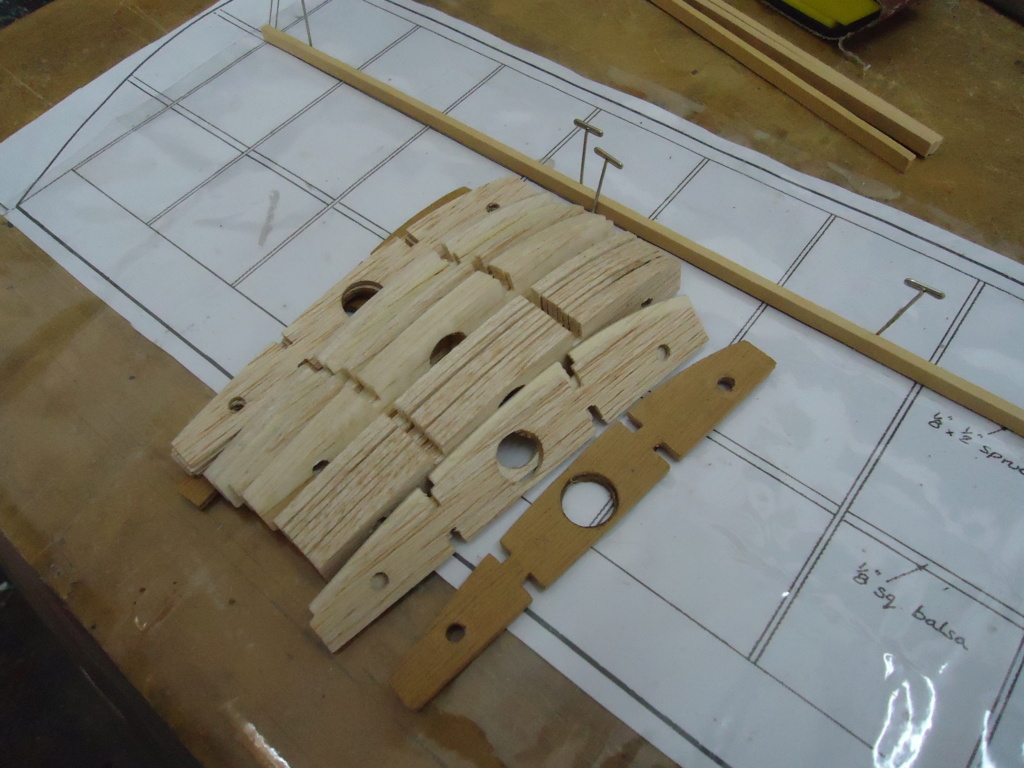
I made different holes in the F1 to be able to accommodate any type of Cox engine, for example, Babe Bee, QRC, Golden Bee, Black Widow, Tee Dee, Medallion, etc.



the base for the main train ...
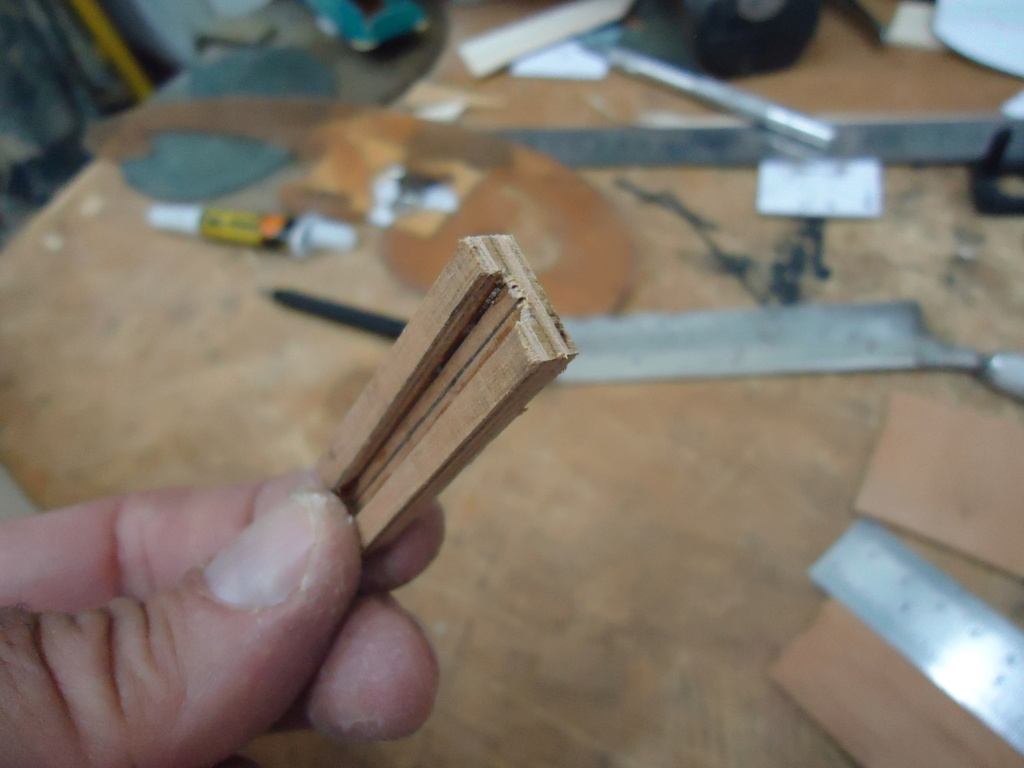
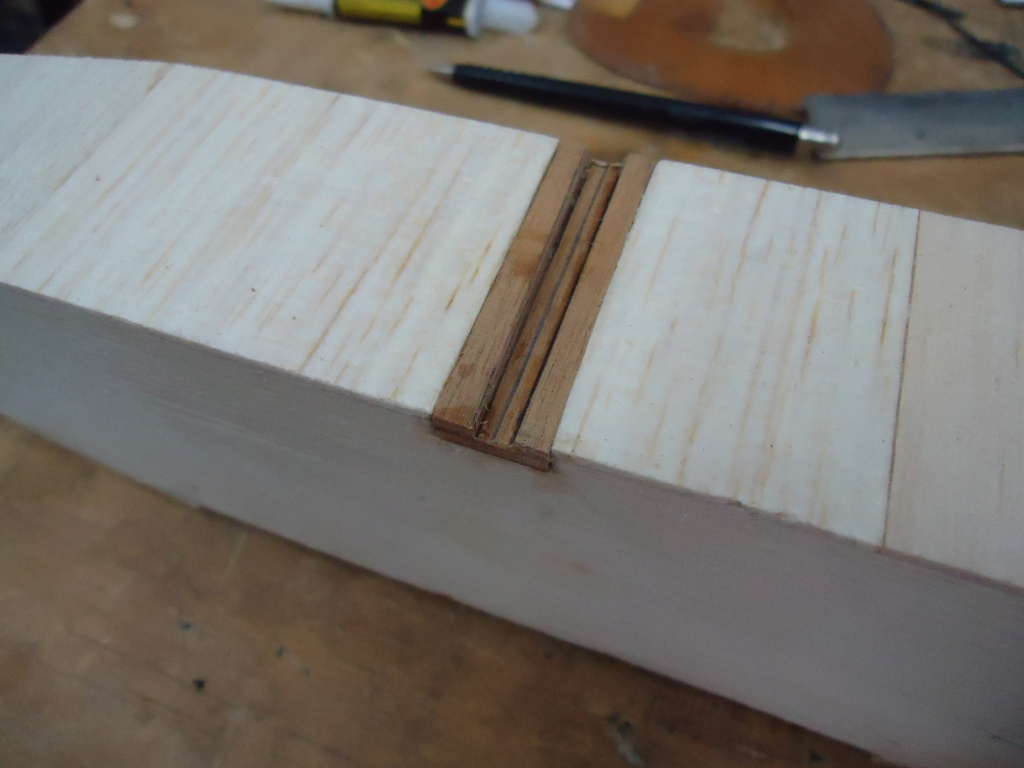

And here there is a problem, when the Du-Bro front end is bent, it breaks, so I took another and the same thing happened again, I wonder if I am doing something wrong ... well, I warmed it up on the second train. sector to bend and still broke, so I decided to make a definitive solution.
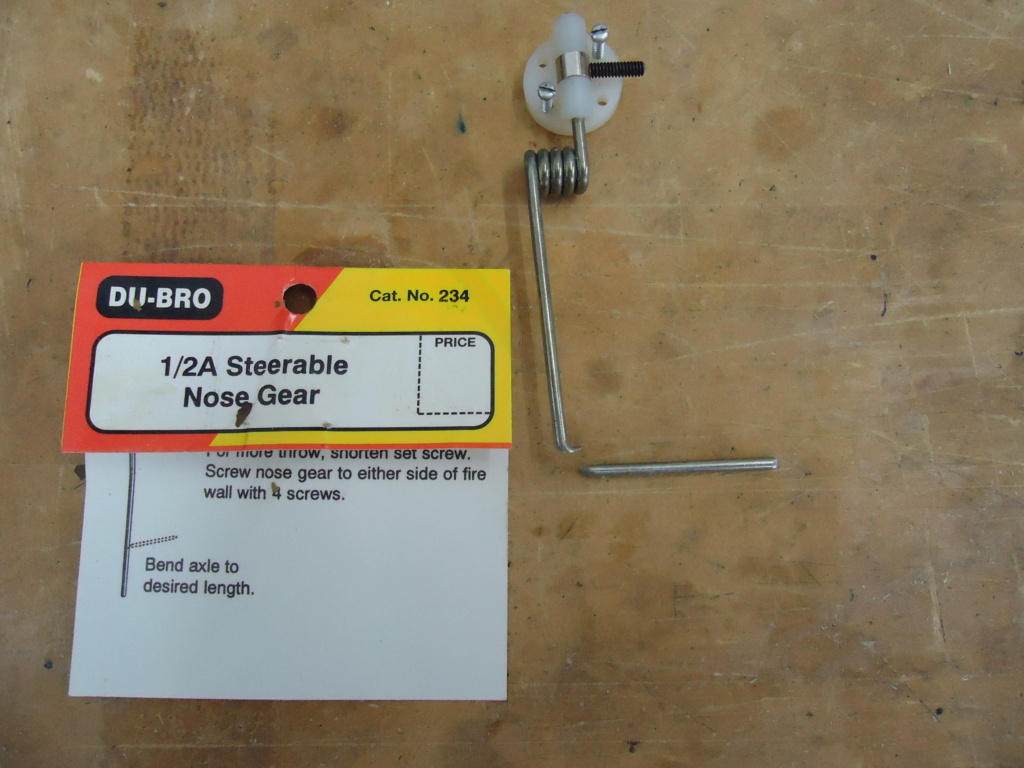
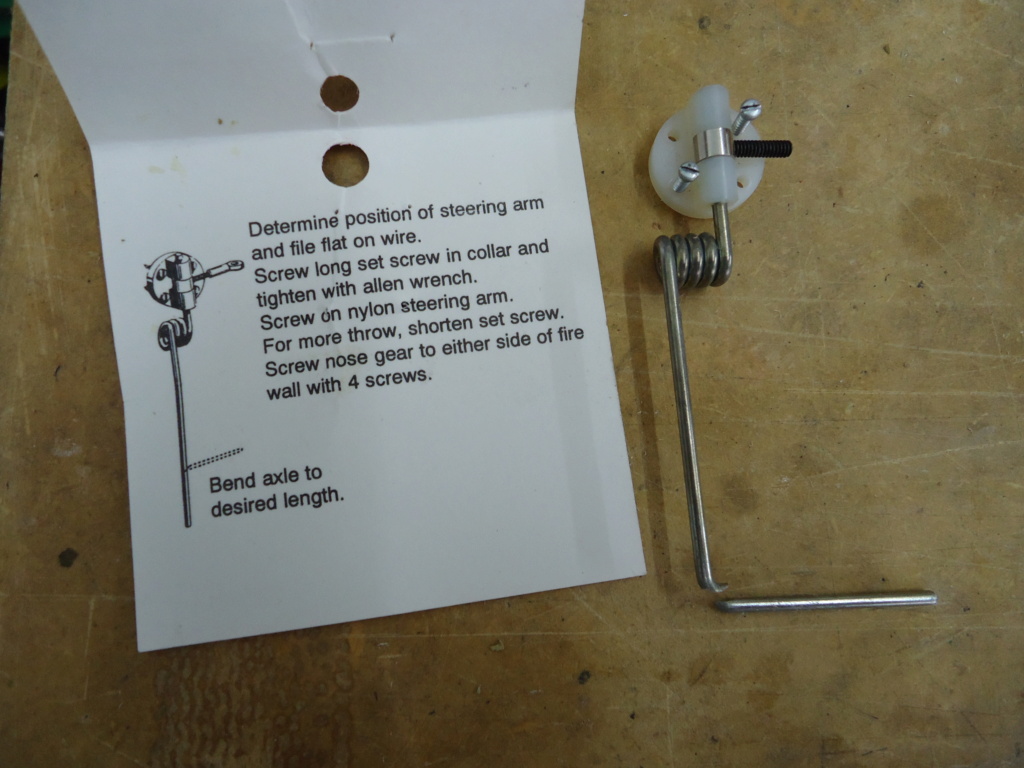
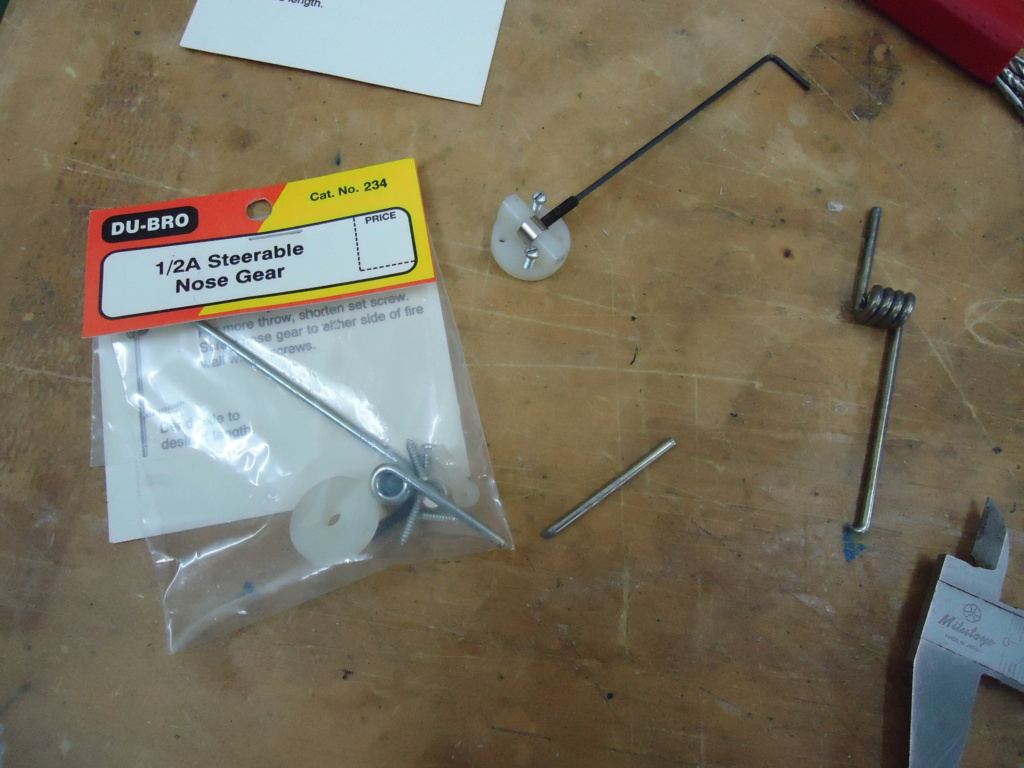
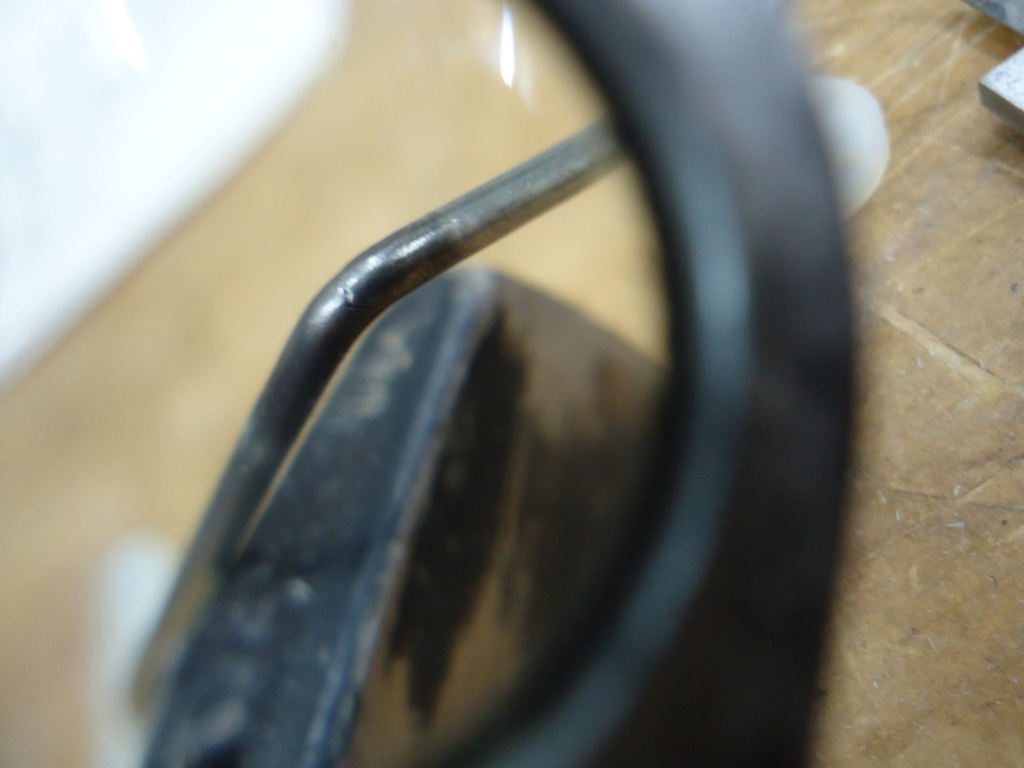
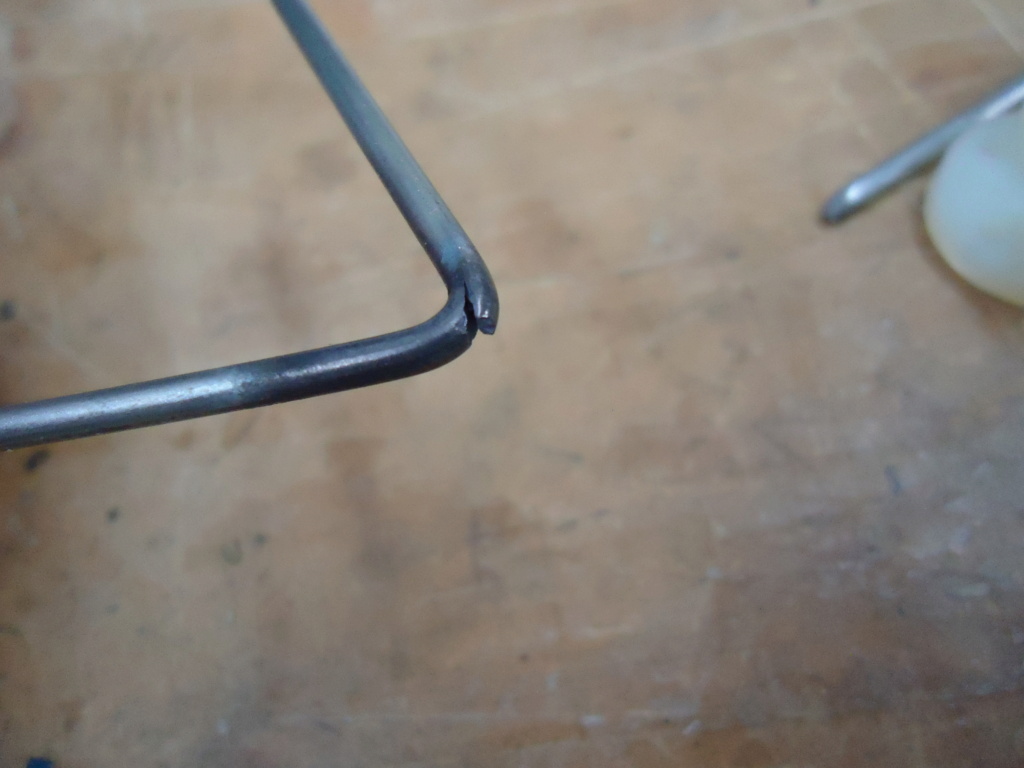
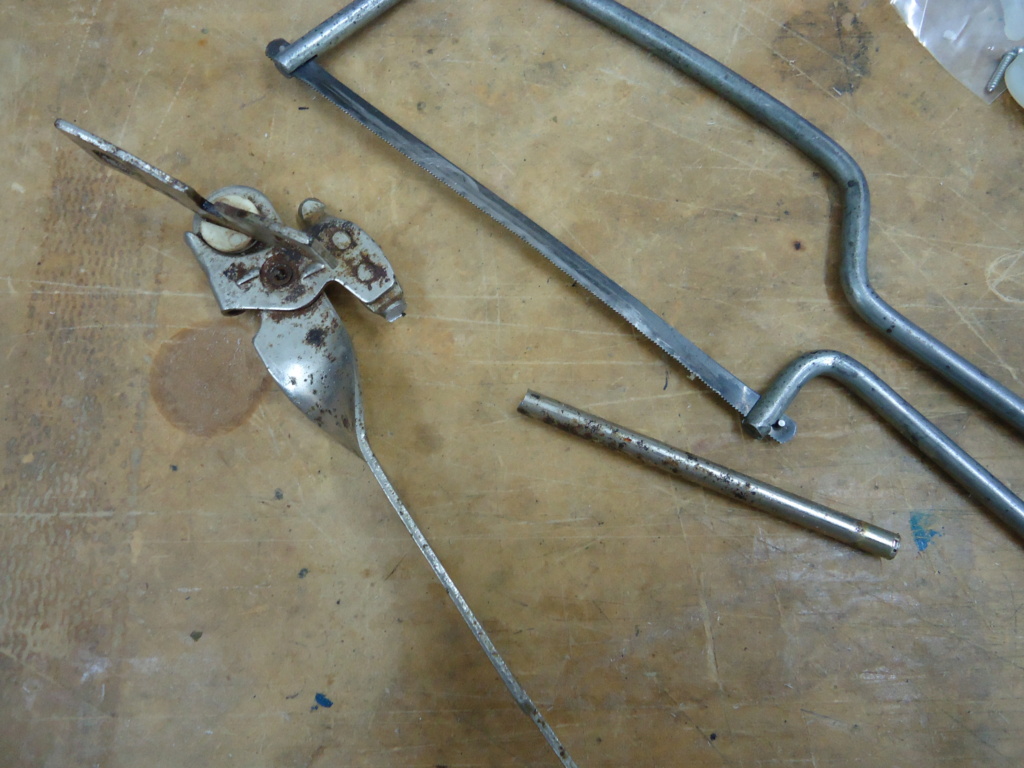
I took an old can opener and cut a piece of round iron.
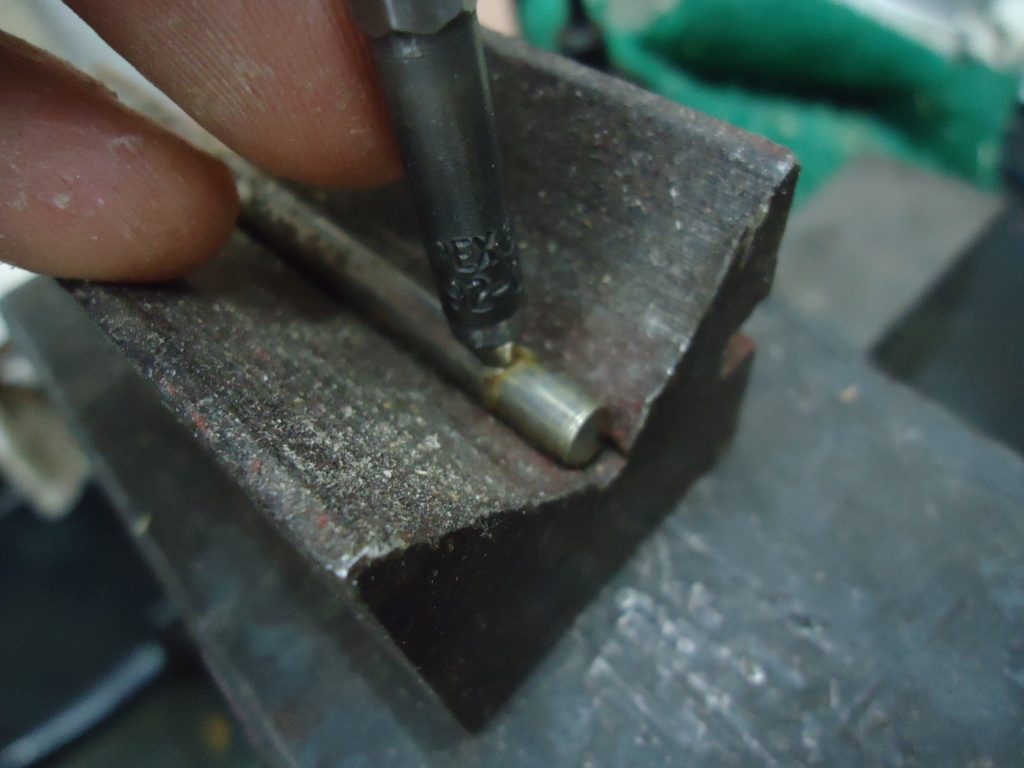
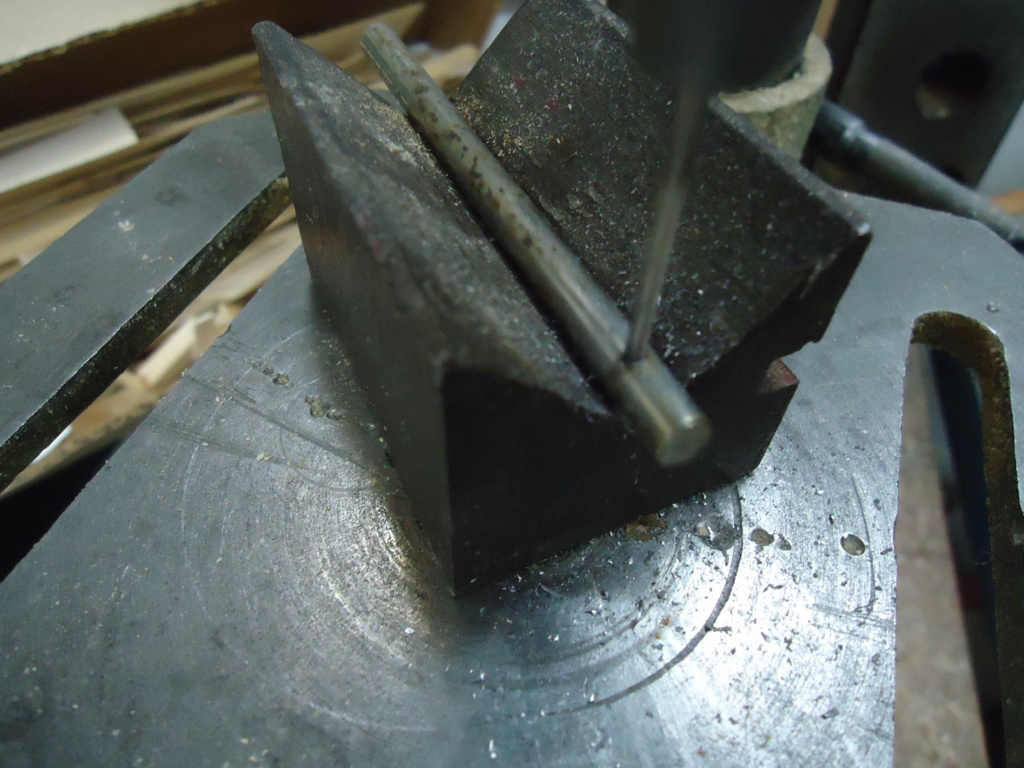
I drilled crosswise.
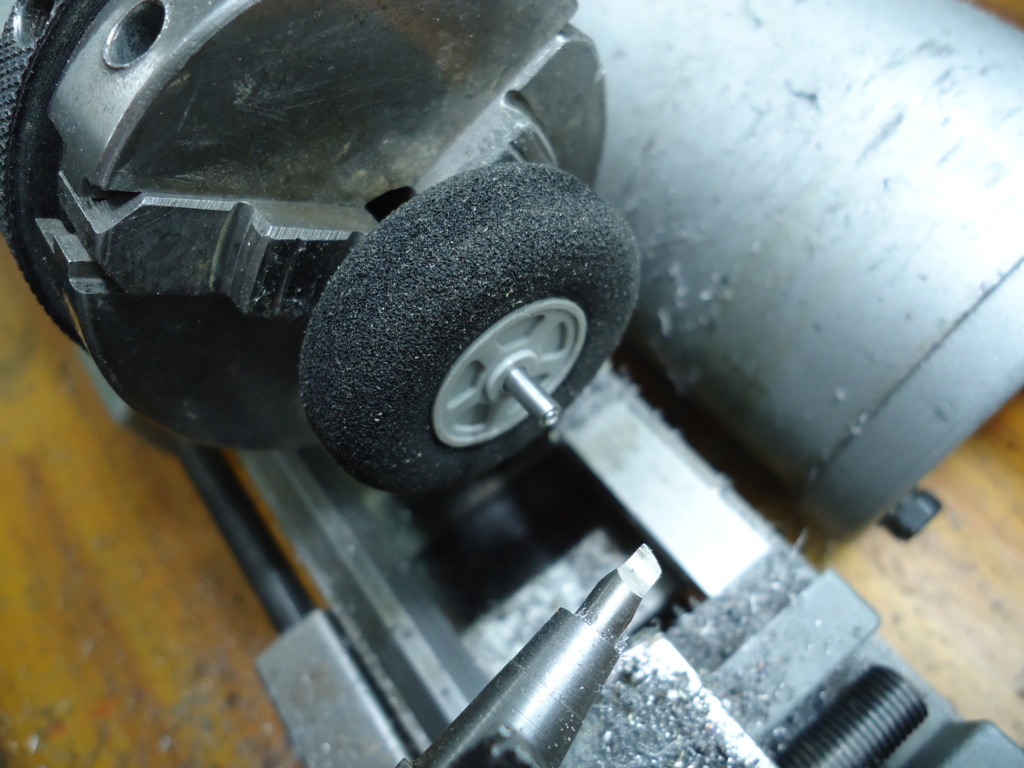
then I turned so I could lighten the wheel.
Solder with tin, leaving everything perfectly squared.
With a tap, I made a thread to place a nut.
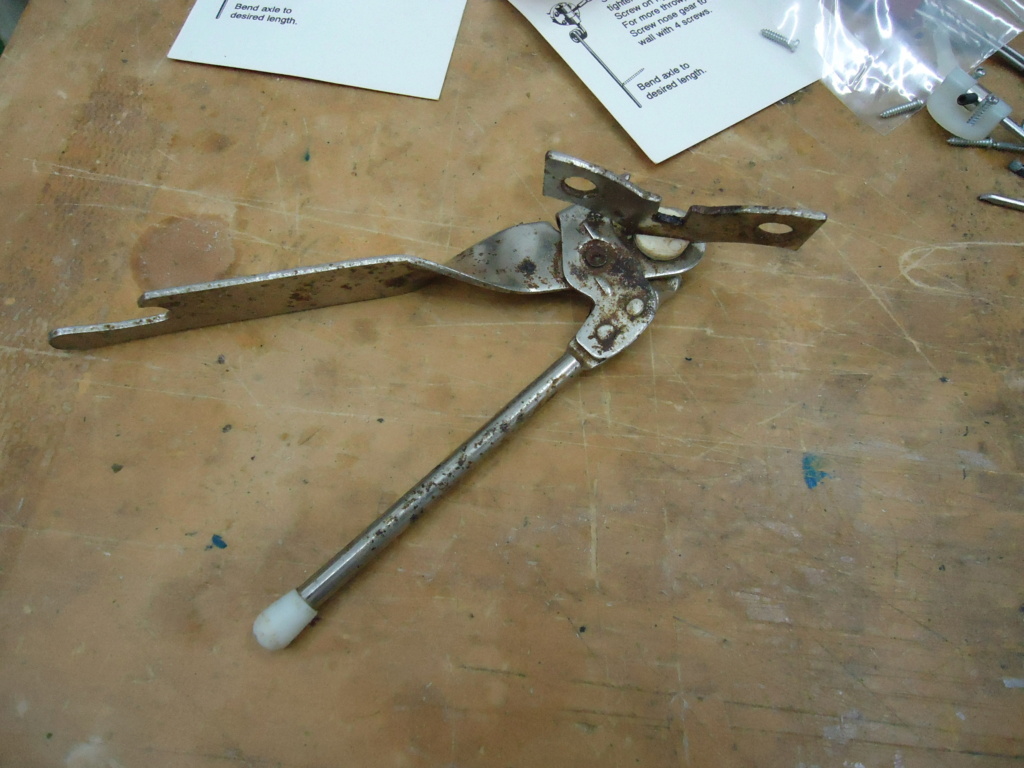

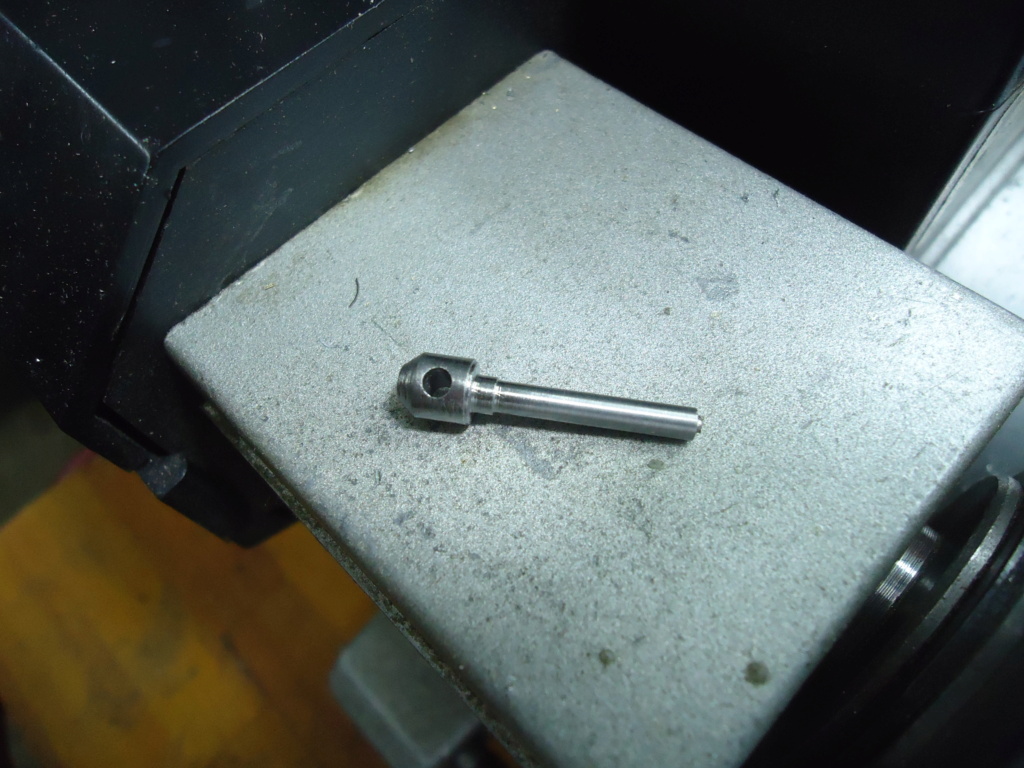
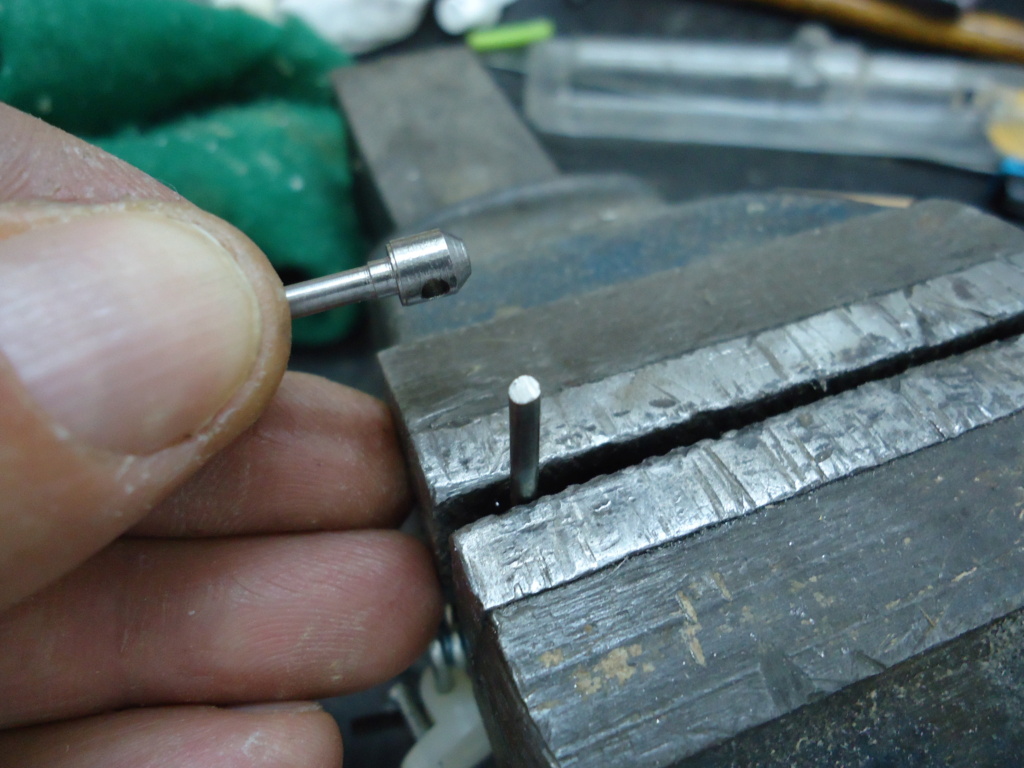
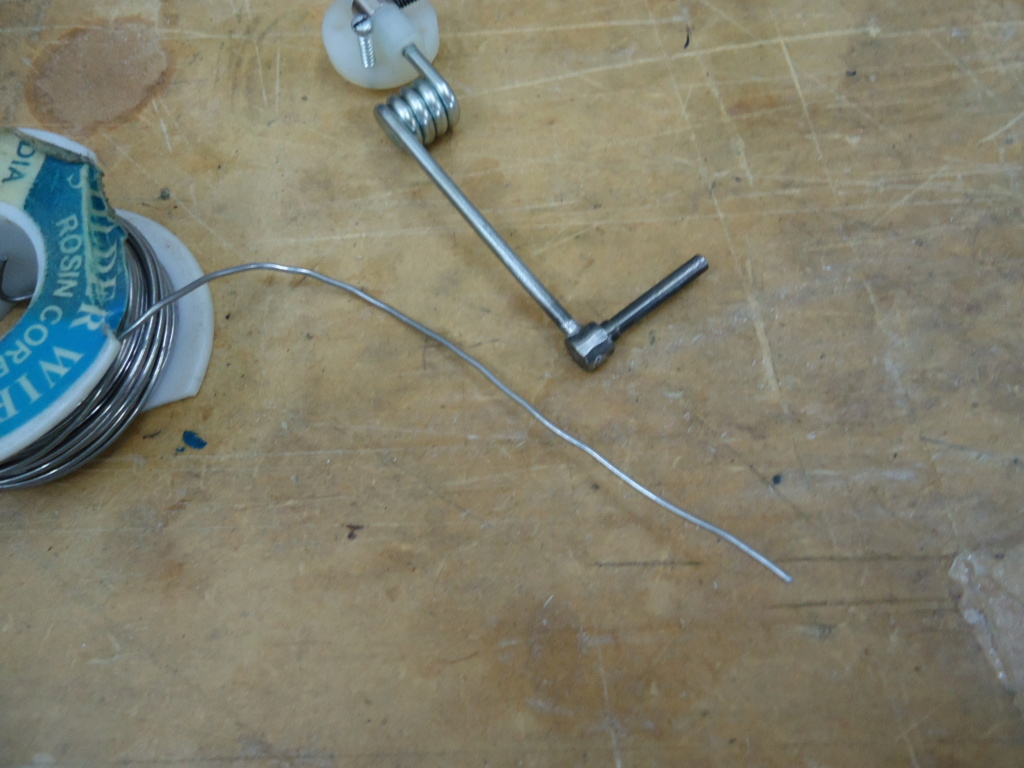
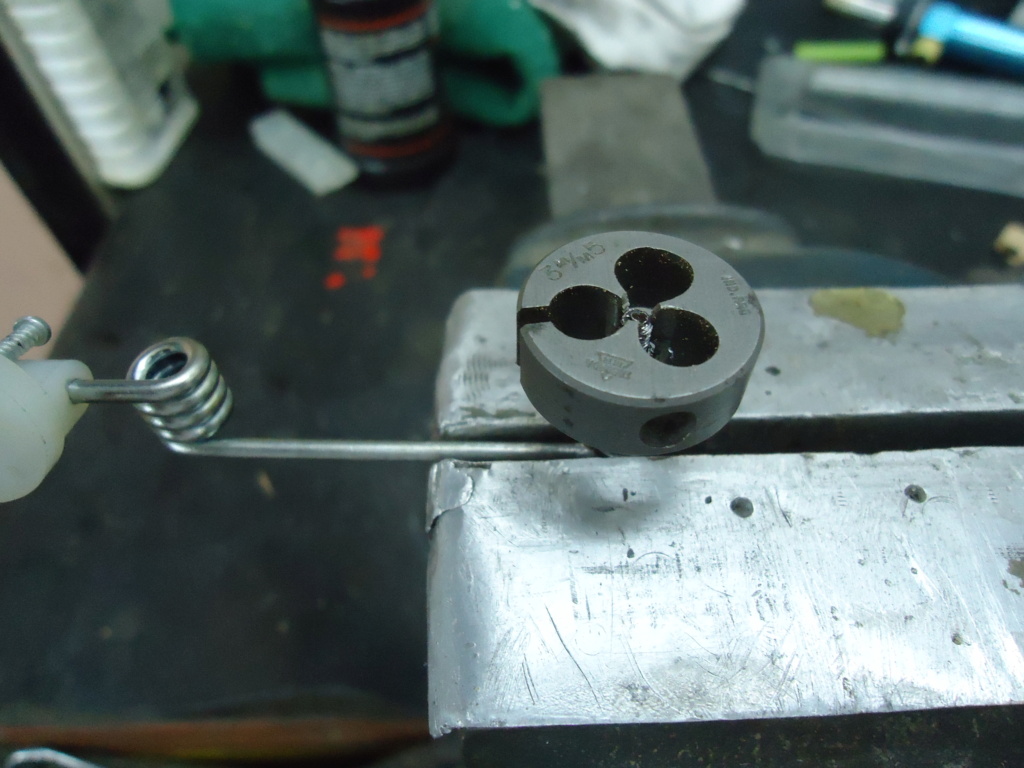
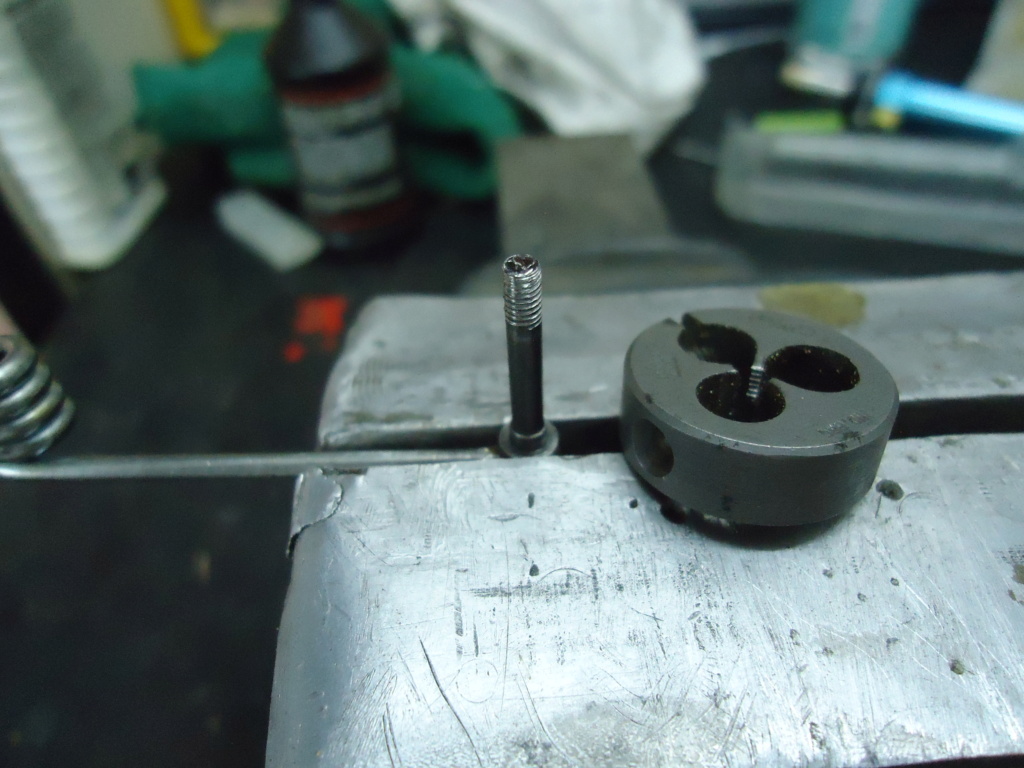
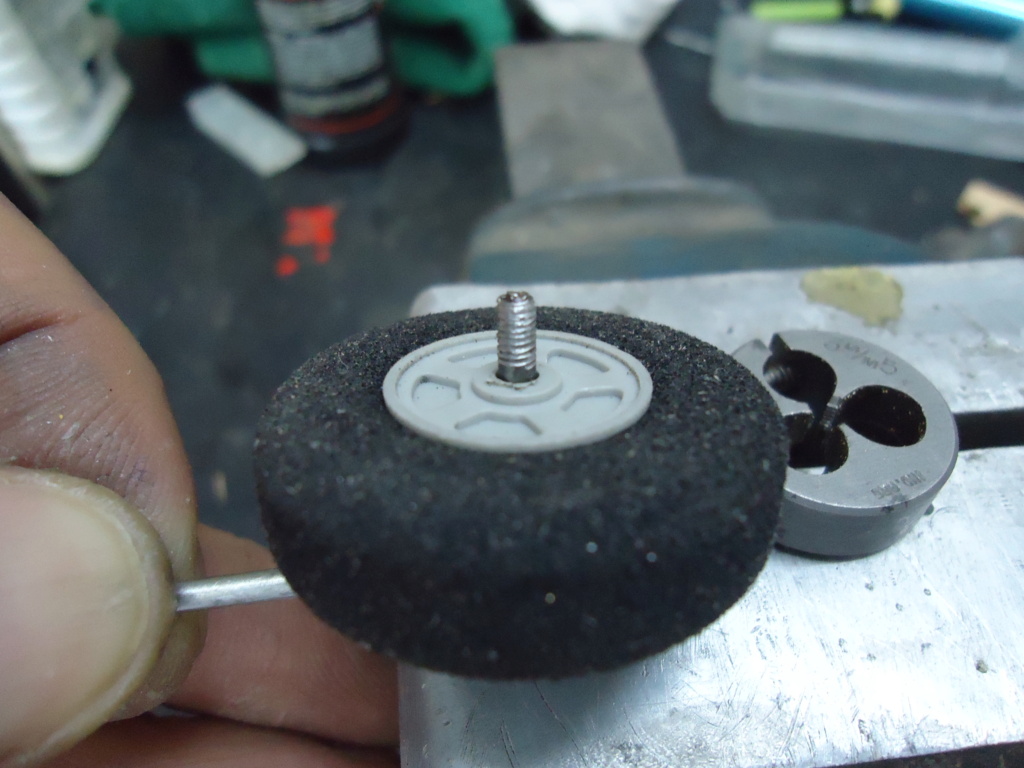
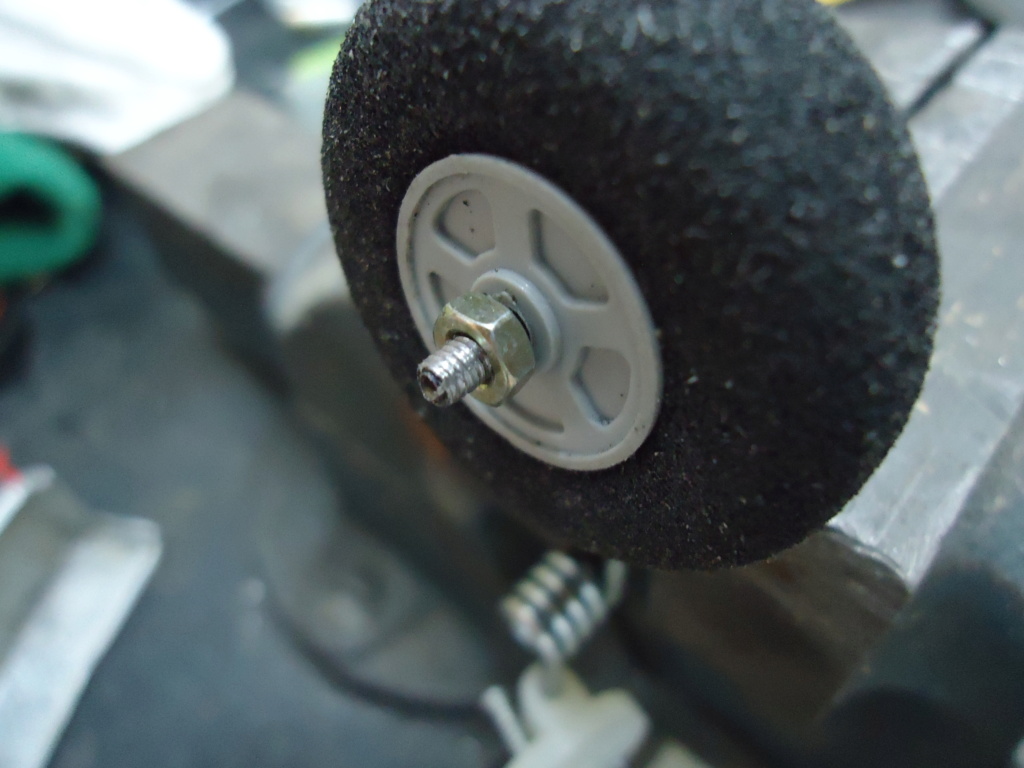
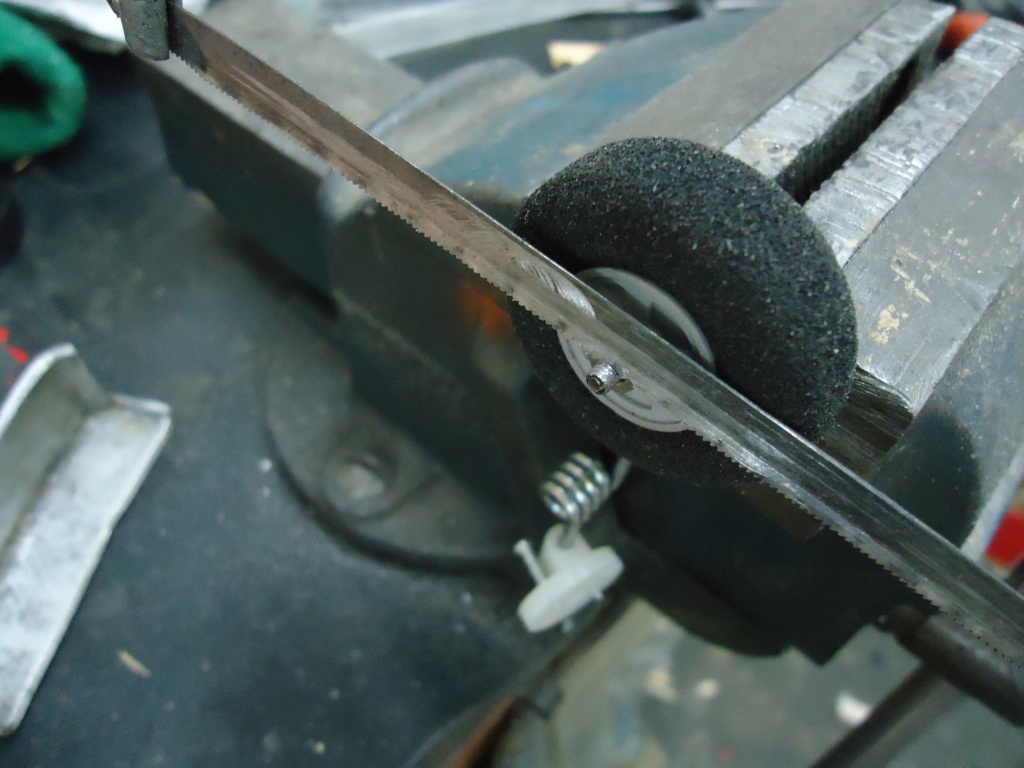
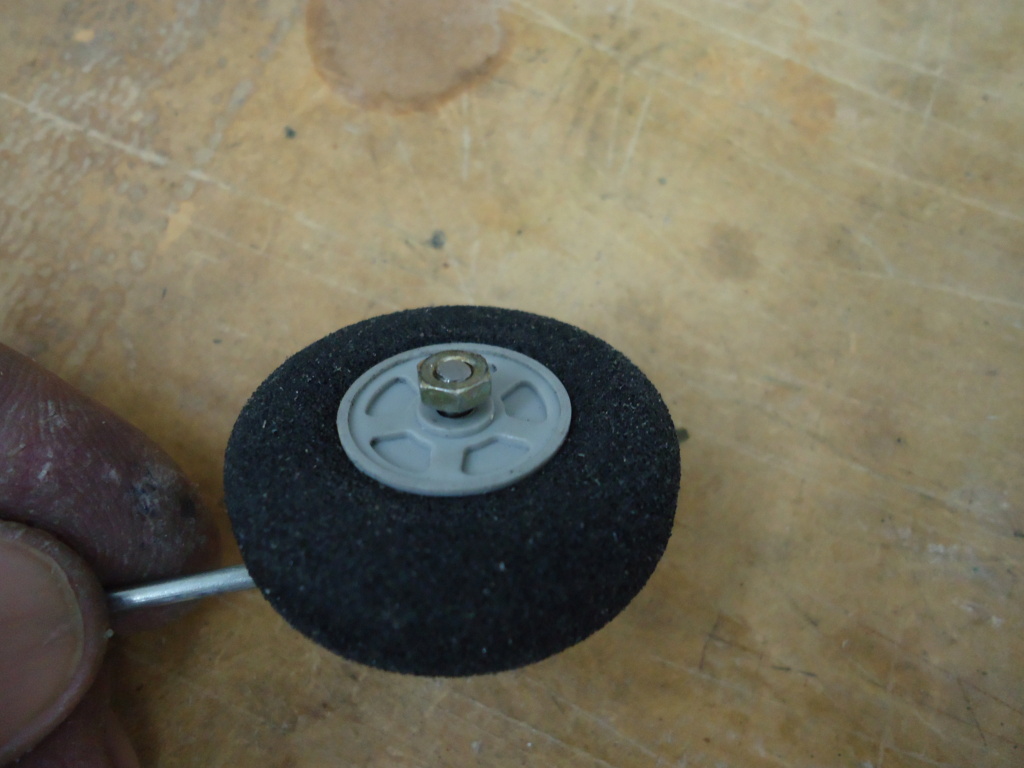
I finally got the nose train to fit the way I like it!...

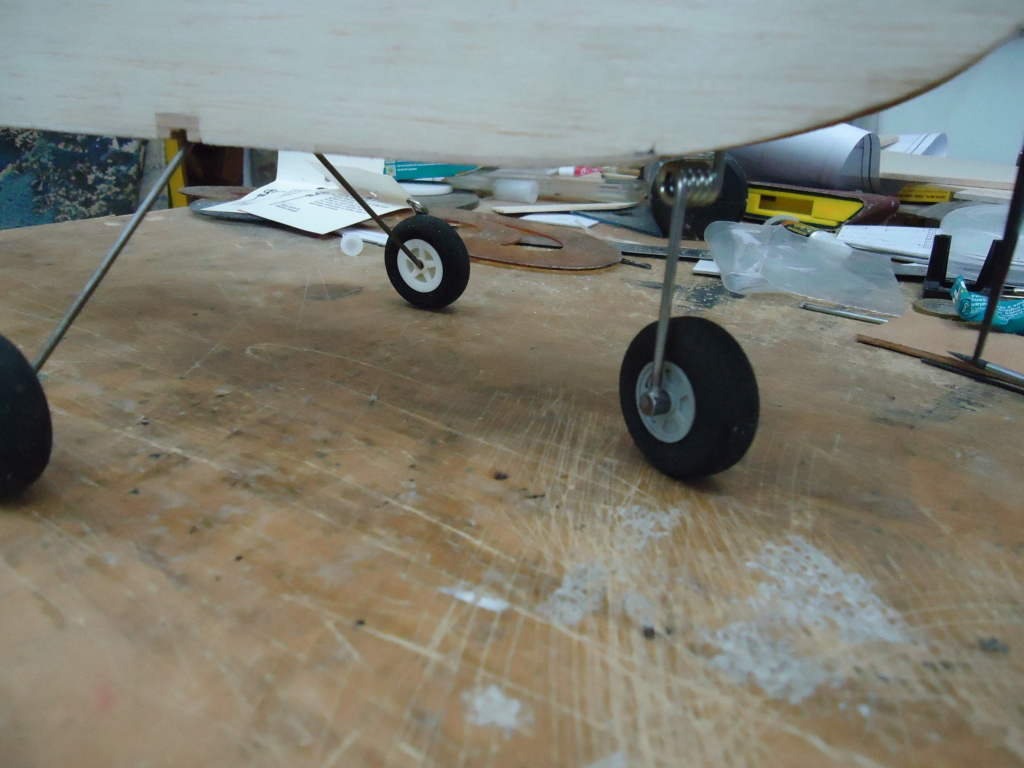
to be continue!.....
Here you can see the progress and assembly of the fuselage ...
I made different holes in the F1 to be able to accommodate any type of Cox engine, for example, Babe Bee, QRC, Golden Bee, Black Widow, Tee Dee, Medallion, etc.


the base for the main train ...


And here there is a problem, when the Du-Bro front end is bent, it breaks, so I took another and the same thing happened again, I wonder if I am doing something wrong ... well, I warmed it up on the second train. sector to bend and still broke, so I decided to make a definitive solution.


I took an old can opener and cut a piece of round iron.
I drilled crosswise.
then I turned so I could lighten the wheel.
Solder with tin, leaving everything perfectly squared.
With a tap, I made a thread to place a nut.


I finally got the nose train to fit the way I like it!...


to be continue!.....


MauricioB- Top Poster

- Posts : 3712
Join date : 2016-02-16
Age : 53
Location : ARG
 Re: New r / c model airplane project for Cox!
Very quick and accurate work Mauricio...will you fix the engines with wood screws, or, fpply blind nuts on the backside of the firewall?

balogh- Top Poster


Posts : 4958
Join date : 2011-11-06
Age : 66
Location : Budapest Hungary
 Re: New r / c model airplane project for Cox!
im curious as well, no question blind nuts are king, although sometimes # 2 allen(cap) head wood screws are just easier for me but seems even with loc-tite some still vibrate out if not checked on the regular.balogh wrote:Very quick and accurate work Mauricio...will you fix the engines with wood screws, or, fpply blind nuts on the backside of the firewall?

ChaseBanner- Gold Member

- Posts : 125
Join date : 2021-09-27
Location : Arkansas
 Re: New r / c model airplane project for Cox!
I also often build my firewalls to accommodate various COX engine options, and always use blind nuts for longevity. Plywood soaks in castor no matter how I seal it, and engine mounts with wood screws eventually surrender to castor...the firewall Mauricio built is thick though, so even wood screws may serve him well.

balogh- Top Poster


Posts : 4958
Join date : 2011-11-06
Age : 66
Location : Budapest Hungary
 Re: New r / c model airplane project for Cox!
Looking Good my Friend , It concerned me that the wire broke when bent So I looked it up and from DU-BRO this guy shows how to bent it without break, I think you were tring to get to much of the 90 degree angle as you can see >> There site https://www.dubro.com/products/steerable-nose-gear
Last edited by getback on Mon Dec 13, 2021 6:04 am; edited 1 time in total (Reason for editing : add on)

getback- Top Poster


Posts : 10442
Join date : 2013-01-18
Age : 67
Location : julian , NC
 Re: New r / c model airplane project for Cox!
what i have done for castor soaked screw holes that seems to work well is drive a toothpick coated in epoxy in the firewall, let dry and reinstall screw with loc-tite. you would be surprised how many times you can fix a castor stripped mounting hole. bbq skewers work well too for larger holesbalogh wrote:I also often build my firewalls to accommodate various COX engine options, and always use blind nuts for longevity. Plywood soaks in castor no matter how I seal it, and engine mounts with wood screws eventually surrender to castor...the firewall Mauricio built is thick though, so even wood screws may serve him well.

ChaseBanner- Gold Member

- Posts : 125
Join date : 2021-09-27
Location : Arkansas
 Re: New r / c model airplane project for Cox!
Thank you so much for the comments!.
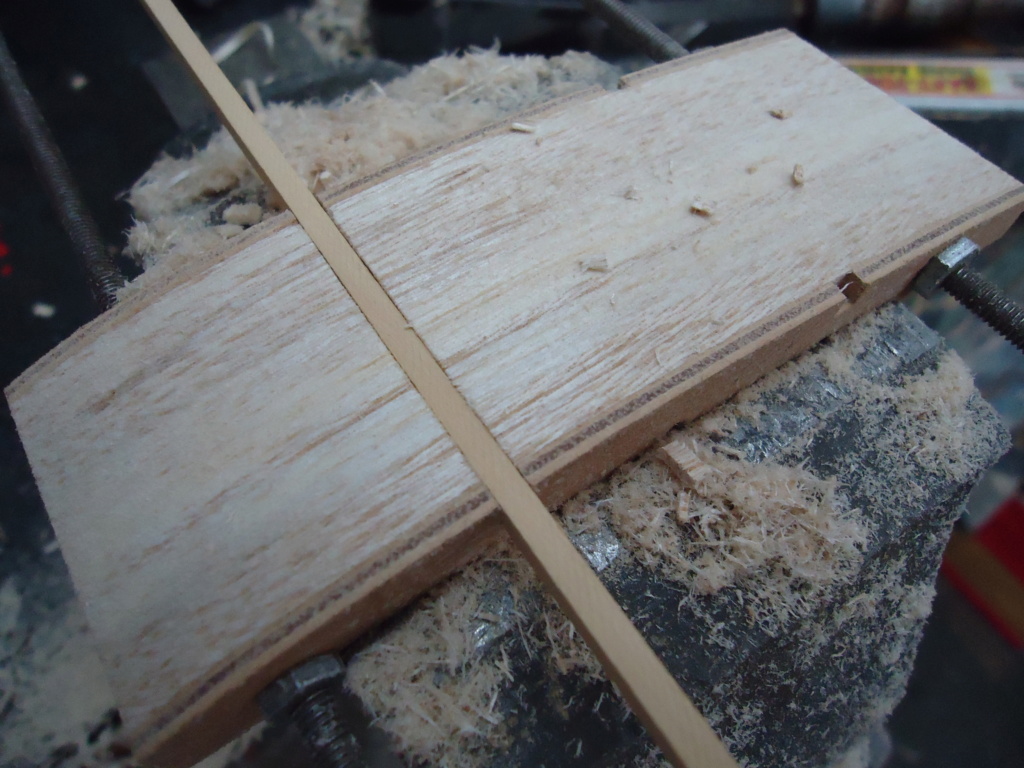
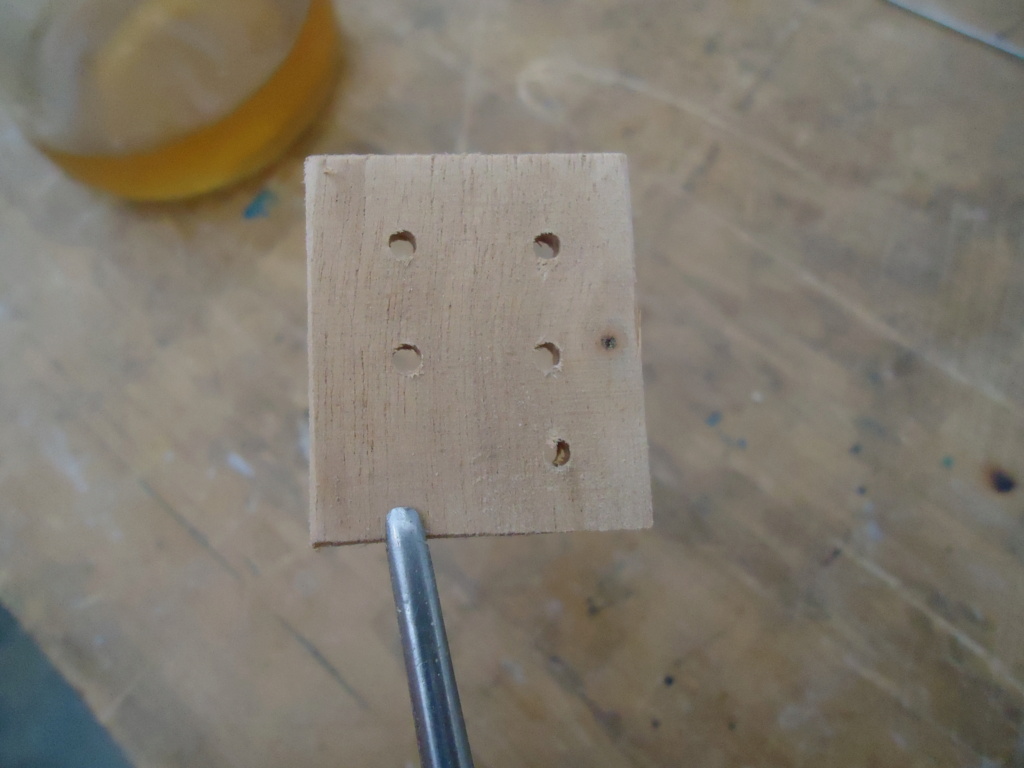
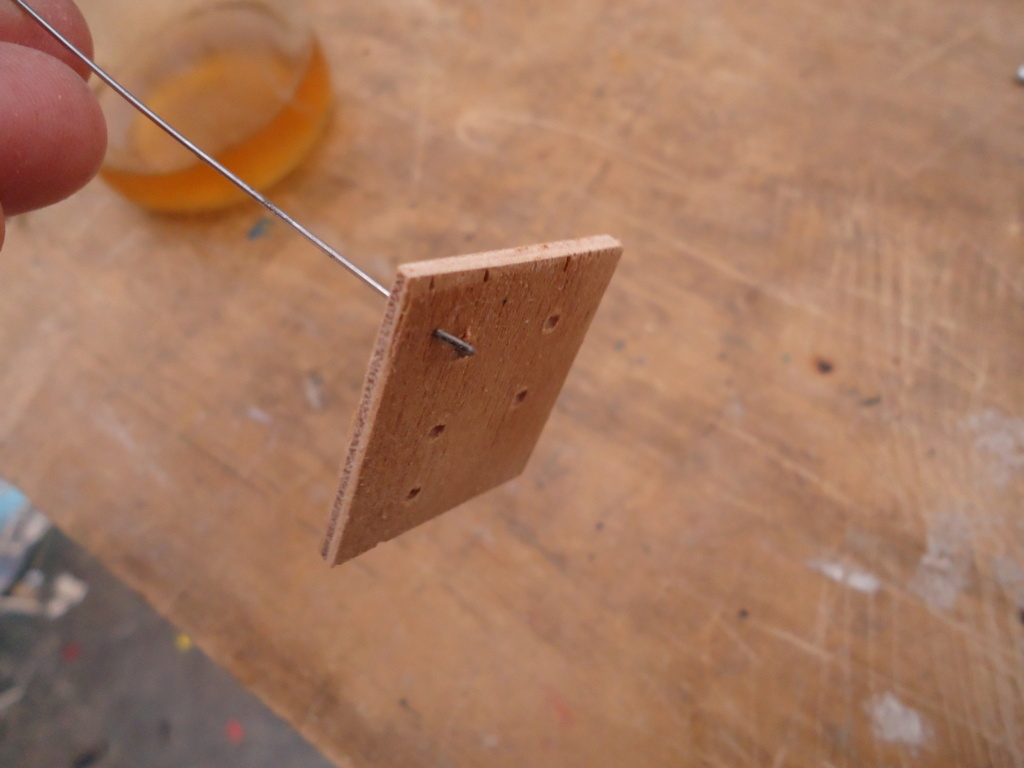
Here I transmit to you my own technique that I apply to the flame arrestor or F1 to avoid the absorption of fuel - oil and the subsequent deterioration of the perforations.
Let's suppose that the wood that I show here is an F1 with its perforations.
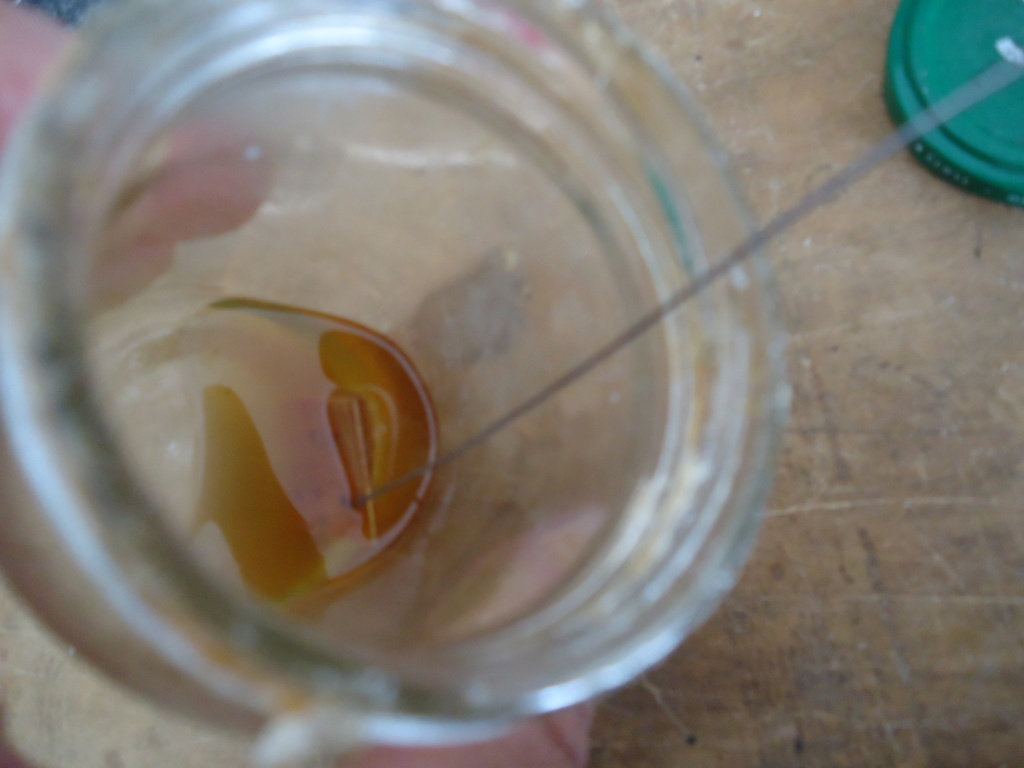
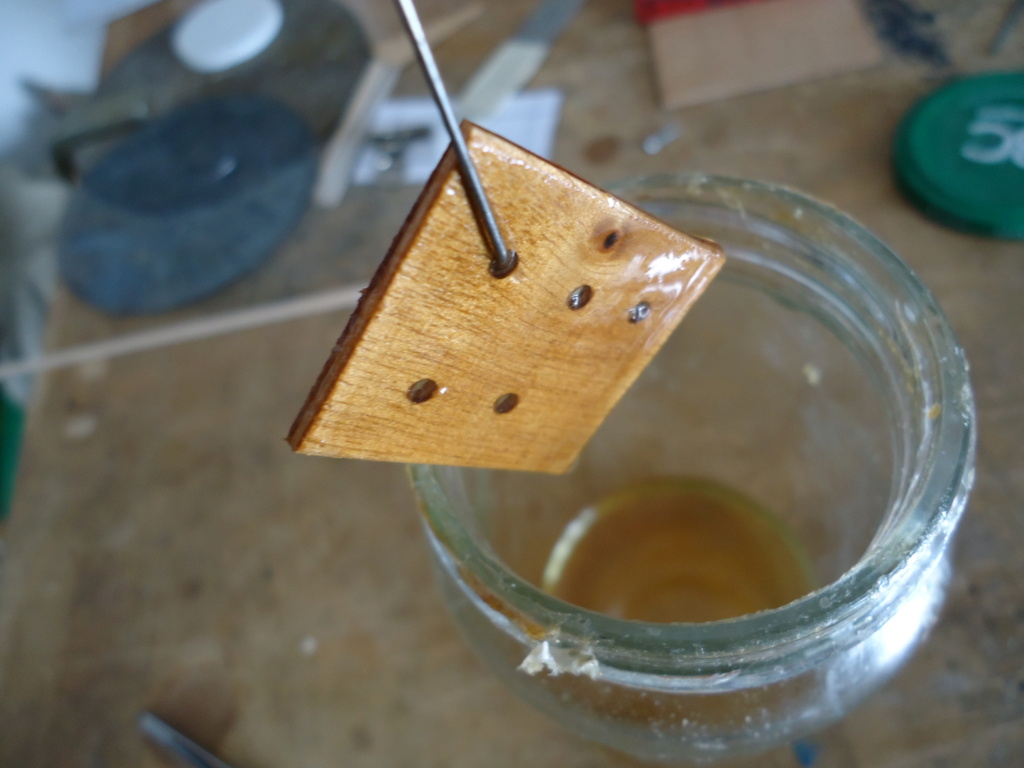
Take the F1 and attach a fine wire to hold it.
In a container with DOPE (50% DOPE 50% thinner), soak the F1 for 24 hours.
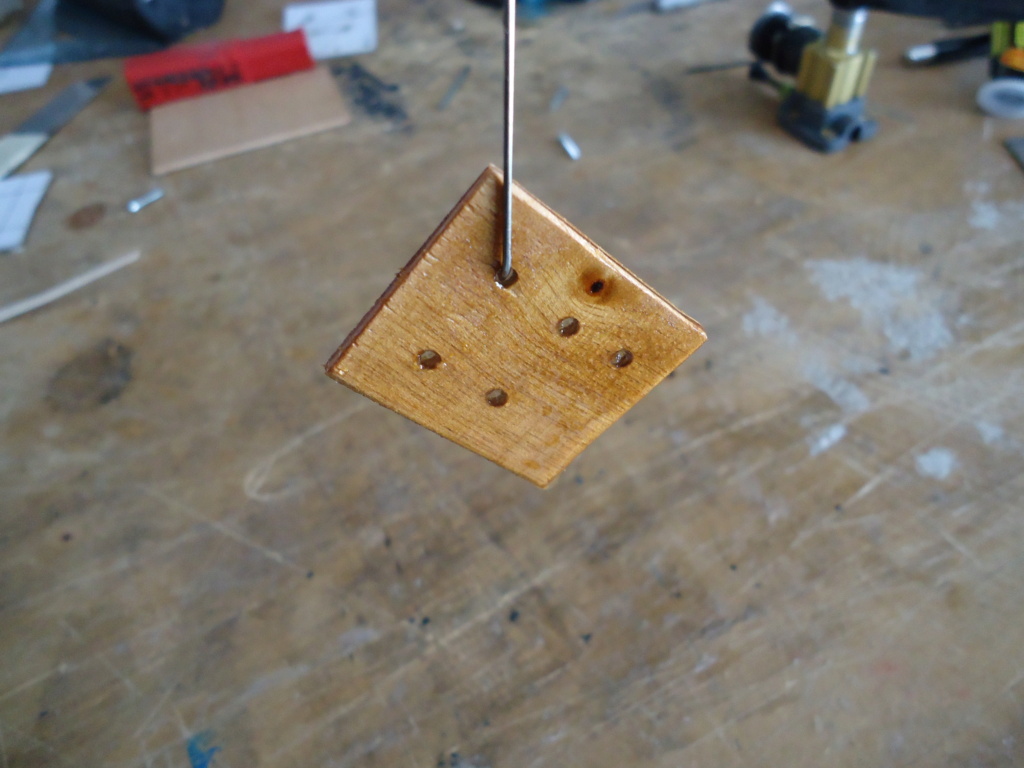
Remove the F1 from the container with DOPE and let it air until you notice that the whole piece is really dry.
Sand if necessary to remove excess material.
You can then use the F1 in your model, which will not absorb in a future oil, because its fibers already incorporated the DOPE and it does not have more absorption capacity.
The fixing holes will only be damaged with the repetitive use of removing and placing them, but by placing a few drops of cyanoacrylate, they are perfectly usable again.
Remember, once this procedure is done, the fibers of the wood of F1, NO LONGER have absorption capacity.


MauricioB- Top Poster

- Posts : 3712
Join date : 2016-02-16
Age : 53
Location : ARG
 Re: New r / c model airplane project for Cox!
Indeed good idea, Mauricio.
I guess the dry dope is removed/sanded at the edges of f1 before you glue it into the fuselage? CA glue and dope may not adhere so well as glue and naked wood?
I guess the dry dope is removed/sanded at the edges of f1 before you glue it into the fuselage? CA glue and dope may not adhere so well as glue and naked wood?

balogh- Top Poster


Posts : 4958
Join date : 2011-11-06
Age : 66
Location : Budapest Hungary
 Re: New r / c model airplane project for Cox!
balogh wrote:Indeed good idea, Mauricio.
I guess the dry dope is removed/sanded at the edges of f1 before you glue it into the fuselage? CA glue and dope may not adhere so well as glue and naked wood?
DOPE sticks perfectly with Cyanoacrylate, with epoxy resin, but not with carpenter's glue.
(What is the English translation of: glue white carpenter glue ??)
Sand the contacts, they are in order to remove (if necessary) the excesses that may remain after evacuating the submerged part of the DOPE, but certainly, you will observe that once the part is really dry, there are almost no excesses of DOPE.
Remember that it is important to dilute 50% DOPE and 50% Thinner, that is so that it absorbs all the fibers very well. If you use directly thick DOPE, it will not absorb inside the F1. That is an important detail.

MauricioB- Top Poster

- Posts : 3712
Join date : 2016-02-16
Age : 53
Location : ARG
 Re: New r / c model airplane project for Cox!
Very Good ! I have always painted mine with full strength dope but will do this from now on  Yes chase the old tooth picks work wonders for repairs to holes .. Mauricio I hope you took NO offence to the way you repair / formulated the steering gear , I was more wondering why it broke , all the ones i have ever used were already bent (for larger planes)
 Yes chase the old tooth picks work wonders for repairs to holes .. Mauricio I hope you took NO offence to the way you repair / formulated the steering gear , I was more wondering why it broke , all the ones i have ever used were already bent (for larger planes)

getback- Top Poster


Posts : 10442
Join date : 2013-01-18
Age : 67
Location : julian , NC
 Re: New r / c model airplane project for Cox!
getback wrote:Very Good ! I have always painted mine with full strength dope but will do this from now onYes chase the old tooth picks work wonders for repairs to holes .. Mauricio I hope you took NO offence to the way you repair / formulated the steering gear , I was more wondering why it broke , all the ones i have ever used were already bent (for larger planes)

Eric, dear friend! Well, how can I be offended? On the contrary, your contribution is great. I looked closely at the video and see that it leaves a steeper curve.
In my case I do this with two aluminum plates placed in the bench clamp and that aluminum makes the steel wire silk, preventing fatigue and breakage. but in this case, I did not succeed, that is, it seems to be an extremely hard steel wire, so for the next attempt I will do it with the technique of this man that is shown in the video of him, the one that you just shared .
Thank you friend! ... hug for you!


MauricioB- Top Poster

- Posts : 3712
Join date : 2016-02-16
Age : 53
Location : ARG
 Re: New r / c model airplane project for Cox!
I never say much just lurk n learn MauricioB......
Ford the watcher
BTW Carpenters glue translates the idea just fine....there are dozens of concoctions here in America we refer to as wood glue, carpenters, glue, TiteBond or another 30 different brand names most are water based and it is true they are a poor glue for non porous surfaces like epoxy or dope impregnated wood
I prefer to pre treat my engine bearers and fire walls, or tank compartments with very thin Butyrate dope (the fuel proof stuff) and later heavy Dope way less thinner or a good coat of 30 min or longer epoxies

fredvon4- Top Poster


Posts : 4012
Join date : 2011-08-26
Age : 69
Location : Lampasas Texas
 Re: New r / c model airplane project for Cox!
ive always just used a 50/50 mix of rubbing alcohol and 30 min epoxy for fuel proofing but MauricioB made a great point bout letting it penetrate the fibers of the wood. guess u can get away with that if ur running a muff directing the spent oil. forgot how much slime the 049's leave behind... love that 2 stroke buzz

ChaseBanner- Gold Member

- Posts : 125
Join date : 2021-09-27
Location : Arkansas

MauricioB- Top Poster

- Posts : 3712
Join date : 2016-02-16
Age : 53
Location : ARG

MauricioB- Top Poster

- Posts : 3712
Join date : 2016-02-16
Age : 53
Location : ARG

Levent Suberk- Diamond Member

- Posts : 2265
Join date : 2017-12-24
Location : Türkiye
 Re: New r / c model airplane project for Cox!
Thanks friend Levent!

MauricioB- Top Poster

- Posts : 3712
Join date : 2016-02-16
Age : 53
Location : ARG

MauricioB- Top Poster

- Posts : 3712
Join date : 2016-02-16
Age : 53
Location : ARG
 Re: New r / c model airplane project for Cox!
Mauricio. Very nice job and details as always.
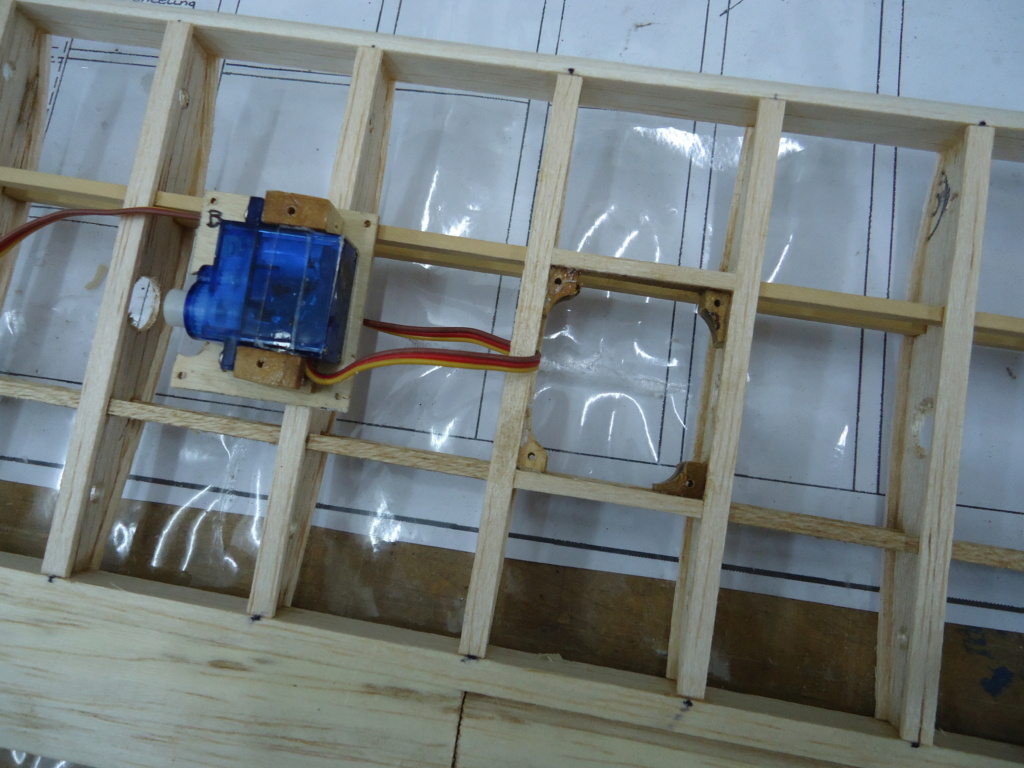
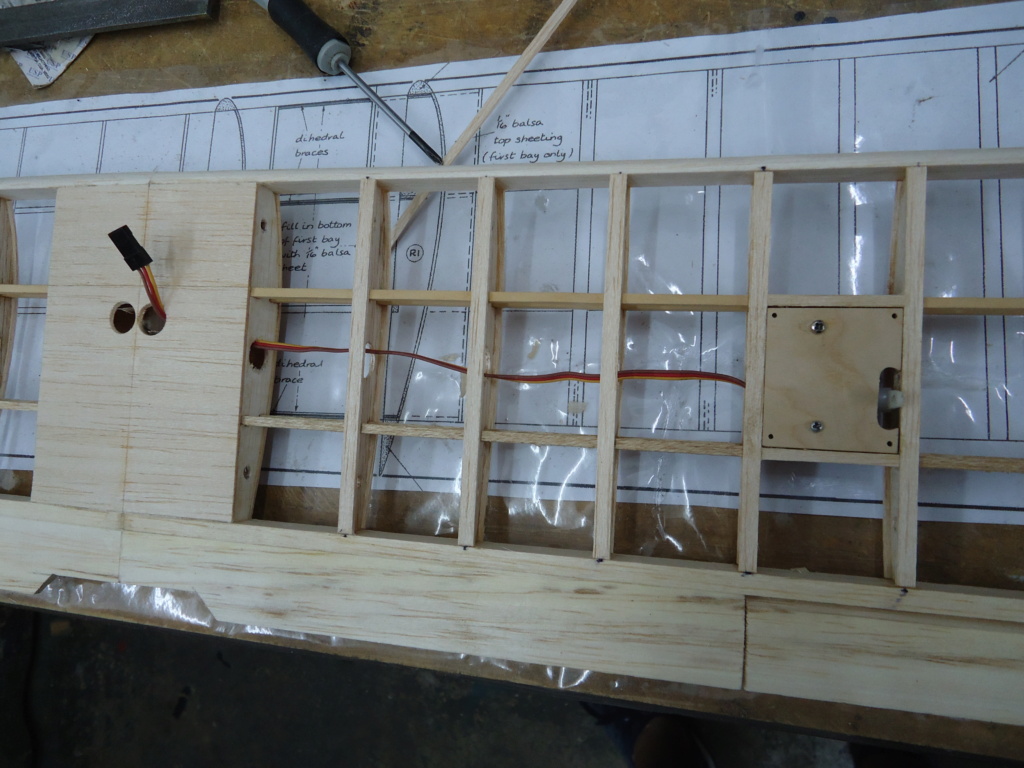
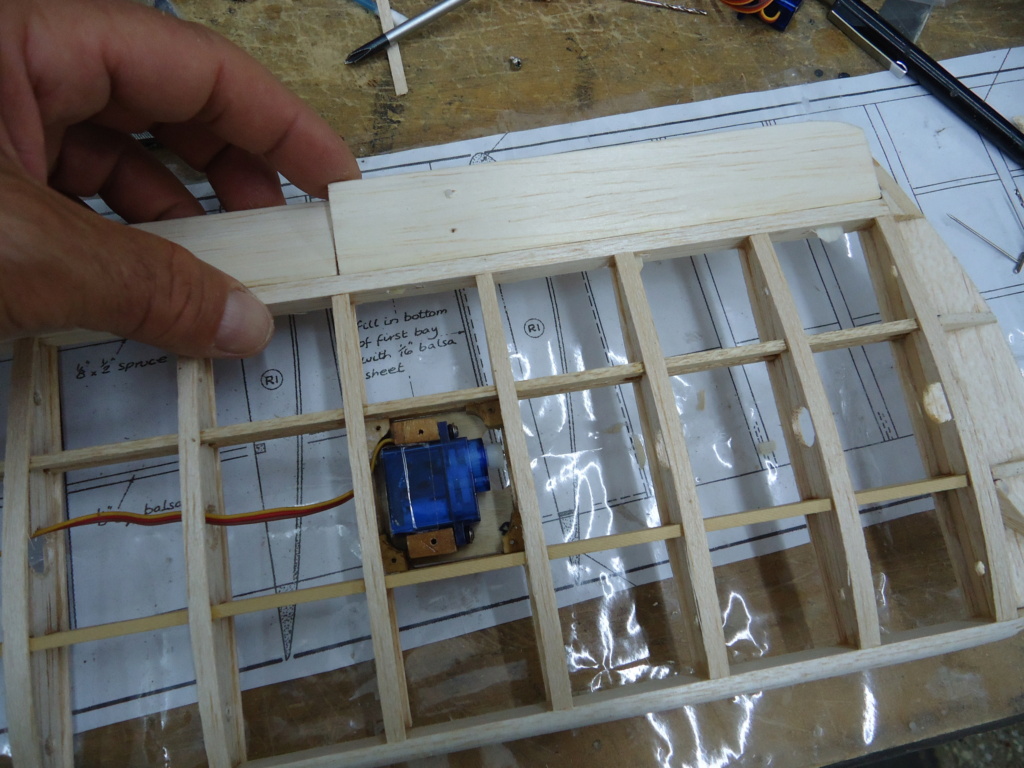
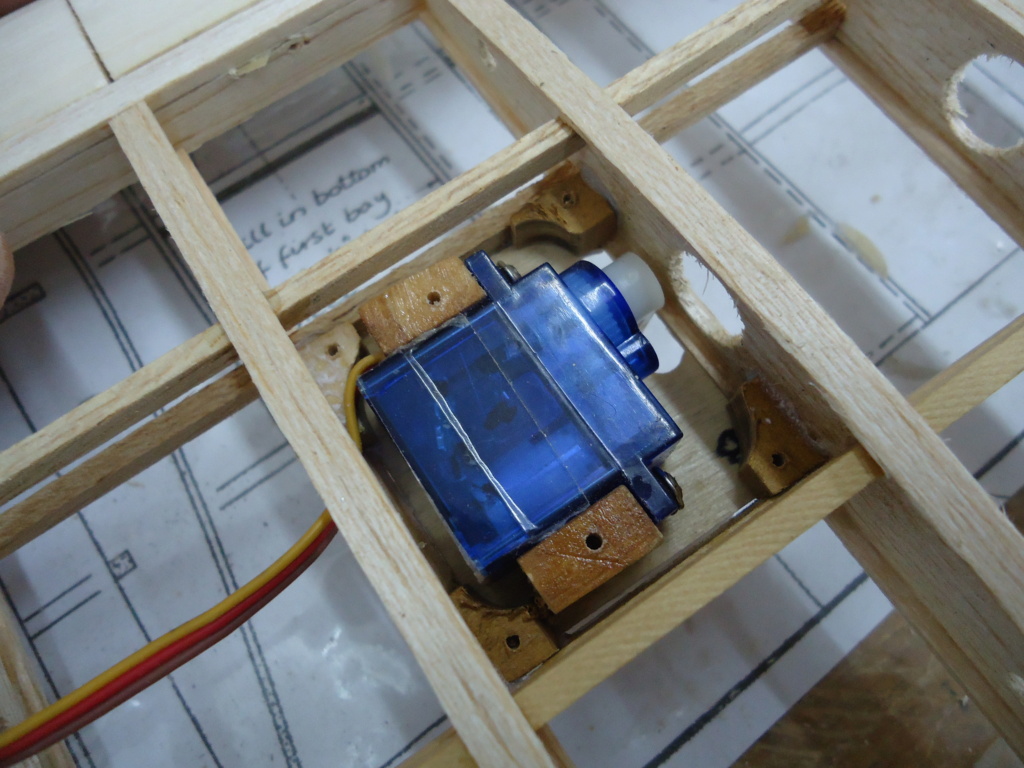
I noted you had adjusted the wing dihedral because of the use of ailerons...how many degrees of dihedral have you finally left?
Thanks for your advice in advance.
I noted you had adjusted the wing dihedral because of the use of ailerons...how many degrees of dihedral have you finally left?
Thanks for your advice in advance.

balogh- Top Poster


Posts : 4958
Join date : 2011-11-06
Age : 66
Location : Budapest Hungary

MauricioB- Top Poster

- Posts : 3712
Join date : 2016-02-16
Age : 53
Location : ARG
 Re: New r / c model airplane project for Cox!
Thanks Mauricio, clear enough.

balogh- Top Poster


Posts : 4958
Join date : 2011-11-06
Age : 66
Location : Budapest Hungary
 Re: New r / c model airplane project for Cox!
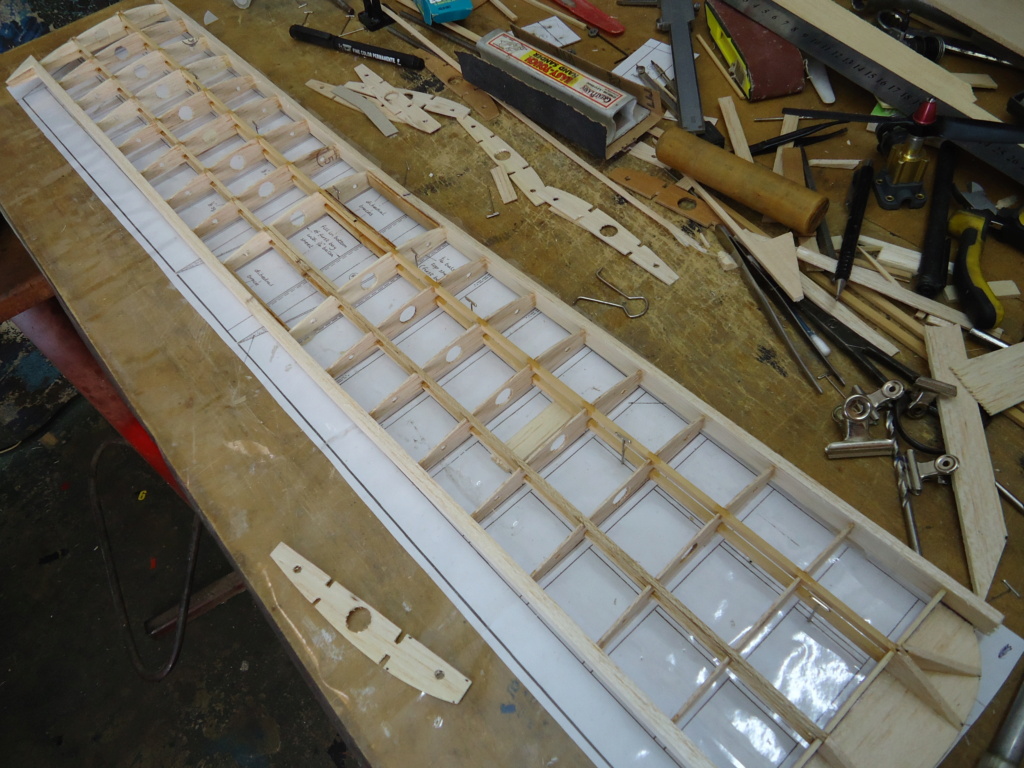
That is one strong looking wing even cap strips , Looking Good Mauricio Big hug to you friend! 


getback- Top Poster


Posts : 10442
Join date : 2013-01-18
Age : 67
Location : julian , NC
 Re: New r / c model airplane project for Cox!
Thanks friend Eric , I want to wish you a beautiful year, I want to meet you and give you a big hug, maybe the SCAMP can be blown up in your backyard ... !!, hahaha 


MauricioB- Top Poster

- Posts : 3712
Join date : 2016-02-16
Age : 53
Location : ARG

MauricioB- Top Poster

- Posts : 3712
Join date : 2016-02-16
Age : 53
Location : ARG
Page 1 of 4 • 1, 2, 3, 4 
Page 1 of 4
Permissions in this forum:
You cannot reply to topics in this forum

 Rules
Rules


