Log in
Search
Latest topics
» My N-1R build logby roddie Today at 12:32 am
» Happy 77th birthday Andrew!
by akjgardner Today at 12:27 am
» TEE DEE Having issues
by TD ABUSER Yesterday at 9:43 pm
» Landing-gear tips
by roddie Yesterday at 6:17 pm
» Roger Harris revisited
by TD ABUSER Yesterday at 2:13 pm
» Tee Dee .020 combat model
by Ken Cook Yesterday at 1:41 pm
» Retail price mark-up.. how much is enough?
by Ken Cook Yesterday at 1:37 pm
» My latest doodle...
by roddie Yesterday at 10:43 am
» Chocolate chip cookie dough.........
by roddie Fri Nov 22, 2024 1:13 pm
» Purchased the last of any bult engines from Ken Enya
by sosam117 Fri Nov 22, 2024 11:32 am
» Free Flight Radio Assist
by rdw777 Fri Nov 22, 2024 9:24 am
» Funny what you find when you go looking
by rsv1cox Wed Nov 20, 2024 3:21 pm
Cox Engine of The Month
It’s the Pitts….
Page 1 of 3
Page 1 of 3 • 1, 2, 3 
 It’s the Pitts….
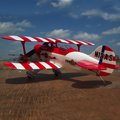
When your favorite Cox airplane sells for collector prices and is a known poor performer anyway. So, what to do? Put in a fresh X-acto blade and start making chips! I’ve posted pictures of finished airplanes in the past, but if you will bear with me, this time I’ll try to show the whole process.
I had the Cox Art Scholl Pitts as a kid, and loved its looks, but had few successful flights. At this point, I think I can reprise the little airplane at a lower weight, and hopefully with better results.
A review of the pictures available online quickly showed that the Cox model is terribly far off scale, more than a dyed-in-the-wool Pitts fanatic can tolerate. Besides, it most nearly resembles an S-1, and we all know that Art’s airplane was an S-2.
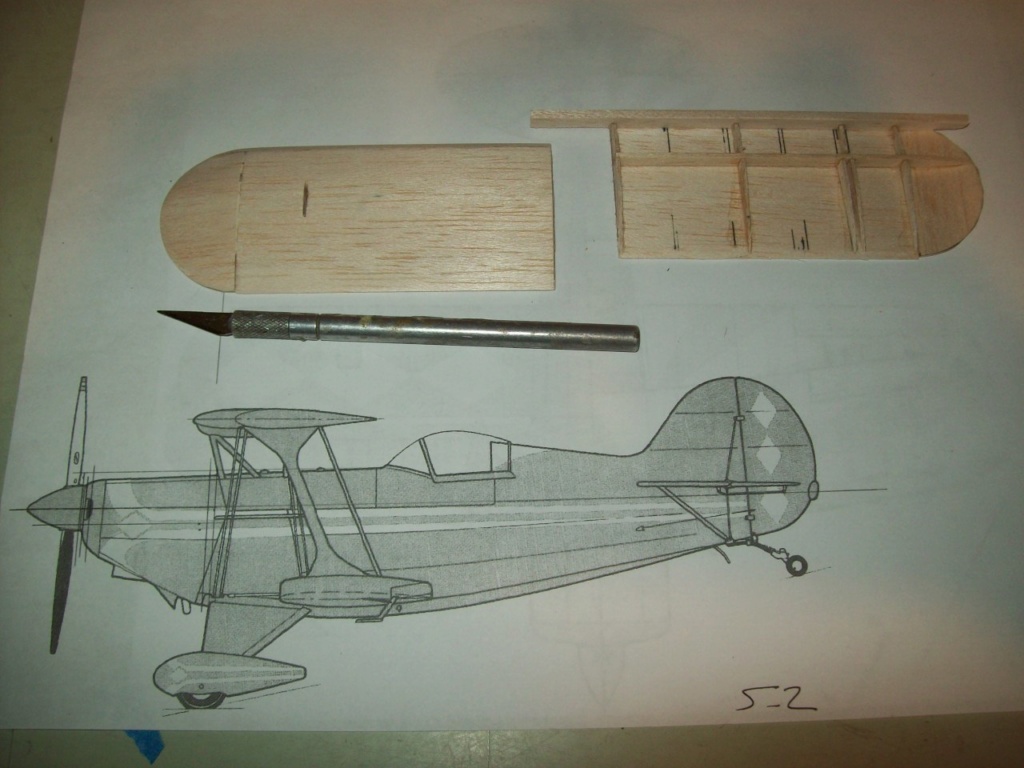
So, I started with a factory 3-view of the full-size S-2 from a Christen Industries catalog, and enlarged it to a 10” span on a photocopier. Placing an .020 PeeWee on the drawing, it was obvious a few changes were necessary. The needle valve was under the top wing LE, where it would be impossible to reach, and the top engine mounting screws were above the top of the cowl.
So, drawing commenced, and in the end I made 3 changes from scale. Moved the engine forward ¼” and down 3/16”, Increased the wing chord by ¼”, and increased the horizontal tail area by 20%. Then, I just filled in the structure over the outline. It’s not often you can draw a full size wing plan on an 8-1/2 x 11 sheet of paper.
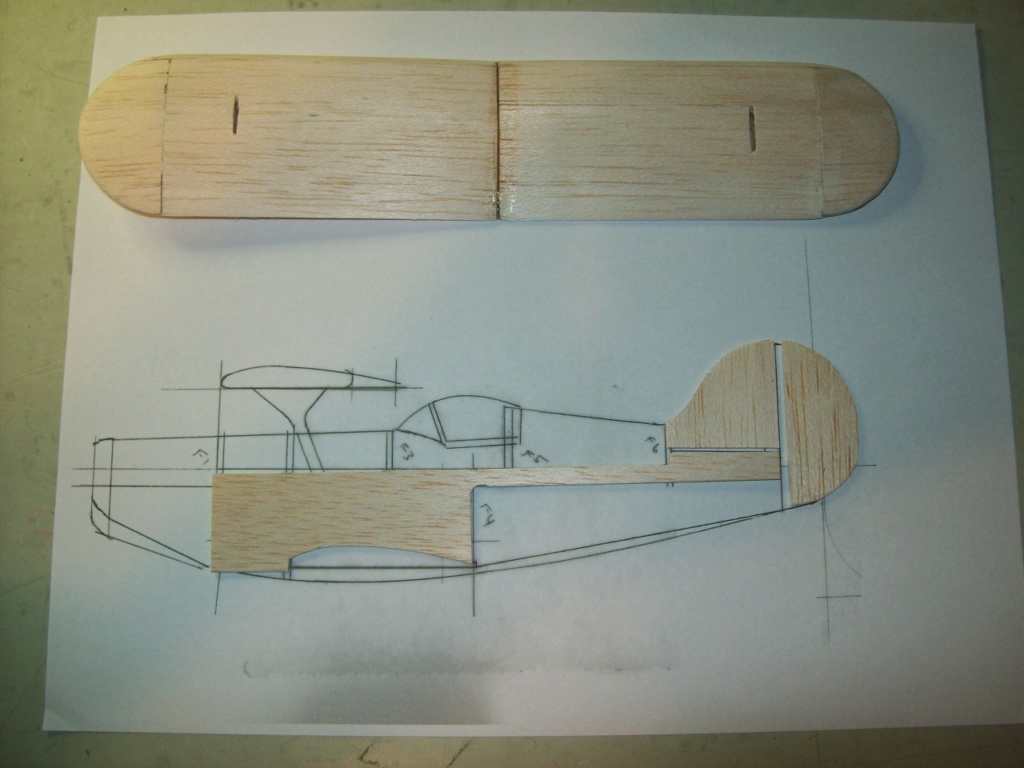
I started cutting and gluing, and soon had this.
[


duaneh- Gold Member

- Posts : 226
Join date : 2019-04-06
 Re: It’s the Pitts….
Excellent! I have seen this done with a Cox Spitfire. Let me find that build thread for inspiration. Good on you!
Here it is:
https://stunthanger.com/smf/12-a-building/cox-spitfire-replica-build-flight-video/msg411939/#msg411939
Here it is:
https://stunthanger.com/smf/12-a-building/cox-spitfire-replica-build-flight-video/msg411939/#msg411939

Cribbs74- Moderator


Posts : 11907
Join date : 2011-10-24
Age : 50
Location : Tuttle, OK
 Re: It’s the Pitts….
Thats Cool, Can't wait to see it finished

akjgardner- Diamond Member


Posts : 1602
Join date : 2014-12-28
Age : 65
Location : Greensberg Indiana
 Re: It’s the Pitts….
The Pitts Special is one of my all time favorites, Art Scholl's is one of the very best. I've wanted to do what you're doing for a long time, but never got around to it. Drawing your own plans makes it a true scratch build too. Hat's off, greenie on! I'll be watching closely. Thanks for taking the time!


Dave P.- Gold Member

- Posts : 477
Join date : 2017-07-31
Age : 67
Location : Durham, NC
 Re: It’s the Pitts….
Thanks for taking an interest, guys! Just got a little more progress to report.
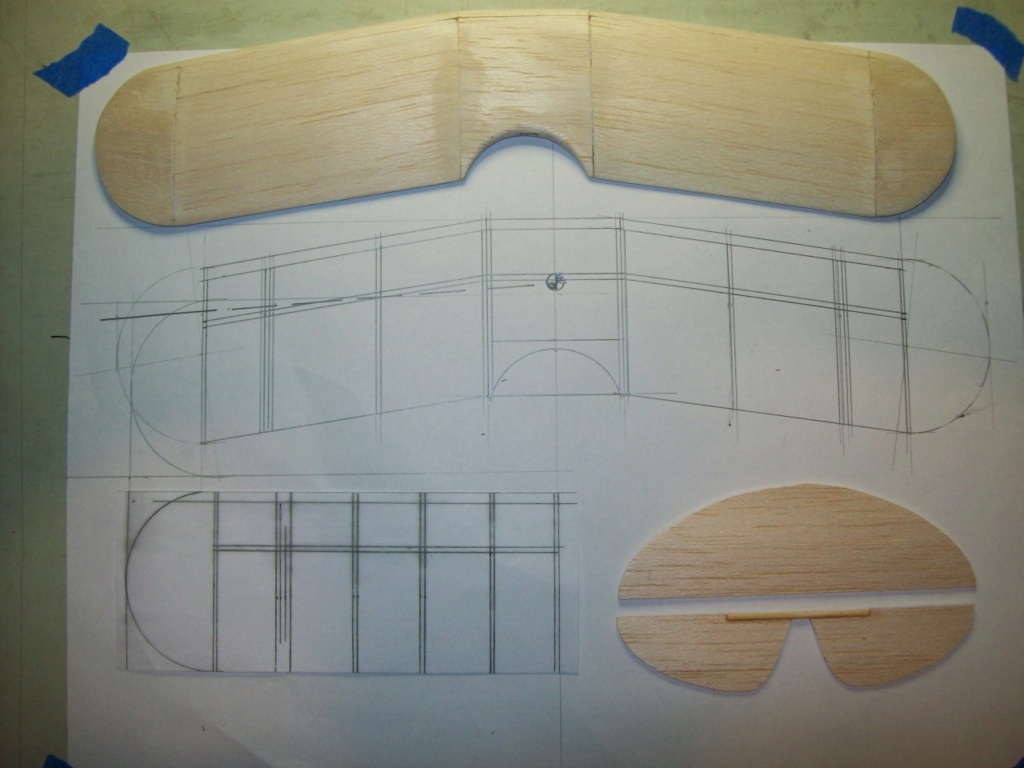
Both wings are finished. At first I thought I would use open rib bays for best realism, but soon realized the parts would just be too small for me to work with. So, I used 1/32 balsa top & bottom sheets with a minimum of internal structure. Tailfeathers are 1/16 balsa. To give a sense of scale, the elevator joiner shown is a toothpick. Not even the whole toothpick, just a section cut from it.
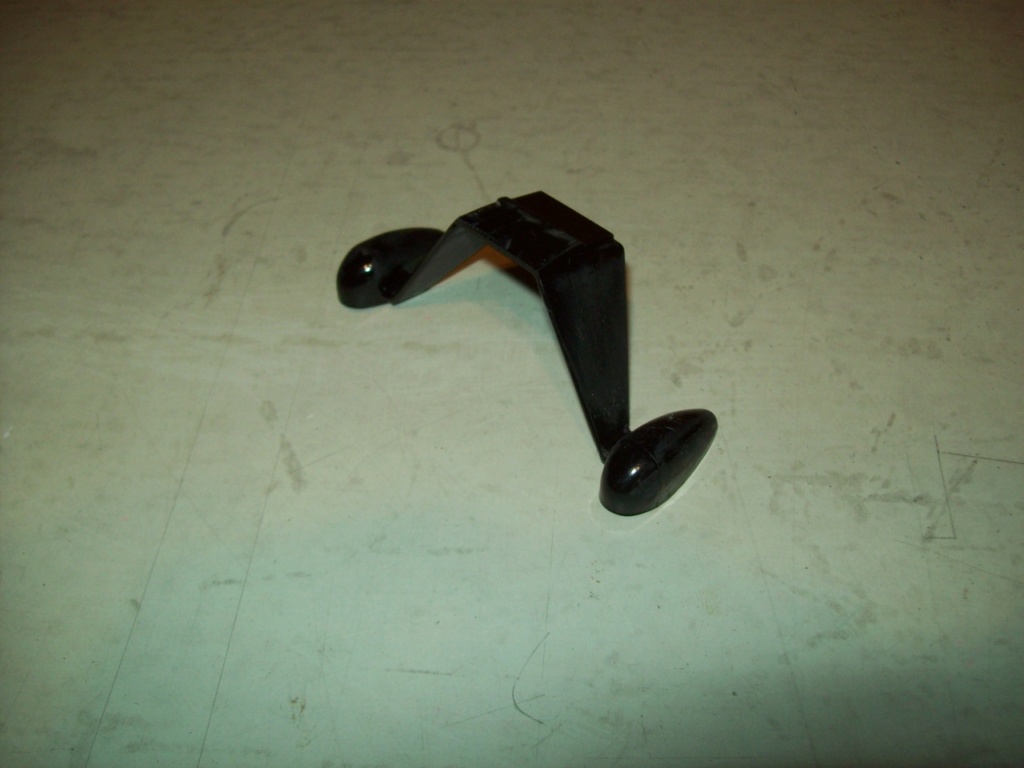
I really did not want to try to make the gear & wheel pants (See above comment on small parts). Fortunately, Bernie sells the Cox Pitts landing gear. Molded of black plastic, I think these are overruns from the 50th Anniversary edition. The pants are not the right shape, but considering the work saved, I can live with it. I didn’t need the molded in firewall, and just cut it off.
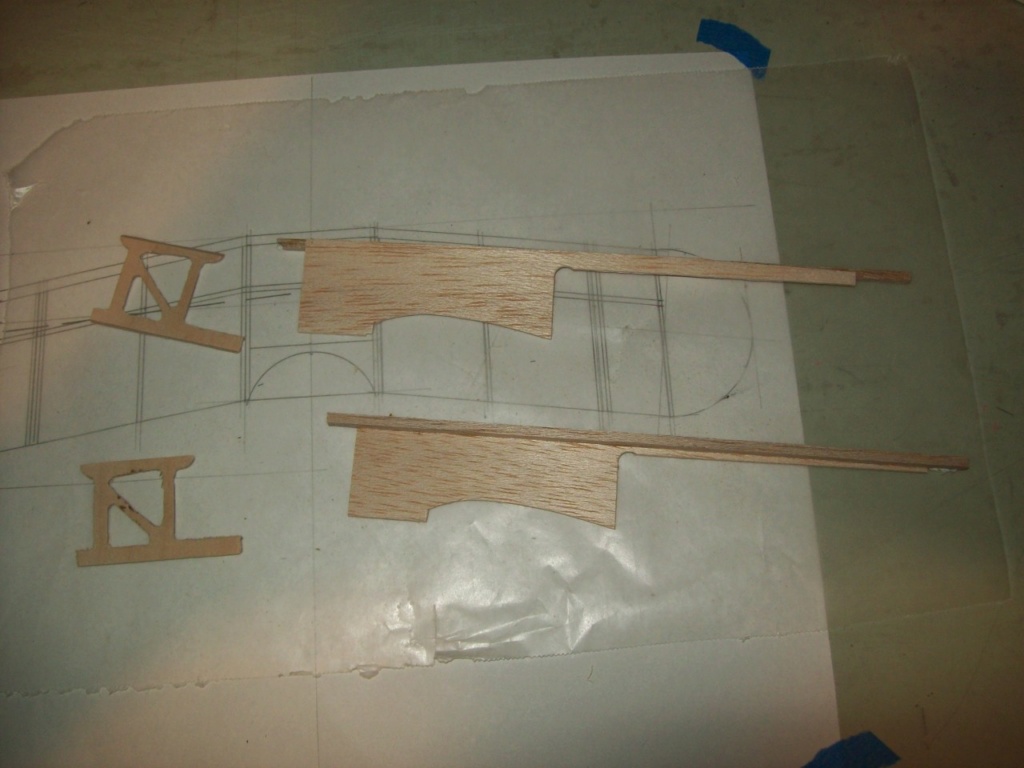
Started work on the fuse. Here’s the sides with the main longerons (1/8 sq.), and the cabanes. I’m not a fan of wire cabanes. It’s hard enough for me to make left & right LG wires that are symmetrical. Cabanes need to be centered, and aligned, and at the right incidence. So, I cut them from 1/16 ply, and will align them with the longerons during fuse construction.
Both wings are finished. At first I thought I would use open rib bays for best realism, but soon realized the parts would just be too small for me to work with. So, I used 1/32 balsa top & bottom sheets with a minimum of internal structure. Tailfeathers are 1/16 balsa. To give a sense of scale, the elevator joiner shown is a toothpick. Not even the whole toothpick, just a section cut from it.

I really did not want to try to make the gear & wheel pants (See above comment on small parts). Fortunately, Bernie sells the Cox Pitts landing gear. Molded of black plastic, I think these are overruns from the 50th Anniversary edition. The pants are not the right shape, but considering the work saved, I can live with it. I didn’t need the molded in firewall, and just cut it off.

Started work on the fuse. Here’s the sides with the main longerons (1/8 sq.), and the cabanes. I’m not a fan of wire cabanes. It’s hard enough for me to make left & right LG wires that are symmetrical. Cabanes need to be centered, and aligned, and at the right incidence. So, I cut them from 1/16 ply, and will align them with the longerons during fuse construction.


duaneh- Gold Member

- Posts : 226
Join date : 2019-04-06
 Re: It’s the Pitts….
Very Cool !! Liking the Looks 


getback- Top Poster


Posts : 10442
Join date : 2013-01-18
Age : 67
Location : julian , NC
 All fused up
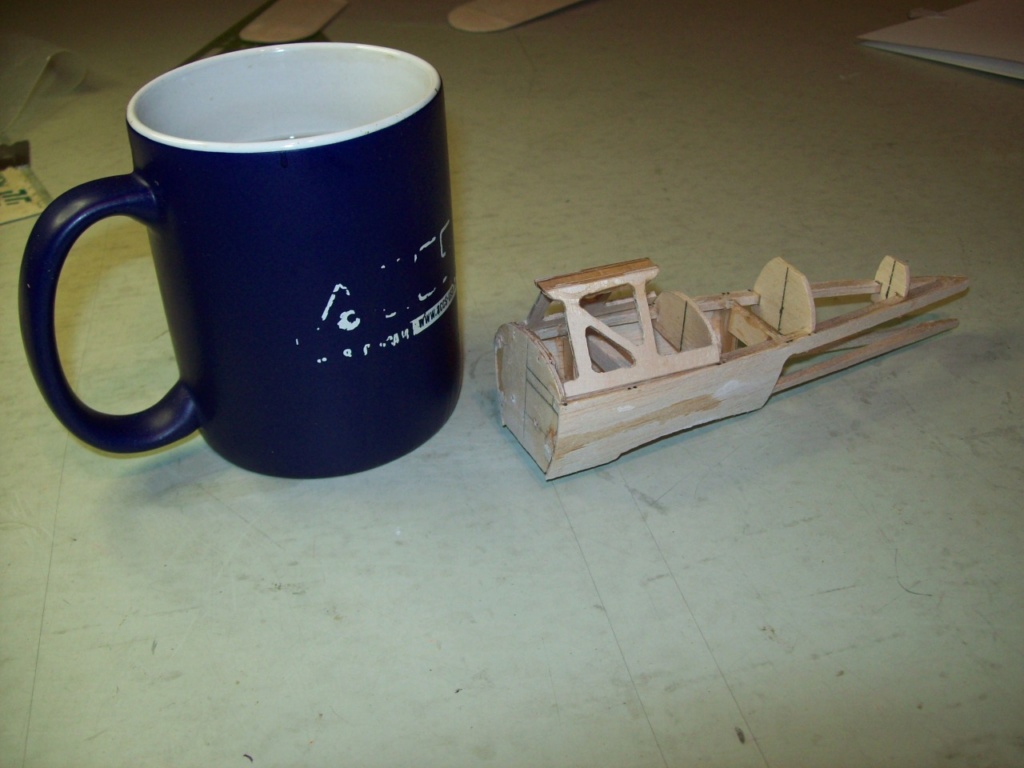
Got the fuse assembled. I was sweating this step, and feel like a milestone has been reached. Time for a coffee break.
I painted the gear white, and mounted it. I sheeted the turtledeck with 1/32" balsa. I didn't want to try to sheet over the top, so it's just a piece of soft 1/8" balsa.
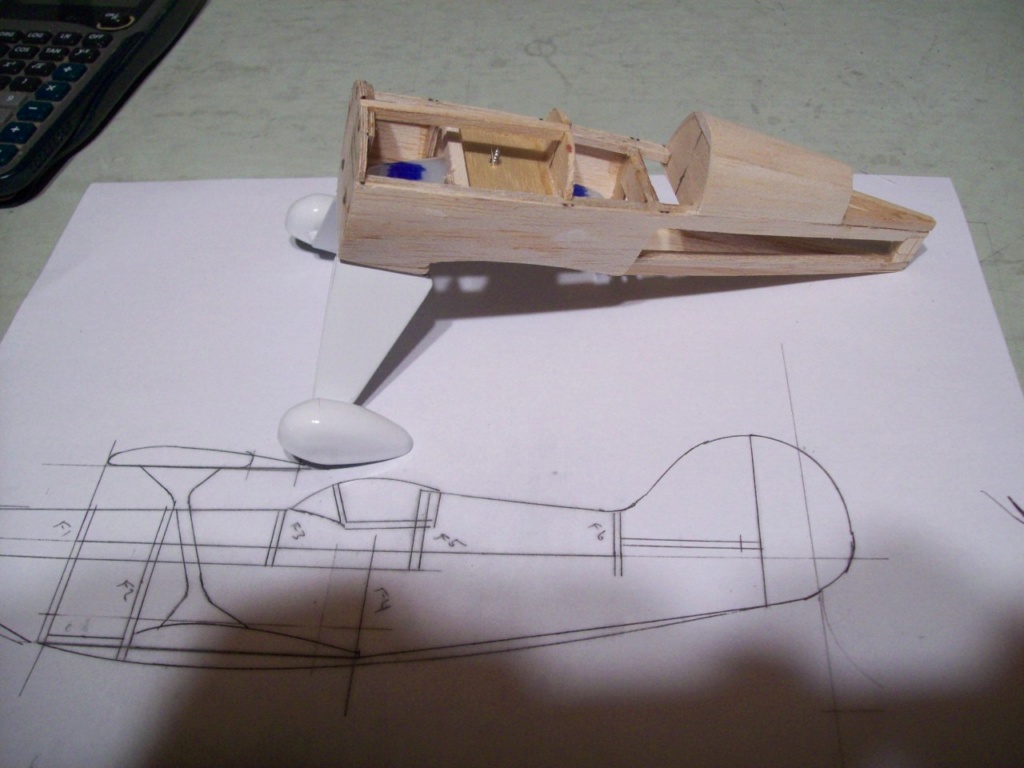
Now that I have a fuse, I can start art work on the cowl. Here's the beginning of it.
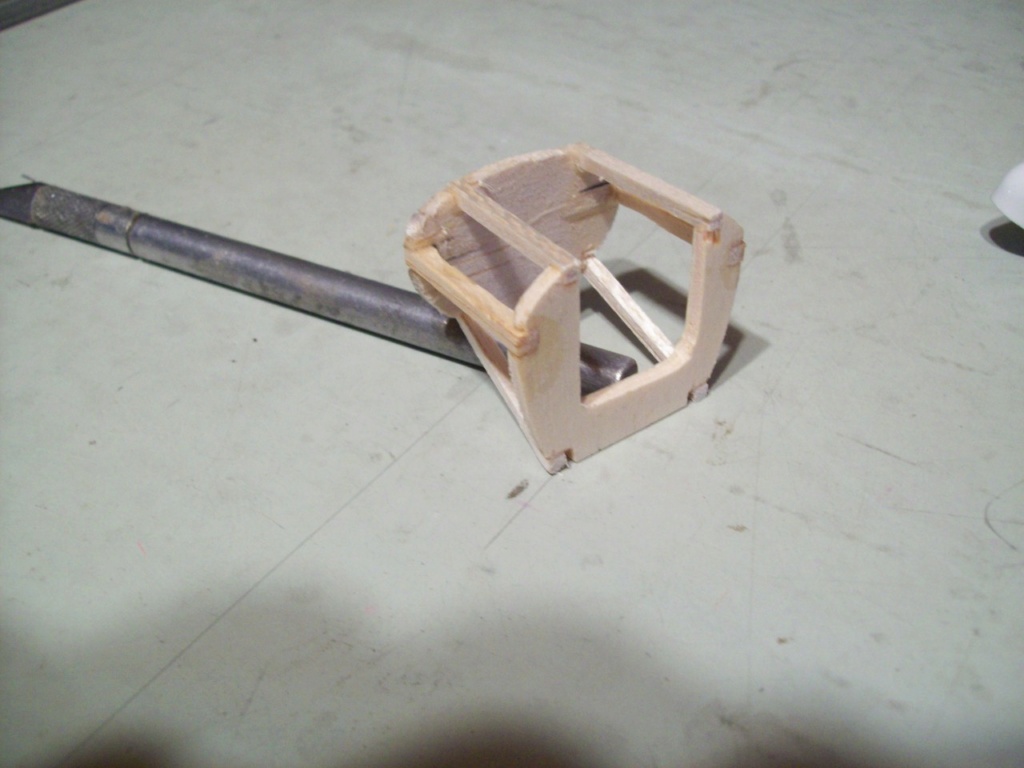

I painted the gear white, and mounted it. I sheeted the turtledeck with 1/32" balsa. I didn't want to try to sheet over the top, so it's just a piece of soft 1/8" balsa.

Now that I have a fuse, I can start art work on the cowl. Here's the beginning of it.


duaneh- Gold Member

- Posts : 226
Join date : 2019-04-06
 Re: It’s the Pitts….
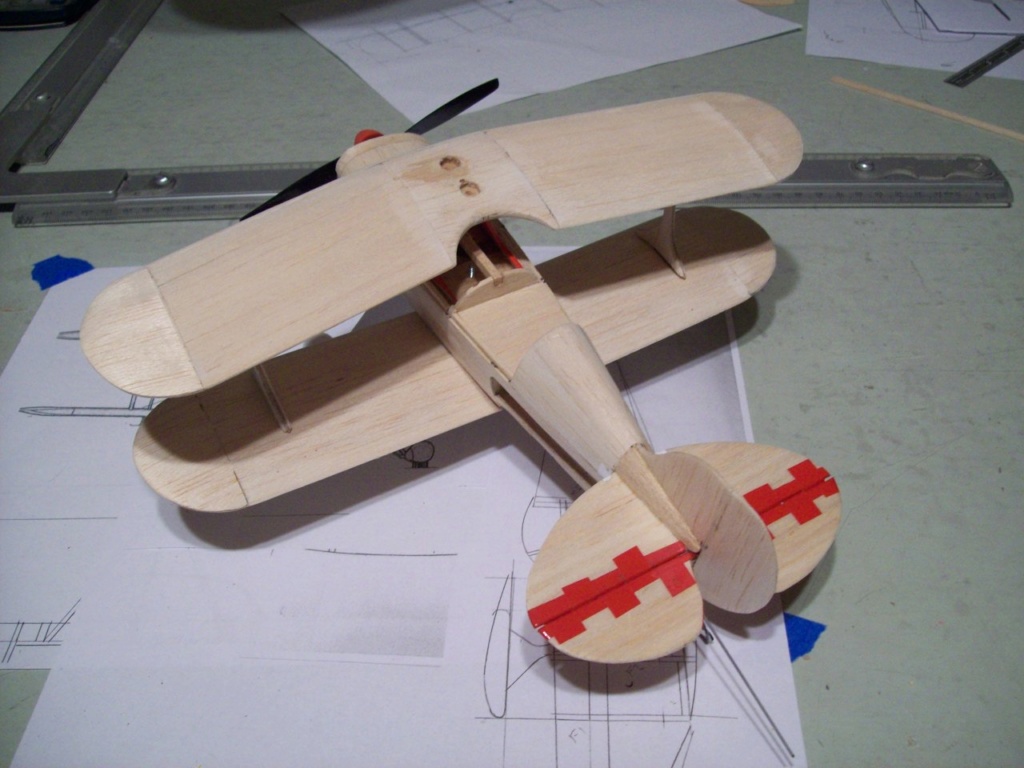
I got the cowl roughed in, and mounted. The cabanes are painted and installed. Now that all the major parts are available, let’s get out the pins & tape, and see what this thing looks like.
Hey, that’s starting to actually look like a Pitts.
Time for another coffee break.


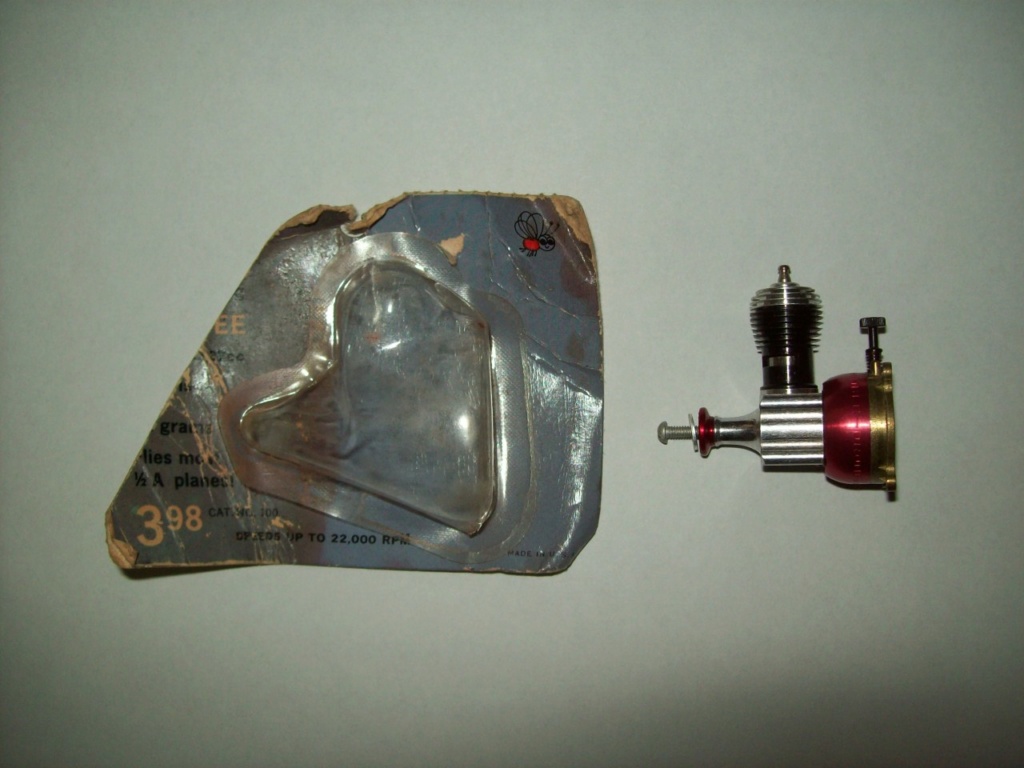
I’ve been using an old engine with a broken backplate and a drilled tank for fitup duty. But, it looks like this project may just work out. I think it deserves a new engine. This one has been waiting nearly 60 years for just such an opportunity. I broke the seal on the package today.
Hey, that’s starting to actually look like a Pitts.
Time for another coffee break.


I’ve been using an old engine with a broken backplate and a drilled tank for fitup duty. But, it looks like this project may just work out. I think it deserves a new engine. This one has been waiting nearly 60 years for just such an opportunity. I broke the seal on the package today.


duaneh- Gold Member

- Posts : 226
Join date : 2019-04-06
 Re: It’s the Pitts….
Looks the business!!!
I can’t tell if you using a standard 1/2A control horn, but if you are I would shorten it and also use the inner hole for the pushrod. Less is more on the controls.
I can’t tell if you using a standard 1/2A control horn, but if you are I would shorten it and also use the inner hole for the pushrod. Less is more on the controls.

Cribbs74- Moderator


Posts : 11907
Join date : 2011-10-24
Age : 50
Location : Tuttle, OK
 Re: It’s the Pitts….
Yeah, it's the usual 1/2A bellcrank that seems to be universally used. Space inside the fuse is so limited that I had to shorten the arms just to fit it in there. Even so, the movement is limited by the fuse sides, so I was worried about having enough throw. "Less is more" is a good thing in this case.
For those of you that have an example of the Cox Pitts, I would be interested to know the amount of elevator movement, and the total weight. It's difficult to use as a reference standard when I don't have one.
For those of you that have an example of the Cox Pitts, I would be interested to know the amount of elevator movement, and the total weight. It's difficult to use as a reference standard when I don't have one.


duaneh- Gold Member

- Posts : 226
Join date : 2019-04-06
 Re: It’s the Pitts….
I hinged the elevators with Monokote hinges while off the airplane, and installed the control horn. Then glued the stab to the airplane. Followed that with the fin and rudder. Then shaped the tail fairing blocks (slivers?), and glued them in place.

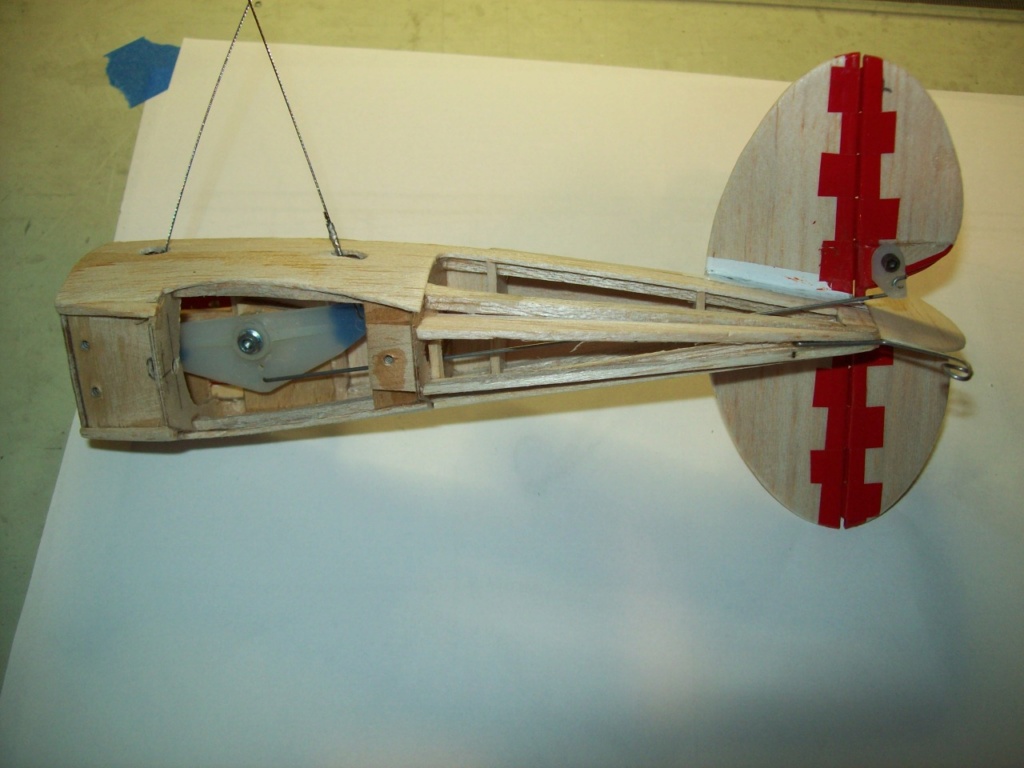
Got the control installation finished. The elevator pushrod is 1/32 wire, leadouts are .018 cable.
There is just barely room for the bellcrank. Also, it can’t move very far in either direction. As has been pointed out, this may be a good thing in terms of limiting throw. I am more concerned about the small amount of control handle movement that it will take for full elevator deflection. This may be a very twitchy little airplane.
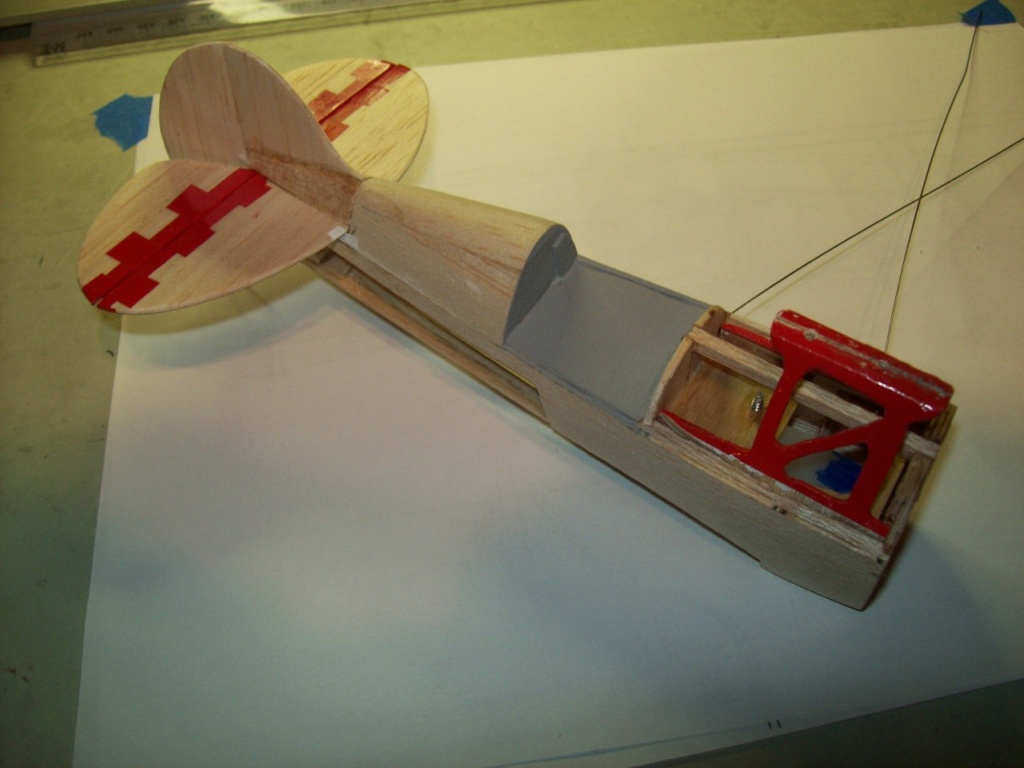
I don’t plan on adding a pilot, or cockpit detail. I just shot a bit of gray primer in the cockpit area to cover the wood. The next step is going to be sheeting the forward fuse top around the cabanes. I’m afraid that is going to be very tedious, and a test of patience.

Got the control installation finished. The elevator pushrod is 1/32 wire, leadouts are .018 cable.
There is just barely room for the bellcrank. Also, it can’t move very far in either direction. As has been pointed out, this may be a good thing in terms of limiting throw. I am more concerned about the small amount of control handle movement that it will take for full elevator deflection. This may be a very twitchy little airplane.

I don’t plan on adding a pilot, or cockpit detail. I just shot a bit of gray primer in the cockpit area to cover the wood. The next step is going to be sheeting the forward fuse top around the cabanes. I’m afraid that is going to be very tedious, and a test of patience.


duaneh- Gold Member

- Posts : 226
Join date : 2019-04-06
 Re: It’s the Pitts….
I hope you post a video of the maiden, cool little project, i think it should fly great, probably half the weight or better of the plastic version.
Cribbs is right, it could be twitchy, keep line spacing on handle close.
Good Luck!
Cribbs is right, it could be twitchy, keep line spacing on handle close.
Good Luck!
 Re: It’s the Pitts….
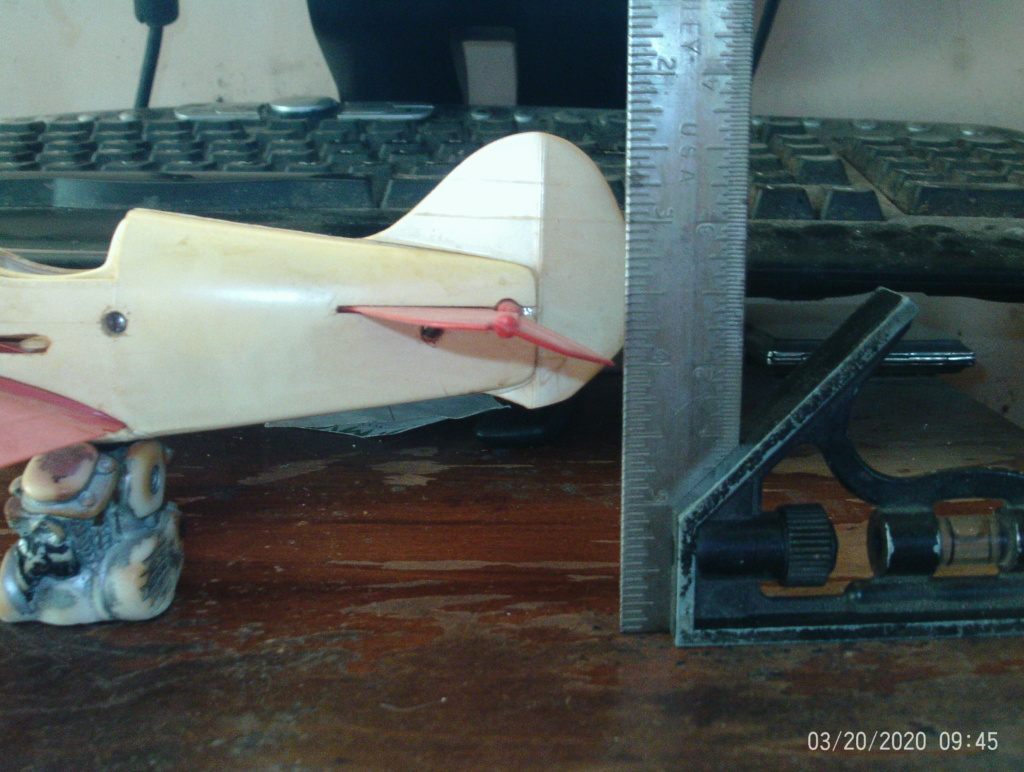
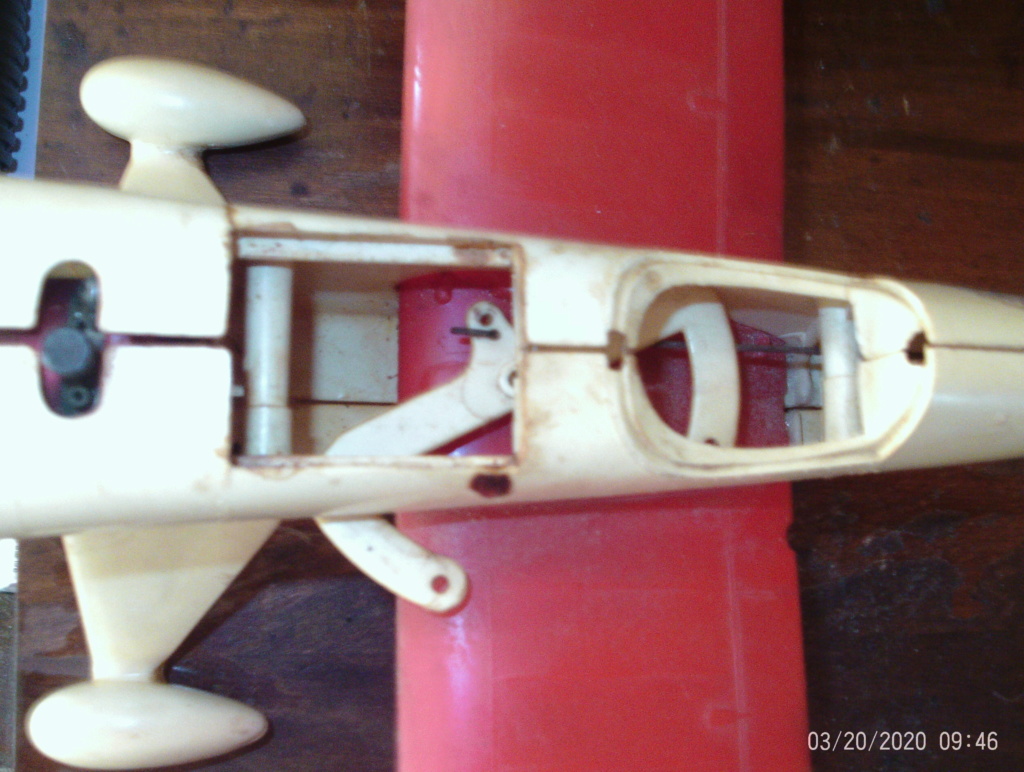
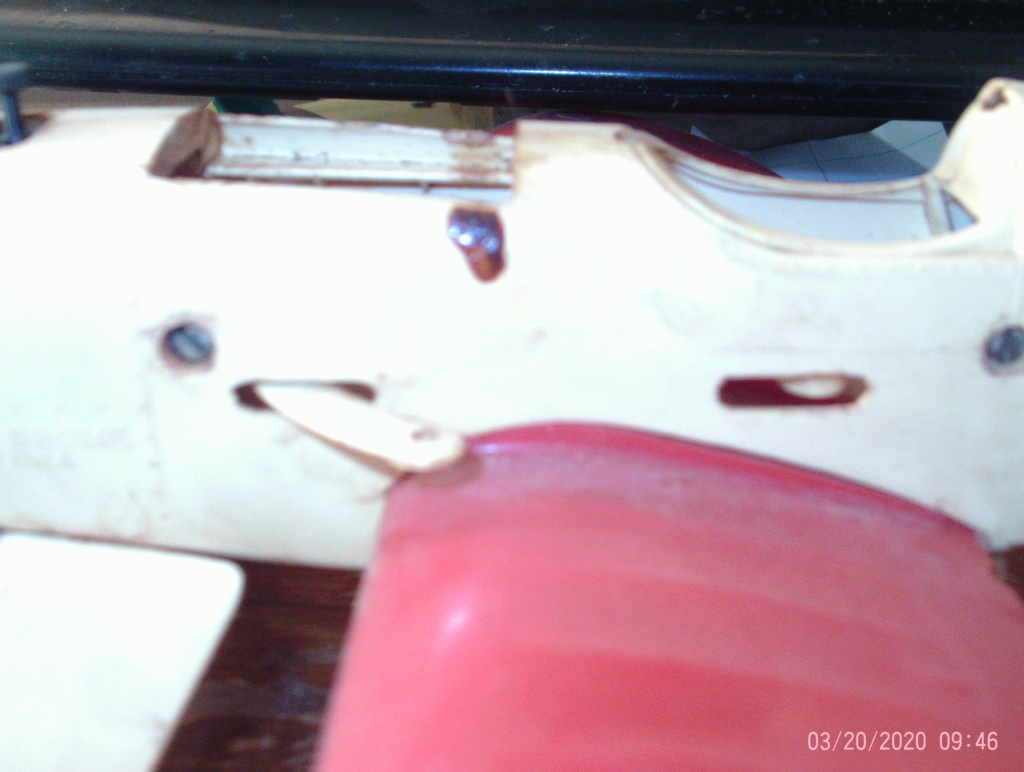
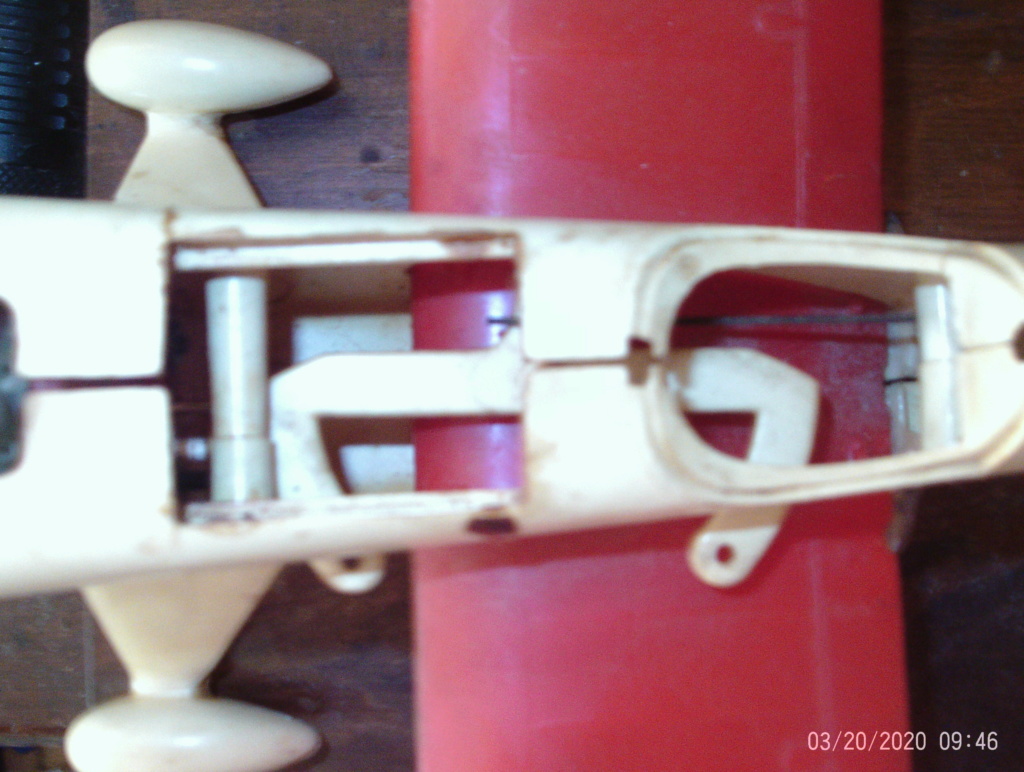
Plane is looking Good Duane > I know its a little late but i have a Lil Stinker that is very similar to the Pitts Got it out and took some pics. and a measurement of the elevator movement . It 3/4 " at the edge of the end,, here are the pics. To load more than 3 pics. go back and remove the ones you posted , then start over (simply) .. 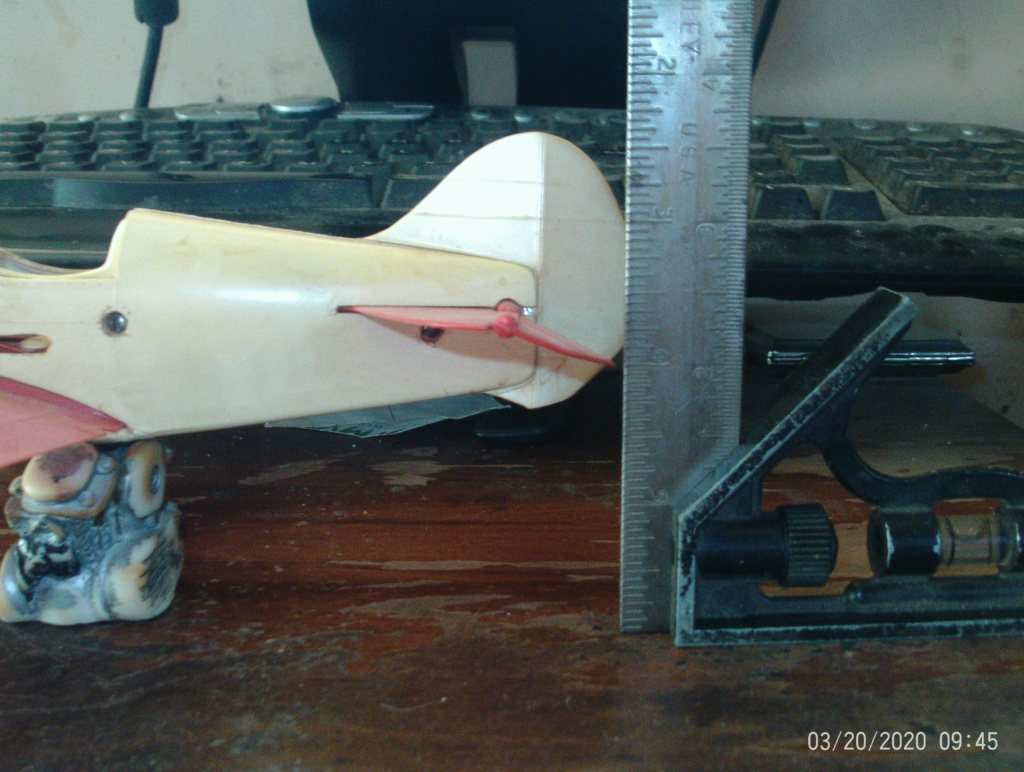




getback- Top Poster


Posts : 10442
Join date : 2013-01-18
Age : 67
Location : julian , NC
 Re: It’s the Pitts….
Eric, that is exactly the information I needed, thanks. I will set mine up to match.
Mark, that's a cool picture, even if the boy is about to crash.
I didn't realize the Lil Stinker had a wire gear and separate firewall. Always thought it was made the same as the later ones.
Mark, that's a cool picture, even if the boy is about to crash.
I didn't realize the Lil Stinker had a wire gear and separate firewall. Always thought it was made the same as the later ones.

duaneh- Gold Member

- Posts : 226
Join date : 2019-04-06

getback- Top Poster


Posts : 10442
Join date : 2013-01-18
Age : 67
Location : julian , NC
 Re: It’s the Pitts….
Hi Duane, The Pitts S-2 is also one of my favorite aircraft! Congratulations on such a FINE job of scratch-building! 

I am excited for the flight-results! Do you have any weight-comparisons with the Cox variants of the aircraft? I've really enjoyed your photo-documented build. Nice work.


I am excited for the flight-results! Do you have any weight-comparisons with the Cox variants of the aircraft? I've really enjoyed your photo-documented build. Nice work.
 Re: It’s the Pitts….
Amazing little build you got there. As well, it looks great. I cannot honestly believe how small that model is, until put beside the coffee cup. And I see rddie beat me to it in asking for a weight comparison from yours to the original Cox version.

NEW222- Top Poster

- Posts : 3896
Join date : 2011-08-13
Age : 46
Location : oakbank, mb
 Re: It’s the Pitts….
I see that you fabricated a wire tail-skid! Depending on how it's anchored; would lend itself well to a pin-stooge/R.O.G. launch if need be.

You mentioned using .031" music-wire for the bellcrank to elev.-horn pushrod. As tiny a model as this is.. I would consider a rod-guide midway the distance. A balsa support hardened with CA glue would add virtually no weight.. yet would give you the insurance that you had the closest to a 1:1 (push-pull) control-input ratio.
It's not easy to hand-launch a model this small. There's actually more chance of a crash before the speed comes-up enough for pitch-control. If your flying over tall grass/weeds.. you can try hand-launching to develop a technique with your mechanic. At least there will be a cushion.. (thawed.. not frozen)
It can be hard to get up the nerve to fly over hard-pack/pavement.. especially for a maiden, but the model has a landing-gear. You could launch (or stooge-launch) from an asphalt parking-lot having a grass border large and safe-enough to move over-onto. If the pavement is blown-off (a leaf-blower in the field-box items checklist.. ) the tiny wheels stand a better chance at rolling. Keep your eye on the tail. When it comes up; apply slight "up" control to see if the model will climb while getting a feeling on it's sensitivity. It's bound to fly like a little Bee... um.. you know what I mean.

You mentioned using .031" music-wire for the bellcrank to elev.-horn pushrod. As tiny a model as this is.. I would consider a rod-guide midway the distance. A balsa support hardened with CA glue would add virtually no weight.. yet would give you the insurance that you had the closest to a 1:1 (push-pull) control-input ratio.
It's not easy to hand-launch a model this small. There's actually more chance of a crash before the speed comes-up enough for pitch-control. If your flying over tall grass/weeds.. you can try hand-launching to develop a technique with your mechanic. At least there will be a cushion.. (thawed.. not frozen)
It can be hard to get up the nerve to fly over hard-pack/pavement.. especially for a maiden, but the model has a landing-gear. You could launch (or stooge-launch) from an asphalt parking-lot having a grass border large and safe-enough to move over-onto. If the pavement is blown-off (a leaf-blower in the field-box items checklist..
 Re: It’s the Pitts….
duaneh wrote:Eric, that is exactly the information I needed, thanks. I will set mine up to match.
Mark, that's a cool picture, even if the boy is about to crash.
I didn't realize the Lil Stinker had a wire gear and separate firewall. Always thought it was made the same as the later ones.
lol, oh no, he pulls it out at the last second! This was artwork on the side of the box.
yep, first version was two pieces inverted engine, when they re-introduced it in 1969, it went to a one piece with upright engine.
 Re: It’s the Pitts….
Roddie;
I would also be interested in a weight comparison, but I don't know what the Cox Pitts weighs. If anyone can supply that information, please post. Mine weighs 2.7 oz. as it sits in the last picture. That number will grow somewhat before it's finished.
Yes, the wire skid is intended for use with a stooge. I tried to bend it in a way that suggested a tail wheel, but it doesn't look as good as it did in my head.
I fly over grass, and was thinking about making a runway out of election signs. I also have an area available that has knee-high grass & weeds, but then need a hand launch. Anyone I can draft for that duty will not be a modeller. There's a lot of ways for that to go wrong.

duaneh- Gold Member

- Posts : 226
Join date : 2019-04-06
 Re: It’s the Pitts….
With everything but a windshield my stinker is 3.7 oz. 


getback- Top Poster


Posts : 10442
Join date : 2013-01-18
Age : 67
Location : julian , NC
Page 1 of 3 • 1, 2, 3 
 Similar topics
» Pitts S-1T
» New in box pitts special!!
» New Flight: Pitts -Skelton Aerobatic model (page 9)
» Art Scholl Pitts tie tack
» Pitts!!!! at the drag races.
» New in box pitts special!!
» New Flight: Pitts -Skelton Aerobatic model (page 9)
» Art Scholl Pitts tie tack
» Pitts!!!! at the drag races.
Page 1 of 3
Permissions in this forum:
You cannot reply to topics in this forum

 Rules
Rules


