Log in
Search
Latest topics
» Purchased the last of any bult engines from Ken Enyaby Coxfledgling Today at 4:18 am
» My N-1R build log
by roddie Today at 12:32 am
» Happy 77th birthday Andrew!
by akjgardner Today at 12:27 am
» TEE DEE Having issues
by TD ABUSER Yesterday at 9:43 pm
» Landing-gear tips
by roddie Yesterday at 6:17 pm
» Roger Harris revisited
by TD ABUSER Yesterday at 2:13 pm
» Tee Dee .020 combat model
by Ken Cook Yesterday at 1:41 pm
» Retail price mark-up.. how much is enough?
by Ken Cook Yesterday at 1:37 pm
» My latest doodle...
by roddie Yesterday at 10:43 am
» Chocolate chip cookie dough.........
by roddie Fri Nov 22, 2024 1:13 pm
» Free Flight Radio Assist
by rdw777 Fri Nov 22, 2024 9:24 am
» Funny what you find when you go looking
by rsv1cox Wed Nov 20, 2024 3:21 pm
Cox Engine of The Month
You gotta be kidding me!
Page 1 of 1
 You gotta be kidding me!
I decided that I need an incidence meter so that I can ensure I get the engine, wing, and tail of my larger planes at 0-0-0 when I build. So I went online to buy one. I checked Tower and they had the Robart incidence meter (https://www.towerhobbies.com/cgi-bin/wti0001p?&I=LXET66). $36.99 plus shipping, when it gets off of back order. Checking Horizon showed the E-Flight incidence meter (https://www.horizonhobby.com/anglepro-ii-5-in-1-digital-throw-incidence-meter-efla280). $59.99 plus shipping, but at least it was in stock. Ridiculous.
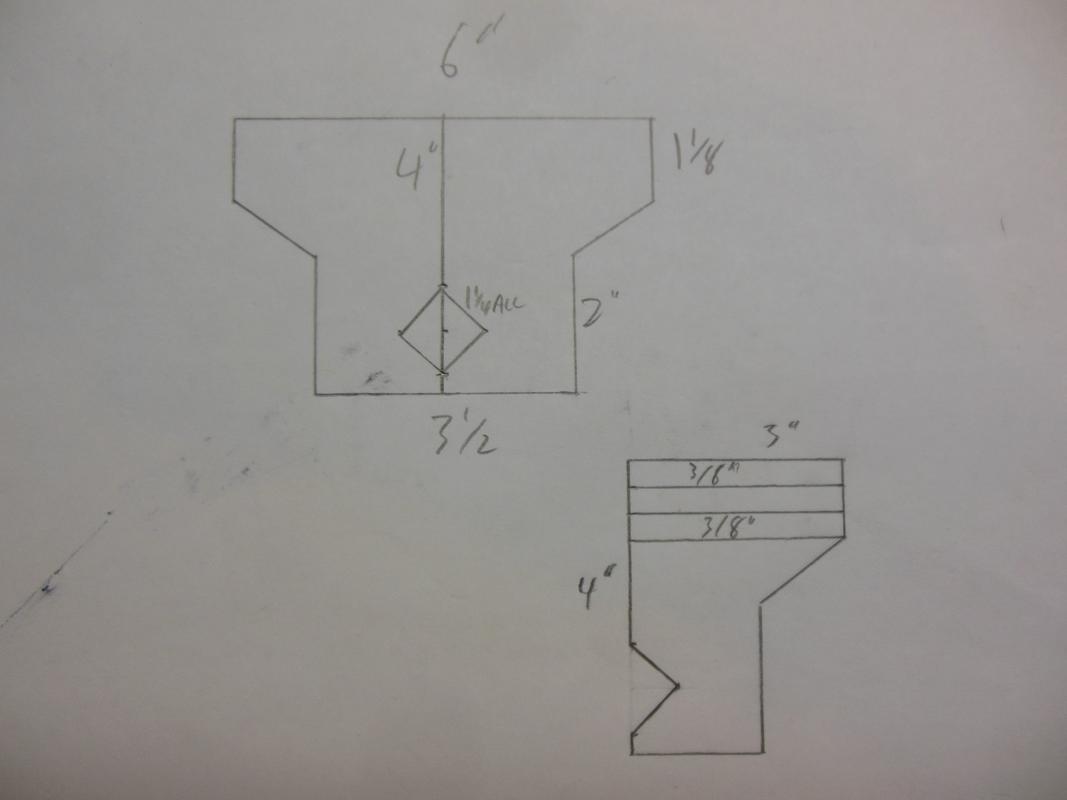
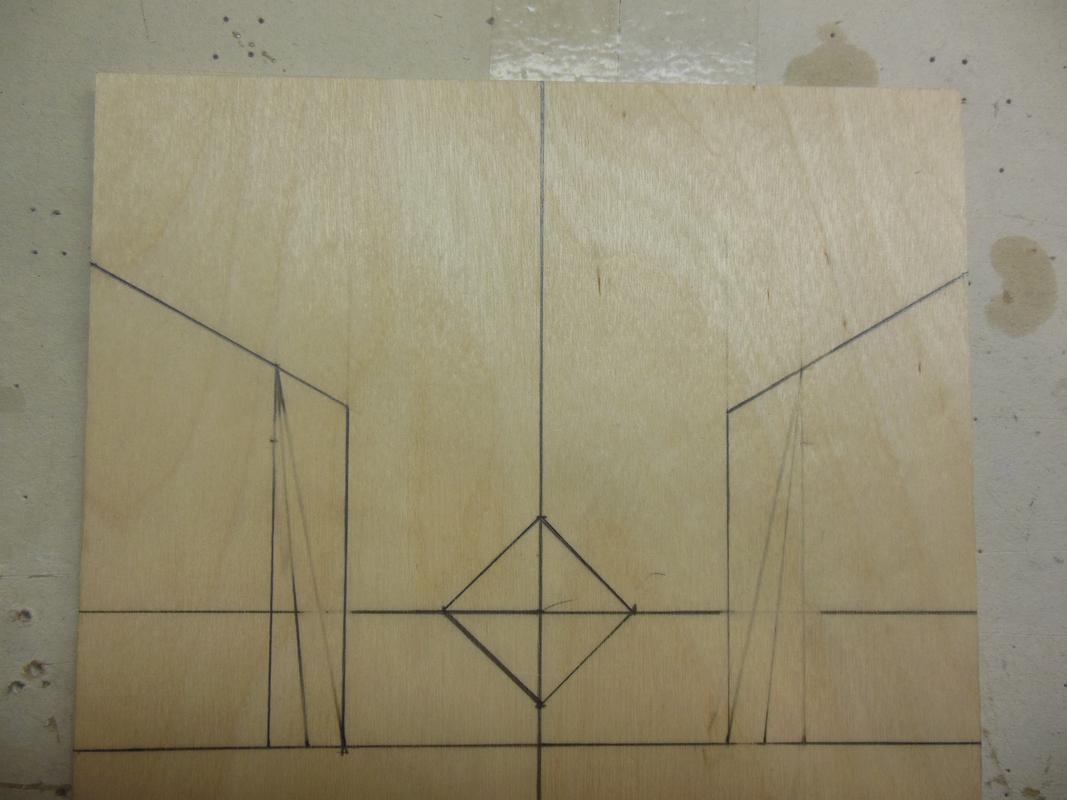
So, I decided to draw out my own and build it. I jotted down some numbers and then took a $2.00 stick of 3/8” x 36” spruce and some scrap ply from the junk box to make my own. The spruce piece was cut to make a 24” stick that the two plates will slide on. The stick will be sandwiched top and bottom by two 6” pieces of spruce cut from the stick and glued to the scrap plywood plate. Here’s the drawing and the ply plate with lines sketched on it.
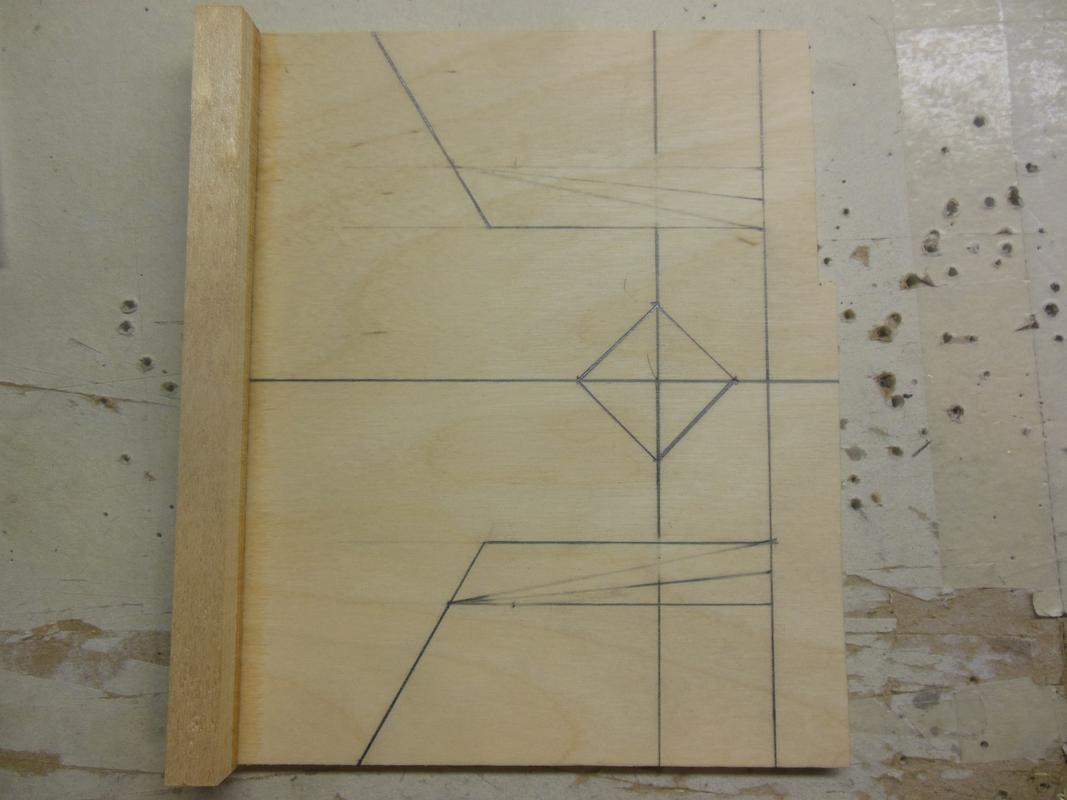
Here, the top piece of spruce is glued to the top of the meter plate.
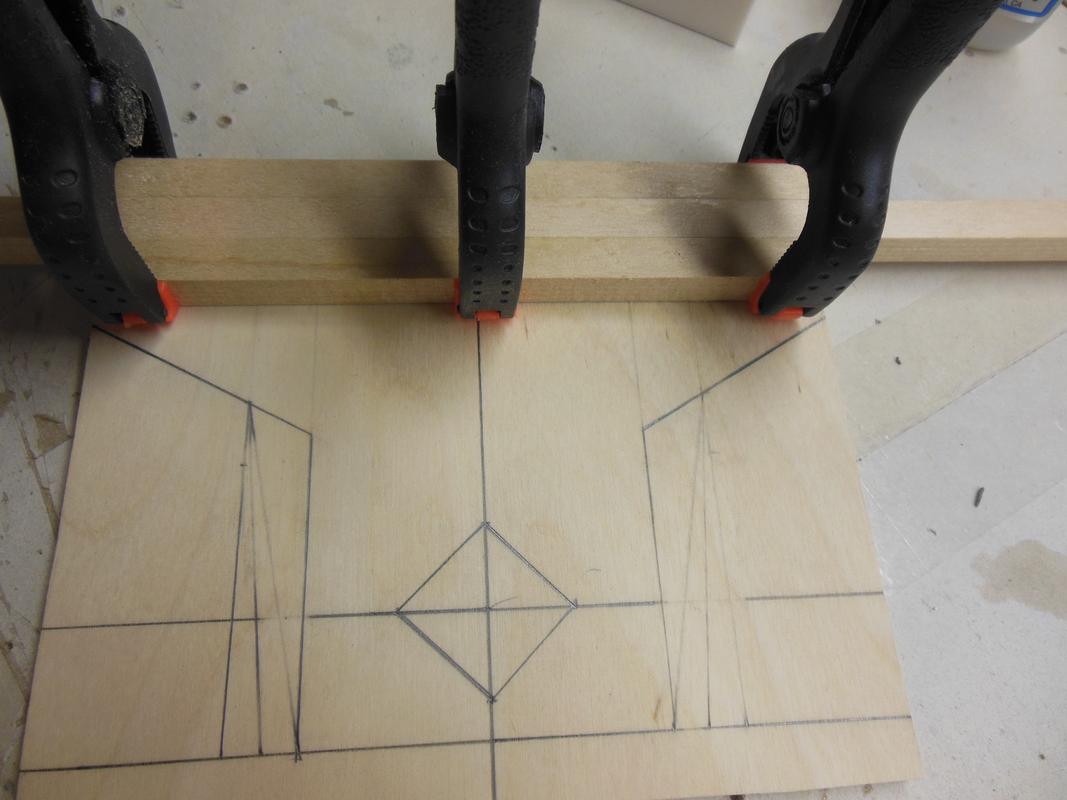
Then the slide stick is sandwiched between the upper piece and the lower piece of spruce to make things nice and tight for gluing the bottom piece. The lower piece gets thin CA on the bottom side, and the middle stick is removed and the other side of the lower piece gets hit with more thin CA.
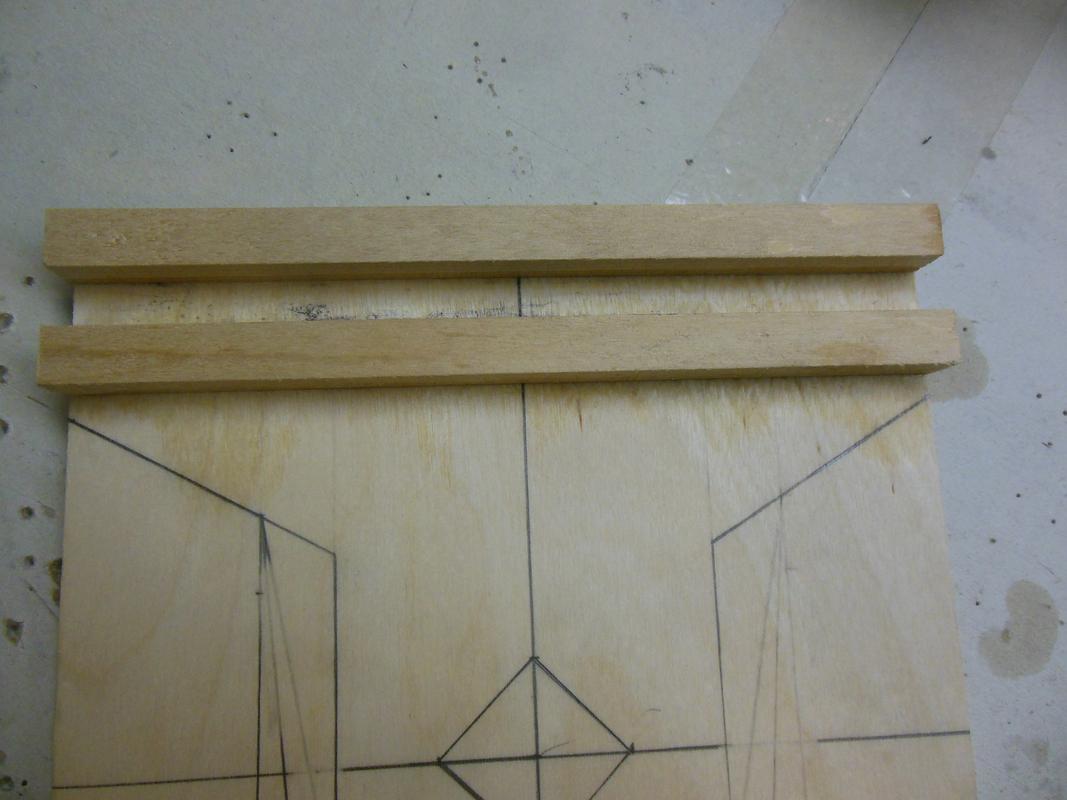
Next, I sawed down the middle at the top and bottom to prepare for the final piece being glued on and getting ready to separate the two halves.
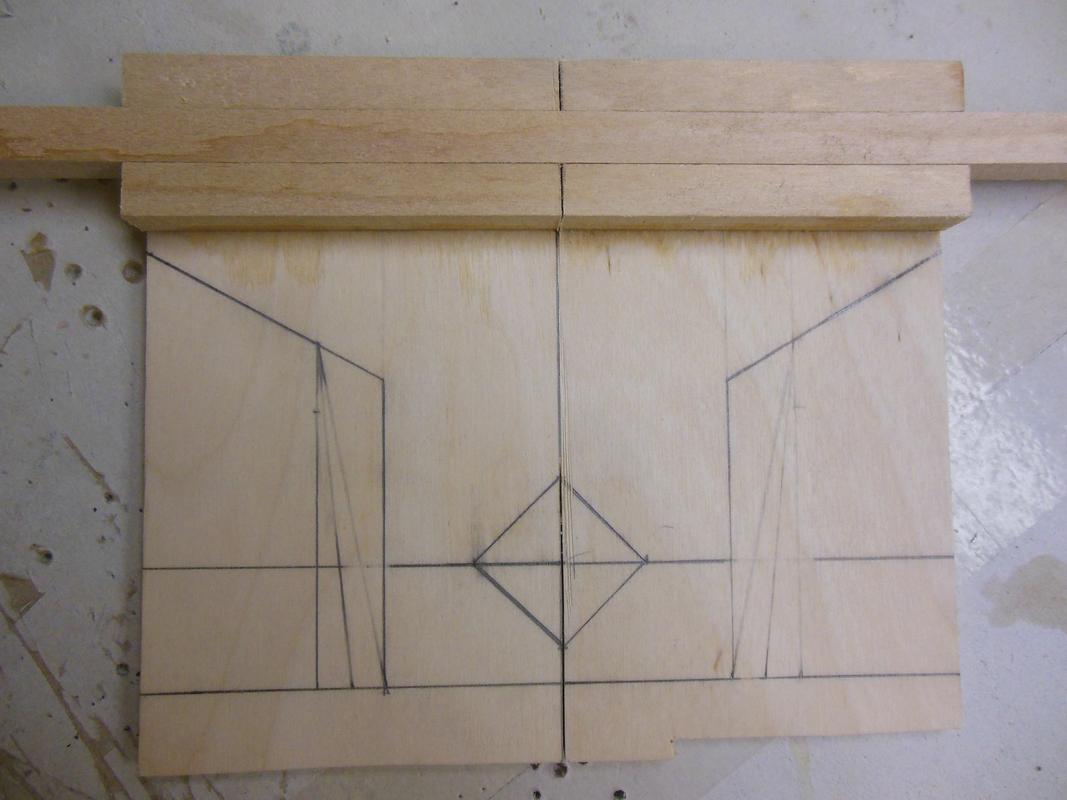
And the final piece of ply glued on top to close out the box section that will slide on the 24” piece of spruce.
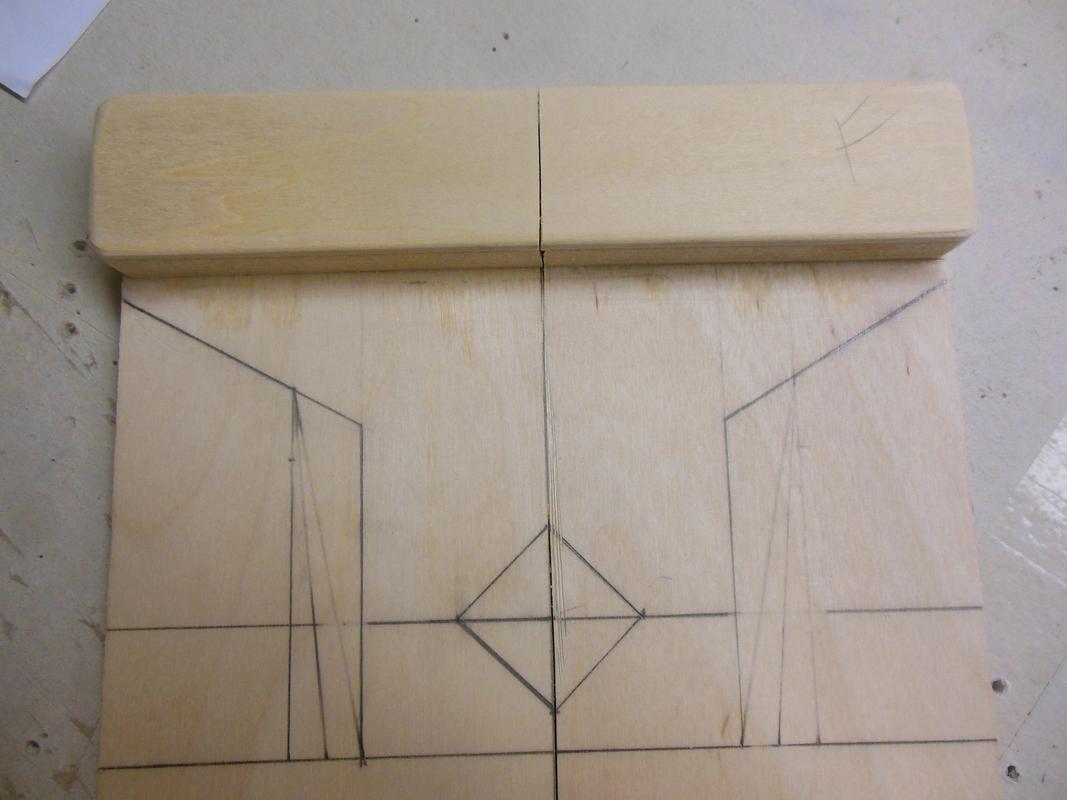
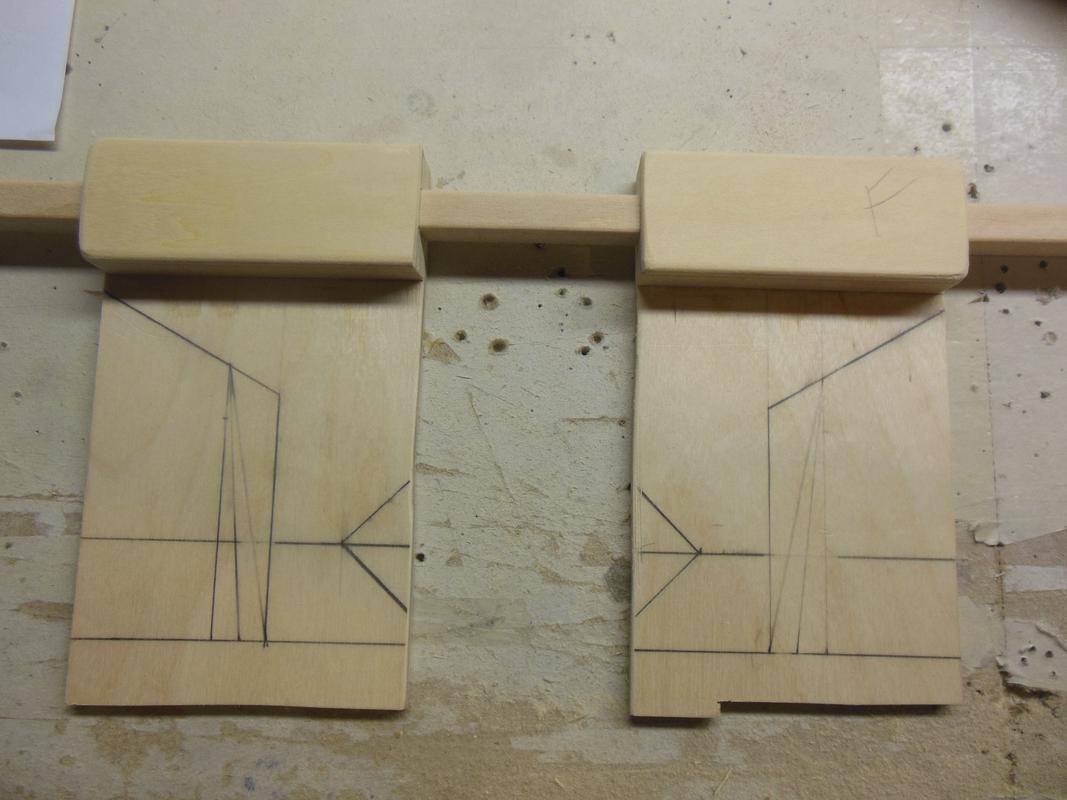
The two halves separated:
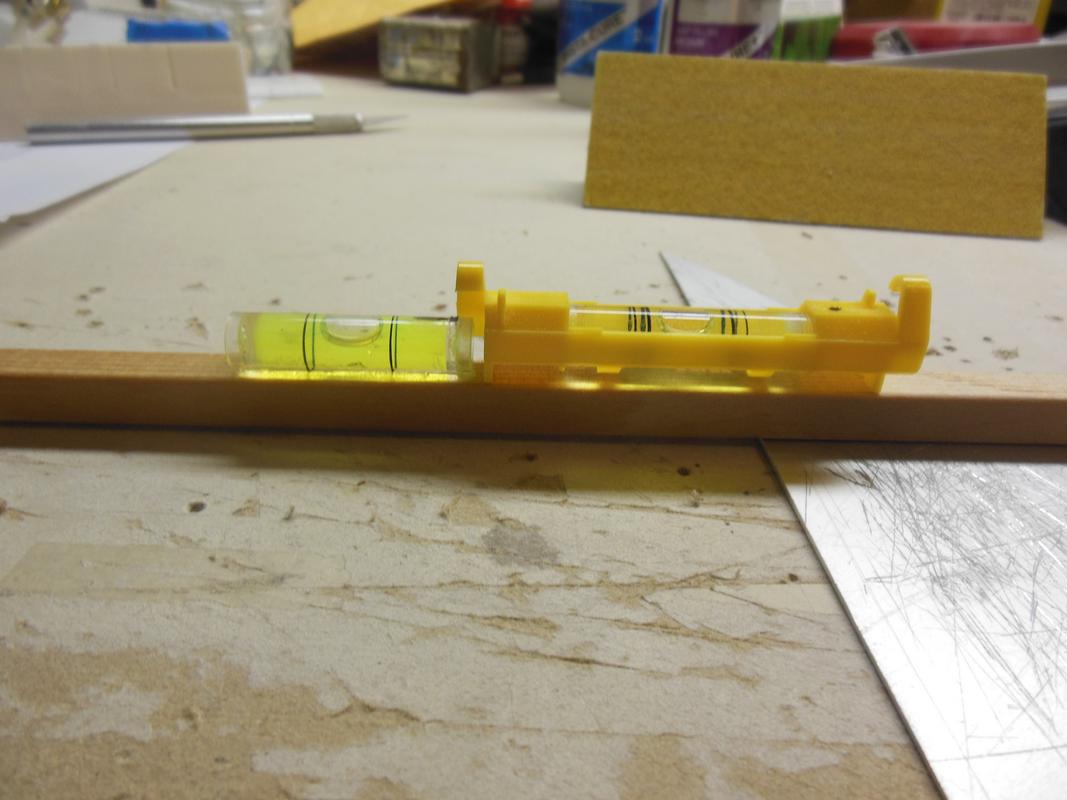
Next a couple of bubble levels from the Dollar Store. One removed from the plastic housing and glued to the 24” spruce stick, and the other alongside to verify they are level with each other.
And the two slide pieces after sanding to shape and coating with a layer of thin CA for a finish. I can clamp a wing with a wing chord of up to26” 21". Somehow I doubt I’ll ever need that much. I’m figuring a probable max of 10” at most.

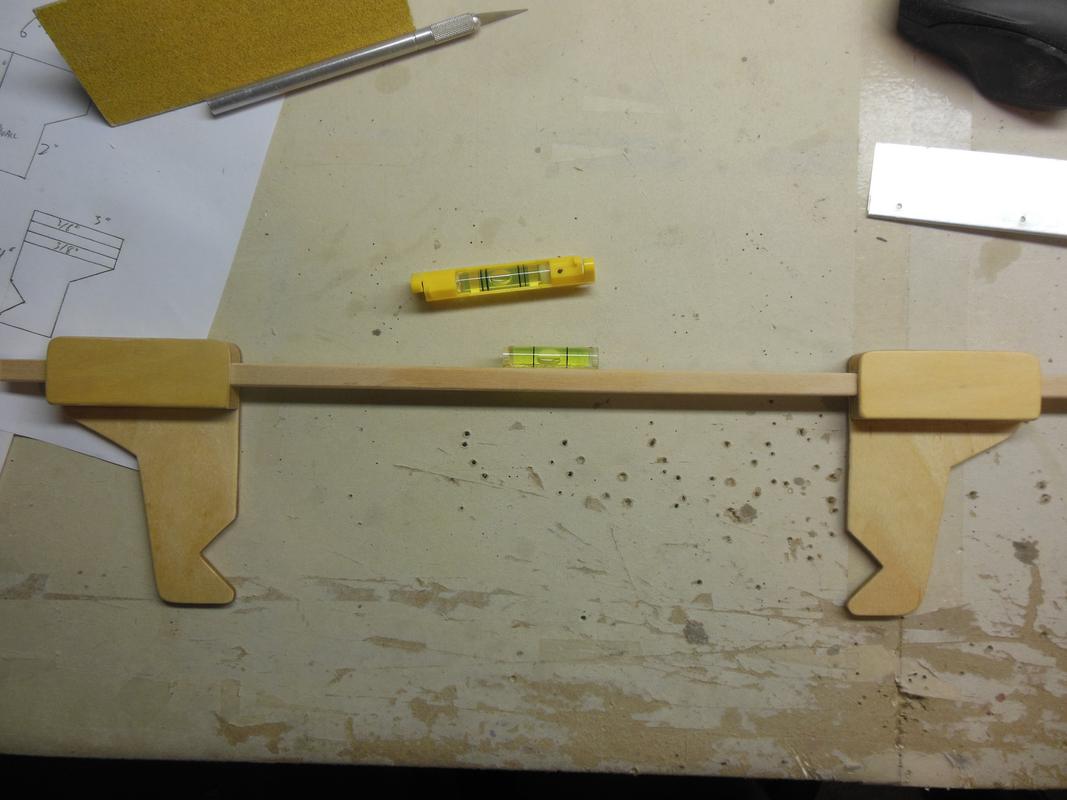
Total cost was about $5.00 for the project using scrap and Dollar Store components and about three hours of time.
The Penny Pincher Mark
So, I decided to draw out my own and build it. I jotted down some numbers and then took a $2.00 stick of 3/8” x 36” spruce and some scrap ply from the junk box to make my own. The spruce piece was cut to make a 24” stick that the two plates will slide on. The stick will be sandwiched top and bottom by two 6” pieces of spruce cut from the stick and glued to the scrap plywood plate. Here’s the drawing and the ply plate with lines sketched on it.


Here, the top piece of spruce is glued to the top of the meter plate.

Then the slide stick is sandwiched between the upper piece and the lower piece of spruce to make things nice and tight for gluing the bottom piece. The lower piece gets thin CA on the bottom side, and the middle stick is removed and the other side of the lower piece gets hit with more thin CA.


Next, I sawed down the middle at the top and bottom to prepare for the final piece being glued on and getting ready to separate the two halves.

And the final piece of ply glued on top to close out the box section that will slide on the 24” piece of spruce.

The two halves separated:

Next a couple of bubble levels from the Dollar Store. One removed from the plastic housing and glued to the 24” spruce stick, and the other alongside to verify they are level with each other.

And the two slide pieces after sanding to shape and coating with a layer of thin CA for a finish. I can clamp a wing with a wing chord of up to


Total cost was about $5.00 for the project using scrap and Dollar Store components and about three hours of time.
The Penny Pincher Mark
Last edited by batjac on Fri May 18, 2018 1:46 pm; edited 1 time in total
batjac- Diamond Member


Posts : 2375
Join date : 2013-05-22
Age : 61
Location : Broken Arrow, OK, USA
 Re: You gotta be kidding me!
"Total cost was about $5.00 for the project using scrap and Dollar Store components and about three hours of time. "
Plus the pride of making up some gear that works just as well/better than the expensive stuff!
Way to go !!!
Plus the pride of making up some gear that works just as well/better than the expensive stuff!
Way to go !!!

Kim- Top Poster


Posts : 8625
Join date : 2011-09-06
Location : South East Missouri
 Re: You gotta be kidding me!
Nice job Mark , i got one of those about to many years ago , i think it was 19.95 at the time haven't used it in a while .. Hope i can still find all of it cause i will bee needing it soon ! 

getback- Top Poster


Posts : 10442
Join date : 2013-01-18
Age : 67
Location : julian , NC
 Re: You gotta be kidding me!
You’re right up there in inspirational Modeler of Modelers. Great idea, great tool, saving money and expanding your skills and craftsmanship all at the same time. I salute you! 


Marleysky- Top Poster


Posts : 3618
Join date : 2014-09-28
Age : 72
Location : Grand Rapids, MI

batjac- Diamond Member


Posts : 2375
Join date : 2013-05-22
Age : 61
Location : Broken Arrow, OK, USA
 Re: You gotta be kidding me!
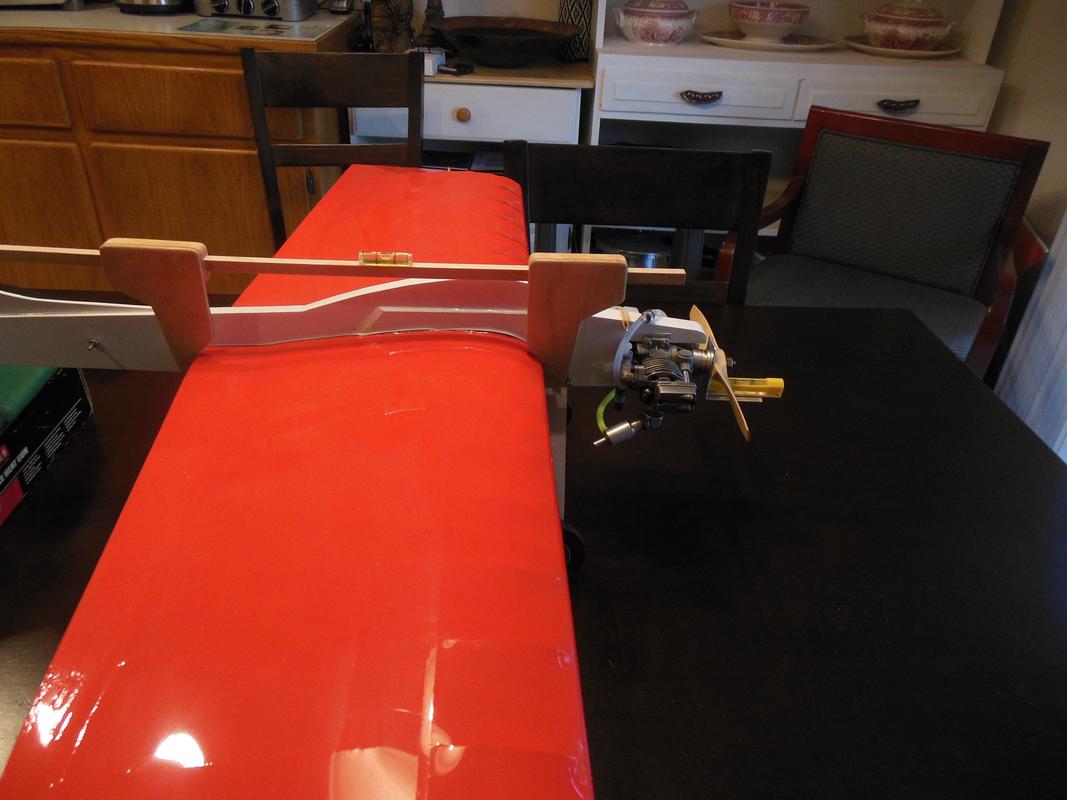
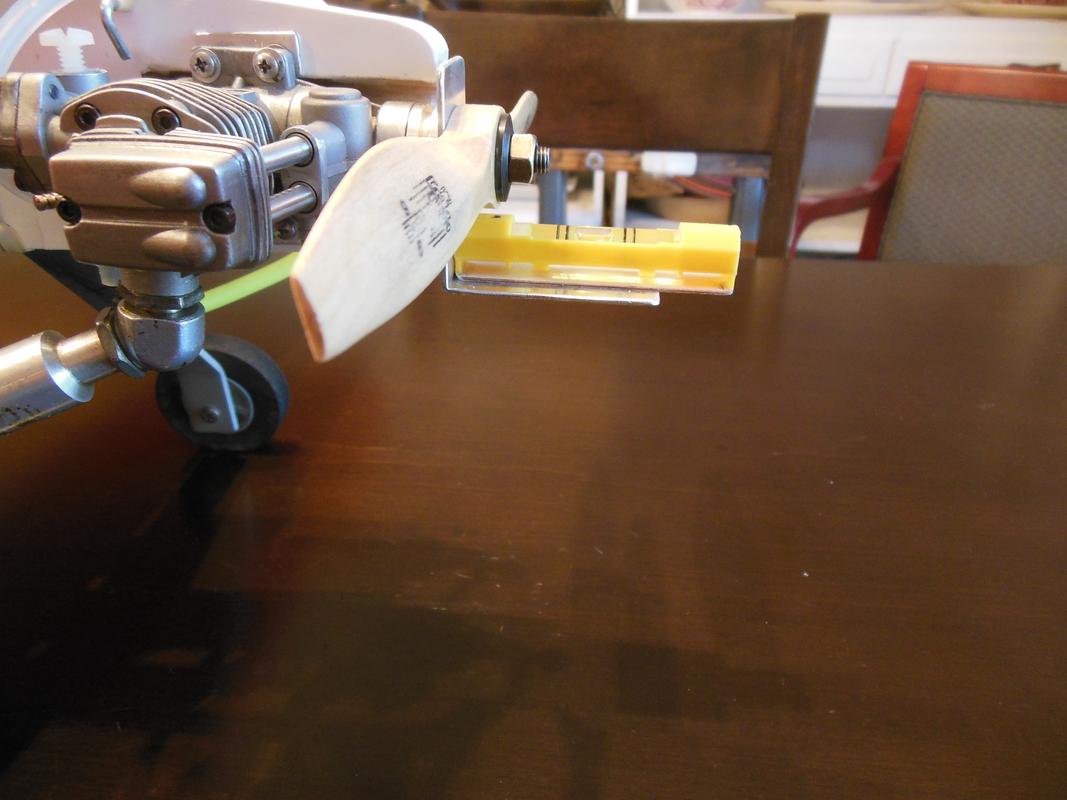
The last part I need to make this a set. I took a length of 2” aluminum angle and cut off a 1” section. I dressed up the edges and the corners, and then I took a uni-bit and drilled a hole in one leg sized for the engine shaft. I ensured there was room for my line level to butt up against the corner. I used a triangle to make sure the angle is square, as I’ve gotten aluminum angle that wasn’t completely at 90 degrees.
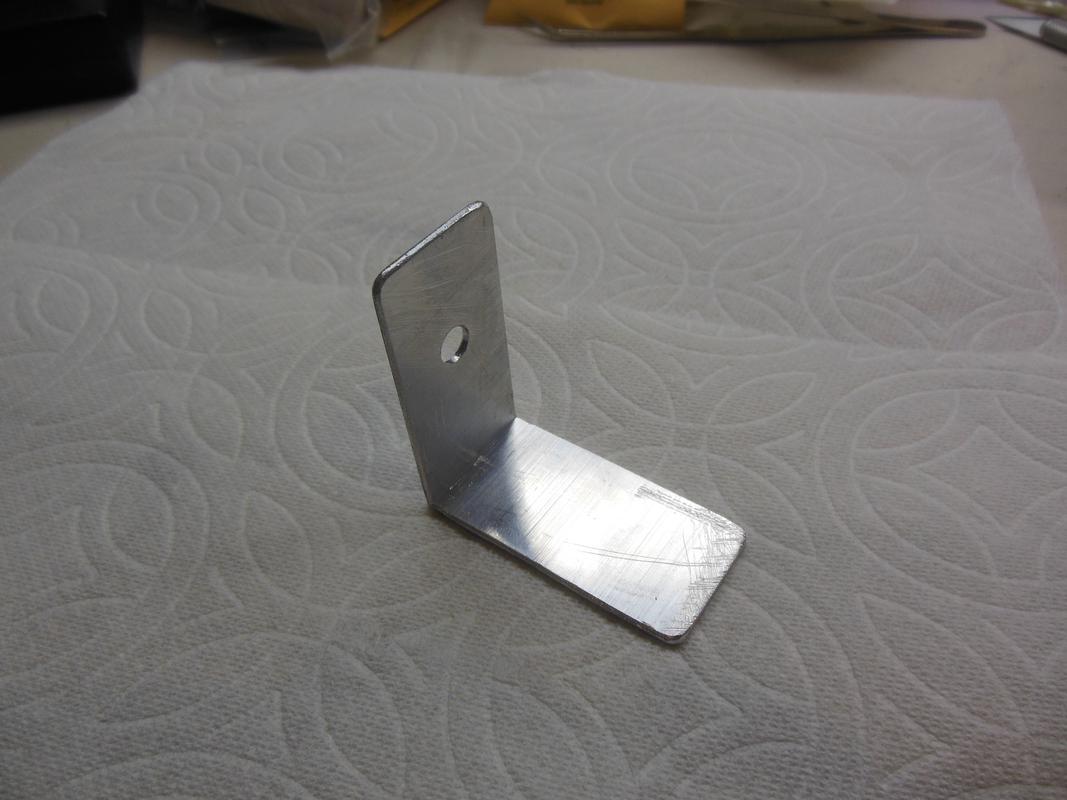
I then sandwiched the angle piece between the prop hub and the prop, and put the line level on the bottom of the angle. I put the wing incidence meter on the wing at the root and raised the tail until the wing incidence was level, and then checked the engine to see that it is level with respect to the wing giving me a 0-0-0 alignment of the stab-wing-engine thrust line.
The Square Mark

I then sandwiched the angle piece between the prop hub and the prop, and put the line level on the bottom of the angle. I put the wing incidence meter on the wing at the root and raised the tail until the wing incidence was level, and then checked the engine to see that it is level with respect to the wing giving me a 0-0-0 alignment of the stab-wing-engine thrust line.


The Square Mark

batjac- Diamond Member


Posts : 2375
Join date : 2013-05-22
Age : 61
Location : Broken Arrow, OK, USA
 Similar topics
» Lots of 1/2A's for sale
» Cox .020 Pee Wee, gotta say - not a fan
» I gotta do this!
» The RMH Bipe build thread
» Woop! Gotta love toys for Christmas!
» Cox .020 Pee Wee, gotta say - not a fan
» I gotta do this!
» The RMH Bipe build thread
» Woop! Gotta love toys for Christmas!
Page 1 of 1
Permissions in this forum:
You cannot reply to topics in this forum

 Rules
Rules


