Log in
Search
Latest topics
» My latest doodle...by batjac Today at 10:05 pm
» Retail price mark-up.. how much is enough?
by gkamysz Today at 9:29 pm
» Happy 77th birthday Andrew!
by roddie Today at 9:22 pm
» Roger Harris revisited
by rsv1cox Today at 3:38 pm
» My N-1R build log
by GallopingGhostler Today at 3:04 pm
» Tee Dee .020 combat model
by 1/2A Nut Today at 2:43 pm
» Chocolate chip cookie dough.........
by roddie Today at 1:13 pm
» Purchased the last of any bult engines from Ken Enya
by sosam117 Today at 11:32 am
» Free Flight Radio Assist
by rdw777 Today at 9:24 am
» Funny what you find when you go looking
by rsv1cox Wed Nov 20, 2024 3:21 pm
» Landing-gear tips
by 1975 control line guy Wed Nov 20, 2024 8:17 am
» Cox NaBOO - Just in time for Halloween
by rsv1cox Tue Nov 19, 2024 6:35 pm
Cox Engine of The Month
Fitting Cox .049 pistons to cylinders..
Page 1 of 2
Page 1 of 2 • 1, 2 
 Fitting Cox .049 pistons to cylinders..
I'm rebuilding some engines.. and have a "baggie" full of pistons with reset-rods. They're not matched-up with cylinders. When trying to fit them; they're "tight" when coming-up to the exhaust-ports. I don't know if there are burrs in the cylinders.. or if I reset the socket-joint too tight. I naturally don't want to force the fit. I'm using plenty of oil in the assembly.. but the piston hangs-up at the exhaust-ports. The rods float freely.. so I don't think I reset them too tightly. Should I try swiping the cylinder with some emery-cloth wrapped-around a dowel?
I'm going "very easy" with the fitting.. Maybe too easy? I don't want to force the fit.. and risk scoring. Any suggestions?
I'm going "very easy" with the fitting.. Maybe too easy? I don't want to force the fit.. and risk scoring. Any suggestions?
 Re: Fitting Cox .049 pistons to cylinders..
I would avoid emory cloth and a dowel. The cylinders are soft and an xacto blade will scrape off the burr. I use magnification to see the burr the take a #11 blade through the exhaust port and scrape the burr away. Take a little at a time and test fit the piston. You will see where there is interference where the bump on the cylinder wall gets shiney after passing a piston through.

Jason_WI- Top Poster


Posts : 3123
Join date : 2011-10-09
Age : 49
Location : Neenah, WI
 Re: Fitting Cox .049 pistons to cylinders..
It is better to swap pistons and cylinders around until you find a good match rather then trying to lapped them I think.
What type of cylinders do you have?
I have some where the bar was removed and these were not deburred enough in that process. These then needed some extra polishing right at the exhaust ports, but nothing above that.
If the piston has been damaged in the resetting of the rod, the low end would still be unaffacted. So try inserting the piston upside down, or from the top (in the regular direction). This will help you to see if the pistons are damaged or not. If the piston fits well from the top but catches on the way down at the exhasut ports, these will need some deburring done.

Surfer_kris- Diamond Member

- Posts : 1912
Join date : 2010-11-20
Location : Sweden
 Re: Fitting Cox .049 pistons to cylinders..
Roddie, I received some excellent advice in this thread:
https://www.coxengineforum.com/t7586-did-i-ruin-my-brand-new-teedee-cylinder?
I do agree with Kris, it is best to start with mixing and matching the pistons and cylinders. For initial deburring of the port areas of the cylinders, an old piston on a brass tube works well. It is also described in the thread.

KariFS- Diamond Member

- Posts : 2044
Join date : 2014-10-10
Age : 53
 Re: Fitting Cox .049 pistons to cylinders..
Don't wrap a dowel with any kind of sandpaper. Use the piston upside down. Use a piece of tubing that fits inside the skirt. The inside of the skirt is tapered so pushing the tubing into it locks it in place to allow you to twirl it. If it doesn't fit tight enough wrap tape around it. With the piston upside down and the tubing sticking out of the top of the cylinder use a metal polish like Brasso or Mothers or rubbing compounds like Dupont #7. Twist the tubing moving it up and down but don't bring the skirt up too high. This removes any burr due to the piston being harder than the cylinder. If you mushroomed the top of the piston your pretty much wasting your time.Clean well when done using hot soapy water.
Last edited by Ken Cook on Sat Jun 24, 2017 6:00 am; edited 1 time in total

Ken Cook- Top Poster

- Posts : 5637
Join date : 2012-03-27
Location : pennsylvania
 Re: Fitting Cox .049 pistons to cylinders..
One thing to remember is that by switching piston/cylinders is a crap shoot at best. Sometimes it works with good success and sometimes not. Fit is critical to allowing peak performance as many times the engine sags. Just because a piston is tight into the sleeve and you lap it in, doesn't mean it's good. Many times your just wearing off the high spots of a possible out of round cylinder or piston. Ledloy steel is very inexpensive and has a fast machining rate which doesn't mean the piston is fitting correctly. So in theory you can believe all the hocus pocus in regards to machining tolerances to the millionths of an inch. If that was true which in no doubt is a possibility, there should be no reason that one engine should run any different than another which we all know is not the case. It's very easy to distort these cylinders or burr them, anyone who has experience with these engines have more than likely done so. If you develop a burr with the virgin piston cylinder then the success rate is usually above 80% in making it workable again. Spending a lot of time in the lower portion of the skirt usually helps as this relieves material that's not needed and generally reduces drag.

Ken Cook- Top Poster

- Posts : 5637
Join date : 2012-03-27
Location : pennsylvania
 Re: Fitting Cox .049 pistons to cylinders..
Thanks very much guys! I read carefully through this thread and the one that Kari linked in his post. I now have a much better feeling about how to proceed.
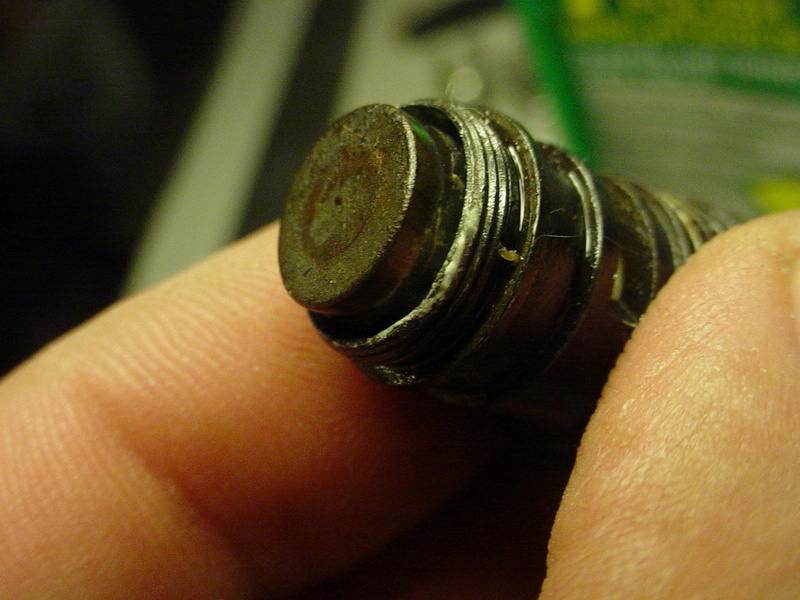
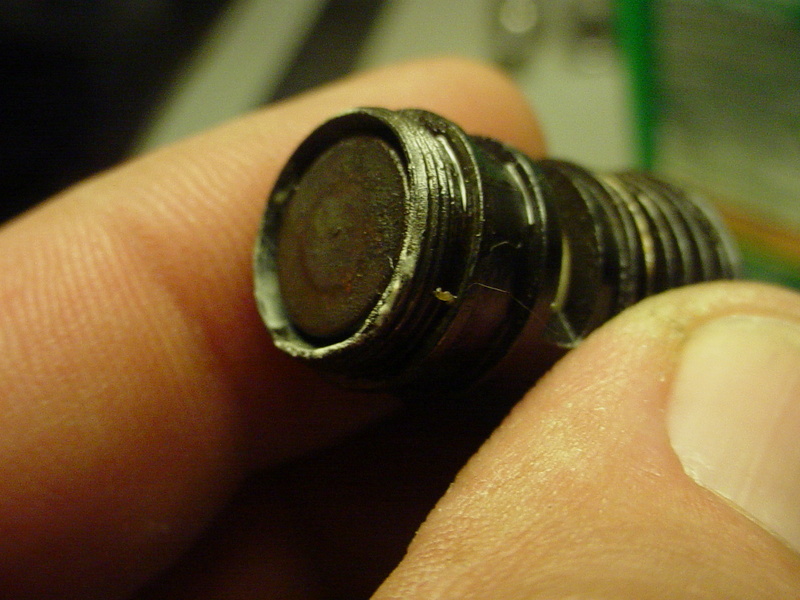
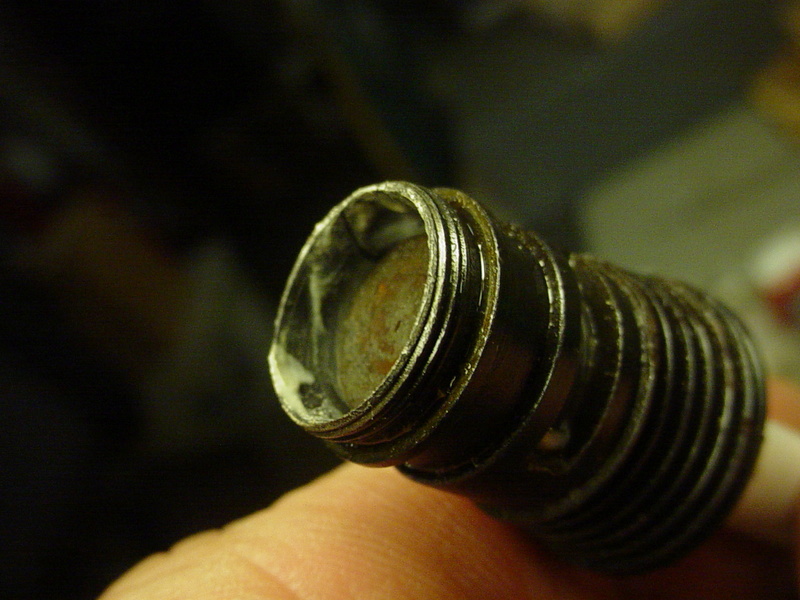
I'll have to see if I have any metal-polish around here. I looked through a magnifier.. but I don't think that there's enough of a burr to see.. but there must be something there on these two #1's..
Maybe these photos show something that my untrained eye isn't seeing?

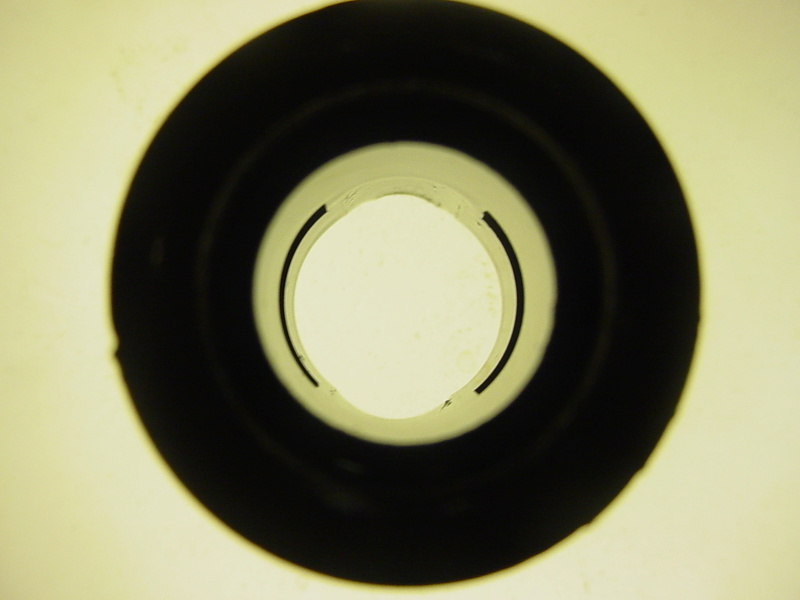


My pistons all measure between .4052"/.4055" at the top.. but there are two in particular that seem to fit into the bores further than the others, before getting tight.

These photos really show how grimy my parts are..
Many of my pistons show discoloration on their walls. Some of this may be castor. Will this hinder proper fitting? Is there any way I can clean them up? Would it make sense to use Ken's polishing technique in an old worn cylinder-bore to clean them up before proceeding?
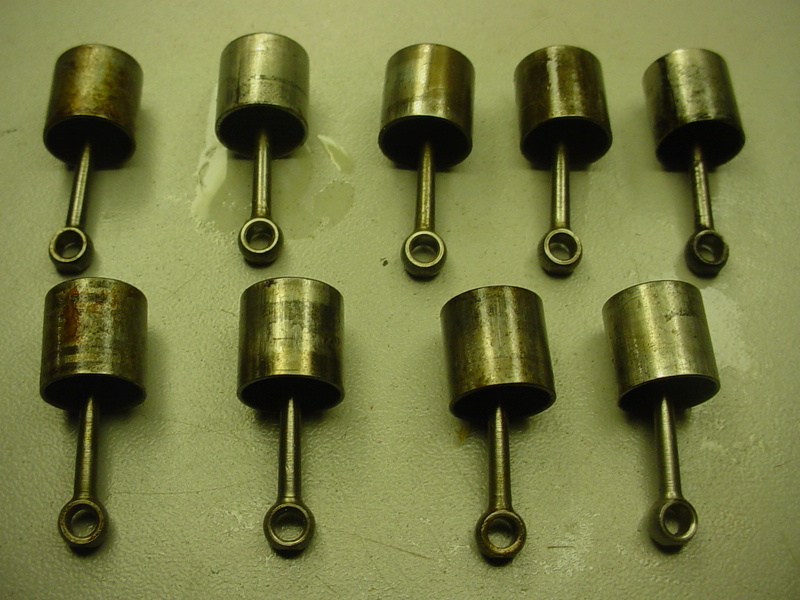

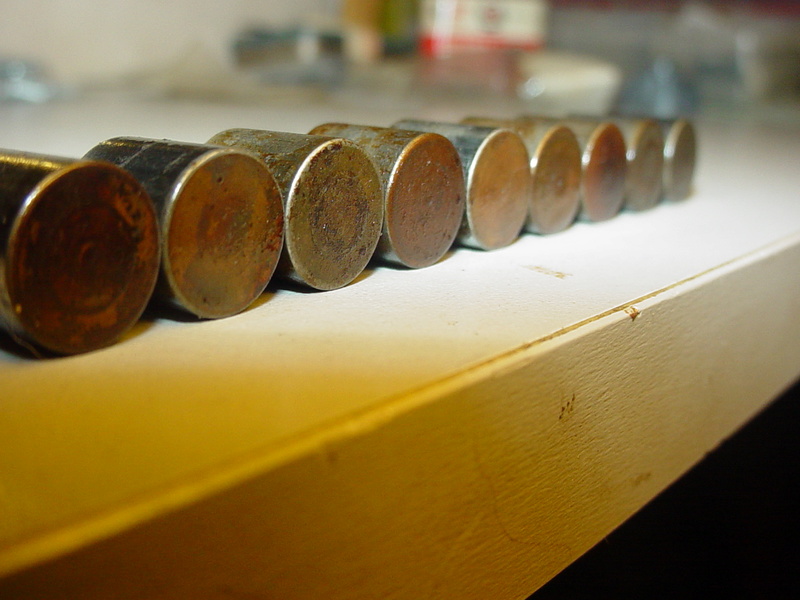
These parts are all from very old engines. As you can see, the copper-plating is worn-off the tops of many of them. Is this cause for concern?
I'll have to see if I have any metal-polish around here. I looked through a magnifier.. but I don't think that there's enough of a burr to see.. but there must be something there on these two #1's..
Maybe these photos show something that my untrained eye isn't seeing?


My pistons all measure between .4052"/.4055" at the top.. but there are two in particular that seem to fit into the bores further than the others, before getting tight.

These photos really show how grimy my parts are..
Many of my pistons show discoloration on their walls. Some of this may be castor. Will this hinder proper fitting? Is there any way I can clean them up? Would it make sense to use Ken's polishing technique in an old worn cylinder-bore to clean them up before proceeding?


These parts are all from very old engines. As you can see, the copper-plating is worn-off the tops of many of them. Is this cause for concern?
 Re: Fitting Cox .049 pistons to cylinders..
The copper plating is a non issue and will not affect engine run. It certainly looks to me like the one cylinder in the picture has plier marks on it. That can certainly screw up a cylinder and make things too tight. Lapping the piston in will polish the piston. No need to do so prior to doing it. After you do lap it in treat it like you would a new engine. After a few runs, I have a 5x3 cut down to 3 7/8" which I give it all the dilithium crystals it can handle. I find this helps make the marriage complete .

Ken Cook- Top Poster

- Posts : 5637
Join date : 2012-03-27
Location : pennsylvania
 Re: Fitting Cox .049 pistons to cylinders..
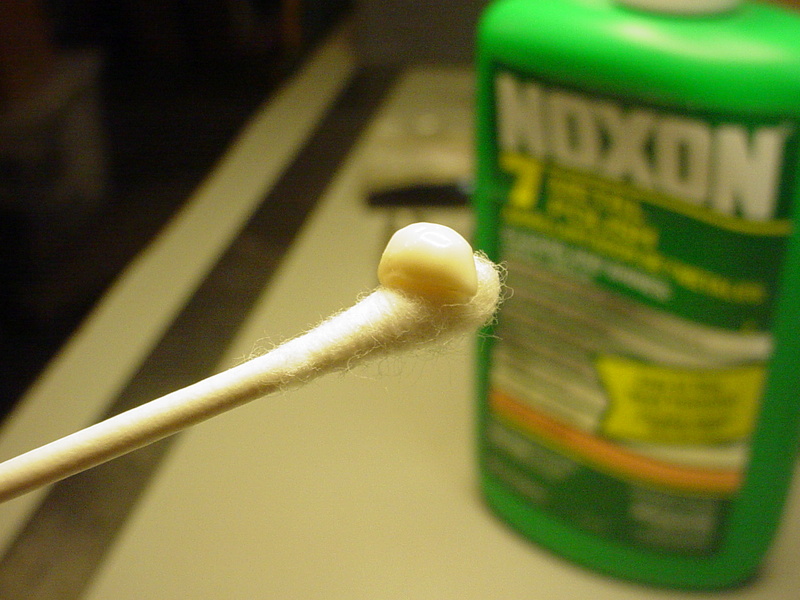
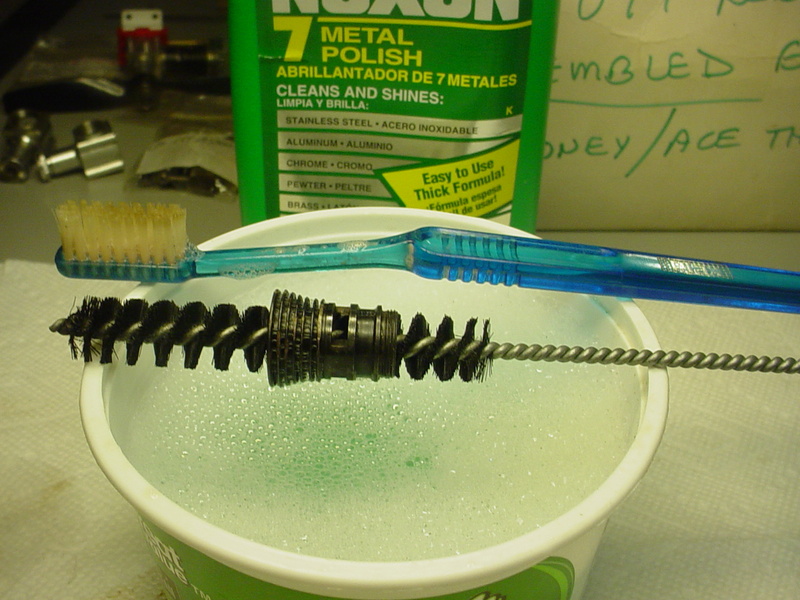
Ready to start lapping! While out on an errand today, I bought some Noxon 7 metal-polish.
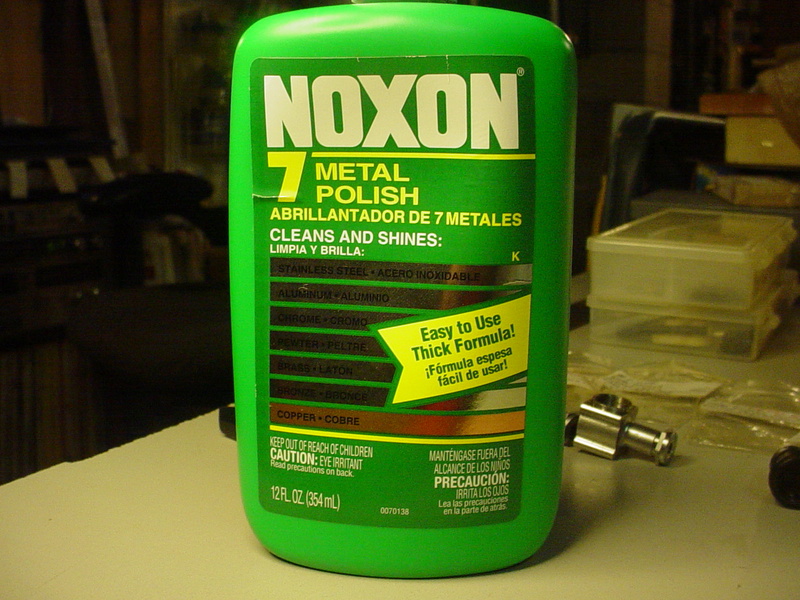
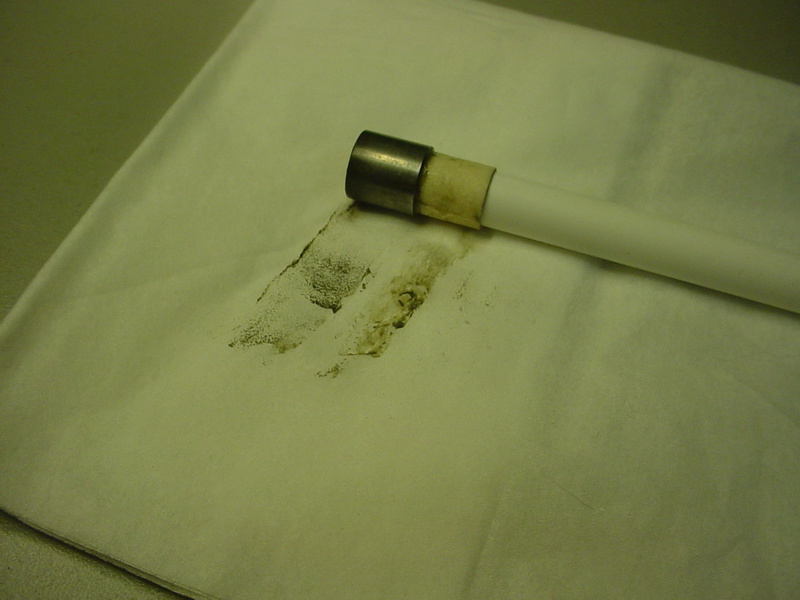
The ID of my Cox .049 piston-skirts measures .357" so I used the plastic body of a ball-point pen.. and wrapped it with masking-tape until I achieved a snug fit inside the skirt.

I also had this nylon-bristle tubing-brush that's going to work nicely for cleaning the bore with the warm soapy water after lapping is complete, which Ken recommends.

I'll report back soon after I've done the work.

The ID of my Cox .049 piston-skirts measures .357" so I used the plastic body of a ball-point pen.. and wrapped it with masking-tape until I achieved a snug fit inside the skirt.

I also had this nylon-bristle tubing-brush that's going to work nicely for cleaning the bore with the warm soapy water after lapping is complete, which Ken recommends.

I'll report back soon after I've done the work.
 Re: Fitting Cox .049 pistons to cylinders..
Joy! This process worked very well!
Some pics..


the bath in a little tub of hot water.. and some Dawn dish liquid..
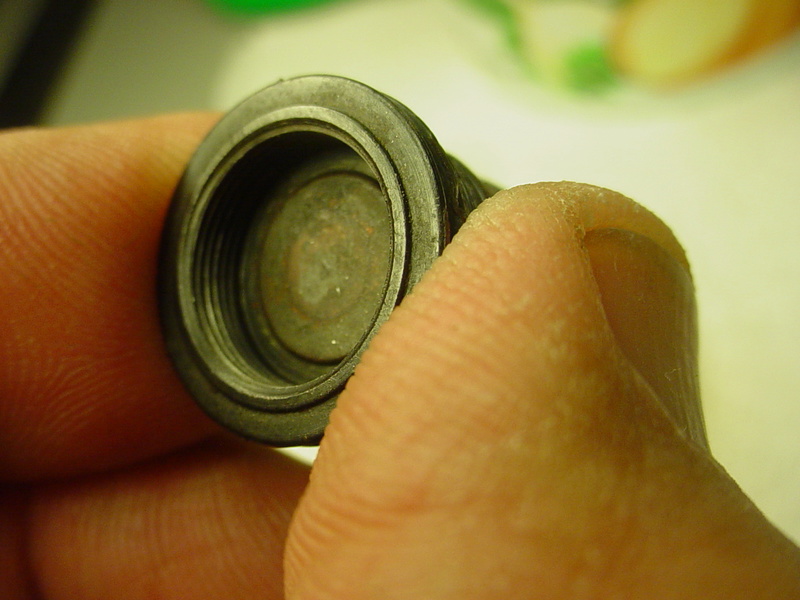
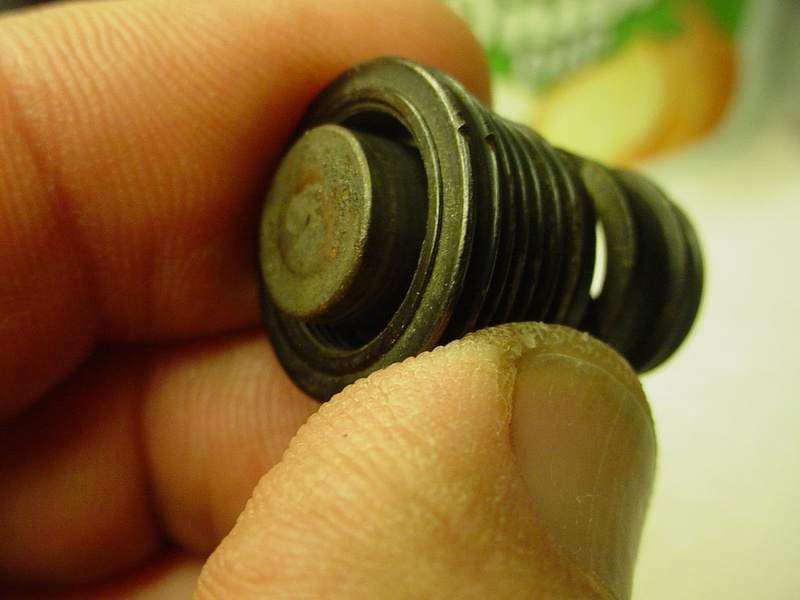
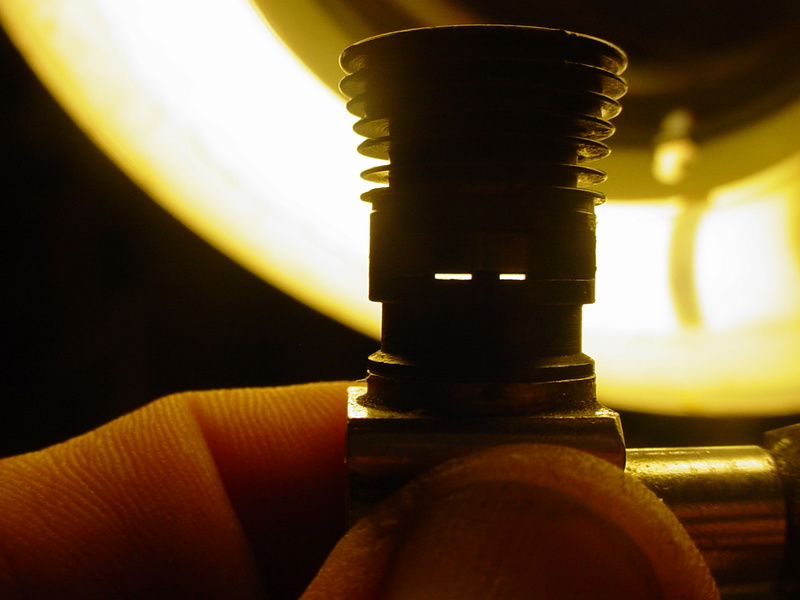
A sub-piston induction gap can be seen here.
Thanks all.. and especially Ken Cook for the guidance! I'll have a few more cylinders that will need this process done.. but it only takes a little time, patience and having the items on-hand for all the steps involved.
Some pics..


the bath in a little tub of hot water.. and some Dawn dish liquid..


A sub-piston induction gap can be seen here.

Thanks all.. and especially Ken Cook for the guidance! I'll have a few more cylinders that will need this process done.. but it only takes a little time, patience and having the items on-hand for all the steps involved.
 Re: Fitting Cox .049 pistons to cylinders..
Roddie.
Did you lap with a sacrificial piston or the actual one to be used in that cylinder? I'd be curious to know what wort of markings it may have left on the surface of the piston. If there is a high spot in the cylinder such as a bur then it may have left some uneven wear marks in the piston surface, although as mentioned, the cylinder is a lot softer than the piston. Personally, to rectify a fault with a cylinder I think I would be using an old piston that was beyond use. (Rusted, pitted etc.) The one on the lower left of your picture looks like it fills that category.
Did you lap with a sacrificial piston or the actual one to be used in that cylinder? I'd be curious to know what wort of markings it may have left on the surface of the piston. If there is a high spot in the cylinder such as a bur then it may have left some uneven wear marks in the piston surface, although as mentioned, the cylinder is a lot softer than the piston. Personally, to rectify a fault with a cylinder I think I would be using an old piston that was beyond use. (Rusted, pitted etc.) The one on the lower left of your picture looks like it fills that category.

Oldenginerod- Top Poster

- Posts : 4018
Join date : 2012-06-15
Age : 62
Location : Drouin, Victoria
 Re: Fitting Cox .049 pistons to cylinders..
Oldenginerod wrote:Roddie.
Did you lap with a sacrificial piston or the actual one to be used in that cylinder? I'd be curious to know what wort of markings it may have left on the surface of the piston. If there is a high spot in the cylinder such as a bur then it may have left some uneven wear marks in the piston surface, although as mentioned, the cylinder is a lot softer than the piston. Personally, to rectify a fault with a cylinder I think I would be using an old piston that was beyond use. (Rusted, pitted etc.) The one on the lower left of your picture looks like it fills that category.
No, I didn't use a sacrificial piston. I followed Ken's method.. of inserting the piston inverted, into the bottom of the cylinder and applied the combination of an "in and out" motion with simultaneous "alternating-rotations" and being very light-handed. The bottom of the skirt is what does the work. The piston-wall and cylinder-bore end up with a very nice clean finish. It takes a bit of work.. and took a LOT longer with the second cylinder. The piston felt like it was hitting a hard ridge. It took me close to 30 minutes.. and several applications of polish before it finally cleared the exhaust port. Once past the burr, I didn't go much further. I basically stayed at that elevation until the rotations felt uniform/smooth. I kept a distance from TDC to preserve the compression-fit. It was well worth the effort and patience though. Both engines were then assembled with a gasket/plug.. and have good compression without actually tightening the plugs.
The engine on the left has the second #1 cylinder that was tougher to hone.
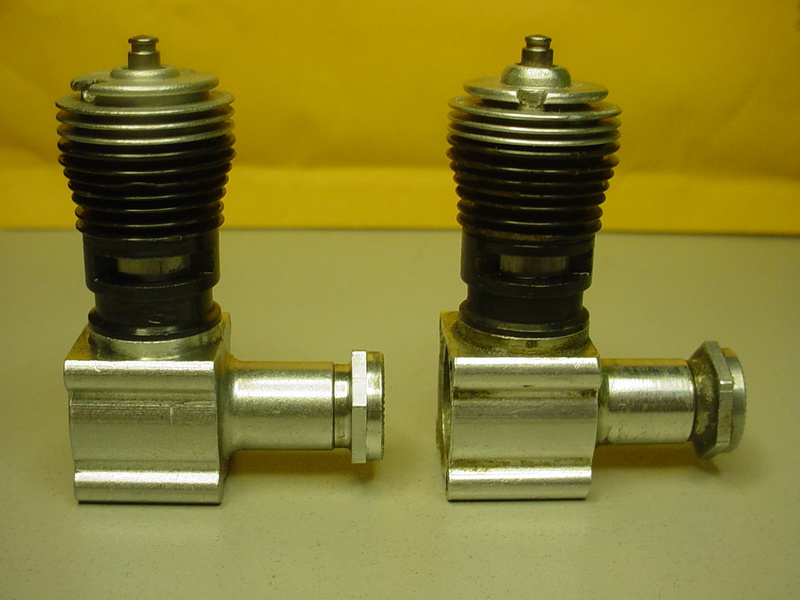
EDIT: I just noticed that those plugs look quite different from each other..
I'm really looking forward to fitting the carbs.. and cranking them up. Ken recommends cutting-down a prop for the initial runs. I've never done that.. so I'm not sure how to go about it. I have a 5 x 2.. that would let them unwind more than any of my other props.
Last edited by roddie on Sat Jun 24, 2017 9:53 pm; edited 1 time in total (Reason for editing : glow-plug difference)
 Re: Fitting Cox .049 pistons to cylinders..
I don't use the small prop for the initial runs. I run a few rich runs first with a 5x3. That keeps the load light. Once I find that I can needle the engine in a bit I use the small prop. Many times the piston wants to swell during operation, if I find that the engine is beginning to sag, I look a bit more deeper into what is going on. As I mentioned and as Rod mentions, this isn't a sure fire solution to a mismatched situation because of exactly what he's mentioned. But, you have a pile of stuff that wasn't doing anything aside from taking up air molecules so why not try it. This is a crude method but it can work. Sometimes, I need to lap the piston in the cylinder with proper orientation, you want the crown of the piston to actually hang right at the landing of the plug. As soon as it's tapped, it falls out. There's no science to cutting down a prop, measure out from the root and clip it with a pair of side cutters. Forget all the balancing mumbo jumbo, smooth the edges and your done. You can put a nail in the center of a board and a nail as a register on the tip and rotate it, making certain the blades are equal in length.

Ken Cook- Top Poster

- Posts : 5637
Join date : 2012-03-27
Location : pennsylvania
 Re: Fitting Cox .049 pistons to cylinders..
Ken Cook wrote:I don't use the small prop for the initial runs. I run a few rich runs first with a 5x3. That keeps the load light. Once I find that I can needle the engine in a bit I use the small prop. Many times the piston wants to swell during operation, if I find that the engine is beginning to sag, I look a bit more deeper into what is going on. As I mentioned and as Rod mentions, this isn't a sure fire solution to a mismatched situation because of exactly what he's mentioned. But, you have a pile of stuff that wasn't doing anything aside from taking up air molecules so why not try it. This is a crude method but it can work. Sometimes, I need to lap the piston in the cylinder with proper orientation, you want the crown of the piston to actually hang right at the landing of the plug. As soon as it's tapped, it falls out. There's no science to cutting down a prop, measure out from the root and clip it with a pair of side cutters. Forget all the balancing mumbo jumbo, smooth the edges and your done. You can put a nail in the center of a board and a nail as a register on the tip and rotate it, making certain the blades are equal in length.
I guess maybe I lucked-out with these two cylinders? I resisted the temptation to rush.. and went very lightly with the lapping. The Noxon 7 polish seemed to work very well.. although I had no other polish to compare it to. The "7" in its name applies to 7 metals it's formulated for. Stainless steel, aluminum, chrome, pewter, brass, bronze and copper. The directions expressly state; not for use on silver. The polish has ammonia in it. I applied it with a cotton-swab and it stays where you put it. It's a liquid but not "runny". It does dry.. but it doesn't "cake". It took a few applications (quite a few on the second cylinder..) The 12oz. container has a flip-top cap with a small hole which provided for a no-mess application. It cost $4 at an "IGA" market that usually has higher-prices on everything.. so you could likely find it cheaper somewhere else.
Regarding my two test-cylinders, the piston-crowns at TDC (where I did not lap..) both have the fit you mentioned after I did the work. I can't feel any dragging through the stokes on either. As I mentioned; after dry-fitting, I oiled the bores with 3-in-One oil and installed gaskets/plugs only hand-tight.. and the compression feels decent with an audible "pop" when flicking the drive-plates. Not "like-new".. but certainly not weak. Castor-oil should work it's magic if they run.. which I'm pretty sure they will. I suppose the real test will be in the actual running of the engines.
I have 5 x 3 props. You mention keeping the load light initially. I also have a 5 x 2. Would that be a better choice? I'll be sure to run the engines on the rich-side as you mentioned. What's the purpose of later running a cut-down prop? Is it advantageous to running-in/burnishing the fit?
 Re: Fitting Cox .049 pistons to cylinders..
Ken Cook wrote: There's no science to cutting down a prop, measure out from the root and clip it with a pair of side cutters. Forget all the balancing mumbo jumbo, smooth the edges and your done. You can put a nail in the center of a board and a nail as a register on the tip and rotate it, making certain the blades are equal in length.
Have you ever used a "hot-knife" for cutting plastic? I haven't.. but am now wondering if one could be used in a fixture like you mention above; with a baseboard having a pin for the prop-hub and mounting the hot-knife vertically at a predetermined distance away from center? This might also be applied with a dremel/cut-off wheel/saw for wood-props..

 Re: Fitting Cox .049 pistons to cylinders..
Roddie, 3 in 1 gave me a lot of problems. Your experience might differ. It makes for difficult starting and if it's let to sit, it freezes up the piston and when moved it feels like rust. I don't know what it is about the stuff but I believe for a short period it frees the castor only to glue it later. I learned the hard way storing some engines. I use only air tool oil or ATF which is similar. Lapping can be done with toothpaste as well. Don't spend too much time thinking about how to cut a prop side cutters work fine. I have dozens of them, I use a nail file emery board to smooth them up. I spin the cut down props in excess of 34K. For APC props, I have a set of scribes with a bushing that fits into the prop hole allowing me to accurately mark both sides. The rubber ducky props are flat enough and square tipped enough to eyeball.

Ken Cook- Top Poster

- Posts : 5637
Join date : 2012-03-27
Location : pennsylvania
 Re: Fitting Cox .049 pistons to cylinders..
Ken Cook wrote: Roddie, 3 in 1 gave me a lot of problems. Your experience might differ. It makes for difficult starting and if it's let to sit, it freezes up the piston and when moved it feels like rust. I don't know what it is about the stuff but I believe for a short period it frees the castor only to glue it later. I learned the hard way storing some engines. I use only air tool oil or ATF which is similar. Lapping can be done with toothpaste as well. Don't spend too much time thinking about how to cut a prop side cutters work fine. I have dozens of them, I use a nail file emery board to smooth them up. I spin the cut down props in excess of 34K. For APC props, I have a set of scribes with a bushing that fits into the prop hole allowing me to accurately mark both sides. The rubber ducky props are flat enough and square tipped enough to eyeball.
Wow.. I have had my issues with hard-starting..
 and now you've got me wondering. I've read the virtues of using air-tool oil since joining CEF.. and bought some a while back. Maybe I should start using it instead. I always kept a little 1oz. tin spout-top can of 3-in-one in my field-box expressly for oiling the drive-plates on my engines prior to using an electric-starter. I don't generally use it as an after-run oil.. but I do use it when reassembling an engine. Maybe it fouls the plug-element?
 Can you get 34K rpm's out of a reed-valve engine
 Re: Fitting Cox .049 pistons to cylinders..
I get 30k with a Norvel .061 and In excess of 34k using ball bearing .049's. TD doesn't cut it so they sit on the shelf.

Ken Cook- Top Poster

- Posts : 5637
Join date : 2012-03-27
Location : pennsylvania
 Re: Fitting Cox .049 pistons to cylinders..
Ken Cook wrote: I get 30k with a Norvel .061 and In excess of 34k using ball bearing .049's. TD doesn't cut it so they sit on the shelf.
Well.. I have to thank you again Ken. I probably wouldn't have tackled this project with anywhere near the success without your advice. Yesterday I had a box of engine-parts.. and today I have six Cox .049 reedies ready for carbs.
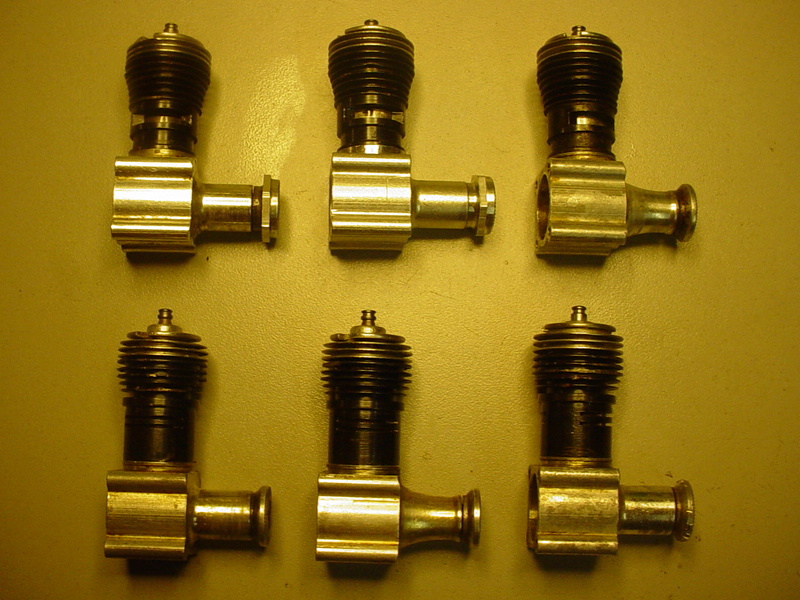
After tightening all the glow-heads, all of the engines have very good compression! The lapping-tool actually helped me to fit the pistons to four cylinders that didn't have any burrs. I used a few drops of air-tool oil and applied the same motion to pick-out/choose the best-fitting pistons.
I have six brand-new backplate/carbs, needles, reeds, screws and gaskets ready to install.
 Re: Fitting Cox .049 pistons to cylinders..
roddie wrote:
Wow.. I have had my issues with hard-starting..and now you've got me wondering. I've read the virtues of using air-tool oil since joining CEF.. and bought some a while back. Maybe I should start using it instead.
A proper after run oil, though expensive, will be soluble in glow fuel and that really improves the starting. So that's all I use when assembling an engine before a test run.

Surfer_kris- Diamond Member

- Posts : 1912
Join date : 2010-11-20
Location : Sweden
 Re: Fitting Cox .049 pistons to cylinders..
 ......... please humor me... I'm a bit excited!
The cylinders in those engines are all dual-bypass. Two are #1's and the other four, I'm not exactly sure of. They're all reed-valve cylinders. None of them have boost-ports. Some are from Babe Bee's.. and maybe one is from a later product-engine. The #1's may have originally been on my two Golden Bee's.. or one of them may possibly from an early "190/290"product engine..?? Only one of them has milled-flats for a wrench.. so I'd really like to source one of those little strap-wrenches like Ken has mentioned. The cylinders will no-doubt loosen from the crankcase before the glow-heads do.. (law of averages..
 ... but will never do that again.
 The #1 cylinders that I removed the burrs from were purposely fitted to cases having the hex drive-plates. I will be running OEM Cox "black" 6 x 2 "L/H" props on those engines.. and have the cam-style spring-starters for them. One (or both) of those engines is slated for a pair of identical self-designed C/L profile P-51 Mustangs. The Cox PT-19 Flight-Trainer uses that prop. The L/H prop helps with line-tension by torque-steering the model outward-circle. The Mustangs were designed with zero rudder-offset and zero offset in their firewalls. They do have adjustable lead-out guides though.
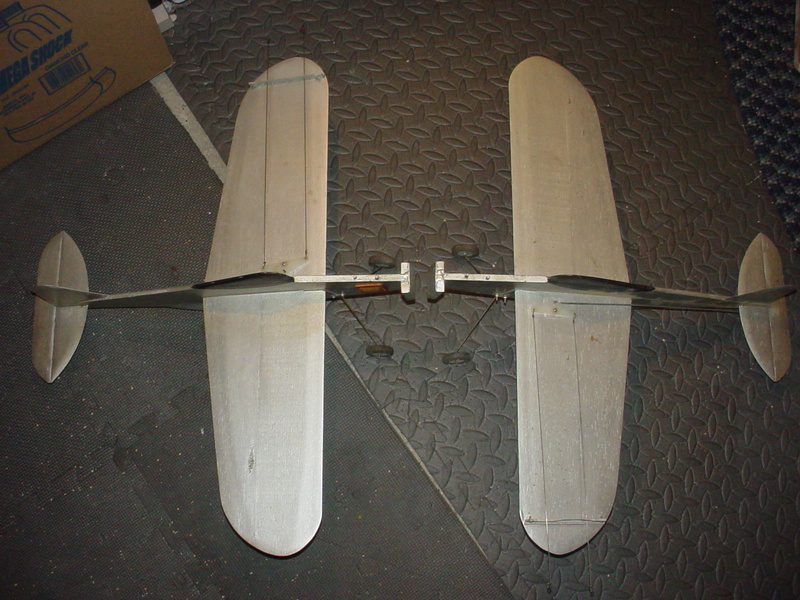
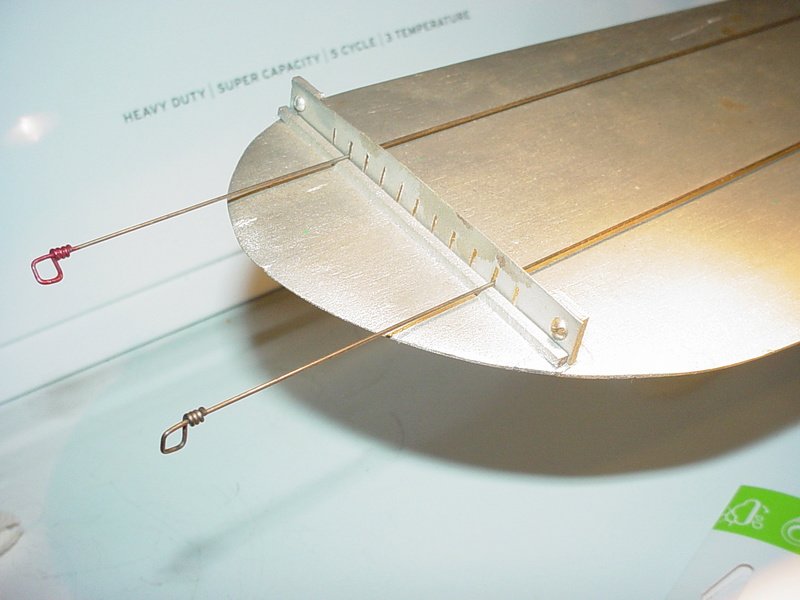
I figure that the L/H props might also give me a little edge.. for the aforementioned reason.. where I haven't flown C/L in decades. I also plan on fitting a L/H prop to my "Rod-Bat".. a small self-designed combat-style job which will be launched via a "bathmat-stooge"..
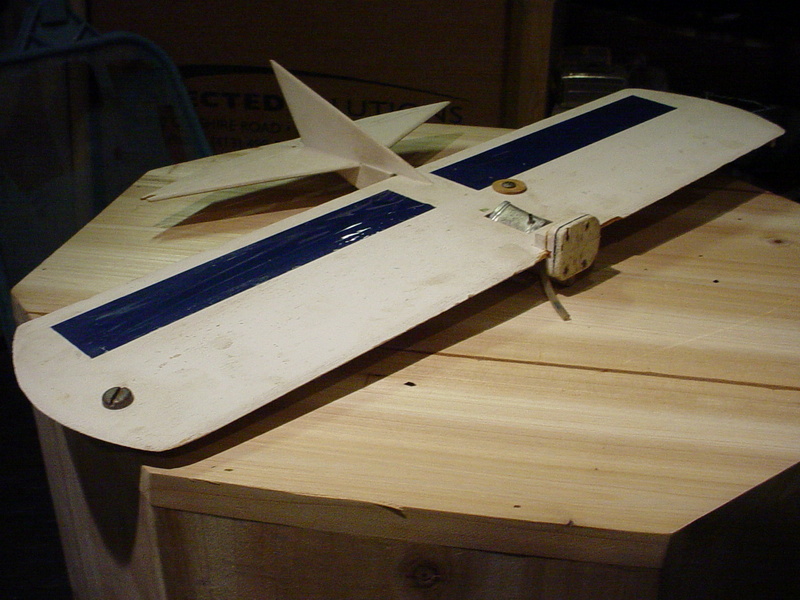
It has the same crude adjustable lead-out guide as the Mustangs..
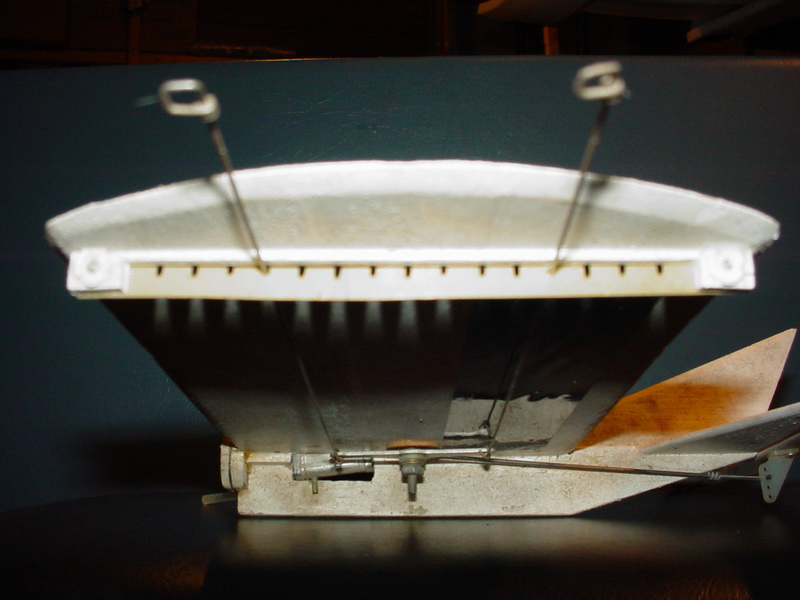
I know it's a bit silly.. because once the setting is optimal, it's unlikely it will be altered.. but what the heck. It seemed like a good idea at the time.
The three "thick-wall" cylinders will be test-beds for my muffler... and seeing if the pressure-tap that I made will actually work. It will be fun for me to try these things.
 Re: Fitting Cox .049 pistons to cylinders..
Back-ends.. (some interesting observations when fitting-up here..) These are all new/NOS parts; Cox .049 Sure-Start (horseshoe) backplate assemblies with short-length/coarse (80 TPI) needles, and Mylar reeds. The case-screws and gaskets are new.
This style reed-retainer snaps-onto the nose of the carb.


I applied the "blow/suck" test to all six carbs.. and they seal quite well. I wouldn't put the pressure of an electric starter against the crankshaft though.
Needles installed..
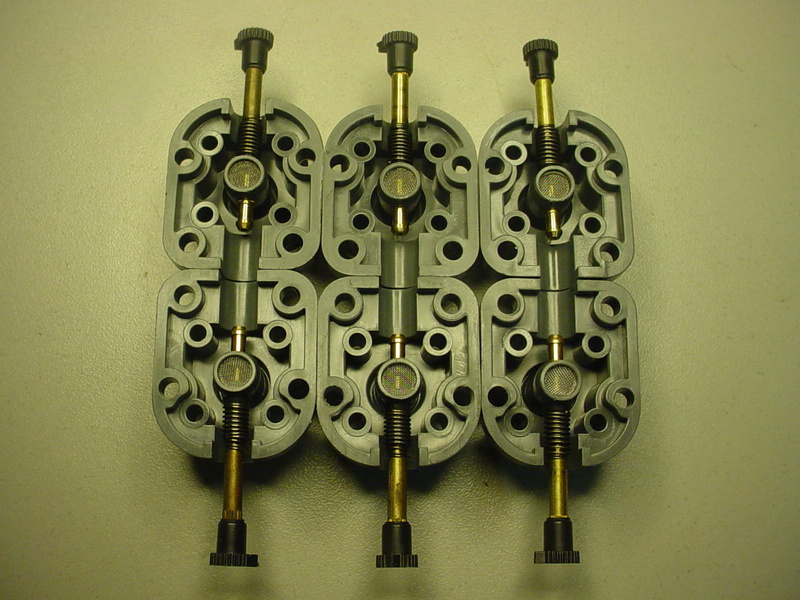
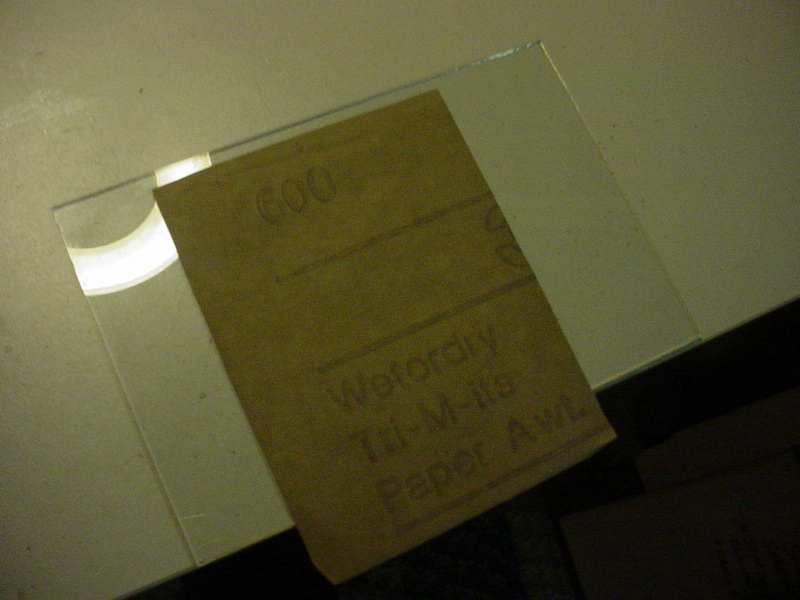
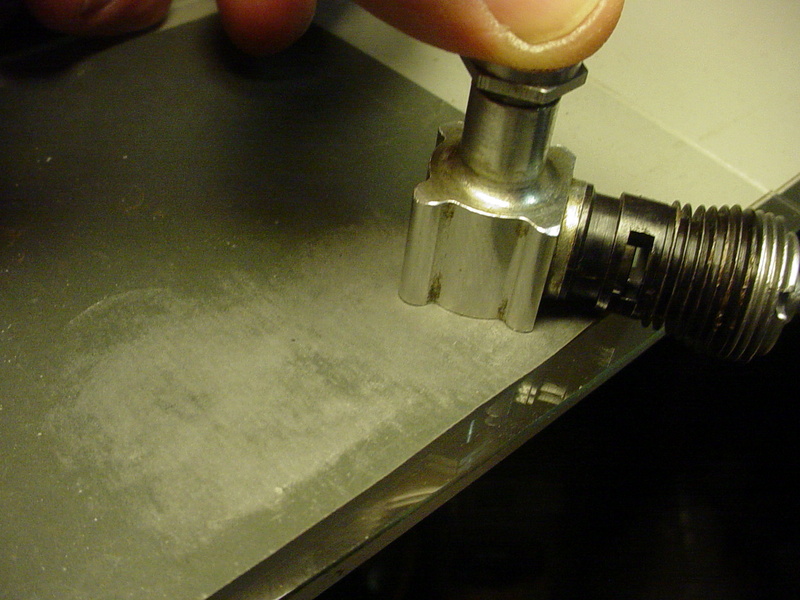
Case-prep for gasket.. (I needed a glass-platen to lap the back of the case)
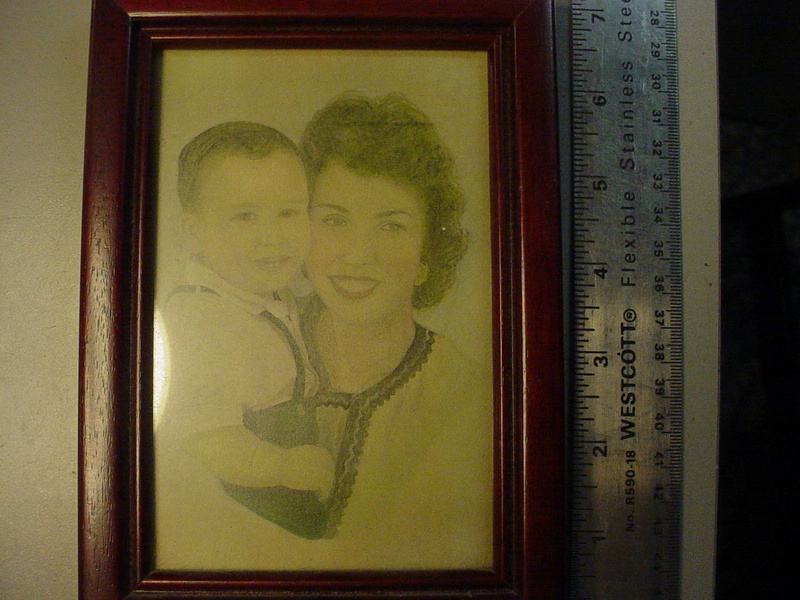
That's a photo of a painting of my mom and I.. that my dad painted in the early 1960's..
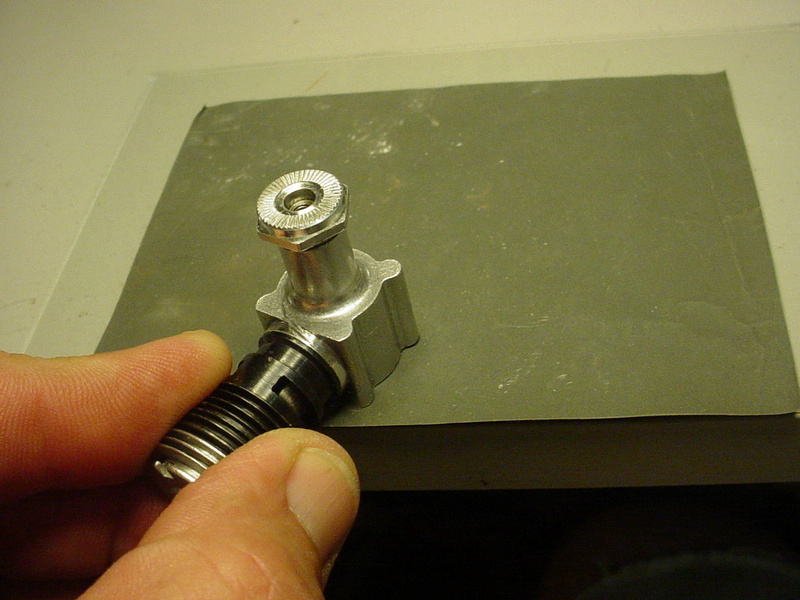
When checking the finish.. I noticed that some of my cases have a really thin web of material where the gasket seats.. Notice the difference between the two photos below.

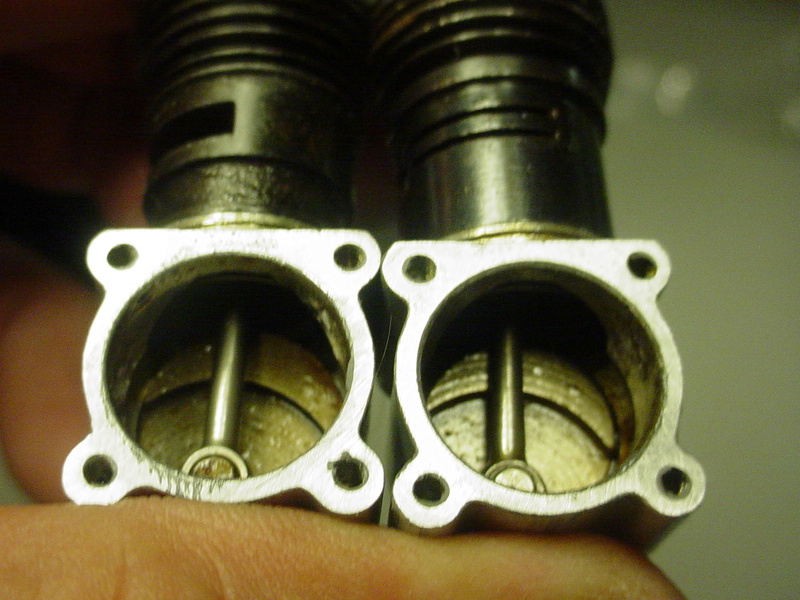
Have any of you noticed this with your Bee's? The 1st/top photo shows a bevel-cut.. .. maybe on purpose?
All six back-ends assembled without incident though. No trouble with screws bottoming before tightening.

I had 5 new aftermarket case-gaskets.. and had to search for a 6th.. I found one in a Cox OEM Cat. #1996 "overhaul-kit for plastic back plate"; a NOS package that I bought from a LHS a few years ago. Its contents were; a case-gasket, 4 case-screws, a Mylar reed, a 3/4"L prop-screw and a "circlip" reed-retainer.. (just a little historical info..)
The six engines are now configured for the airplanes' firewalls that they will be mounted on.
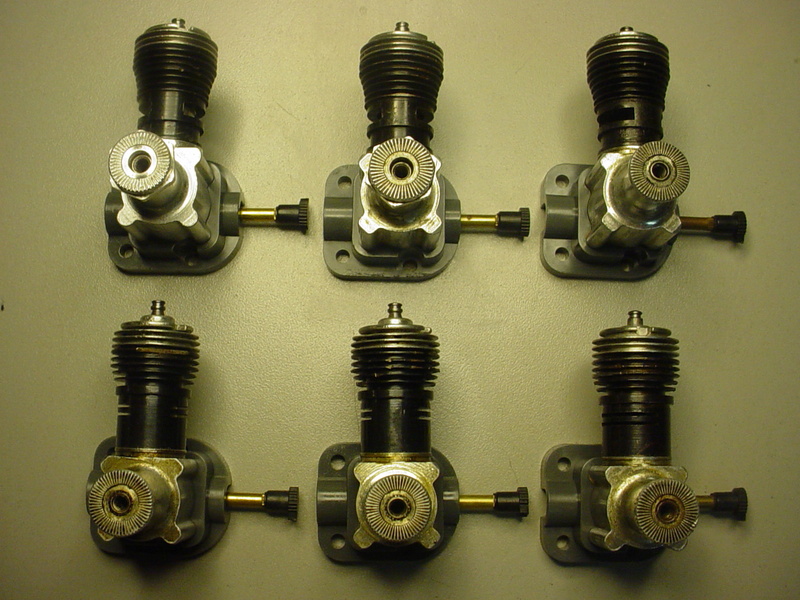
This style reed-retainer snaps-onto the nose of the carb.


I applied the "blow/suck" test to all six carbs.. and they seal quite well. I wouldn't put the pressure of an electric starter against the crankshaft though.
Needles installed..

Case-prep for gasket.. (I needed a glass-platen to lap the back of the case)

That's a photo of a painting of my mom and I.. that my dad painted in the early 1960's..


When checking the finish.. I noticed that some of my cases have a really thin web of material where the gasket seats..


Have any of you noticed this with your Bee's? The 1st/top photo shows a bevel-cut..
 .. maybe on purpose?
All six back-ends assembled without incident though. No trouble with screws bottoming before tightening.

I had 5 new aftermarket case-gaskets.. and had to search for a 6th.. I found one in a Cox OEM Cat. #1996 "overhaul-kit for plastic back plate"; a NOS package that I bought from a LHS a few years ago. Its contents were; a case-gasket, 4 case-screws, a Mylar reed, a 3/4"L prop-screw and a "circlip" reed-retainer.. (just a little historical info..)
The six engines are now configured for the airplanes' firewalls that they will be mounted on.

 Re: Fitting Cox .049 pistons to cylinders..
Now that you assembled them with the cylinder orientated like that, how are you going to screw the hole behind the cylinder?

Ken Cook- Top Poster

- Posts : 5637
Join date : 2012-03-27
Location : pennsylvania
 Re: Fitting Cox .049 pistons to cylinders..
Ken Cook wrote: Now that you assembled them with the cylinder orientated like that, how are you going to screw the hole behind the cylinder?
That's a damn good question Ken..
 Re: Fitting Cox .049 pistons to cylinders..
Unscrewing the cylinder should make room to install the engine. I would drill and if using wood screws pre-thread the holes in the firewall.

coxaddict- Gold Member

- Posts : 429
Join date : 2013-01-27
Location : north shore oahu, Hawaii
Page 1 of 2 • 1, 2 
 Similar topics
» What are the differences (if any) between Cox .09 TD and Medallion pistons/cylinders?
» Fitting a .051 piston to a worn .049 cylinder?
» ISO plans for a V Twin glow engine using Cox 049 cylinders, pistons, glowplugs
» Tips and tricks for getting that tinyt fuel line on the tiny fitting on the back of all.049s HELP!
» Workshop safety
» Fitting a .051 piston to a worn .049 cylinder?
» ISO plans for a V Twin glow engine using Cox 049 cylinders, pistons, glowplugs
» Tips and tricks for getting that tinyt fuel line on the tiny fitting on the back of all.049s HELP!
» Workshop safety
Page 1 of 2
Permissions in this forum:
You cannot reply to topics in this forum

 Rules
Rules


