Log in
Search
Latest topics
» TEE DEE Having issuesby TD ABUSER Today at 9:43 pm
» Landing-gear tips
by roddie Today at 6:17 pm
» Roger Harris revisited
by TD ABUSER Today at 2:13 pm
» Tee Dee .020 combat model
by Ken Cook Today at 1:41 pm
» Retail price mark-up.. how much is enough?
by Ken Cook Today at 1:37 pm
» Happy 77th birthday Andrew!
by getback Today at 11:52 am
» My latest doodle...
by roddie Today at 10:43 am
» My N-1R build log
by GallopingGhostler Yesterday at 3:04 pm
» Chocolate chip cookie dough.........
by roddie Yesterday at 1:13 pm
» Purchased the last of any bult engines from Ken Enya
by sosam117 Yesterday at 11:32 am
» Free Flight Radio Assist
by rdw777 Yesterday at 9:24 am
» Funny what you find when you go looking
by rsv1cox Wed Nov 20, 2024 3:21 pm
Cox Engine of The Month
Project update - Picture heavy
Page 1 of 1
 Project update - Picture heavy
Lot's of rainy days here in WV gave me a chance to work on "Kim's submission".
It arrived with a fixed nose gear and never having a R/C airplane without a steerable nose wheel I was determined to replace it. Not easy as the fixed strut was sewed and epoxied in.
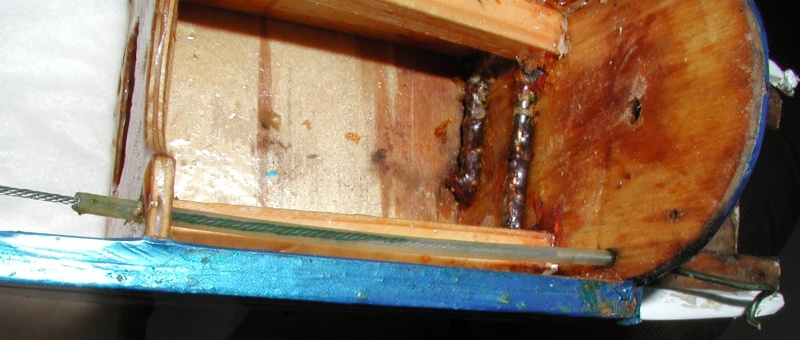
Also the strut was not long enough in relation to the mains that resulted in a severe nose down attitude that would negatively affect take-off.
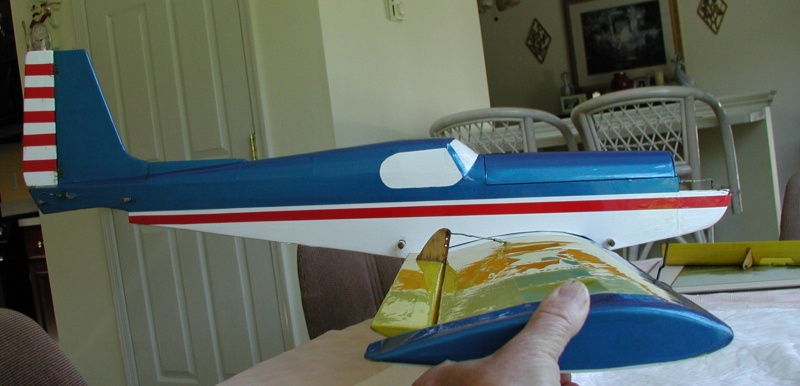
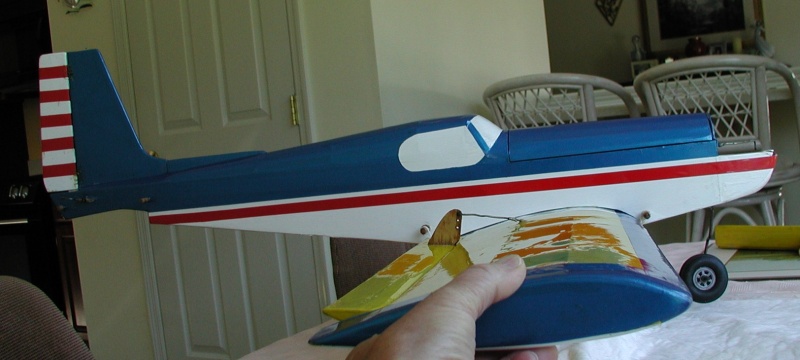
Holding it nose up I thought about a 3/4" extension of the gear would be sufficient.
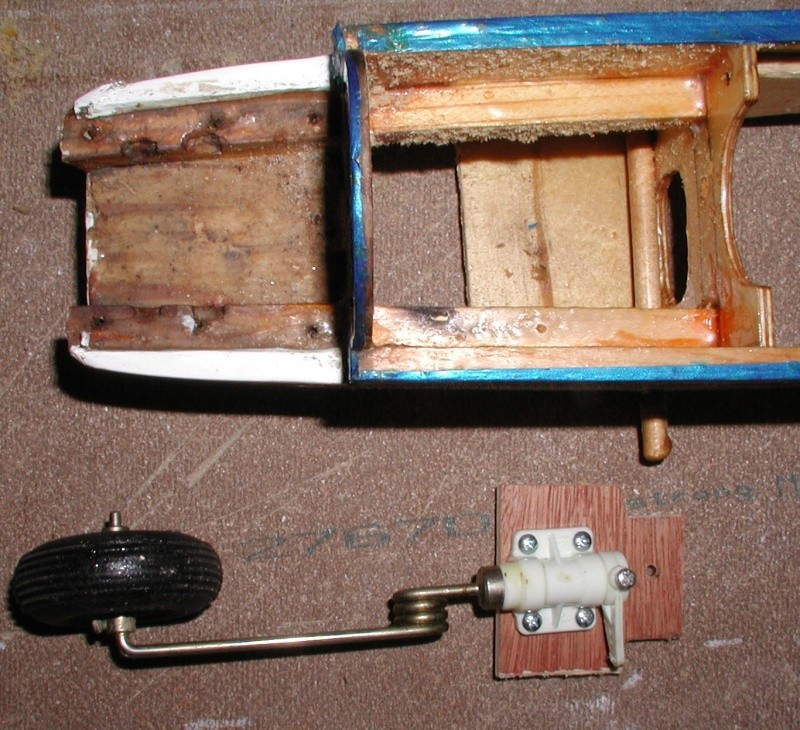
Hunting though my spares I found a steerable nose gear that would fit perfectly. I didn't thing the firewall strong enough so I built a support to mount it on.
That problem solved I turned to the control rods. The person that put this model together was quite innovative. He made his own linkages which at first I thought were not adjustable, but they are. Kind of neat but all replaced now with golden rods.
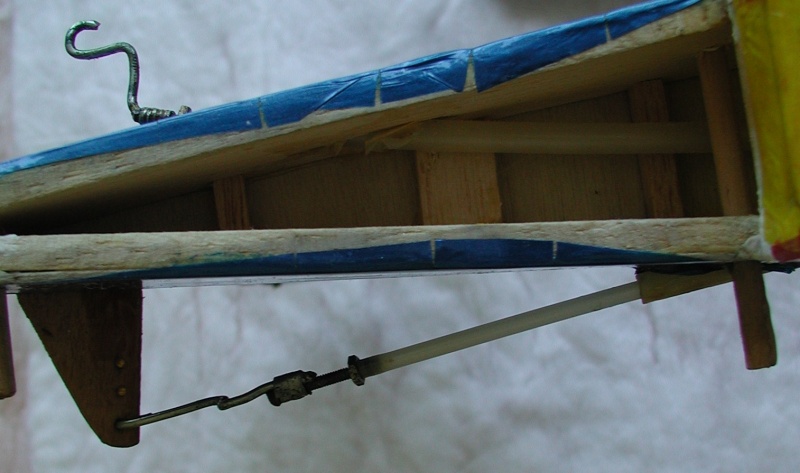

My first test installation of the servos left much to be desired as none of the control linkages would line up. So I thought upside down, not hard for me. .
.

I decided on a .19 engine. (Talk me out of it). It fit's better and should supply enough power to pull this model around in lazy circles.
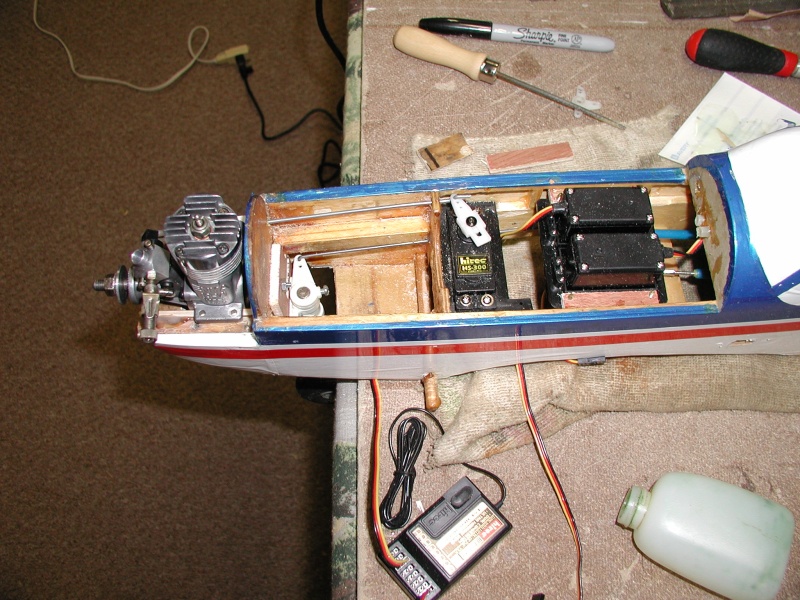
Still lot's to do before this old girl see's air-time, as most everything is just roughed in. I sure do create a mess.
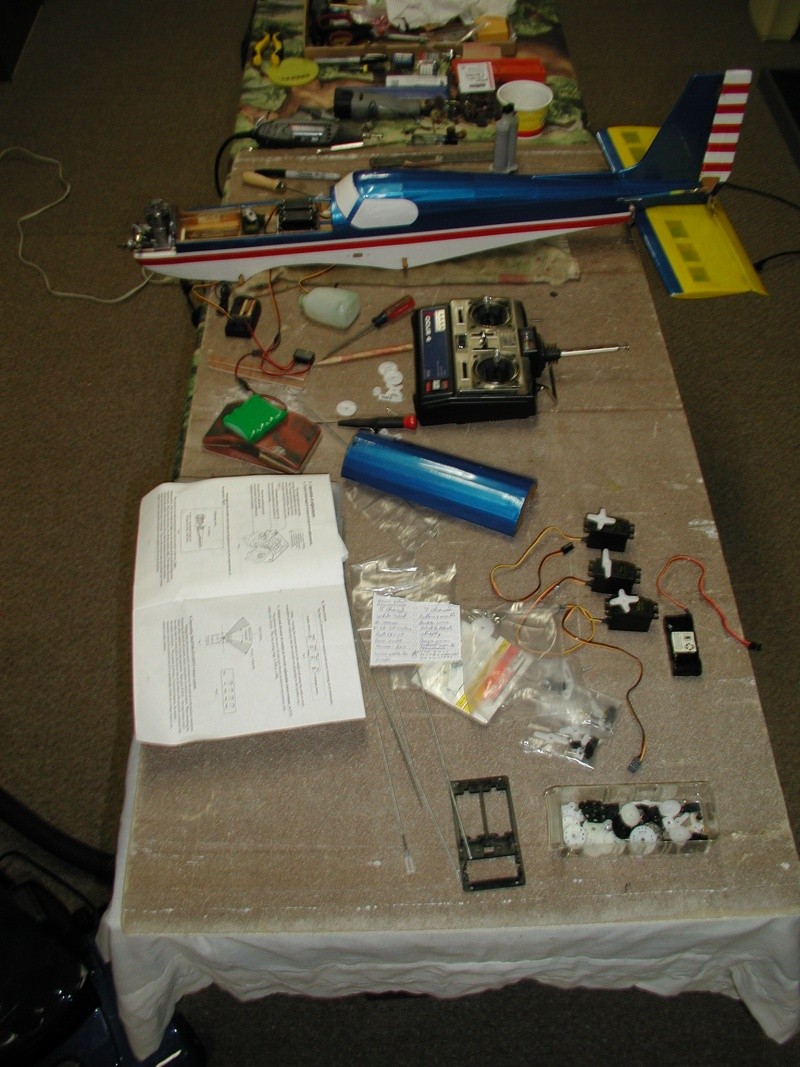
Hey, It's 8 am and sunny out there, We haven't had a completely sunny day for a month, sorta a joke around here. Gotta put this project on hold for awhile and get caught up on yard chores. The lawn doesn't mow itself.......
Bob
It arrived with a fixed nose gear and never having a R/C airplane without a steerable nose wheel I was determined to replace it. Not easy as the fixed strut was sewed and epoxied in.

Also the strut was not long enough in relation to the mains that resulted in a severe nose down attitude that would negatively affect take-off.

Holding it nose up I thought about a 3/4" extension of the gear would be sufficient.

Hunting though my spares I found a steerable nose gear that would fit perfectly. I didn't thing the firewall strong enough so I built a support to mount it on.

That problem solved I turned to the control rods. The person that put this model together was quite innovative. He made his own linkages which at first I thought were not adjustable, but they are. Kind of neat but all replaced now with golden rods.


My first test installation of the servos left much to be desired as none of the control linkages would line up. So I thought upside down, not hard for me.

I decided on a .19 engine. (Talk me out of it). It fit's better and should supply enough power to pull this model around in lazy circles.

Still lot's to do before this old girl see's air-time, as most everything is just roughed in. I sure do create a mess.

Hey, It's 8 am and sunny out there, We haven't had a completely sunny day for a month, sorta a joke around here. Gotta put this project on hold for awhile and get caught up on yard chores. The lawn doesn't mow itself.......
Bob

rsv1cox- Top Poster


Posts : 11250
Join date : 2014-08-18
Location : West Virginia
 Re: Project update - Picture heavy
I like your resurrection threads and the work is always good and well thought out
We seem to get and then send endless cruddy weather out to you
I have asked the Pacific North west folks to steer it more to the north
I am tiered of not seeing the sun for long periods then it comes out and the entire place needs a mowing
We seem to get and then send endless cruddy weather out to you
I have asked the Pacific North west folks to steer it more to the north
I am tiered of not seeing the sun for long periods then it comes out and the entire place needs a mowing

fredvon4- Top Poster


Posts : 4012
Join date : 2011-08-26
Age : 69
Location : Lampasas Texas
 Re: Project update - Picture heavy
Well at least your getting some build/repair time in and yes I know about the lawn not mowing it self , got one of mine on the truck to go to a friend and get some steering fixed / the other rider I have worked on twice with water issues in the fuel , should bee good for awhile till the deck spindles give in  I am looking forward to seeing some air time after this rain lets up and some gardening started ! (never seen any one mount servos upside down ? Eric

getback- Top Poster


Posts : 10442
Join date : 2013-01-18
Age : 67
Location : julian , NC
 Re: Project update - Picture heavy
Deck spindles, reminds me of my old Craftsman rider. The mower was direct drive with splined shafts that if you didn't keep greased would wear requiring replacement. I loved that old mower though.
I finally got the radio in and everything works. All four channels and doing a happy dance here. I decided to keep the PO's control horns and aileron control arrangement. I'm not a fan but replacing them would require major alterations and I didn't want to go there, besides they work just fine.
It's a rats nest in there right now. But soon all the wires will be straight and securely tucked away from the controls.
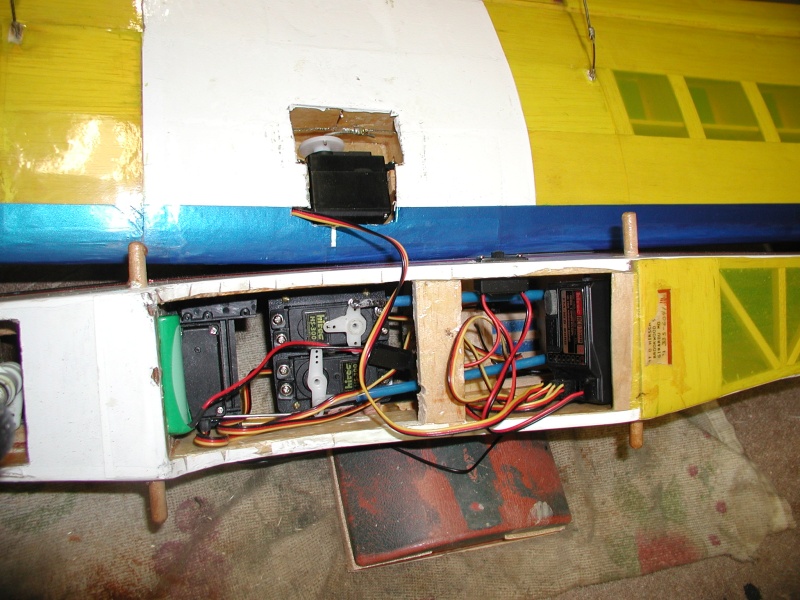
The mains flopped around in their places so I epoxied them in.
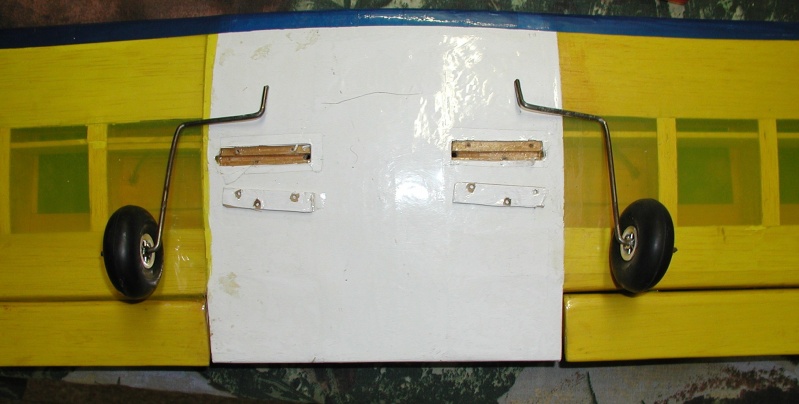
The biggest problem was mounting the steerable nose gear, cutting out the firewall for the control arm and the mounting hardware. I still need to epoxy it in but it will have a mechanical attachment as well. Nose gear as we all know must take a beating.
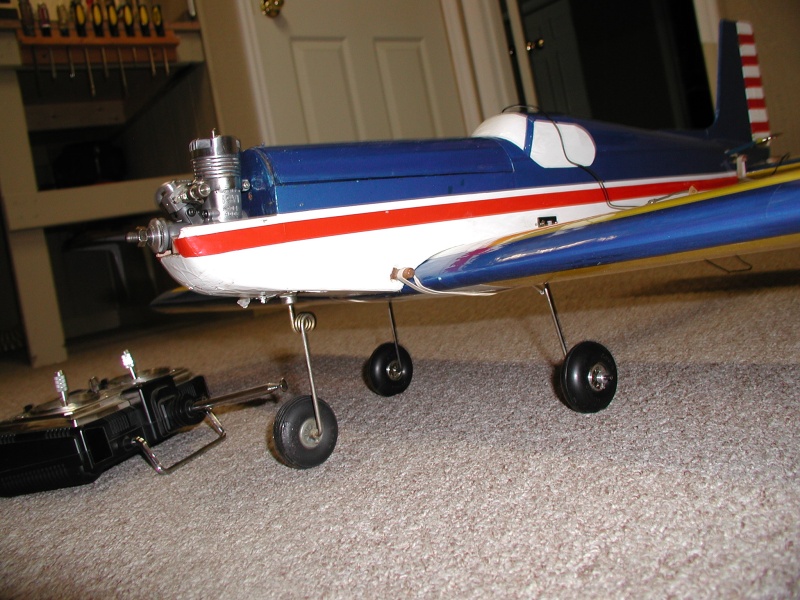
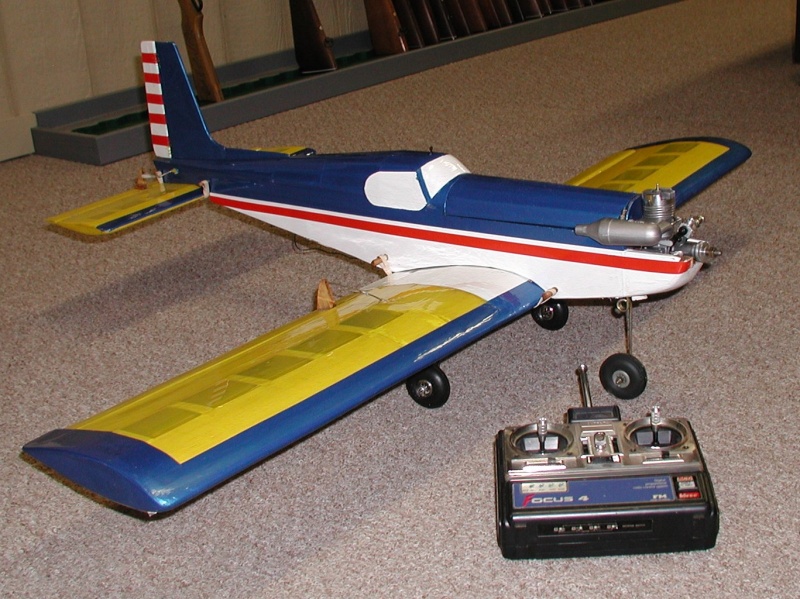
Still lot's of fussy work to do. Maybe by mid-summer it will be ready to go.
I finally got the radio in and everything works. All four channels and doing a happy dance here. I decided to keep the PO's control horns and aileron control arrangement. I'm not a fan but replacing them would require major alterations and I didn't want to go there, besides they work just fine.
It's a rats nest in there right now. But soon all the wires will be straight and securely tucked away from the controls.

The mains flopped around in their places so I epoxied them in.

The biggest problem was mounting the steerable nose gear, cutting out the firewall for the control arm and the mounting hardware. I still need to epoxy it in but it will have a mechanical attachment as well. Nose gear as we all know must take a beating.


Still lot's of fussy work to do. Maybe by mid-summer it will be ready to go.

rsv1cox- Top Poster


Posts : 11250
Join date : 2014-08-18
Location : West Virginia
 Re: Project update - Picture heavy
LOOKING GOOD !! I see you got the servos turned right side up , that one in the wing has a strange way of mounting lol . defiantly not a C/L build RC can take up some time to get right A MUST  Did you check the CG? Eric
 Did you check the CG? Eric
getback- Top Poster


Posts : 10442
Join date : 2013-01-18
Age : 67
Location : julian , NC
 Re: Project update - Picture heavy
Yes. strange way to mount that wing servo, but it works flat that way, the linkage is even stranger.
I'm more concerned about the fuel tank. A 2-1/2 oz wedge C/L tank fits perfectly and all the openings align for my purposes, but I have ordered a new slant clunk for it. It's only 2 oz but still should give me 10+ minutes of flight time with a .19 sitting up front.

CG might be a problem, lot of nose up there.
Bob

rsv1cox- Top Poster


Posts : 11250
Join date : 2014-08-18
Location : West Virginia
 Re: Project update - Picture heavy
OK I get it now I was looking at the bottom /wing mount , took me a couple drinks of coffee to see it though  I don't see getting 10 mins. run time on 2 oz. tank with a .19 ? but that's be side the point you can ck it on the ground running WO . So you don't know where the CG is now / and where it should bee ? Eric


getback- Top Poster


Posts : 10442
Join date : 2013-01-18
Age : 67
Location : julian , NC
 Similar topics
» L-19 Bird Dog take-apart. Picture heavy
» My New Plastex Delta (picture heavy)
» Dissecting the Cox F4U Corsair - Picture heavy
» Cox planes on Ebay
» Just stuff - picture heavy miscellaneous ramblings from around the shop
» My New Plastex Delta (picture heavy)
» Dissecting the Cox F4U Corsair - Picture heavy
» Cox planes on Ebay
» Just stuff - picture heavy miscellaneous ramblings from around the shop
Page 1 of 1
Permissions in this forum:
You cannot reply to topics in this forum

 Rules
Rules


