Log in
Search
Latest topics
» My N-1R build logby roddie Today at 12:32 am
» Happy 77th birthday Andrew!
by akjgardner Today at 12:27 am
» TEE DEE Having issues
by TD ABUSER Yesterday at 9:43 pm
» Landing-gear tips
by roddie Yesterday at 6:17 pm
» Roger Harris revisited
by TD ABUSER Yesterday at 2:13 pm
» Tee Dee .020 combat model
by Ken Cook Yesterday at 1:41 pm
» Retail price mark-up.. how much is enough?
by Ken Cook Yesterday at 1:37 pm
» My latest doodle...
by roddie Yesterday at 10:43 am
» Chocolate chip cookie dough.........
by roddie Fri Nov 22, 2024 1:13 pm
» Purchased the last of any bult engines from Ken Enya
by sosam117 Fri Nov 22, 2024 11:32 am
» Free Flight Radio Assist
by rdw777 Fri Nov 22, 2024 9:24 am
» Funny what you find when you go looking
by rsv1cox Wed Nov 20, 2024 3:21 pm
Cox Engine of The Month
Repairing 1/4 " fuselodge Question
Page 1 of 1
 Repairing 1/4 " fuselodge Question
I need to put my broken 1/4" fuse back together at the nose engine mount (reed speed p-51D) and thinking of getting some Carbon Rod to do it with what would bee a good size in diameter to do this I am thinking 3/32 or 2mm is that too small and cause flex? Round or square? I have never tried this with the C rod before or would even Bamboo skewers work ? Thanks , getback 


getback- Top Poster


Posts : 10442
Join date : 2013-01-18
Age : 67
Location : julian , NC
 Re: Repairing 1/4 " fuselodge Question
Bamboo skewers are tough and cheap. 1/8"(.125") is the smallest CF tube I've used, and I think tube is less flexible than CF rod. For a short piece like 2 or 3" it will have almost no flex at all. Either would be a fine choice. Bamboo and epoxy is nearly indestructible. It's been holding the rear fuse of my Shoestring together for 3 years and many hundreds of dubious flights.
If you'd rather change it to a beam mount, I'll dig up my old pics from the Jumpin' Bean to Refried Bean conversion. It turned out pretty solid.
Rusty
EDITED because I'm wishy washy and changed my mind.
If you'd rather change it to a beam mount, I'll dig up my old pics from the Jumpin' Bean to Refried Bean conversion. It turned out pretty solid.
Rusty
EDITED because I'm wishy washy and changed my mind.
Last edited by RknRusty on Sat Mar 12, 2016 11:47 am; edited 1 time in total
_________________
Don't Panic!
...and never Ever think about how good you are at something...
while you're doing it!
My Hot Rock & Blues Playlist
...and never Ever think about how good you are at something...
while you're doing it!
My Hot Rock & Blues Playlist

RknRusty- Rest In Peace

- Posts : 10869
Join date : 2011-08-10
Age : 68
Location : South Carolina, USA
 Re: Repairing 1/4 " fuselodge Question
The problem is in lining-up the holes that you'd need to drill. Those sizes would be good.. but you've probably got splinters of balsa that need to fit back together. Can you mate the two pieces together, tight enough to where the gap is tight? Bent (loose) splinters should be removed carefully by using tweezers and pulling straight-out so that the firm splinters fit back together tightly, leaving only a crack-sized gap if possible.
Once you achieve a decent fit.. and with the joint as tight as possible, sand smooth and spread thin CA over the crack all the way around. Use a little piece of wax-paper with your finger to smooth-over the crack. The CA will not stick to it.
If you have room either side of the repair.. you can "skin" both sides with thin plywood. When I say thin.. I mean 1/64" if you have some. Heavy-paper would even provide some extra strength when glued in place over the crack. Feather-over with filler.. sand.. and you'll have a repair that's barely noticeable.
Another option for skinning-over the repair is to cut a patch of fiberglass-type window screening and wrap it flat all the way around the top and bottom. Tack one edge of the screen in place with CA.. and stretch-tight around the nose and tack tight with CA. Once the patch is held in place.. mix up some epoxy and "paint-it" into the screen's weave using a plumbers flux-brush with bristles cut short. This acts as a brush and spreader to adhere the screen.. while keeping the surface reasonably flat and free of bumps. Scuff-sand when dry.. and repaint.
I used the fiberglass window screen to reinforce these butt-joints on a box-fuse I'm building.
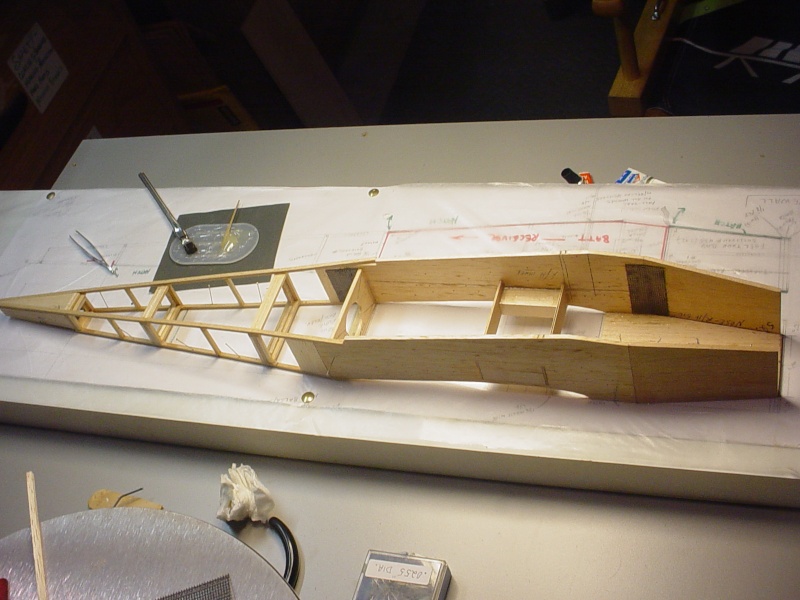
Dowel-joints are good for reinforcing a butt-joint.. but using them to repair a jagged-break will be difficult. Drilling the holes will distort the splinters that need to interlock for the most strength. Bamboo skewers are very strong if you decide to go that route.. but if you decide to use/cut carbon-fiber rod.. be sure to treat the cut area with thin CA BEFORE cutting.. or it will unravel the fibers. A dremel/cut-off wheel works well for cutting. Wear goggles and work over a large bowl or pail so you don't lose a small piece when it cuts through.
Good luck man! I hope this was of some help.
Once you achieve a decent fit.. and with the joint as tight as possible, sand smooth and spread thin CA over the crack all the way around. Use a little piece of wax-paper with your finger to smooth-over the crack. The CA will not stick to it.
If you have room either side of the repair.. you can "skin" both sides with thin plywood. When I say thin.. I mean 1/64" if you have some. Heavy-paper would even provide some extra strength when glued in place over the crack. Feather-over with filler.. sand.. and you'll have a repair that's barely noticeable.
Another option for skinning-over the repair is to cut a patch of fiberglass-type window screening and wrap it flat all the way around the top and bottom. Tack one edge of the screen in place with CA.. and stretch-tight around the nose and tack tight with CA. Once the patch is held in place.. mix up some epoxy and "paint-it" into the screen's weave using a plumbers flux-brush with bristles cut short. This acts as a brush and spreader to adhere the screen.. while keeping the surface reasonably flat and free of bumps. Scuff-sand when dry.. and repaint.
I used the fiberglass window screen to reinforce these butt-joints on a box-fuse I'm building.

Dowel-joints are good for reinforcing a butt-joint.. but using them to repair a jagged-break will be difficult. Drilling the holes will distort the splinters that need to interlock for the most strength. Bamboo skewers are very strong if you decide to go that route.. but if you decide to use/cut carbon-fiber rod.. be sure to treat the cut area with thin CA BEFORE cutting.. or it will unravel the fibers. A dremel/cut-off wheel works well for cutting. Wear goggles and work over a large bowl or pail so you don't lose a small piece when it cuts through.
Good luck man! I hope this was of some help.
 Re: Repairing 1/4 " fuselodge Question
Roddie I'm on the fly after rewriting my above post, so I didn't study yours. But over-boring the holes and packing with sawdust filled epoxy allows alignment and adjustment with a good solid set when finished. And by Packing, I mean a lot of sawdust in the mix.
Rusty
Rusty
_________________
Don't Panic!
...and never Ever think about how good you are at something...
while you're doing it!
My Hot Rock & Blues Playlist
...and never Ever think about how good you are at something...
while you're doing it!
My Hot Rock & Blues Playlist

RknRusty- Rest In Peace

- Posts : 10869
Join date : 2011-08-10
Age : 68
Location : South Carolina, USA
 Re: Repairing 1/4 " fuselodge Question
Get some light fiberglass and wrap the joint. Yes you COULD pin it internally. Using some flat carbon fiber or fiber glass battens set into the edge after gluing and clamping straight is another option.
1/2mm x 3mm would be plenty. Cut a groove in the top and bottom of the profile, a couple inches long 3mm deep so the batten fits tight, but doesn't spread the edge and put it in with medium CA. Glue the groove and the batten.
1mm x 6mm would be overkill, but not crazy.
Phil
1/2mm x 3mm would be plenty. Cut a groove in the top and bottom of the profile, a couple inches long 3mm deep so the batten fits tight, but doesn't spread the edge and put it in with medium CA. Glue the groove and the batten.
1mm x 6mm would be overkill, but not crazy.
Phil

pkrankow- Top Poster

- Posts : 3025
Join date : 2012-10-02
Location : Ohio
 Re: Repairing 1/4 " fuselodge Question
I am cooking a pizza ALL these sound good an d yes the alien is the main prob. , I am not as good as I was in drilling but can wollow to fit  I just need to get the plane together so I can fly it again
 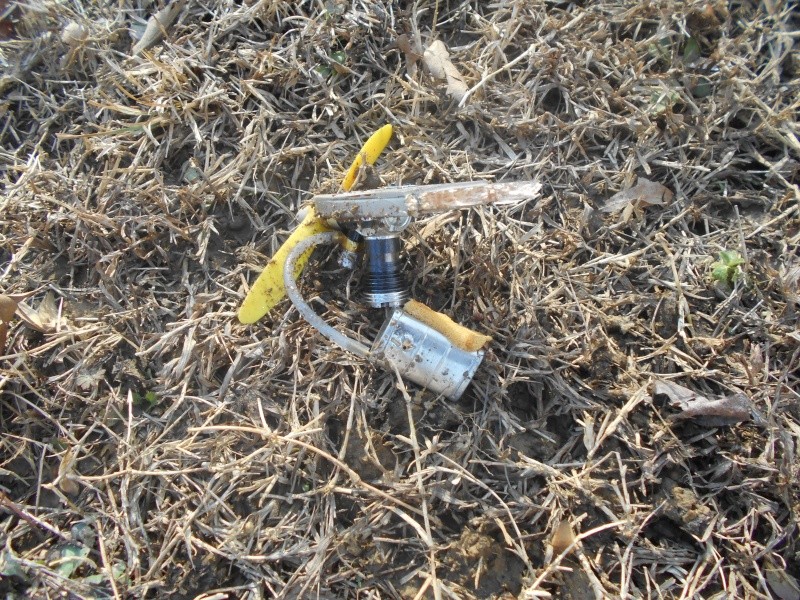 poor p51
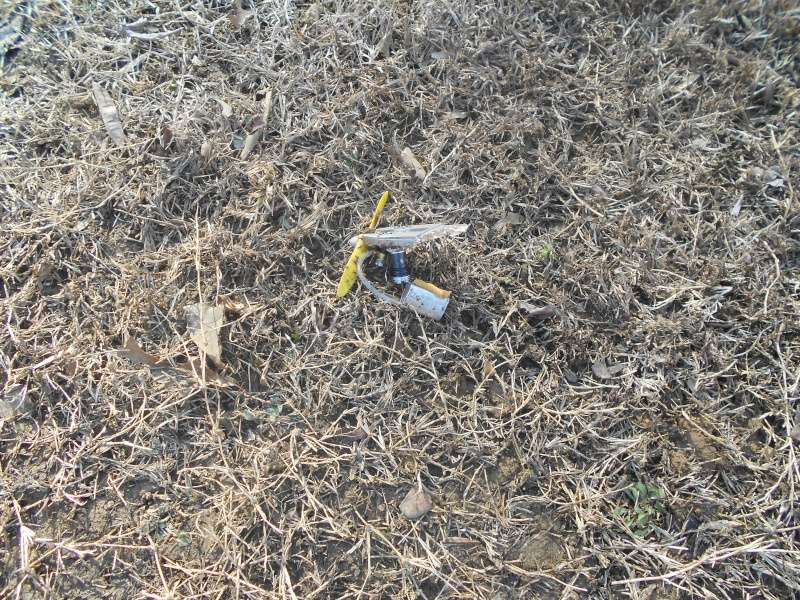
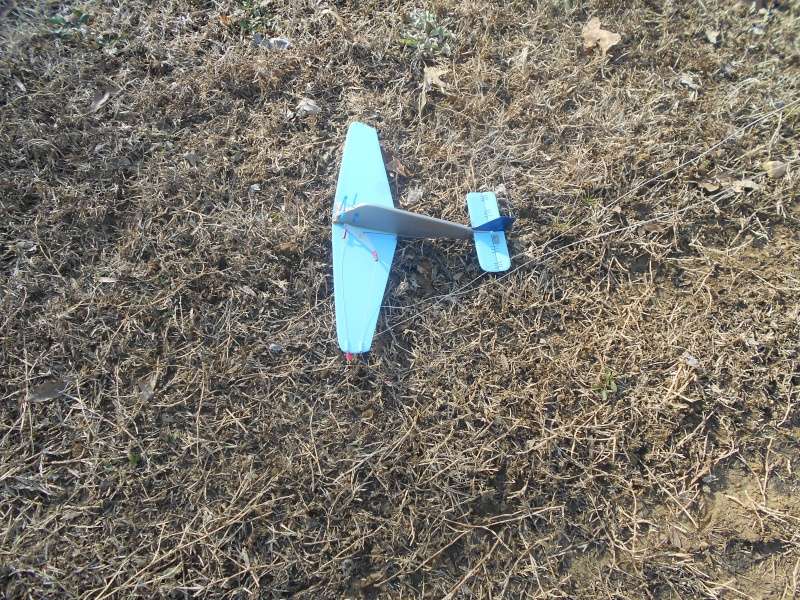 Thanks Again let me see what I can do with this . It broke all up in the beam mount is a big problem. Definitely pin and web for its the engine want want it to fly away
  getback
 poor p51
 Thanks Again let me see what I can do with this . It broke all up in the beam mount is a big problem. Definitely pin and web for its the engine want want it to fly away
getback- Top Poster


Posts : 10442
Join date : 2013-01-18
Age : 67
Location : julian , NC
 Re: Repairing 1/4 " fuselodge Question
I am using 1/16 CF rod to stiffen horz and vert stab on a 1/2A plane I am building and in general you could use it to pin your repair. It is very stiff. I would depend on your craftsmanship to make a general repair with it, you can probably do it. I would think a 2" section is about all I could hope to line up well on the broken pieces, 3" tops, without some special jigging. CF rod like this isn't to expensive, I keep it around for jobs like you have. Show Results! Interested to see how it comes out.

PeterJGregory- Gold Member

- Posts : 144
Join date : 2014-07-28
Age : 61
Location : Hudson Valley, New York
 Re: Repairing 1/4 " fuselodge Question
Ok Peter I will show the ending progress , I am still tossing around the difference of the CF vs bamboo , I don't have any cf but the HL says they have it but is a ride to get it . I think to do the tail section 1/16 would bee fine but not so up front where the engine is broken off // and while I am doing the rear end I need to add some weight ,, I had some straped on to get the flight in and the wire that was holding the weight went through the balsa is why I am having to repair that . In all reality making a longer tail section would be the way to go but with all that a new fuse is not that much to build other than redoing the NAH scratch that >>> Eric ? 


getback- Top Poster


Posts : 10442
Join date : 2013-01-18
Age : 67
Location : julian , NC
 Re: Repairing 1/4 " fuselodge Question
I see your dilemma now that I see the pics. Any chance you could make a new pair of beams.. and run them back; "over and under" the wing-joint on the O/B side? If so, you might not need to add any tail-weight. Your fuel-tank would also end up closer to the CG.
If you have a piece of finish-maple board lying around.. (an old bureau drawer for instance..) set your table-saw's ripping fence to 1/4" and cut some beam-stock using a push-stick (paint-stirrer with a notch cut..) for safety. A couple of 20-24" lengths would make enough stock for a bunch of future builds.
If you have a piece of finish-maple board lying around.. (an old bureau drawer for instance..) set your table-saw's ripping fence to 1/4" and cut some beam-stock using a push-stick (paint-stirrer with a notch cut..) for safety. A couple of 20-24" lengths would make enough stock for a bunch of future builds.
 Re: Repairing 1/4 " fuselodge Question
Hi Roddie , The pieces fit together pretty good but , the tank mount is right were it needs to join , this is a problem. I have thought the same thing about replacing the beams and yes the doublers DO need to come back further and might fix some of the CG problem? At least help! Would have to make two cuts that wouldn't meet as good as what I have with my cutting skills and not able to put on a saw with the wing on !?!? I will look at it some more when I get time > Thanks , Eric

getback- Top Poster


Posts : 10442
Join date : 2013-01-18
Age : 67
Location : julian , NC
 Re: Repairing 1/4 " fuselodge Question
Eric, if I'm interpreting the pictures right, it looks like it might press fit back together pretty well. If so, and the splinters interlock at each end, slather it with lots of epoxy and jam it together, throw some sawdust into the mix, and then add more to the leftover puddle to mix up for spackling any gaps along the edges. It'll be ugly and strong. My BFS II has been flying that way for 2 years. It wears ugly like a badge Lol. I'm only guessing from the pics, but it could be quick. It doesn't have to be perfectly aligned, just not pointed inboard. You can do it in the time it takes a pizza to cook.
Rusty
Rusty
_________________
Don't Panic!
...and never Ever think about how good you are at something...
while you're doing it!
My Hot Rock & Blues Playlist
...and never Ever think about how good you are at something...
while you're doing it!
My Hot Rock & Blues Playlist

RknRusty- Rest In Peace

- Posts : 10869
Join date : 2011-08-10
Age : 68
Location : South Carolina, USA
 Re: Repairing 1/4 " fuselodge Question
getback wrote:Hi Roddie , The pieces fit together pretty good but , the tank mount is right were it needs to join , this is a problem. I have thought the same thing about replacing the beams and yes the doublers DO need to come back further and might fix some of the CG problem? At least help! Would have to make two cuts that wouldn't meet as good as what I have with my cutting skills and not able to put on a saw with the wing on !?!? I will look at it some more when I get time > Thanks , Eric
I remember now.. after seeing this pic.
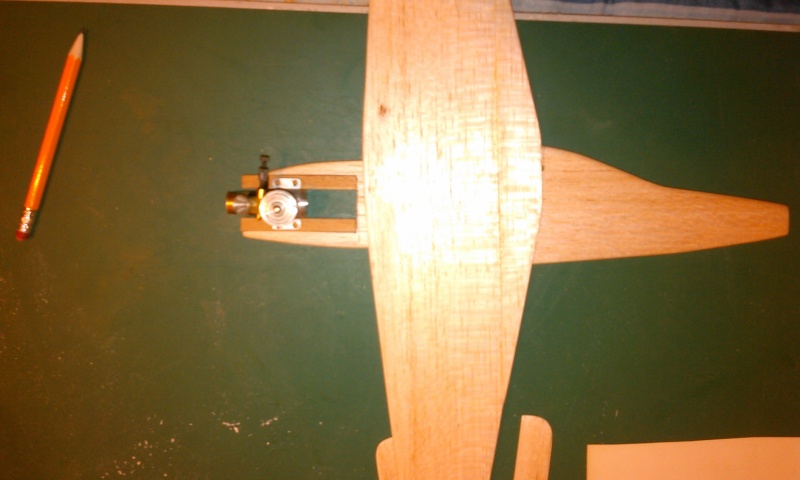
So now; your main-fuse is flat-sided from the break-point rearward?
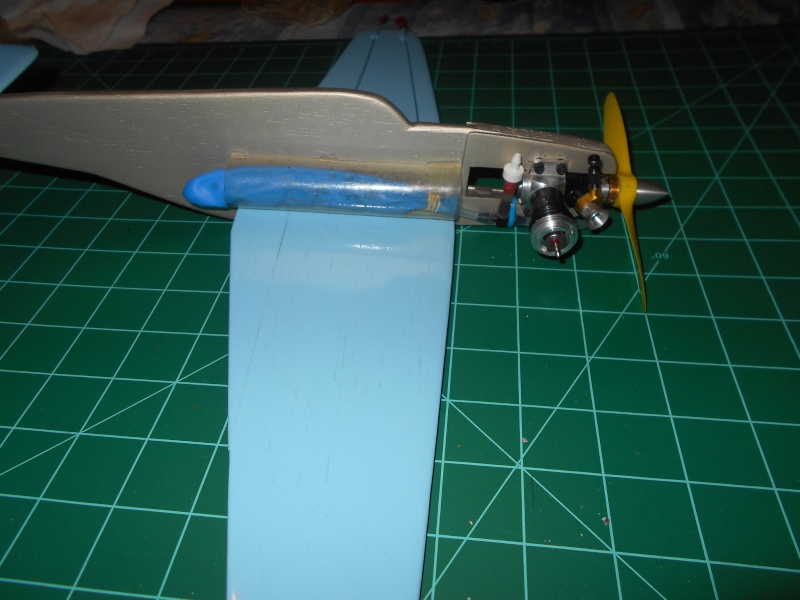
I was thinking.. that's where you could mount square-maple beams. I remember the wing-joint being lower now.. close to the bottom of the fuse.
The beam-application I suggested, can be better understood by this photo of one of my first cracks at designing..
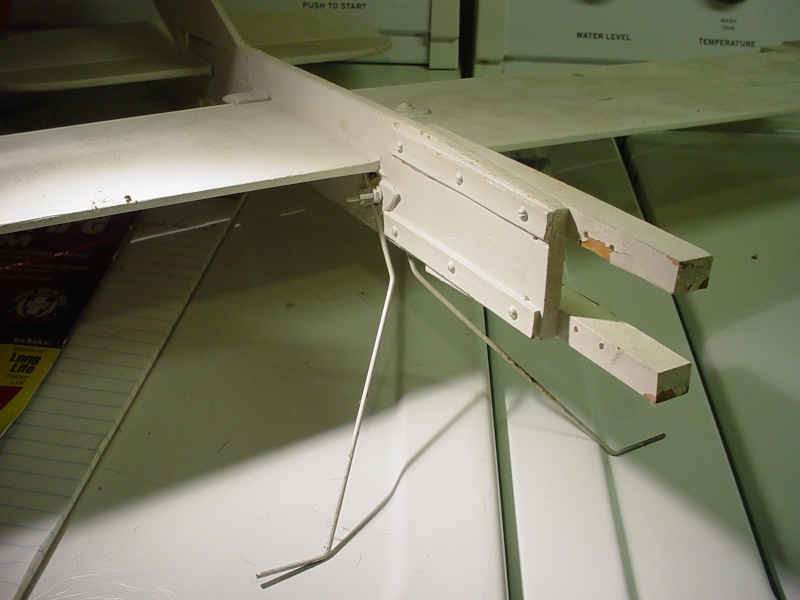
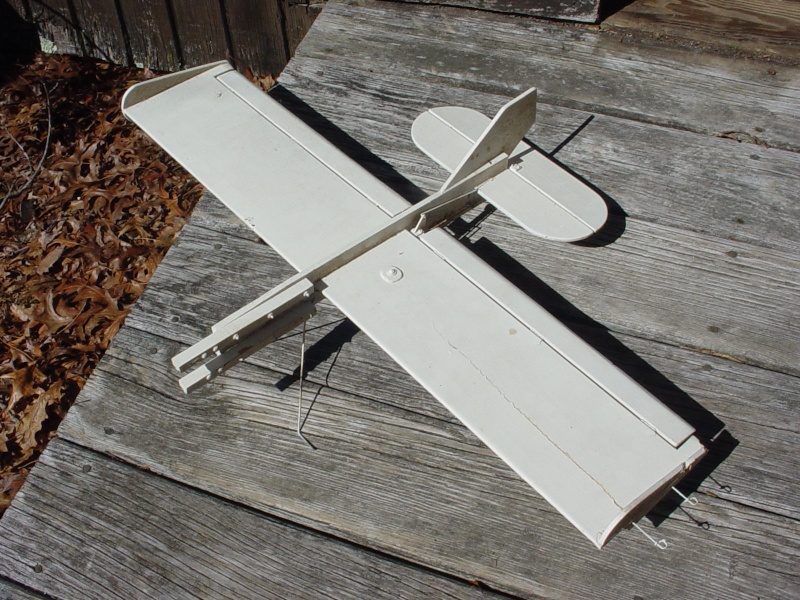
You could make beams around 4" long.. and mount them with machine-screws to the outside of the fuse with bearing-plates on the inside. If you don't want the weight of screws.. use them and the bearing-plates as a clamp for gluing the beams on with epoxy. I understand what you meant now.. when you said "not able to put on a saw with the wing on".. My idea is a surface-mount.. although beams imbedded in slots cut in the fuse would be cleaner.
You can actually find hardwood square beams at Walmart.. I don't know what the actual wood is.. but it resembles either maple or poplar. Check out the crafts department next time you're there. The bag contains a 10 pc. assortment of sizes from approx. 3/16" to 1/2" (precisely metric).. in 12" lengths. Just an option.

One more thing..
It don't have to be pretty.. it just has to have teeth.. like Rusty said..
 Re: Repairing 1/4 " fuselodge Question
** I think this is my best option since there is just not enough there to reinforce with rods , and if I did it would bee off bad ! From my experience before trying to drill parallel holes. I cant find my camera cord at this time to put up a better pic ? And I will melt the weight down and mount in the tail section ( I was going to do this and ran out of time ) I only had a year !!! This should bee good enough I had to do this with the other racer I made and kept crashing till I figured out the problem . EricRknRusty wrote:Eric, if I'm interpreting the pictures right, it looks like it might press fit back together pretty well. If so, and the splinters interlock at each end, slather it with lots of epoxy and jam it together, throw some sawdust into the mix, and then add more to the leftover puddle to mix up for spackling any gaps along the edges. It'll be ugly and strong. My BFS II has been flying that way for 2 years. It wears ugly like a badge Lol. I'm only guessing from the pics, but it could be quick. It doesn't have to be perfectly aligned, just not pointed inboard. You can do it in the time it takes a pizza to cook.
Rusty


getback- Top Poster


Posts : 10442
Join date : 2013-01-18
Age : 67
Location : julian , NC
 Re: Repairing 1/4 " fuselodge Question
Just one more thing... even if you do it later down the road.. about making long beams.. (outboard ones) is that they provide nice anchor-points for a hard-tank. Consider these additional points if you decide to make some; wire brads in pre-drilled holes top/bottom would provide for rubber-banding a tank in place. The joint between the beams could receive a balsa plug and foam-rubber pad for some vibration damping or open in between for seating a tube for running a balloon or bladder would be self-centered with the venturi, having the beams as it's cradle with a thin foam pad in between.
As much as you hate to do it Eric.. I think that shortening/strengthening the nose will prevent the same thing from happening again. The engine could stand to be moved back to help your balance-issue. The nose-contour can be rebuilt from leftover fuse-stock and attached/blocked between/around the beams on the inboard side to butt against where the break is. If there's still any fuse-meat there.. you could block-sand it square for the new nose piece to butt to.
A scale Mustang nose-moment would be nice.. but you'd need to get creative to make it work well on this type of model. Remember RKflyer's P39 Airacobra? What's to stop you from asking him about parts used for an extended prop-shaft? Yours would only need to be an inch or so long.. set in a pillow-block bearing spanning the beams running forward of the engine far-enough to get the length desired. Engine sits back near the wing's L/E!
 Re: Repairing 1/4 " fuselodge Question
Well it's drying 30 min epoxy , going to let that set up good before I do anything else , Going to shorten the nose I believe Roddie and want need as much or no weight . I was thinking to drill and put the lead in would make a weak spot with weight and that's not good in another crash .. It's nice and straight I may go ahead and fix the tail in a few and plug the front mounts tomorrow ? The bamboo will work well for that .... 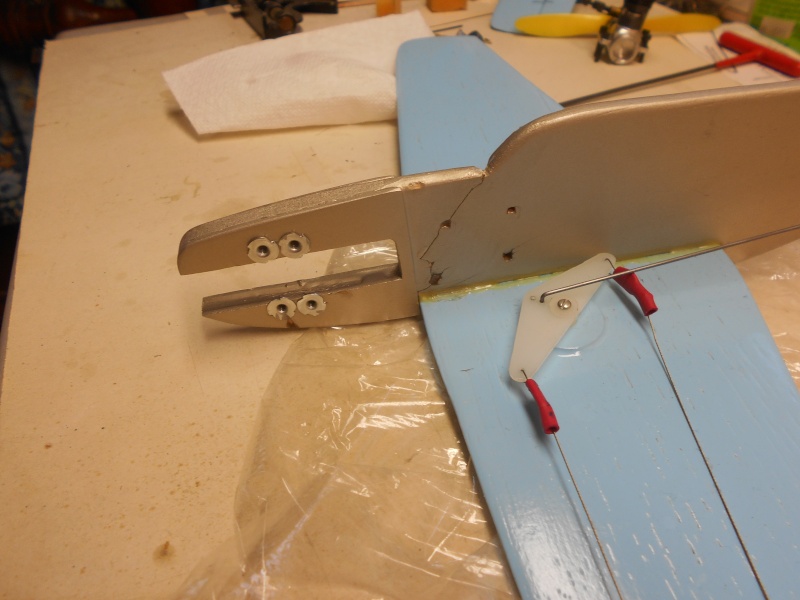
 Eric
Eric  tail feathers
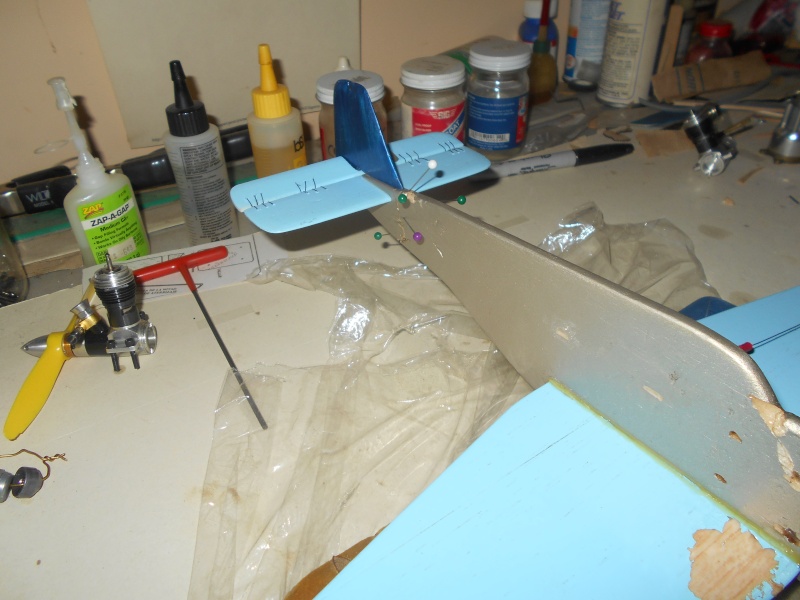
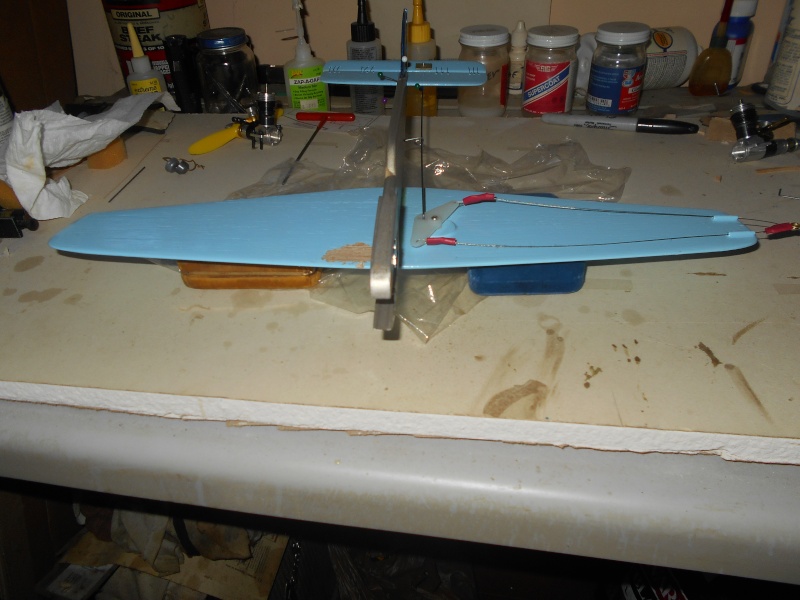 O yea !!

 Eric
Eric 
 O yea !!
 Last edited by getback on Sun Mar 13, 2016 5:56 pm; edited 1 time in total (Reason for editing : add pics)

getback- Top Poster


Posts : 10442
Join date : 2013-01-18
Age : 67
Location : julian , NC
 Re: Repairing 1/4 " fuselodge Question
GLuing the nose back on with epoxy and going out for another try would be my best suggestion. The problem with what you have is that the plywood stops at the leading edge of the wing. A stress riser is now created and that's why it broke there. Peeling one or both of the doublers off and extending them back onto the wing about 1 1/4" would be a very suitable fix. For now, I would continue to keep using epoxy. It will get you in the air quicker and it will be more than sufficient. I can't tell you how many Fox .35's I have which have the nose plugged back on using 5 min epoxy and they stay put. If your worried about losing an engine, do what we do in combat and secure your engine from your bellcrank bolt to your cylinder head using a piece of .018" flying wire and make a engine restraint cable.

Ken Cook- Top Poster

- Posts : 5640
Join date : 2012-03-27
Location : pennsylvania
 Re: Repairing 1/4 " fuselodge Question
Ken Cook wrote: The problem with what you have is that the plywood stops at the leading edge of the wing. A stress riser is now created and that's why it broke there. Peeling one or both of the doublers off and extending them back onto the wing about 1 1/4" would be a very suitable fix.
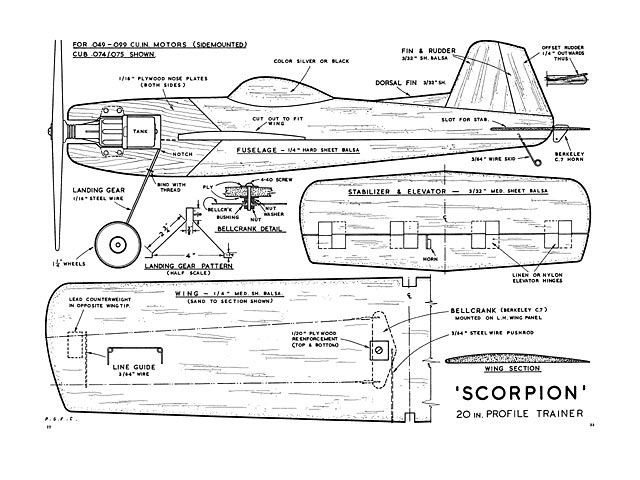
Eric, if you decide to peel off and replace the plywood parts with extended ones, you may want to make their ends "slanted", that way they will spread the stress of a possible hard landing over a larger area of balsa. An example of this is below:

KariFS- Diamond Member

- Posts : 2044
Join date : 2014-10-10
Age : 53
 Re: Repairing 1/4 " fuselodge Question
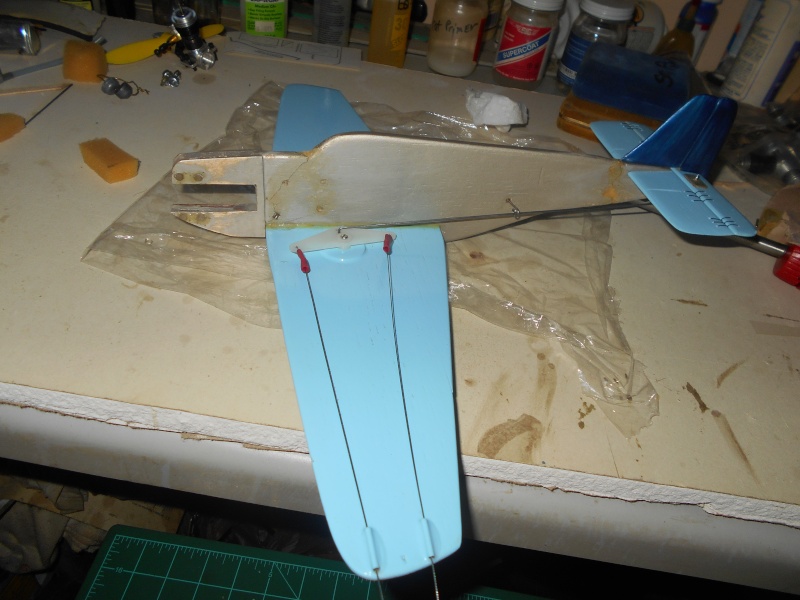
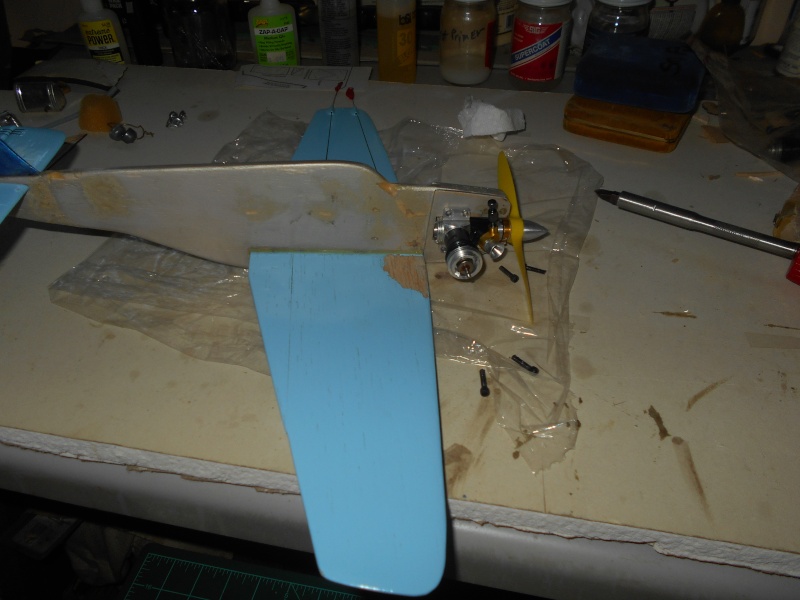
Well got some head way I just epoxied the mount back with 30 min also the tail section , there is no PEELING going on the way I put the doublers on sandwiched with the same glue , but thanks for the advice and will do different next times . I like the idea of cableing off the engine too . I mixed up some white glue with sanding from balsa and somewhat filled the dents and holes , used bamboo skewers to plug the engine mount holes. Also sawed off the front to shorten so the CG would move , I am still going to need a little weight but nothing like before . Haven't finished sanding but here is where I am now ( that pill I took was a dud and now its bud time to put me to 
 >>
>> 
 getback

 >>
>> 
 getback

getback- Top Poster


Posts : 10442
Join date : 2013-01-18
Age : 67
Location : julian , NC
 Re: Repairing 1/4 " fuselodge Question
KariFS wrote:
The "Scorpion" is one of the planes on my "bucket list". I have admired it since it was published in MAN in the mid-fifties by noted engine reviewer P. G. F. Chinn...I just like its lines.
George

gcb- Platinum Member

- Posts : 908
Join date : 2011-08-11
Location : Port Ewen, NY
 Re: Repairing 1/4 " fuselodge Question
George, I like the Scorpion's looks too. I chose it for my first C/L build mainly because of its looks, of course it was the perfect size too. I modded the nose for a radial mount, maybe not the prettiest but... Anyway, here's a build thread, maybe it'll inspire you to start building one 
https://www.coxengineforum.com/t7820-scorpion-simple-trainer-build
Anyway, once I get my project queue a bit shorter, I'll build another Scorpion for TeeDee power and a built-up wing adapted from Baby Ringmaster. But that'll bee another story
https://www.coxengineforum.com/t7820-scorpion-simple-trainer-build
Anyway, once I get my project queue a bit shorter, I'll build another Scorpion for TeeDee power and a built-up wing adapted from Baby Ringmaster. But that'll bee another story

KariFS- Diamond Member

- Posts : 2044
Join date : 2014-10-10
Age : 53
 Re: Repairing 1/4 " fuselodge Question
Epoxy comes off with heat.
Another choice is to butt joint the new doubler section and then add a trippler.
Phil
Another choice is to butt joint the new doubler section and then add a trippler.
Phil

pkrankow- Top Poster

- Posts : 3025
Join date : 2012-10-02
Location : Ohio
 Re: Repairing 1/4 " fuselodge Question
Thanks Phil gosh as much as I have read that but never done it so I guess its not implanted in the old brain , sorry Ken . I have been thinking along the ways of a ply plate for the fuel cell to mount on so to add a length of doubler to both sides along the repair would do the job for both. I always have trouble with the tank mount something I need to figure out and get over to move on with my builds < the B Clown is still waiting on the tank and engine mount , everthing else went fine and fast  Well it does have one glitch in the controls but I think will bee ok! I think while I am up again will set the engine holes
  Eric
Eric 
 Well it does have one glitch in the controls but I think will bee ok! I think while I am up again will set the engine holes
getback- Top Poster


Posts : 10442
Join date : 2013-01-18
Age : 67
Location : julian , NC
 Re: Repairing 1/4 " fuselodge Question
I always make a mess digging out epoxy. My best efforts have been using a soldering iron with a chisel tip on it. The epoxy moves like peanut butter and smokes... Plywood disintegrates too.
Supposedly getting it up around 300F is all it takes so a monokote iron should be able to do the deed. Never tried that myself.
Supposedly getting it up around 300F is all it takes so a monokote iron should be able to do the deed. Never tried that myself.

pkrankow- Top Poster

- Posts : 3025
Join date : 2012-10-02
Location : Ohio
 Re: Repairing 1/4 " fuselodge Question
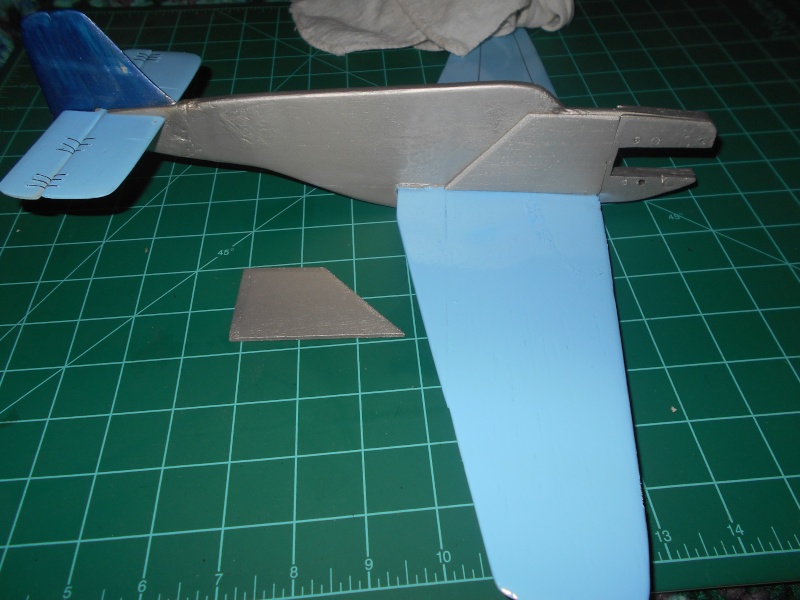
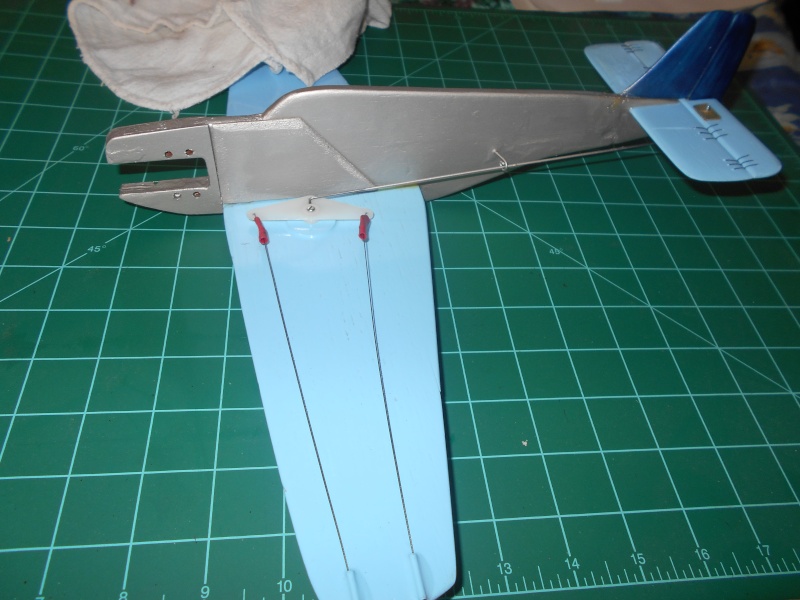
Just a Little update Not finished but getting there , made the doublers for the broken fuse I had epoxied back together the out board side is 1/8" ply inboard 1/8" balsa figured I could save some up front weight / and just need a good surface to mount the tank too. I cut the engine mount 1/2" or so back got the holes ready for the engine and blind nuts I am using ,I have some 2MM carbon rod coming don't know yet if I will use them at the rear or not but will have some . Did the patch up paint job yesterday and painted the doublers , that was a pain for me the silver (Krylon) is real runny the rusty t o don't want to stick when I redoped and sanding sealed the bare spot on the wing it bubbled up and I just painted over it but , will seal it with some clear lusterkote before flying , any way here I am for now. getback 


getback- Top Poster


Posts : 10442
Join date : 2013-01-18
Age : 67
Location : julian , NC
Page 1 of 1
Permissions in this forum:
You cannot reply to topics in this forum

 Rules
Rules


