Log in
Search
Latest topics
» My N-1R build logby roddie Today at 12:32 am
» Happy 77th birthday Andrew!
by akjgardner Today at 12:27 am
» TEE DEE Having issues
by TD ABUSER Yesterday at 9:43 pm
» Landing-gear tips
by roddie Yesterday at 6:17 pm
» Roger Harris revisited
by TD ABUSER Yesterday at 2:13 pm
» Tee Dee .020 combat model
by Ken Cook Yesterday at 1:41 pm
» Retail price mark-up.. how much is enough?
by Ken Cook Yesterday at 1:37 pm
» My latest doodle...
by roddie Yesterday at 10:43 am
» Chocolate chip cookie dough.........
by roddie Fri Nov 22, 2024 1:13 pm
» Purchased the last of any bult engines from Ken Enya
by sosam117 Fri Nov 22, 2024 11:32 am
» Free Flight Radio Assist
by rdw777 Fri Nov 22, 2024 9:24 am
» Funny what you find when you go looking
by rsv1cox Wed Nov 20, 2024 3:21 pm
Cox Engine of The Month
Ace R/C Guppy
Page 1 of 3
Page 1 of 3 • 1, 2, 3 
 Ace R/C Guppy
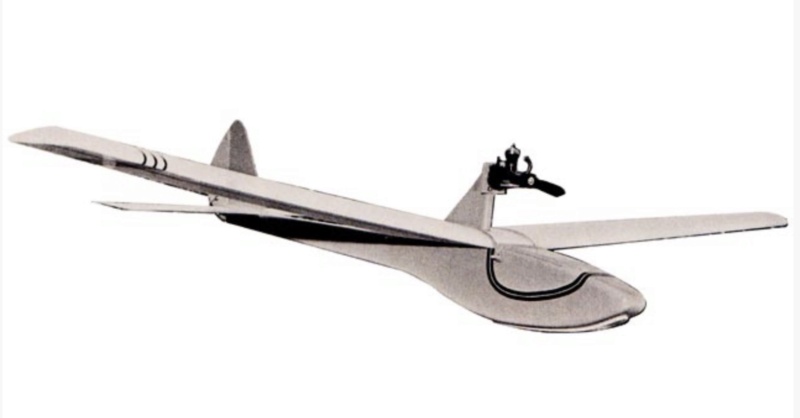
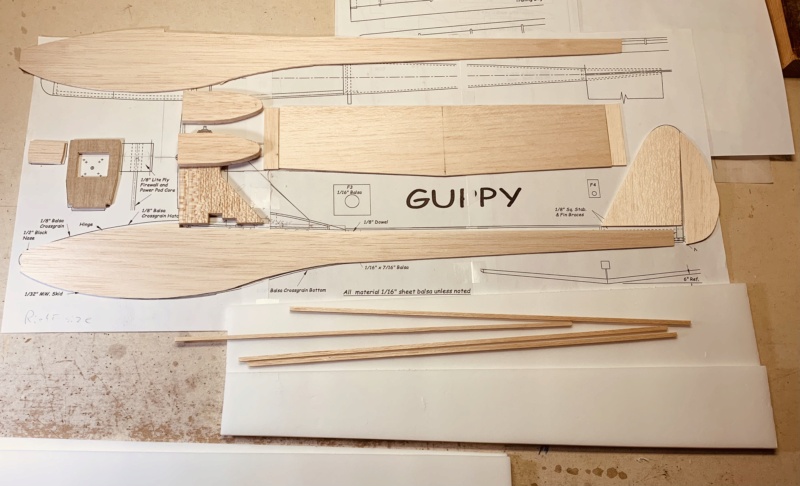
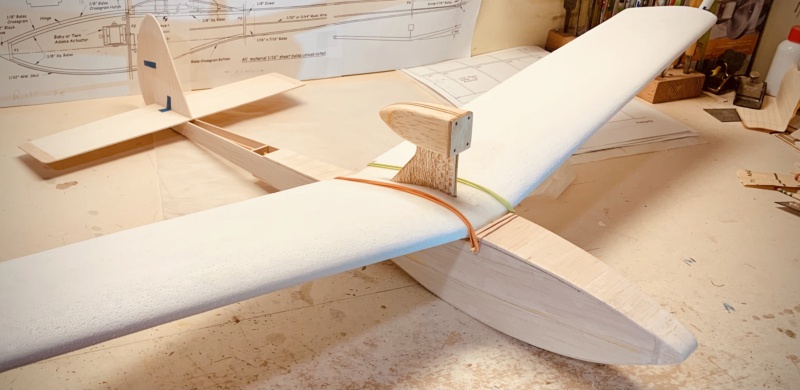
For PeeWee .020 power…. I was off for spring break this week so decided to start a new project….(And ran some engines!
I’m going to try a KFm-2 airfoil which are basically flat plates laminated and has a step at mid chord…. Using WM foam board…. Will use a balsa leading edge and spar to stiffen it up…. If it doesn’t work out the plans have provision for a built up wing…. The original was a foam wing so kind of want to go there….
This is kind of a nod to another Ace plane I did in the ‘70s, An Ace High glider… It was bigger and for .049…. The only way I could afford rc as a high school kid was attempt to build a set from a kit…. I built the Ace Digital Commander 3 channel set and to my surprise it actually worked….I remember exactly how much it cost….$109.00 from America’s Hobby Center….I sent it back to the factory for final tune and taught myself how to fly with the powered glider…. Wasn’t pretty but finally got the hang of it…. Got my first real job as electrician apprentice when owner found out I built the radio …Nice experience…
Will post some more on the build as I am able to find some shop time…

rdw777- Diamond Member


Posts : 1718
Join date : 2021-03-11
Location : West Texas
 Re: Ace R/C Guppy
This is a sweet, quick building kit. I had a similar built up glider but slightly larger wingspan at 48" for .020 Tee Dee, the Nomad, used Ace rudder only pulse with Baby Twin actuator. However, I made the mistake 32 years ago of covering it in Monokote, which made it too heavy for that power. It was designed to have the wings covered in silkspan or lightweight silk, balsa parts coated in clear dope with trim. Later it fell victim to moves and hangar rash.
I think you will have fun with it. It seems the simpler, the better.
I think you will have fun with it. It seems the simpler, the better.

GallopingGhostler- Top Poster


Posts : 5724
Join date : 2013-07-13
Age : 70
Location : Clovis NM or NFL KC Chiefs
 Re: Ace R/C Guppy
Cool Looking build , I take it you have never tried the KFm-2 airfoil ? Well had to look it up to see what it is all about and got this >easy pleasy < > https://www.youtube.com/watch?v=T57wFH2cgsM  And https://www.flitetest.com/articles/kfm-wings-a-basic-explanation


getback- Top Poster


Posts : 10442
Join date : 2013-01-18
Age : 67
Location : julian , NC
 Re: Ace R/C Guppy
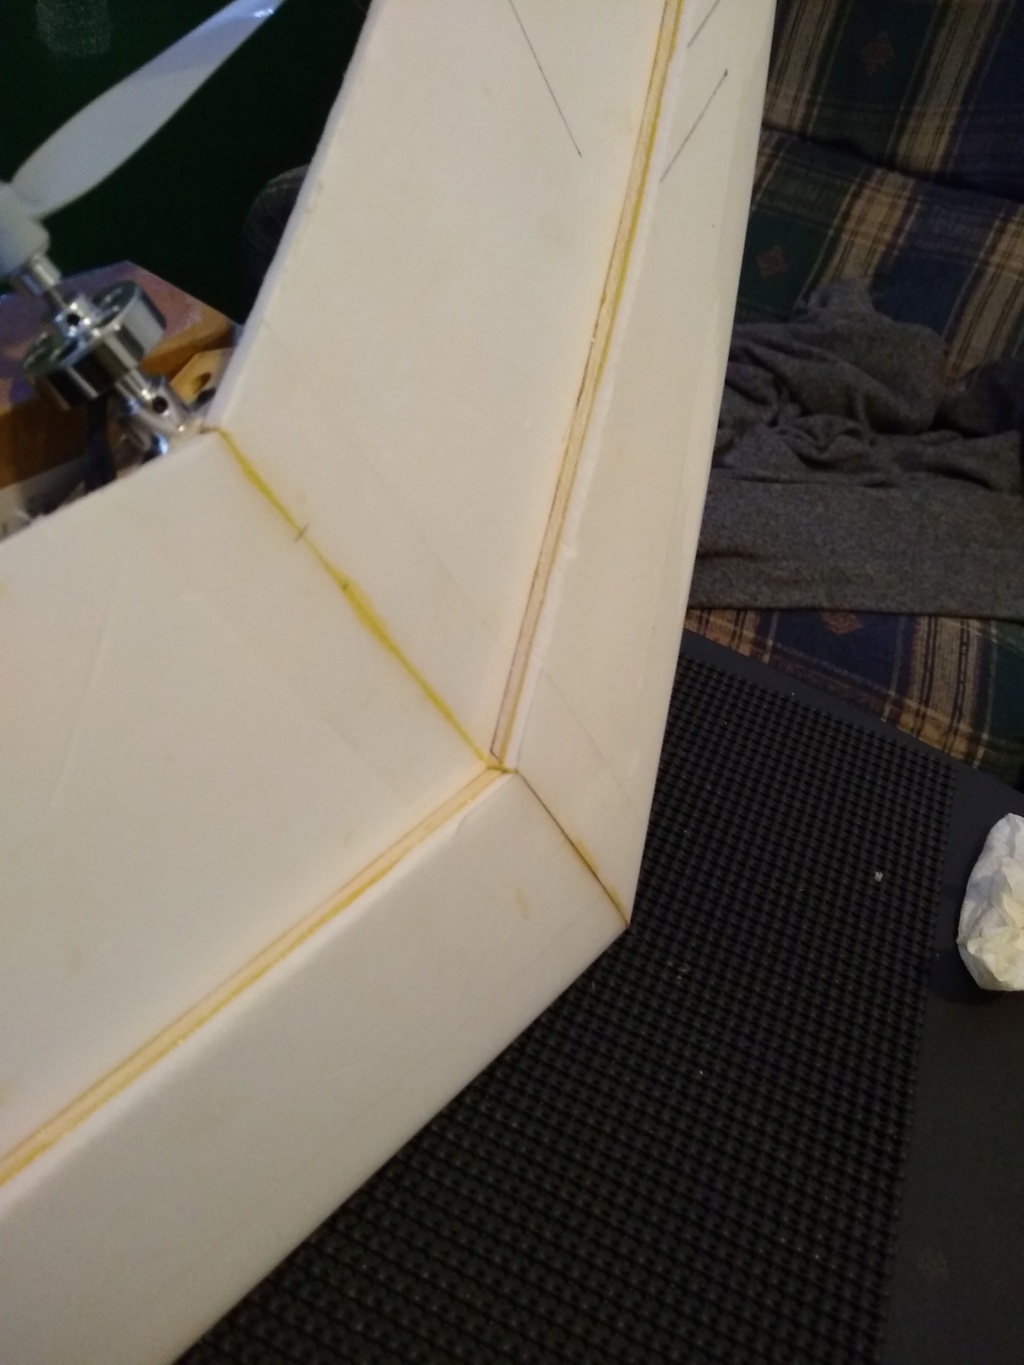
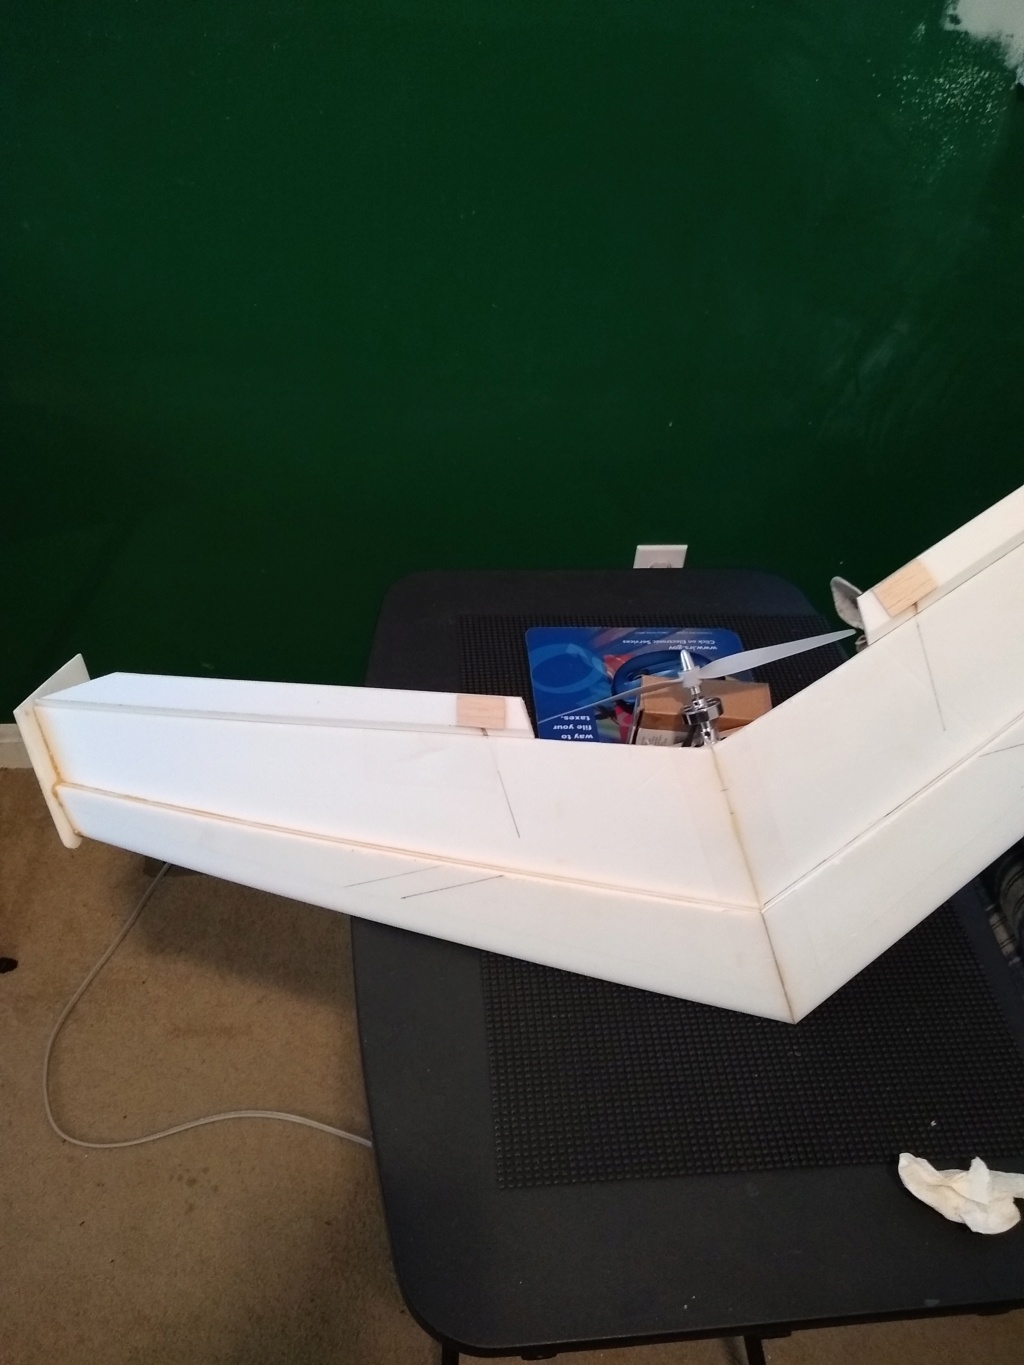
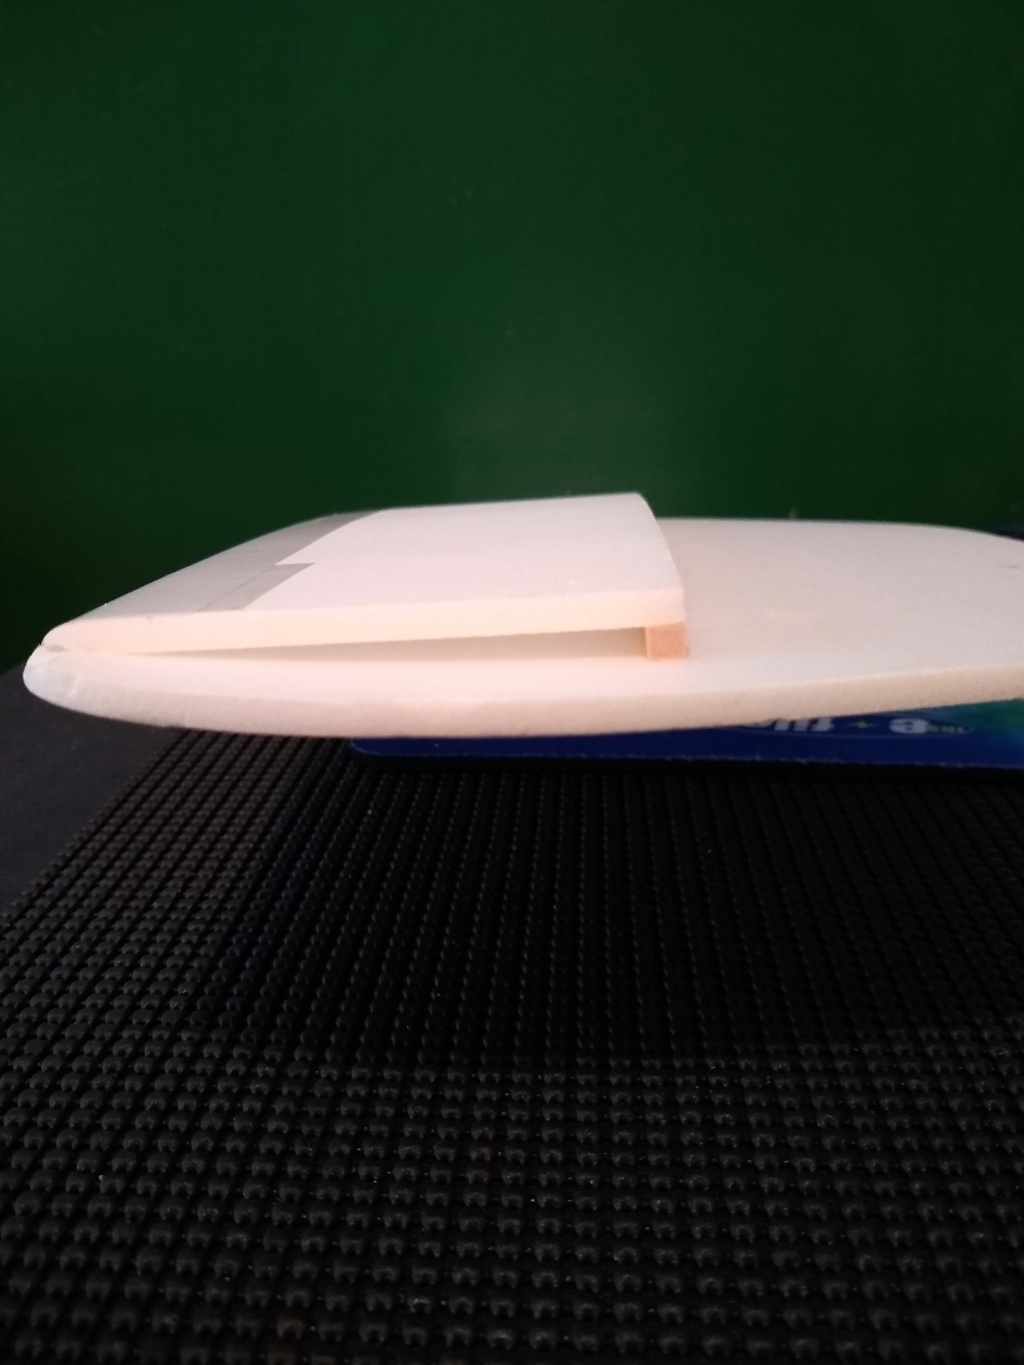
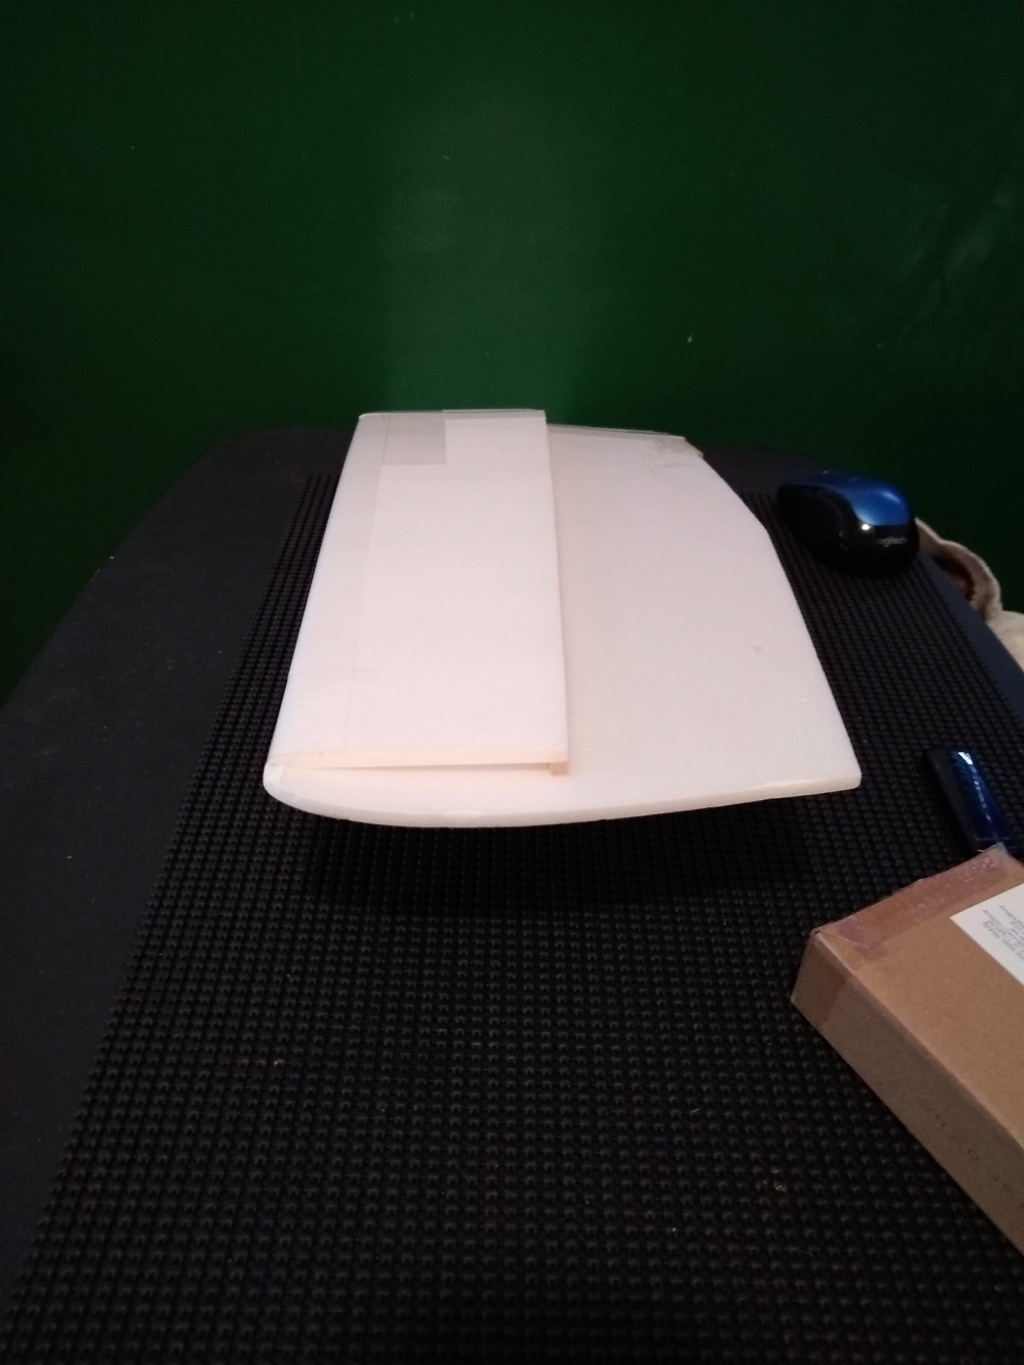
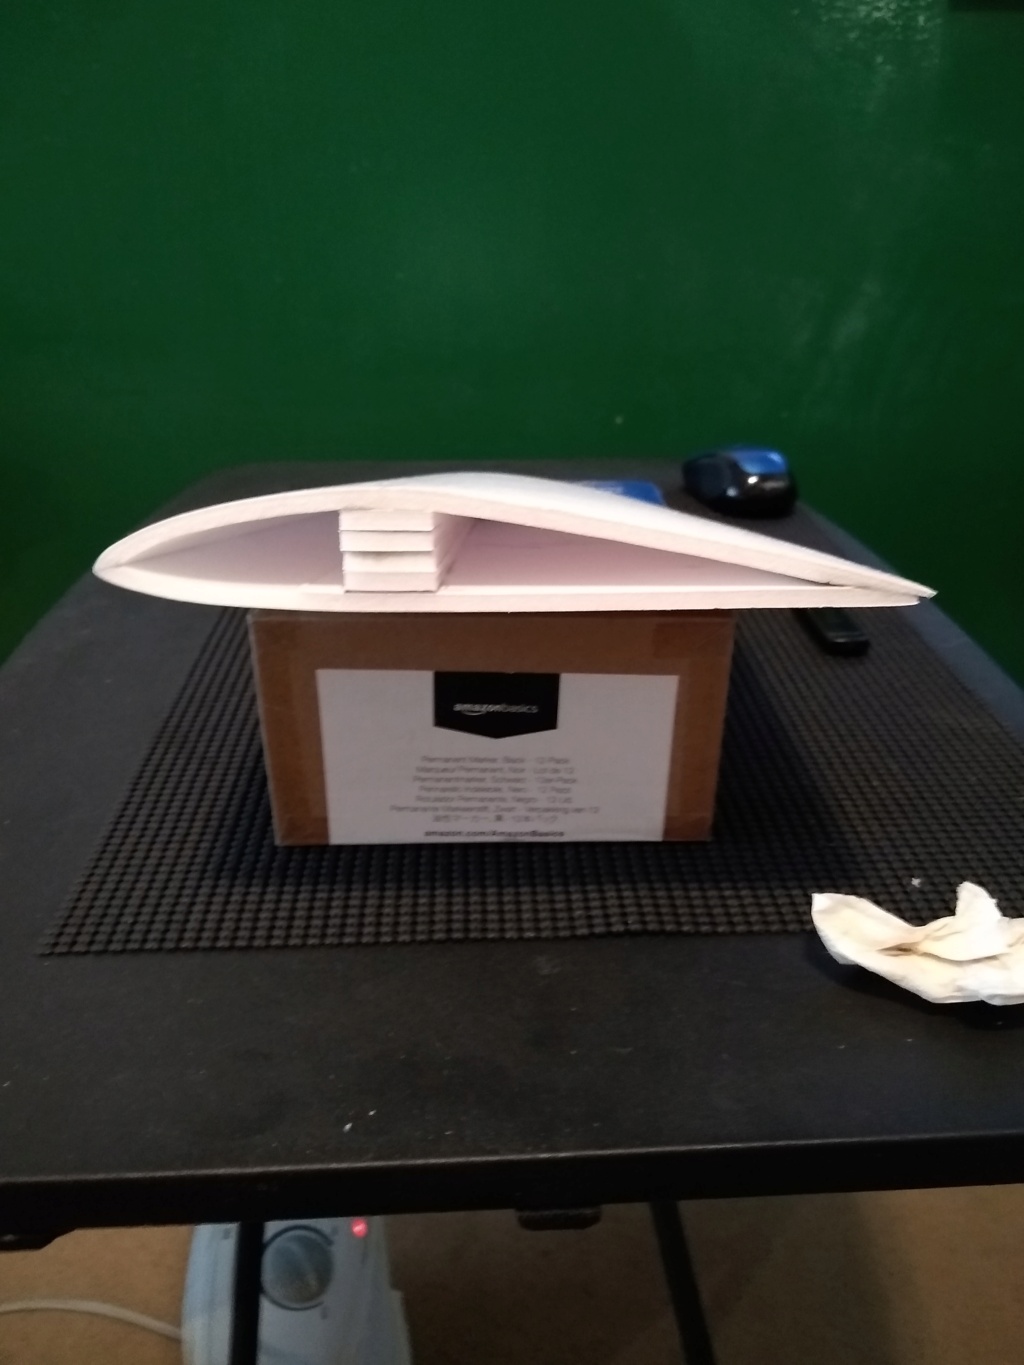
I've built several KF wings over the years. Attached are pics of two different KF wings. As of late, I've been experimenting with Armin wing designs (the Clark Y wing) to replace the foam wing on the older sport cubs from Horizon. When using WM foam board, you can realize a significant weight savings by stripping the paper off the foam. It increases the flexibility of the foam, but with appropriate reinforcement, you can still have a good, stiff wing. Both the KF wings have a 3/16" spar. The Clark Y wing has a 1" wide strip of fiberglass window screen laminated between the upper and lower trailing edges. I also use the window screen as a surface reinforcement and sometimes as an internal laminate for spars. It is very light and incredibly strong in tension. When glued down as a surface stiffener, it adds considerable strength. I like Elmer's Probond Advanced for foam and attaching the screen. You don't have to worry about mixing resin and wetting out fiberglass -- just add a thin coat to the foam, lay down the screen and squeegee until you have a good coverage.


 Re: Ace R/C Guppy
It is good to know about the simplicity, aerodynamic and cost advantages of the KF airfoil. This is info that I had no knowledge of, but also would seem to be a good replacement for the Ace R/C mini foam wings of two decades ago that are no longer available (although there are a few wing cutters who will mimic them by wire cutting on a special order basis). Thanks Eric and Andrew.

GallopingGhostler- Top Poster


Posts : 5724
Join date : 2013-07-13
Age : 70
Location : Clovis NM or NFL KC Chiefs
 Re: Ace R/C Guppy
Thanks guys for your input on the airfoil…. I know more now than I did before…. Yes this is the first time I will have tried one…. Chosen just for simplicity to build and hope that it works well…
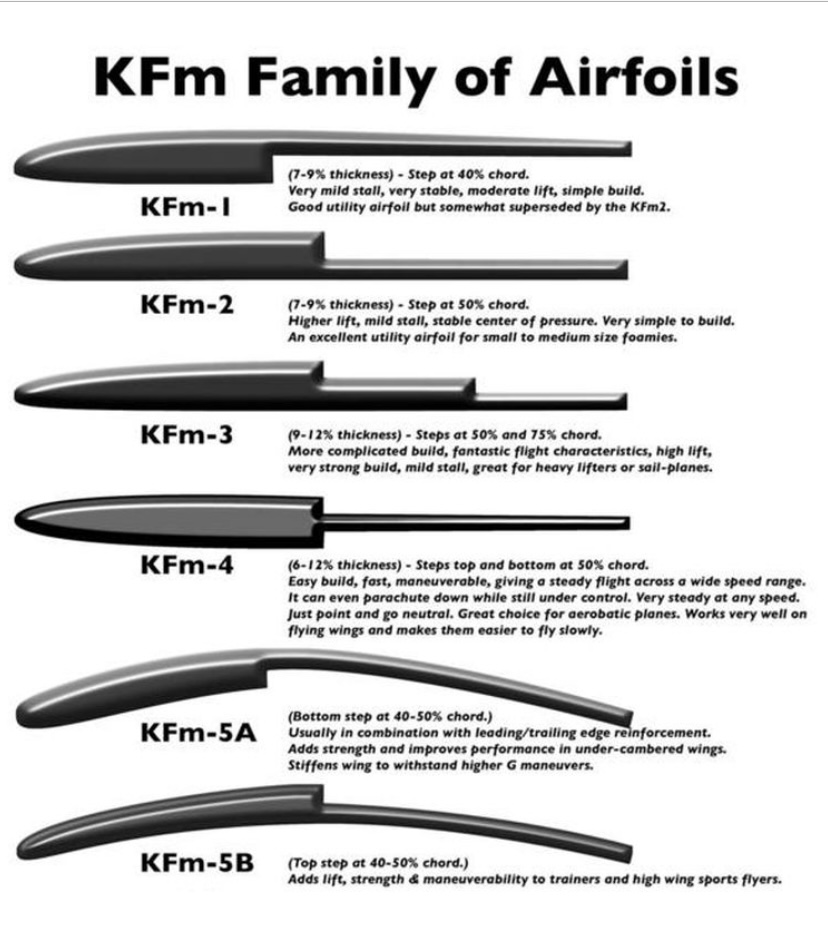
Thanks Andrew for the short tutorial on how you build wings… noted!!…. Looks like
KFm-4 might be a good candidate for a flying wing as well….
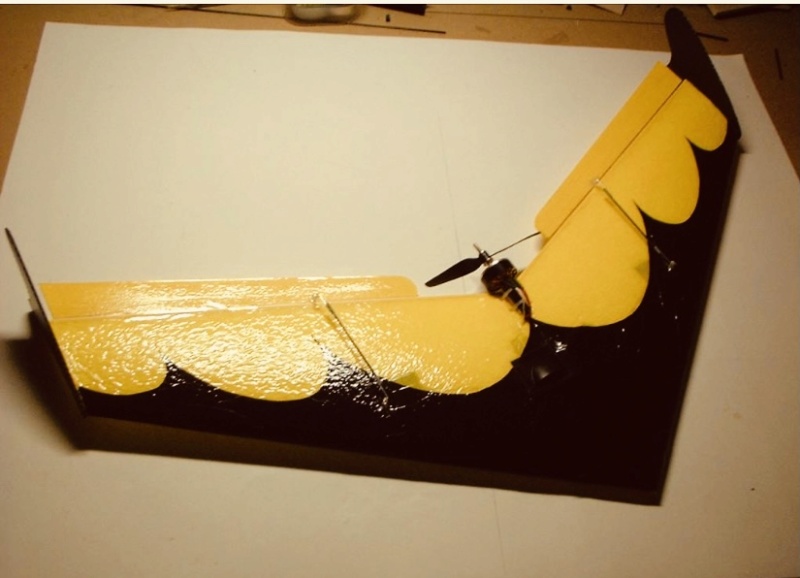
Here’s a wing I built in ‘05… Got a screenshot from RCG from when I posted it back then…A Wing Warrior - Scrappy….70 watts on 5.8 oz …. Was quite peppy!

Thanks Andrew for the short tutorial on how you build wings… noted!!…. Looks like
KFm-4 might be a good candidate for a flying wing as well….
Here’s a wing I built in ‘05… Got a screenshot from RCG from when I posted it back then…A Wing Warrior - Scrappy….70 watts on 5.8 oz …. Was quite peppy!


rdw777- Diamond Member


Posts : 1718
Join date : 2021-03-11
Location : West Texas
 Re: Ace R/C Guppy
Thanks, rdw777, for posting that KFm airfoil chart. I saved the jpeg to my hard drive, for later reference and use.

GallopingGhostler- Top Poster


Posts : 5724
Join date : 2013-07-13
Age : 70
Location : Clovis NM or NFL KC Chiefs
 Re: Ace R/C Guppy
rdw777 --
To keep your wing as light as possible, you'll want to strip the paper off one side and maybe both. It does get pretty bendy (sp?) with the paper off both sides, but my KFm-1 wings are like that. The 3/16" spar does stiffen them up and keeps the weight down. I like the DUCK HD clear tape on the leading edges -- it has good adhesion and is pretty tough. I just picked up a roll of DUCK Max Strength to try on the Sport Cub wings because they're a bit larger and models are heavier. Since you've been reading about the KF wing construction, then you're familiar with beveling, taping and forming the LE. Weighting one panel and using a board to fold the other panel over to form the LE is best -- without paper, trying to fold using just your hands will be difficult. Once the panels are taped and the LE formed, you'll be surprised how much stiffness it adds.
The ROSS Foam Board from Walmart works nicely, but I did find that it will bend more easily on one axis than the other. If you strip the paper from one side, it bends quite easily across the panel (20" side) and is more stiff along the long axis (30" side). Probably has something to do with the extrusion process, but that's just a guess. When cutting out your panels, keep the span running lengthwise to the panel and the chords crosswise. For me, it gave a stiffer wing and was easier to bend in the airfoil (found out after I cut and discarded the first set of panels - with the boards being cheap, it lessened the pain). If you feel you need to improve the stiffness in selected locations, as I noted above, the fiberglass window screen is a favorite of mine. Cheap, tough and you can use most water based glues - the Elmer's Probond Advanced seems to work best for me.
Keep us up to date and shoot us some pics.
For GG
My first attempt at R/C was also with Ted Strader's Nomad. It had a rubber band powered escapement and the Citizenship transmitter contained a vacuum tube. Seems like the range was about 50 feet and I spent more time chasing rather than trying to fly it. Of recent, I've considered building another, but electric with R/E.
 Re: Ace R/C Guppy
andrew wrote:For GG
My first attempt at R/C was also with Ted Strader's Nomad. It had a rubber band powered escapement and the Citizenship transmitter contained a vacuum tube. Seems like the range was about 50 feet and I spent more time chasing rather than trying to fly it. Of recent, I've considered building another, but electric with R/E.
Sounds like you had a sweet setup there, andrew. From what I recall from my the late 1960's / early 1970's, reading R/C books of the 1950's, back then they used mostly lower powered zinc-carbon dry cell batteries, not like our alkalines of today. Those 22.5V photoflash batteries akin to our modern 9 Volt (about 1/4" longer, IIRC), 3 in series provided 67.5 Volt plate current for the Citizenship, were probably short lived, sounds like you might have had weak plate voltage for amplification for such a short range. (Could have been the transmitter batteries, too. But of course, I am only speculating).
I got into rudder only flying in the early 1970's, it was affordable and ultra reliable with the then newer Ace R/C Pulse Commander system. It was such a definite blast that after I got rid of my 26.997 MHz system, I bought another on 72 MHz in late 1970's. I continued to fly rudder only until obsoleted by narrow band equipment.
However, I can see definite advantages for such a glider under electric power, plus elevator. You can get it high, cut the motor, do some thermal seeking. If you get a hat sucking thermal, you can dive the aircraft away with motor full bore, instead of trying to spiral it (a downward barrel roll) like with single channel. You run out of lift, the cut motor back on to gain elevation and more thermal seeking.
Electric does have some definite advantages over glow with gliders, IMO.

GallopingGhostler- Top Poster


Posts : 5724
Join date : 2013-07-13
Age : 70
Location : Clovis NM or NFL KC Chiefs
 Re: Ace R/C Guppy
Andrew,
I stripped the paper off both sides and yes, found it to be pretty floppy…. I was planning to to stiffen the panels back up by balsa leading edge and spar… But I’m thinking I like your method to simplify and reduce shaping and sanding…. I think I’ll try leaving the paper on one side and just fold the leading edge and reinforce with the packing tape…. I will still use a balsa spar… Great info on orientation of the board for bending… I had no idea…
On wings that are tapered from root to tip do you try and taper rib thickness to keep the step ratio about the same?…. I guess a tapered spar could be used under the step to do this?….I don’t know that it matters on something as slow as the little glider will fly…How do you join the panels when when wing halves are complete? … I was planning on using foam safe Gorilla glue with a reinforcement wrap of some kind…

rdw777- Diamond Member


Posts : 1718
Join date : 2021-03-11
Location : West Texas
 Re: Ace R/C Guppy
Galloping Ghoster,
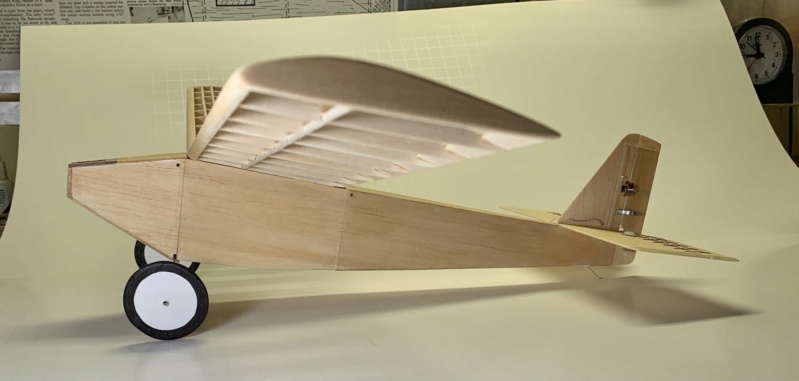
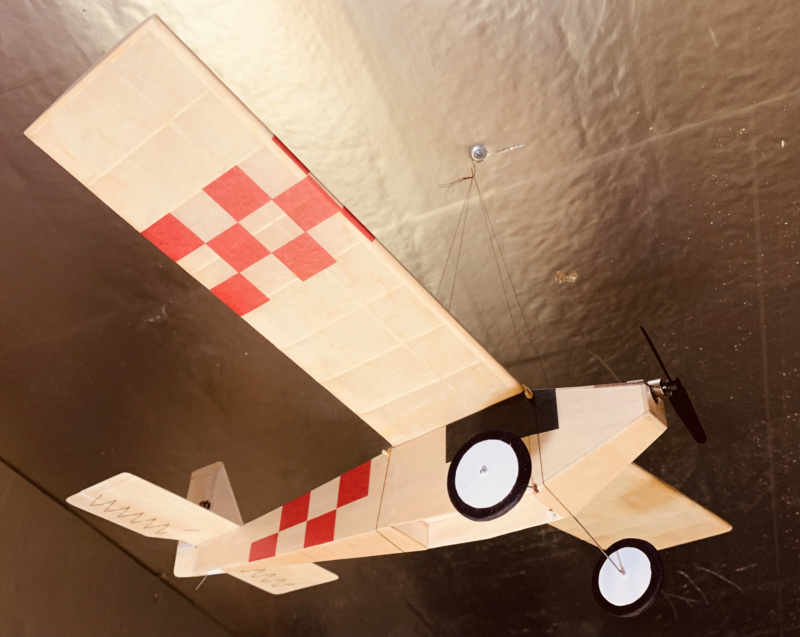
I still like messing around with single channel a little… The plane in the photo was built from Model Builder magazine plans but reduced the size to 24”” ws..
It has a Ceto receiver and Fritz Mueller actuator built into the rudder….Motor is on a timer that is adjustable….The elevator is hinged but just linked to a set screw for trim…It’s basically trimmed like a free flight to fly right hand circles till you push the button in the TX to turn left… Very docile little flyer


rdw777- Diamond Member


Posts : 1718
Join date : 2021-03-11
Location : West Texas
 Re: Ace R/C Guppy
rdw777 wrote:Andrew,
…. I think I’ll try leaving the paper on one side and just fold the leading edge and reinforce with the packing tape…. I will still use a balsa spar…
On wings that are tapered from root to tip do you try and taper rib thickness to keep the step ratio about the same?…. I guess a tapered spar could be used under the step to do this?….I don’t know that it matters on something as slow as the little glider will fly…How do you join the panels when when wing halves are complete? … I was planning on using foam safe Gorilla glue with a reinforcement wrap of some kind…
As you have found out, the paper is a double edged sword -- adds a lot of strength; adds a lot of weight. You don't have to restrict yourself to stripping an entire skin. The Clark Y wing is an example: The top skin had the entire side stripped on the bottom because I wanted to curve the entire upper surface. The bottom panel had the paper removed (on the inside) from about 3/8" in front of the spar all the way to the LE. This kept the bottom flat and stiff, but allowed me to pull the portion forward of the spar up a bit. The panels were each tapered at the TE with fiberglass screen sandwiched in the middle -- lightweight, but really stiffened it up.
That being said, the Guppy is light and with a folded leading edge using packing tape coupled with a spar, you may find that the wing is sufficiently stiff without any paper. I can tell from your posts that you're a meticulous builder. I find myself having to repeat a mantra: "It's a foam airplane; it ain't the space shuttle." Build one wing panel without paper and check if you think it's strong enough. Unlike traditional built-up wings, experimenting is quick and cheap with this material.
I'm a lazy builder! I don't worry about adding a tapered spar on the tapered wings; at the speeds these planes fly, aerodynamics is way down the list.
Taping the LE before folding: Bevel each panel and true up the LE. With the bevels down and leading edges fully touching, pin your panels to the board to keep them flat and from shifting. I lay down a 3" x 3" patch of masking tape on the board at the one end of the panels. Pull off some tape and stick it to the patch so it is centered on the LE join line -- don't stick it to the wing yet. Spool off enough tape to cover the panels (don't stick it down yet). The DUCK HD Clear is so clear that I can't always determine where the edges are. With the tape still on the roll, I mark the center with a Magic Marker -- when I do stick it down, I use the mark to align the tape at the end opposite the masking tape. With the tape just above the LE joint, I start at the masking tape end and use a Credit Card to begin sticking the tape down. I used to use just my fingers, but invariably ended up with wrinkles. Keep tension on the tape and push the tape down all the way to the roll and cut off. You can trim later. This seems to work best for me, but YMMV.
Joining wings: Prop up a wing tip to the dihedral that you want with the root at the edge of your building table. I use a sanding block to bevel the wing root for joining. A good sanding block or two is really helpful with this material -- 220 seems about right (for me) in that it cuts rapidly, but does not leave a rough edge. I used to use Gorilla Glue, but have gotten away from it due to the foaming and need to clamp tightly. It will cure without any misting, just takes longer and does not foam up as much. With the roots aligned and a tip propped up, I use Pro Bond or Loctite's Go 2 Glue. With foam, the glue is always stronger than the surface, consequently, the dihedral joint will need reinforcement. A strip of DUCK tape chordwise over the joint is a start. You can also run a strip or two spanwise -- 3" or so either side of the dihedral joint will extend the surface area enough to hold well. I don't worry about a dihedral brace.
Whew, sorry to be so wordy. I'm sure there are better methods, but these seem to work well for me.
 Re: Ace R/C Guppy
rdw777 wrote:I still like messing around with single channel a little… The plane in the photo was built from Model Builder magazine plans but reduced the size to 24”” ws.. It has a Ceto receiver and Fritz Mueller actuator built into the rudder….Motor is on a timer that is adjustable….The elevator is hinged but just linked to a set screw for trim…It’s basically trimmed like a free flight to fly right hand circles till you push the button in the TX to turn left… Very docile little flyer
That is a very well done light flyer there, rdw777. Yes, I remember reading about those micro RC systems. Regarding RO flying, haven't done much for the past 30 years, because here, we have nominally a 15 mph breeze or more most of the time. Being in the high desert, we have wide open areas with very few trees. Calm days are harder to find. Thus, I am limited to flying .15 to .35 CL and .10 and up RC 2 or 3 channel. The smaller stuff doesn't handle the winds as well.

GallopingGhostler- Top Poster


Posts : 5724
Join date : 2013-07-13
Age : 70
Location : Clovis NM or NFL KC Chiefs
 Re: Ace R/C Guppy
Not a lot to report other than I did not have any luck with the KFm wing panels…. It was going OK until I added “spars” with the Duck tape and induced a warp along the span…This is on panels with all paper removed….. Looking back I may have needed to bevel the fold joint more to not put as much stress into the joint…. Thank you Andrew for the detailed explanation…. My first attempt was strictly my error…. I think next time I try it will use the fiber glass screen mesh you mentioned to stiffen things up…
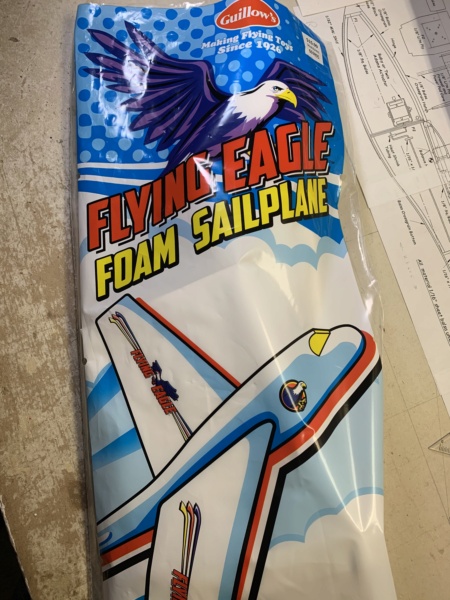
I found this in a craft store and decided to give it a shot…
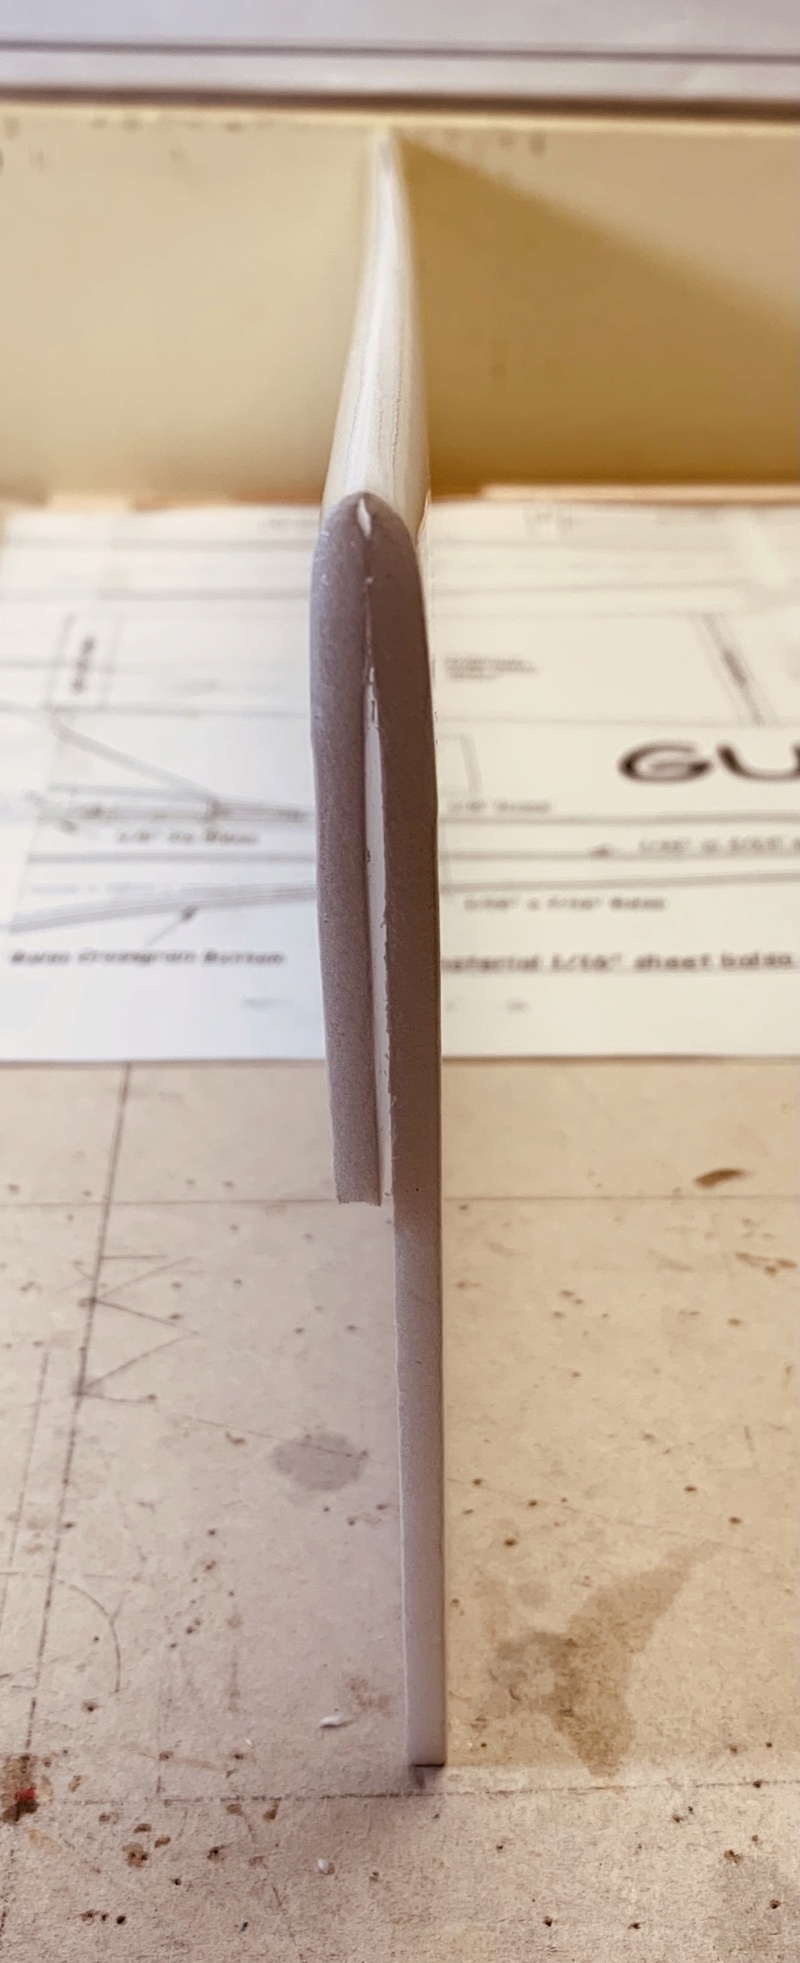
The tip chord was right on the money and the root was only 1/4” to long when cut down to correct span….It has a pretty blunt leading edge so I rounded it better from the bottom side to hopefully make perform a bit better…. It has a bit of under camber as can be seen in the sliced out section…..Also sanded in some washout at the tips….This foam responds best to about 100 grit paper….

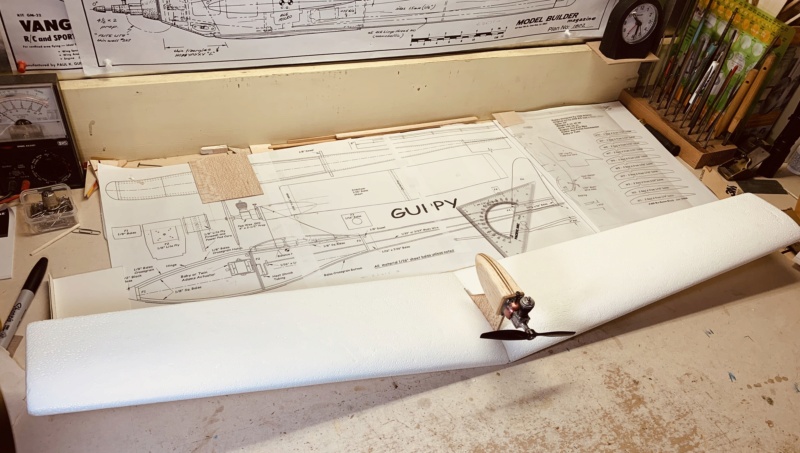
I won’t permanently mount the power pod until it gets a few test glides in case it turns out weird and I need to do something else…. If it works out it will be home for the PeeWee that had the bent cylinder…

I found this in a craft store and decided to give it a shot…

The tip chord was right on the money and the root was only 1/4” to long when cut down to correct span….It has a pretty blunt leading edge so I rounded it better from the bottom side to hopefully make perform a bit better…. It has a bit of under camber as can be seen in the sliced out section…..Also sanded in some washout at the tips….This foam responds best to about 100 grit paper….


I won’t permanently mount the power pod until it gets a few test glides in case it turns out weird and I need to do something else…. If it works out it will be home for the PeeWee that had the bent cylinder…

rdw777- Diamond Member


Posts : 1718
Join date : 2021-03-11
Location : West Texas
 Re: Ace R/C Guppy
Nice work, good you found a work around for the foam wing assembly. BTW, that glider you used for parts, you were fortunate as Guillow no longer manufacturers that. They replaced it with a smaller foam glider.

GallopingGhostler- Top Poster


Posts : 5724
Join date : 2013-07-13
Age : 70
Location : Clovis NM or NFL KC Chiefs
 Re: Ace R/C Guppy
I like it looking Good !! The wing looks pretty darn good too . 


getback- Top Poster


Posts : 10442
Join date : 2013-01-18
Age : 67
Location : julian , NC
 Re: Ace R/C Guppy
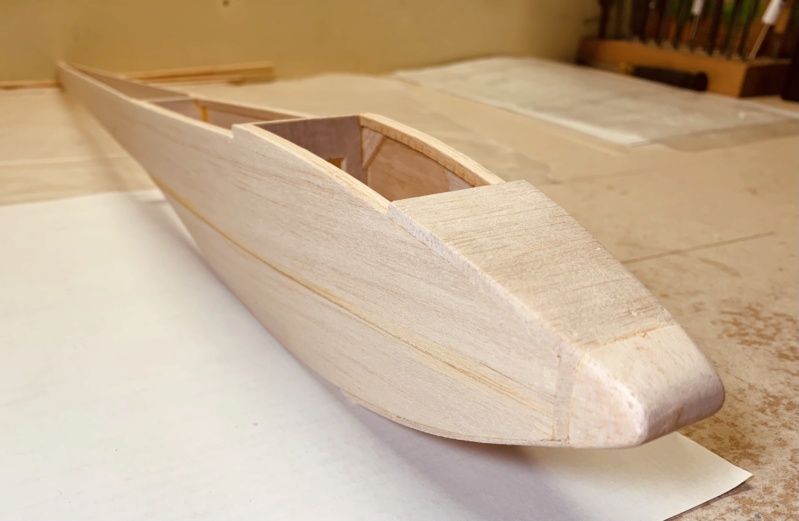
Had just a little time over the weekend to shape up the nose some…
Here’s the receiver I am intending to use…..Rated 3.7 - 9.6 volts…

I have two 9 gram servos to use…. Servos are usually rated 4.8 - 6 volt …. The battery pack I have is a 370 mah 2S (7.4 volt)…. I assume the receiver has no voltage regulator for output and I could fry the servos unless I add an external regulator…,I am looking at this one…
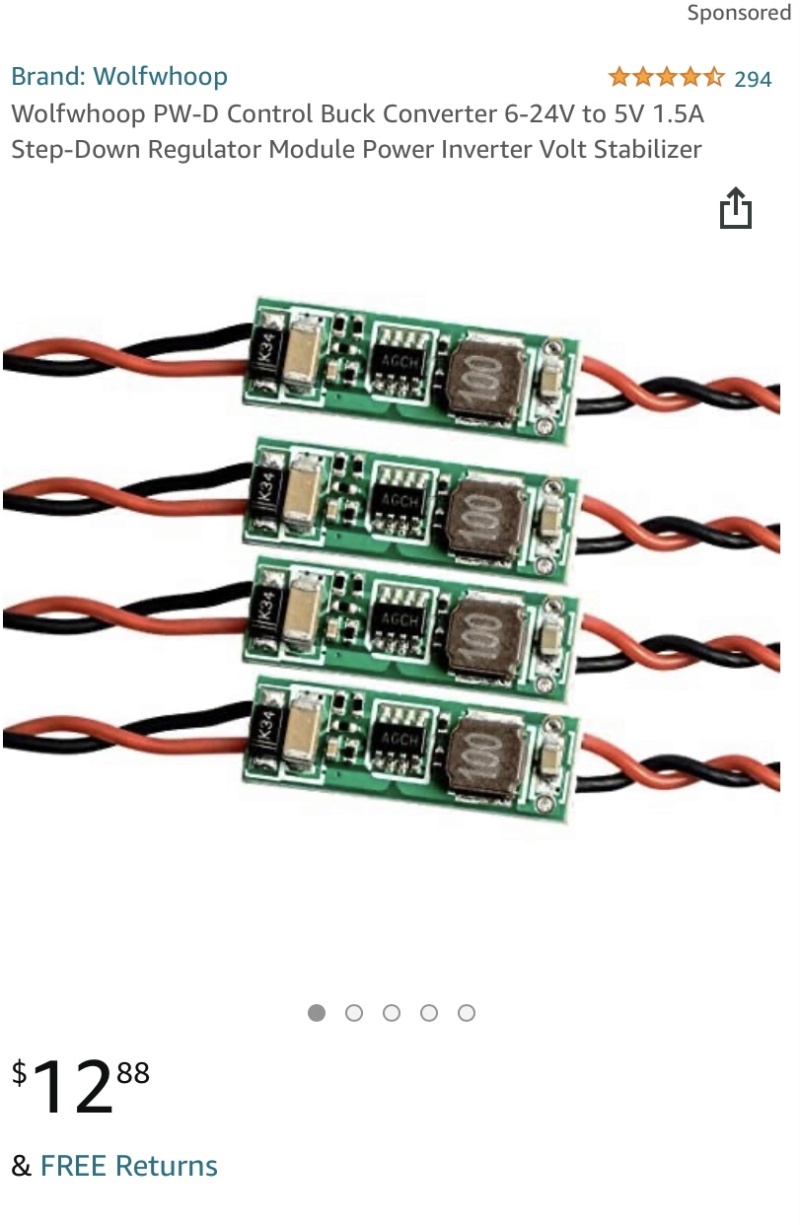
Am I moving right direction? Thought I would check with small gas R/C flyers before I let the magic blue smoke out of something …. Thanks…

Here’s the receiver I am intending to use…..Rated 3.7 - 9.6 volts…

I have two 9 gram servos to use…. Servos are usually rated 4.8 - 6 volt …. The battery pack I have is a 370 mah 2S (7.4 volt)…. I assume the receiver has no voltage regulator for output and I could fry the servos unless I add an external regulator…,I am looking at this one…

Am I moving right direction? Thought I would check with small gas R/C flyers before I let the magic blue smoke out of something …. Thanks…

rdw777- Diamond Member


Posts : 1718
Join date : 2021-03-11
Location : West Texas
 Re: Ace R/C Guppy
heh nice choice on the glider, that wing flies really well actually. needs reinforcement though, the wings on the thing i just made flex like crazy

Lukemiester- Gold Member

- Posts : 290
Join date : 2020-10-08
Age : 19
Location : currently Wickenburg, AZ

rdw777- Diamond Member


Posts : 1718
Join date : 2021-03-11
Location : West Texas
 Re: Ace R/C Guppy
she looks god nice and smooth , about the voltage reducer the are some commits in some other threads and some inline regulators as you can tell i don't know much about it but see this if you want >> https://www.google.com/search?q=reducing+voltage+for+rc+receiver&sxsrf=APq-WBu7OVc2mVF8AOnzkUNIKa2sDA3hPA%3A1650287750637&source=hp&ei=hmRdYuShI_fIkPIPj_CauAM&iflsig=AHkkrS4AAAAAYl1yllfuIm1H4cEd_bPep1sjtMo3r--y&oq=reducing+voltage+for+rc+&gs_lcp=Cgdnd3Mtd2l6EAEYAjIICCEQFhAdEB4yCAghEBYQHRAeMggIIRAWEB0QHjIICCEQFhAdEB4yCAghEBYQHRAeMggIIRAWEB0QHjIICCEQFhAdEB4yCAghEBYQHRAeOgQIIxAnOgQILhAnOgUIABCABDoLCC4QgAQQsQMQ1AI6CAgAEIAEELEDOgsILhCABBDHARCjAjoOCC4QgAQQsQMQxwEQ0QM6CwguEIAEEMcBENEDOggILhCxAxCDAToLCAAQgAQQsQMQgwE6DgguEIAEELEDEMcBEKMCOgUILhCABDoFCAAQsQM6CggAEIAEEIcCEBQ6BQgAEIYDOgYIABAWEB5QAFi5gAFgtrYBaABwAHgAgAFgiAHmDZIBAjI0mAEAoAEB&sclient=gws-wiz

getback- Top Poster


Posts : 10442
Join date : 2013-01-18
Age : 67
Location : julian , NC
 Re: Ace R/C Guppy
Thanks Getback, I couldn’t get the link to work but used your key words and found some good articles… One was on voltage dropping diodes… Sounded good so I ordered some… I also had previously ordered the regulator in the photo above… Will try em both… The goal is to use 2 cell li po’s and charger I already have.. Gracias!

rdw777- Diamond Member


Posts : 1718
Join date : 2021-03-11
Location : West Texas
 Re: Ace R/C Guppy
First, your Guppy is really coming along nicely - superb work. The wing looks great.
I think your first decision to use a voltage regulator is your best choice. You get a constant output voltage while your battery voltage may vary. The regulator you chose is a little light on current, but as long as your linkages are free and you don't stall a servo, it should be just fine. I was not able to find much detail about the specs of the regulator, but it is likely a linear rather than switch mode regulator. Again, that will cause no problems. Switch mode regulators tend to be more efficient, but a linear regulator will work OK. When sourcing regulators, you might want to look for SBECs or switching battery eliminator circuits. This is a typical example, although a little heavy at 18 gr.: https://hobbyking.com/en_us/turnigy-5a-8-26v-sbec-for-lipo.html? You can also search for UBECs -- these also tend to be switching regulators, especially with the later designs.
The receiver pictured has been discontinued by Hobbyking, but may still be available through other outlets as stock. Specs indicate a current draw of 35 mA for that receiver and will have to be taken into account when determining overall current needs for your setup.
Diodes have been used to control voltage for a long time since their voltage drop is known and they may be connected in series to achieve the necessary reduction. They are cheap, light and reasonably tough, but you must choose the appropriate diode to handle your current needs. However, when used with a battery, the downstream voltage will follow the battery voltage as it goes down. For example, 4 silicon diodes in series will drop approximately 2.8V. With a fully charged 2S lipo, battery voltage is around 8.4V, so downstream voltage would be 5.6V. As the battery voltage drops, say to 7.2V, downstream voltage follows directly to 4.4V. Now, you likely will never fly your battery down that low, but your dropping voltage must be sufficient to handle a fully charged battery lest you burn up a small servo.
More pics, please.
andrew
Last edited by andrew on Tue Apr 19, 2022 11:35 am; edited 2 times in total
 Re: Ace R/C Guppy
Andrew glad you popped in , like i said i only know what i have read and not done any experimenting.. I know your riding mowers have these inline diodes in them and the rattle alot when in use so dependable Yes 


getback- Top Poster


Posts : 10442
Join date : 2013-01-18
Age : 67
Location : julian , NC
 Re: Ace R/C Guppy
Thanks Getback, Andrew, This is helping me work thru this part of the project 
Andrew, Thank you again for your detailed explanation of your foam wing work, Noted, and I’m sure I’ll put it to work some day,
I received the regulators today… I tried to determine if they are linear or switching but not much luck…. The packaging has PW on the label that might hint at Pulse Width which may lean toward switching…Not that I know how much it matters…
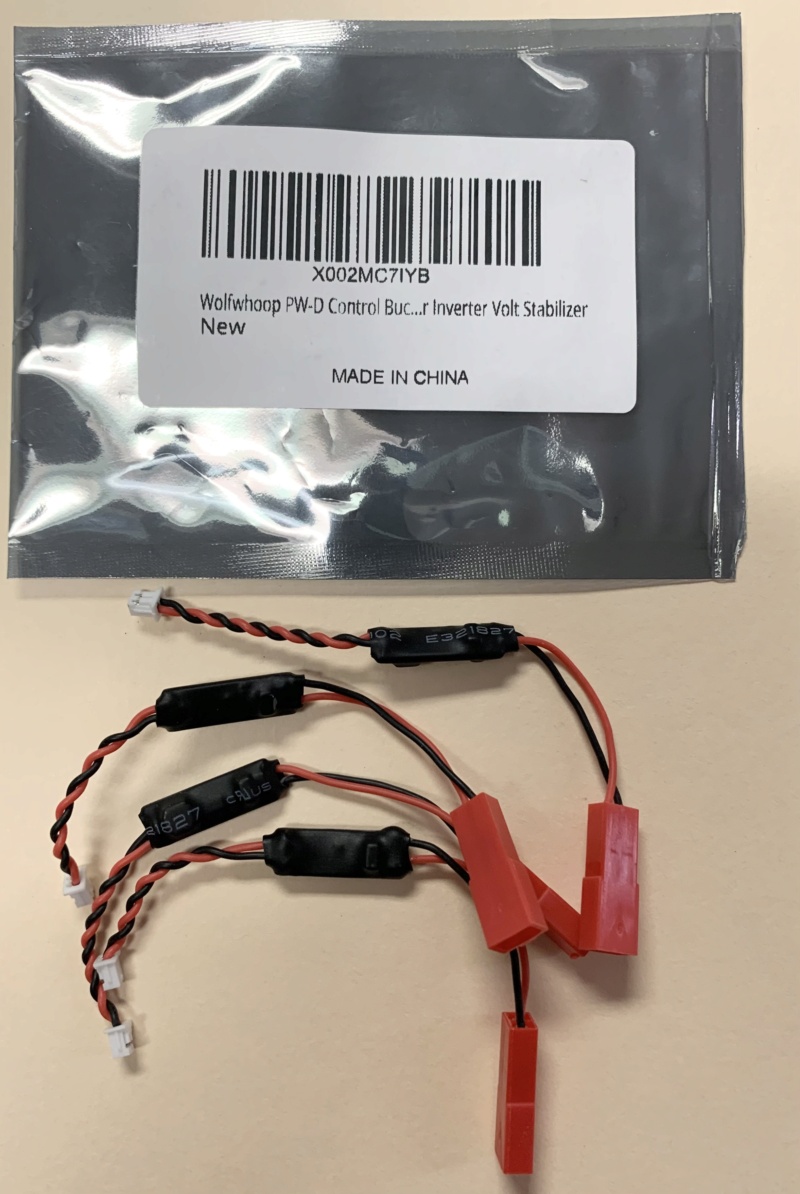
The current rating is 1.5 Amps and as you noted the receiver will consume around 35 mA…When the time comes I’ll rig a harness tocheck current on the entire system…. Maybe abuse it a little and see that it stays up…I have two of those receivers, One is installed and has given good service…
Here’s the article I read on the diode power supply which gave a little insight to regulators as well..,Courtesy of Getback…
https://eastbayrc.org/index.php/tims-tips/90-3-diode-voltage-dropper
Please continue to post thoughts and opinions…Welcomed…. Obviously a a four cell NiMH pack could work but just trying to stay with one system that I already have if possible…
Absolutely will post a few photos of the build along the way, Thank you..,
Andrew, Thank you again for your detailed explanation of your foam wing work, Noted, and I’m sure I’ll put it to work some day,
I received the regulators today… I tried to determine if they are linear or switching but not much luck…. The packaging has PW on the label that might hint at Pulse Width which may lean toward switching…Not that I know how much it matters…

The current rating is 1.5 Amps and as you noted the receiver will consume around 35 mA…When the time comes I’ll rig a harness tocheck current on the entire system…. Maybe abuse it a little and see that it stays up…I have two of those receivers, One is installed and has given good service…
Here’s the article I read on the diode power supply which gave a little insight to regulators as well..,Courtesy of Getback…
https://eastbayrc.org/index.php/tims-tips/90-3-diode-voltage-dropper
Please continue to post thoughts and opinions…Welcomed…. Obviously a a four cell NiMH pack could work but just trying to stay with one system that I already have if possible…
Absolutely will post a few photos of the build along the way, Thank you..,

rdw777- Diamond Member


Posts : 1718
Join date : 2021-03-11
Location : West Texas
Page 1 of 3 • 1, 2, 3 
Page 1 of 3
Permissions in this forum:
You cannot reply to topics in this forum

 Rules
Rules


