Log in
Search
Latest topics
» My latest doodle...by batjac Today at 10:05 pm
» Retail price mark-up.. how much is enough?
by gkamysz Today at 9:29 pm
» Happy 77th birthday Andrew!
by roddie Today at 9:22 pm
» Roger Harris revisited
by rsv1cox Today at 3:38 pm
» My N-1R build log
by GallopingGhostler Today at 3:04 pm
» Tee Dee .020 combat model
by 1/2A Nut Today at 2:43 pm
» Chocolate chip cookie dough.........
by roddie Today at 1:13 pm
» Purchased the last of any bult engines from Ken Enya
by sosam117 Today at 11:32 am
» Free Flight Radio Assist
by rdw777 Today at 9:24 am
» Funny what you find when you go looking
by rsv1cox Wed Nov 20, 2024 3:21 pm
» Landing-gear tips
by 1975 control line guy Wed Nov 20, 2024 8:17 am
» Cox NaBOO - Just in time for Halloween
by rsv1cox Tue Nov 19, 2024 6:35 pm
Cox Engine of The Month
Troublesome Babe Bee
Page 1 of 2
Page 1 of 2 • 1, 2 
 Troublesome Babe Bee
Hello All:
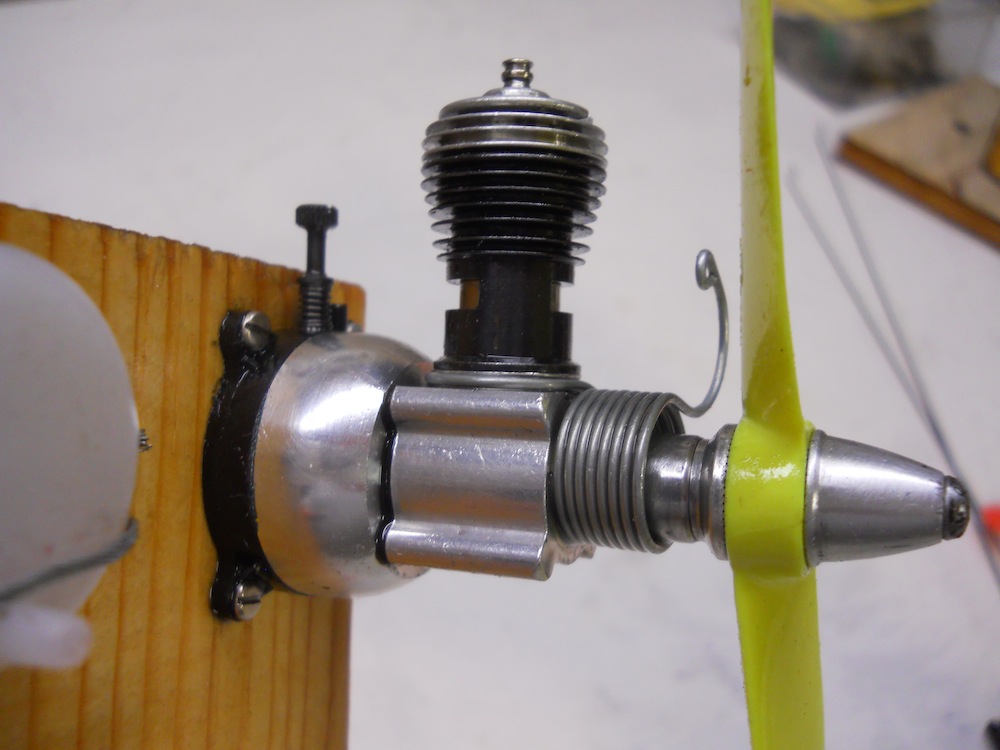
You'd think getting this little beauty to run right would be a piece of cake, but I'm stymied. Help me out if you can, good people. It's a bit of a franken engine mounted on a new tank and back plate from Bernie.
Problem: Very tricky to get started and to keep running. With effort and luck, I can find the needle setting to get it to two-stoke. Drinks fuel like a banshee - lucky to get a minute out of the 5cc tank when I can get it to run that long.
Attempted solutions:
1) Made sure all screws were tight.
2) Checked the fuel pickup for proper placement.
3) Tried two different fuels (both 25% nitro and 20% castor).
4) Replaced glow head and head gaskets.
Crickets!
I've got some other ideas on what to try, but thought I'd check here before putting out the shekels and more time.
Thanks.
Dave Mo...


DaveyMo- Bronze Member

- Posts : 49
Join date : 2019-01-12
Age : 73
Location : Baraboo, WI
 Re: Troublesome Babe Bee
Check for a worn crankcase bearing. If this is the case, you will get poor fuel suction and lots of fuel blowing past the bearing.

706jim- Gold Member

- Posts : 472
Join date : 2013-11-29
 Re: Troublesome Babe Bee
Sounds like a reed issue to me. It looks like the engine has the later reed holder installed. What kind of reed did you use with it?

Cribbs74- Moderator


Posts : 11907
Join date : 2011-10-24
Age : 50
Location : Tuttle, OK
 Re: Troublesome Babe Bee
Also make sure the venturi gasket between the tank and backplate is present and in good condition.
 Re: Troublesome Babe Bee
Did you buy this tank/back plate as an assy. if not the tank it self does NOT come with a venture O-Ring ,, either way you will have to tear it back down if not sure snap some pics. for us to look at . 

getback- Top Poster


Posts : 10441
Join date : 2013-01-18
Age : 67
Location : julian , NC
 Re: Troublesome Babe Bee
Ok i believe this one is a bit more complex than just fuel leakage draw problems no it's just its wrong configuration the cylinder is an old one with a simple taper piston one bypas u need to adjust sub piston induction if u put new piston its posible after performance reduce and use that bigger ventury Not helping you nead to use the tank of a smaller order with a thimble drome singing and its backplate nead a restraints insert try to find the first jr texaco tank with its back plate its wy this engine do not work the right way just change cylinder je wil run just Perfect Try with a new cylinder of cox I am ready to bet that the engine will work correctly with the right components it just nead a twin bypas no3 no1 At least two transfer ports with smaller spi hope it help 

davidll1984- Diamond Member

- Posts : 2327
Join date : 2020-02-12
Age : 39
Location : shawinigan
 Re: Troublesome Babe Bee
Hello All:
Such fast and thoughtful replies. This board can't be beat. Thank-you!
My thoughts, as informed by your great input.
1) Admin and Cribbs74 and Getback: Good suggestions, though from the crankcase gasket on back, everything is new from Bernie. Carefully installed, his parts are a class act. The reed is plastic (mylar?) as included in the later reed holder set. The venturi gasket is a dandy and quite robust.
2) 706jim: Hmm..., you might be onto something. I noticed that the bit of fuel accumulating on the head during runs was colored light gray, not clear or pink as expected. Not sure how I'd evaluate the bearing for condition.
3) Davidll1984: Ah, you appear to have some good experience with configurations, so you have my attention. Correct, the cylinder is a Number 2 with single port. I checked the sub-piston induction on this, and it is >.30 mm and <.35 mm. I'm sure I have a Number 1 cylinder, but I need to do a search. When I install it, is there a particular piston that needs go with the Number 1?
Thank-you very much!
Dave Mo...

DaveyMo- Bronze Member

- Posts : 49
Join date : 2019-01-12
Age : 73
Location : Baraboo, WI
 Re: Troublesome Babe Bee
Hello Again:
Oops! My apologies, but forgot one point: I've no idea how to respond to concerns about the venturi that Davidll1984 raised.
Dave Mo...
Oops! My apologies, but forgot one point: I've no idea how to respond to concerns about the venturi that Davidll1984 raised.
Dave Mo...

DaveyMo- Bronze Member

- Posts : 49
Join date : 2019-01-12
Age : 73
Location : Baraboo, WI
 Re: Troublesome Babe Bee
It is my fault I forgot to explain that the ventury is a shape inside the intake inside the fuel tank The size of the intake just matches its backplate and now the engine is running with the wrong air fuel ratio To cut the air flow for the cylinder configuration You want a smaller ventury inside the intake manifold for that I suggest to find the smallest one that exists you need a tank wit its back plate also the one posible To use its Identify with a sign cox thimble drome the back plate use insert inside its ventury extra parts

davidll1984- Diamond Member

- Posts : 2327
Join date : 2020-02-12
Age : 39
Location : shawinigan
 Re: Troublesome Babe Bee
All Bee engines can mismatch parts and still run correctly. Cylinders, heads backplates, tanks crankcases and cylinders. I have personally cobbled engines together from the parts bin and they all run just fine. Some may perform better than others due to the parts difference, but they all run.
New parts don’t always function as advertised. Does the reed move freely in the retainer?
New parts don’t always function as advertised. Does the reed move freely in the retainer?

Cribbs74- Moderator


Posts : 11907
Join date : 2011-10-24
Age : 50
Location : Tuttle, OK
 Re: Troublesome Babe Bee
No1 cylinder its like the black widow one u have in spare wit no piston ? ok first dos it had milled top fin or Not the first version has tapered cylinders steep wall This means that the piston cannot come out of the cylinder head.but no matter a good new piston with this no1 cylinder should do the job but also the gas reserve goes quickly less than two minutes or so its posible To use External tank to extend the flight duration like so 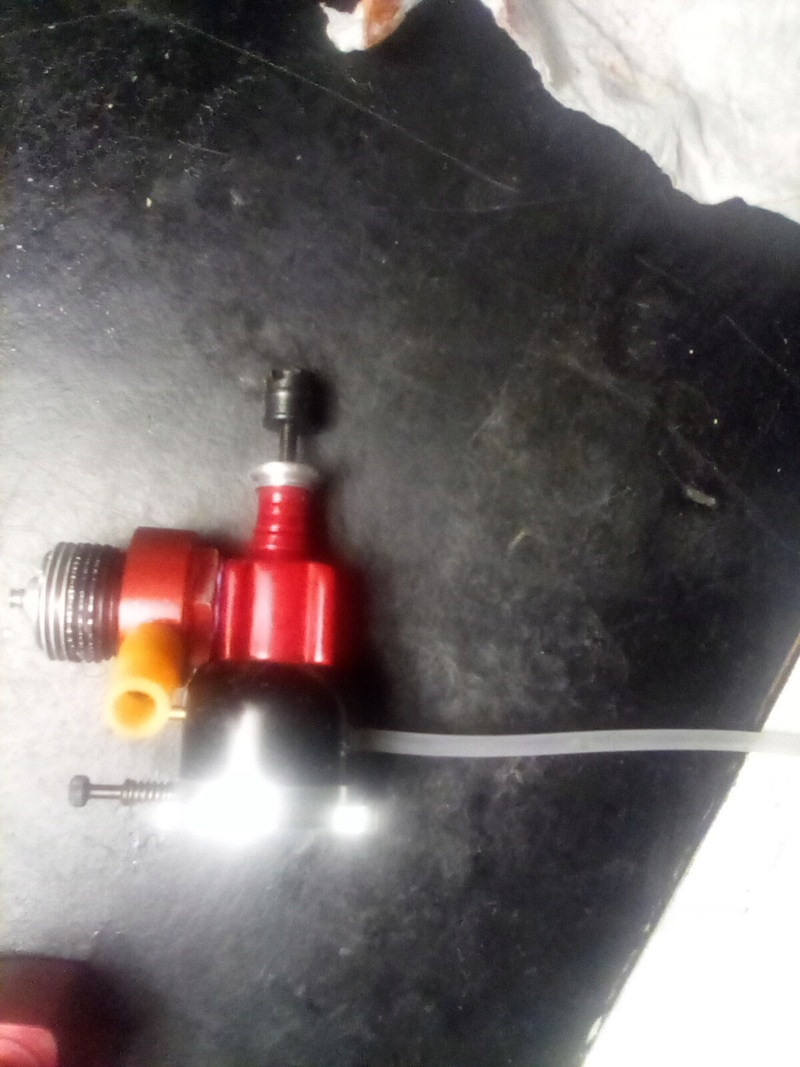
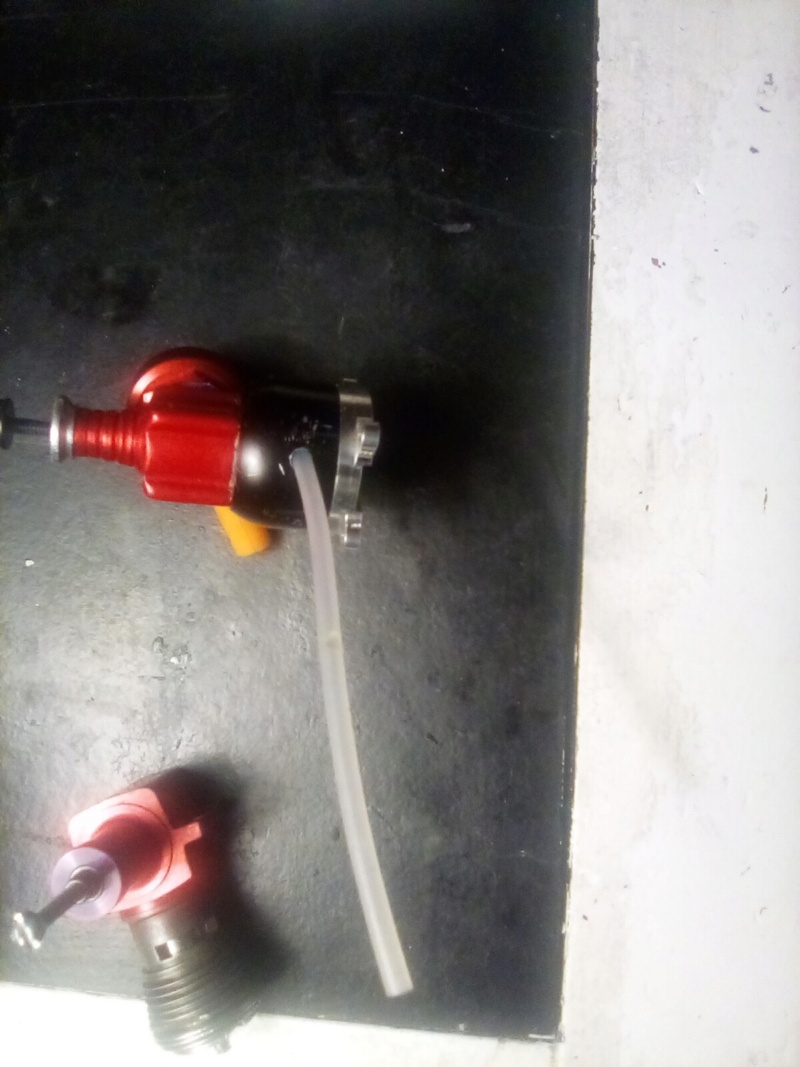
This engine Intake is very large like i can insert one back plate Bolt inside its Intake port is like 2.11 mm in size its no1 black widow old tapered steep wall cylinder Is works like no other there are not two like this the tank that u have is a 1990 ish era Should be large enough for this cylinder that tank Intake ventury just To large for the old one wit this setup He must spit it out fuel oil like crazy oil mess in second


This engine Intake is very large like i can insert one back plate Bolt inside its Intake port is like 2.11 mm in size its no1 black widow old tapered steep wall cylinder Is works like no other there are not two like this the tank that u have is a 1990 ish era Should be large enough for this cylinder that tank Intake ventury just To large for the old one wit this setup He must spit it out fuel oil like crazy oil mess in second

davidll1984- Diamond Member

- Posts : 2327
Join date : 2020-02-12
Age : 39
Location : shawinigan
 Re: Troublesome Babe Bee
Thank-you kindly, David, for both of your latest responses. I'll read through them later on, compare to what I have and then respond tomorrow.
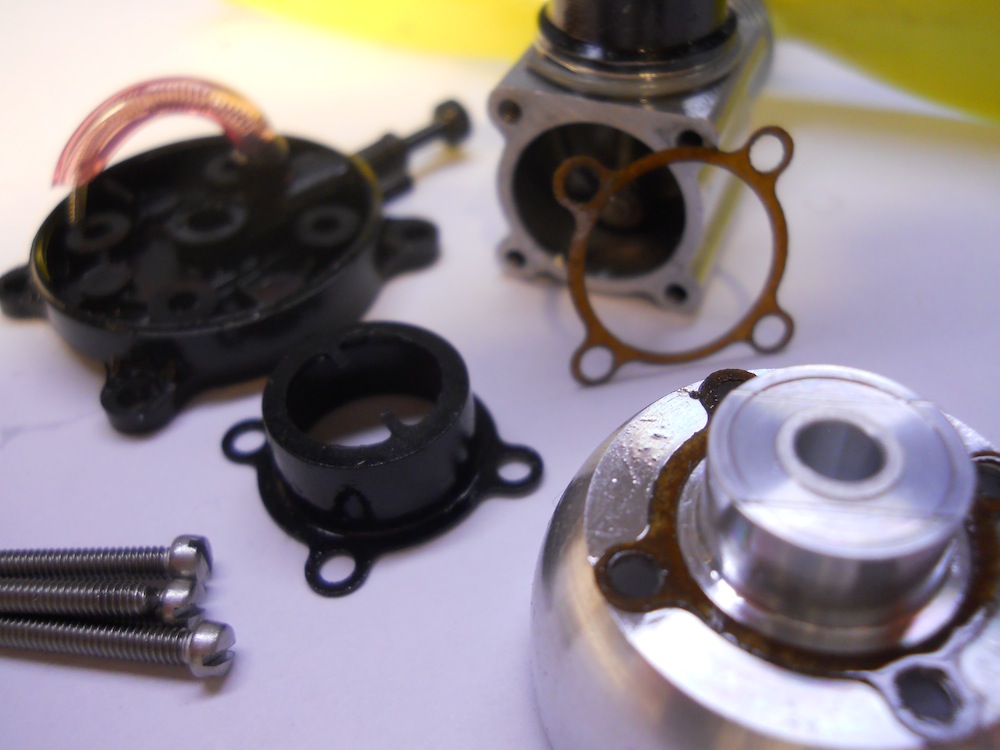
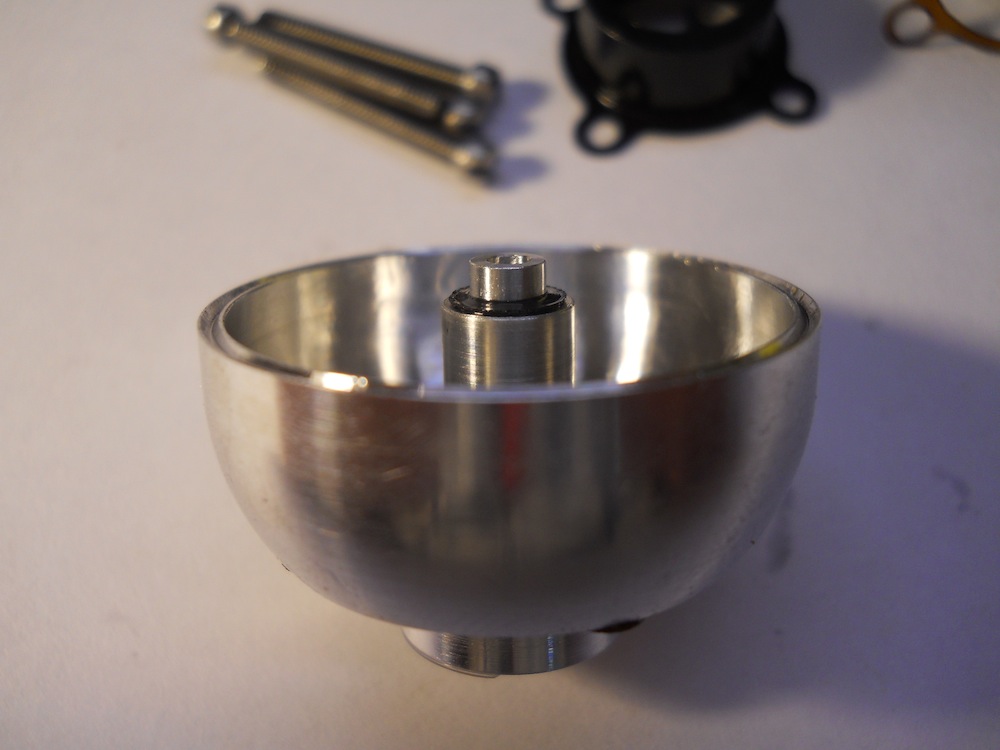
Now just a followup to Cribbs74. Attached are photos of the teardown. The mylar reed rotates under the plastic retainer just fine. Notice that the retainer, when assembled, is sandwiched between two gaskets. Not sure if this is typical? The kit came with both gaskets and I used them as you can see. It just dawned on me that the gasket installed against the tank would allow the reed a little more float during operation. Take a look. Thanks!
Dave Mo...


DaveyMo- Bronze Member

- Posts : 49
Join date : 2019-01-12
Age : 73
Location : Baraboo, WI
 Re: Troublesome Babe Bee
I fyou have a lot of excess fuel coming out the CC/CS at the Prop plate that is a problem >> Do you have another engine to test the tank assy. on? And you can hold the case and wiggle the shaft there should bee a minimum of play like .001-2 thousands . 


getback- Top Poster


Posts : 10441
Join date : 2013-01-18
Age : 67
Location : julian , NC
 Re: Troublesome Babe Bee
Take the gasket of no nead If the fuel tank is too far from the crank it wil damage crankcase crankchaft piston rod crankchaft pin and lock al up first after u put al component of a engine take its cylinder of then place crankchaft end prop drive plate up To simulation of climbing them turn slow look at tdc if piston conecting rod want To slip of its crankchaft pin exit the litle track inside crankcase the litle track inside crankcase

davidll1984- Diamond Member

- Posts : 2327
Join date : 2020-02-12
Age : 39
Location : shawinigan
 Re: Troublesome Babe Bee
Gaskets on both sides aren't going to have a impact on the way the engine runs. While some were offered without gaskets some where. Put the engine back together, prior to installing the tank hook a syringe to the venturi tube with a piece of medium tubing. where the o-ring is and try to extract the syringe. You should absolutely not be able to withdraw the syringe at all. If you can pull the syringe back even a little that's your problem. If that's the situation, flip the reed over and try it again. Even new reeds have distortion to them and can seal one way better vs the opposite.
Once the engine is together, screw the needle valve all the way down but not tight enough to break the tip, just snug. Pressurize the fuel tank with the syringe ensuring that your covering the small vent hole as well. This is difficult but can be done. Listen for air leaks, If you hear air coming from the venturi screen hole, the o-ring is leaking. The tank to tank back can leak as well and placing a piece of oiled up dental floss in the v-groove can stop it. Place a drop of oil around the needle valve threads and watch for bubbles because leaks will form there as well.
Place oil around the case to tank connection where the plastic reed retainer is visible on the outside and check for leaks there as well. I've had to add the gaskets on each side to stop the leaks. Facing the rear of the case by placing it on a piece of glass with 400 sandpaper is easy to do. Add a little oil and hold the case flat and slide it in figure 8's on the glass to lap the case to the glass.
The next area of concern is the screws, holding the engine with the nose down looking directly at the screws place a drop of oil on each screw head immersing it in oil. This is easier with help, pressurize the tank again and watch for bubbles around the screw heads. To seal screws, I tear off a piece of cotton swab and wrap the screw the same way Teflon tape is applied so it doesn't unwrap when tightened. Good luck

Ken Cook- Top Poster

- Posts : 5637
Join date : 2012-03-27
Location : pennsylvania
 Re: Troublesome Babe Bee
I have read the thread and looked at photos and can't tell, is that a plastic backplate? I know CI sells black aluminum plates also.
If plastic chuck it in the can, they can be easily distorted by over tightening screws. Never had much luck with them.
If a new aluminum one, NEVERMIND!
If plastic chuck it in the can, they can be easily distorted by over tightening screws. Never had much luck with them.
If a new aluminum one, NEVERMIND!

Last edited by crankbndr on Tue Mar 30, 2021 4:42 pm; edited 1 time in total

crankbndr- Top Poster

- Posts : 3109
Join date : 2011-12-10
Location : Homestead FL
 Re: Troublesome Babe Bee
I feel just the opposite with the plastic backplates. I've had as many metal versions leak, have cracks around the screw bosses and concave equally when the screws were over tightened. I can say I've also had my share of plastic versions leak or cause issues but I prefer them nonetheless. However, if you crash, things aren't so good in that department. I've had the case pull the screws right through the backplate and the backplate still attached to the firewall while the rest went into the grass.

Ken Cook- Top Poster

- Posts : 5637
Join date : 2012-03-27
Location : pennsylvania
 Re: Troublesome Babe Bee
For a different take on troubleshooting a difficult Babe Bee...install a product backplate so you are checking operability of the crankcase, cylinder and head. If it runs configured like a product engine, but fails to run configured as a Bee, then that helps narrow this down to a tank issue.
FWIW, my Golden Bee from childhood died from front case wear around the crank. The engine could no longer keep a good seal on the front end.
FWIW, my Golden Bee from childhood died from front case wear around the crank. The engine could no longer keep a good seal on the front end.
_________________
Never enough time to build them all...always enough time to smash them all!
944_Jim- Diamond Member


Posts : 2022
Join date : 2017-02-08
Age : 59
Location : NE MS
 Re: Troublesome Babe Bee
Thanks for that, Jim. It makes complete sense, which is944_Jim wrote:For a different take on troubleshooting a difficult Babe Bee...install a product backplate so you are checking operability of the crankcase, cylinder and head. If it runs configured like a product engine, but fails to run configured as a Bee, then that helps narrow this down to a tank issue.
probably why it never occurred to me.

Bob

dckrsn- Diamond Member

- Posts : 2750
Join date : 2010-10-21
Age : 71
Location : Long Island, New York
 Re: Troublesome Babe Bee
The spring in the fuel pickup tube in the photo sticking out, as the tube looks a little short. I like to cut the tubing a little longer so that it touches the tank front shoulder to help keep it in place when assembled.

coxaddict- Gold Member

- Posts : 429
Join date : 2013-01-27
Location : north shore oahu, Hawaii
 Re: Troublesome Babe Bee
coxaddict wrote:The spring in the fuel pickup tube in the photo sticking out, as the tube looks a little short. I like to cut the tubing a little longer so that it touches the tank front shoulder to help keep it in place when assembled.

Coxfledgling- Gold Member

- Posts : 404
Join date : 2021-01-10
Location : Near Caernarfon, Snowdonia, Wales, UK
 Re: Troublesome Babe Bee
Hello All:
Great answers to my query!
A progress report after a teardown and reassembly which included: a piston swap, flipping the reed, installing waxed thread between tank & back plate, and replacing NV spring with a short length of fuel line. Everything else the same. Performed all of Ken's pressure tests (but not so thoroughly; stay tuned). Still runs miserably.
davidll1984: The backplate came with an intake of 2.1mm. I kept the #2 cylinder but installed a piston that is tighter at top dead center. If this all works, I suspect that the reduced fuel draw with the #2 cylinder would work for short, beginner flights.
cribbs74: As noted, I flipped the reed over and it passed the negative pressure test. Neat avatar, by the way.
706jim and getback: The prop shaft rotates nicely and I can detect no sideplay. Guessing that it's tight enough.
getback and admin: Good instincts! Hang on.
Ken Cook: What a valuable set of diagnostic techniques!! So well written and easy to follow. I'll save them for future reference.
944_Jim: Zoot, but I need to lay my paws on a product backplate adapter. A diagnostic technique right up there with Ken's list.
crankbender: Glad you mentioned the potential crash problem with the plastic backplate. This mill is intended for a trainer, so will take it under advisement.
coxaddict: Yup, a longer pipe is in order.
So..., the motor passed all of Ken's tests except one. It hisses like a snake at the venturi. No other leaks. That above photo
of the little black venturi gasket looks good, but it must not be doing the job.
The plan: order an aluminum backplate from CI and include a few gaskets. I'll try to make a gasket out of fuel line in the next day or so and give it a whirl. Will report back.
Many thanks to a cast of thousands (actually 9) for all the help. What a learning experience and comradeship!
Dave Mo...

DaveyMo- Bronze Member

- Posts : 49
Join date : 2019-01-12
Age : 73
Location : Baraboo, WI
 Re: Troublesome Babe Bee
Finally replaced the venturi gasket, and it runs like a Cox! Thus the kepwie doll goes to Admin! Lots of good discussion in the process, though. Thanks again.
Dave Mo...
Dave Mo...

DaveyMo- Bronze Member

- Posts : 49
Join date : 2019-01-12
Age : 73
Location : Baraboo, WI
 Re: Troublesome Babe Bee
Dave, it's always difficult diagnosing via the internet. However, a lot of good advice was offered that can be used in the future. I'm glad it's working for you. These little engines can be pretty cantankerous at times. Ken

Ken Cook- Top Poster

- Posts : 5637
Join date : 2012-03-27
Location : pennsylvania
 Re: Troublesome Babe Bee
Glad you got it running like a Cox should.

NEW222- Top Poster

- Posts : 3896
Join date : 2011-08-13
Age : 46
Location : oakbank, mb
Page 1 of 2 • 1, 2 
 Similar topics
» The troublesome Corsair engine, the gruesome twosome, another Hero Testors McCoy .049 and the yellow prop returns.
» (Wanted) NEW 1959-60 Vintage Thimble Drome .049 Babe Bee
» Hot Babe Bee
» 1st Babe Bee?
» an old Babe Bee..
» (Wanted) NEW 1959-60 Vintage Thimble Drome .049 Babe Bee
» Hot Babe Bee
» 1st Babe Bee?
» an old Babe Bee..
Page 1 of 2
Permissions in this forum:
You cannot reply to topics in this forum

 Rules
Rules


