Log in
Search
Latest topics
» A Little 400 Mile Hop for Some Memory Lane Stuff, and to Hit a Swap Meet.by Kim Today at 12:22 pm
» Promote the forum with flyers!
by roddie Today at 9:27 am
» My N-1R build log
by roddie Today at 9:19 am
» Engine choice
by 1975 control line guy Today at 8:29 am
» Roger Harris revisited
by rsv1cox Today at 7:45 am
» Night flying at Walters RC park
by 1975 control line guy Yesterday at 7:29 pm
» Happy 77th birthday Andrew!
by GallopingGhostler Yesterday at 7:10 pm
» Cox films/videos...
by GallopingGhostler Yesterday at 7:07 pm
» Cox 020 PeeWee rebuild questions
by LooseSpinner99 Yesterday at 6:13 pm
» Did you spot the Cox engine in this NASA research video?
by balogh Yesterday at 5:08 pm
» Retail price mark-up.. how much is enough?
by Ken Cook Yesterday at 2:54 pm
» Tee Dee .020 combat model
by 1/2A Nut Yesterday at 10:34 am
Cox Engine of The Month
CEF speed contest Design Discussions (2014)
Page 20 of 20
Page 20 of 20 •  1 ... 11 ... 18, 19, 20
 Re: CEF speed contest Design Discussions (2014)
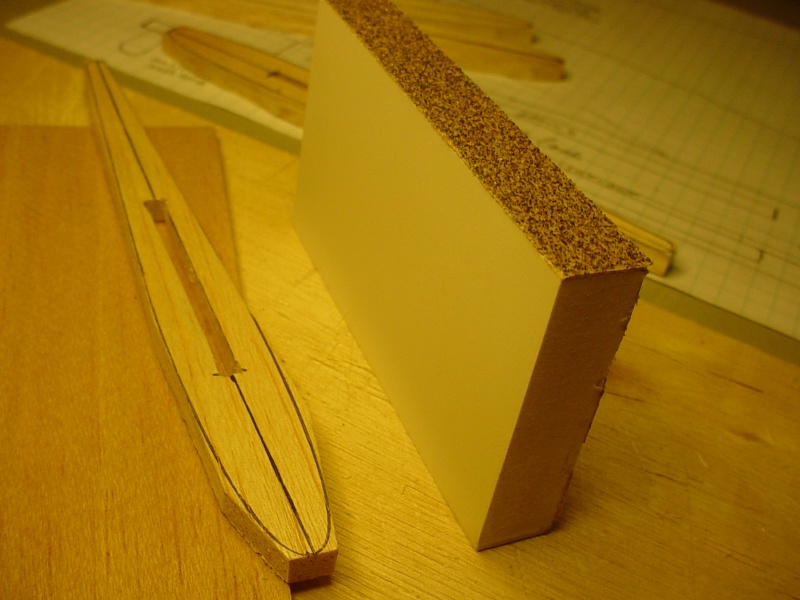
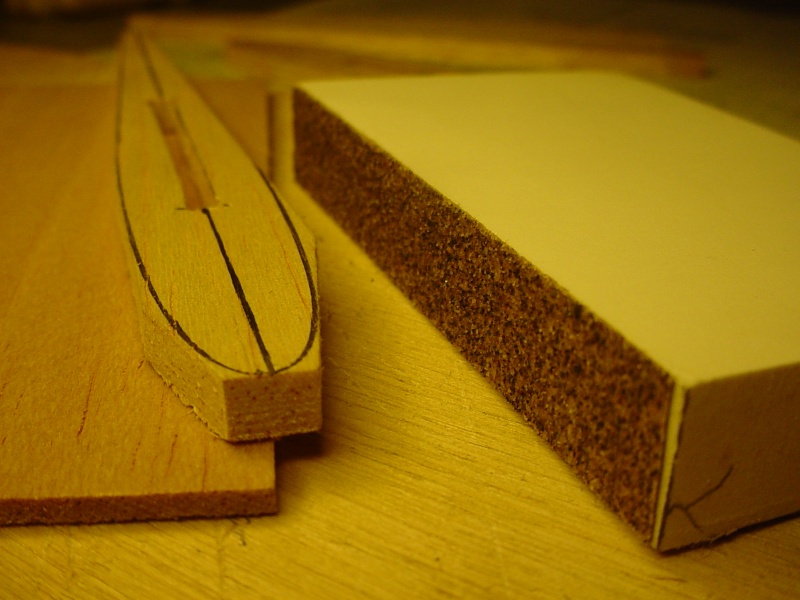
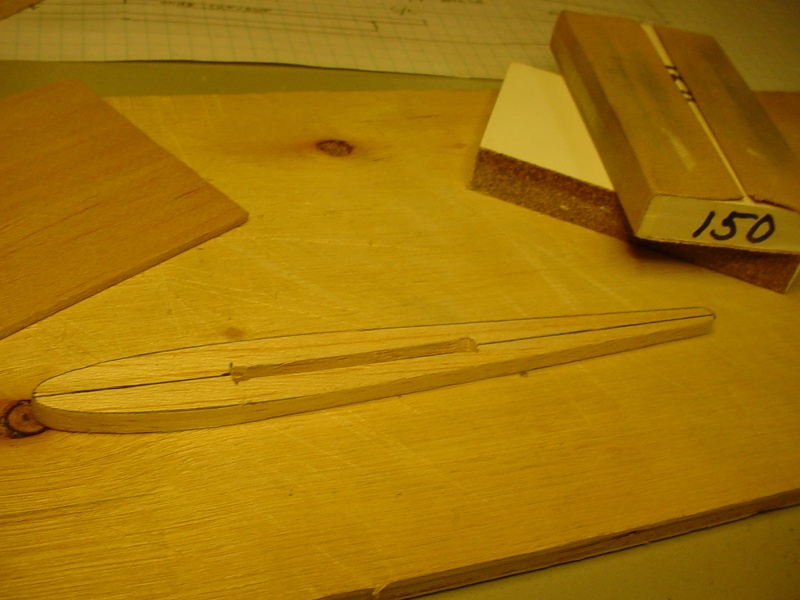
Sanding the wing-tip/tanks for the T33. I faced the edge of a small 1/2" thick PVC block with double-sided film-tape and 80 grit paper and used a sheet of 1/8" scrap balsa for a base to raise the work-piece for a nice square cut.
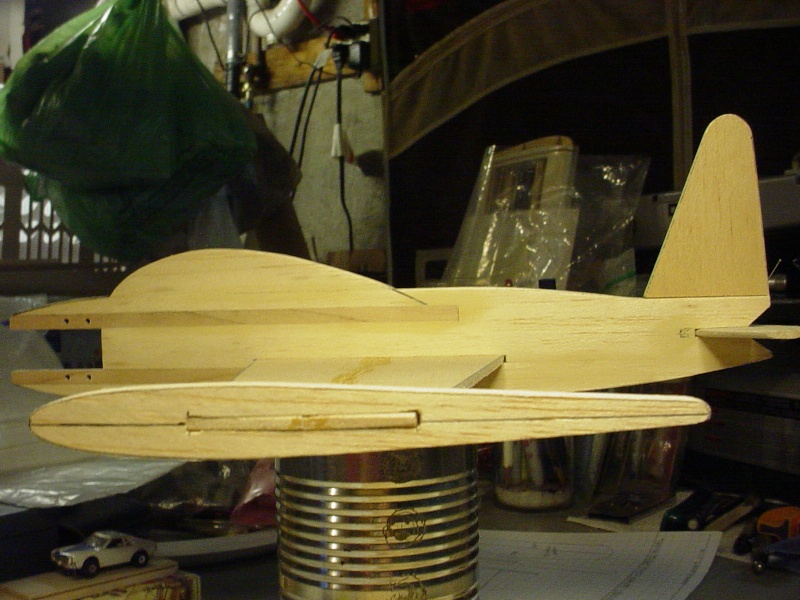
I like it.. and I'm anxious now to start working on the control system. The elevator horn will be top-mounted.. as well as the bell-crank, locating the controls above the launch-cradle that the model will sit down into.
As a side-benefit.. the tip-tanks provide a lot of real-estate for lead-out guide placement.. although it may end up within the span of the "un-tanked" tip.
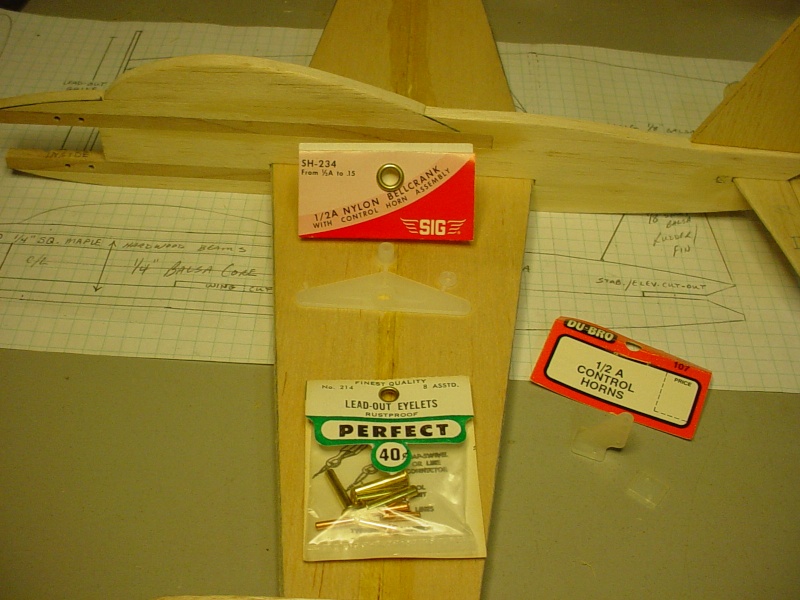
A stepped 1/16" music-wire pushrod is planned.. to help counter nose-weight. If at finish; the model tends toward tail-heavy.. I have .060" carbon fiber rod as a lightweight alternative.


I like it.. and I'm anxious now to start working on the control system. The elevator horn will be top-mounted.. as well as the bell-crank, locating the controls above the launch-cradle that the model will sit down into.
As a side-benefit.. the tip-tanks provide a lot of real-estate for lead-out guide placement.. although it may end up within the span of the "un-tanked" tip.

A stepped 1/16" music-wire pushrod is planned.. to help counter nose-weight. If at finish; the model tends toward tail-heavy.. I have .060" carbon fiber rod as a lightweight alternative.
 Re: CEF speed contest Design Discussions (2014)
I found this control-horn that I like better. I'm tempted to just drill the single hole in the elevator.. fill it with epoxy and feather-it out over the top and bottom plates.
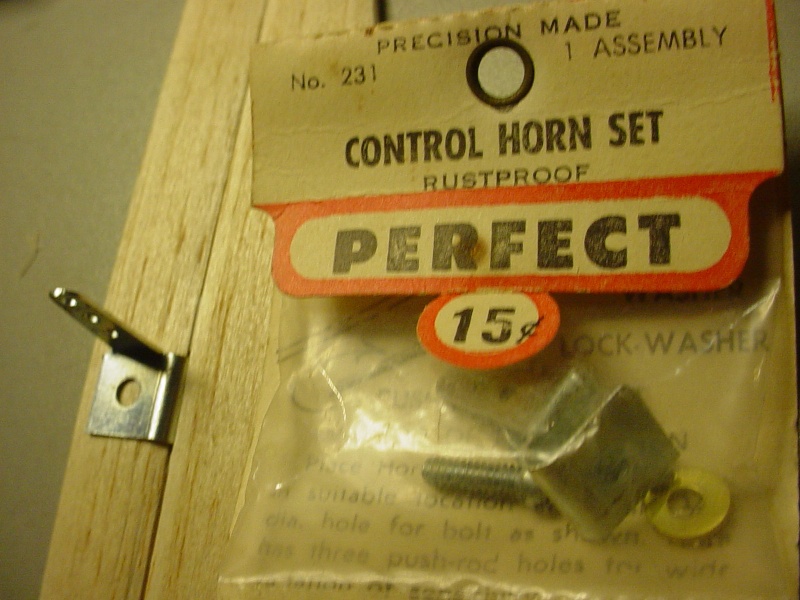
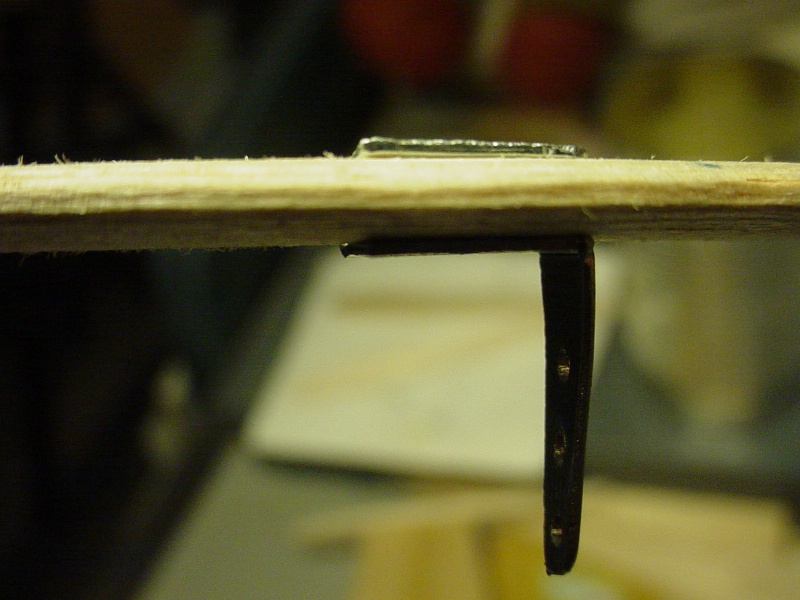
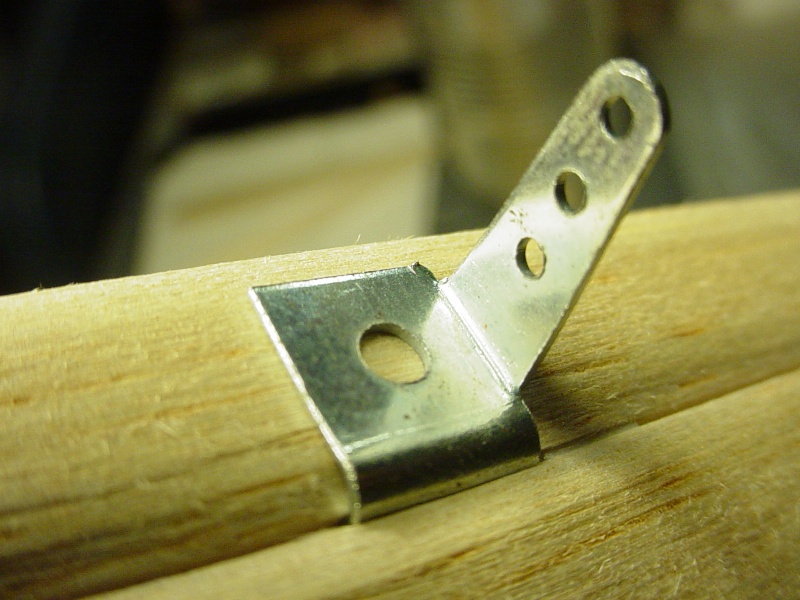
Some of you people remember when hardware like this was available at the marked price. I guess I could be called a collector of vintage 1/2A hardware! It's metal.. mostly.. and has a presence of "strength" about it.. The bell-crank however; will be the Sig 1/2A plastic one because I plan to make-up my lead-outs from .015" 7-strand stainless line this time around.. instead of solids.


Some of you people remember when hardware like this was available at the marked price. I guess I could be called a collector of vintage 1/2A hardware! It's metal.. mostly.. and has a presence of "strength" about it.. The bell-crank however; will be the Sig 1/2A plastic one because I plan to make-up my lead-outs from .015" 7-strand stainless line this time around.. instead of solids.
 Re: CEF speed contest Design Discussions (2014)
Here are my lead-outs. .015" stranded SS through tiny brass tubes that were ready-length from a K & S assortment bag of "cut-offs" sold through Tower Hobbies. I had to use a lighted magnifier to make these.
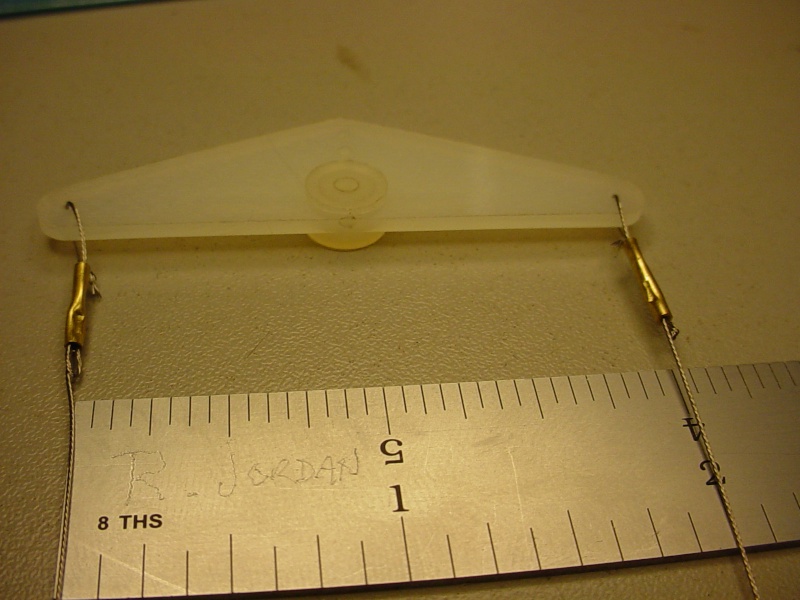
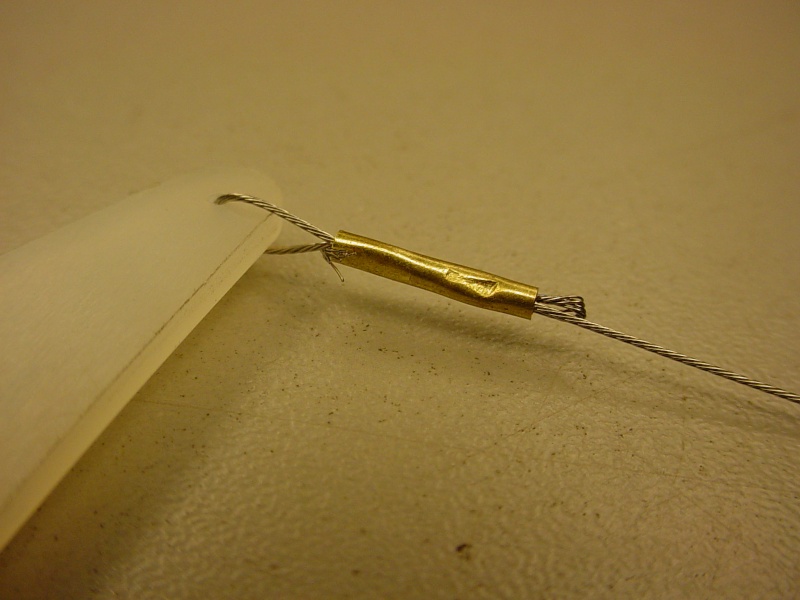
Not sure where to put the bell-crank though. I found a length of 1/16" music-wire for the pushrod.. and proceeded to shear-it in the cutting-jaws of my locking pliers and.. snap!... both pieces grenaded and one piece is lost in the abyss. The second shearing was done by stepping with shoes on both sides of the pliers while on a rug. This yielded a couple lengths at the extremes of where the bell-crank might/could/should be mounted..
forward.. might help in leading/whipping.. until enough airspeed is attained? I keep thinking that I need to be in control of the nose of this model.. because it's going to be more about aiming the thrust.. rather than counting on stability from the airframe. Lead-out guides have free reign of placement along the tip-tanks.. no matter where the bell-crank is positioned.
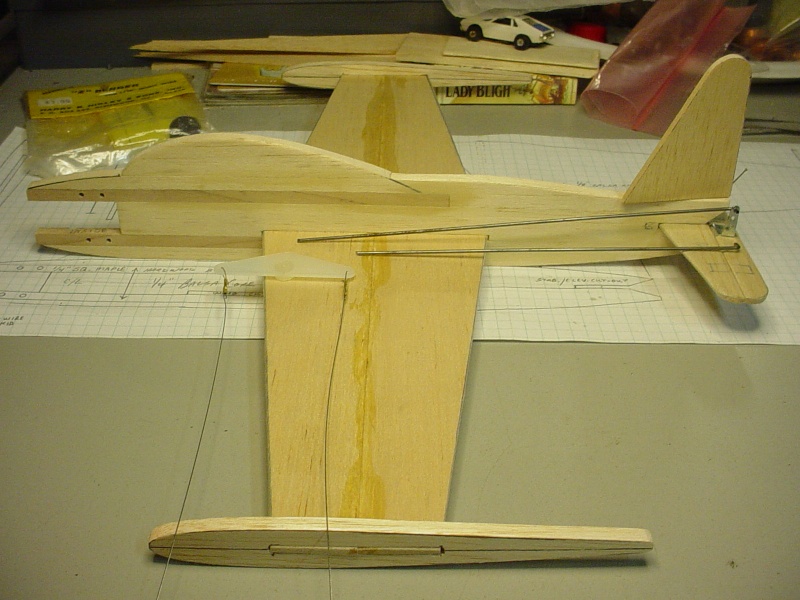
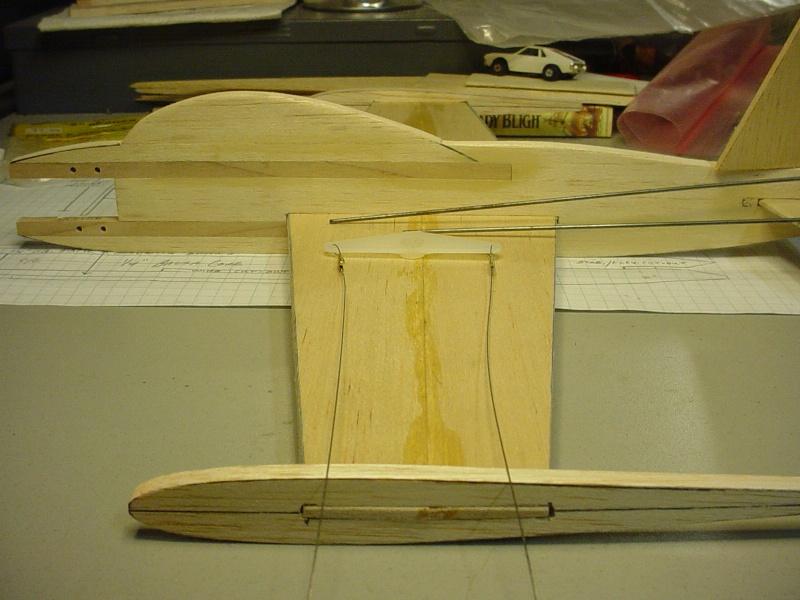
Now I need to devise a mount for the capsule that will hold the balloon tank. I'm considering two fuse-mounted music-wire stand-offs with hoops to support the tube away from the fuse a bit, to prevent turbulence.


Not sure where to put the bell-crank though. I found a length of 1/16" music-wire for the pushrod.. and proceeded to shear-it in the cutting-jaws of my locking pliers and..
forward.. might help in leading/whipping.. until enough airspeed is attained? I keep thinking that I need to be in control of the nose of this model.. because it's going to be more about aiming the thrust.. rather than counting on stability from the airframe. Lead-out guides have free reign of placement along the tip-tanks.. no matter where the bell-crank is positioned.


Now I need to devise a mount for the capsule that will hold the balloon tank. I'm considering two fuse-mounted music-wire stand-offs with hoops to support the tube away from the fuse a bit, to prevent turbulence.
 Re: CEF speed contest Design Discussions (2014)
Looking good Roddie and also you will use those eye pins that I cant find around here  Can't wait to see what you come up with at the tank tip , I know it will bee interesting . eric
 Can't wait to see what you come up with at the tank tip , I know it will bee interesting . eric
getback- Top Poster


Posts : 10443
Join date : 2013-01-18
Age : 67
Location : julian , NC
 Re: CEF speed contest Design Discussions (2014)
getback wrote:Looking good Roddie and also you will use those eye pins that I cant find around hereCan't wait to see what you come up with at the tank tip , I know it will bee interesting . eric
Thank You Eric! Those eye-pins you can find in Wal-Mart's jewelry dept. They're pretty small though.. better suited to .047" (3/64") wire and under. I'm running a 1/16" dia. pushrod and will probably use a small cut-off safety-pin. Like I said; it's mostly a weight-gain move for the tail.. if I need it.
Last edited by roddie on Sun Jan 10, 2016 9:18 pm; edited 1 time in total
 Re: CEF speed contest Design Discussions (2014)
You didn't need to cut wire to start this.
Put the engine on. Use clay and balance the model roughly where it should, between the LE and 20% typical. Hang it from a thread and see where the LO approximately should be. Put the LO position as the forward position on the bell crank location if convenient.
Bell crank location is important for FAIRNESS of the lead outs and has no other function in trim. The bell crank location with respect to CG is moot. Lead out position through the wing tip (or even off the wing tip) is what trims how the model flies. There are old designs that recommended using bent tubing and going pull-pull direct to the elevator!
Phil

pkrankow- Top Poster

- Posts : 3025
Join date : 2012-10-02
Location : Ohio
 Re: CEF speed contest Design Discussions (2014)
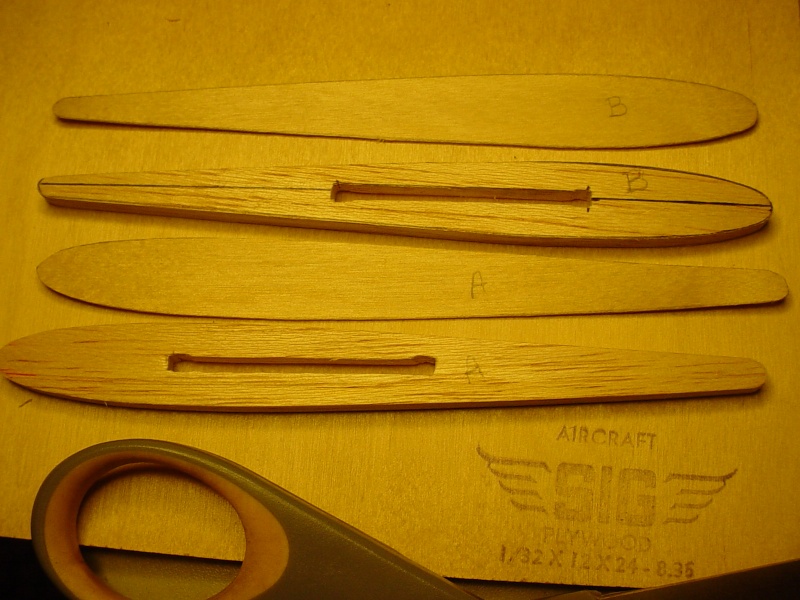
Thanks Phil. I decided to worry less about it.. and move on. I cut 1/32" ply caps for both tip-tanks. They're dual-purpose. They cover the slot in the balsa.. and provide some rigidity for whatever I come up with for line-guides. The scale tip-tanks both have a small horizontal rear fin. My outboard-fin will be aluminum.. and serve as the tip weight.
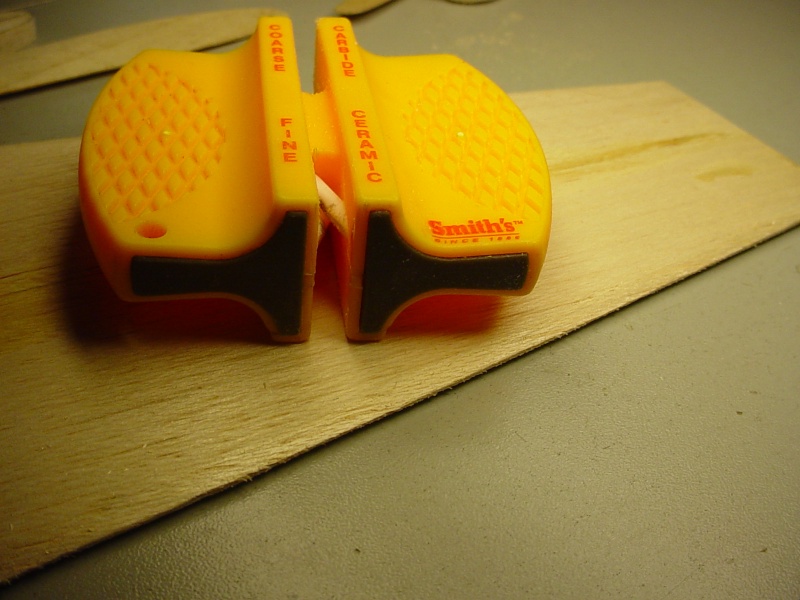
I've mentioned this tool before. I like the way it quickly "carves" a rough-taper onto the edge of 1/8" balsa sheet. The carbide blades remove wood scary-quick and it takes a little practice. I've found what works best is smooth strokes with even pressure.. not necessarily light pressure either. It depends on the density of the wood. A few quick strokes with a sanding-block afterward.. and you have a nice taper. I did this edge free-hand.. but the tool can alternately be placed in a vise.
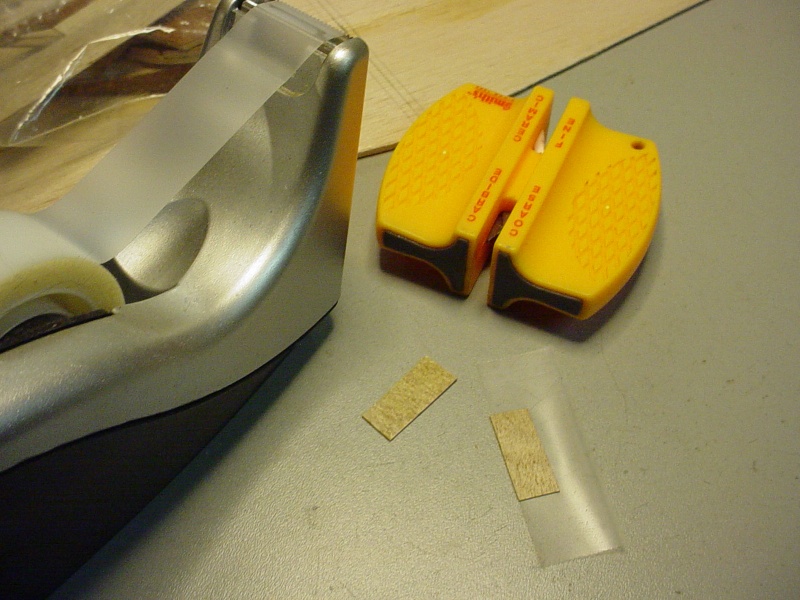
Keeping the workpiece square to the cutters is naturally important.. so I took a measurement between the tool's guide.. and made a pair of pads to gage the gap closer to the thickness of the wood. 1/64" plywood scotch-taped on each side fit nicely.
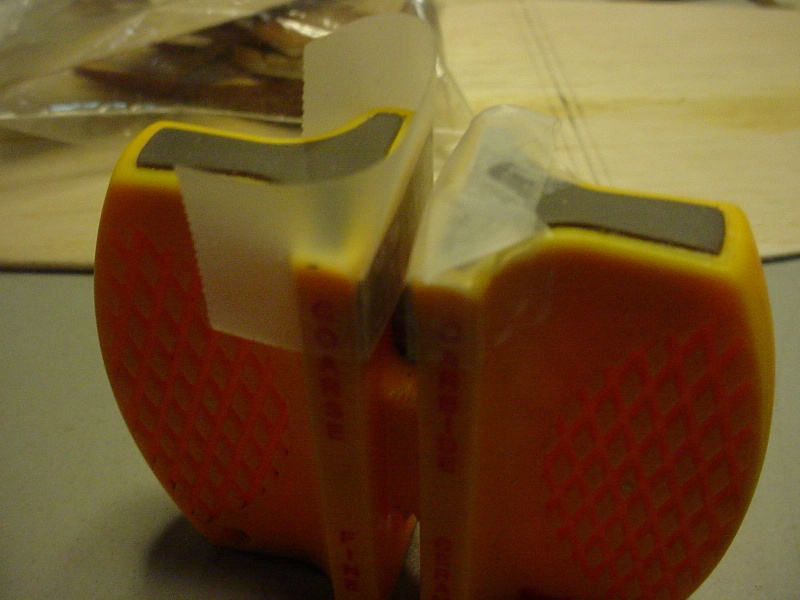
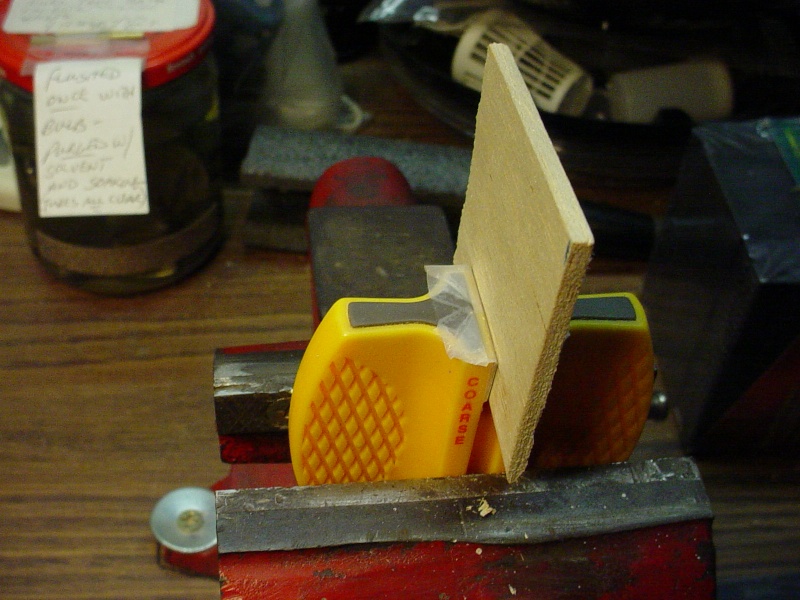
Start by carving any existing corners of the work-piece first.. by pulling the stock completely through the cutters from an inch or so back. It's easier than starting in the middle and working your way outward.
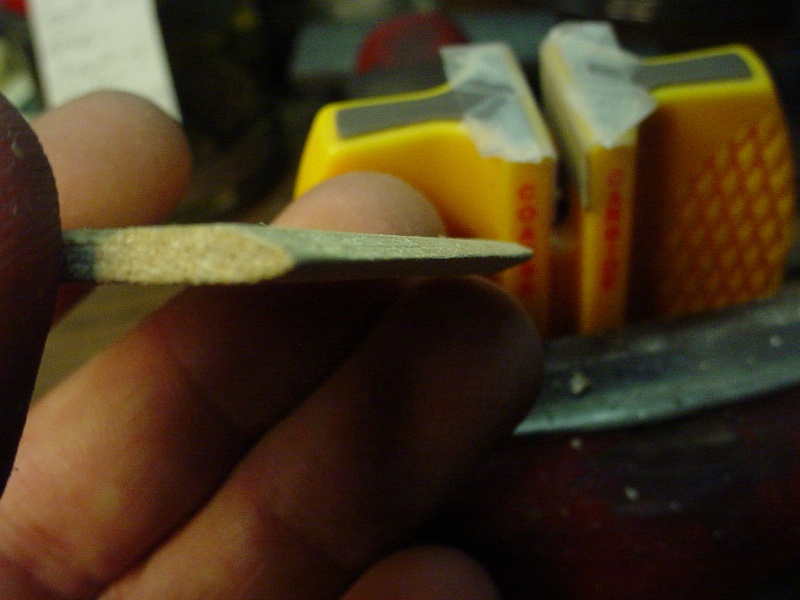

I've mentioned this tool before. I like the way it quickly "carves" a rough-taper onto the edge of 1/8" balsa sheet. The carbide blades remove wood scary-quick and it takes a little practice. I've found what works best is smooth strokes with even pressure.. not necessarily light pressure either. It depends on the density of the wood. A few quick strokes with a sanding-block afterward.. and you have a nice taper. I did this edge free-hand.. but the tool can alternately be placed in a vise.

Keeping the workpiece square to the cutters is naturally important.. so I took a measurement between the tool's guide.. and made a pair of pads to gage the gap closer to the thickness of the wood. 1/64" plywood scotch-taped on each side fit nicely.


Start by carving any existing corners of the work-piece first.. by pulling the stock completely through the cutters from an inch or so back. It's easier than starting in the middle and working your way outward.

 Re: CEF speed contest Design Discussions (2014)
I picked up some paint for Blue Angels trim.
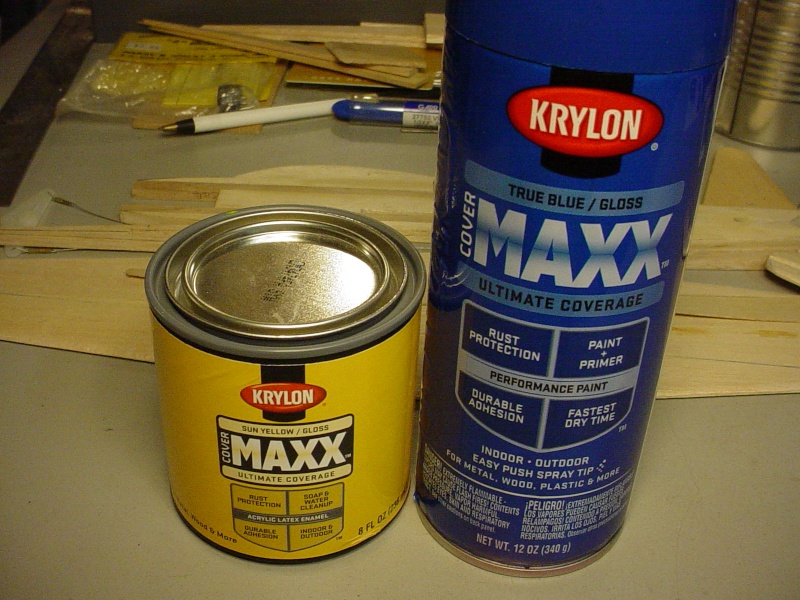
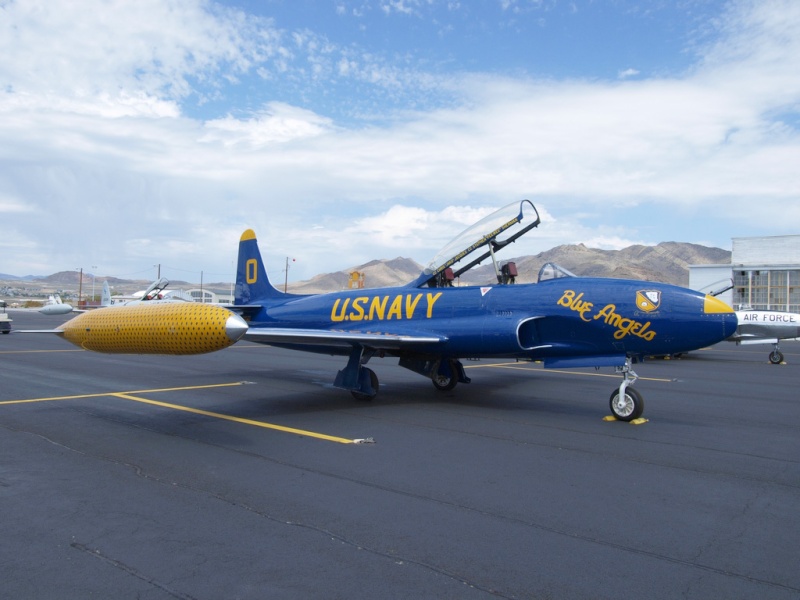
The blue looks a little dark.. but I think it'll be ok.


The blue looks a little dark.. but I think it'll be ok.
Page 20 of 20 •  1 ... 11 ... 18, 19, 20
 Similar topics
» CEF speed contest Design Discussions
» CEF T-Shirt Design Contest
» *VOTE* CEF T-Shirt Design Contest
» Reed Speed qualifying photos... Post em if ya got em. (2014)
» What is it???
» CEF T-Shirt Design Contest
» *VOTE* CEF T-Shirt Design Contest
» Reed Speed qualifying photos... Post em if ya got em. (2014)
» What is it???
Page 20 of 20
Permissions in this forum:
You cannot reply to topics in this forum

 Rules
Rules


