

 Rules
Rules
Log in
Search
Latest topics
» Looking For Comet Tri-Pacerby DanMc Yesterday at 7:25 pm
» "Red Neck" .049 elec. starter
by 944_Jim Yesterday at 7:04 pm
» Cox AT-6 Texan repaint.....Pretty nice
by 944_Jim Yesterday at 4:31 pm
» Prayers for my Wife Please
by balogh Yesterday at 4:08 pm
» Jim Walkers FireBee - This is going to be fun
by rdw777 Yesterday at 3:58 pm
» Hawk had breakfast and then took a bath
by rdw777 Yesterday at 3:46 pm
» Roddie's water-cooling bottle for bench-running
by roddie Yesterday at 3:07 pm
» Removing old decals
by latole Yesterday at 3:06 pm
» Prop Rod - resto to a runner
by rsv1cox Yesterday at 2:29 pm
» Cox Ryan ST 2.0
by 944_Jim Yesterday at 11:52 am
» Blue backplate postage stamp engine
by getback Yesterday at 6:46 am
» COX Postage Stamp engine -Babe Bee & Horseshoe Backplate adapters
by GallopingGhostler Yesterday at 6:33 am


CEF Traveling Engine


Win This Engine!

Live on Patrol


Kingpin, I said I wasn't going to build it...
Page 1 of 1

Kingpin, I said I wasn't going to build it...
![]() duaneh Thu Feb 01, 2024 1:48 pm
duaneh Thu Feb 01, 2024 1:48 pm
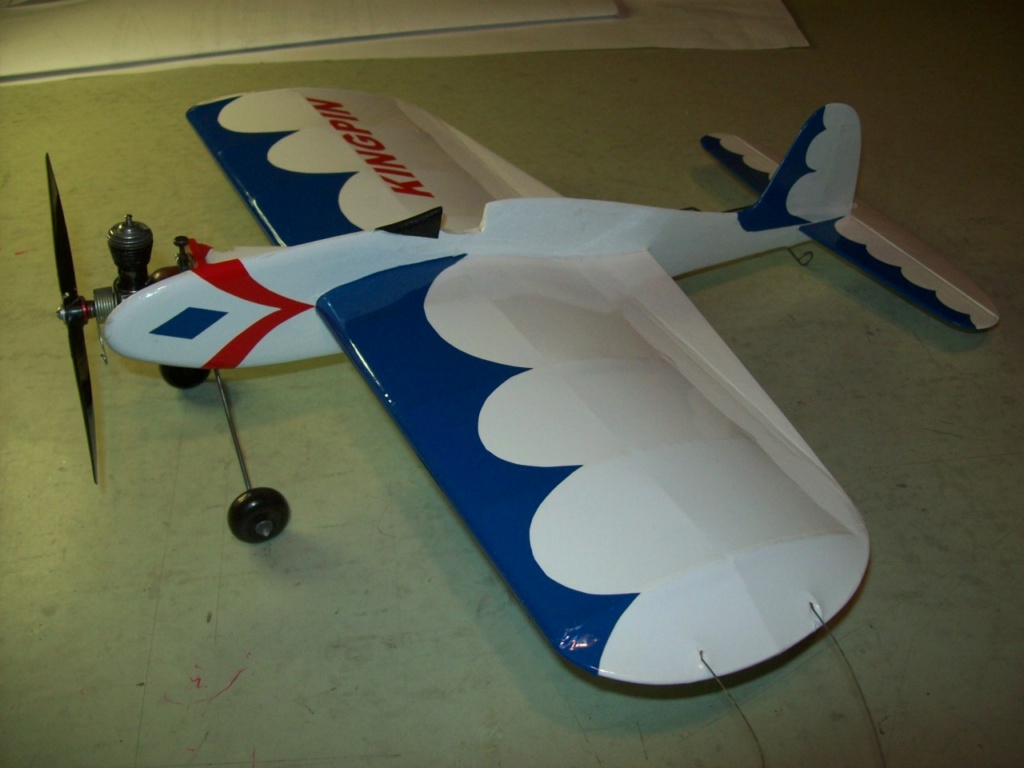
After reading the Scientific Kingpin thread and looking over the “plans”, I decided to pass. I didn't care for the hammerheaded look of the cowled engine on a profile fuselage, and the wing mounting method seemed suspect.
But after giving it some thought, all the issues seemed fixable. I decided to go ahead, but to build it a little differently. I made 3 changes.
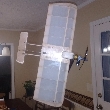
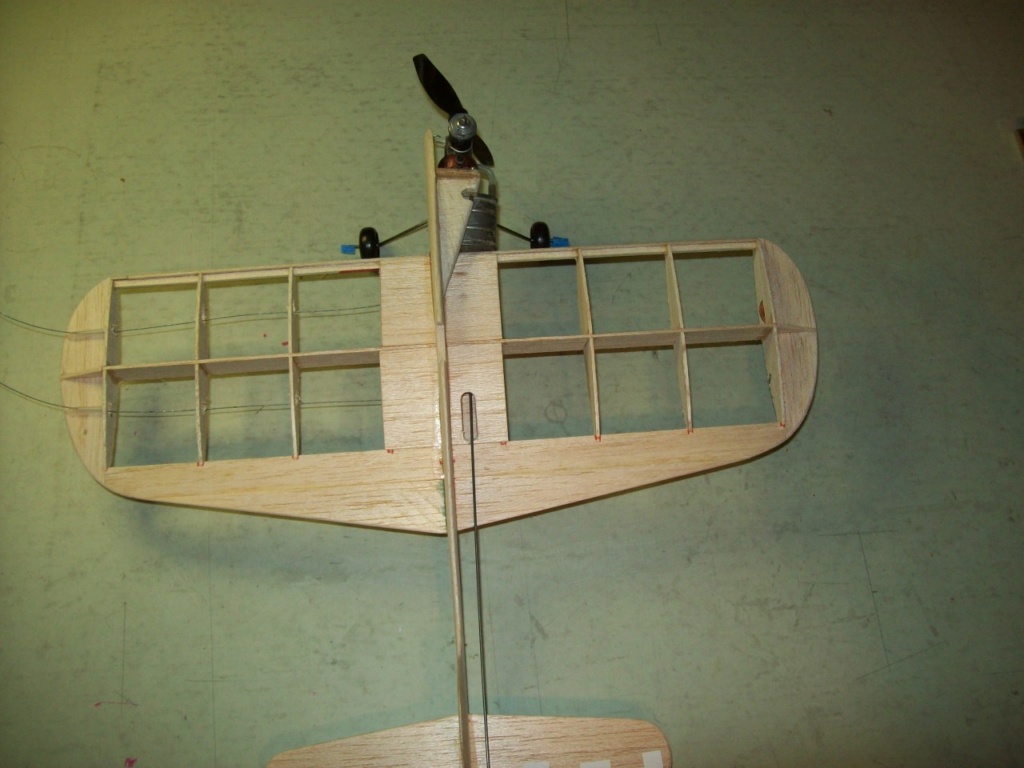
1. Extended the fuse profile to the nose and used a side mounted engine. Also slightly changed the vertical tail shape.
2. Made a full wing slot in the fuse, and sheeted the wing center section. The wing then mounts the same as any profile.
3. The kit wing has a straight LE and a tapered TE. I simply made it into a 'Hershey Bar' wing and added fixed flaps to give the taper.
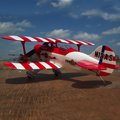
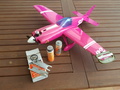
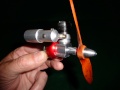
The actual size of the original is uncertain due to plan inaccuracies. I decided to disregard this, and press on as if they were correct. The span came out to 14-1/2”, length to 14”. Weighs 3.3 oz. Power is a PeeWee with a drilled tank. (Not by me!) The trim is like the boxtop. For colors, I tried to match the decals pictured in RSV1cox's thread.
But after giving it some thought, all the issues seemed fixable. I decided to go ahead, but to build it a little differently. I made 3 changes.
1. Extended the fuse profile to the nose and used a side mounted engine. Also slightly changed the vertical tail shape.
2. Made a full wing slot in the fuse, and sheeted the wing center section. The wing then mounts the same as any profile.
3. The kit wing has a straight LE and a tapered TE. I simply made it into a 'Hershey Bar' wing and added fixed flaps to give the taper.
The actual size of the original is uncertain due to plan inaccuracies. I decided to disregard this, and press on as if they were correct. The span came out to 14-1/2”, length to 14”. Weighs 3.3 oz. Power is a PeeWee with a drilled tank. (Not by me!) The trim is like the boxtop. For colors, I tried to match the decals pictured in RSV1cox's thread.
Last edited by duaneh on Thu Feb 01, 2024 11:21 pm; edited 1 time in total
duaneh- Gold Member

- Posts : 201
Join date : 2019-04-06
Re: Kingpin, I said I wasn't going to build it...
![]() rsv1cox Thu Feb 01, 2024 3:11 pm
rsv1cox Thu Feb 01, 2024 3:11 pm
Wow, and you turned that out in..........less than a month? Amazing.
You are the master of the side mount engine which works great on this model and a method that I employed on my P-38 build X2.
I love the paint scheme when brought to life in color.

You are the master of the side mount engine which works great on this model and a method that I employed on my P-38 build X2.
I love the paint scheme when brought to life in color.

rsv1cox- Top Poster


Posts : 10648
Join date : 2014-08-18
Location : West Virginia
Re: Kingpin, I said I wasn't going to build it...
![]() 944_Jim Thu Feb 01, 2024 8:45 pm
944_Jim Thu Feb 01, 2024 8:45 pm
DuaneH knocked it out of the park...again!
How did you do the lettering and scallop job?
How did you do the lettering and scallop job?
_________________
Never enough time to build them all...always enough time to smash them all!
944_Jim- Diamond Member

-
Posts : 1964
Join date : 2017-02-08
Age : 59
Location : NE MS
Re: Kingpin, I said I wasn't going to build it...
![]() balogh Fri Feb 02, 2024 3:17 am
balogh Fri Feb 02, 2024 3:17 am
That is a beautifully made and finished lil bird, congratulations!
balogh- Top Poster
-
Posts : 4755
Join date : 2011-11-06
Age : 65
Location : Budapest Hungary
Re: Kingpin, I said I wasn't going to build it...
![]() akjgardner Fri Feb 02, 2024 4:46 am
akjgardner Fri Feb 02, 2024 4:46 am
Very nice job , absolutely love the color scheme
akjgardner- Diamond Member
-
Posts : 1477
Join date : 2014-12-28
Age : 64
Location : Greensberg Indiana
Re: Kingpin, I said I wasn't going to build it...
![]() GallopingGhostler Fri Feb 02, 2024 7:43 am
GallopingGhostler Fri Feb 02, 2024 7:43 am
Nice variation @duaneh , changes are practical but still meets the original intent, should fly well. 


By the way, excellent craftsmanship, a real head turner!
Scientific had a habit of modifying their kit designs over time to reduce the cost of manufacturing. Example, they retained the original photos on Little Bipe and Little Devil, but the later versions deviated slightly in looks from the original design. I imagine that this could account for differences in the .020 Kinpin over time as well.

GallopingGhostler- Top Poster
-
Posts : 5346
Join date : 2013-07-13
Age : 70
Location : Clovis NM or NFL KC Chiefs
Re: Kingpin, I said I wasn't going to build it...
![]() duaneh Fri Feb 02, 2024 9:49 am
duaneh Fri Feb 02, 2024 9:49 am
Glad you guys like it!
Jim, for the lettering, I typed into MS Word, then played with fonts and size until I got what I wanted. Then printed and cut the letters from Monokote. The resulting stencil is used for positioning.
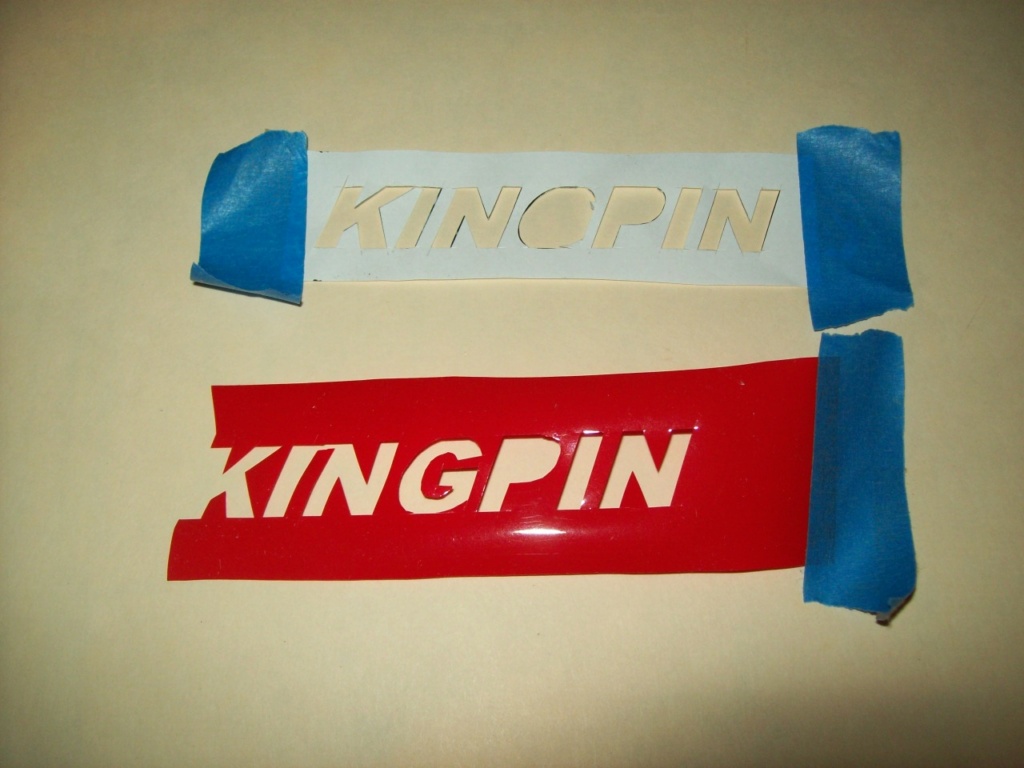
The tail scallops are monokote cut directly from the plan, using a penny as a cutting guide. Wing scallops were redrawn and cut freehand from the plan. I fudged the spacing slightly so that the scallops would fall on rib locations. Makes it a little easier to avoid wrinkles.
Jim, for the lettering, I typed into MS Word, then played with fonts and size until I got what I wanted. Then printed and cut the letters from Monokote. The resulting stencil is used for positioning.
The tail scallops are monokote cut directly from the plan, using a penny as a cutting guide. Wing scallops were redrawn and cut freehand from the plan. I fudged the spacing slightly so that the scallops would fall on rib locations. Makes it a little easier to avoid wrinkles.
duaneh- Gold Member
- Posts : 201
Join date : 2019-04-06
Re: Kingpin, I said I wasn't going to build it...
![]() GallopingGhostler Fri Feb 02, 2024 12:16 pm
GallopingGhostler Fri Feb 02, 2024 12:16 pm
Good methodology for the lettering, Duane, thanks for sharing.
Regarding one less scallop in the wing trim, perhaps the original photo had an extra wing rib? That is what comes across my mind with Scientific kit changes over time.
Regarding one less scallop in the wing trim, perhaps the original photo had an extra wing rib? That is what comes across my mind with Scientific kit changes over time.
GallopingGhostler- Top Poster
-
Posts : 5346
Join date : 2013-07-13
Age : 70
Location : Clovis NM or NFL KC Chiefs
Re: Kingpin, I said I wasn't going to build it...
![]() Mike1484 Fri Feb 02, 2024 1:17 pm
Mike1484 Fri Feb 02, 2024 1:17 pm
Another home run duaneh. Seeing a new plane posted here always brighten up the day. Thanks for posting your Kingpin.
Mike1484
Mike1484
Mike1484- Gold Member
- Posts : 296
Join date : 2011-10-28
Age : 75
Location : Northern Ohio
Re: Kingpin, I said I wasn't going to build it...
![]() duaneh Fri Feb 02, 2024 3:17 pm
duaneh Fri Feb 02, 2024 3:17 pm
GallopingGhostler wrote:Regarding one less scallop in the wing trim, perhaps the original photo had an extra wing rib? That is what comes across my mind with Scientific kit changes over time.
My rib spacing is different from the kit because of the change to the wing center section. The first rib moves outboard about an inch to support the sheeting, then the others are evenly spaced from it.
duaneh- Gold Member
- Posts : 201
Join date : 2019-04-06
Re: Kingpin, I said I wasn't going to build it...
![]() rdw777 Fri Feb 02, 2024 5:20 pm
rdw777 Fri Feb 02, 2024 5:20 pm
The finish is beautiful with the bright trim….Excellent build too….. Would love to see that one in the air!…

rdw777- Diamond Member
-
Posts : 1342
Join date : 2021-03-11
Location : West Texas
» Gifted Scientific "Kingpin" gets a Re-Fit
» Breaking the seal on a Scientific Kingpin
» Help Deciding on Kit
» Guillows Cessna 150 build circa 1970 (Build Log)
» Looking for first RC build...
» Breaking the seal on a Scientific Kingpin
» Help Deciding on Kit
» Guillows Cessna 150 build circa 1970 (Build Log)
» Looking for first RC build...
Page 1 of 1
Permissions in this forum:
You cannot reply to topics in this forum