Log in
Search
Latest topics
» Roger Harris revisitedby TD ABUSER Today at 2:30 am
» My latest doodle...
by batjac Yesterday at 10:05 pm
» Retail price mark-up.. how much is enough?
by gkamysz Yesterday at 9:29 pm
» Happy 77th birthday Andrew!
by roddie Yesterday at 9:22 pm
» My N-1R build log
by GallopingGhostler Yesterday at 3:04 pm
» Tee Dee .020 combat model
by 1/2A Nut Yesterday at 2:43 pm
» Chocolate chip cookie dough.........
by roddie Yesterday at 1:13 pm
» Purchased the last of any bult engines from Ken Enya
by sosam117 Yesterday at 11:32 am
» Free Flight Radio Assist
by rdw777 Yesterday at 9:24 am
» Funny what you find when you go looking
by rsv1cox Wed Nov 20, 2024 3:21 pm
» Landing-gear tips
by 1975 control line guy Wed Nov 20, 2024 8:17 am
» Cox NaBOO - Just in time for Halloween
by rsv1cox Tue Nov 19, 2024 6:35 pm
Cox Engine of The Month
3D Printing
Page 3 of 4
Page 3 of 4 •  1, 2, 3, 4
 Re: 3D Printing
pkrankow wrote:Cribbs74 wrote:Could one just suspend the model by a single string at the CG point and add or remove weight to make the plane level?
Yes. Using fingers, pencils, or other under the wing support is another option too.
This is just a different way to skin the cat, so to speak.
I suspect this would function without the bearings, or any other added fanciness.
Phil
I mark the wing to do a quick check using fingers just before flying. On a large plane though, it is difficult to use arms, sight for level and make adjustments.
I tried wobbling a plane on two pencils with rubbers (sorry erasers) on the ends. Not easy if the wing is cambered and doesn't have a flat surface.

ian1954- Diamond Member

- Posts : 2688
Join date : 2011-11-16
Age : 70
Location : England
 Re: 3D Printing
Now THIS is a keeper!
If its not obvious, a continuous loop of yarn (first string type I found) laced through the clothing hanger to hang evenly. The broken propeller half is the plumb bob, held by a second piece of yard the around the hook of the hanger, and passed over the wire, and under the crossing yarns. A slipped overhand knot secures the prop and allows for easy adjustment of its height to the plane.
Phil


pkrankow- Top Poster

- Posts : 3025
Join date : 2012-10-02
Location : Ohio
 Re: 3D Printing
pkrankow wrote:Now THIS is a keeper!
If its not obvious, a continuous loop of yarn (first string type I found) laced through the clothing hanger to hang evenly. The broken propeller half is the plumb bob, held by a second piece of yard the around the hook of the hanger, and passed over the wire, and under the crossing yarns. A slipped overhand knot secures the prop and allows for easy adjustment of its height to the plane.
Phil
That is a brilliant demonsration of the principle and would suffice for most practical purposes.
However, and this requires some thought, the friction between the yarn used and the coathanger together with the weight of the aeroplane may affect the accuracy.
If you take the set up as pictured an tilt the plane slightly. Does it stay in that position?
If it were heavier, could it remain stationery at an angle?
If it can then because the plane is level on the trapeze it may not mean that it indicating the balance point.

ian1954- Diamond Member

- Posts : 2688
Join date : 2011-11-16
Age : 70
Location : England
 Re: 3D Printing
ian1954 wrote:pkrankow wrote:Now THIS is a keeper!
If its not obvious, a continuous loop of yarn (first string type I found) laced through the clothing hanger to hang evenly. The broken propeller half is the plumb bob, held by a second piece of yard the around the hook of the hanger, and passed over the wire, and under the crossing yarns. A slipped overhand knot secures the prop and allows for easy adjustment of its height to the plane.
Phil
That is a brilliant demonsration of the principle and would suffice for most practical purposes.
However, and this requires some thought, the friction between the yarn used and the coathanger together with the weight of the aeroplane may affect the accuracy.
If you take the set up as pictured an tilt the plane slightly. Does it stay in that position?
If it were heavier, could it remain stationery at an angle?
If it can then because the plane is level on the trapeze it may not mean that it indicating the balance point.
Yes, the plane can be tilted, carefully, as the strings do not move and there is considerable friction. The bob remains pointing at the same position. Verifying by supporting the wing from below the balance point is the same position as indicated in the photograph.
I hope this is a little more clear. The string is laced around the hanger braces, down, and back again around the hanger braces. With a light load it won't slip. It also means the plane wing slides on the string, instead of the string sliding on the hanger.

Phil

pkrankow- Top Poster

- Posts : 3025
Join date : 2012-10-02
Location : Ohio
 Re: 3D Printing
Ah HA! A "Vanessa" machine!
http://home.mindspring.com/~the-plumber/Vanessa%20CG%20Machine.htm
http://www.rcuniverse.com/forum/tips-techniques-180/708060-vanessa-c-g-rig-how.html#post708060
Phil
http://home.mindspring.com/~the-plumber/Vanessa%20CG%20Machine.htm
http://www.rcuniverse.com/forum/tips-techniques-180/708060-vanessa-c-g-rig-how.html#post708060
Phil

pkrankow- Top Poster

- Posts : 3025
Join date : 2012-10-02
Location : Ohio
 Re: 3D Printing
Wouldn't this work with a single pulley? Balanced is balanced... right? Extend the pulleys' axle, to hang the plumb-bob.
(edit) I'll expand on that... one string with slip-loops on each end, that cradle the "fuse" fore/aft the wing; would accomplish the same thing, wouldn't it?
Roddie
(edit) I'll expand on that... one string with slip-loops on each end, that cradle the "fuse" fore/aft the wing; would accomplish the same thing, wouldn't it?
Roddie
 Re: 3D Printing
I think we need a mod to split the CG machine portion out to a separate thread, if the OP is onboard. That way this thread can return to 3D printing, and the CG discussion can continue separately.
feel free to delete this post when a decision is made.
Phil
feel free to delete this post when a decision is made.
Phil
Last edited by pkrankow on Sun Dec 22, 2013 6:33 pm; edited 1 time in total

pkrankow- Top Poster

- Posts : 3025
Join date : 2012-10-02
Location : Ohio
 Re: 3D Printing
roddie wrote:Wouldn't this work with a single pulley? Balanced is balanced... right? Extend the pulleys' axle, to hang the plumb-bob.
(edit) I'll expand on that... one string with slip-loops on each end, that cradle the "fuse" fore/aft the wing; would accomplish the same thing, wouldn't it?
Roddie
Don't need a pulley. All that is needed is a sling to hold the airplane, and a plumb bob from the same support point. This could be done with a single hook, except it would bind against fancy paintwork, so separation is desired.
The plane in the sling is one pendulum. The free hanging pendulum is obviously a second pendulum. The two originating from the same point mean the CG of both systems are in line with each other.
Because the orientation of the suspended object doesn't matter (people use this for race cars and boats too), but the plans are marked in the way they are, usually from the LE of the wing, having the plane level makes it easier. Leveling the horizontal stabilizer is the most simple manner described in the linked thread on RCuniverse, as when the plane is flying level, with no elevator input, the horizontal stabilizer will be level.
Having the sling adjustable by turning the support rod means re-leveling the H. Stab after adding weights or adjusting components is much easier than sliding against friction.
Phil

pkrankow- Top Poster

- Posts : 3025
Join date : 2012-10-02
Location : Ohio
 Re: 3D Printing
Hi Phil,
I tried out the coat hanger approach this morning and it works rather well.
Unfortunately, I tried it out with my "Max Thrust Riot" and the coat hanger snapped. Luckily it was dangling only 2ft above a bed at the time.
Looks like I will have to print a coat hanger around a steel frame
I tried out the coat hanger approach this morning and it works rather well.
Unfortunately, I tried it out with my "Max Thrust Riot" and the coat hanger snapped. Luckily it was dangling only 2ft above a bed at the time.
Looks like I will have to print a coat hanger around a steel frame

ian1954- Diamond Member

- Posts : 2688
Join date : 2011-11-16
Age : 70
Location : England
 Re: 3D Printing
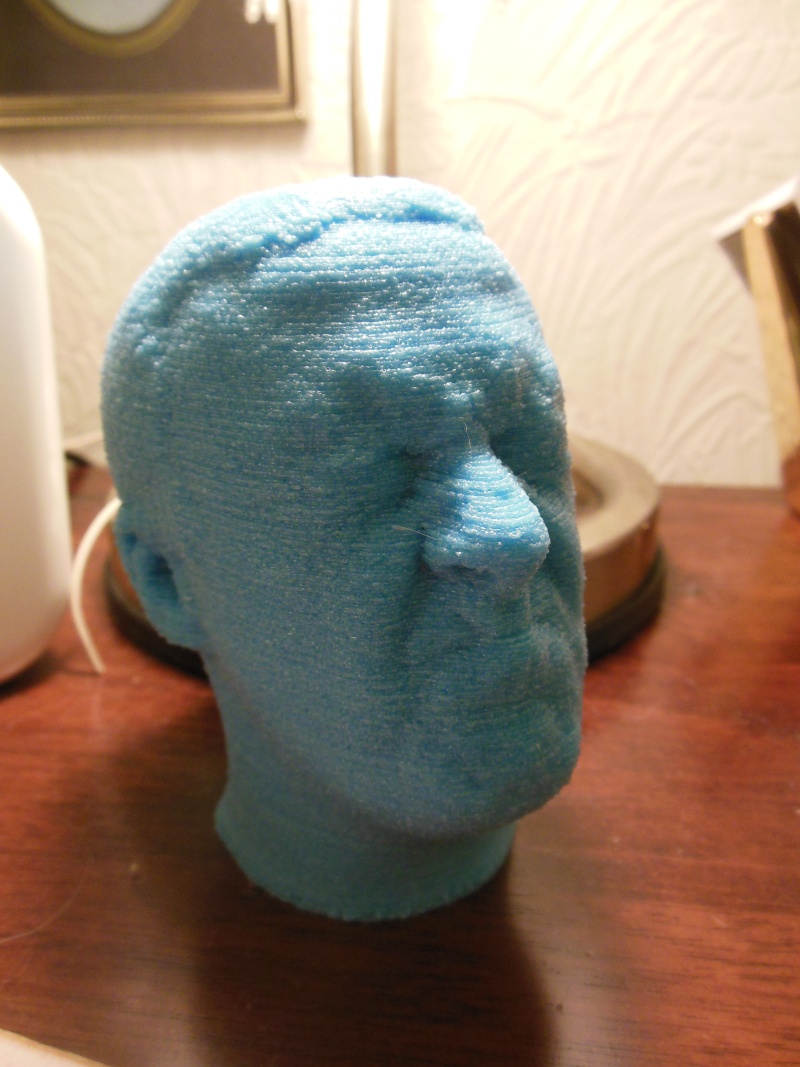
This resembles my face when the coat hanger snapped!


ian1954- Diamond Member

- Posts : 2688
Join date : 2011-11-16
Age : 70
Location : England
 Re: 3D Printing
ian1954 wrote:This resembles my face when the coat hanger snapped!
That is awesomely grumpy. Looks like me before coffee in the morning.
Phil

pkrankow- Top Poster

- Posts : 3025
Join date : 2012-10-02
Location : Ohio
 Re: 3D Printing
ian1954 wrote:Hi Phil,
I tried out the coat hanger approach this morning and it works rather well.
Unfortunately, I tried it out with my "Max Thrust Riot" and the coat hanger snapped. Luckily it was dangling only 2ft above a bed at the time.
Looks like I will have to print a coat hanger around a steel frame
Coat hanger might be a little weak on something heavy...I'm probably going to swap out the coat hanger for something better soon. I see my hanger breaking if I hang something much heavier than this decathlon on it.
Phil

pkrankow- Top Poster

- Posts : 3025
Join date : 2012-10-02
Location : Ohio
 Re: 3D Printing
Or me, after eating a green persimmon.pkrankow wrote:That is awesomely grumpy. Looks like me before coffee in the morning.
Phil
_________________
Don't Panic!
...and never Ever think about how good you are at something...
while you're doing it!
My Hot Rock & Blues Playlist
...and never Ever think about how good you are at something...
while you're doing it!
My Hot Rock & Blues Playlist

RknRusty- Rest In Peace

- Posts : 10869
Join date : 2011-08-10
Age : 68
Location : South Carolina, USA
 Re: 3D Printing
pkrankow wrote:ian1954 wrote:Hi Phil,
I tried out the coat hanger approach this morning and it works rather well.
Unfortunately, I tried it out with my "Max Thrust Riot" and the coat hanger snapped. Luckily it was dangling only 2ft above a bed at the time.
Looks like I will have to print a coat hanger around a steel frame
Coat hanger might be a little weak on something heavy...I'm probably going to swap out the coat hanger for something better soon. I see my hanger breaking if I hang something much heavier than this decathlon on it.
Phil
I think for a simple approach - a 2" x 2" block of wood drilled through for a broom handle (1" diameter). A really good hook then screwed into the block. That would be strong enough.

ian1954- Diamond Member

- Posts : 2688
Join date : 2011-11-16
Age : 70
Location : England
 Re: 3D Printing
Some iphone cases I printed for xmas gifts. The gears are printed seperate then the pins are glued in to hold the gears in place. They turn pretty smooth.


Jason_WI- Top Poster


Posts : 3123
Join date : 2011-10-09
Age : 49
Location : Neenah, WI
 Re: 3D Printing
The finish looks superb and the phone case is smooth. My prints are all still rough looking but I am perservering.
Marvellous job Jason.
Marvellous job Jason.

ian1954- Diamond Member

- Posts : 2688
Join date : 2011-11-16
Age : 70
Location : England
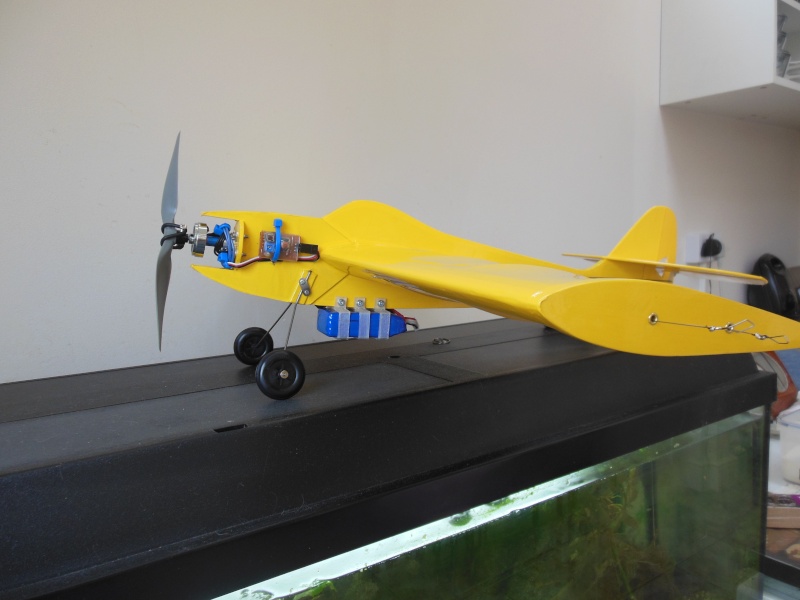
 Battery holders

Now mounted


ian1954- Diamond Member

- Posts : 2688
Join date : 2011-11-16
Age : 70
Location : England

ian1954- Diamond Member

- Posts : 2688
Join date : 2011-11-16
Age : 70
Location : England
 Re: 3D Printing
Looking good. Is that still ABS? What percentage of fill you you normally use. Most of the stuff I print is 40% infill but on large objects I might drop down to 25%.
Might need to build up a boss around the hole for the battery mount to beef it up. Would hate to loose a battery midflight!
Might need to build up a boss around the hole for the battery mount to beef it up. Would hate to loose a battery midflight!

Jason_WI- Top Poster


Posts : 3123
Join date : 2011-10-09
Age : 49
Location : Neenah, WI
 Re: 3D Printing
In these items the fill is solid. All ABS.
I did a pull test on some sample battery brackets I made and it took some effort to break one.
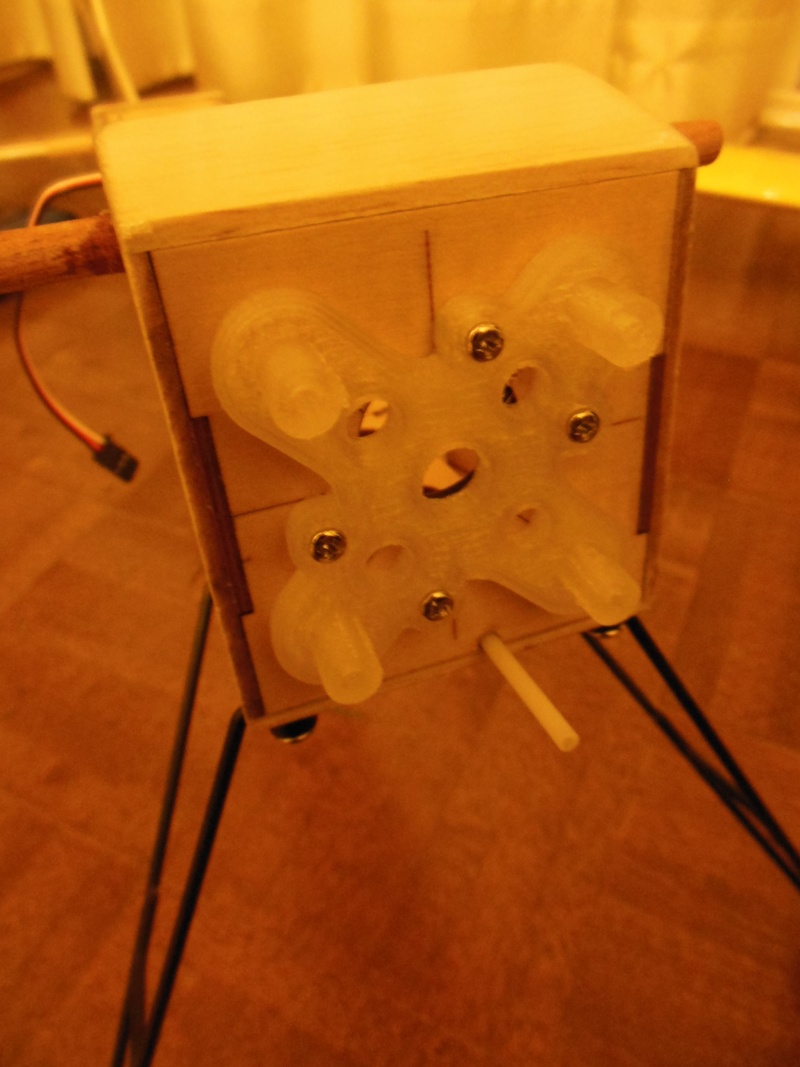
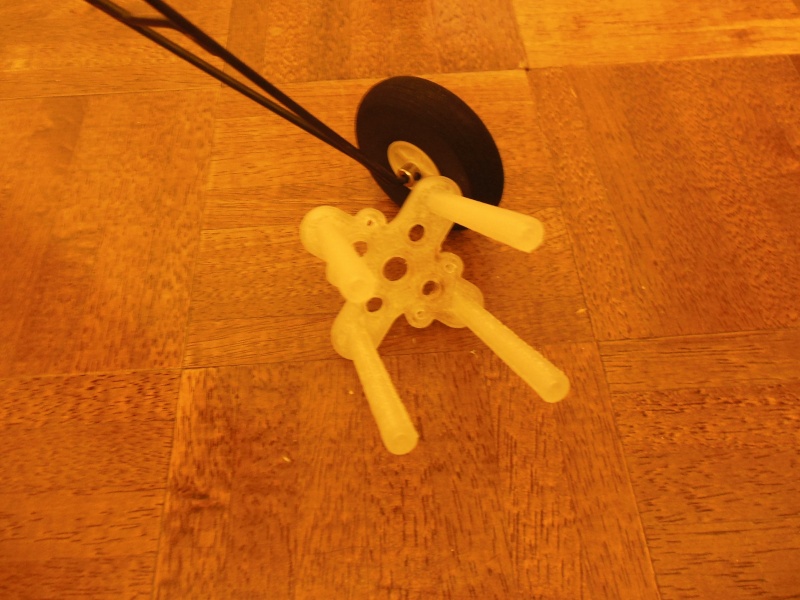
The rods on the motor mount will have steel thread rods running through - with lock nuts on the engine bracket and blind nuts on the firewall. Length still to be decided when I balance the plane.
I did a pull test on some sample battery brackets I made and it took some effort to break one.
The rods on the motor mount will have steel thread rods running through - with lock nuts on the engine bracket and blind nuts on the firewall. Length still to be decided when I balance the plane.

ian1954- Diamond Member

- Posts : 2688
Join date : 2011-11-16
Age : 70
Location : England
 Re: 3D Printing
Pretty good looking stuff Ian!

Cribbs74- Moderator


Posts : 11907
Join date : 2011-10-24
Age : 50
Location : Tuttle, OK
 Re: 3D Printing
The battery hanging off the bottom is not going to be helpful for stunt. It is shifting the CG low. Otherwise looks good.
Phil
Phil

pkrankow- Top Poster

- Posts : 3025
Join date : 2012-10-02
Location : Ohio
 Re: 3D Printing
Hi,
I just ordered Reprap Pro Ormerod from RS component, still waiting for delivery.
two things which I'm keen to know,
1)temperature of crank case might too high for ABS motor mount. anyone successfully run an engine on printed ABS mount yet?
2)ABS fuel proof?
ew
I just ordered Reprap Pro Ormerod from RS component, still waiting for delivery.
two things which I'm keen to know,
1)temperature of crank case might too high for ABS motor mount. anyone successfully run an engine on printed ABS mount yet?
2)ABS fuel proof?
ew

tru168- Gold Member

- Posts : 277
Join date : 2012-11-03
Location : Johor, Malaysia
 Re: 3D Printing
I have run both diesel and glo engines on mounts made from ABS and they appear to be fuel proof. Only time will tell!
I have seen no engine crankcase heat cause any ill effects but ABS starts to soften at around 90 deg C and melts at 105 deg C. The mounting lugs don't get that hot but the cylinder definitely does.
However, they dissolve readily in acetone and, over time, will absorb water. I can't say how long something printed with ABS will last or if it degrades.

ian1954- Diamond Member

- Posts : 2688
Join date : 2011-11-16
Age : 70
Location : England
Page 3 of 4 •  1, 2, 3, 4
 Similar topics
» PT-19 3D printing
» Printing on Tissue
» Printing out .pdf plans to scale
» 3D printing nonstop
» Todays Cox 3D Printing Adventures....
» Printing on Tissue
» Printing out .pdf plans to scale
» 3D printing nonstop
» Todays Cox 3D Printing Adventures....
Page 3 of 4
Permissions in this forum:
You cannot reply to topics in this forum

 Rules
Rules


