Log in
Search
Latest topics
» My latest doodle...by batjac Yesterday at 10:05 pm
» Retail price mark-up.. how much is enough?
by gkamysz Yesterday at 9:29 pm
» Happy 77th birthday Andrew!
by roddie Yesterday at 9:22 pm
» Roger Harris revisited
by rsv1cox Yesterday at 3:38 pm
» My N-1R build log
by GallopingGhostler Yesterday at 3:04 pm
» Tee Dee .020 combat model
by 1/2A Nut Yesterday at 2:43 pm
» Chocolate chip cookie dough.........
by roddie Yesterday at 1:13 pm
» Purchased the last of any bult engines from Ken Enya
by sosam117 Yesterday at 11:32 am
» Free Flight Radio Assist
by rdw777 Yesterday at 9:24 am
» Funny what you find when you go looking
by rsv1cox Wed Nov 20, 2024 3:21 pm
» Landing-gear tips
by 1975 control line guy Wed Nov 20, 2024 8:17 am
» Cox NaBOO - Just in time for Halloween
by rsv1cox Tue Nov 19, 2024 6:35 pm
Cox Engine of The Month
Todays Cox 3D Printing Adventures....
Page 1 of 1
 Todays Cox 3D Printing Adventures....
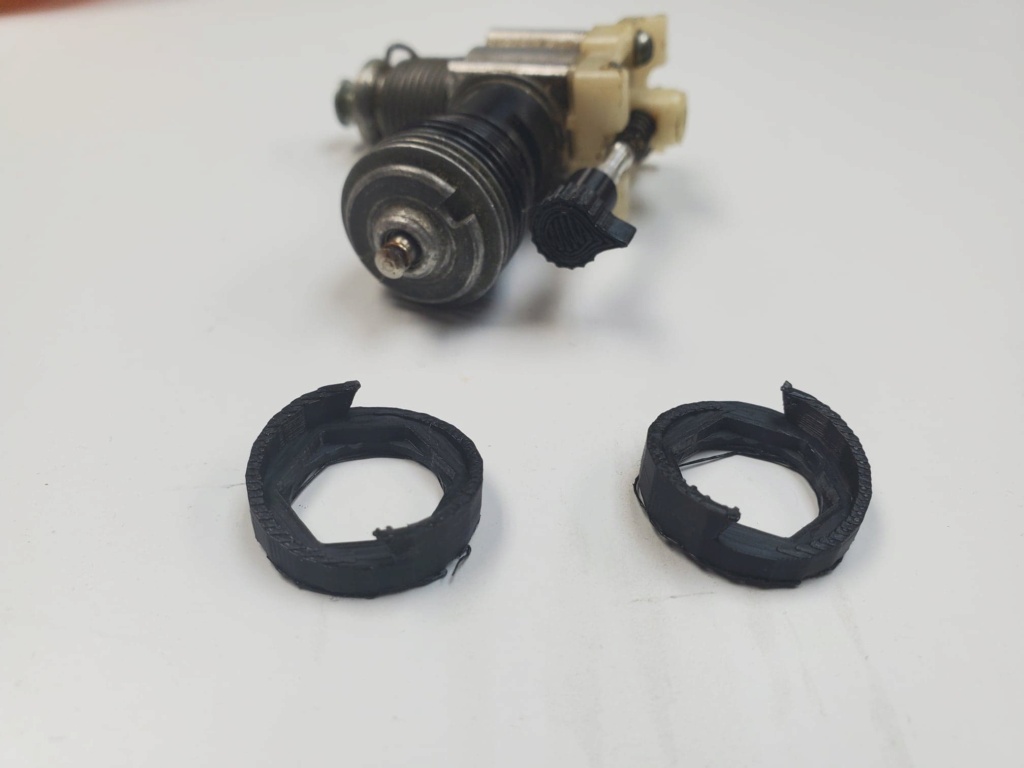
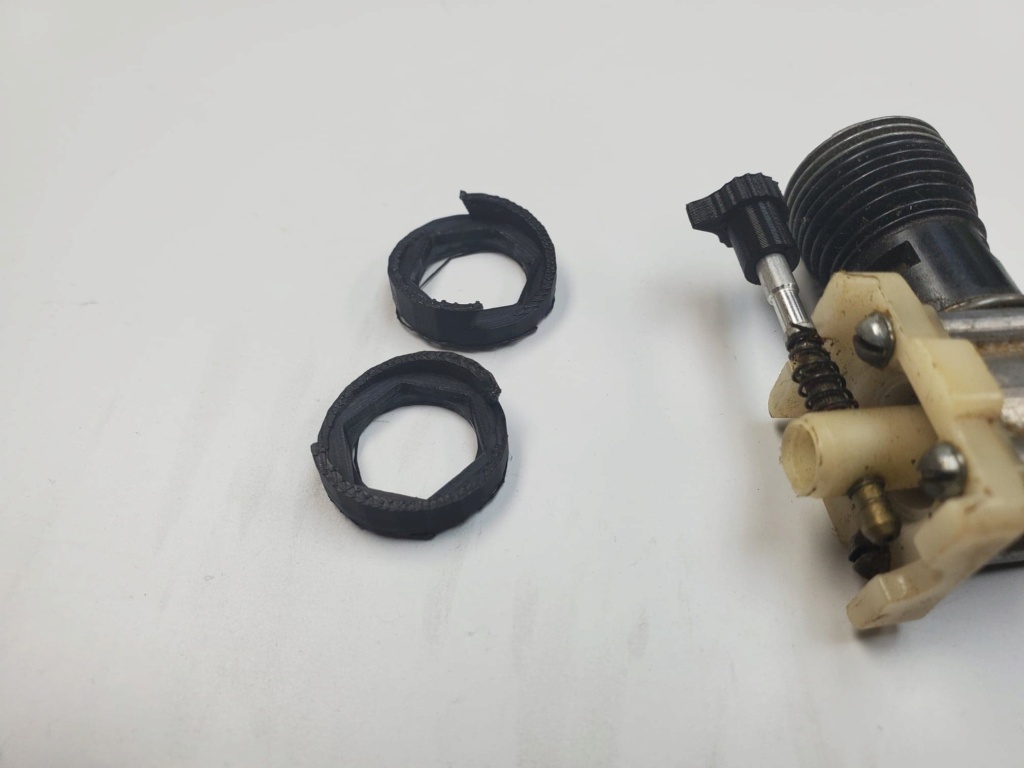
So while it has stayed around and below -40 F all day today, I got thinking of things I want to try and print Cox related. There was 2 things that came to mind. One was the little black adjustment knob for the brass and aluminum Cox needles. This was relatively easy as I had found a file online for the little knob. Secondly was the plastic cam for the Cox spring starters. This I had to design from scratch. The cam took a bit of playing around with the program to figure out how to do it and honestly, it turned out rather well if I do say so. Took a couple of tries to get the dimensions all correct, but finally nailed it. Did a little test with it and it does work. Now as to how long and well it will hold up will have to wait till spring. I will make them in a different material as I just used what I had loaded currently for trials. Please disregard the 'roughness' and 'stringiness' on the cams as they needed adhesion to print without problems and I did not clean them up before the picture. After I had the RH cam done, the LH one was a lot quicker to finish up.


NEW222- Top Poster

- Posts : 3896
Join date : 2011-08-13
Age : 46
Location : oakbank, mb

Lukemiester- Gold Member

- Posts : 290
Join date : 2020-10-08
Age : 19
Location : currently Wickenburg, AZ

NEW222- Top Poster

- Posts : 3896
Join date : 2011-08-13
Age : 46
Location : oakbank, mb
 Re: Todays Cox 3D Printing Adventures....
Espo clutch its hard To Find and part easy To make if y have the machine its Somting y like To try couple new desing clutch cool that it work 3d print is sort of art and y dont have wat it take To use that kind of machines

davidll1984- Diamond Member

- Posts : 2327
Join date : 2020-02-12
Age : 39
Location : shawinigan
 Re: Todays Cox 3D Printing Adventures....
Oh, I am sure you would do just fine David. It is honestly not as hard as it looks, more time consuming and thinking. Especially once you know how to use the designing software. I had some great help from people on here to get me started. And now, it seems to just get easier. The biggest thing is that once designed, it may take a couple of prints to get things just right. My cam spring starter pieces took 4 revisions to get just right, but it is part of designing I guess. I had absolutely zero experience with both printing and especially designing just days prior to the new year.

NEW222- Top Poster

- Posts : 3896
Join date : 2011-08-13
Age : 46
Location : oakbank, mb
 Similar topics
» Todays Haul
» 010's more run time and POWER I MUST HAVE MORE POWER WMAHHAHA
» Irvine Mills .75 replica
» Cox engine rehab, todays effort........The saga continues
» Todays haul and help needed.
» 010's more run time and POWER I MUST HAVE MORE POWER WMAHHAHA
» Irvine Mills .75 replica
» Cox engine rehab, todays effort........The saga continues
» Todays haul and help needed.
Page 1 of 1
Permissions in this forum:
You cannot reply to topics in this forum

 Rules
Rules


