Log in
Search
Latest topics
» Roger Harris revisitedby TD ABUSER Today at 2:30 am
» My latest doodle...
by batjac Yesterday at 10:05 pm
» Retail price mark-up.. how much is enough?
by gkamysz Yesterday at 9:29 pm
» Happy 77th birthday Andrew!
by roddie Yesterday at 9:22 pm
» My N-1R build log
by GallopingGhostler Yesterday at 3:04 pm
» Tee Dee .020 combat model
by 1/2A Nut Yesterday at 2:43 pm
» Chocolate chip cookie dough.........
by roddie Yesterday at 1:13 pm
» Purchased the last of any bult engines from Ken Enya
by sosam117 Yesterday at 11:32 am
» Free Flight Radio Assist
by rdw777 Yesterday at 9:24 am
» Funny what you find when you go looking
by rsv1cox Wed Nov 20, 2024 3:21 pm
» Landing-gear tips
by 1975 control line guy Wed Nov 20, 2024 8:17 am
» Cox NaBOO - Just in time for Halloween
by rsv1cox Tue Nov 19, 2024 6:35 pm
Cox Engine of The Month
How To Disassemble These Two Gems.......
Page 1 of 1
 How To Disassemble These Two Gems.......
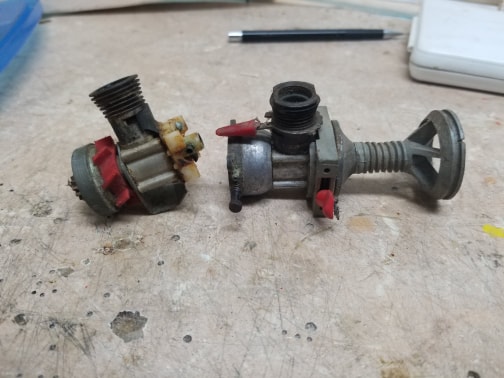
Hi all. So, I am at a point where I am tied up with my planes for the moment. I am now wanting to clean up these two engines I have. One is from the Cox Dragster, and the other from the Cox Dune Buggy. The one from the dragster is only castor locked, I think and hope. While the one from the dune buggy is what I believe siezed with rust.... Regardless, that is not currently an issue for me, at least I think. What I want to know and need help with is how on earth do I take these apart, moreso, how do I remove the 'car' parts from the front end? Once these parts are off, I am good to go from there. Whether they will go back on or not is a different story, as I would like to make drive plates for them so I can run them with propellers. ANy help is greatly appreciated. Thank you.

NEW222- Top Poster

- Posts : 3896
Join date : 2011-08-13
Age : 46
Location : oakbank, mb

NEW222- Top Poster

- Posts : 3896
Join date : 2011-08-13
Age : 46
Location : oakbank, mb
 Re: How To Disassemble These Two Gems.......
Ok. SO a bit of searching later, I found out how to disassemble the one on teh left from the dragster. Remove screw, put in longer one, press out. The other one I am starting to think may be the same, but before doing so, I will wait a bit for confirmation.

NEW222- Top Poster

- Posts : 3896
Join date : 2011-08-13
Age : 46
Location : oakbank, mb
 Re: How To Disassemble These Two Gems.......
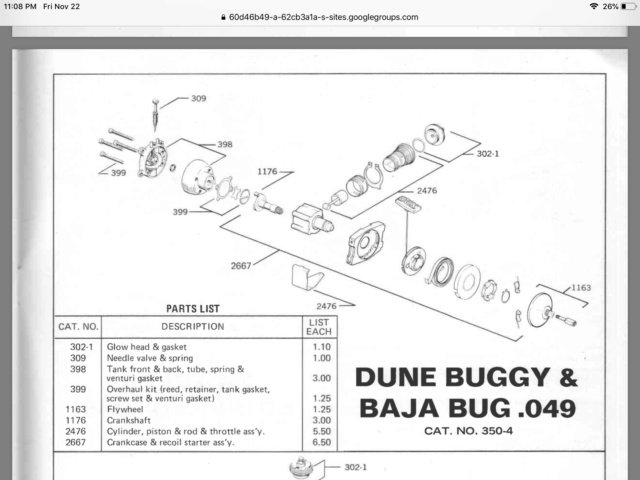
If I remember correctly....remove the screw from inside the worm gear drive, you will find a “c” clip retainer to remove and slide off the pull starter. Then use the long screw to push out the crankshaft.
Let me see if I can find a picture....here it is!
Also, Matt at Ex-modelengines has the prop drive to use for propellers on these engines.
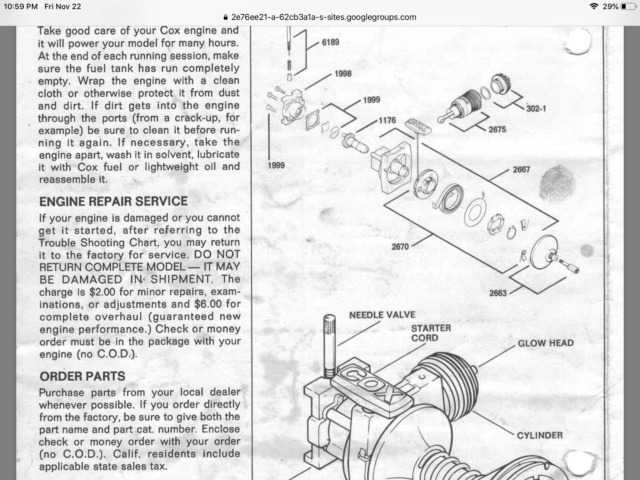
Let me see if I can find a picture....here it is!
Also, Matt at Ex-modelengines has the prop drive to use for propellers on these engines.

Last edited by Marleysky on Fri Nov 22, 2019 10:04 pm; edited 1 time in total (Reason for editing : Found picture)

Marleysky- Top Poster


Posts : 3618
Join date : 2014-09-28
Age : 72
Location : Grand Rapids, MI
 Re: How To Disassemble These Two Gems.......
Great, thank you. I now have something I can try out. I'll post back when I have a chance to try it!

NEW222- Top Poster

- Posts : 3896
Join date : 2011-08-13
Age : 46
Location : oakbank, mb

Marleysky- Top Poster


Posts : 3618
Join date : 2014-09-28
Age : 72
Location : Grand Rapids, MI
 Re: How To Disassemble These Two Gems.......
Had a minute during the last commercial during Live PD, so gave it a try. Well, it came apart just as you said! Thank you for the help! The hardest part was to remove that darned clip! The recoil came off very easily, and almost in many pieces and a spring too..... But I saved it. It is currently sitting on my bench waiting to be zip tied together so it does not come apart. It would be nice to keep it, but have no real use of it yet. But then again, a pull start airplane engine would be neat! Now teh second engine..... The propeller screw appears to be seized on. So will evaluate that situation carefully. I do not mind if the assembly on the front of that one falls apart, but would like to try and save it as well. reason I say that is I may use heat to remove the screw.

NEW222- Top Poster

- Posts : 3896
Join date : 2011-08-13
Age : 46
Location : oakbank, mb
 Re: How To Disassemble These Two Gems.......
Another update. The engine on the right is disassembled now with the only thing left is the piston is seized in the cylinder. Will try heating it up tomorrow and see if it will release. The one on the left has the backplate, and exhaust deflector removed. A little heat and it is freed up. However, the 'prop screw' is still seized in the crankshaft. So, with that said, I am debating at how to continue the removal. I will not be using it in a car, so heat is an option. The other option is to cut the front gear off carefully so I can grab the screw with a set of pliers and see if I can remove it that way. But I am thinking either way, the front gear/fan assembly will no longer be of any good. Any other ideas will be more than welcomed. This is the hardest one I have had to disassemble yet! The other thing with this one is that the white postage stamp backplate has been slightly melted where the exhaust deflector/shield was at the top behind the cylinder.

NEW222- Top Poster

- Posts : 3896
Join date : 2011-08-13
Age : 46
Location : oakbank, mb
 Re: How To Disassemble These Two Gems.......
A good pre-disassembly kerosene soaking is probably in order for the rusty one.

ticomareado- Account Under Review
- Posts : 1089
Join date : 2013-10-03
Location : NC
 Re: How To Disassemble These Two Gems.......
Both of these engines are non SPI set ups and would probably make a good starting point for Texaco duration engines.

ticomareado- Account Under Review
- Posts : 1089
Join date : 2013-10-03
Location : NC
 Re: How To Disassemble These Two Gems.......
Ok. Will try to get some kerosene to soak in.
As of now, the first one is completely disassembled. I put the piston and cylinder assembly back in the crankcase and carefully used a short piece of dowel that filled the cylinder and gave it a couple very light taps (more like letting the mallet fall on its own approximately 2") with a small rubber mallet and the piston dropped out almost instantly. I will shortly be putting this one in a nitro engine fluid bath for a quick cleaning. And after that, I will have to look into finding a prop hub for the tapered crankshaft, or make another as I had done once before.
As of now, the first one is completely disassembled. I put the piston and cylinder assembly back in the crankcase and carefully used a short piece of dowel that filled the cylinder and gave it a couple very light taps (more like letting the mallet fall on its own approximately 2") with a small rubber mallet and the piston dropped out almost instantly. I will shortly be putting this one in a nitro engine fluid bath for a quick cleaning. And after that, I will have to look into finding a prop hub for the tapered crankshaft, or make another as I had done once before.

NEW222- Top Poster

- Posts : 3896
Join date : 2011-08-13
Age : 46
Location : oakbank, mb
 Got it apart!!!!!!!!!!!
Well, finally, I managed to get the front hub/flywheel off of the second engine. However, it is no longer usable. I was able to grind some of the front of it off to get a grip of the screw with a pair of pliers. Wonce ready, I gripped the solid metal hub in the vice and used a pair of pliers to remove the screw. once freed up, I reinstalled the screw and tried pressing it out in the vice with a wooden block on the rear of the crankcase. I thought it was going well, then I went to remove the screw and saw the threads were 'pressed' off of the screw. So I came in and grabbed a new screw and used it and it popped the flywheel right off, albeit a bit sticky. So both engines are now ready for a bath. The only thing I found different with this engine is that the front splines on the crankshaft are of a larger diameter than I am used to seeing. So, I will have to figure out what kind of prop drive plate I need for this one as I do not think I can make one like this. If I cannot find one, I at least got a postage stamp backplate and piston/cylinder set that I can save for the day I need one!

NEW222- Top Poster

- Posts : 3896
Join date : 2011-08-13
Age : 46
Location : oakbank, mb

crankbndr- Top Poster

- Posts : 3109
Join date : 2011-12-10
Location : Homestead FL
 Re: How To Disassemble These Two Gems.......
I hereby nominate your for the Prison Workshop Project of Year Award.

ticomareado- Account Under Review
- Posts : 1089
Join date : 2013-10-03
Location : NC
 Re: How To Disassemble These Two Gems.......
ticomareado wrote:I hereby nominate your for the Prison Workshop Project of Year Award.
Lol!

NEW222- Top Poster

- Posts : 3896
Join date : 2011-08-13
Age : 46
Location : oakbank, mb
 Re: How To Disassemble These Two Gems.......
ticomareado wrote:I hereby nominate your for the Prison Workshop Project of Year Award.
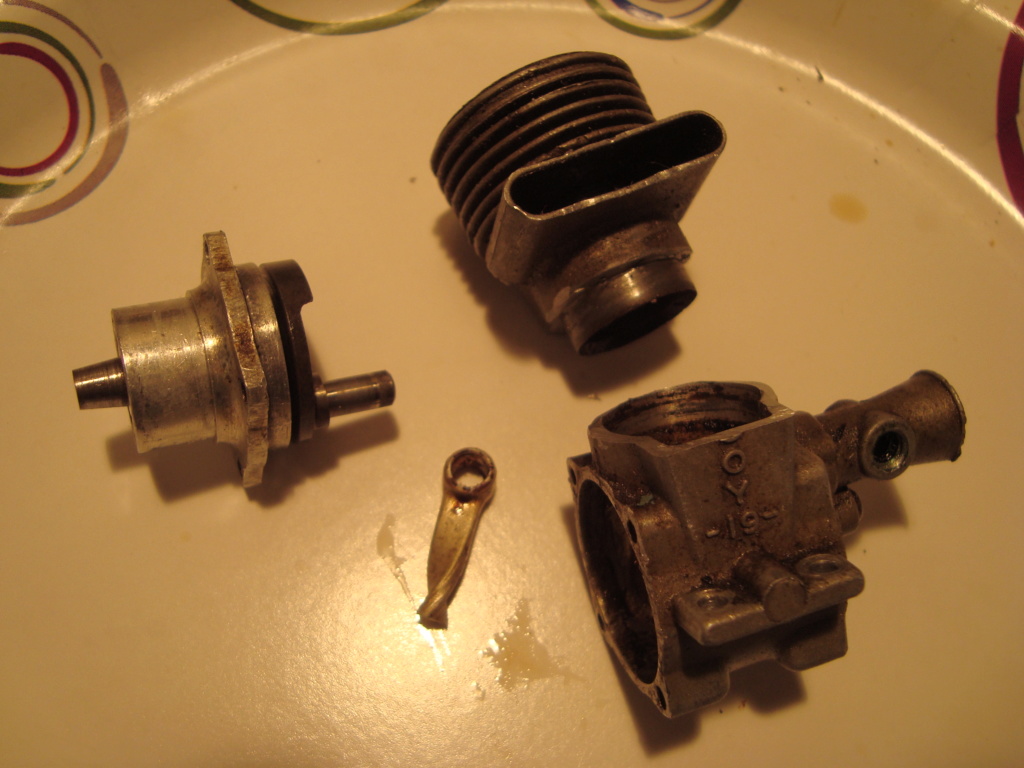
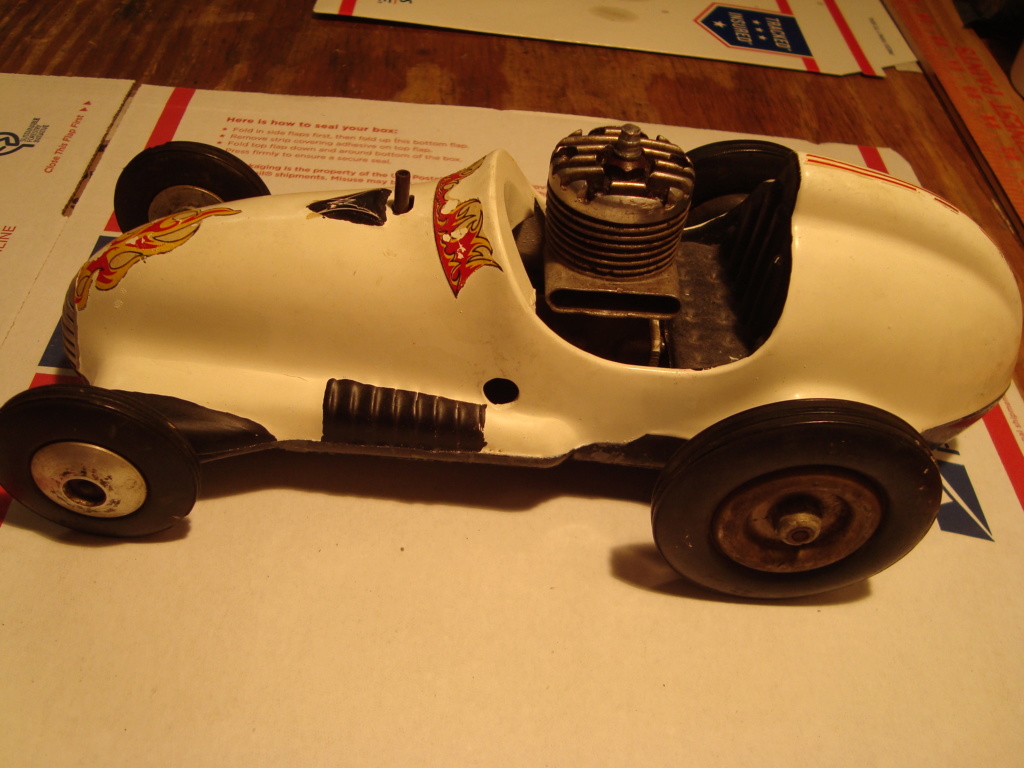
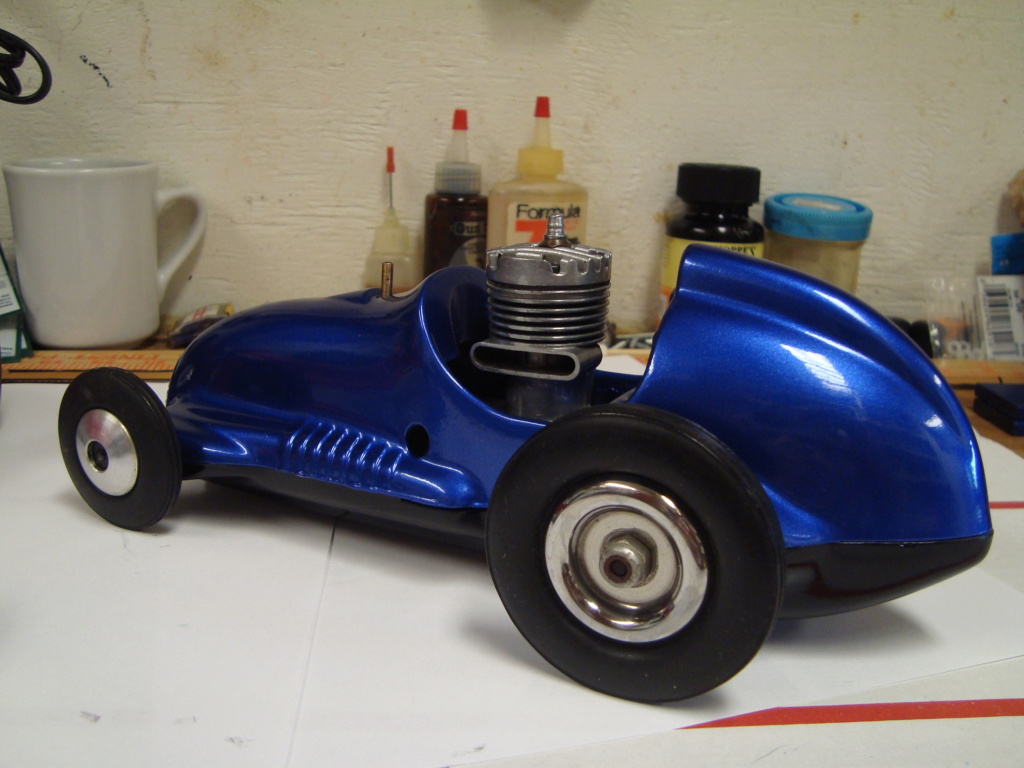
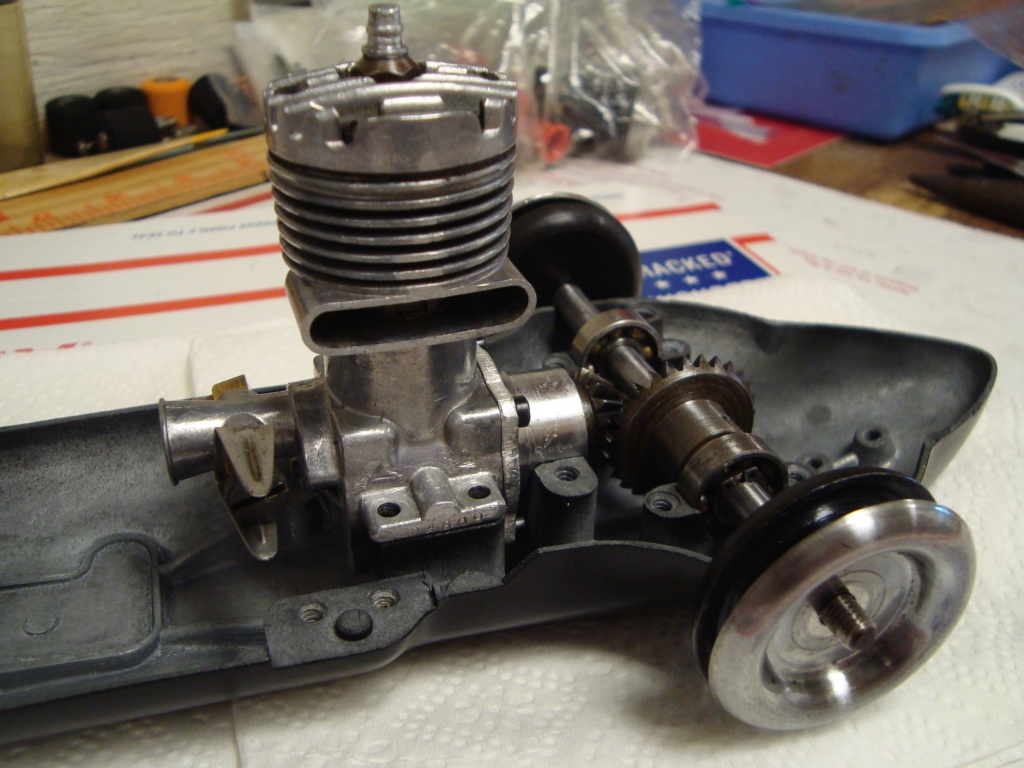
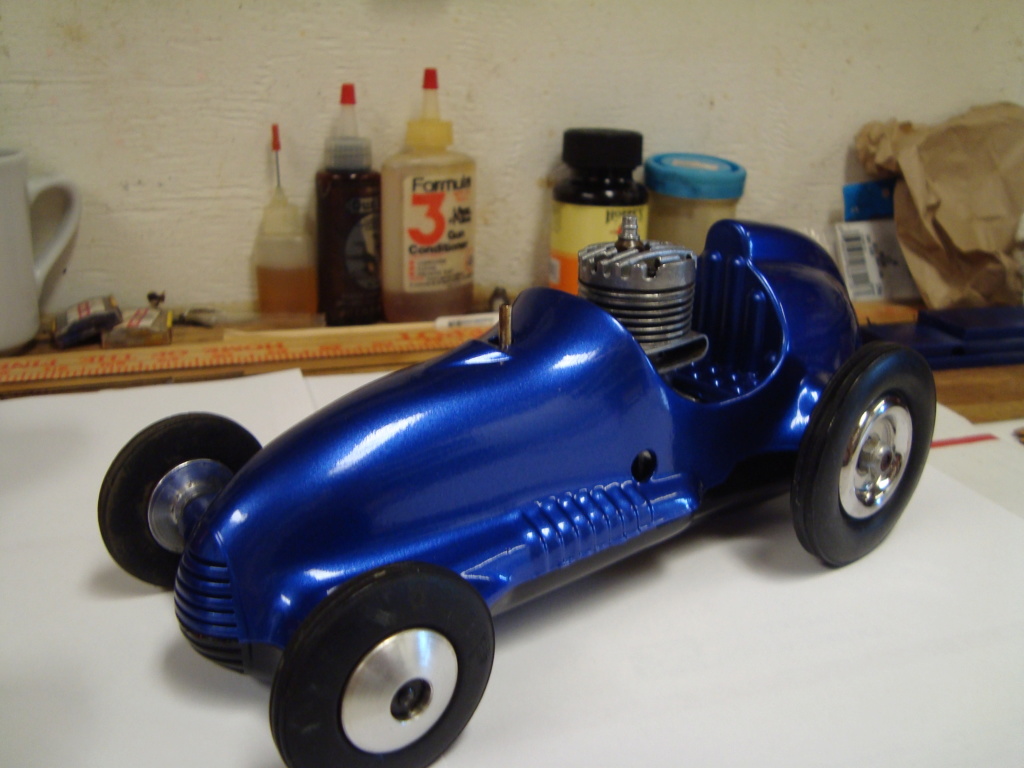
The McCoy 19 was out of a well run tether car, the fuel used left what looked like black epoxy. I crank pin was stuck in the rod and rotary valve. All I needed was the crank and front housing.
I found a replacement engine made for air models and changed the crank and front casing. My prison project when finished.

crankbndr- Top Poster

- Posts : 3109
Join date : 2011-12-10
Location : Homestead FL
 Re: How To Disassemble These Two Gems.......
Bravo!! Excelentisimo!! Your sentence has been commuted.

ticomareado- Account Under Review
- Posts : 1089
Join date : 2013-10-03
Location : NC

NEW222- Top Poster

- Posts : 3896
Join date : 2011-08-13
Age : 46
Location : oakbank, mb

crankbndr- Top Poster

- Posts : 3109
Join date : 2011-12-10
Location : Homestead FL
 Similar topics
» Sweet Cindy P51 and P40 find at SEMS
» couple eBay gems!
» Testor Zero : How to disassemble it
» Testors P 51 Mustang, how to disassemble?
» How does one remove/ disassemble the flywheel on a car engine
» couple eBay gems!
» Testor Zero : How to disassemble it
» Testors P 51 Mustang, how to disassemble?
» How does one remove/ disassemble the flywheel on a car engine
Page 1 of 1
Permissions in this forum:
You cannot reply to topics in this forum

 Rules
Rules


